Uniden America UB376 DIGITAL SCANNER RECEIVER User Manual 1
Uniden America Corporation DIGITAL SCANNER RECEIVER Users Manual 1
UserManual.wiki
>
Uniden America
>
UB376 User Manual
>
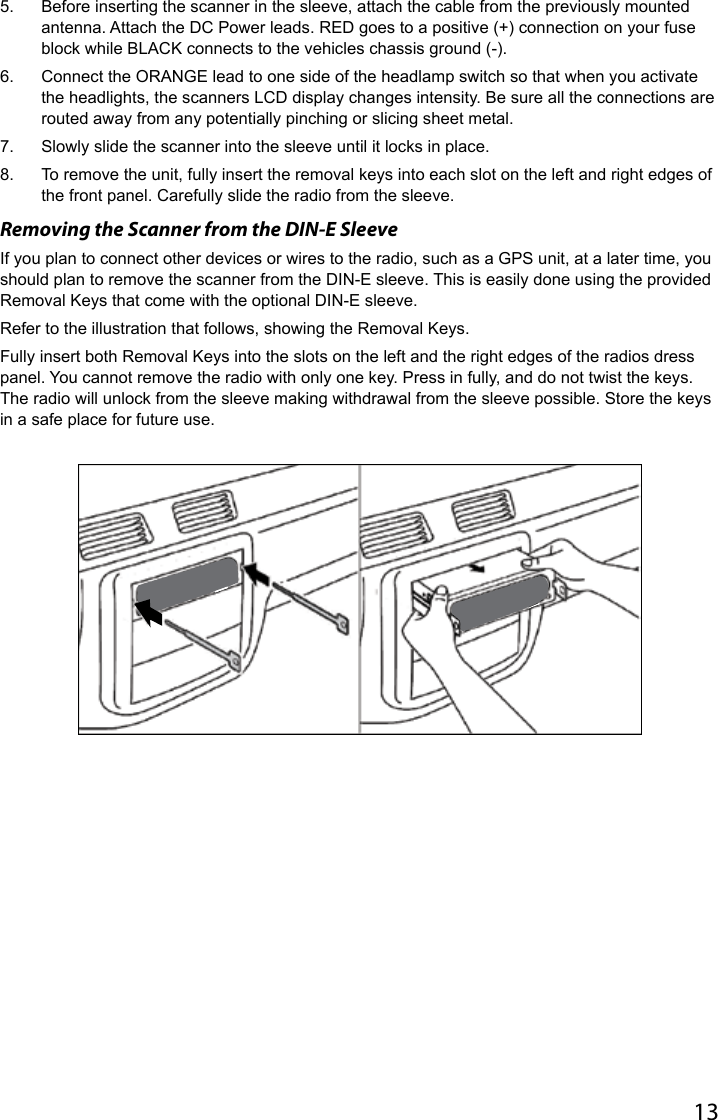
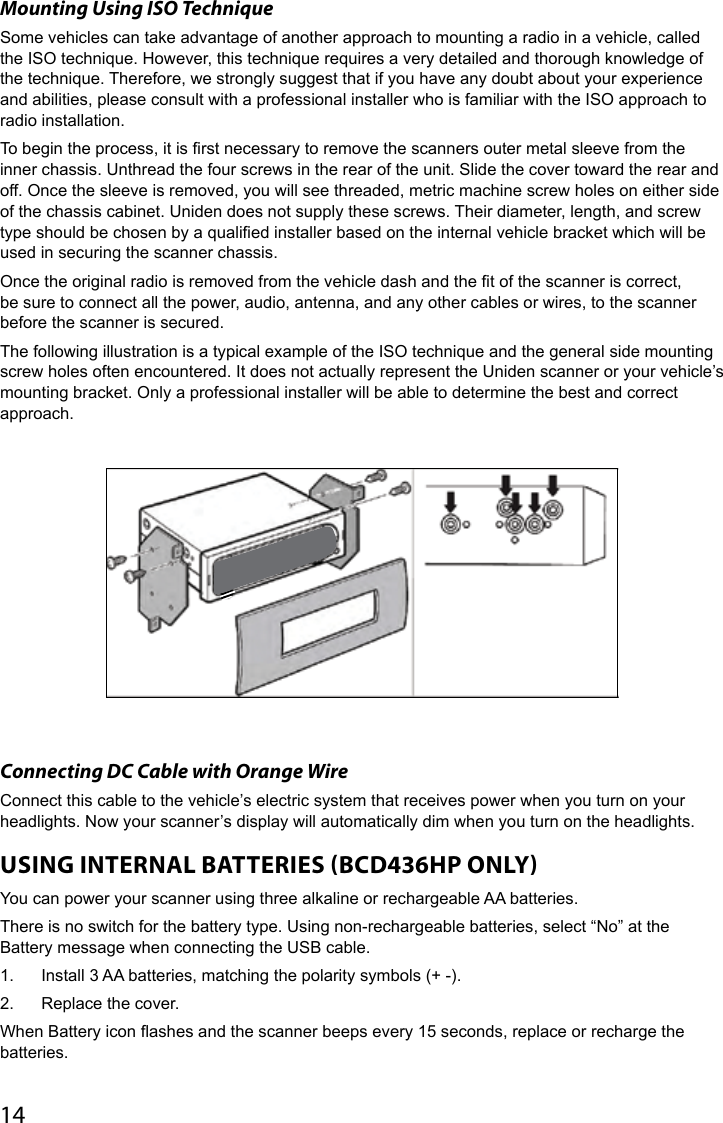
Users Manual 1
Contents
1.
Users Manual 1
2.
User Manual 2
3.
Owner Manual English
4.
Owner Manual French
Users Manual 1
Navigation menu
Upload a User Manual
Namespaces
Wiki Guide
HTML
PDF
Info
Views
User Manual
Discussion / Help
Navigation


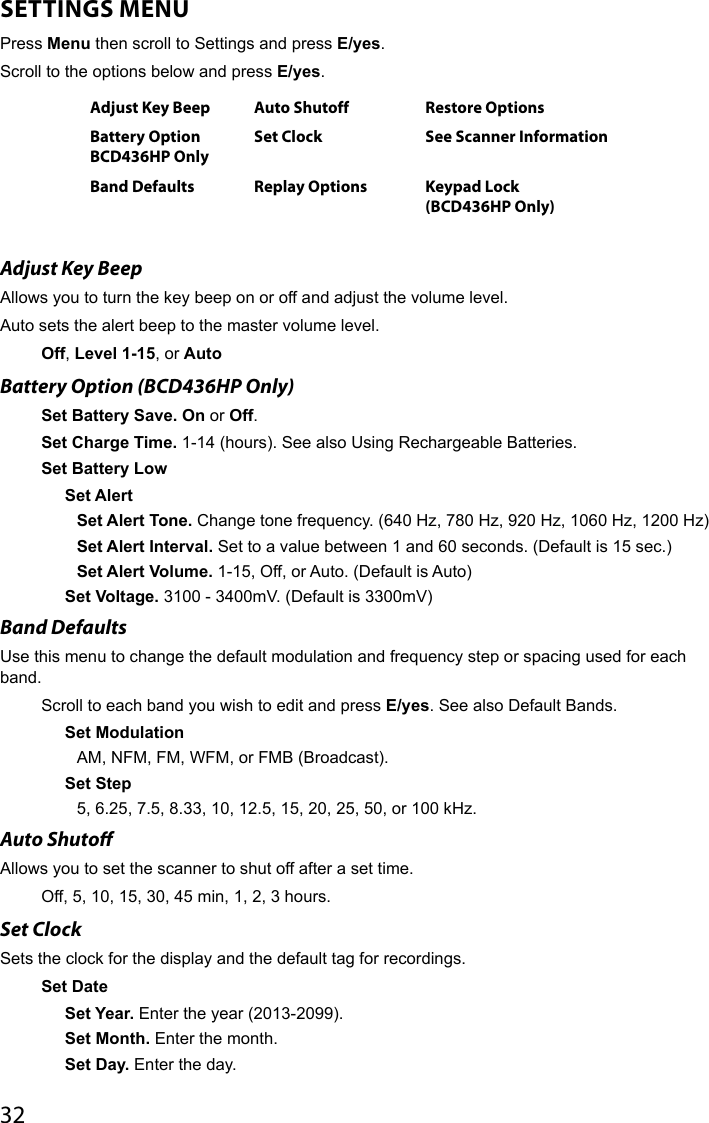
![9BCD536HPINSTALLING YOUR SCANNERThe BCD536HP can be placed on a convenient surface in your home as a base station, and connected to a standard outlet that supplies 120VAC, 60Hz. You must use either the supplied antenna or an electrically correct outdoor antenna, properly and safely mounted at your chosen site.The unit can also be placed above, beneath, or in the dash of your vehicle using the supplied bracket and mounting hardware. • If your scanner receives interference or electrical noise, move the scanner or its antenna away from the source.• Do not use the scanner in high-moisture environments such as the kitchen or bathroom. Avoid placing the scanner in direct sunlight or near heating elements or vents.POWER RELATED ISSUESImportant: To prevent memory from being corrupted, do not unplug the AC adapter during the time the memory is accessed for programming or auto store.Note 1: If when you connect the AC adapter the [VOL] /Power Switch is ON, the scanner may not power on. Should this occur, simply turn the control OFF, then ON again.Note 2: When you turn off the scanner using the power switch, the scanner remembers the last settings and mode. When you turn power back on, it resumes the previous mode.CONNECTING AN OPTIONAL ANTENNAThe scanner’s BNC connector makes it easy to connect a variety of optional antennas, including an external mobile antenna or outdoor base station antenna.Note: Always use 50-ohm, RG-58, or RG-8, BNC terminated coaxial cable to connect an outdoor antenna. If the antenna is over 50 feet from the scanner, use RG-8 low-loss dielectric coaxial cable. Cable loss increases with higher frequency.CONNECTING AN EXTENSION SPEAKERIn a noisy area, an optional amplied extension speaker, positioned in the right place, might provide more comfortable listening. Plug the speaker cables 1/8-inch (3.5-mm) mini-plug into your scanners back-panel Ext. Sp. Jack.](https://usermanual.wiki/Uniden-America/UB376.Users-Manual-1/User-Guide-2112667-Page-17.png)

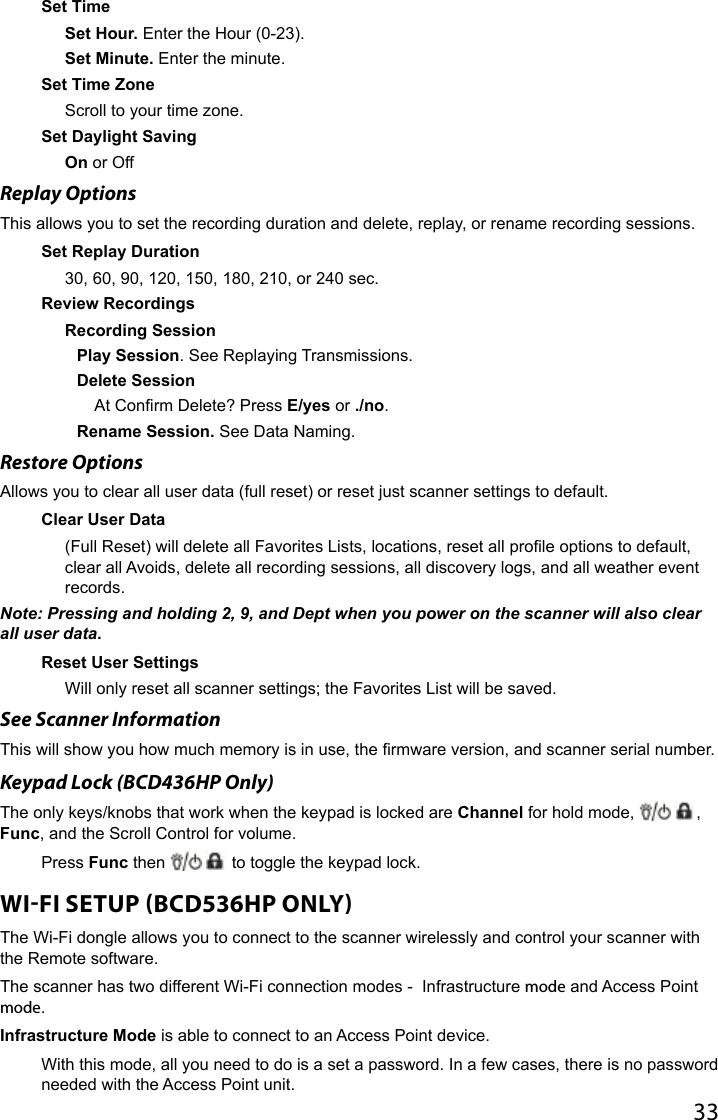
![39SYSTEM OPTIONSPress Menu then scroll to Manage Favorites and press E/yes.Scroll to the Favorites List and press E/yes. Scroll to Review/Edit System and press E/yes.Scroll to the System you want to edit and press E/yes. Scroll to Edit Sys Option and press E/yes.Note: Not all options will appear for all types of systems.Set Quick Key Priority ID Scan Clear All ID AvoidsSet Number Tag Set Status Bit Set Audio AGCSet Avoid Set End Code P25 NAC OptionSet Hold Time Emergency Alert P25 Waiting TimeID Search Review ID Avoids P25 Threshold ModeEdit Fleet Map P25 Threshold Level Set Quick Key – This assigns a quick key to the System and the scanner will scan the System when the key is enabled. The default setting is . (no quick key). If you don’t assign a Quick Key to a system, it will always be scanned unless you Avoid it.0-99 or . for no quick key. Note: Pressing the rst number of a 2-digit quick key will get you closer, 1 for 10, 2 for 20, etc., then scroll to second digit.Set Number Tag – This allows you to number a System so you can access it quickly from Scan Hold mode. The default setting is no number tag. See also Using Number Tags.Enter the number [0-99, Blank (no number tag)] and press E/yes to save.Set Avoid – This determines whether a System will be scanned or not (even if the system is enabled). Temporary Avoids cancel when you cycle power.The default setting is Stop Avoiding. Stop Avoiding, Temporary Avoid, or Permanent AvoidSee also Scan Avoids. Set Hold Time – This sets (in seconds) the amount of time the scanner will scan the System before moving on to the next system. All (Unavoided) channels will be scanned at least once regardless of this setting. The scanner moves to the next system after the hold time expires, any current transmission ends, and the channel delay time expires. The default setting is 0 seconds.Enter the hold time and press E/yes to save.0-255ID Search – This sets whether the scanner searches for all IDs in a trunking system (On), or scans only programmed IDs (Off). The default setting is Off. See also ID Toggle ID Scan or Search.On or Off](https://usermanual.wiki/Uniden-America/UB376.Users-Manual-1/User-Guide-2112667-Page-47.png)