Unitech Electronics MT38EM01 A Versatile Multi-Function Terminal User Manual MT380 UM EN
Unitech Electronics Co., Ltd. A Versatile Multi-Function Terminal MT380 UM EN
UserManual.wiki
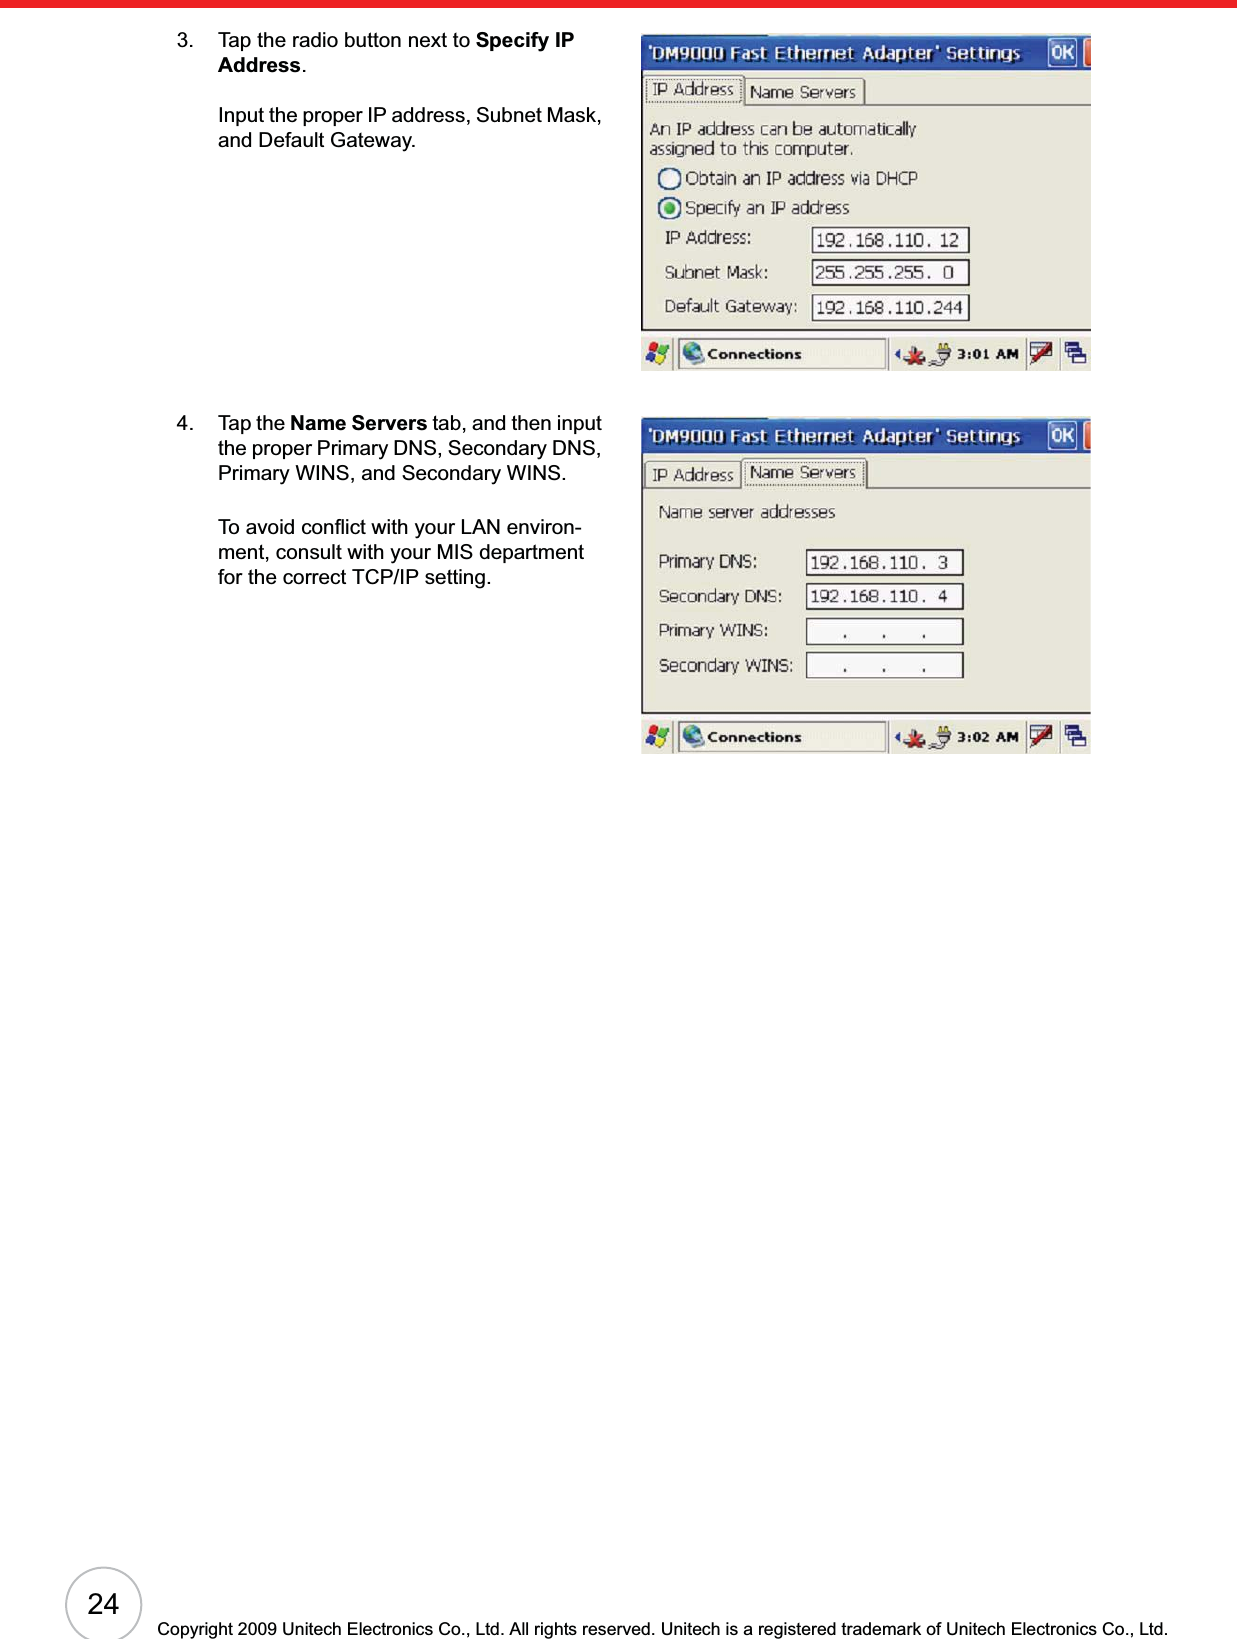
>
Unitech Electronics
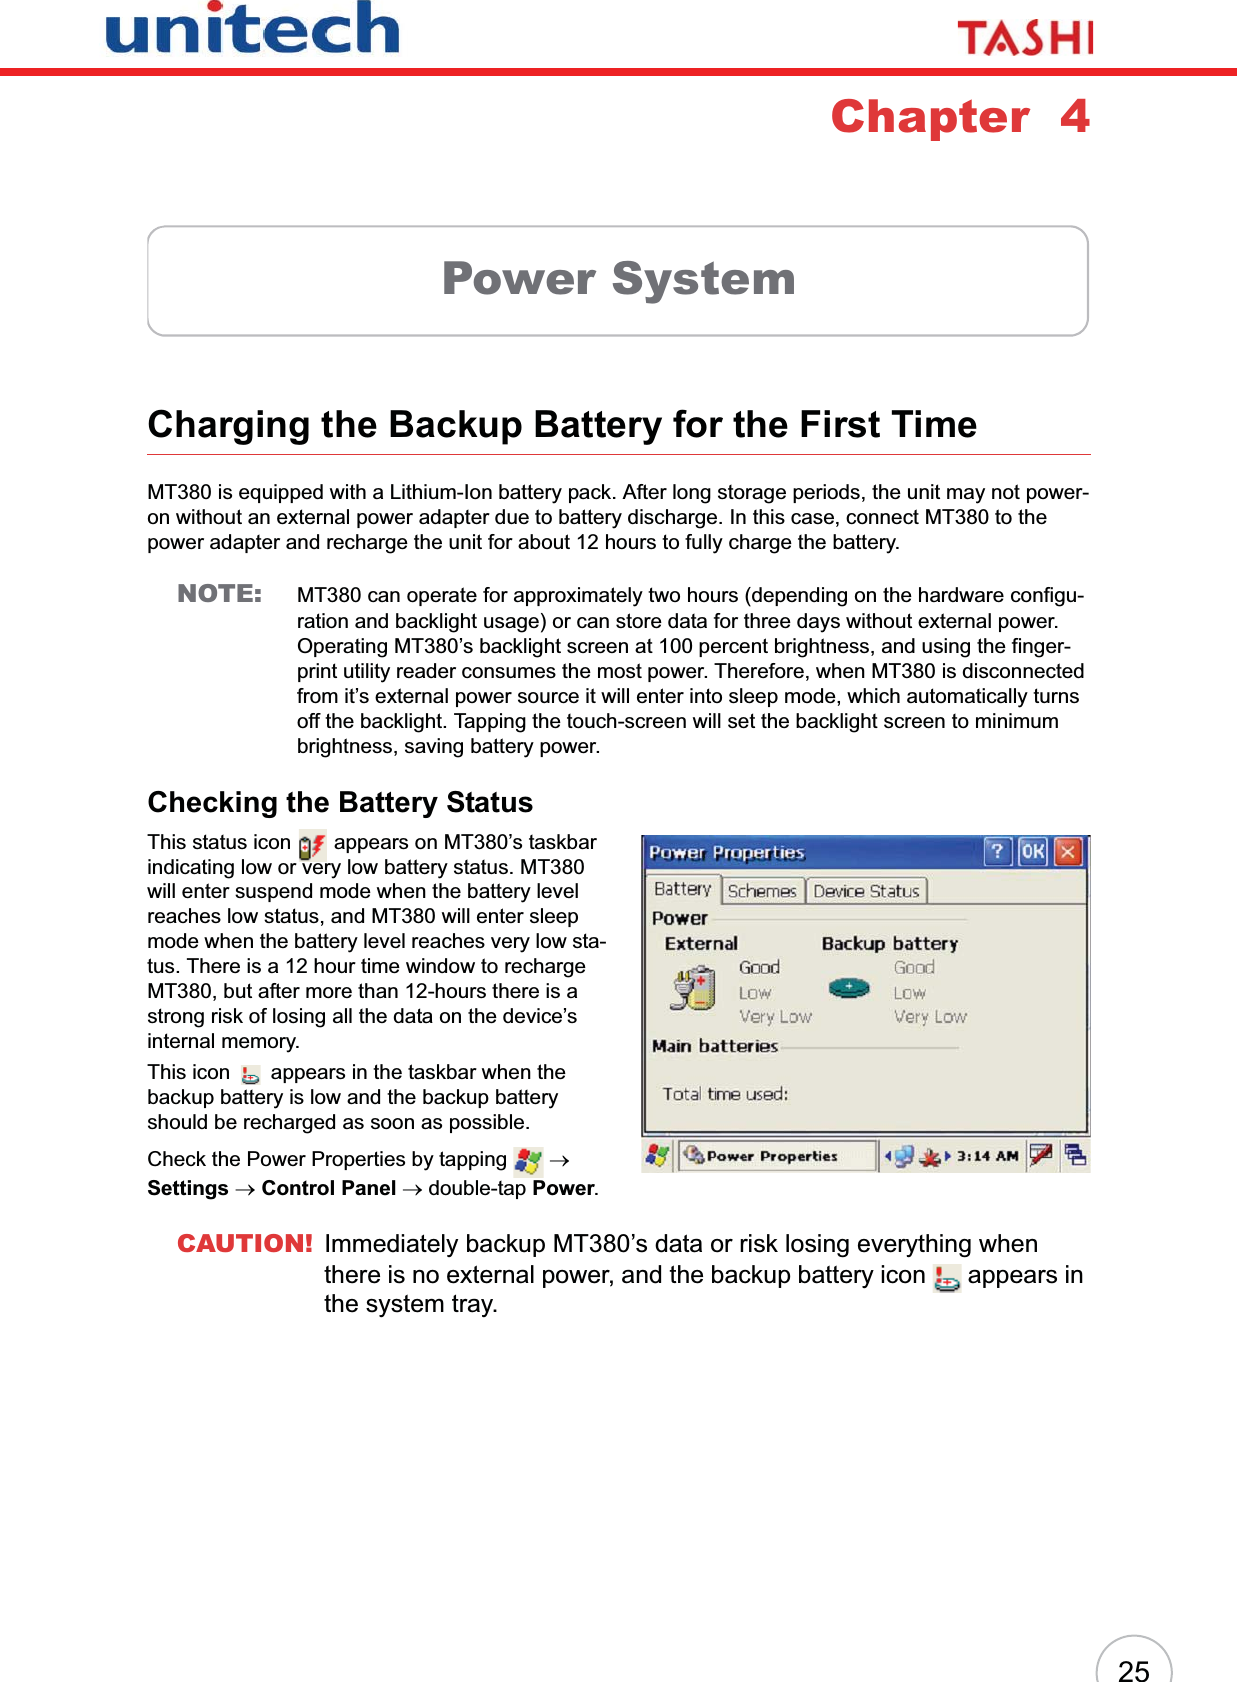
>
MT38EM01 User Manual
User Manual
Navigation menu
Upload a User Manual
Namespaces
Wiki Guide
HTML
PDF
Info
Views
User Manual
Discussion / Help
Navigation


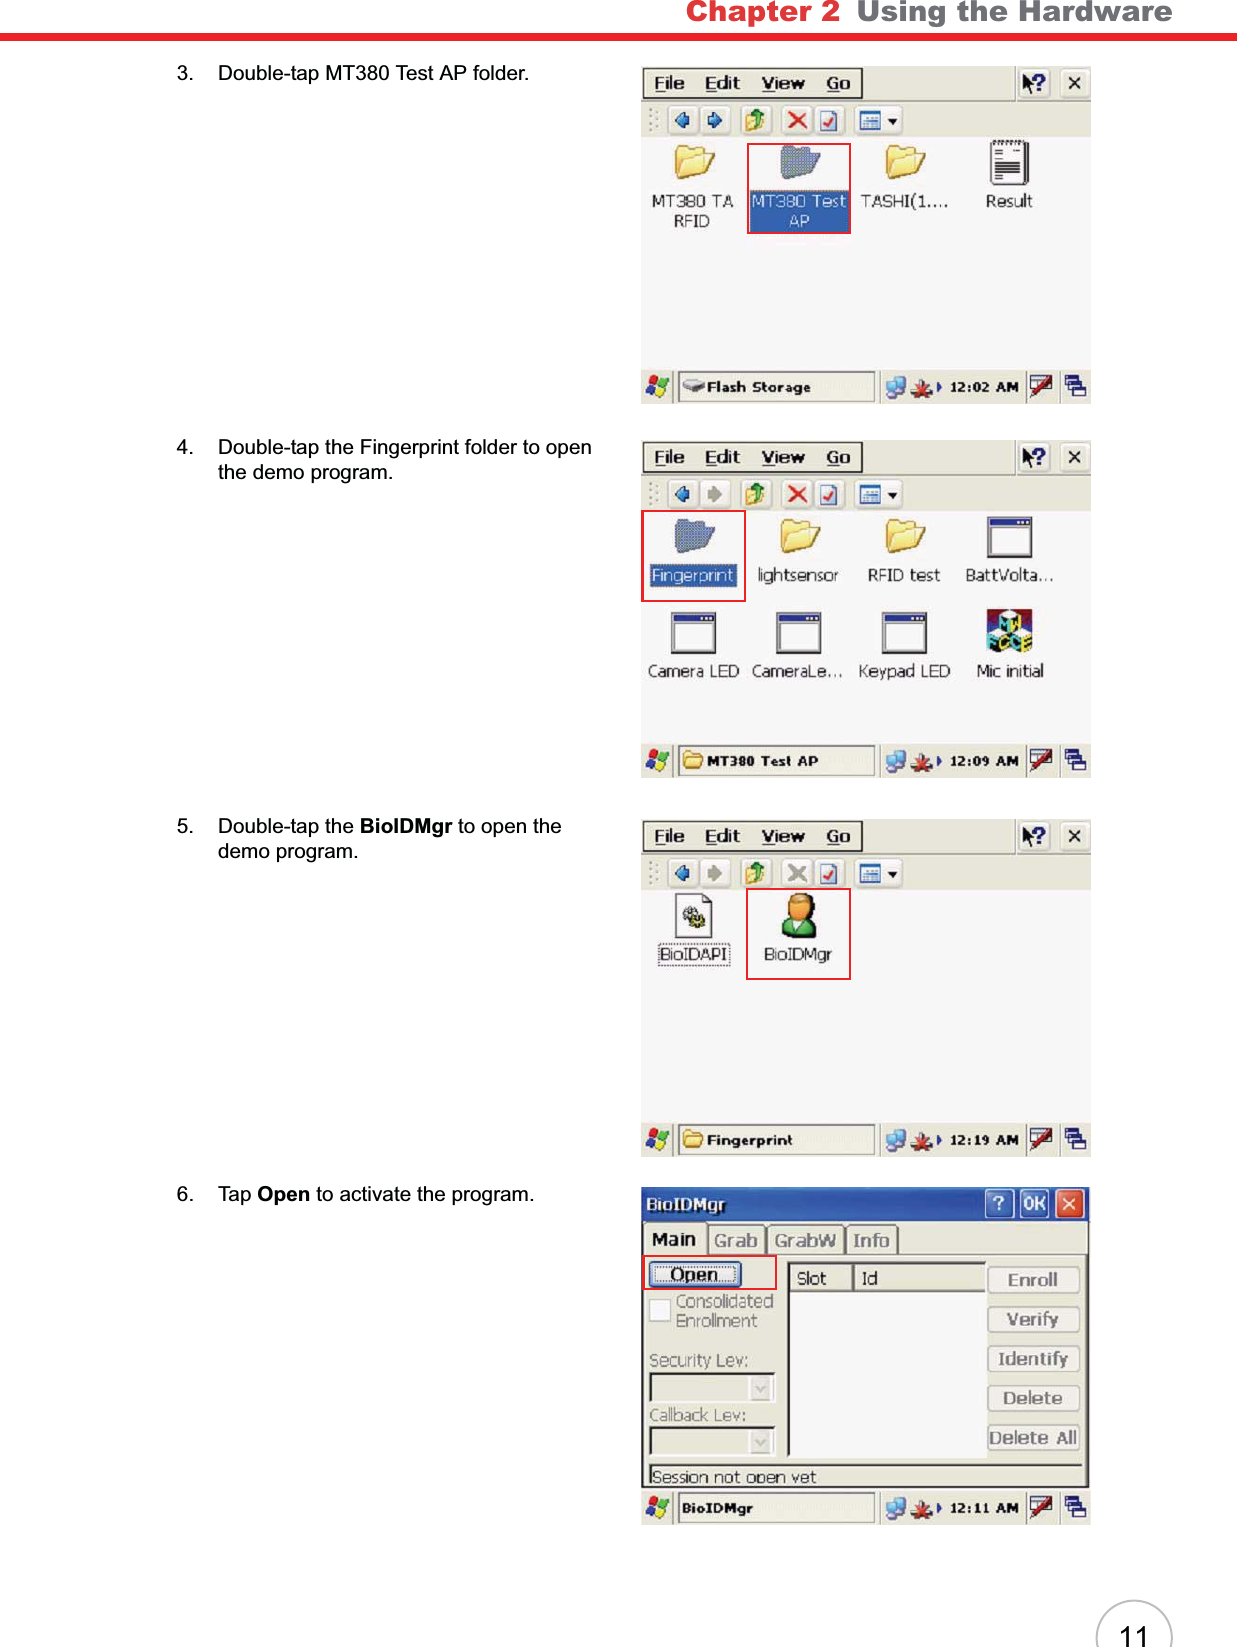
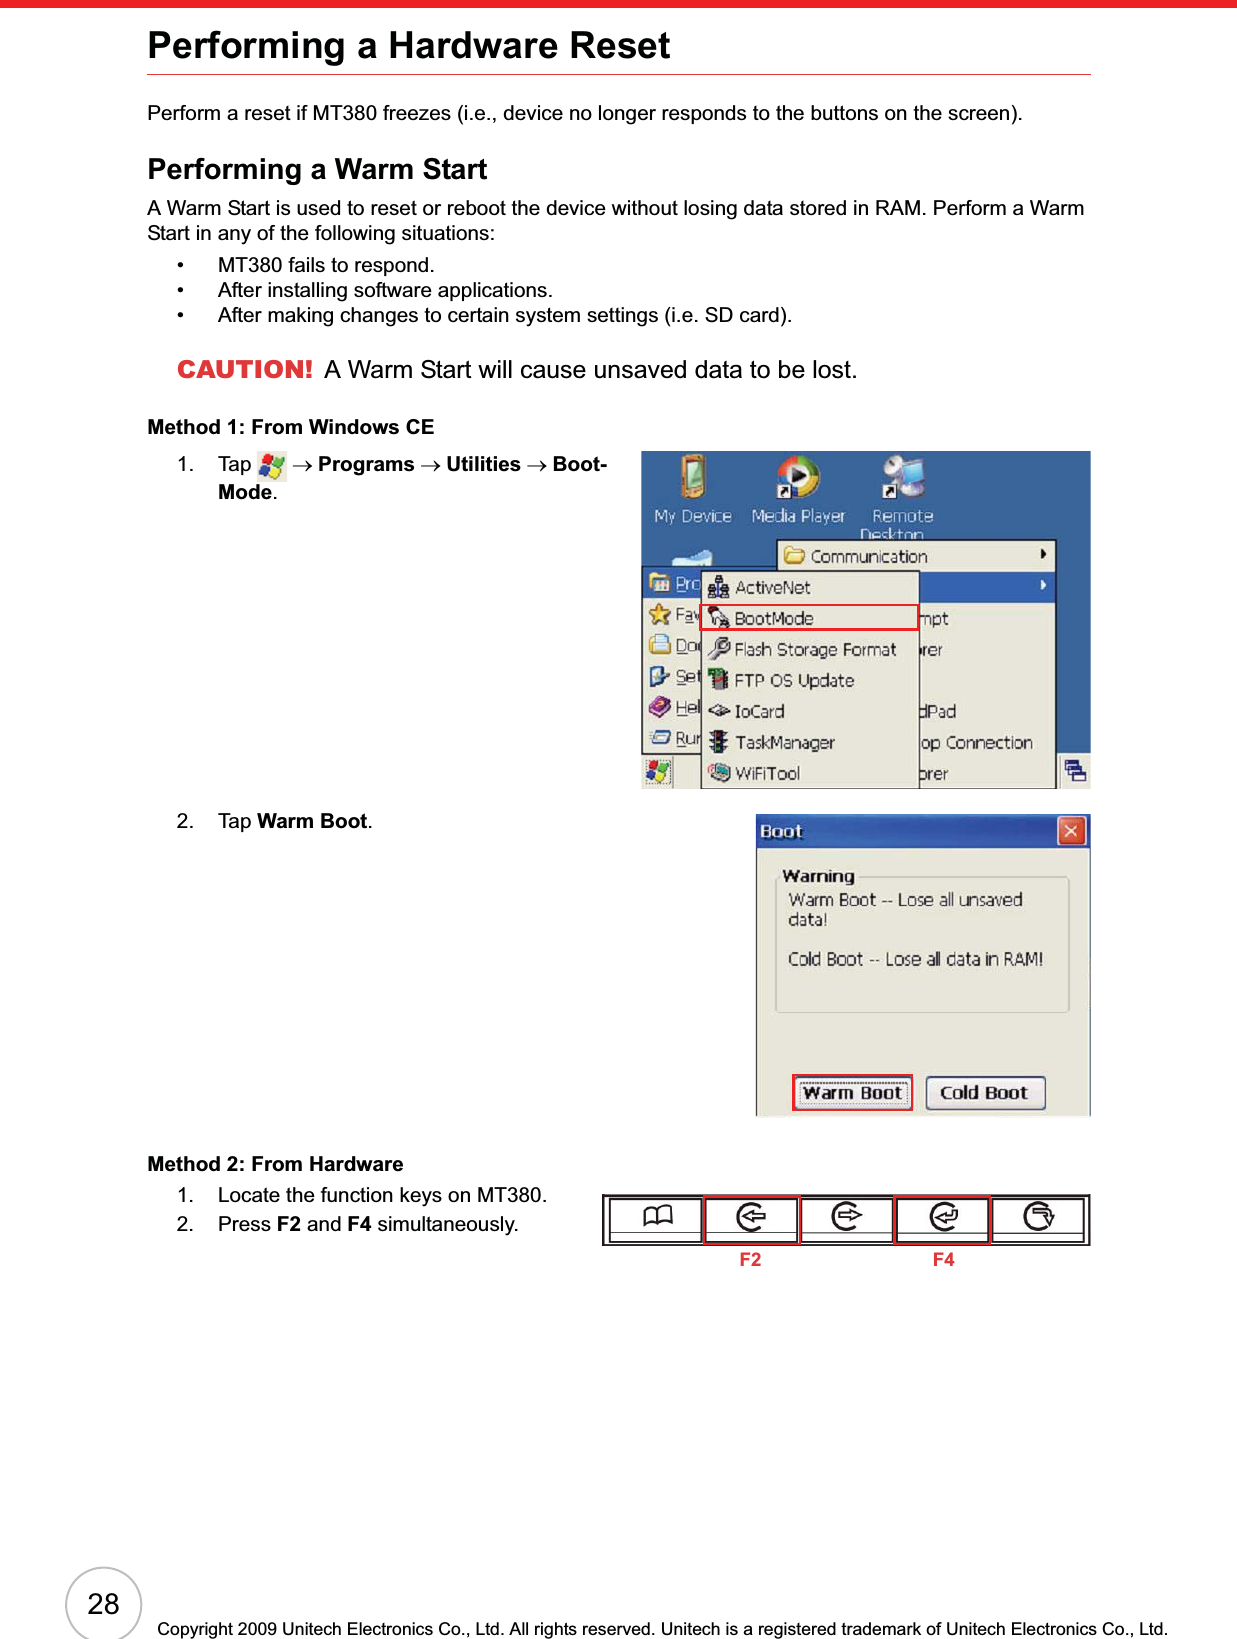
![Chapter 1 Getting Started3Turning MT380 on for the First TimeAfter you have initially charged your device for about 12 hours, the device is ready to be used. You can now start up your device where you’ll calibrate the display, and set up the system time zone, date and time.Powering OnMT380 automatically powers-on when the 12V DC power adapter is plugged-in. MT380 welcome screen appears followed by the Windows CE screen.Calibrating MT380 ScreenThe calibrate screen automatically appears when the unit is powered-on for the first time or after the system is reset.MT380 prompts you to calibrate the unit by tapping a sequence of screen locations. Tap gently but firmly with the stylus. When you have completed the series of taps, press the [F5]/[ENTER] key to confirm calibration or press the [F4] /[ESC] key to cancel it.After confirming calibration, the Date/Time Proper-ties screen appears prompting you to set the date and time.Setting the Date and TimeIn the Date/Time Properties window, use the stylus to select the current date and time, time zone, and daylight saving time option.• Tap the Left or Right arrows to scroll the year and month you desire or directly tap location of year or month to change the year or month setting.• Tap on the Hr/Min/Sec AM/PM to input the Hr/Min/Sec to set the time.• Tap the arrow and set the correct time zone from the drop-down list.• Check the box to enable Windows to automatically adjust for daylight saving.•Tap OK to save the settings and exit the Date/Time Properties dialog or tap X to exit without saving.NOTE: To change the time and date at any time tap oSettings oControl Panel oDate/Time.Set dateSet timeSet timezoneSetdaylightsaving](https://usermanual.wiki/Unitech-Electronics/MT38EM01/User-Guide-1083020-Page-11.png)
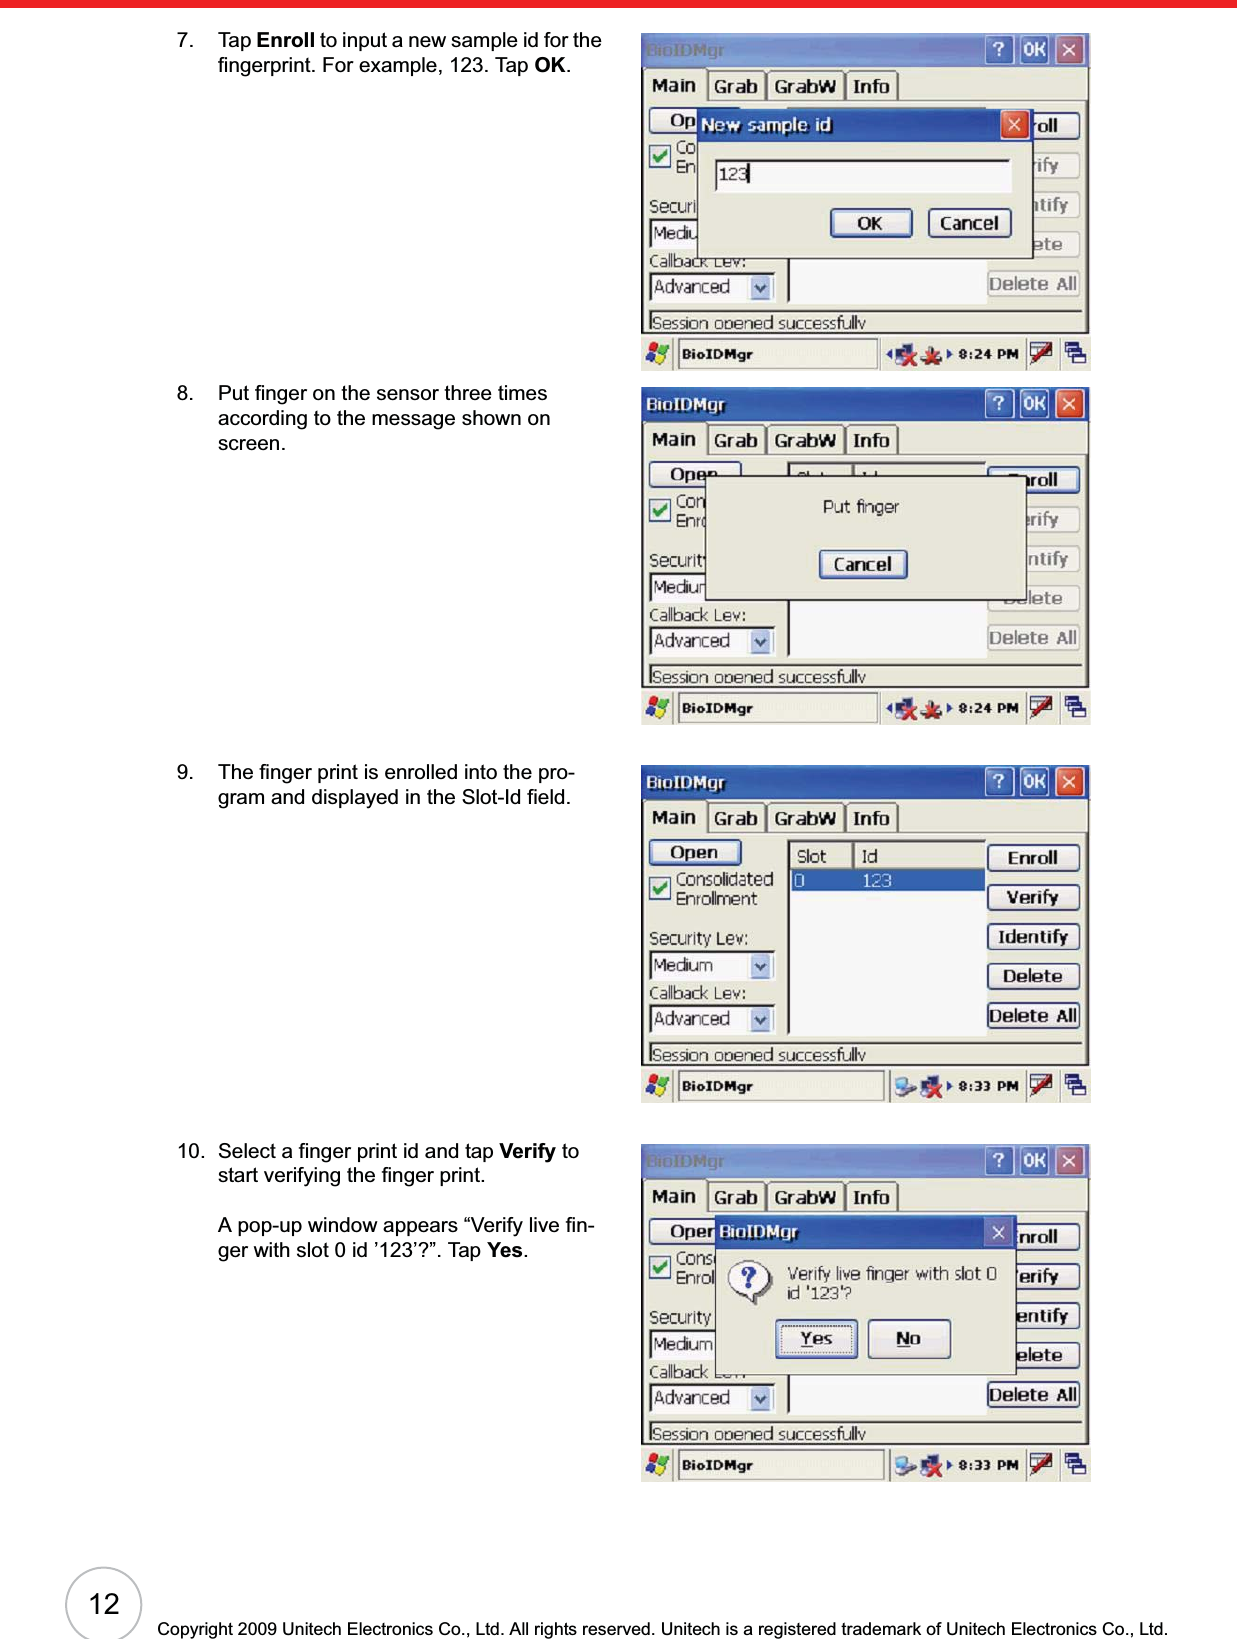
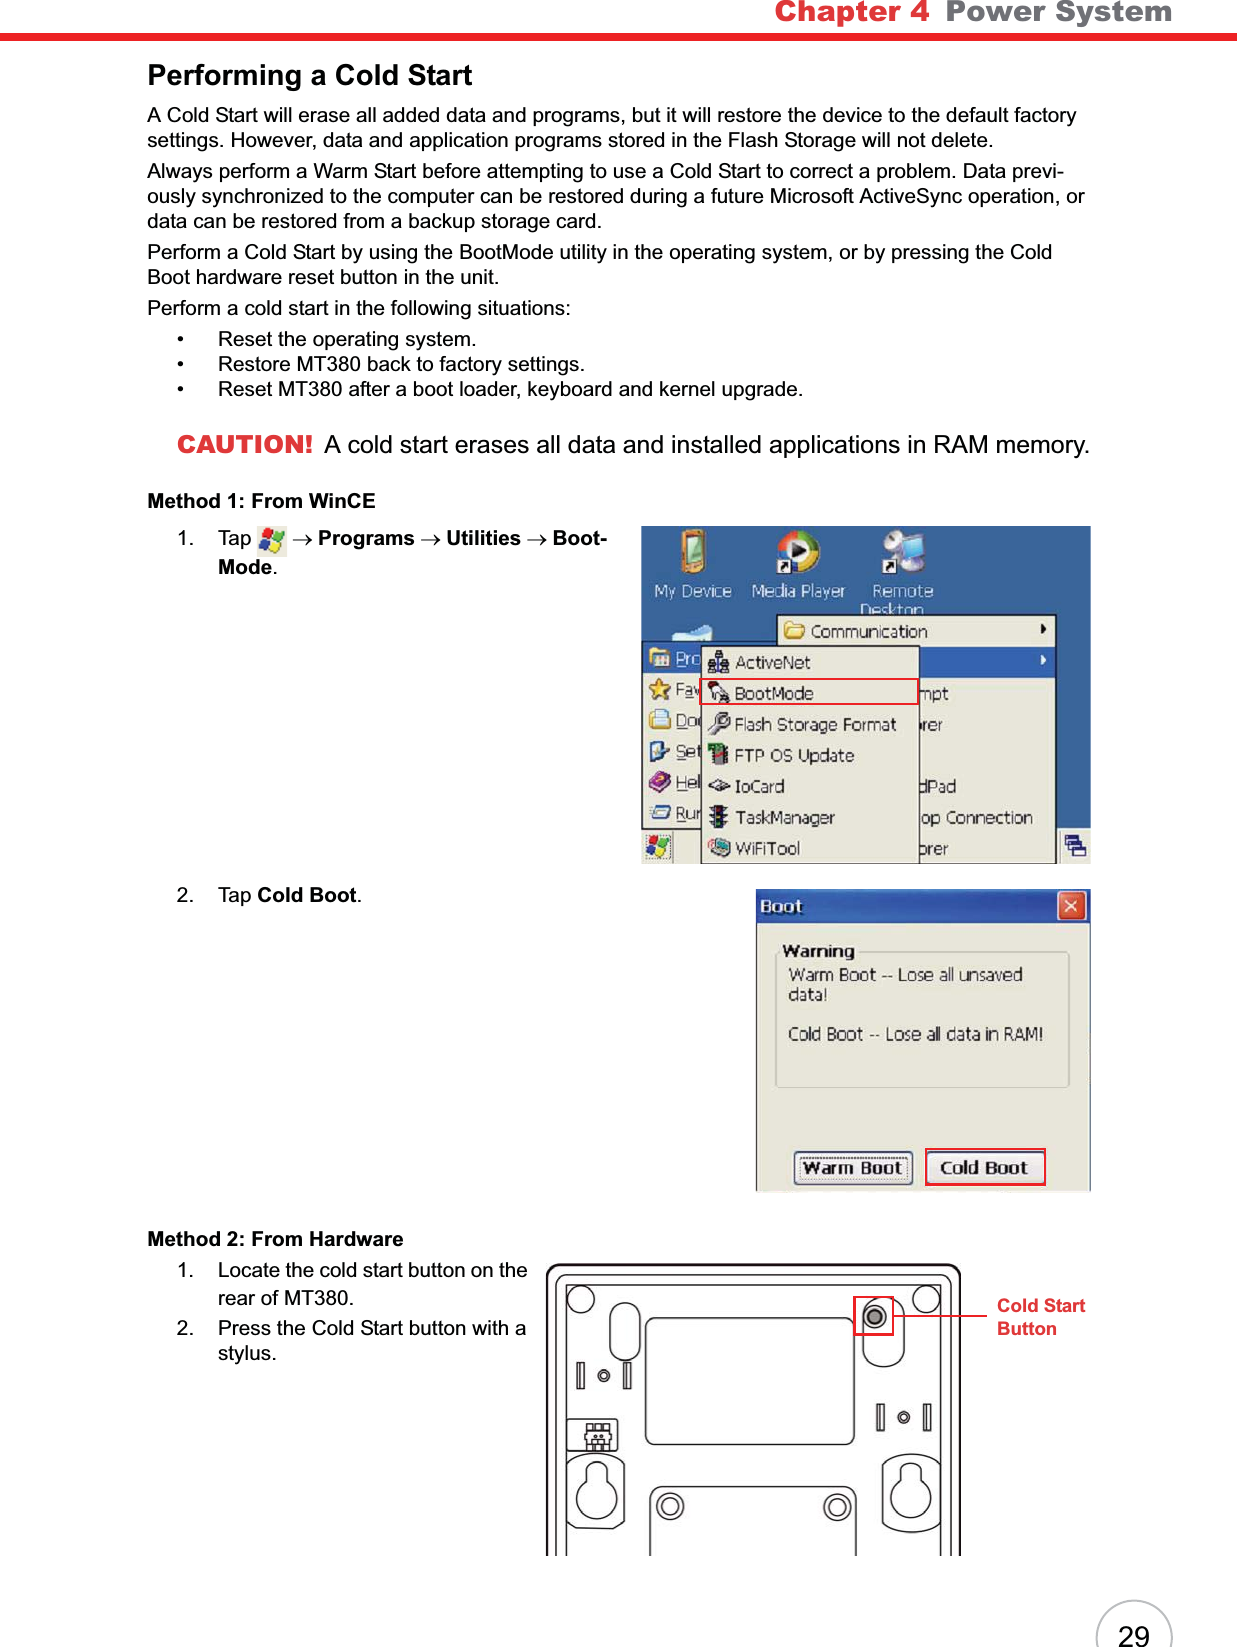
![5Chapter 2Using the HardwareUsing the KeypadMT380 contains five function keys and twelve numeric keys.The following table describes the function keys.Using Windows CE KeyboardThe Windows CE Software provides a touch screen keyboard for alphanumeric input. The Windows based keyboard replicates the layout of a standard PC keyboard.Open the Windows CE keyboard by tapping the “keyboard” icon on the task bar and tapping Keyboard.Key Main FunctionMenu[F1]: Function KeyClock-in[F2]: Function KeyClock-out[F3]: Function KeyBreak-in[F4]: Function Key, or [ESC]: Performs the same function as tapping the button on the touch screen.Break-out[F5]: Function Key, or [ENTER]: Enters a carriage return or executes a command.Keyboard icon](https://usermanual.wiki/Unitech-Electronics/MT38EM01/User-Guide-1083020-Page-13.png)
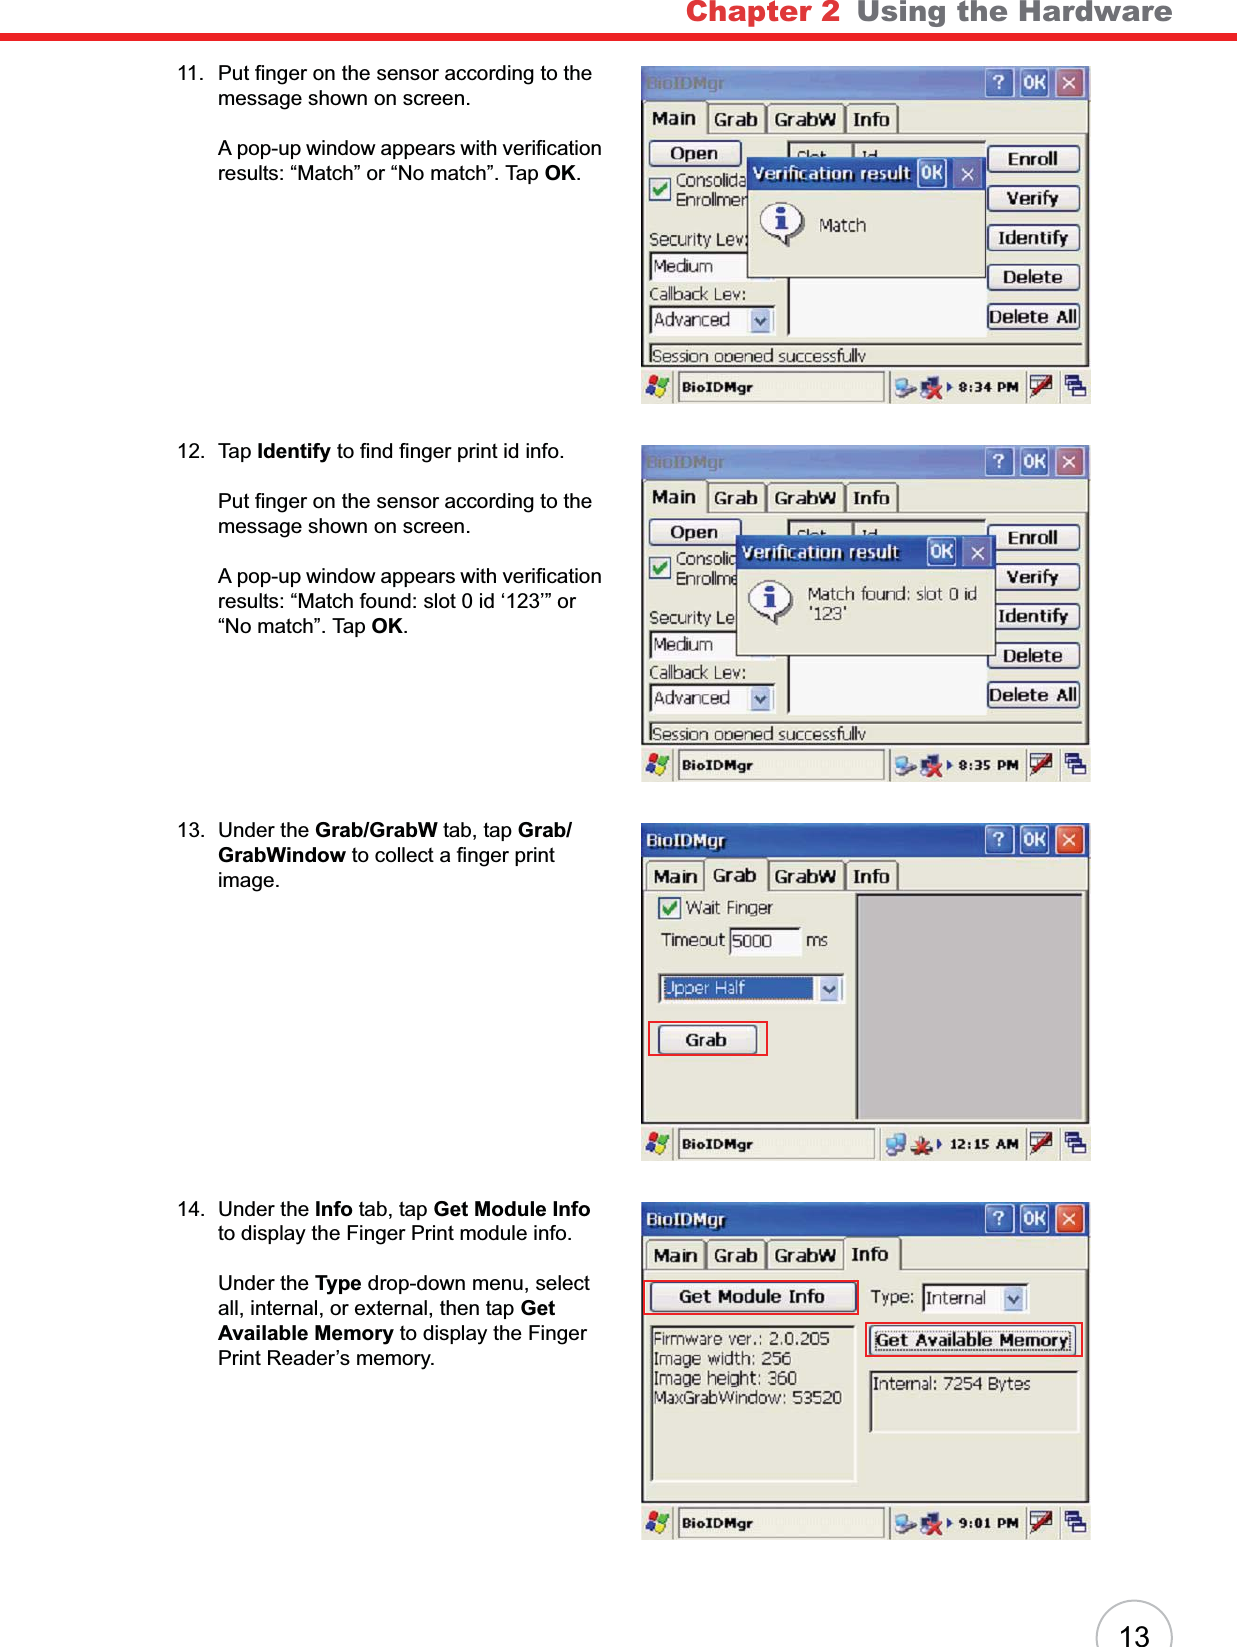
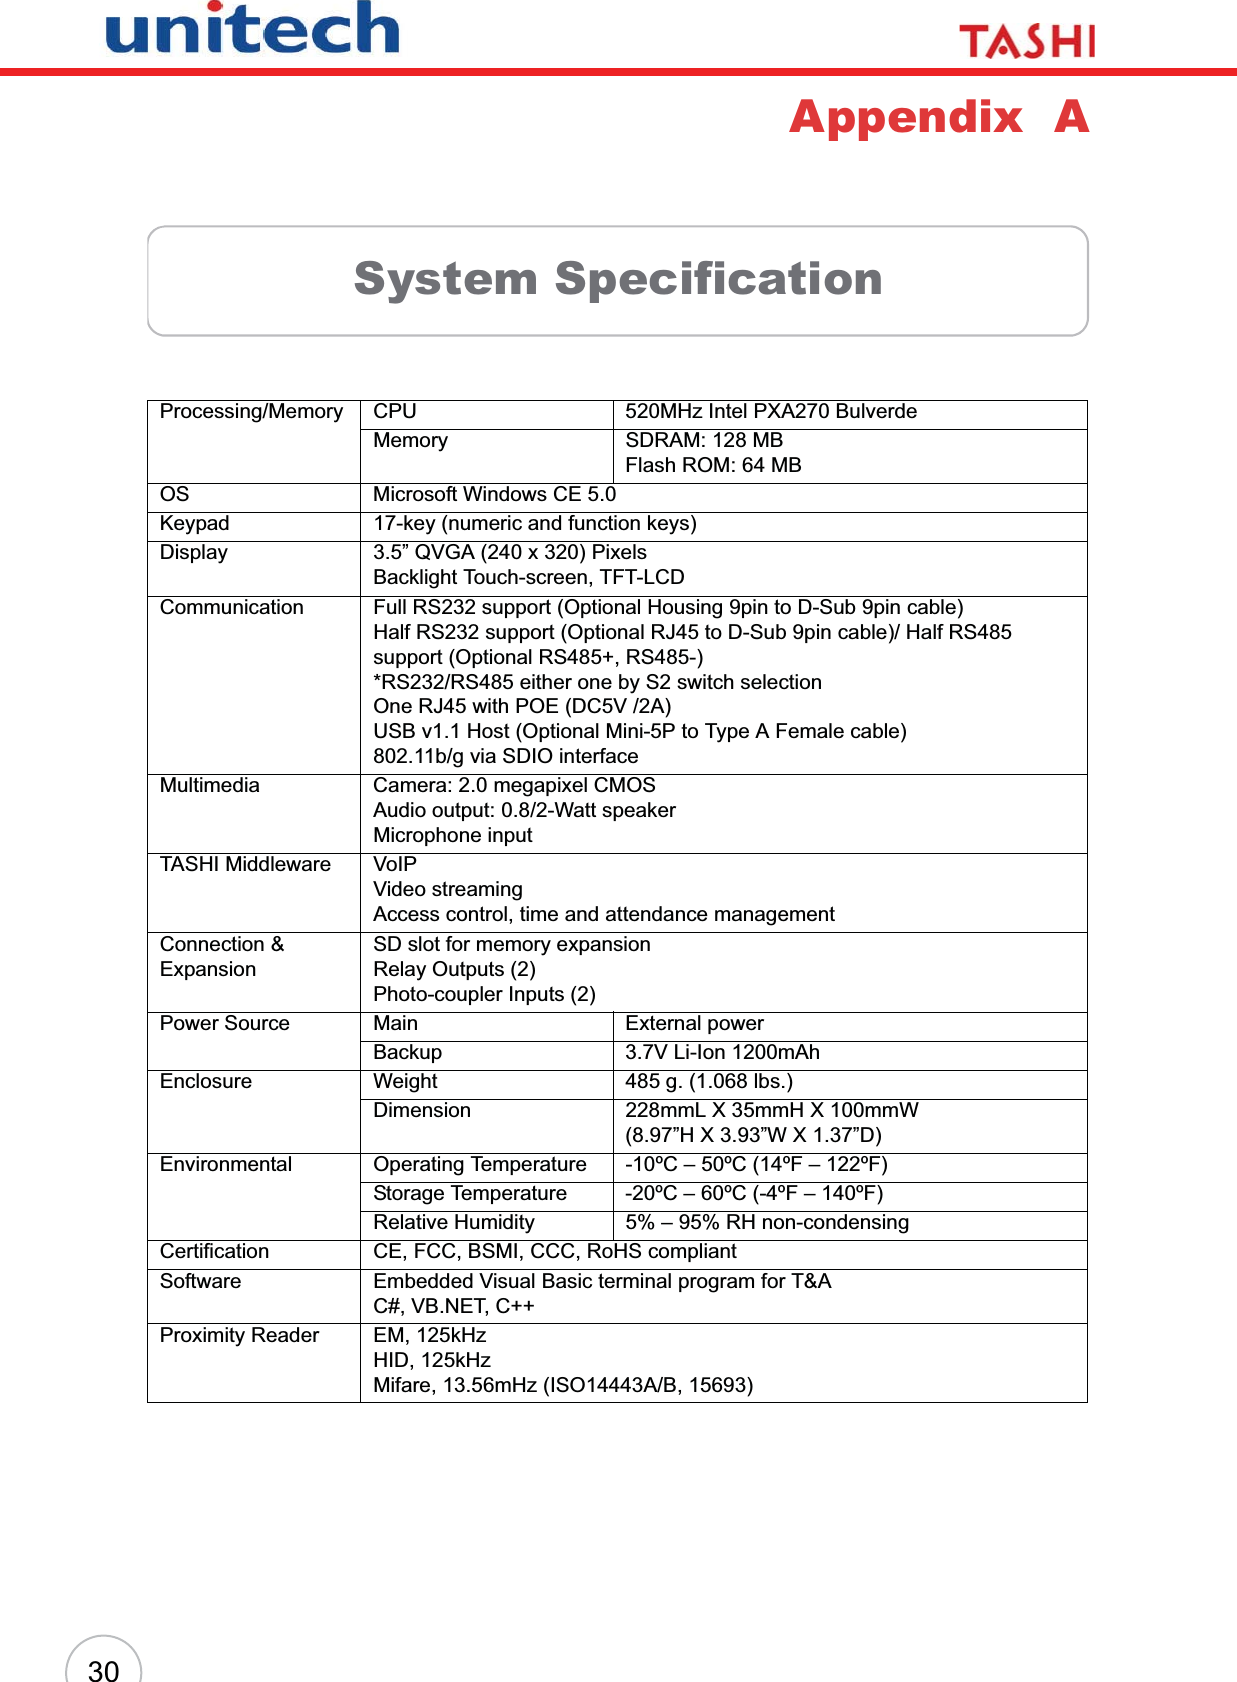
![6Copyright 2009 Unitech Electronics Co., Ltd. All rights reserved. Unitech is a registered trademark of Unitech Electronics Co., Ltd.Entering CharactersCharacter input is the same as on a standard PC keyboard. Tap the on-screen button corresponding to the character you want to input.International Character Support:Tap the [áü] button to switch from the Standard English keyboard to the European keyboard or switch from the standard keyboard to perform the desired special characters.Entering NumericsOpen the Windows CE numeric keyboard by tapping the “keyboard” icon on the task bar and tapping Numeric Keyboard. Tap the on-screen button corresponding to the numeric you want to input.Moving the KeyboardTap the title bar and drag the keyboard to the desired location.Closing the KeyboardTap the keyboard icon and tap Hide Input Panel to close Windows CE keyboard.Title barTap to enter special charactersTitle bar](https://usermanual.wiki/Unitech-Electronics/MT38EM01/User-Guide-1083020-Page-14.png)