Unitron Hearing UWBTE Hearing Aid User Manual 29 5452 02 conNT BTEgd eng
Unitron Hearing, Inc. Hearing Aid 29 5452 02 conNT BTEgd eng
UserManual.wiki
>
Unitron Hearing
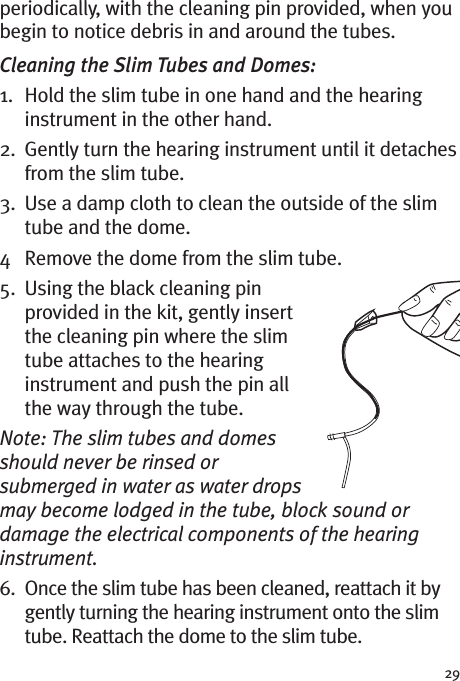
>
UWBTE User Manual
User manual
Navigation menu
Upload a User Manual
Namespaces
Wiki Guide
HTML
PDF
Info
Views
User Manual
Discussion / Help
Navigation


![35Warning to Hearing InstrumentDispensersA hearing instrument dispenser should advise aprospective hearing instrument user to consult promptlywith a licensed physician (preferably an ear specialist)before dispensing a hearing instrument if the hearinginstrument dispenser determines through inquiry, actualobservation, or review of any other availableinformation concerning the prospective user, that theprospective user has any of the following conditions: (i)Visible congenital or traumatic deformity of the ear. (ii)History of active drainage from the ear within theprevious 90 days. (iii) History of sudden or rapidlyprogressive hearing loss within the previous 90 days.(iv) Acute or chronic dizziness. (v) Unilateral hearing lossof sudden or recent onset within the previous 90 days.(vi) Audiometric air-bone gap equal to or greater than 15decibels at 500 hertz (Hz), 1,000 Hz, and 2,000 Hz. (vii)Visible evidence of significant cerumen accumulation ora foreign body in the ear canal. (viii) Pain or discomfortin the ear. Special care should be exercised in selectingand fitting a hearing instrument whose maximum soundpressure level exceeds 132 decibels because there maybe risk of impairing the remaining hearing of the hearinginstrument user. [This provision is required only forthose hearing instruments with a maximum soundpressure capability greater than 132 decibels (dB).]](https://usermanual.wiki/Unitron-Hearing/UWBTE/User-Guide-1074645-Page-37.png)