Universal Electronics 8700 Monster Revolution200(AVL50), Table Top Remote, 09 User Manual LIT Revolution200 LightingInstr
Universal Electronics Inc Monster Revolution200(AVL50), Table Top Remote, 09 LIT Revolution200 LightingInstr
MG38700 User manual
S I M P L E A D V A N C E D
H O M E T H E A T E R A N D L I G H T I N G C O N T R O L
I N S T R U C T I O N M A N U A L
1
HOW TO SET UP LIGHTING
OPERATING BEHAVIOR FOR Z-WAVE / LIGHTING FUNCTIONS . . . . . . . . . . . . . . . . . . . . . . . . . . . . . . . . . . . . . . . . . . . . . . . . 2
PROGRAMMINGTIME AND DAY..........................................................................3
CREATING A Z-WAVE NETWORKOFMODULES .............................................................4
Adding Individual Modules (Nodes) to Your Z-Wave Network . . . . . . . . . . . . . . . . . . . . . . . . . . . . . . . . . . . . . . . . . . . . . 4
Deleting Individual Modules (Nodes) to Your Z-Wave Network . . . . . . . . . . . . . . . . . . . . . . . . . . . . . . . . . . . . . . . . . . . . 4
Renaming Individual Z-Wave Modules (Nodes) ..........................................................5
Understanding the All ON/OFFFeature .................................................................5
Customizing the ALL ON/OFFFeature...................................................................6
Exclude...........................................................................................6
Include ........................................................................................... 6
Exclude On........................................................................................7
Exclude Off........................................................................................7
MANAGINGSCENES ....................................................................................8
Setting Up a Scene...................................................................................8
Renaming a Scene....................................................................................8
Removing a Node from a Scene........................................................................9
Deleting a Scene.....................................................................................9
Controlling Scene Controllers (Monster IlluminEssence Scene Controllers) . . . . . . . . . . . . . . . . . . . . . . . . . . . . . . . 10
How to Include an IlluminEssence Scene Controller . . . . . . . . . . . . . . . . . . . . . . . . . . . . . . . . . . . . . . . . . . . . . . . . . . . . . 10
How to Delete / Remove a Scene Controller from your Z Wave Network . . . . . . . . . . . . . . . . . . . . . . . . . . . . . . . . . . . 11
How to Program a Button on the Scene Controller to Turn a Lighting Scene On / Off . . . . . . . . . . . . . . . . . . . . . . . . 11
How to Remove a Scene from a Button on the Scene Controller . . . . . . . . . . . . . . . . . . . . . . . . . . . . . . . . . . . . . . . . . . 12
How to Update a Scene Controller.....................................................................12
HOW TO AUTOMATE A TIMERS THAT TURNS LIGHT ON/OFF . . . . . . . . . . . . . . . . . . . . . . . . . . . . . . . . . . . . . . . . . . . . . . . . 13
How to Add an Event.................................................................................13
How to Remove an Event.............................................................................14
How to Enable / Disable an Event......................................................................14
How to Copy a Network to other Z Wave and Monster Controllers . . . . . . . . . . . . . . . . . . . . . . . . . . . . . . . . . . . . . . . . 15
Preparing the Destination Controller to Receive Data . . . . . . . . . . . . . . . . . . . . . . . . . . . . . . . . . . . . . . . . . . . . . . . . . . . 16
COPYINGDATA FROM THE SOURCEREMOTE..............................................................16
Copy Option 1: Create Secondary Controller – Entire REVOLUTION 200 . . . . . . . . . . . . . . . . . . . . . . . . . . . . . . . . . . . 16
Copy Option 2: Create Secondary Controller – Network Only . . . . . . . . . . . . . . . . . . . . . . . . . . . . . . . . . . . . . . . . . . . . . 17
Copy Option 3: Controller Swap – Entire REVOLUTION 200. . . . . . . . . . . . . . . . . . . . . . . . . . . . . . . . . . . . . . . . . . . . . . . 17
Copy Option 4: Controller Swap – Network Only ........................................................17
MANAGINGNETWORKSETUP...........................................................................18
Network Reset......................................................................................18
Network Recovery - Re-optimizing the Z Wave RF Signal routing for optimized performance . . . . . . . . . . . . . . . . 18
of the Z wave Network
Network Update.....................................................................................19
Remove Failed Node.................................................................................19
Controlling Thermostats .............................................................................19
FEDERALCOMMUNICATIONSCOMMISSIONSTATEMENT..................................................20
GLOSSARYOFTERMS...................................................................................21
2
3
HOW TO SET UP LIGHTING
OPERATING BEHAVIOR FOR Z-WAVE / LIGHTING FUNCTIONS
It’s highly recommended you read the Glossary of Terms and this section before reading any
other lighting-related section. Doing so will thoroughly familiarize you with how the REVOLUTION
Remote Control communicates statuses of the actions you take while using it.
Success: Upon a successful operation, the LCD screen displays SUCCESS for 3 seconds,
unless otherwise specified.
Fail: Upon an unsuccessful operation, the LCD screen displays FAIL for 3 seconds, unless
otherwise specified.
Scenes:
Pressing and holding a s scene button causes associated nodes within that scene
to dim up/down.
Each scene starts with an LCD screen option to dim up using a toggle function.s
When you press and release a s scene button, all devices associated with that scene will turn
on/off, starting with the on function.
For any scene, whether the last time you edited it was to turn a node on/off or dim ones
up/down, upon entering it again, scene editing on the LCD screen starts with the option
to toggle your existing settings in the opposite direction.
Dim Up/Dim Down: When executing a dim up or dim down command, for as long as the button
is held down, the LCD screen will display “Dimming Up” for dim up commands and “Dimming
Down” for dim down commands.
On/Off: When executing commands that tell a node or scene to turn on, the LCD displays ON.
When executing commands that tell a node or scene to turn off, the LCD displays OFF.
Transfer: Any time the REVOLUTION Remote Control is in the process of transferring data to an-
other controller or receiving data from another controller, the green LED of the key
shift button blinks
rapidly. To exit this function prior to completion, press the button.
PROGRAMMING TIME AND DAY
To set the time and date:
Press and hold the 1. key
shift button for 3 seconds without ‘MONSTER’ highlighted. (If you have not
previously used the REVOLUTION Remote Control Setup Wizard, the on-remote screen will
display the message, “Use Web Setup or Press OK to Use Remote Setup”).
Press the physical 2. button and a menu of Setup-related options appears.
Use the physical 3. or button to highlight Advanced Setup (a fourth menu choice not
displayed among the first three).
Press the 4. button and a new submenu appears.
Use the 5. or button to highlight Time/Day (a fifth menu choice not displayed among
the first three).
The time, as currently set on the remote, displays with the Day of Week element highlighted6.
by default (i.e., the time format has the following elements: day, hour, minute, AM/PM).
Press the or button to cycle through the choices for the highlighted element.
Use the 7. or buttons to navigate from one element to a neighboring one. The
button moves your highlight to the left. The button moves it to the right.
Once you have each of the time elements set as desired, press the 8. button. The remote
screen will display “SUCCESS” for 3 seconds to acknowledge your new Time/Day setting.
Afterwards, the previous menu appears with Time/Day as the highlighted item.
To view the remote’s current Time/Date setting, press and hold the 9. key for 2.5 seconds.
The Time/Date value appears for 3 seconds and then reverts to the previous screen.
Note: Any time you have the Time/Day menu choice highlighted and press the button, the
remote will display the default Time/Day setting of MON 12:00 AM. To see the actual Time/Day
setting for the remote, press and hold the button for 3 seconds from any menu location.
Note: Users must manually change the Time/Day setting to adjust for Daylight Savings Time.
4
5
CREATING A Z-WAVE NETWORK OF MODULES
A network is the sum total of Z-Wave modules you have paired with your REVOLUTION remote
where each module is referred to as a “node.” You can add and delete nodes from your network.
You can also rename nodes as you see fit.
While there are a variety of commands your remote can perform on the network of nodes as
a whole (and they are detailed in later sections), for now, let’s focus on adding, deleting and
renaming individual nodes.
Adding Individual Modules (Nodes) to Your Z-Wave Network
If you’re not already at the Home screen, press the 1. button to move back one screen
at a time until ‘MONSTER’ is highlighted.
Use the 2. or button to highlight Monster if it’s not already highlighted.
Press and hold the 3. key
shift button for 3 seconds. The menu changes and Nodes is highlighted.
Press the button.
The menu changes and Add is highlighted. Press the 4. button.
The remote’s LCD screen display reads, “Press pairing button on device.” Hold the remote 5.
close to the module you wish to pair. Press the pairing button on the module.
When the remote receives a pairing signal from the module, the remote’s LCD screen flashes
the following messages in succession:
SUCCESS
Dimmer #X Included
Rename
The prompt to rename gives you a choice. Use the button to respond YES or the button
to respond NO. If you press the button, you will see the screen for renaming the node.
For details on how to navigate this screen, see Renaming Individual Z-Wave Modules (Nodes)
on page __.
If the remote does not receive a pairing signal from the module within ___ seconds, the remote’s
LCD screen flashes, “FAIL.” When this happens, it may be necessary to reset the module before
attempting to pair it again. To reset it, hold down its pairing button until its light turns red and
flashes repeatedly.
Deleting Individual Modules (Nodes) to Your Z-Wave Network
If you’re not already at the Home screen, press the 1. button to move back one screen
at a time until ‘MONSTER’ is highlighted.
Press and hold the 2. key
shift button for 3 seconds. The menu changes and Nodes is highlighted.
Press the button.
The menu changes and Add is highlighted. Use the 3. or button to highlight Delete
instead. Press the button.
The remote’s LCD screen display reads, “Press pairing button on device.” Hold the remote 4.
close to the module you wish to unpair. Press the pairing button on the module.
When the remote receives an unpairing signal from the module, the remote’s LCD screen flashes
SUCCESS and your Z-Wave network shrinks by one module / node.
Renaming Individual Z-Wave Modules (Nodes)
If you’re not already at the Home screen, press the 1. button to move back one screen
at a time until ‘MONSTER’ is highlighted.
Press and hold the 2. key
shift button for 3 seconds. The menu changes and Nodes is highlighted.
Press the button.
The menu changes and Add is highlighted. Use the 3. or button to highlight Rename
instead. Press the button.
The remote’s LCD screen lists the nodes it currently has stored. If you don’t see your node of 4.
interest listed among the first three, it may be further down the list. Either way, use the
or buttons until you have it highlighted and press the button.
The name of the node to be renamed appears with the first letter in its default name highlighted.5.
Use the or button to cycle through the letters, numbers and symbols until the character
you want to use appears.
When the character you want appears, use the 6. button to navigate to the next character
to be edited and repeat Step #6. Once this character is edited as you wish, repeat this Step #7
until all the characters you want to change are edited. If you wish to navigate to the left, you
can do so at any time using the button.
Once you’ve completed renaming the node, press the 7. button to commit your changes.
The remote’s LCD screen will briefly flash “SUCCESS” and the menu will return to Step 3
so you can rename another node if you like.
Understanding the All ON/OFF Feature
All ON/OFF conveniently enables you to toggle all modules (especially lighting nodes) in your home’s
Z-Wave network from ON to OFF or OFF to ON. To toggle them, use the off button labeled “off.”
If the last time you pressed this button it turned modules OFF, then pressing it again will cause
the remote’s LCD screen to quickly display, “All ON” and all module nodes found on the network
will turn on.
If the last time you pressed this button it turned modules ON, then pressing it again will cause
the remote’s LCD screen to quickly display, “All OFF” and all module nodes found on the network
will turn off.
6
7
Customizing the ALL ON/OFF Feature
Unless you customize the behavior of the ALL ON/OFF feature, then by default, the remote will
attempt to turn on or off, all modules it finds on your Z-Wave network based on the current state
of toggle.
However, your REVOLUTION remote gives you the power to include or exclude specific modules
from All ON commands, All OFF commands, or both.
Described below are four possibilities: Exclude, Include, Exclude On, Exclude Off.
Exclude
Applying this choice to a specific node will exclude it from every All ON and All OFF command
issued from your remote.
To exclude a module from All ON and All OFF commands alike:
If you’re not already at the Home screen, press the 1. button to move back one screen
at a time until ‘MONSTER’ is highlighted.
Press and hold the 2. key
shift button for 3 seconds. The menu changes and Nodes is highlighted.
Use the 3. or button to highlight All ON/OFF (a fifth menu choice not displayed among
the first three) and press the button.
Use the 4. or button to highlight Exclude (if it is not already highlighted by default)
and press the button.
The LCD screen displays, “Exclude from All ON/OFF” and awaits a signal from the module you 5.
wish to exclude. Hold the remote near the module and press the pairing button on the module.
When the remote receives the signal from the module, the remote’s LCD screen will briefly read,
“SUCCESS.” If the signal is not received within __ seconds, the screen will briefly read “FAIL.”
Include
Applying this choice to a specific node ensures it will be active when the All ON and All OFF
command is sent from your remote.
To include a module in every All ON and All OFF command alike:
If you’re not already at the Home screen, press the 1. button to move back one screen
at a time until the only two choices appearing are Monster and Add Device.
Use the 2. or button to highlight Monster.
Press and hold the 3. key
shift button for 3 seconds. The menu changes and Nodes is highlighted.
Use the 4. or button to highlight All ON/OFF (a fifth menu choice not displayed among
the first three) and press the button.
Use the 5. or button to highlight Include and press the button.
The LCD screen displays, “Include in All ON/OFF” and awaits a signal from the module you 6.
wish to include. Hold the remote near the module and press the pairing button on the module.
When the remote receives the signal from the module, the remote’s LCD screen will briefly read,
“SUCCESS.” If the signal is not received within __ seconds, the screen will briefly read “FAIL.”
Exclude On
Applying this choice to a specific node will exclude it from every All ON command issued
from your remote.
To exclude a module from All ON commands:
If you’re not already at the Home screen, press the 1. button to move back one screen
at a time until the only two choices appearing are Monster and Add Device.
Use the 2. or button to highlight Monster.
Press and hold the 3. key
shift button for 3 seconds. The menu changes and Nodes is highlighted.
Use the 4. or button to highlight All ON/OFF (a fifth menu choice not displayed among
the first three) and press the OK button.
Use the 5. or button to highlight Exclude ON and press the button.
The LCD screen displays, “Exclude from All ON Only” and awaits a signal from the module you 6.
wish to exclude. Hold the remote near the module and press the pairing button on the module.
When the remote receives the signal from the module, the remote’s LCD screen will briefly read,
“SUCCESS.” If the signal is not received within __ seconds, the screen will briefly read “FAIL.”
Exclude Off
Applying this choice to a specific node excludes it from All OFF commands sent from your remote.
To exclude a module from All OFF commands:
If you’re not already at the Home screen, press the 1. button to move back one screen
at a time until the only two choices appearing are Monster and Add Device.
Use the 2. or button to highlight Monster.
Press and hold the 3. key
shift button for 3 seconds. The menu changes and Nodes is highlighted.
Use the 4. or button to highlight All ON/OFF (a fifth menu choice not displayed among
the first three) and press the button.
Use the 5. or button to highlight Exclude ON and press the button.
The LCD screen displays, “Exclude from All OFF Only” and awaits a signal from the module you 6.
wish to exclude. Hold the remote near the module and press the pairing button on the module.
When the remote receives the signal from the module, the remote’s LCD screen will briefly read,
“SUCCESS.” If the signal is not received within __ seconds, the screen will briefly read “FAIL.”
8
9
MANAGING SCENES
Scenes are collections of nodes you specify as related to one another in a way that’s meaningful
to you. For example, you keep several paired lighting modules in a certain room of your home.
To control all of them in a preset way, you can create a scene, include them in the scene, and
control them using a scene button.
The remote stores up to 18 scenes. You can access scenes 1 through 9 from any mode of
operation using the numbered scene buttons 1 through 9. You can access scenes 1 through 18
by pressing the key
shift button and one of the nine scene buttons.
What happens when you press the key
shift button together with a numbered scene button depends
on the menu’s current state. If a device is highlighted, that device will send its selected command.
Otherwise, whatever scene has been defined for this combination will toggle OFF to ON or ON
to OFF as the case may be.
Setting Up a Scene
If you’re not already at the Home screen, press the 1. button to move back one screen
at a time until ‘MONSTER’ is highlighted.
Press and hold the 2. key
shift button for 3 seconds. The menu changes and Nodes is highlighted.
Use the 3. or button to highlight Scenes and press the button.
The menu changes and Setup is highlighted. Press the 4. button and the remote’s screen
reads, “Press the desired scene button.”
Press one of the numbered scene buttons. If you pressed the 5. party button labeled #1, screen
will display, “Add node to scene #1” and then list all nodes.
Use the 6. or button to highlight the node you wish to add to this scene and press
the button. The screen then reads, “Adjust brightness level.” If you wish to change the
brightness level, use the button to increase brightness or the button to decrease
brightness. Once done adjusting brightness, press the button.
The screen reads, “Dimmer #X added to Scene #1” soon replaced with “Press OK to continue 7.
or back to exit.” If you want to add more nodes to this scene, press the button and repeat
steps #7 and #8.
Renaming a Scene
If you’re not already at the Home screen, press the 1. button to move back one screen
at a time until the only two choices appearing are Monster and Add Device.
Use the 2. or button to highlight Monster.
Press and hold the 3. key
shift button for 3 seconds. The menu changes and Nodes is highlighted.
Use the 4. or button to highlight Scenes and press the button.
The menu changes and Setup is highlighted. Use the 5. or button to highlight Rename
instead. Press the button and the remote lists all scenes.
Use the 6. or button to highlight the scene you wish to rename and press the button.
The name of the scene to be renamed appears with the first letter in its name highlighted. Use7.
the or button to cycle through the letters, numbers and symbols until the character
you want to use appears.
When the character you want appears, use the 8. button to navigate to the next character
to be edited and repeat Step #7. Once this character is edited as you wish, repeat this Step #8
until all the characters you want to change are edited. If you wish to navigate to the left, you
can do so at any time using the button.
Once you’ve completed renaming the scene, press the 9. button to commit your changes.
The remote’s LCD screen will briefly flash “SUCCESS” and the menu will return to Step 3
so you can rename another scene if you like.
Removing a Node from a Scene
If you’re not already at the Home screen, press the 1. button to move back one screen
at a time until the only two choices appearing are Monster and Add Device.
Use the 2. or button to highlight Monster.
Press and hold the 3. key
shift button for 3 seconds. The menu changes and Nodes is highlighted.
Use the 4. or button to highlight Scenes and press the button.
The menu changes and Setup is highlighted. Use the 5. or button to highlight Remove
Node instead. Press the button.
The screen displays, “Press the desired scene button.” Press the scene button from which 6.
you will delete a node.
A list of the scene’s nodes appears. Use the 7. or button to highlight the node to be
deleted and press the button.
The screen reads, “SUCCESS” and returns to the menu in step #4 for removing other nodes 8.
from scenes if desired.
Deleting a Scene
If you’re not already at the Home screen, press the 1. button to move back one screen
at a time until the only two choices appearing are Monster and Add Device.
Use the 2. or button to highlight Monster.
Press and hold the 3. key
shift button for 3 seconds. The menu changes and Nodes are highlighted.
Use the 4. or button to highlight Scenes and press the button.
10
11
The menu changes and Setup is highlighted. Use the 5. or button to highlight Delete Scene
instead (a fourth menu choice not displayed among the first three). Press the button.
The screen displays, “Press the desired scene button.” Press the scene button for the scene 6.
you wish to delete.
The screen reads, “SUCCESS” and returns to the menu in step #4 for removing additional 7.
scenes if desired.
Controlling Scene Controllers (Monster IlluminEssence Scene Controllers)
Scene controllers are in-wall lighting fixtures with four buttons where each can control a
different scene. To make use of scene controllers, you must have at least one
scene containing one or more nodes already set up on your remote. Once you do,
you can use your remote to assign a scene to a button on your scene controller.
From then on, you can use the scene controller’s button to toggle that scene on or
off. There is a total of 18 scenes that can be setup in the network. Each scene can
be associated/disassociated with each button of the same scene controller or
different scene controller, however it only supports Monster scene controller.
There are five commands related to scene controllers you can perform with your
remote: Include, Delete, Associate, Disassociate, Update Controller.
How to Include an IlluminEssence Scene Controller
“Including” is to a scene controller what “pairing” is to other kinds of lighting modules.
Once you include a particular scene controller, it enables the remote to perform any other
scene controller command.
So, to include a scene controller:
If you’re not already at the Home screen, press the 1. button to move back one screen
at a time until ‘MONSTER’ is highlighted.
Press and hold the 2. key
shift button for 3 seconds. The menu changes and Nodes is highlighted.
Use the 3. or button to highlight Scene Controller (a fourth menu choice not displayed
among the first three). Press the button.
The Include menu choice is highlighted by default. Press the 4. button.
The remote displays the message, “Set Scene Ctrl in Program Mode and Waiting.” Make sure 5.
to hold the remote 3” to 5” from the scene controller.
On the scene controller, hold the 6. first and third buttons down together to send the pairing or
include signal to the remote.
Once the remote acknowledges the signal and briefly reads, “SUCCESS,” it will 7.
display “Scene Controller 001” though the numbering will change as you include
more scene controllers.
The menu returns to step #4 with Scene Controller highlighted by default.8.
How to Delete / Remove a Scene Controller from your Z Wave Network
To delete a scene controller from the memory of your remote:
If you’re not already at the Home screen, press the 1. button to move back one screen
at a time until ‘MONSTER’ is highlighted.
Press and hold the 2. key
shift button for 3 seconds. The menu changes and Nodes is highlighted.
Use the 3. or button to highlight Scene Controller (a fourth menu choice not displayed
among the first three). Press the button.
Use the 4. or button to highlight Delete.
The remote displays the message, “Set Scene Ctrl in Program Mode and Waiting.” Make sure 5.
to hold the remote 3” to 5” from the scene controller.
On the scene controller, hold the 6. first and third buttons down together to send the delete sig-
nal to the remote.
Once the remote acknowledges the signal and briefly reads, “SUCCESS,” it will 7.
display “Scene Controller 001” (if that’s the name of the scene controller whose
buttons you were pressing in the previous step).
The menu returns to step #4 with Scene Controller highlighted by default.8.
How to Program a Button on the Scene Controller to Turn a Lighting Scene On / Off
To assign one of the four buttons of a scene controller to control a given scene:
If you’re not already at the Home screen, press the 1. button to move back one screen
at a time until the MONSTER is highlighted.
Press and hold the 2. key
shift button for 3 seconds. The menu changes and Nodes is highlighted.
Use the 3. or button to highlight Scene Controller (a fourth menu choice not displayed
among the first three). Press the button.
Use the 4. or button to highlight Associate.
The remote displays the message, “Select Scene Controller” followed by Controller #15.
highlighted by default. Use the or buttons to cycle through the choices of scene
controllers you’ve already included in your Z-Wave network. Once you have made
a selection, press the button.
The remote displays the message, “Select Scene” followed by a list of scenes. Use the 6.
button to highlight the scene you want to associate with a button on the scene controller you
selected in the previous step. To continue, press the button.
The remote displays the message, “Select Button 1-4” followed by Button #1 highlighted by 7.
default. Use the or buttons to cycle through the choices of Button #1, Button #2,
Button #3, or Button #4. Once you have selected the Button # you want to associate with the
12
13
scene you chose in the previous step, press the OK button and hold the remote 3” to 5” from
the scene controller.
The remote displays the message, “Sending” shortly followed by either “Fail” or “Success”8.
displayed for 3 seconds.
The menu returns to step #4 with Scene Controller highlighted by default.9.
How to Remove a Scene from a Button on the Scene Controller
To break the association between a particular button on a scene controller and a given scene
(and thereby leave that scene controller button with no effect when pressed):
If you’re not already at the Home screen, press the 1. button to move back one screen
at a time until ‘MONSTER’ is highlighted.
Press and hold the 2. key
shift button for 3 seconds. The menu changes and Nodes is highlighted.
Use the 3. or button to highlight Scene Controller (a fourth menu choice not displayed
among the first three). Press the OK button.
Use the 4. or button to highlight Disassociate.
The remote displays the message, “Select Scene Controller” followed by Controller #15.
highlighted by default. Use the or buttons to cycle through the choices of scene
controllers you’ve already included in your Z-Wave network. Once you have made
a selection, press the button.
The remote displays the message, “Select Button 1-4” followed by Button #1 highlighted by 6.
default. Use the or buttons to cycle through the choices of Button #1, Button #2,
Button #3, or Button #4. Once you have selected the Button # you want to associate with the
scene you chose in the previous step, press the button and hold the remote 3” to 5” from
the scene controller.
The remote displays the message, “Sending” shortly followed by either “Fail” or “Success”7.
displayed for 3 seconds.
The menu returns to step #4 with Scene Controller highlighted by default.8.
How to Update a Scene Controller
To send out a signal to refresh the relationships of all scene controllers and their respective
buttons to their assigned scenes all at once, simply:
If you’re not already at the Home screen, press the 1. button to move back one screen
at a time until ‘MONSTER’ is highlighted.
Press and hold the 2. key
shift button for 3 seconds. The menu changes and Nodes are highlighted.
Use the 3. or button to highlight Scene Controller (a fourth menu choice not displayed
among the first three). Press the button.
Use the 4. or button to highlight Update Control.
The remote displays the message, “Select Scene Controller” followed by Controller #15.
highlighted by default. Use the or buttons to cycle through the choices of scene
controllers you’ve already included in your Z-Wave network. Once you have made
a selection, press the button.
The remote displays the message, “Sending” shortly followed by either “Fail” or “Success”6.
displayed for 3 seconds.
The menu returns to step #4 with Scene Controller highlighted by default.7.
HOW TO AUTOMATE A TIMERS THAT TURNS LIGHT ON/OFF
Events enable you to schedule a scene or individual module (node) to turn on at a certain time
and then turn off at a later time. Whenever a new event is created, it automatically overwrites
the previous one. There are 18 events can be added totally.
In order to schedule events reliably, make sure you have already set up the Time/Day setting
accurately. For the steps on how to do this, see Programming Time and Day on p. __.
There are four basic scheduling commands for events: Add, Remove, Enable/Disable, and view.
How to Add an Event
To add an event:
If you’re not already at the Home screen, press the 1. button to move back one screen
at a time until ‘MONSTER’ is highlighted.
Press and hold the 2. key
shift button for 3 seconds. The menu changes and Nodes is highlighted.
Use the 3. or button to highlight Events and press the button.
The menu choice Add is highlighted by default so, press the 4. button.
A complete list of events appears. Use the 5. or button to highlight the scene you’d
like to schedule and press the button.
A list of timing options appears: Daily, Weekly, Monday to Friday, Saturday – Sunday.6.
Use the or button to highlight the timing option you prefer.
Next, the remote gives the choice of scheduling By Scene or By Node. Use the 7. or
button to highlight your preference. If you choose By Scene, you will be scheduling all of the
lighting modules that belong to that scene. If you choose By Node, you’ll be scheduling one
individual lighting module only. Whether you choose By Scene or By Node, the next step
is the same.
Use the 8. or button to highlight the Scene or Node you wish to schedule.
Next, the screen reads, On Time followed by the default time. The hours portion is highlighted.9.
14
15
Use the or buttons to change the hours to your preferred time. Once you have it set,
use or button to highlight the minutes and proceed in the same way until each element
of the On Time is set the way you want it. Once you’ve done this, press the button to save
your preferred On time for this event.
Next, the screen reads, Off Time followed by the default time. Follow the same procedure as 10.
step #10 to set the time this event will turn off. Once you press the button, the screen will
briefly read Success and then return the menu to step #5 for additional event scheduling.
How to Remove an Event
To remove an event:
If you’re not already at the Home screen, press the 1. button to move back one screen
at a time until the only two choices appearing are Monster and Add Device.
Use the 2. or button to highlight Monster.
Press and hold the 3. key
shift button for 3 seconds. The menu changes and Nodes is highlighted.
Use the 4. or button to highlight Events and press the button.
Use the 5. or button to highlight Remove and press the button.
A list of events appears. Use the 6. or button to highlight the event you want to delete
and press the button. The remote briefly displays SUCCESS and returns the menu to step
#5 for additional event scheduling.
How to Enable / Disable an Event
When you enable an event you’ve already added, the remote will perform the event at the time
you scheduled it for. When you disable an event, the event remains in memory but the remote
never performs it until enable it again.
To enable or disable an event:
If you’re not already at the Home screen, press the 1. button to move back one screen
at a time until the only two choices appearing are Monster and Add Device.
Use the 2. or button to highlight Monster.
Press and hold the 3. key
shift button for 3 seconds. The menu changes and Nodes is highlighted.
Use the 4. or button to highlight Events and press the button.
Use the 5. or button to highlight Enable/Disable and press the button.
A list of events appears. Use the 6. or button to highlight the event whose status you
wish to toggle and press the button.
The name of the event you chose appears on the first followed by Enable on line 2 and Disable 7.
on line 3. If the event is currently enabled, line 2 is highlighted. If the event is currently disabled,
line 3 is highlighted. Use the or button to highlight the status you prefer and press the
button. The remote briefly displays SUCCESS and returns the menu to step #5 for enabling
or disabling additional events.
Missing How to view an Event.
How to Copy a Network to other Z Wave and Monster Controllers
If you would like the convenience of a second remote that controls your Z-Wave enabled devices
and modules, the REVOLUTION Remote Control offers several alternative commands so you can
tailor the results to your liking:
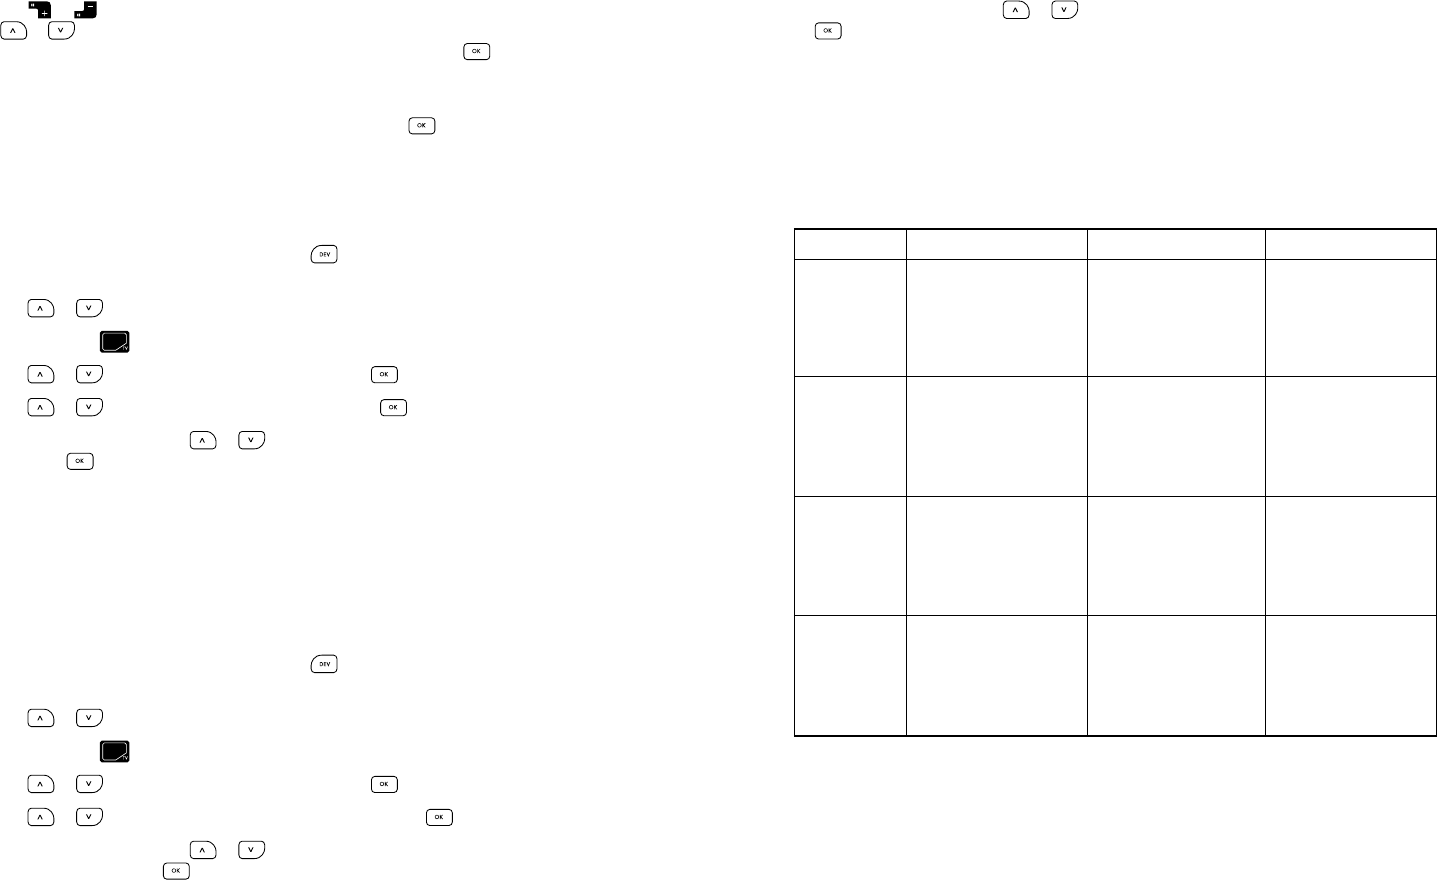
Copy Option Command Data Transferred Result
1
Create Secondary
Controller – Entire
REVOLUTION 200
All network, device,
group, and scene
information (includes
user-edited names
for network nodes)
Source remote
remains primary
remote. Destination
controller becomes
secondary remote.
2
Create Secondary
Controller – Network Only
All nodes on the network
(generic references
to individual nodes
transferred without
user-edited names)
Source remote
remains primary
remote. Destination
controller becomes
secondary remote.
3
Controller Swap –
Entire REVOLUTION 200
All network, device,
group, and scene
information (includes
user-edited names
for network nodes)
Destination controller
becomes primary
remote. Source
remote becomes
secondary remote.
4
Controller Swap –
Network Only
All nodes on the network
(generic references
to individual nodes
transferred without
user-edited names)
Destination controller
becomes primary
remote. Source
remote becomes
secondary remote
16
17
Preparing the Destination Controller to Receive Data
First, it is necessary to place the destination controller into a receiving state. If your destination
controller is also a REVOLUTION Remote Control, follow the steps below.
On your destination controller:
If you’re not already at the Home screen, press the 1. button to move back one screen
at a time until the only two choices appearing are Monster and Add Device.
Use the 2. or button to highlight Monster.
Press and hold the 3. key
shift button for 3 seconds. The menu changes and Nodes is highlighted.
Use the 4. or button to highlight Transfer (a seventh menu choice not displayed among
the first three) and press the button.
On the next screen, use the 5. or button to highlight Receive (the third menu choice
of three) and press the button.
The screen displays RECEIVING. This means your destination controller is ready to receive 6.
data from your source remote.
NOTE: To place a destination controller into receiving mode that is not a REVOLUTION Remote
Control, follow the instructions in the manual that came with it. Do so before you perform the
Copy Option commands on your source remote as described in the next section.
COPYING DATA FROM THE SOURCE REMOTE
Before you follow the steps for your preferred Copy Option, make sure you place the source
remote and destination controller 3 to 5 inches apart.
Copy Option 1: Create Secondary Controller – Entire REVOLUTION 200
On your source remote, follow the same steps 1 to 4 you just performed on your Destination1.
controller (see Preparing the Destination Controller to Receive Data).
On the next screen, use the 2. or button to highlight Create Secondary and press
the button.
On the next screen, use the 3. or button to highlight Entire Rvltn 200 and press the
button. The source remote screen will say SENDING and the destination remote screen will
say RECEIVING.
If the copy succeeds, the source remote screen will say SUCCESS. Otherwise, it will read FAIL.4.
Copy Option 2: Create Secondary Controller – Network Only
On your source remote, follow the same steps 1 to 4 you just performed on your Destination1.
controller (see Preparing the Destination Controller to Receive Data).
On the next screen, use the 2. or button to highlight Create Secondary and press
the button.
On the next screen, use the 3. or button to highlight Network Only and press the
button. The source remote screen will say SENDING and the destination remote screen will
say RECEIVING.
If the copy succeeds, the source remote screen will say SUCCESS. Otherwise, it will read FAIL.
Copy Option 3: Controller Swap – Entire REVOLUTION 200
Performing this command copies all data: network, scenes and node settings.
On your source remote, follow the same steps 1 to 4 you just performed on your Destination1.
controller (see Preparing the Destination Controller to Receive Data).
On the next screen, use the 2. or button to highlight Controller Swap and press
the button
On the next screen, use the 3. or button to highlight Entire Rvltn 200 and press the
button. The source remote screen will say SENDING and the destination remote screen will
say RECEIVING.
If the copy succeeds, the source remote screen will say SUCCESS. Otherwise, it will read FAIL.
Copy Option 4: Controller Swap – Network Only
Performing this command copies all node information but does not copy any scenes.
On your source remote, follow the same steps 1 to 4 you just performed on your Destination1.
controller (see Preparing the Destination Controller to Receive Data).
On the next screen, use the 2. or button to highlight Controller Swap and press
the button
On the next screen, use the 3. or button to highlight Network Only and press the
button. The source remote screen will say SENDING and the destination remote screen will
say RECEIVING.
If the copy succeeds, the source remote screen will say SUCCESS. Otherwise, it will read FAIL.
18
19
MANAGING NETWORK SETUP
At the network level, there are four operations the remote can perform: Network Reset, Network
Recovery, Network Update, and Remove Fail Node.
Network Reset
Network Reset deletes all nodes from the network, restoring the network to its original state
before the first node was ever added. Be sure to follow this step beforeyou create a network.
To perform a Network Reset:
If you’re not already at the Home screen, press the 1. button to move back one screen
at a time until the only two choices appearing are Monster and Add Device.
Use the 2. or button to highlight Monster.
Press and hold the 3. key
shift button for 3 seconds. The menu changes and Nodes is highlighted.
Use the 4. or button to highlight Network (an eighth menu choice not displayed among
the first three) and press the button.
Use the 5. or button to highlight Reset (if it is not already highlighted by default)
and press the button.
The green LED under the key
shift button blinks rapidly while this command is in progress.
If the copy succeeds, the source remote screen will say SUCCESS. Otherwise, it will read FAIL
or EMPTY (to specify the network contains zero nodes).
Note: Once you complete a Network Reset, if you want to add a Z-Wave module or reprogram
one, make sure to perform a hard resent on each module or device you want to add or reprogram.
Network Recovery - Re-optimizing the Z Wave RF Signal routing for optimized performance
of the Z wave Network
Network Recovery rebuilds all routines for all the nodes in the network. To perform a Network
Recovery:
If you’re not already at the Home screen, press the 1. button to move back one screen
at a time until the only two choices appearing are Monster and Add Device.
Use the 2. or button to highlight Monster.
Press and hold the 3. key
shift button for 3 seconds. The menu changes and Nodes is highlighted.
Use the 4. or button to highlight Network (an eighth menu choice not displayed among
the first three) and press the button.
Use the 5. or button to highlight Recovery and press the button.
The green LED under the key
shift button blinks rapidly while this command is in progress.
If the copy succeeds, the source remote screen will say SUCCESS. Otherwise, it will read FAIL
or EMPTY (to specify the network has zero nodes).
Network Update
Network Update ____ all nodes on the network. To perform a Network Update:
If you’re not already at the Home screen, press the 1. button to move back one screen
at a time until the only two choices appearing are Monster and Add Device.
Use the 2. or button to highlight Monster.
Press and hold the 3. key
shift button for 3 seconds. The menu changes and Nodes is highlighted.
Use the 4. or button to highlight Network (an eighth menu choice not displayed among
the first three) and press the button.
Use the 5. or button to highlight Update and press the button.
The green LED under the key
shift button blinks rapidly while this command is in progress.
If the copy succeeds, the source remote screen will say SUCCESS. Otherwise, it will read FAIL
or EMPTY (to specify the network has zero nodes).
Remove Failed Node
Remove Failed Node removes any node not found when the remote sends signals to all nodes
on the network. To perform a Removed Failed Node:
If you’re not already at the Home screen, press the 1. button to move back one screen
at a time until the only two choices appearing are Monster and Add Device.
Use the 2. or button to highlight Monster.
Press and hold the 3. key
shift button for 3 seconds. The menu changes and Nodes is highlighted.
Use the 4. or button to highlight Network (an eighth menu choice not displayed among
the first three) and press the button.
Use the 5. or button to highlight Remove Failed Nodes (a fourth menu choice not
displayed among the first three) and press the button.
The green LED under the key
shift button blinks rapidly while this command is in progress.
If the copy succeeds, the source remote screen will say SUCCESS. Otherwise, it will read FAIL
or EMPTY (to specify the network has zero nodes).
20
21
Controlling Thermostats
Your REVOLUTION remote can control any Z-Wave enabled thermostat. To find the pairing button
for your Z-Wave enabled thermostat, consult your manufacturer’s manual.
For thermostats, the REVOLUTION remote distinguishes between the state of your home as being
Occupied versus Unoccupied. When you use the remote to put your thermostat in the “Occupied”
state, it tells the thermostat to set the temperature at the same level as room temperature.
When you use the remote to put your thermostat in the “Unoccupied” state, it tells the thermostat
to set the temperature for energy savings at a level appropriate for evenings and vacations away
from home. Furthermore, you can set the temperature for Unoccupied in advance.
FEDERAL COMMUNICATIONS COMMISSION STATEMENT
This device complies with part 15 of the FCC rules. Operation of this device is subject to the
following two conditions: (1) This device may not cause harmful interference, and (2) This device
must accept any interference, including interference that may cause undesired operation.
NOTE: This equipment has been tested and found to comply with the limits for a Class B digital
device, pursuant to Part 15 of the FCC Rules. These limits are designed to provide reasonable
protection against harmful interference in a residential installation. This equipment generates,
uses and can radiate radio frequency energy and, if not installed and used in accordance with
the instructions, may cause harmful interference to radio communications. However, there is
no guarantee that interference will not occur in a particular installation. If this equipment does
cause harmful interference to radio or television reception, which can be determined by turning
the equipment off and on, the user is encouraged to try to correct the interference by one or more
of the following measures:
Reorient or relocate the receiving antenna or device.s
Increase the separation between the equipment and receiver.s
Connect the equipment into an outlet on a circuit different from that to which the receivers
is connected.
Consult the dealer or an experienced radio/TV technician for help.s
WARNING! Changes or modifications not expressly approved by Monster Cable Inc. could void
the user’s authority to operate the equipment.
Specification Information
Indoor use only
Suitable for use in dry locations
Operating Temperature Range: 0°C to 40°C
RF range: 50 feet minimum
Uses 4 size “AAA” alkaline batteries. 1.5VDC ea.
Made in China.
GLOSSARY OF TERMS
Z-Wave: Z-Wave uses reliable, low power radio waves to control all aspects of your home
wirelessly: lighting, climate control, safety and security, home entertainment, energy conservation,
remote monitoring, and more. With no programming at all, you can add any Z-Wave enabled
device or many non-Z-Wave devices with adapters, to your home’s network and control them
with your REVOLUTION Remote Control. Before you create a Z-Wave network, make sure to
delete all nodes (if any exist) and then reset the network.
Pairing: The process of adding Z-Wave enabled devices or module adapters to a home network
and confirming their successful inclusion using your REVOLUTION Remote Control in Monster mode.
Nodes: Individual nodes represent individual Z-Wave enabled devices or module adapters. that
have been paired with the REVOLUTION Remote Control. Up to 232 nodes can be added to a
network (i.e., Inclusion). Nodes can be removed from a network (i.e., Deletion), or renamed at will.
Scenes: The bottom row of buttons numbered 1 through 9 is a collection of Scene buttons.
A scene exits when the user has set up as few as one or as many as 64 nodes to be controlled
together by one of these buttons. Using the Key/Shift/TV button, users can assign scenes
10 through 18 to buttons 1 through 9 respectively for a total of 18 scenes. Scenes 1 through 9
are available at all times from any mode of operation. Scenes 10 through 18 are available only
in Monster mode or while setting up scene controllers.
Events: You can schedule the REVOLUTION Remote Control to perform certain actions at specific
times on a daily, weekly, weekday, or weekend basis. Such events execute with respect to
a specific node or scene.
Network: All nodes paired with your REVOLUTION Remote Control are recorded into its internal
database and together form “the network.” The network can include lighting modules, thermostat
modules, or any Z-Wave enabled device. Successful inclusion or deletion of a node from the
network requires both the remote control and the node to be within the range of the network.
Inclusion: The successful addition of a node to a network.
Deletion: The successful removal of a node from a network.
Replication: The successful duplication of all network nodes from one remote controller
to another. This can be convenient, for example, if you want to keep one controller upstairs
and another downstairs.
Monster Mode: The operating mode of the REVOLUTION Remote Control that enables users to pair
Nodes and also work with Scenes, Events, Thermostats, the Network, and Additional Controllers.

©2010 Monster, LLC
7251 West Lake Mead Blvd.
Las Vegas, NV 89128
Monster, the Monster logo, Revolution 200, Monster Central, and the Monster Central logo
are trademarks or registered trademarks of Monster Cable Products, Inc. or its
subsidiaries in the United States or other countries.
Blu-ray Disc is a trademark of Sony Kabushiki Kaisha Corp.
www.MonsterCentral.com