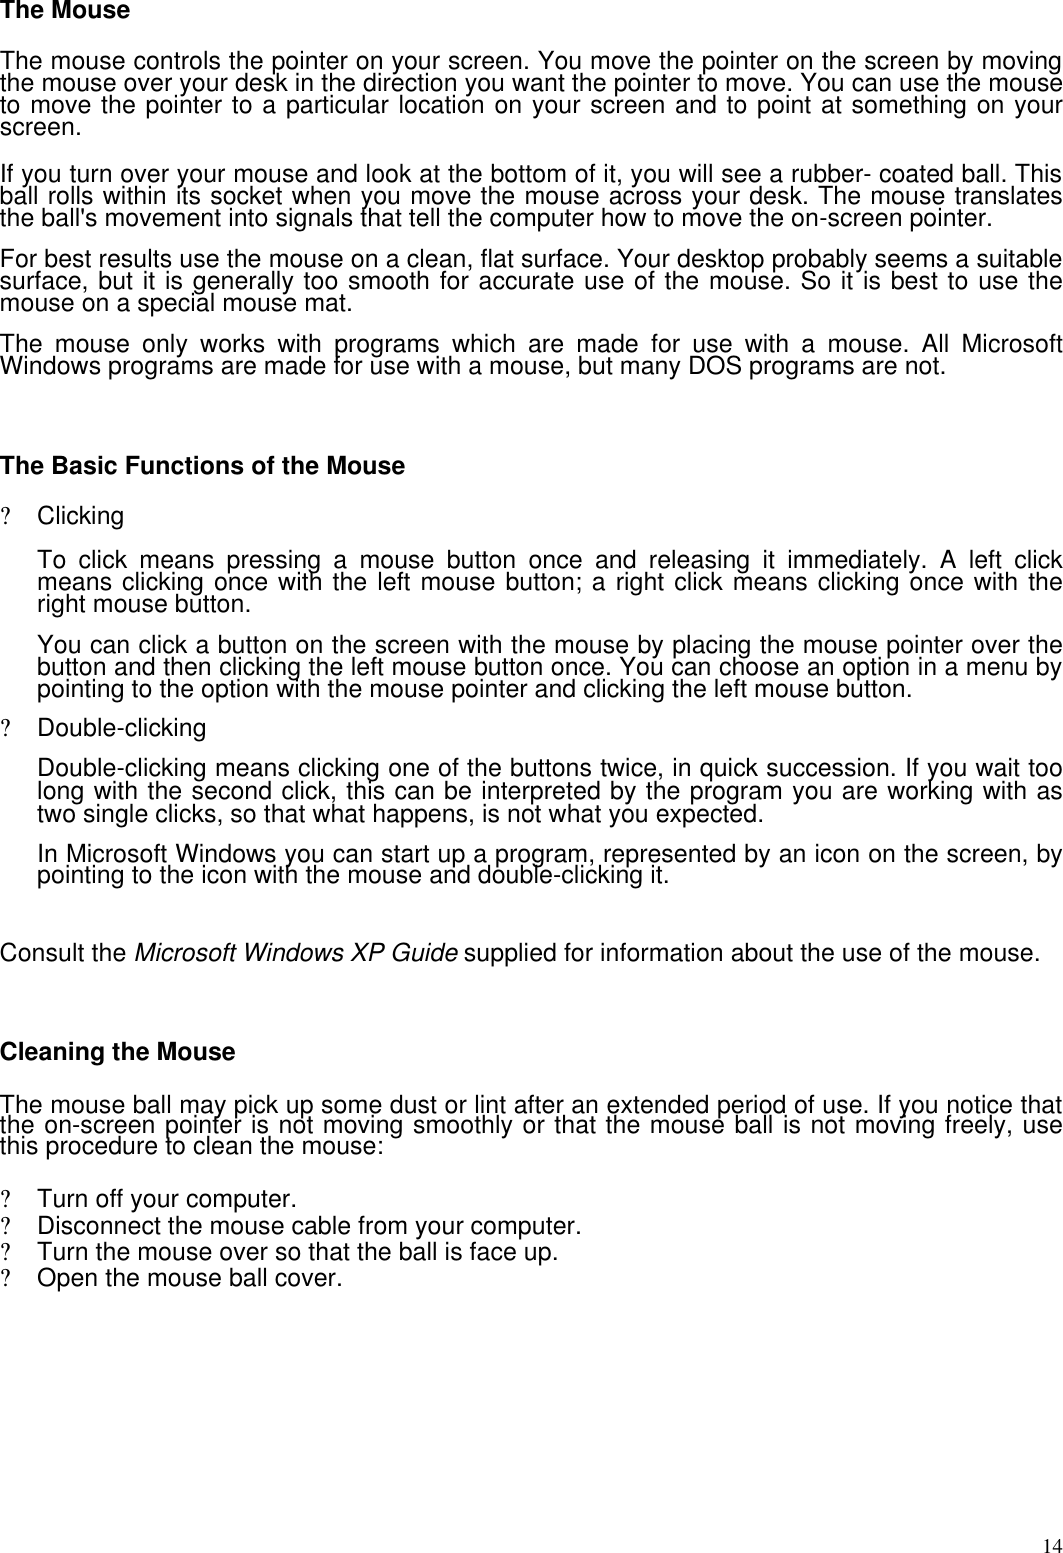
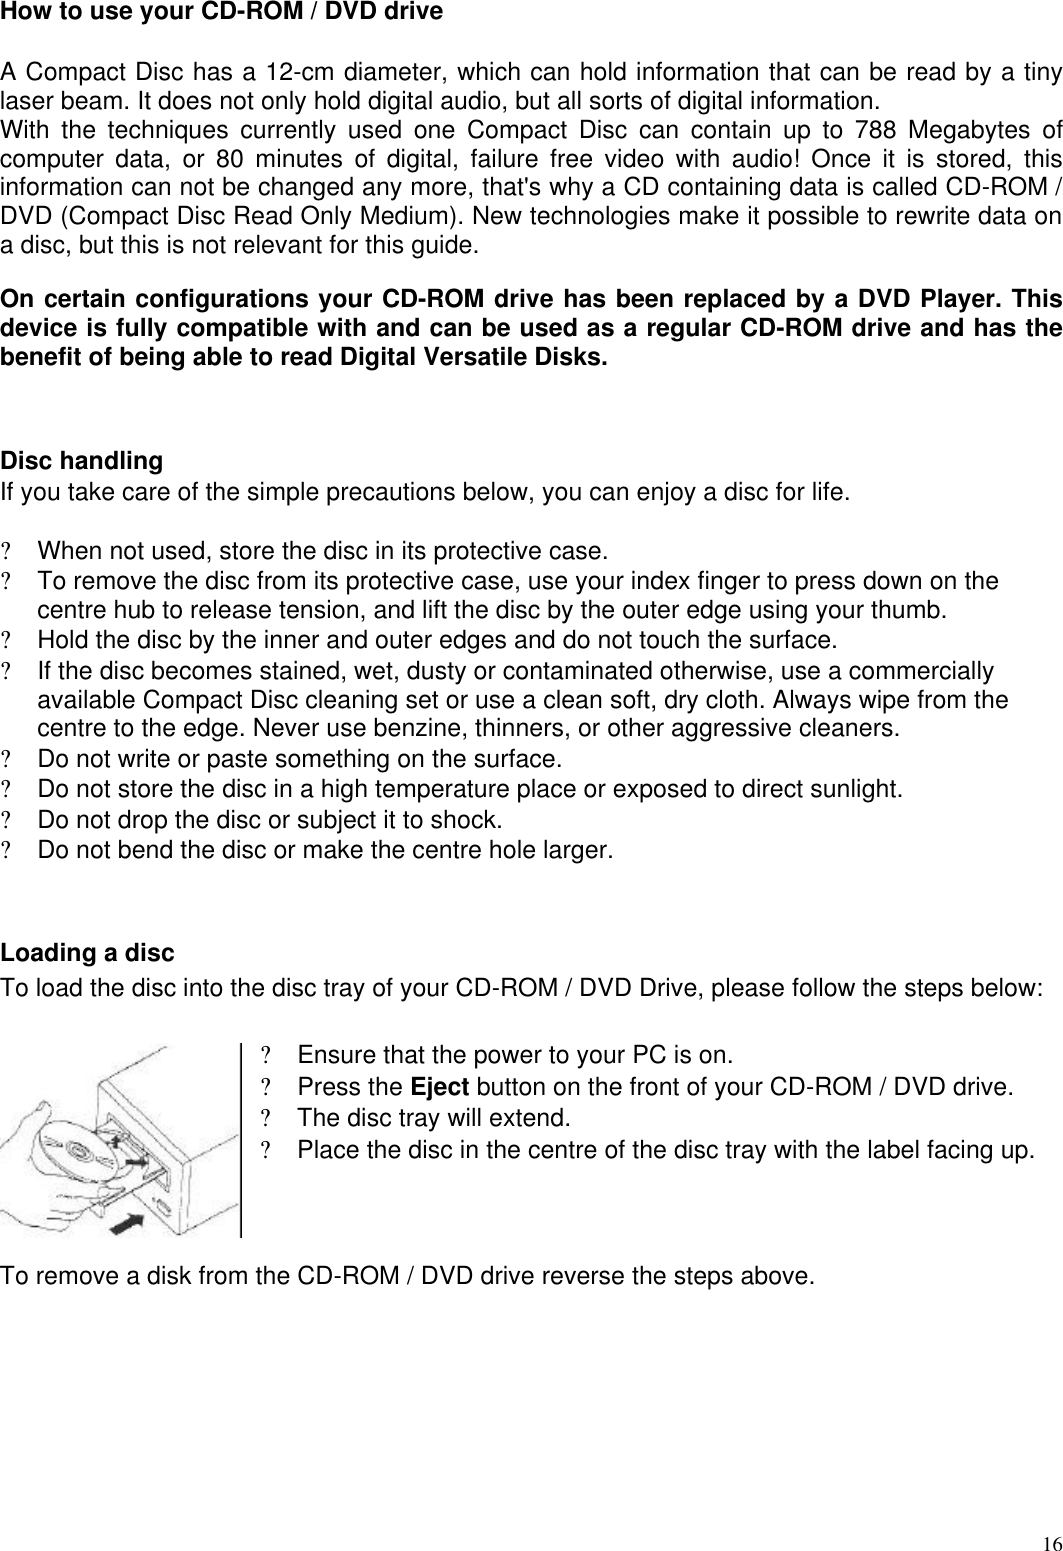
VESTEL KOMUNIKASYONN TIC A S VESTELPROMEGA VESTEL PC PROMEGA User Manual VesteENG IB

VESTEL KOMUNIKASYON SAN. TIC. A.S. VESTEL PC PROMEGA VesteENG IB

User Manual

           Personal Computer  User Manual   Model : PROMEGA              TThhiiss  gguuiiddee  ccoonnttaaiinnss  iimmppoorrttaanntt  iinnffoorrmmaattiioonn..  PPlleeaassee  rreeaadd  iitt  tthhoorroouugghhllyy  bbeeffoorree  pphhoonniinngg  yyoouurr  ssttoorree  oorr  tthhee  PPCC  SSeerrvviiccee  HHeellpplliinnee  ffoorr  TTeecchhnniiccaall  SSuuppppoorrtt..
 2  Product Safety Precautions  ? Follow all warnings and instructions marked on the product ? Do not use this product near water ? This PC should be installed on a solid horizontal base ? To protect from electrical shock, unplug PC from the wall outlet before relocating or cleaning. When cleaning, use only a neutral detergent cleaner with soft damp cloth. Do not spray with liquid or aerosol cleaners. ? Do not expose this PC to direct sunlight or heat. Hot air may cause damage to the PC and other parts. ? Adequate ventilation must be maintained to ensure reliable and continued operation and to protect the PC from overheating. Do not block ventilation slots and openings with objects or install the PC in a place where ventilation may be hindered. ? This PC should be operated from the type of power source indicated on the rear panel of the display. ? The main socket has to be near the device and easy accessible. ? Do not allow metal pieces or objects of any kind fall into the PC from ventilation holes. ? Do not attempt to service this unit yourself. Removal of the display cover may expose you to dangerous voltage or other risks. Refer all servicing to qualified service personnel.   Unplug this product from the wall outlet and refer servicing to qualified service personnel in the event that:  1. Power cord or plug is damaged or frayed. 2. Liquid is spilled into the product or the product is exposed to rain or water.
 3  WARNING ? TO PREVENT FIRE OR SHOCK HAZARD. DO NOT EXPOSE THIS PC TO RAIN OR MOISTURE.   Caution: 1. Keep PC away from excessive dust, high temperature, moisture or direct sunlight.  2. Use in well ventilated area and do not cover ventilation openings. 3. Unauthorized modifications of this equipment or substitution or attachment of unshelded connecting cable may cause excessive interference. 4.   When the PC is not in use for a long time, turn off power switch                            !
 4      CONTENTS  Welcome 3 Introduction 3 In the Box  4 Safety 5 Virus Warning 5 Epilepsy Warning 5 Lightning Damage  5 Setup 6 Connecting Your Vestel PC 6 Connecting Additional Devices 8 Starting Windows XP for the first time  9 Using your Vestel PC 10 Knowing your Vestel PC 10 The Keyboard 11 The Mouse 12 How to use a Floppy Disk 13 How to use your CD ROM / DVD drive 14 Getting additional help 15 Upgrade capabilities  15 Technical Support 16 Quick Tips 16 Specialist support for your PC 17   Copyright Notice 18
 5WELCOME   Introduction   Dear Customer   Thank you for choosing the Vestel Personal Computer which we hope will give you many years of trouble-free service. The purpose of this User Manual is to give you an introduction on how to operate your new PC and to help you be on friendly terms with the system.  Because the potential uses of your PC are so varied, a detailed explanation of the system's abilities would fill several volumes. The objective of this manual is not to tell you everything that the system can do, but rather to help you get the most from it without submerging yourself in technicalities or the internal workings of your PC.  If this is your first PC, be aware that this can be a frustrating, sometimes baffling, often addictive and usually tremendously rewarding experience. You will help yourself considerably if you give yourself time and exercise patience. Your Vestel PC and the software that you use will do exactly as they are told. The challenge is in making sure that the instructions you give the system are the right ones to make it do as you wish. When you do encounter a difficulty, give yourself time to read the manuals, time to use the on-line "Help" functions and most important of all, time to think. If the problems persist qualified personnel are always available to help 24 hours a day, 365 days a year (see section 6 for details).  If you have previous experience of PC's you should have no difficulty connecting the individual elements of the system together in order to get the machine working. All the connections at the back of the system unit are labelled.  Your Vestel PC comes with twelve months on-site warranty covering both parts and labour. To ensure that you receive the best possible service in the unlikely event of needing a warranty repair, Please:  Keep your proof of purchase and a note of the machine's serial number in a safe place.   Finally, all electrical equipment is potentially dangerous if misused or damaged. Please read and follow the safety information in this manual.   Always contact qualified personnel if you have any doubts about the safety of any of your equipment.   Wishing you many years of interesting, productive and enjoyable computing.   Yours sincerely,  VESTEL Personal Computers
 6IN THE BOX  Check to ensure you have all the necessary hardware and that the set of manuals and backup software is complete. If anything is damaged or missing please contact your supplier.  You should have the following hardware components:  ? Base unit ? Monitor (This may have come in a separate box) ? Speakers (This may have come in a separate box, Excluding Subwoofer* ) ? Mouse ? Keyboard ? Two Power Leads ? Modem cable - Selected models only ? User Guide (this one) ? Windows XP Guide ? Full Product Recovery CD-ROM disk   *You may also have a separate box with the subwoofer and 2 more speakers.
 7SAFETY  Virus warning  Vestel guarantees that this product is 100% virus free. Please take the following precautions to protect your system against new viruses:   ? Do not use illegal copies of software protected by copyright.  ? Check all floppy disks carefully using a virus scanner before you start using them.  ? If your computer is connected to a network, please make sure that only authorised persons have access to your system. For example, you can use passwords and share files as Read Only.   Epilepsy warning  PLEASE READ BEFORE USING GAMES OR ALLOWING YOUR CHILDREN TO USE THEM. Some people are susceptible to epileptic seizures or loss of consciousness when exposed to certain flashing lights or light patterns in everyday life. Such people may have a seizure while watching television images or playing certain games. This may happen even if the person has no medical history of epilepsy or has never had any epileptic seizures. If you or anyone in your family has ever had symptoms related to epilepsy (seizures or loss of consciousness) when exposed to flashing lights, consult your doctor prior to playing.   We advise that parents should monitor the use of games by their children. If you or your child experience any of the following symptoms: dizziness, blurred vision, eye or muscle twitches, loss of consciousness, disorientation, any involuntary movement or convulsion while playing a game, IMMEDIATELY discontinue use and consult your doctor.   Precautions to take during use  •  Do not sit or stand too close to the screen. Sit a good distance away from the screen.  •  Preferably play a game on a small screen.  •  Avoid playing if you are tired or have not had much sleep.  •  Make sure that the room in which you are playing is well lit.  •  Rest for at least 10 to 15 minutes per hour while playing a game.     Lightning Damage  CAUTION: Lightning strikes, power surges and other electrical anomalies can damage your computer and other electronics. For the protection of your computer, it is recommended that you connect all power cords for your computer and its peripheral devices (i.e. printer, scanner, etc.) to some form of surge protection such as a power strip or UPS (Uninterruptible Power Supply).  Not all power strips provide surge protection; they must be specifically labelled as having this ability. Look for manufacturers that have a Damage Replacement Policy to replace your equipment if their surge protection fails.
 8SETUP   CONNECTING  YOUR  VESTEL  PC  (THIS  ILLUSTRATION MAY  CHANGE  ACCORDING   TO  MODEL  YOU  HAVE CHOSEN)  To  help  you  set  up  your  computer  quickly  and  easily;  the connectors  on  the  back  of  your  computer  are  all  labelled. Refer to the diagram on the right, the Top Sheet Poster that came with your computer, and the instructions below to help you set up your computer.    This  section  of  your  User  Guide  tells  you  how  to  set  your computer  up  and  hook  up  additional  equipment,  such  as speakers and printers, that you may have purchased.   1.  Connect  your  keyboard  to  the  keyboard  connector.   It  is labelled KEYBOARD.     2.  Connect your mouse to the mouse connector. It is labelled MOUSE.      3.   Refer  to  your  monitor  User's  Guide  to  connect  your monitor  to  your  computer.  However,  for  most  monitors,  you can follow the steps below to connect it:   a.  Connect  the  monitor  to  the  monitor  connector.  A monitor icon marks the monitor connector.   b. Connect the monitor power cord to the monitor and to the wall outlet.   4. Connect the speakers to the speaker connector on the rear of the PC. It is coloured green.  VIDEOVIDEOVIDEO
 95. If you received a Joystick with your Vestel PC, connect the Joystick to the port labelled GAME.  6. Follow the directions below to connect your modem – Selected models only. a. Connect one end of the modem line that came with your computer to the outlet on the back of your computer.   b. Connect the other end of the modem line to the telephone jack in your house.   6. Finally, connect the power cord the rear of the computer and plug it into the wall outlet.  Once you have checked all the above connections are correct you can turn on the PC. There is a switch you have to press in order to turn on the PC.  The switch is on the front of the computer. Press and release this button.         If you have any optional devices to connect please read the next section. If not, then move on to the section entitled 'Starting Windows XP for the first time'.
 10CONNECTING ADDITIONAL DEVICES   Connecting a Printer If you have a printer, refer to the documentation that came with your printer to connect it to your computer. However, for most printers, you can follow the steps below.  a. Locate the parallel printer connector on the back of the computer, it is labelled PARALLEL.  b. Plug the printer cable into the computer and into the printer using the appropriate parallel cable.  c. Plug the printer's power cable into the printer and the wall outlet.  d. Press the printer's power button.  e. From the Windows Desktop, click on the 'Start' button. Point to 'Settings', then click on 'Printers'. The 'Printers' dialogue box appears.      f. Double-click on the 'Add Printer' icon.    g. The 'Add Printer Wizard' dialogue box appears.  h. Follow the instructions on your screen or refer to the documentation that came with the printer.   Connecting a USB Device  If you have a USB device, such as a USB camera or Scanner, you can connect it to your Vestel computer. Look for the text USB on the back of your computer.  a. Select one of the USB ports.  b. Align the plug with the socket, with the labelled side up.  c. Gently push the plug until it stops.
 11STARTING WINDOWS XP FOR THE FIRST TIME  The final step is to set-up Windows XP. The first time you switch your computer on, it needs to configure itself. During the configuration process you will be asked to enter regional settings, your name, company, username, password, and a Product Key. This number can be found on the Certificate of Authenticity, on the cover of the 'Microsoft Windows XP Getting Started' guide, so you should have it nearby when you start. A pointer will appear on the screen. You can move this pointer using the mouse. To select a feature just press or 'click' the left-button on the mouse. Please follow the steps below to setup Windows XP.  Regional Settings  Using the left-hand button of your mouse, select the up and down arrows on the scroll bar, situated on the right-hand side, to highlight the appropriate country. e.g. English (British). To proceed, point the mouse and click on the "Next>" button using your mouse.   Keyboard layout  As above, use your mouse and the scroll bar to select your required keyboard layout e.g. British. again, to proceed, press the "Next>" button using your mouse.  At this point you will observe a small box appear in the centre of the screen. This will inform you to "Please wait whilst set-up installs your international settings'.   User Information  At this screen you should enter your name using the keyboard and, if applicable, your company name by moving the cursor with the 'Tab' key (do not use the 'Return' key at this point). To proceed, click the "Next>" button.   licence Agreement  The Windows XP licence agreement should now appear on your screen. To accept the licence agreement, point your mouse towards the relevant button and click with your mouse.   Start Wizard  Click on the 'Finish" button. Your computer will now shutdown and restart automatically in order to complete the set-up procedure.   Password  If you decide to set a password, you will be prompted for this password every time you log onto your computer. To do so, enter your user name and then use the 'Tab" key to enter your chosen password. If you do not wish to use the password option, do not enter any text and click the 'Cancel" button.
 12USING YOUR VESTEL PC  Knowing your VESTEL PC (THIS ILLUSTRATION MAY CHANGE ACCORDING TO MODEL YOU HAVE CHOSEN)  On the front of your Vestel computer you will find a CD-ROM or DVD drive, a floppy disk drive, a number of activity lights (LED’s or Light Emitting Diodes) and a number of buttons. These various parts are described below.       1. CD-ROM / DVD drive 2. CD-ROM / DVD drive activity LED 3. CD-ROM / DVD drive eject button 4. Floppy disk drive activity LED 5. Floppy disk drive  6. Floppy disk drive eject button 7. Power button 8. Reset button 9. Power LED 10. Hard disk drive activity LED     12345678910
 13The Keyboard  A computer keyboard differs little from a standard typewriter keyboard, with a number of additional special purpose keys. In the paragraphs below, the various keys are discussed. The diagram below shows the lay-out of a keyboard (it is possible that the lay-out Of your keyboard differs slightly).   The Function Keys  The function keys are located at the top of the keyboard. You can use keys <F1> to <F12> to activate a certain function. The function of these keys depends on which program you are using.  The Numeric Keypad  On the right-hand side of the keyboard is the numeric keypad, consisting of 17 keys. You activate the numeric keypad by pressing <Num Lock>. The Num lock LED lights up. You can now use the numeric keypad to type numbers.  The Arrow Keys  The cursor control keys (the keys with the arrows, left of the numeric keys) reposition the cursor up or down a line, or one position to left or right, as indicated by the arrows.    The keys <Insert>, <Delete>, <Home>, <End>, <Page Up>, <Page Down>, <PrtSc/SysRq>, <Pause/Break>, <Num Lock> and <Scroll Lock> (above the cursor control keys), <Esc> and <Caps Lock> (on the left of the keyboard) have the same function in most programs.  When you are typing in a text, you may hit the wrong key. There are two keys on the keyboard to help you correct this, namely the <Del> or <Delete> key and the <Backspace> key (this is the key with an arrow going left). Use the <Del> key to remove a letter or word to the left of the cursor (=blinking dash or block on the screen). Use the <Backspace> key to delete a letter or word to the left of the cursor.   Special Keys You can use the key with the Windows logo   to open the Start menu of Microsoft Windows.   You can use the key with this symbol    to open a menu within an application.
 14The Mouse   The mouse controls the pointer on your screen. You move the pointer on the screen by moving the mouse over your desk in the direction you want the pointer to move. You can use the mouse to move the pointer to a particular location on your screen and to point at something on your screen.   If you turn over your mouse and look at the bottom of it, you will see a rubber- coated ball. This ball rolls within its socket when you move the mouse across your desk. The mouse translates the ball's movement into signals that tell the computer how to move the on-screen pointer.  For best results use the mouse on a clean, flat surface. Your desktop probably seems a suitable surface, but it is generally too smooth for accurate use of the mouse. So it is best to use the mouse on a special mouse mat.  The mouse only works with programs which are made for use with a mouse. All Microsoft Windows programs are made for use with a mouse, but many DOS programs are not.   The Basic Functions of the Mouse  ? Clicking   To click means pressing a mouse button once and releasing it immediately. A left click means clicking once with the left mouse button; a right click means clicking once with the right mouse button.  You can click a button on the screen with the mouse by placing the mouse pointer over the button and then clicking the left mouse button once. You can choose an option in a menu by pointing to the option with the mouse pointer and clicking the left mouse button.  ? Double-clicking  Double-clicking means clicking one of the buttons twice, in quick succession. If you wait too long with the second click, this can be interpreted by the program you are working with as two single clicks, so that what happens, is not what you expected.  In Microsoft Windows you can start up a program, represented by an icon on the screen, by pointing to the icon with the mouse and double-clicking it.   Consult the Microsoft Windows XP Guide supplied for information about the use of the mouse.   Cleaning the Mouse   The mouse ball may pick up some dust or lint after an extended period of use. If you notice that the on-screen pointer is not moving smoothly or that the mouse ball is not moving freely, use this procedure to clean the mouse:  ? Turn off your computer. ? Disconnect the mouse cable from your computer. ? Turn the mouse over so that the ball is face up. ? Open the mouse ball cover.
 15How to use a floppy disk  To insert a disk into the diskette drive, follow these simple instructions.    Hold the diskette with the label facing up and the arrow pointing toward the drive, then gently push the disk into the drive.  To remove a disk, press the floppy disk eject button.      Formatting a Floppy Disk A floppy disk is a thin piece of magnetic tape on which data can be stored electronically. This floppy disk is protected with a hard plastic case. Before a floppy disk can be used, it must be formatted. Formatting is the process which makes a floppy disk ready to accept data.   To format a floppy disk follow the steps below. ? Insert the diskette into your floppy drive.  ? Using the mouse, click on the Start button, point to Programs, then click on Windows Explorer. ? Point to 3.5-inch Floppy (A:) under ‘My Computer’. ?  Click on the right mouse button then select ‘Format’. ? Click on ‘Start’.   For information on copying files to and from floppies, or making backups of your data, refer to the Introducing Microsoft Windows XP manual that came with your computer.
 16How to use your CD-ROM / DVD drive  A Compact Disc has a 12-cm diameter, which can hold information that can be read by a tiny laser beam. It does not only hold digital audio, but all sorts of digital information.  With the techniques currently used one Compact Disc can contain up to 788 Megabytes of computer data, or 80 minutes of digital, failure free video with audio! Once it is stored, this information can not be changed any more, that's why a CD containing data is called CD-ROM / DVD (Compact Disc Read Only Medium). New technologies make it possible to rewrite data on a disc, but this is not relevant for this guide.   On certain configurations your CD-ROM drive has been replaced by a DVD Player. This device is fully compatible with and can be used as a regular CD-ROM drive and has the benefit of being able to read Digital Versatile Disks.    Disc handling  If you take care of the simple precautions below, you can enjoy a disc for life.  ? When not used, store the disc in its protective case.  ? To remove the disc from its protective case, use your index finger to press down on the centre hub to release tension, and lift the disc by the outer edge using your thumb.  ? Hold the disc by the inner and outer edges and do not touch the surface.  ? If the disc becomes stained, wet, dusty or contaminated otherwise, use a commercially available Compact Disc cleaning set or use a clean soft, dry cloth. Always wipe from the centre to the edge. Never use benzine, thinners, or other aggressive cleaners.  ? Do not write or paste something on the surface.  ? Do not store the disc in a high temperature place or exposed to direct sunlight. ? Do not drop the disc or subject it to shock.  ? Do not bend the disc or make the centre hole larger.    Loading a disc  To load the disc into the disc tray of your CD-ROM / DVD Drive, please follow the steps below:   ? Ensure that the power to your PC is on.  ? Press the Eject button on the front of your CD-ROM / DVD drive. ? The disc tray will extend. ? Place the disc in the centre of the disc tray with the label facing up.     To remove a disk from the CD-ROM / DVD drive reverse the steps above.
 17Getting Additional Help  There are many books available to help you get the most out of Windows XP and individual applications. The following resources, already available with your Vestel PC, may also be useful.   Microsoft Windows  The Microsoft Windows XP Guide, supplied with the system, explains common tasks so that you can quickly become proficient on your computer. Some example topics that may be of interest are:  ? Using Windows Explorer ? Saving Documents ? Setting up a Screensaver ? Connecting to the Internet ? Creating and using shortcuts   Windows Help  Windows help is an online manual that guides you through almost every aspect of Windows XP. It can be accessed at any time by clicking on the ‘Start’ button then clicking ‘Help’. Some example topics are:  ? Customising the ‘Start’ menu ? Customising system settings ? Changing the appearance of your desktop ? Moving and resizing windows ? Creating Icons ? Using the right mouse button for certain tasks    Upgrade Capabilities   Your Vestel PC has been manufactured from high quality industry standard components to meet your immediate computing needs, with excellent provision for your future requirements.  Whether you require increased memory, a faster processor, or more storage space, the basic Vestel design has made provision for such upgrades.  A careful user can install most additions; others require the skills of a qualified engineer. Some electronic components can be damaged or their performance degraded if they are handled without suitable static precautions. It is very important to follow the instructions provided with upgrade kits to avoid damage. If you are at all unsure about upgrades, contact the PC Helpline first (the number can be found at the rear of this manual). Engineers are available to carry out upgrades for you; again please contact the PC Helpline.
 18TECHNICAL SUPPORT  If you do run into difficulties, we would recommend that you first check the following quick tips.   Quick Tips  No Power from the PC? First, check all the connections and the fuse in the mains plug. Some PC's have a 'sleep' button or even a second power switch at the back of the PC which you will need to turn on. The PC power light is on but there is no picture on the monitor? Check that the monitor cable is connected securely to the main PC unit. The screen comes on but then goes blank after a short while? Don't worry - a power saving device has switched off power to the monitor. Just press a key or move the mouse and the picture will return. No sound is coming from the speakers? Check all cables are connected to the correct sockets - refer to your manual or 'getting started' guide. Check the master volume by clicking on the speaker symbol in the bottom right hand corner of the screen. A file has been deleted by mistake? Open the 'Recycle Bin' by double-clicking the left mouse button on its icon on the desktop. All the deleted files will show up. Simply highlight the file you would like, click on 'File' and choose 'Rescue' The Windows taskbar has disappeared? Press the 'Windows' key on your keyboard. This will show you where the Taskbar is. Now just move the mouse to the edge of the screen where the Taskbar is, click the left button on the mouse, hold down and drag it to where you want to put the Taskbar. This is called Drag and Drop. A file cannot be saved on to a floppy disk? Check the write-protect tab on the disk. This is a small square hole in the corner of the disk that can be covered with a plastic tab. When the tab covers the hole, files can be saved to the disk. Part of the PC, (e.g. the Printer or the Speakers) stops working? Shut down the PC, disconnect the cables to the problem part (Ensure the power is off when you do this), then re-connect them and re-start your PC. Please refer to your user guide or manual for correct connections. The mouse pointer isn't moving properly? If you are finding it difficult to control the mouse pointer on screen, or it is stuck completely, the mouse may need cleaning. This is quite common when the mouse is not used on a proper mouse pad. You get a message saying 'Non System Disk or Disk Error. Replace and Strike Any Key'? Remove the floppy disk from the disk drive and press any key to continue. Possibly this floppy is unsuitable because you need to 'Format' it. To do this, see the appropriate section in the manufacturer's instructions. Error messages such as 'Invalid Page Fault' or 'General Protection Fault' keep appearing. Click on 'Start', 'Programs', 'Accessories', 'System Tools' and 'ScanDisk'. Select the 'C:' drive and choose 'Thorough' in the type of test. Put a tick in the 'Automatically fix errors' box and click 'Start'.    If you are still having problems, please call the relevant help-line service, as detailed on the following page.
 19SPECIALIST SUPPORT FOR YOUR PC  PC’s and business products are complex. Therefore, a dedicated (Mastercare) PC Service team will help you if you need support for your PC, Laptop, Printer, Fax machine or Word Processor. Please choose the help-line that meets your particular needs.  Expert Support  PC Repair Service       +90 800 2190109  (Calls Charged at National call rate)  Help to resolve faults with your PC   All telephone lines are manned 09:00 till 19:00 a day, 365 days a year. They are particularly busy from 09.00 to 10.30 and 16.30 to 19.00, so please try to avoid calling during these times, if at all possible.
 20COPYRIGHT NOTICE  VESTEL User's Guide, version 1.0, November 2004,  Copyright (c) 2004 VESTEL. All Rights Reserved.  No part of this manual may be reproduced or transmitted, in any form or by any means, whether electronic, chemical, manual or otherwise, including but not limited to photocopying, recording, or information storage and retrieval systems, for any purpose without prior written permission of Vestel.   Disclaimer  Vestel specifically disclaims all warranties, either express or implied, including but not limited to implied warranties of merchantability and fitness for a particular purpose with respect to this product and documentation. Vestel reserves the right to revise or make changes or improvements to this product or documentation at any time without obligation to notify any per- son of such revisions or improvements.  In no event shall Vestel be liable for any consequential or incidental damages, including but not limited to loss of business profits or any other commercial damages, arising out of the use of this product.    Trademarks  Microsoft, MS-DOS and Windows are registered trademarks of Microsoft Corporation.  lntel, and Pentium are registered trademarks and MMX and Celeron are trade-marks of Intel Corporation.  PS/2 is a trademark of International Business Machines Corporation.    All other company or product names are trademarks, registered trademarks or service marks of their respective owners.    Federal Communications Commission Notice This equipment has been tested and found to comply with the limits for a Class B digital device, pursuant to part 15 of the FCC Rules. These limits are designed to provide reasonable protection against harmful interference in a residential installation. This equipment generates, uses and can radiate radio frequency energy and, if not installed and used in accordance with the instructions, may cause harmful interference to radio communications. However, there is no guarantee that interference will not occur in a particular installation. If this equipment does cause harmful interference to radio or television reception, which can be determined by turning the equipment off and on, the user is encouraged to try to correct the interference by one or more of the following measures: • Reorient or relocate the receiving antenna. • Increase the separation between the equipment and receiver. • Connect the equipment into an outlet on a circuit different from that to which the receiver is connected. • Consult the dealer or an experienced radio or television technician for help. Modifications The FCC requires the user to be notified that any changes or modifications made to this device that are not expressly approved by the manufacturer responsible for compliance may void the user’s authority to operate the equipment. Cables
 21Connections to this device must be made with shielded cables with metallic RFI/EMI connector hoods to maintain compliance with FCC Rules and Regulations.   CE Statement  This equipment has been designed to comply with the requirements for CE Mark Certification, pertaining to products intended for sale within the European Union.    Year 2000 Statement This PC is year 2000 compliant in accordance with the following standards:

Navigation menu