VStarcam Technology C23-24 IP Camera User Manual C7823WIP
Shenzhen VStarcam Technology Co.,Ltd IP Camera C7823WIP
User Manual

PnP IP/Network Camera
Quick Installation Guide
Pangolin T series
VStarcam, IP Camera Expert

一. Hardware installation
Please connect the IP camera and router via network cable.
And make sure that the Power indicator light of the router is on (yellow) and the Network Indicator light is
flashing (green).
Please use the provided power adapter. Unauthorized power adapter may damage
the IP camera.
Note: The IP camera can be reset to factory setting by pressing the reset button for 10 seconds. The reset
button can be found on the bottom of the camera.
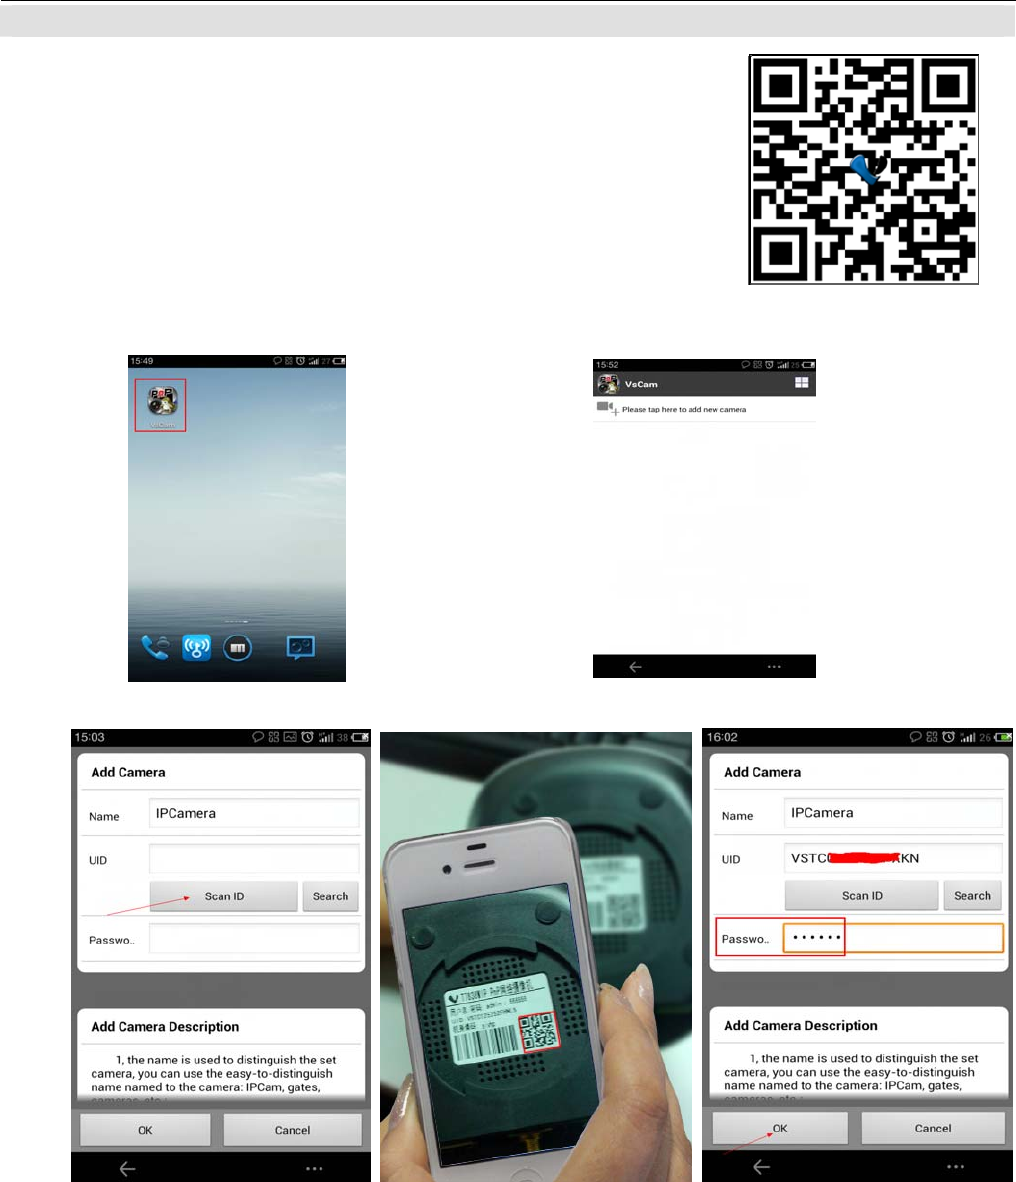
二.View via Android mobile phone
1. Install the P2PCam264 software:Visit the URL: http://cd.gocam.so
via the phone web browser, and follow the instruction to download or scan the
QR code to download the PnP version software.
2. " VsCam" will be shown on the phone
desktop after success installation. 3. Run the software and click “Add” to add
cameras.
4. Click “scan”, and then point the phone camera towards the UID sticker.
The UID can be found on the bottom of the camera or the warranty card. After a “beep” sound, the UID is
scanned successfully. Also you can click “search” to add cameras in the LAN.
The default password is: 888888; The default user is : admin
5. Click "camera" to view the live video.
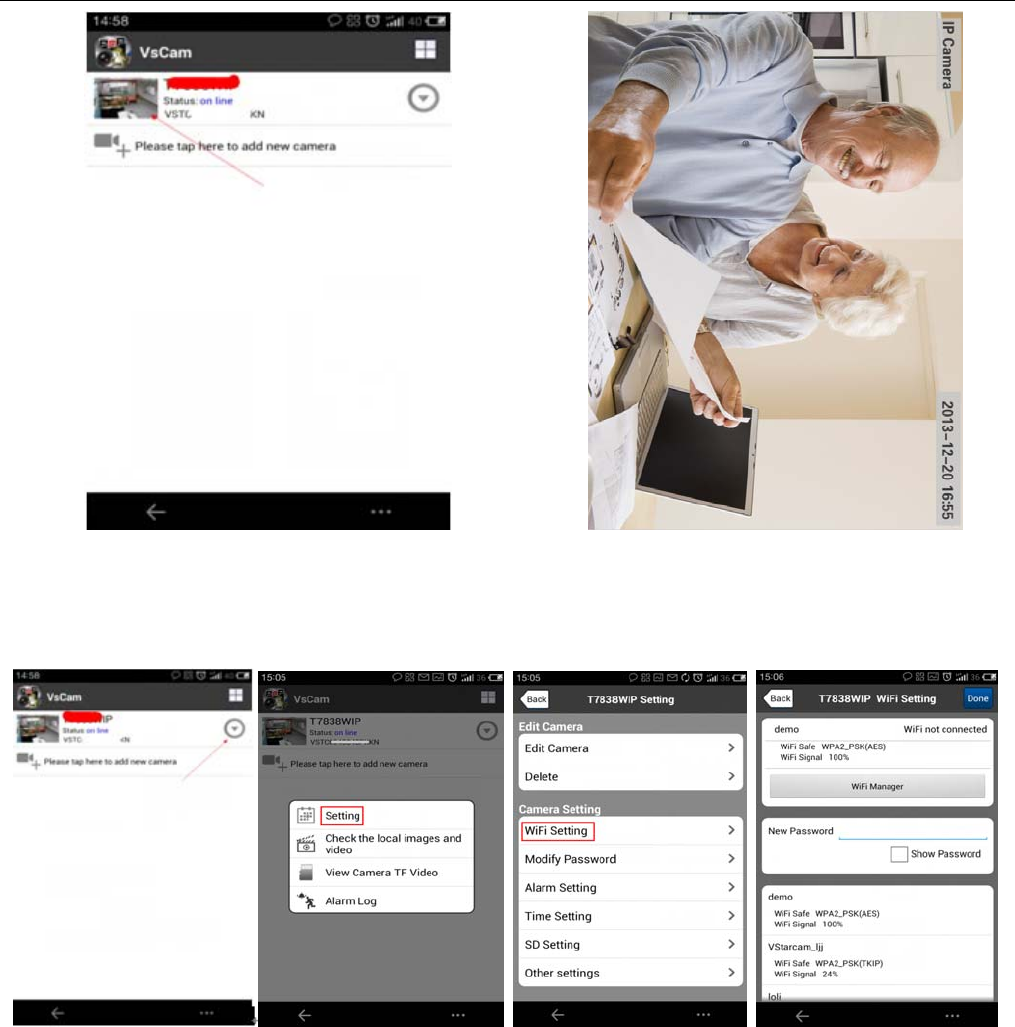
6. WIFI Setup
Click the icon on the right of the camera to set the camera. click “Setting” and “Wifi Setting”, then the Router
SSID list will pop up. Click the right SSID, and input WIFI password, click "OK". Then unplug the camera's
network cable, the camera will restart, and auto connect to the WiFi.
Notes:
If the camera has Pan/Tilt function, users can slide up and down the video screen to control the camera.
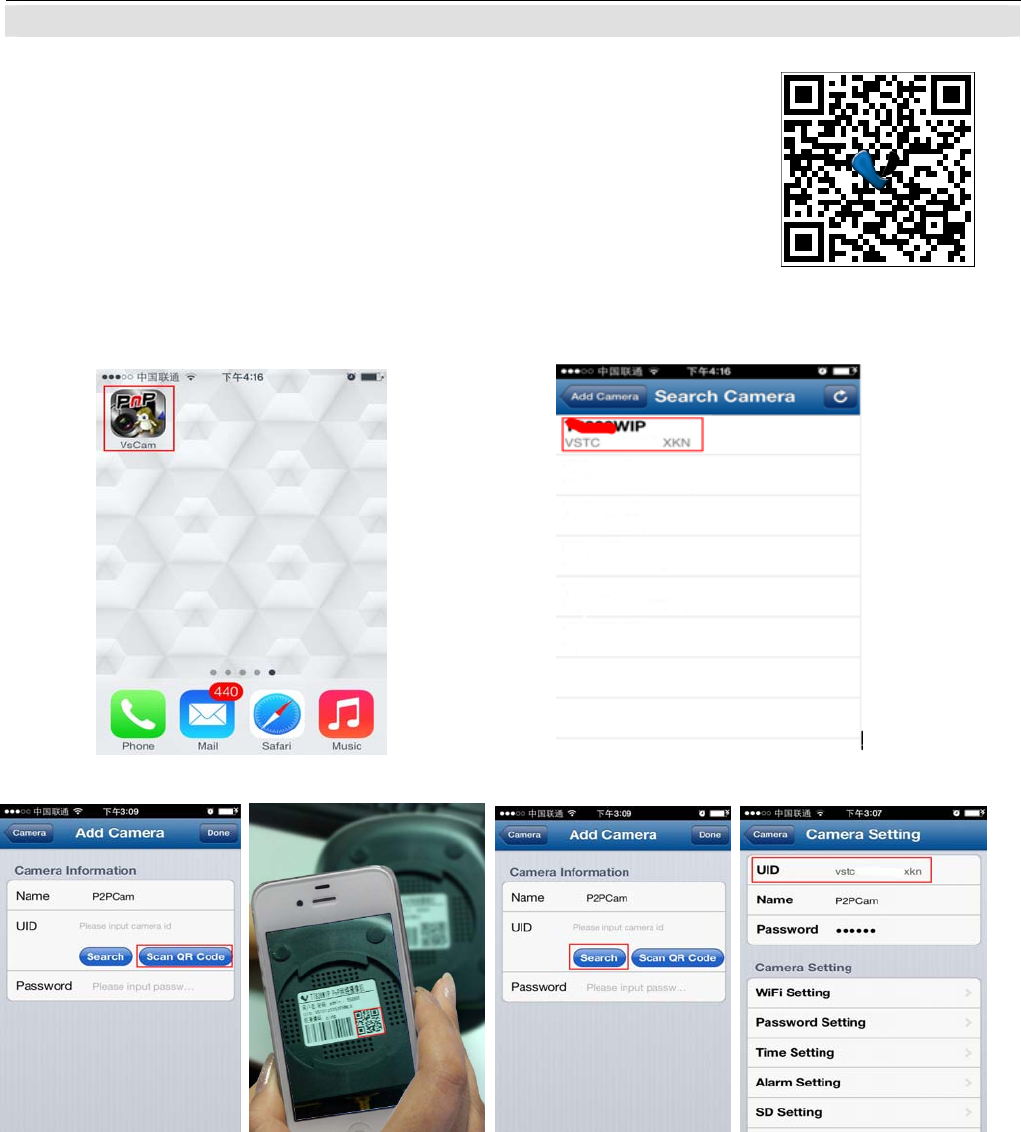
三.View via iPhone
1. Install the VsCam software:Visit the URL: http://cd.gocam.so via the
phone web browser, and follow the instruction to download or scan the QR
code to download the PnP version software.
2. "VsCam" will be shown on the phone
desktop after success installation. 3. Run the software and click “Add” to
add cameras
4. Click “Scan”, then scan the camera's UID.
Point iPhone camera towards the UID (The UID can be found on the bottom of the IP camera or the warranty
card). After a “beep” sound, the UID is scanned successfully. Also you can click search button to add
cameras in the LAN, or manually add a camera by pressing “+” button, to input the camera's UID and
password.
The default password is: 888888; The default user is : admin
5. Click "camera" to view the live video.
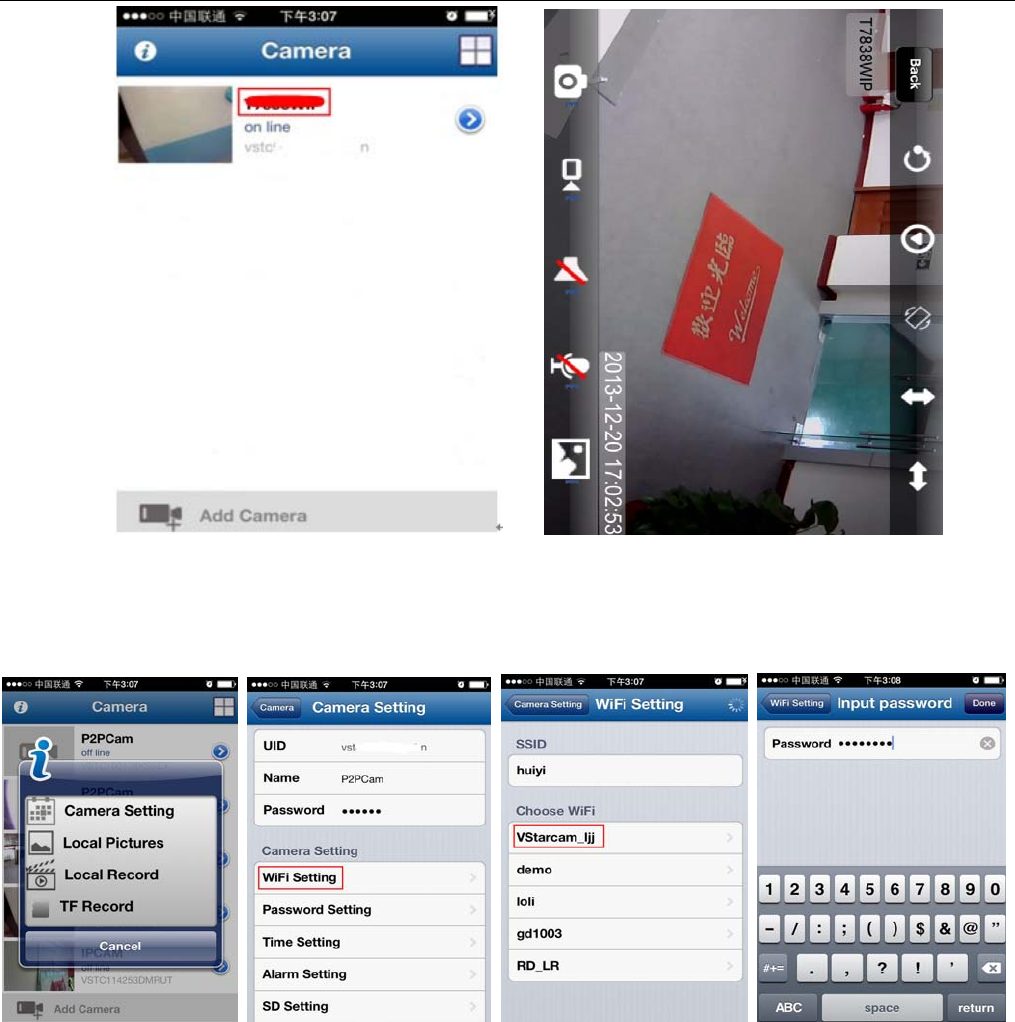
6. WIFI Setup
Click the arrow icon of the online camera, press “WIFI Setting” label, then the Router SSID list will pop up.
Click the right router's SSID, and input WIFI password, click "Add". Then unplug the camera's network cable,
the camera will restart, and connect the WIFI automatically.
Notes:
If the device has Pan/Tilt function, users can slide up and down on the video screen to control the camera P/T.
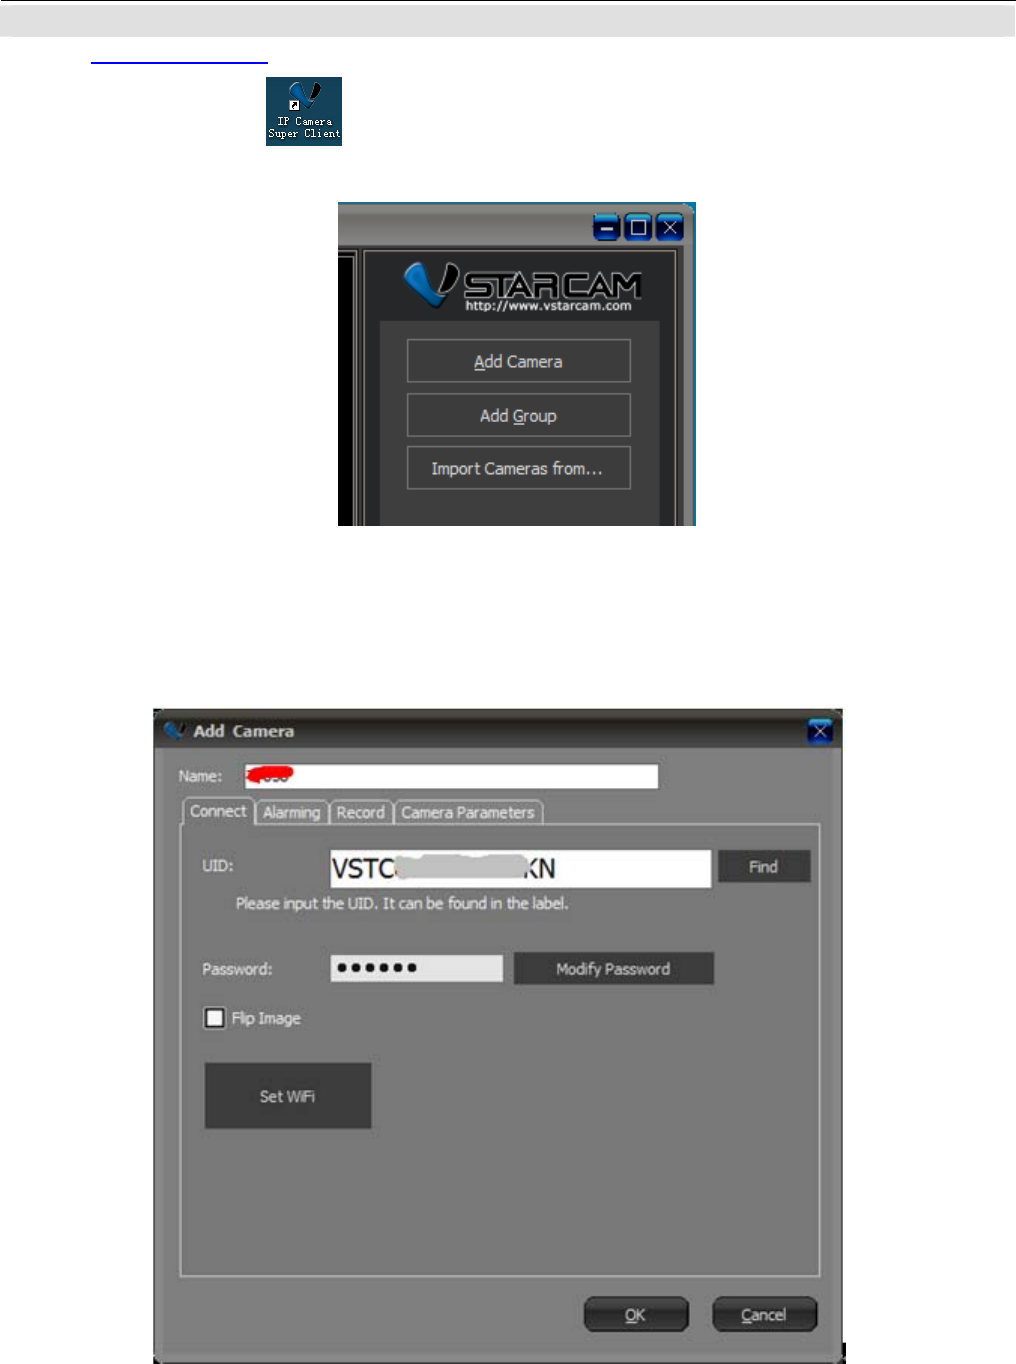
四.View via PC
1. Visit http://cd.gocam.so to get a download link for PC client.
After installation this icon will be shown on the desktop,double click it.
2. Click "Add Camera", to connect camera in LAN or in WAN.
Add cameras in LAN: click “Find” button and select the cameras.
Add cameras in WAN: Input UID (UID can be found on the bottom of the camera or warranty card)
Default password: 888888.
3. Click "OK" to confirm add camera.
"Set WiFi": can setup camera to be connected via WiFi.
4. Double click "IP Camera" icon to view the camera.
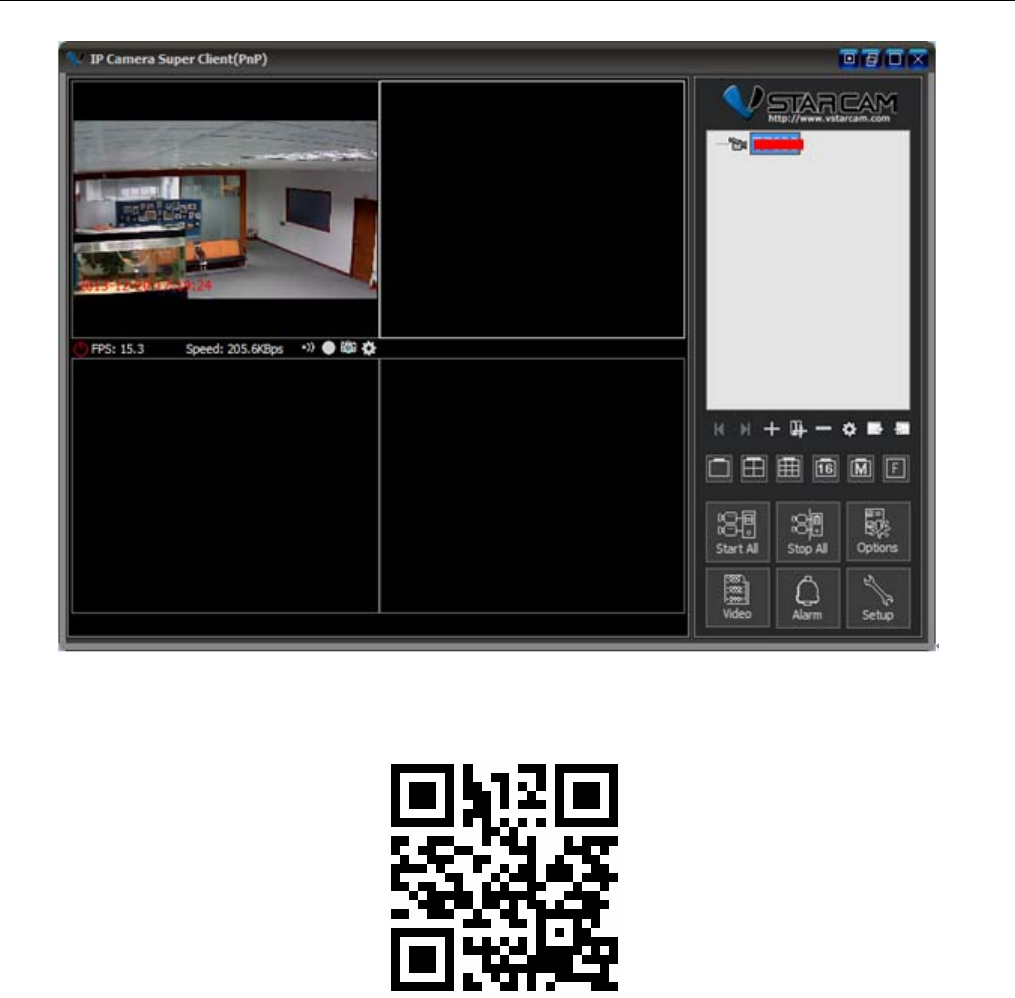
Note:For more information, please refer to online CD: http://cd.gocam.so

FCC Warning Statement
Changes or modifications not expressly approved by the party responsible for compliance could void the use
r’s authority to operate the equipment.
This equipment has been tested and found to comply with the limits for a Class B digital device, pursuant to
Part 15 of the FCC Rules. These limits are designed to provide reasonable protection against harmful interfer
ence in a residential installation. This equipment generates uses and can radiate radio frequency energy and
, if not installed and used in accordance with the instructions, may cause harmful interference to radio com
munications. However, there is no guarantee that interference will not occur in a particular installation. If thi
s equipment does cause harmful interference to radio or television reception, which can be determined by tu
rning the equipment off and on, the user is encouraged to try to correct the interference by one or more of t
he following measures:
‐Reorient or relocate the receiving antenna.
‐Increase the separation between the equipment and receiver.
- Connect the equipment into an outlet on a circuit different from that to which the receiver is
connected.
‐ Consult the dealer or an experienced radio/TV technician for help.
FCC Radiation Exposure Statement The antennas used for this transmitter must be installed to provide a separ
ation distance of at least 20 cm from all persons and must not be co‐
located for operating in conjunction with any other antenna or transmitter.