VTech Telecommunications 2230 AT&T; 2230 2.4 GHz Digital Cordless Telephone User Manual 2230 book 1ATT
VTech Telecommunications Ltd AT&T; 2230 2.4 GHz Digital Cordless Telephone 2230 book 1ATT
User manual
1
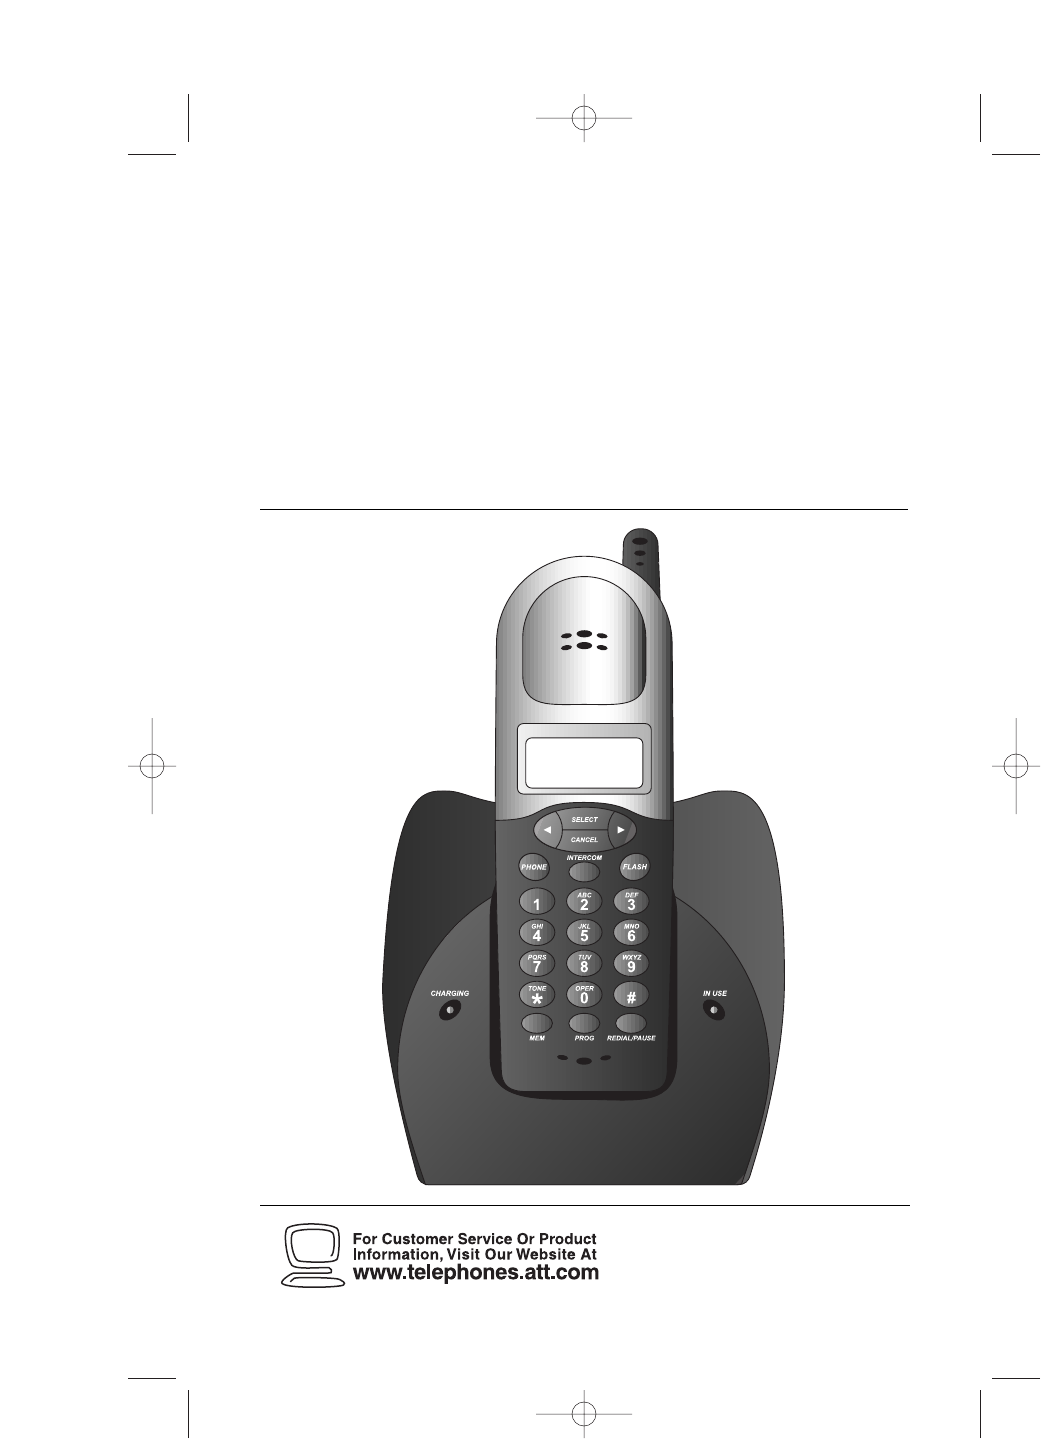
2.4 GHz Cordless Telephone 2230
with Caller ID/Call Waiting
1
Please also read
Part 1 — Important
Product Information
USER’S MANUAL
Part 2
AT&T and the globe symbol are registered trademarks of AT&T Corp.licensed to Advanced American Telephones.
REVISED
5/10/01
2230_book_1ATT 5/10/01 8:25 PM Page ii

© 2001 Advanced American Telephones. All rights reserved.
Printed in China. Issue 1AT&T 05/01
2230_book_1ATT 5/10/01 8:25 PM Page iii

CONTENTS
TO COME
2230_book_1ATT 5/10/01 8:25 PM Page 1

2230_book_1ATT 5/10/01 8:25 PM Page 2

About the Base and the Charger
This cordless product provides you with two cordless handsets,a base
station and a charger. You can charge either handset in the base or in the
charger. You’ll need to connect the base to both AC power and a modular
telephone jack. You’ll connect the charger to AC power only. For more
installation information,please see INSTALLATION in this User Manual.
About Caller Identification (Caller ID)
This product has a Caller ID with Call Waiting feature that works with
service from your local phone service provider.
Caller ID with Call Waiting lets you see who’s calling before you answer
the phone,even when you’re on another call.
You may need to change your phone service to use this feature. Contact
your phone service provider if:
• You have both Caller ID and Call Waiting,but as separate services
(you may need combined service)
• You have only Caller ID service,or only Call Waiting service
• You don’t subscribe to any Caller ID or Call Waiting services.
You can use this product with regular Caller ID service,and you can use
this product’s other features without subscribing to either Caller ID or
combined Caller ID with Call Waiting service.
There are fees for Caller ID services,and they may not be available in
all areas.
This product can provide information only if both you and the caller are
in areas offering Caller ID service,and if both telephone companies use
compatible equipment.
About Call History
This phone assigns each incoming call a number from 1 to 30. The most
recent call will have the lowest number. When the memory is full,the
oldest call information is deleted to make room for new incoming call
information.
If you answer a call before call information appears on the screen,it will
not be in the call history.
BEFORE YOU BEGIN
3
2230_book_1ATT 5/10/01 8:25 PM Page 3
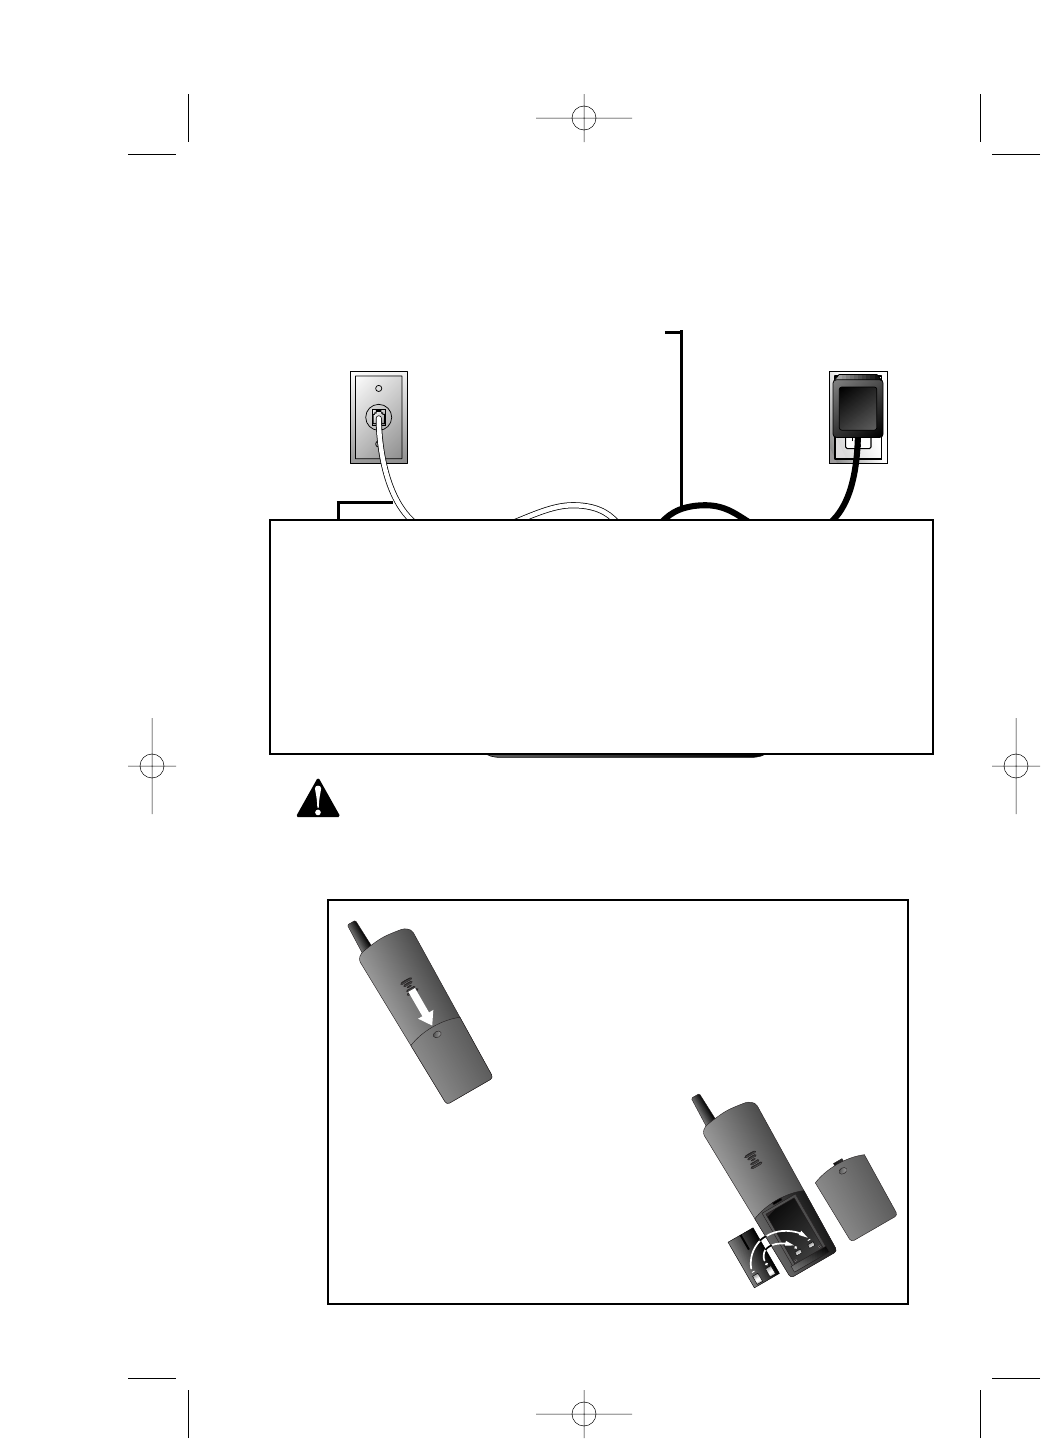
1 Connect the power cord to the base and an electrical outlet
not controlled by a wall switch.
Use only the power cord supplied with this product.
If you need a replacement,call 1 800 222-3111.
3 Install the handset battery.
Use only AT&T Battery 2401,SKU# 91077.
INSTALLATION
4
Standard
electrical outlet
Modular
telephone
jack
b) Place the battery pack in
the handset. Align the metal
contacts on the battery with
the contacts in the battery
compartment.
c) Replace cover by
sliding it on its
track up over
battery case until
it snaps firmly
into place.
a) Remove
battery
compartment
cover by
pressing on
indentation
and sliding
downward.
2 Connect
the
telephone
line cord.
ART AND TEXT
FOR POSITION ONLY
STILL NEED INFORMATION
TO COMPLETE THIS SECTION
2230_book_1ATT 5/10/01 8:25 PM Page 4
INSTALLATION
5
4 Charge the handset battery.
• Place the handset in the base (or a remote charging stand,
purchased separately).
• Charge the battery at least 12 hours. After the first charge,the
battery will quick charge in only eight hours.
5 Check for dial tone.
• After the batteries are charged,lift the handset and press
P;you should hear a dial tone.
Belt Clip
Attach belt clip to the cordless handset (optional).
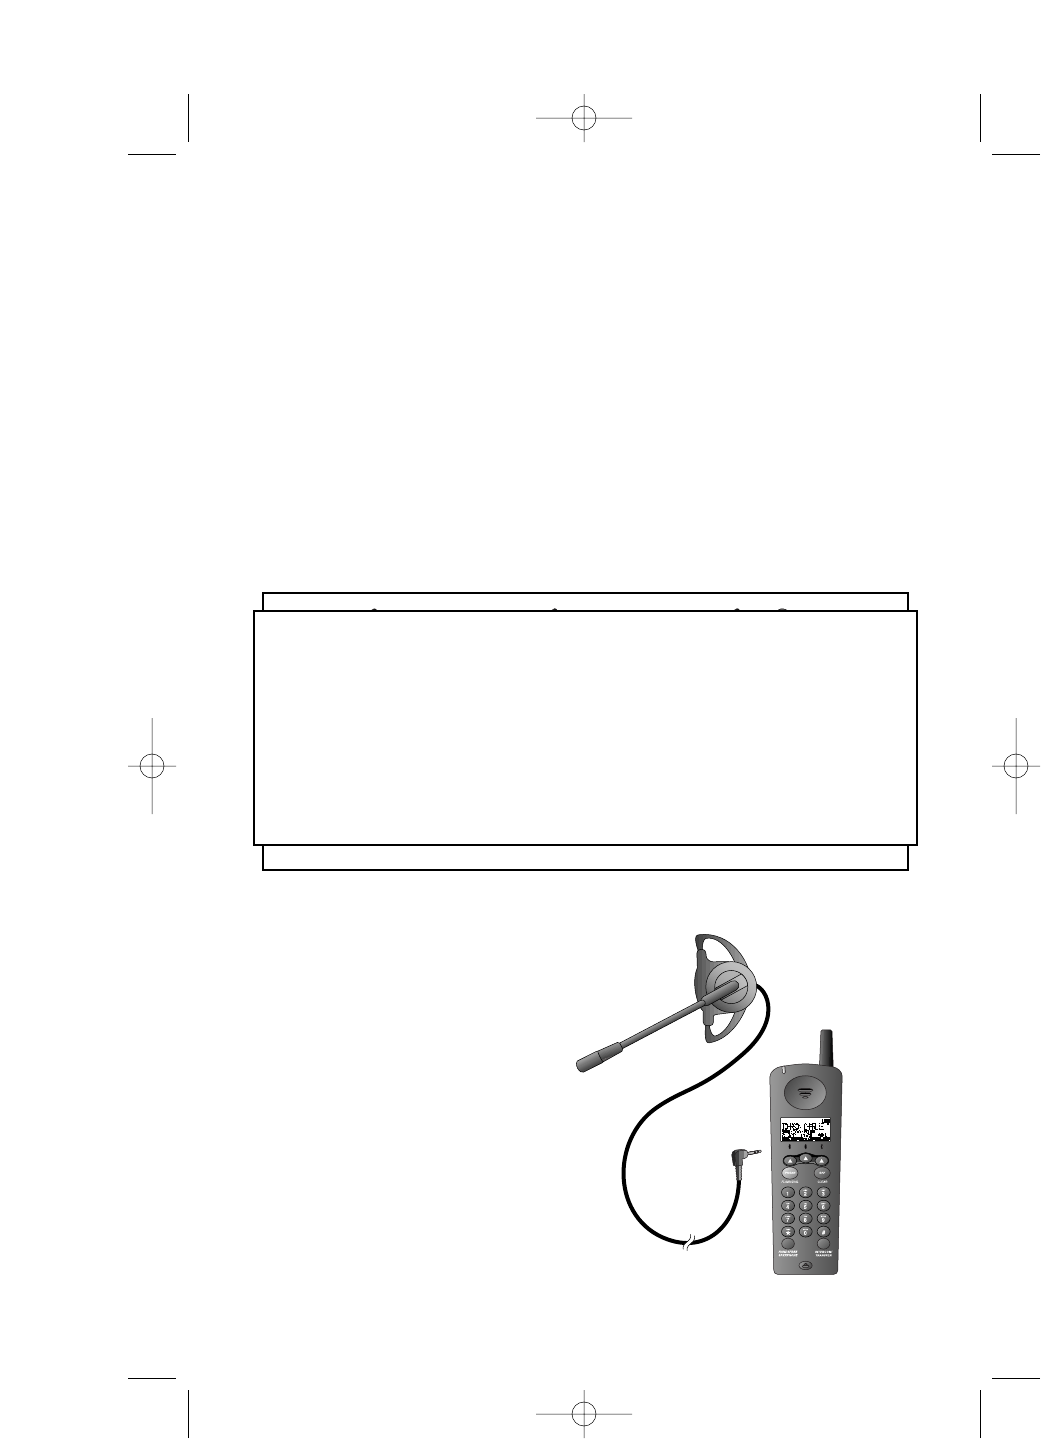
Headset
You can use this telephone
hands-free when you install a 2.5
mm headset (purchased
separately).
Plug the headset into the jack
located on the left side of the
handset (under the small rubber
flap). Do not force the
connection,but make sure the
plug fits securely.
a) Slide down into
grooves to attach. b) Push up and away
to remove.
ART AND TEXT
FOR POSITION ONLY
STILL NEED INFORMATION
TO COMPLETE THIS SECTION
2230_book_1ATT 5/10/01 8:25 PM Page 5
Feature Setup Menu
When you set features marked with * you are setting the feature for BOTH
handsets. All other features must be set separately at each handset.
Press to return to the previous menu item.
NOTE: If you wait more than 30 seconds without pressing a key, the
handset returns to the standby screen.
Handset Volume
Adjusting handset volume will not affect the volume of what the other
party hears. Default setting is 3. You can also adjust volume during
conversation by pressing <or >.
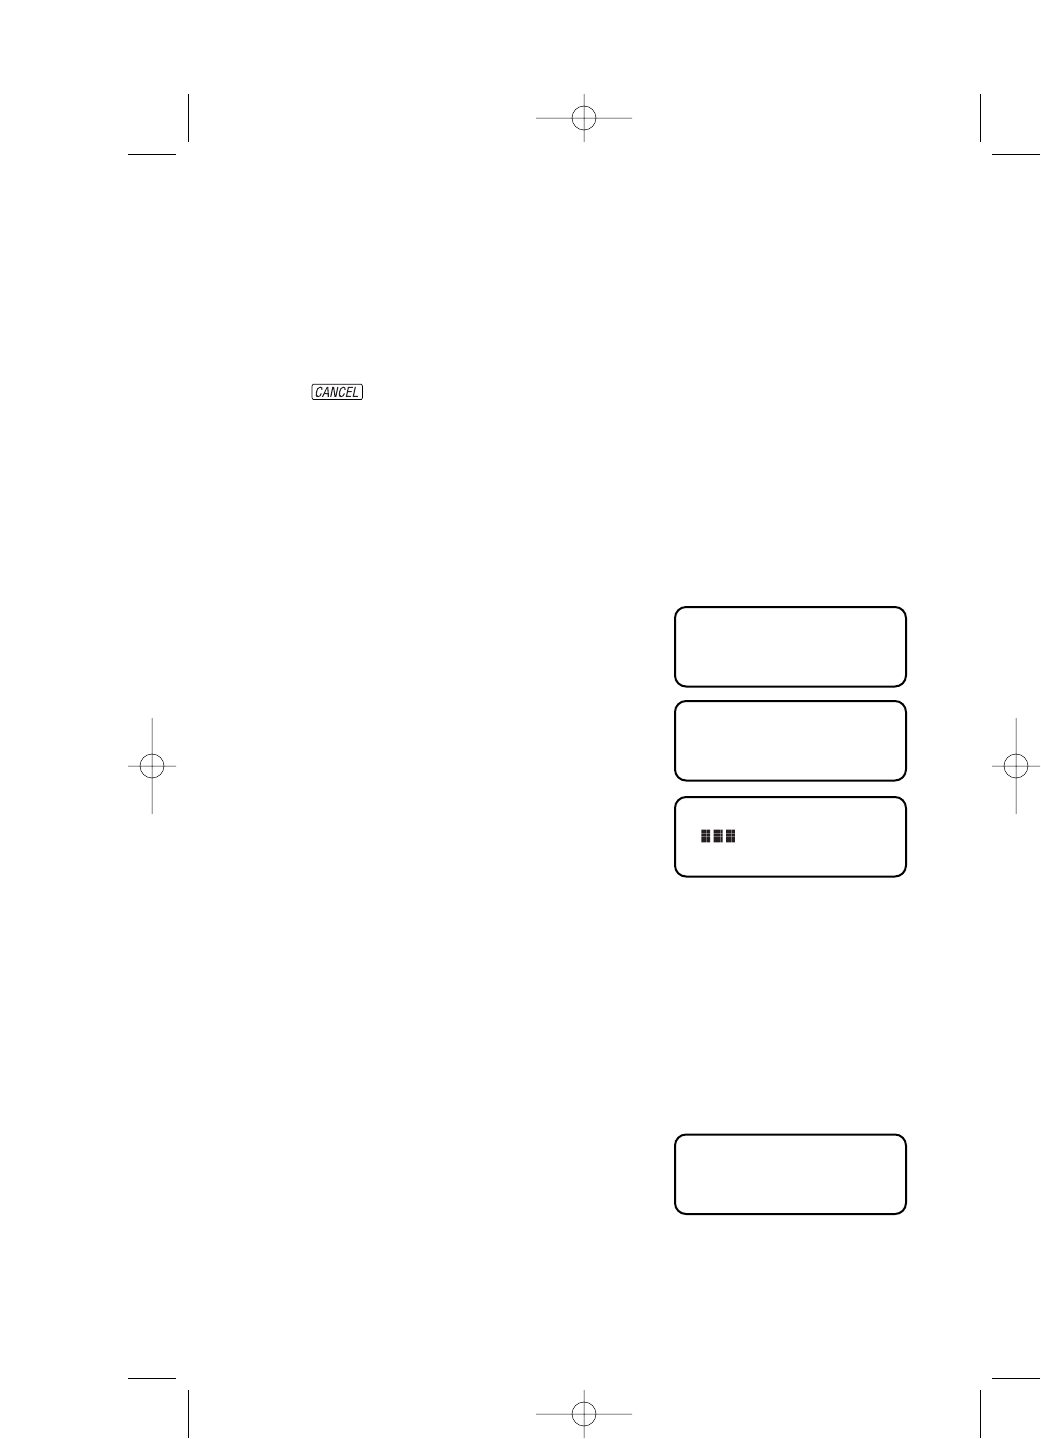
1Press S. The screen displays
2Press 2. The screen displays
3Press S. The screen displays
4Use the keypad to enter a volume setting (0– 7)
— OR —
Press <or >to display desired setting.
5Press Sto save displayed setting.
Ring Volume
Adjust the volume of the handset ringer. Setting volume to 0turns the
ringer off. Default setting is 3.
1Press S.
2Press 3. The screen displays
3Press S.
FEATURE SETUP
6
>CALL LOG
PHONEBOOK
>HANDSET VOLUME
RING VOLUME
>HANDSET VOLUME
>RING VOLUME
RING PATTERN
2230_book_1ATT 5/10/01 8:25 PM Page 6

4Use the keypad to enter a volume setting (0– 6)
— OR —
Press <or >to display desired setting.
5Press Sto save displayed setting.
Ring Pattern
The external ring pattern sets which ringer you hear when you have an
outside call. The internal ring pattern sets which ringer you hear when you
have an intercom call from the other handset. External ring pattern default
setting is 0;internal ring pattern default setting is 1.
1Press S.
2Press 4. The screen displays
3Press S.
4Press >then Sto set EXT RING PATTERN or INT RING
PATTERN.
5Use the keypad to enter a ring pattern selection (0– 9)
— OR —
Press <or >to display desired setting. A sample of the displayed
setting is played briefly.
6Press Sto save displayed setting.
Auto Answer
When this feature is on,an incoming call is connected when you lift the
handset from the base or the charger (you don’t have to press P). If
the handset is not in the base or charger,you do have to press Pto
answer a call,regardless of the setting. The default setting is OFF.
1Press S.
2Press 5. The screen displays
3Press <to turn ON.
— OR —
Press >to turn OFF.
4Press Sto save the displayed setting.
FEATURE SETUP
7
>RING PATTERN
AUTO ANSWER
>AUTO ANSWER
KEY CLICK
2230_book_1ATT 5/10/01 8:25 PM Page 7
Key Click
When this feature is on,each key press makes a sound,except when the
keypad is locked. Default setting is ON.
1Press S.
2Press 6. The screen displays
3Press S.
4Press <or >to display ON or OFF.
5Press Sto save the displayed setting.
Key Lock
When this feature is on,the keypad cannot be used to dial calls. You can
still answer calls,but when the call is ended,the keypad lock is reactivated.
The key lock icon is displayed on the screen when this feature is activated.
The default setting is OFF.
NOTE: To make an emergency call when the keypad is locked, press
Pthen 911. When the call is ended, the keypad lock is
reactivated.
1Press S.
2Press 7. The screen displays
3Press S.
4Press <or >to display ON or OFF.
5Press Sto save the displayed setting.
Disable Key Lock
When the keypad is locked,press S,<,Sto turn off the lock.
FEATURE SETUP
8
>KEY CLICK
KEY LOCK
>KEY LOCK
HANDSET NAME
2230_book_1ATT 5/10/01 8:25 PM Page 8
Handset Name
You can customize the handset to display a name or word of your choice
in place of the READY standby screen. The default setting is READY.
1Press S.
2Press 8. The screen displays
3Press S.
4Use the chart on page XX to enter a handset name.
5Press Sto save the displayed name.
Language Setting
You can set each handset so the display appears in English or Spanish. The
default setting is English.
1Press S.
2Press 9. The screen displays
3Press S.
4Press <or >to select a language.
5Press Sto save the displayed setting.
Clear Message Waiting*
If you subscribe to telephone company voice mail,and the message waiting
indicator remains on even after you have reviewed all messages,follow the
directions below to turn off the indicator.
1Press S.
2Press 10. The screen displays
3Press S. The screen displays
4Press Sto confirm.
FEATURE SETUP
9
>HANDSET NAME
LANGUAGE
>ENGLISH
ESPANOL
>CLEAR MSG WAIT
DIALING
CLEAR MSG WAIT
CONFIRM?
2230_book_1ATT 5/10/01 8:25 PM Page 9
Set Dial Mode*
This phone comes set for touch tone (DTMF) dialing. If you have dial pulse
(rotary) service,set the dial mode to PULSE.
1Press S.
2Press 11. The screen displays
3Press S. The screen displays
4Press S.
5Press <or >to display DTMF or PULSE.
6Press Sto save displayed setting.
Set Flash Time
Some phone systems require longer or shorter tones when sending touch
tone signals. You can set the handsets to send a longer or shorter tone by
following the directions below. The default setting is LONG.
1Press S,#.
2Press 12. The screen displays
3Press <or >to display LONG or SHORT.
4Press Sto save displayed setting.
FEATURE SETUP
10
>DIALING
FLASH TIME
>DIAL METHOD
FLASH TIME
>FLASH TIME
LONG
2230_book_1ATT 5/10/01 8:25 PM Page 10
TELEPHONE OPERATION
11
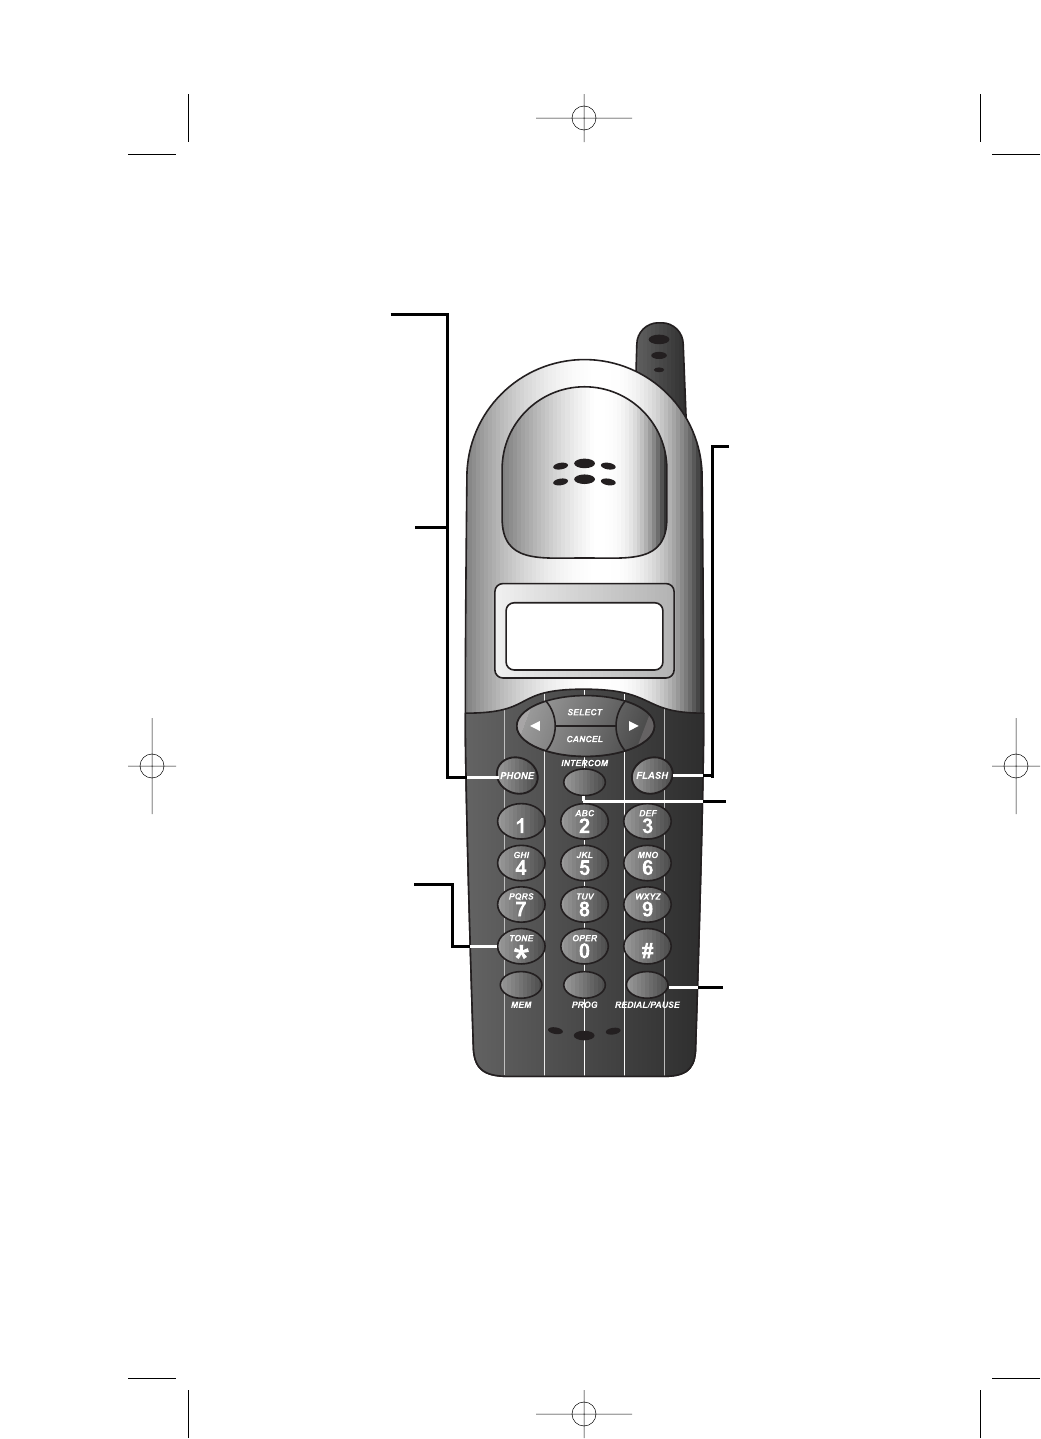
Making a Call
1Press P,then
dial the number
— OR —
Dial the number,
then press P.
2Press Pagain
to end the call.
Answering a Call
1Press Pto
answer a call.
2Press Pagain
to end the call.
NOTE: If you have
the Auto Answer
feature turned on,
you can answer a
call by lifting the
handset from the
base or charger.
Temporary Tone
Dialing
If you have dial pulse
(rotary) service,you
can change from dial
pulse to touch tone
dialing during a call
by pressing *.
1Make the call,
and wait until it
is connected.
2Press *. Keys pressed after
this send touch tone signals.
3After you hang up,the
phone automatically returns
to tone service.
Redial
1Press Rto
call the last
number (up to 24
digits) dialed from
either handset.
2Press Pto
end the call.
Flash/Call Waiting
1Press Fto
connect to the
new call when
you receive a
call-waiting signal.
2Press Fagain
to return to the
original call.
NOTE: Use Fto
access other phone
company subscriber
services, as described
by your provider.
Intercom
1Signal one handset
from the other by
pressing I.
2To respond,press
Ion the
second handset.
2230_book_1ATT 5/10/01 8:25 PM Page 11
Transferring a Call
You can transfer a call from one handset to the other.
1Press I(your call is put on hold) to signal the second
handset.
2At the second handset,press Pto take the call.
3Place the first handset in the base or charger,or press P.
Forwarding a Call
You can forward the call to the second handset.
1Press I(your call is put on hold),then press P. The
call is sent to the second handset,and disconnected at the first.
2At the second handset,press Pto take the call.
3If the second handset does not pick up the call,it’s sent back to
the first handset. The screen displays ??.
4Press Pto reconnect the first handset to the call
— OR —
The call is automatically reconnected to the first handset in 20
seconds.
Conference Calling
1If one handset is already on a call,you can connect the second
handset to the call by pressing P.
2Disconnect either or both handsets by pressing P.
Mute
1During a telephone conversation,mute the handset microphone
by pressing . The other party will by unable to hear
anything on your end.
2To return to two-way conversation,press again.
TELEPHONE OPERATION
12
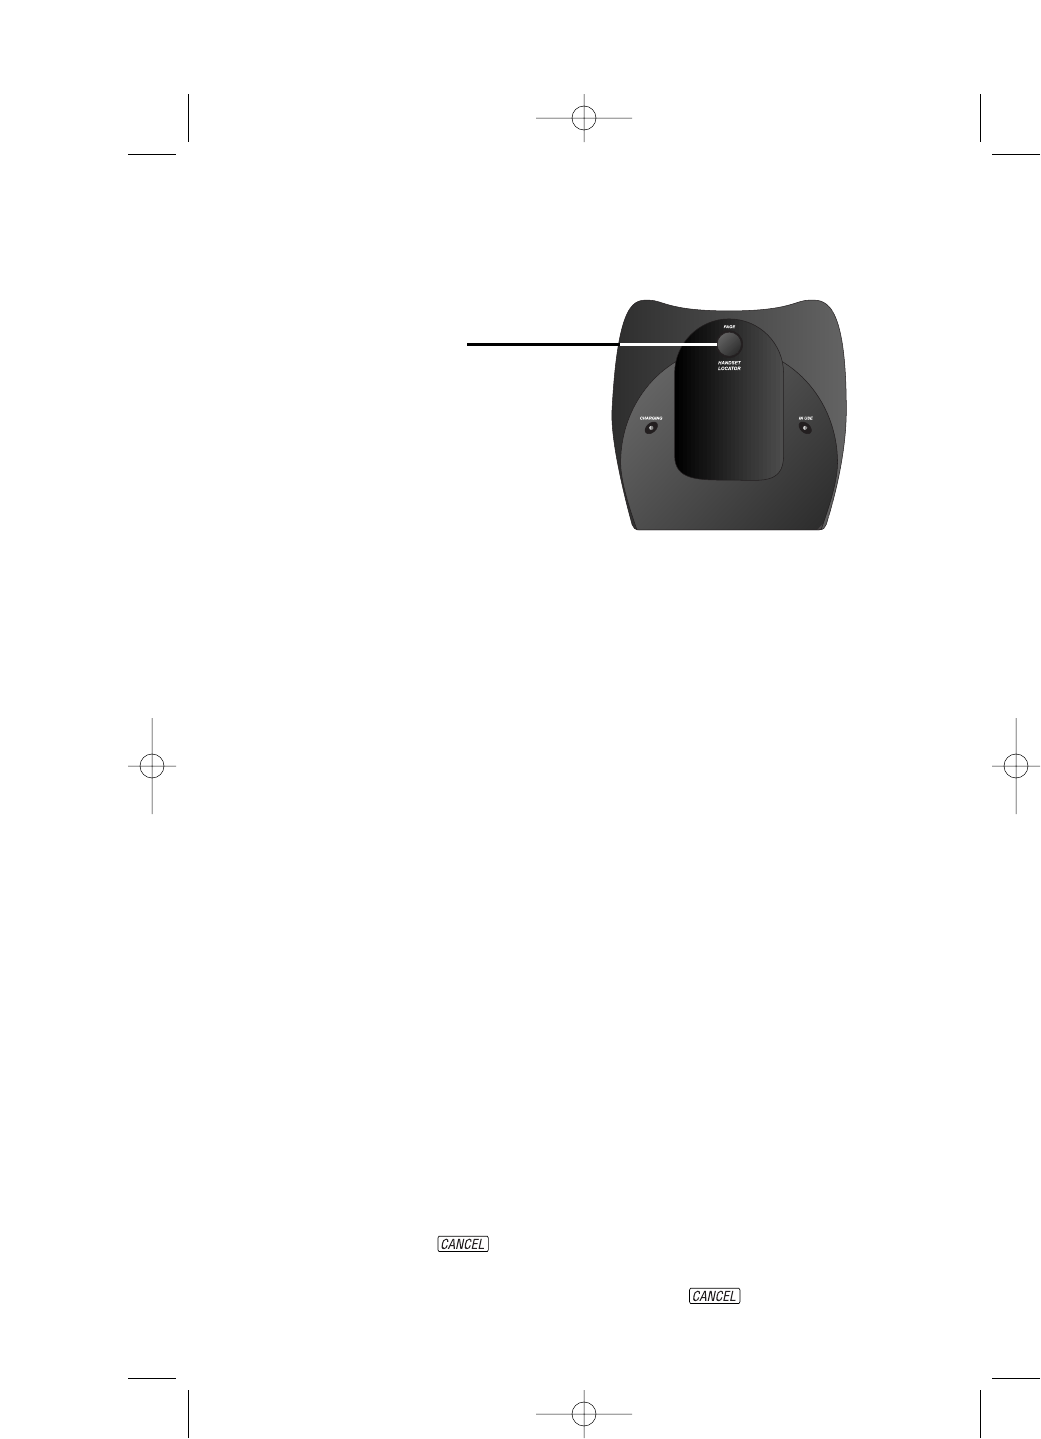
Page/Handset Locator
Page the handsets from the base by
pressing L. The
handsets will sound a repeating tone.
Cancel the page by pressing any key
on the handset,or wait 30 seconds.
2230_book_1ATT 5/10/01 8:25 PM Page 12
This telephone can store up to 20 telephone numbers and names.
Storing a Number and Name in Phone Book
1Press m.
2Press P.
3Enter the telephone number (up to
24 digits).
4Press P.
5Enter a name connected with this
number,using the chart below.
6Press m.
7Enter a location number (01 – 20).
8 Begin at Step 2 to enter another telephone number and name
— OR —
Press to exit.
Presses
Dial Key 123456789
1space 1
2ABC2abc
3DEF3de f
4GH I 4 g h i
5JKL5jkl
6MNO6mno
7PQRS7pqrs
8TUV8 t uv
9WX Y Z 9 w x y z
00
**?!/()
##’,-.
TELEPHONE PHONE BOOK
13
FOR POSITION ONLY
We need a screen
illustration here.
FOR POSITION ONLY
We need a screen
illustration here.
FOR POSITION ONLY
We need a screen
illustration here.
2230_book_1ATT 5/10/01 8:25 PM Page 13

Dialing a Number in Phone Book
1Press m.
2Enter the memory location number (01 – 20)
— OR —
Press <or >to scroll through memory locations.
3Press Pto dial the displayed number.
Editing/Deleting a Number in Phone Book
1Press S>S.
2Press <or >to scroll through memory locations.
3Press to erase a digit
— OR —
Press and hold to delete entire telephone number.
TELEPHONE PHONE BOOK
14
2230_book_1ATT 5/10/01 8:25 PM Page 14
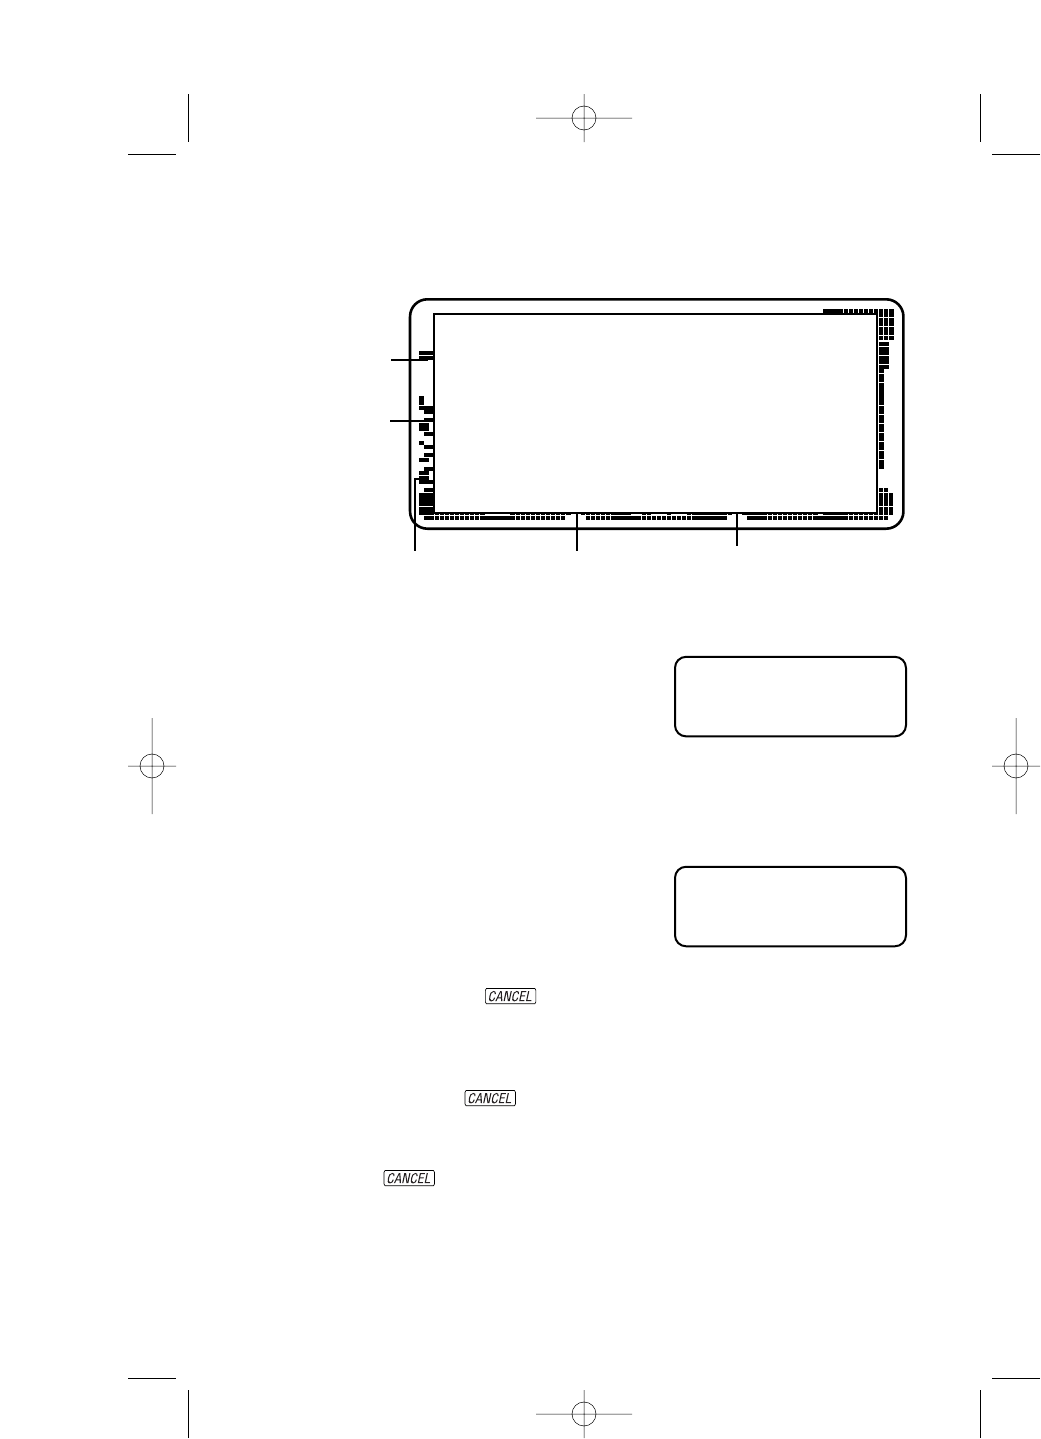
Reviewing Call History
1Press Stwice. The screen
displays the most recent call in call
history (call 1 is the most recent call).
2Press <or >to scroll through call history.
Removing Call Records
Removing a Specific Call Record
1Press Stwice. The screen
displays the most recent call in call
history (call 1 is the most recent call).
2Press <or >to scroll through call history.
3Press and release to delete the displayed call record.
Removing All Call Records
1Press Stwice.
2Press and hold . The screen displays DELETE ALL?
3Press Sto delete all call records
— OR —
Press to exit without deleting.
CALLER ID OPERATION
15
Caller’s
name
Caller’s
telephone
number
Time of call Date of call Position of call
in Calls Log
FOR POSITION ONLY
We need a screen illustration here
with all icons called out, and basic
caller id screen showing name,
number, place in call history, new
or repeat,etc.
FOR POSITION ONLY
We need a screen
illustration here.
FOR POSITION ONLY
We need a screen
illustration here.
2230_book_1ATT 5/10/01 8:25 PM Page 15

Storing a Call Record in Phone Book
You can store a number received by Caller ID in the Telephone Phone
Book.
1Press Stwice. The screen displays the most recent call in call
history (call 1 is the most recent call).
2Press <or >to scroll through call history.
3Press Sto store displayed number in phone book.
Display Dial
Press Pto dial a number displayed in call history.
Dialing Options
Press Runtil the screen displays the number the way you want to
dial it.
For example: 1–908–555–1212
908–555–1212
1–555–1212
555–1212
The number of dialing options available for each call displayed depends on
the format of the original call.
CALLER ID OPERATION
16
2230_book_1ATT 5/10/01 8:25 PM Page 16
BATTERIES
17
ART AND TEXT
FOR POSITION ONLY
STILL NEED INFORMATION
TO COMPLETE THIS SECTION
Battery Life
Battery life depends on how far the handset is from the base,and other
environmental conditions.
NOTE: For optimum performance, charge your handset on the base or
charger every night.
Charge the Handset Battery Pack
• This battery should remain charged for up to five days. A fully charged
battery provides an average talk time of about six to eight hours.
• The battery pack needs charging when:
– The battery icon ( ) flashes,
– A warning tone sounds,or
– The screen displays LOW BATTERY when idle.
• Place the handset in the base or charger so the CHARGING light goes
on. The battery pack is typically charged in eight hours. For best
results,the initial charge should be twelve hours.
• You can keep the battery fully charged by returning the handset to the
base or charger after each use.
• If you repeatedly get a Low Battery indicator,even after eight hours of
charging,the battery should be replaced. Use only AT&T Battery 2401,
SKU# 91077.
CAUTION: Charge the battery provided with or identified for use
with this product only in accordance with the instructions and
limitations specified in the User’s Manual,Part 1.
Spare Battery
This phone is equipped with a built-in spare battery charger in the base
unit. The spare battery charger allows you to always have a charged
battery available should the handset battery charge become low.
NOTE: Do not switch the battery while on a call.
1Press the release button on the bottom of the base unit to open
the spare battery compartment drawer.
2Place the battery pack (AT&T Battery 2401,SKU# 91077,
purchased separately) in the drawer,with the charge contacts
facing up and to the left.
3Push the drawer closed.
4The spare battery takes 24 hours to fully charge.
2230_book_1ATT 5/10/01 8:25 PM Page 17
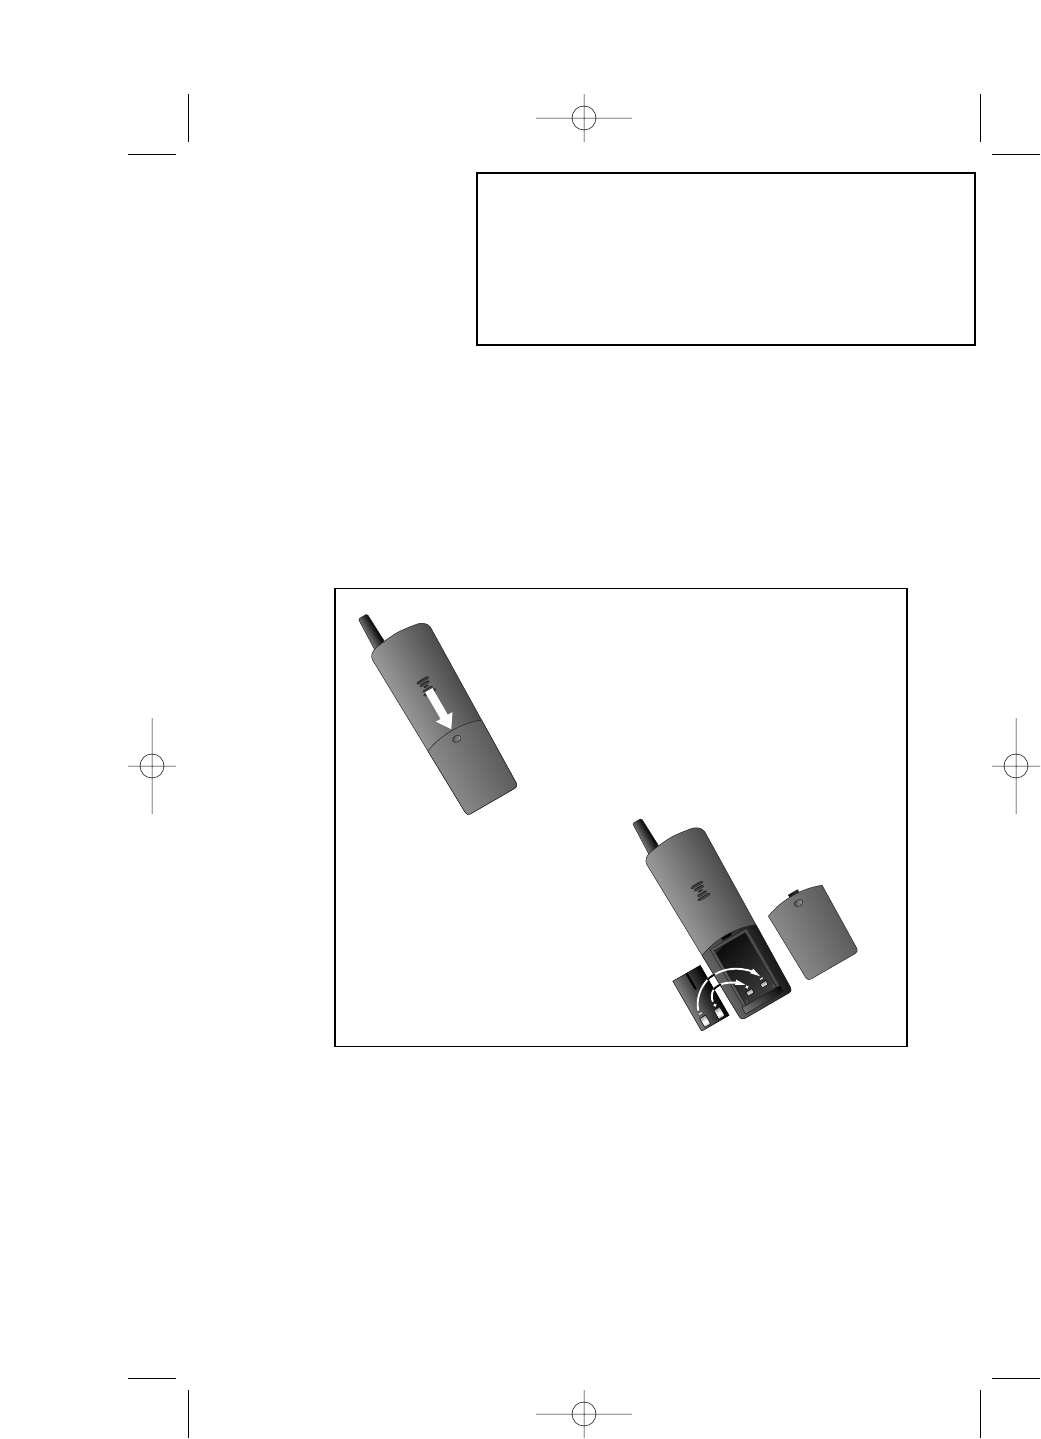
Replace the Handset Battery Pack
1 Install the handset battery.
Use only AT&T Battery 2401,SKU# 91077.
2 Charge the handset battery.
• Place the handset in the base or charger.
• Charge the battery at least 12 hours. After the first charge,the
battery will quick charge in only eight hours.
Power Fail Operation
You can use your cordless phone during a power outage when a fully
charged battery is installed in the base unit (see “Spare Battery”). This
battery will provide enough power for you to make and receive calls for up
to five hours.
NOTE: When using the spare battery backup power, audio quality may
be somewhat reduced.
BATTERIES
18
b) Place the battery pack
in the handset. Align
the metal contacts on
the battery with the
contacts in the battery
compartment.
c) Replace cover
by sliding it
on its track up
over battery
case until it
snaps firmly
into place.
a) Remove
battery
compartment
cover by
pressing on
indentation
and sliding
downward.
ART AND TEXT
FOR POSITION ONLY
STILL NEED INFORMATION
TO COMPLETE THIS SECTION
2230_book_1ATT 5/10/01 8:25 PM Page 18

If you have difficulty operating this phone,try the suggestions below.
For Customer Service,visit our website at www.telephones.att.com or call
1 800 222–3111. Please retain your receipt as your proof of purchase.
If the phone does not work at all, check these items first:
• Make sure the power cord is plugged into the base and an electrical
outlet not controlled by a wall switch.
• Make sure the telephone line cord is plugged firmly into the base unit
and the telephone jack.
• Make sure the battery pack is installed correctly.
• If the screen displays LOW BATTERY,place the handset in the base or
charger and charge for at least eight hours.
• If the battery does not charge after eight hours,replace it with AT&T
Battery 2401,SKU# 91077.
If the above suggestions do not solve the problem,try re-initializing the
handset and base (see “To re-initialize the handset and base”below).
If you have no dial tone:
Check all the previous suggestions. If you still do not hear a dial tone,
disconnect the phone and try another phone in the same jack. If there is
no dial tone on that phone either,the problem is probably in your wiring
or local service.
If you hear a two-beep signal when you try to use the handset:
• The handset and base are not communicating properly. You might be
out of range. Move closer to the base and try again.
• If moving closer to the base does not help,follow the directions below
to re-initialize the handset and base.
To re-initialize the handset and base:
1Disconnect the power to the base.
2Remove the handset battery pack.
3Wait at least 15 seconds.
4Insert the handset battery pack.
5Connect the power to the base.
6Put the handset in the base to re-initialize.
7Wait for handset to display FOUND BASE.
IN CASE OF DIFFICULTY
19
section not complete
2230_book_1ATT 5/10/01 8:25 PM Page 19

If you hear noise or interference when using the phone:
• You may be out of range. Move closer to the base.
• Household appliances plugged into the same circuit as the base can
sometimes cause interference. Try moving the appliance or the base to
another outlet.
• The layout of your home or office may be limiting the operating range.
Try moving the base to another location,preferably on an upper floor.
If the phone does not ring when you receive a call:
• Make sure the ringer is on.
• Make sure the telephone line cord is connected firmly to the base and
the telephone jack.
• Make sure the AC adapter is plugged firmly into an electrical outlet not
controlled by a wall switch.
• You might be too far from the base;move closer.
• You might have too many extension phones on your telephone line to
allow all of them to ring. Try unplugging some of them.
If your telephone misdials:
• If you have dial pulse (rotary) service,you’ll need to set the Dial Mode
to PULSE. Follow the instructions under “Set Dial Mode”in the
FEATURE SETUP section of this manual.
• If you have touch tone service and you hear clicks while you are dialing,
you’ll need to set the Dial Mode to DTMF. Follow the instructions under
“Set Dial Mode”in the FEATURE SETUP section of this manual.
If the caller’s name or phone number is not displayed:
• Make sure you subscribe to a Caller ID service from your local
telephone company.
• Make sure the battery is charged.
• Caller ID service might not work when the phone is connected to a
Private Branch Exchange (PBX).
If the caller’s name or phone number is not displayed during
Call Waiting:
• You should call your service provider to confirm that you subscribe to
a combined Caller ID with Call Waiting service.
• The Caller ID with Call Waiting feature is inactive during a power
interruption.
• Make sure the battery is charged.
IN CASE OF DIFFICULTY
20
section not complete
2230_book_1ATT 5/10/01 8:25 PM Page 20