VTech Telecommunications 80-5425-00 Cordless Telephone System User Manual ATT 2525CIB d1
VTech Telecommunications Ltd Cordless Telephone System ATT 2525CIB d1
UserManual.wiki
>
VTech Telecommunications
>
80-5425-00 User Manual
>
Manual 2525cib
Contents
1.
Manual 2525cib
2.
Manual 2555cib
3.
Manual CIB Part 1
Manual 2525cib
Navigation menu
Upload a User Manual
Namespaces
Wiki Guide
HTML
PDF
Info
Views
User Manual
Discussion / Help
Navigation

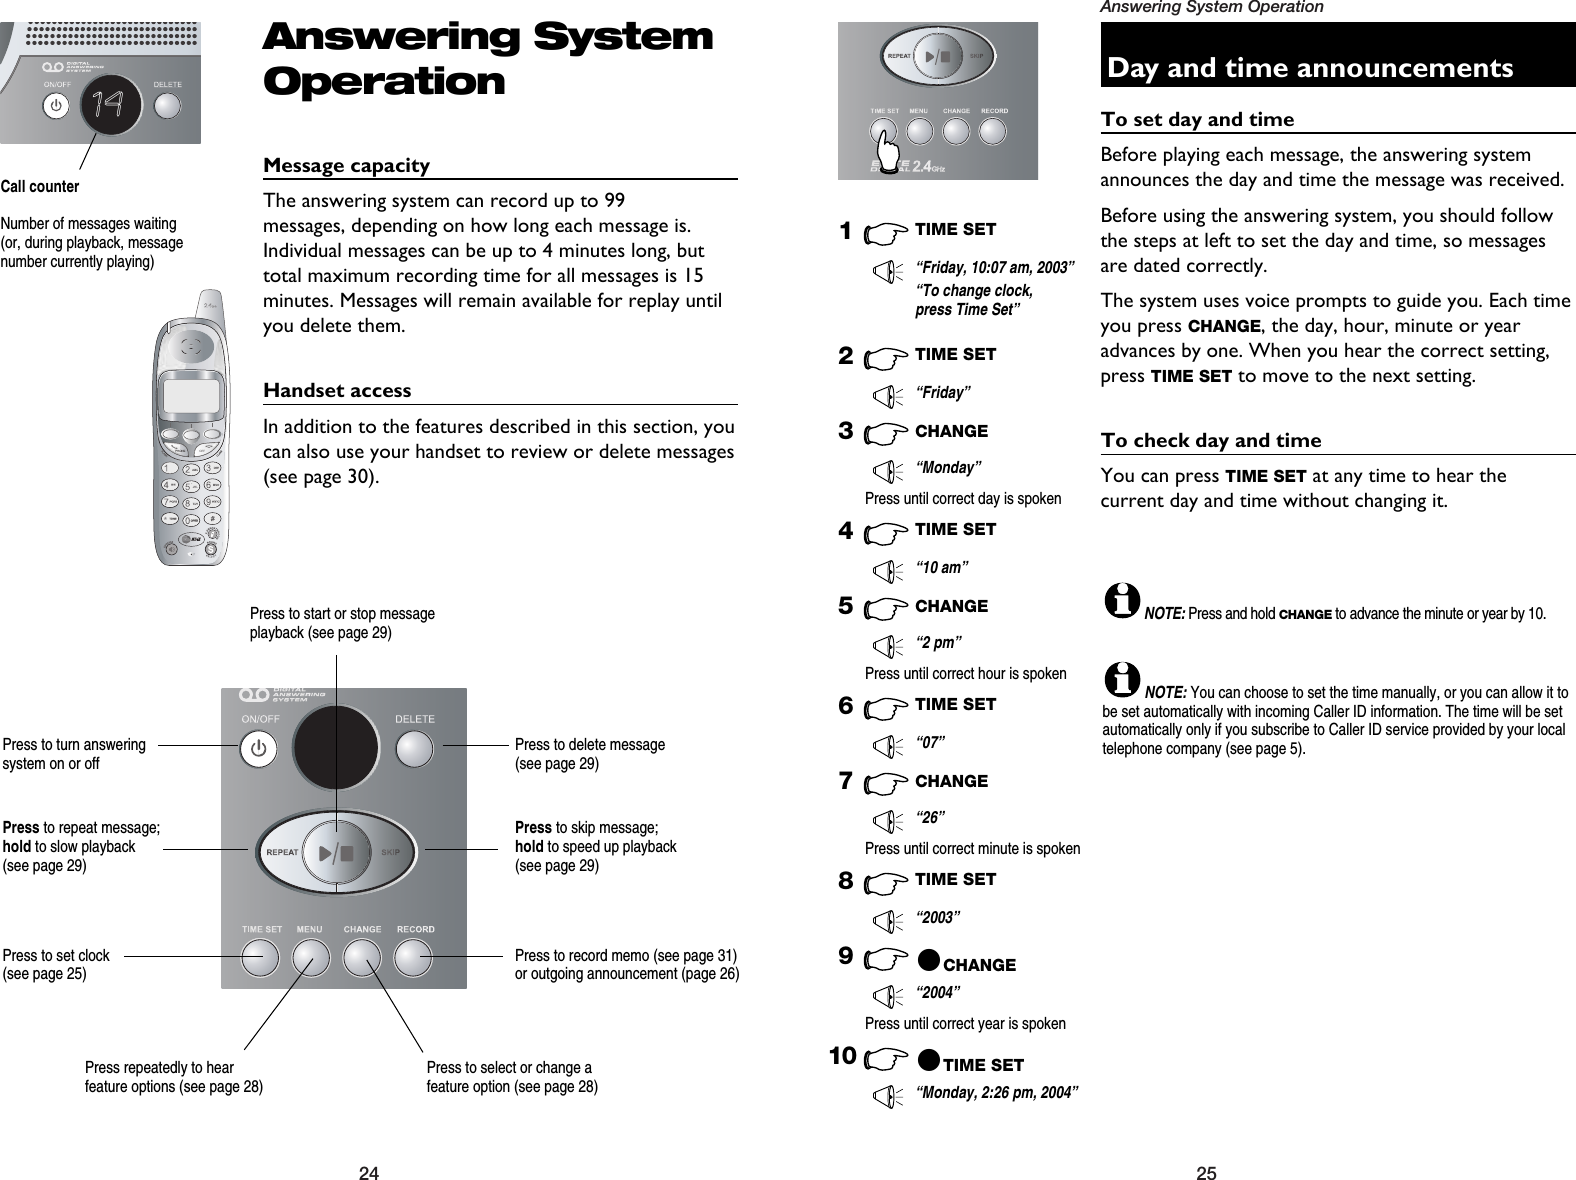
![29Answering System Operation28Answering System OperationMessage playback (at base)Press PLAY/STOP to hear messages. The systemannounces the number of messages, then begins playback.If you have new messages waiting, you will hear only thenew messages (oldest first). If there are no new messages,the system will play back all messages (oldest first). Announcements• When playback begins, you will hear the number ofmessages waiting.• Before each message, you will hear the day and timeit was received.• After the last message, you will hear “End of messages.”If the system has less than 5 minutes of recordingtime left, you will hear time remaining.Options during playback• Press VOLUME button to adjust speaker volume.• Press SKIP to skip to next message (or hold down tospeed up message playback).• Press REPEAT to repeat message currently playing.Press twice to hear previous message. (Hold downto slow message playback). • Press DELETE to delete message being played back.• Press PLAY/STOP to stop playback.To delete all messagesTo delete all messages, press DELETE while the phone isidle (not during a call, or during message playback).1“You have [xx] newand [xx] old messages”Number of new messages waiting (or, during playback, messagenumber currently playing)14Message playback begins. Seeoptions at right.2Message playback ends. NOTE:If “F” is flashing inthe message window, memory isfull. You will have to delete somemessages before new ones canbe received.NOTE:New (unheard)messages cannot be deleted.Press PLAY/STOP to begin orend message playbackChanging feature optionsMenu features can be changed to customize how theanswering system operates. Press MENU repeatedly tohear each feature. Press CHANGE when you hear thefeature you want to modify.Feature options (Default settings underlined)System announces: Feature description:1MENU3MENUOrPress until desired featureis heard(see list at right)Press until desired selectionis heardPress to set selection andmove to next menu optionPress to set selection andexit menu2CHANGE“Change Announcement”Options: [record announcement]“Change remote access code”Options: [enter 2-digit code] 50“Change message alert”Options: On / Off“Change announce only”Options: On / Off“Change call screening”Options: On / Off“Change number of rings”Options: 2 / 4/ 6 /Toll SaverRecord your outgoing announcement(see page 26).Enter a 2-digit number (40-99) for remoteaccess from another phone (see page 33).When on, the telephone beeps every 10 seconds when you have new messages.When on, callers hear an announcementbut cannot leave messages (see page 27).When on, you can hear callers leavemessages, or answer the call.Choose number of rings before the systemanswers a call. When Toll Saver is active,the system answers after 2 rings if youhave new messages, and after 4 rings ifyou have no new messages.NOTE:Press and hold CHANGEto advance the remote access codenumber by 10.](https://usermanual.wiki/VTech-Telecommunications/80-5425-00.Manual-2525cib/User-Guide-386601-Page-16.png)
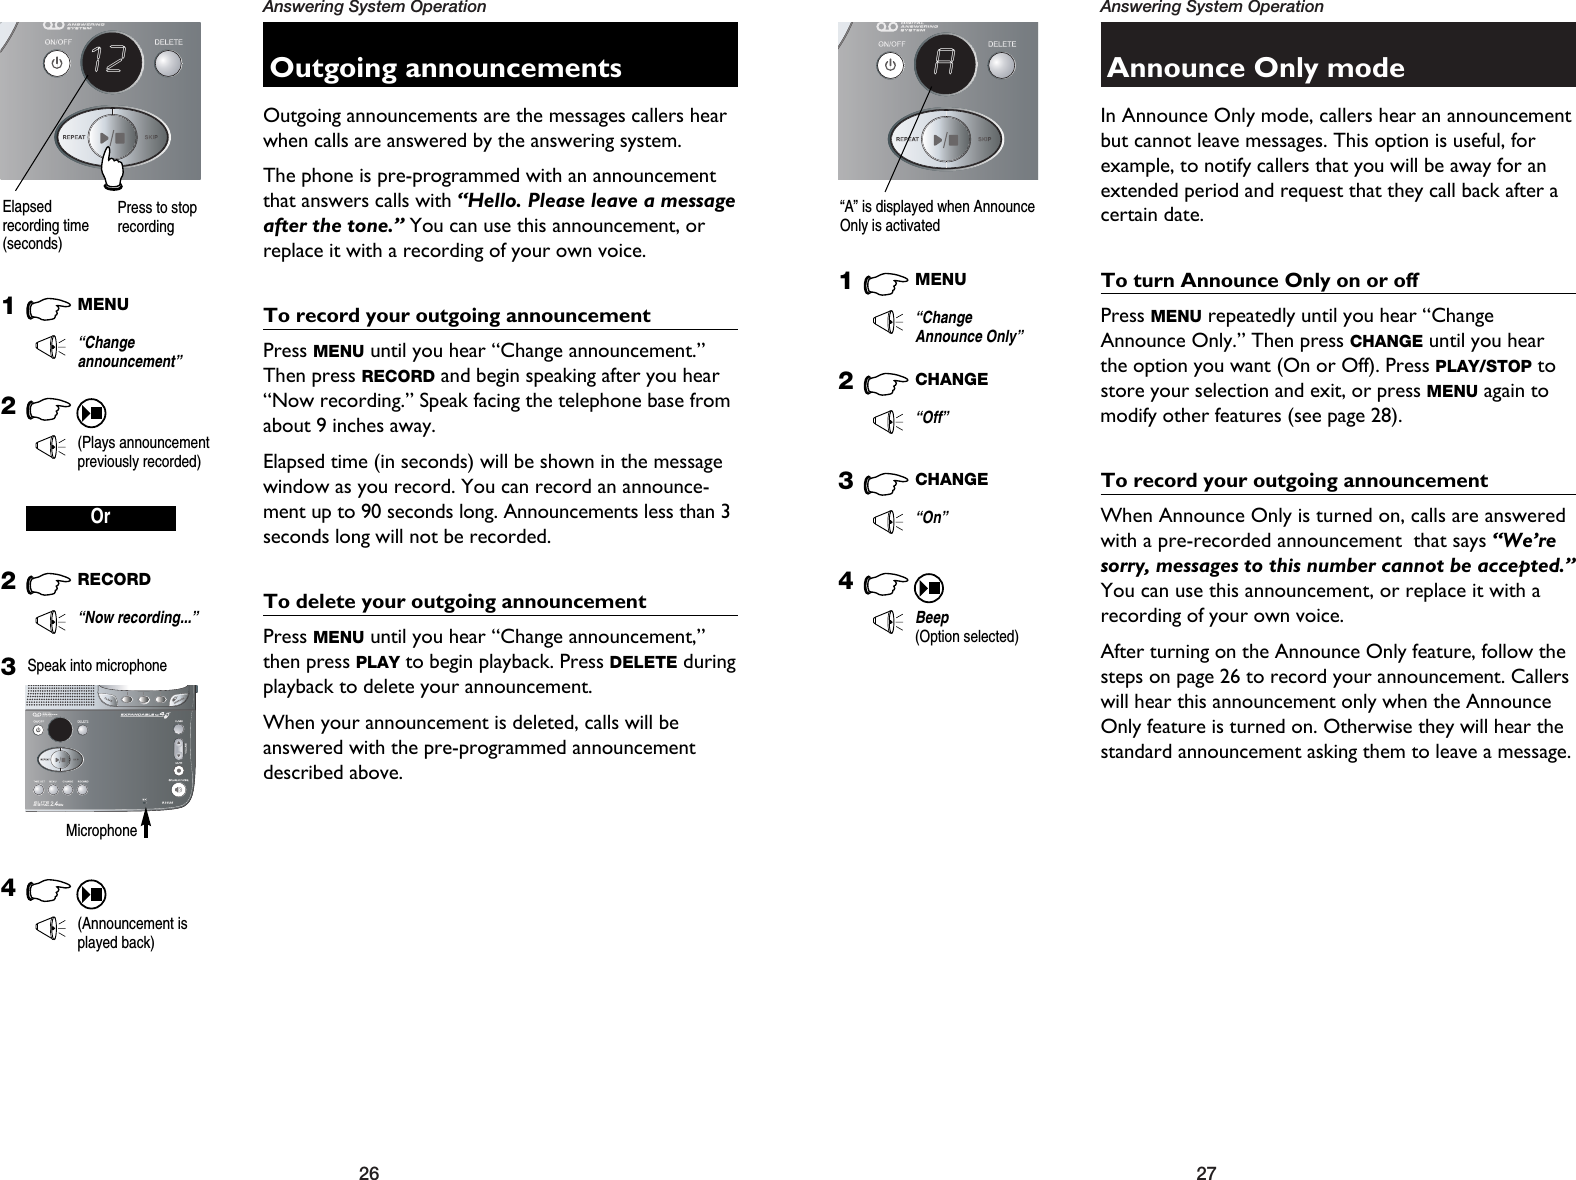
![31Answering System Operation30Answering System OperationRecording and playing memosMemos are messages you record yourself. They aresaved, played back and deleted exactly like incomingmessages. You can record a memo as a reminder toyourself, or leave a message for someone else if othersin your household use the answering system.To record a memoFollow the steps at left to record a memo. Elapsed time(in seconds) are shown in the message window as yourecord. You can record a memo up to 4 minutes long.Memos less than 1 second long will not be recorded.To play back a memoPress PLAY/STOP to hear messages and memos (seepage 29 for other options).1RECORD“Now recording...”3Beep(Memo has beenrecorded)12Elapsedrecording time(seconds)Press to stoprecording2Speak into microphoneMicrophoneMessage playback (at handset)Follow the steps at left to use your handset to review ordelete voice messages.Listening optionsWhen you select PLAY MESSAGES you will hear messagesthrough the handset speakerphone. Press SPEAKER totransfer playback to the handset earpiece for privatereview of messages.Playback optionsAt the Messages screen, use the joystick to control message playback:• Press OFF to end message playback.• Press <to repeat the message currently playing.• Press >to skip forward to the next message.• Press DEL to delete the message currently playing.Announcements• When playback begins, you will hear the number ofmessages.• Before each message, you will hear the day and timeit was received.• After the last message, you will hear “End of mes-sages.” If the system has less than 5 minutes ofrecording time left, you will hear time remaining.HANDSET 1REDIAL MEMMENUPLAY MESSAGESCALLS LOGHANDSET SETTINGSSET TIME^VOKPRESS OFFTO END MESSAGEPLAYBACK<>DELRepeat SkipDelete“You have [xx] newand [xx] old messages”](https://usermanual.wiki/VTech-Telecommunications/80-5425-00.Manual-2525cib/User-Guide-386601-Page-17.png)