VTech Telecommunications 80-6044-01 Digital Modulation Cordless Phone - Base Unit User Manual 91 001402 010 100SL82X08 CIB FR HW
VTech Telecommunications Ltd Digital Modulation Cordless Phone - Base Unit 91 001402 010 100SL82X08 CIB FR HW
Contents
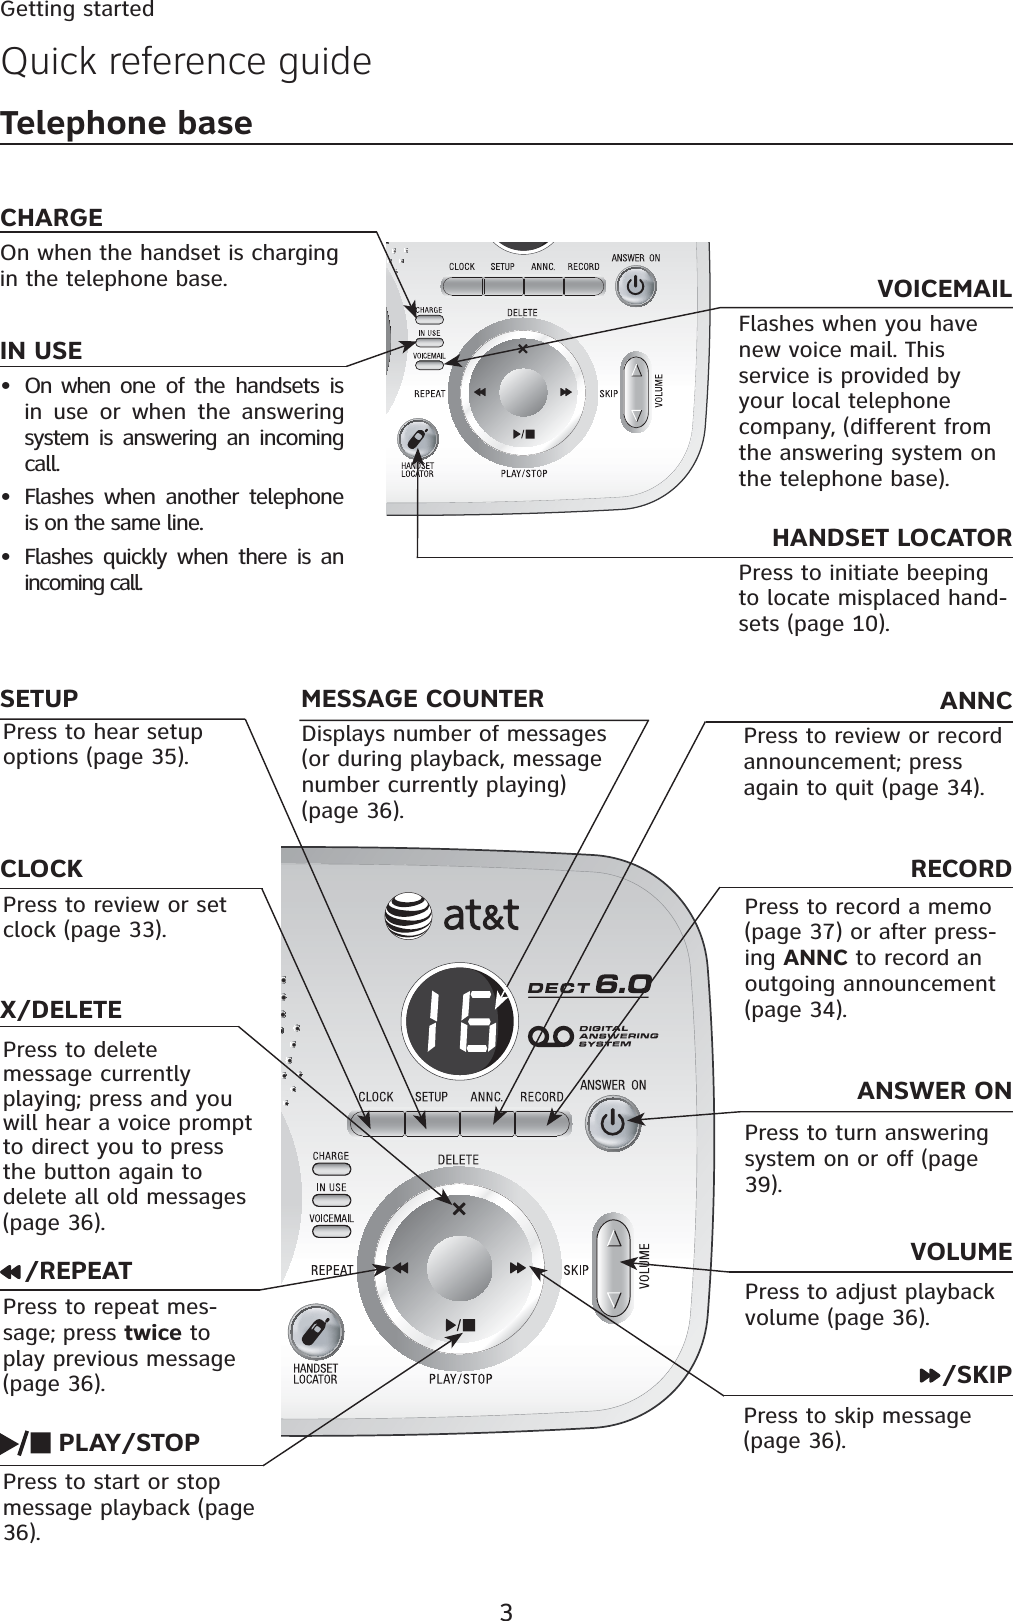
- 1. Users Manual
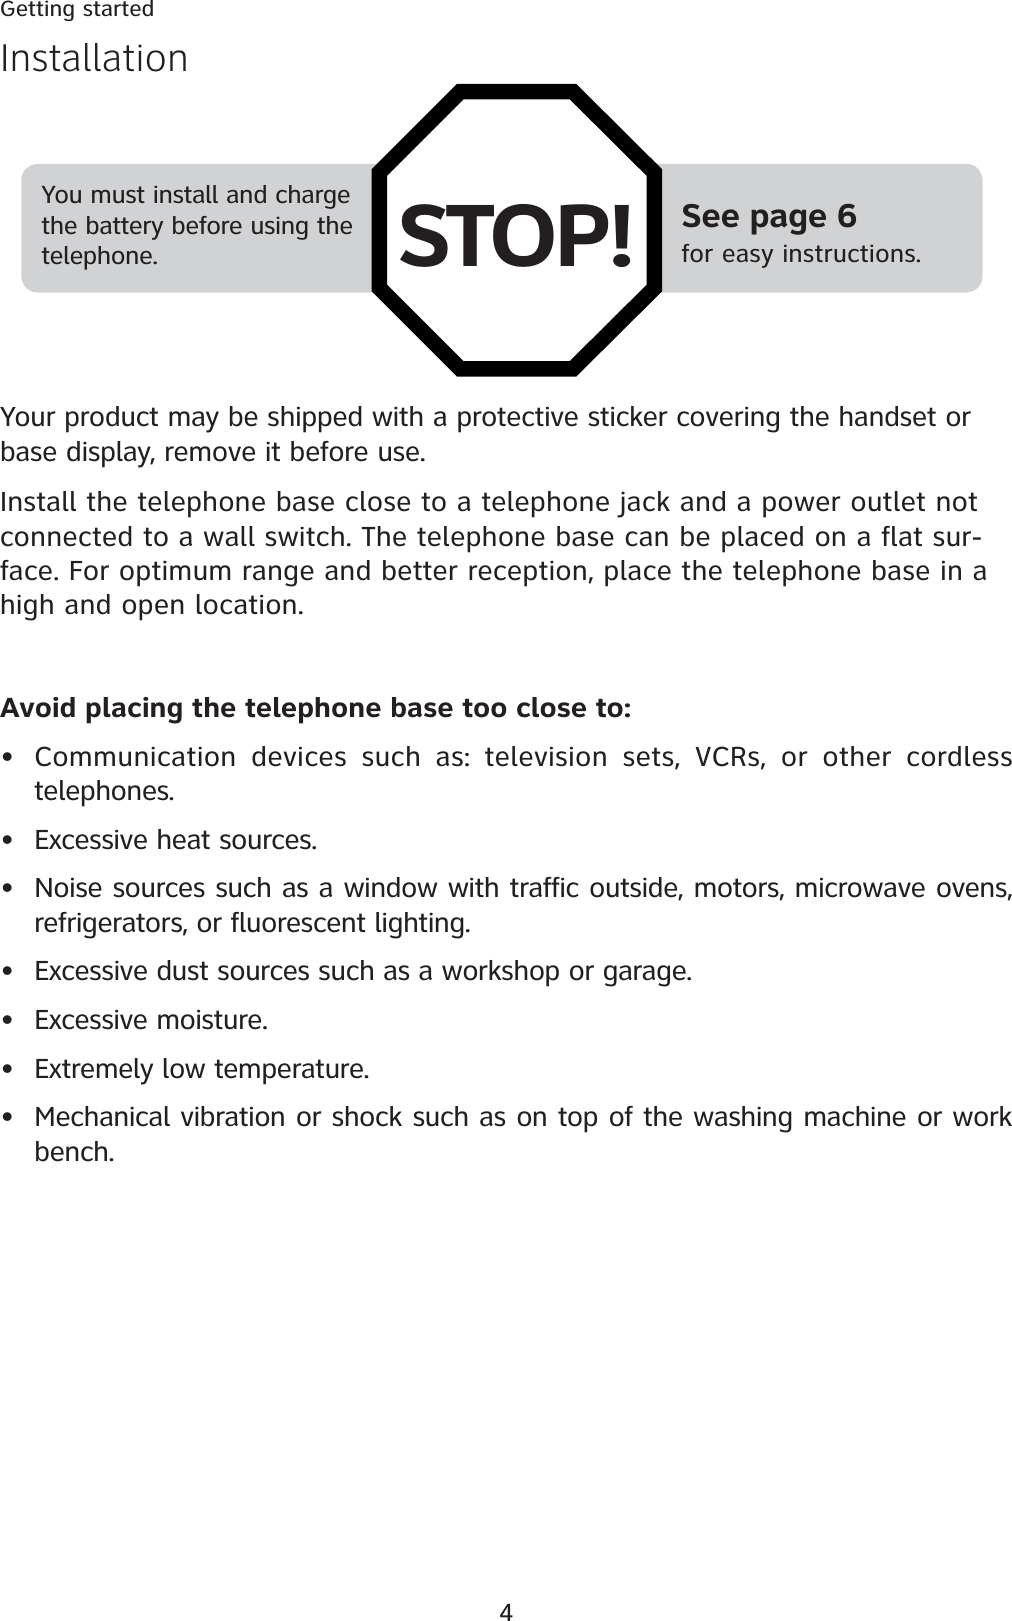
- 2. User Manual
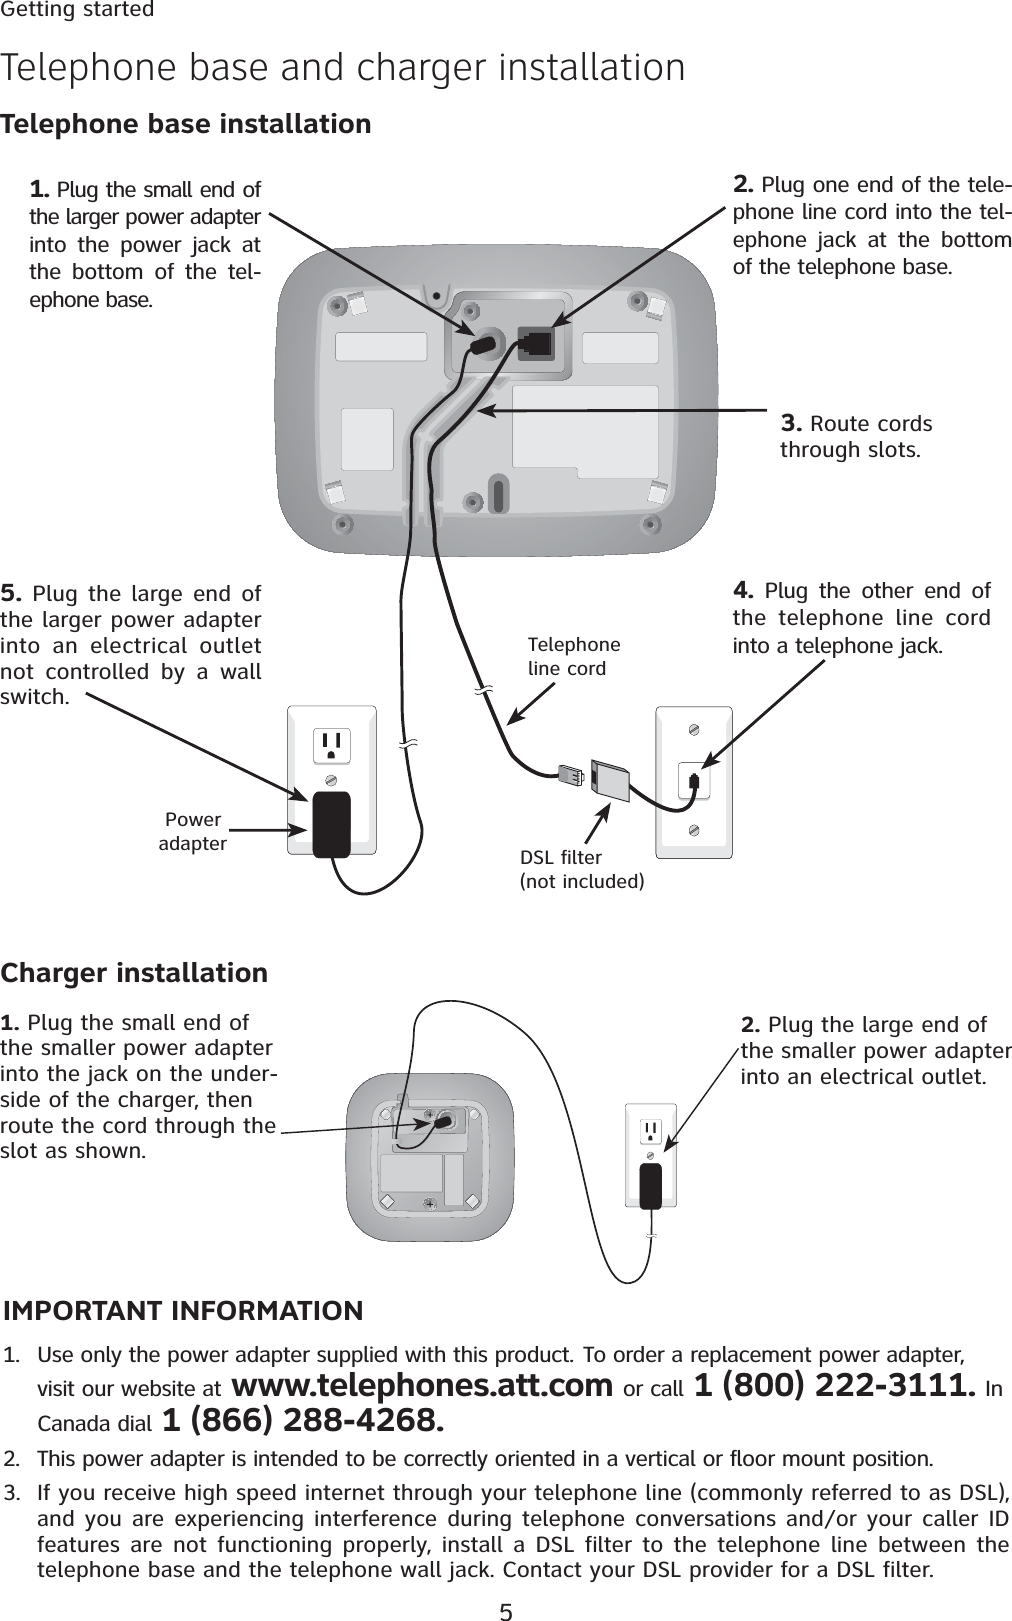
- 3. Users Manual I
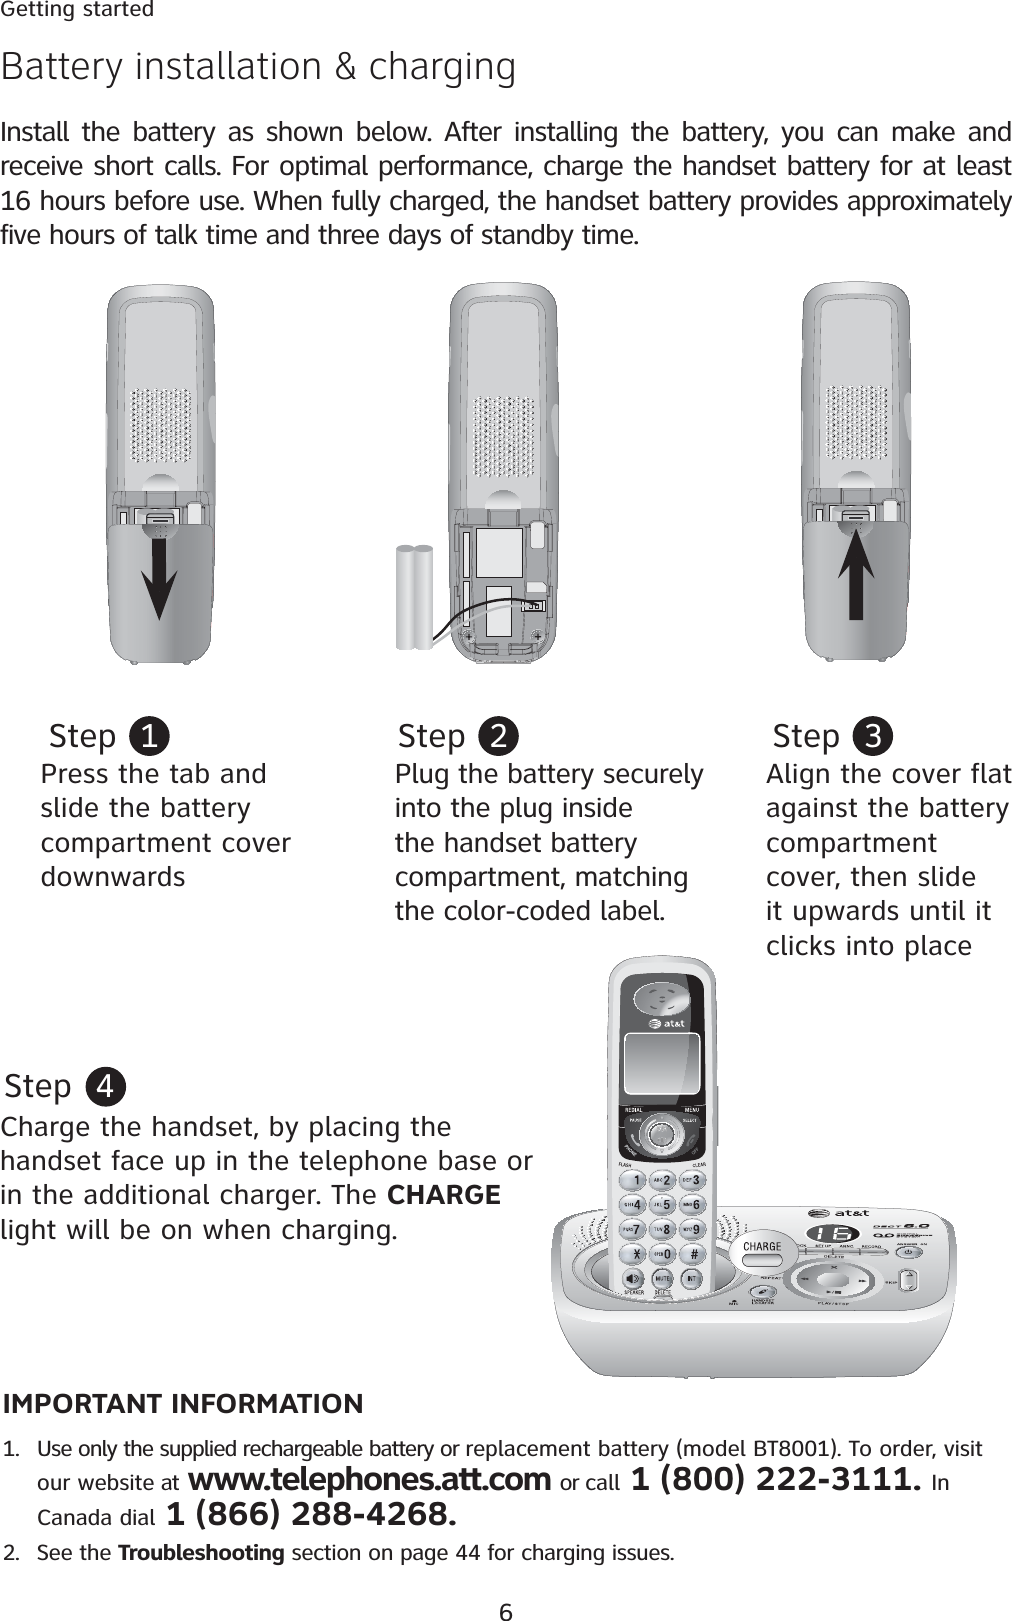
- 4. Users Manual II
- 5. Users Manual III
Users Manual II