VTech Telecommunications 80-7305-00 1.9GHz CORDLESS PHONE WITH BLUETOOTH User Manual EW780 7305 00 manual
VTech Telecommunications Ltd 1.9GHz CORDLESS PHONE WITH BLUETOOTH EW780 7305 00 manual
UserManual.wiki
>
VTech Telecommunications
>
80-7305-00 User Manual
>
Users Manual
Contents
1.
Users Manual
2.
User manual
Users Manual
Navigation menu
Upload a User Manual
Namespaces
Wiki Guide
HTML
PDF
Info
Views
User Manual
Discussion / Help
Navigation
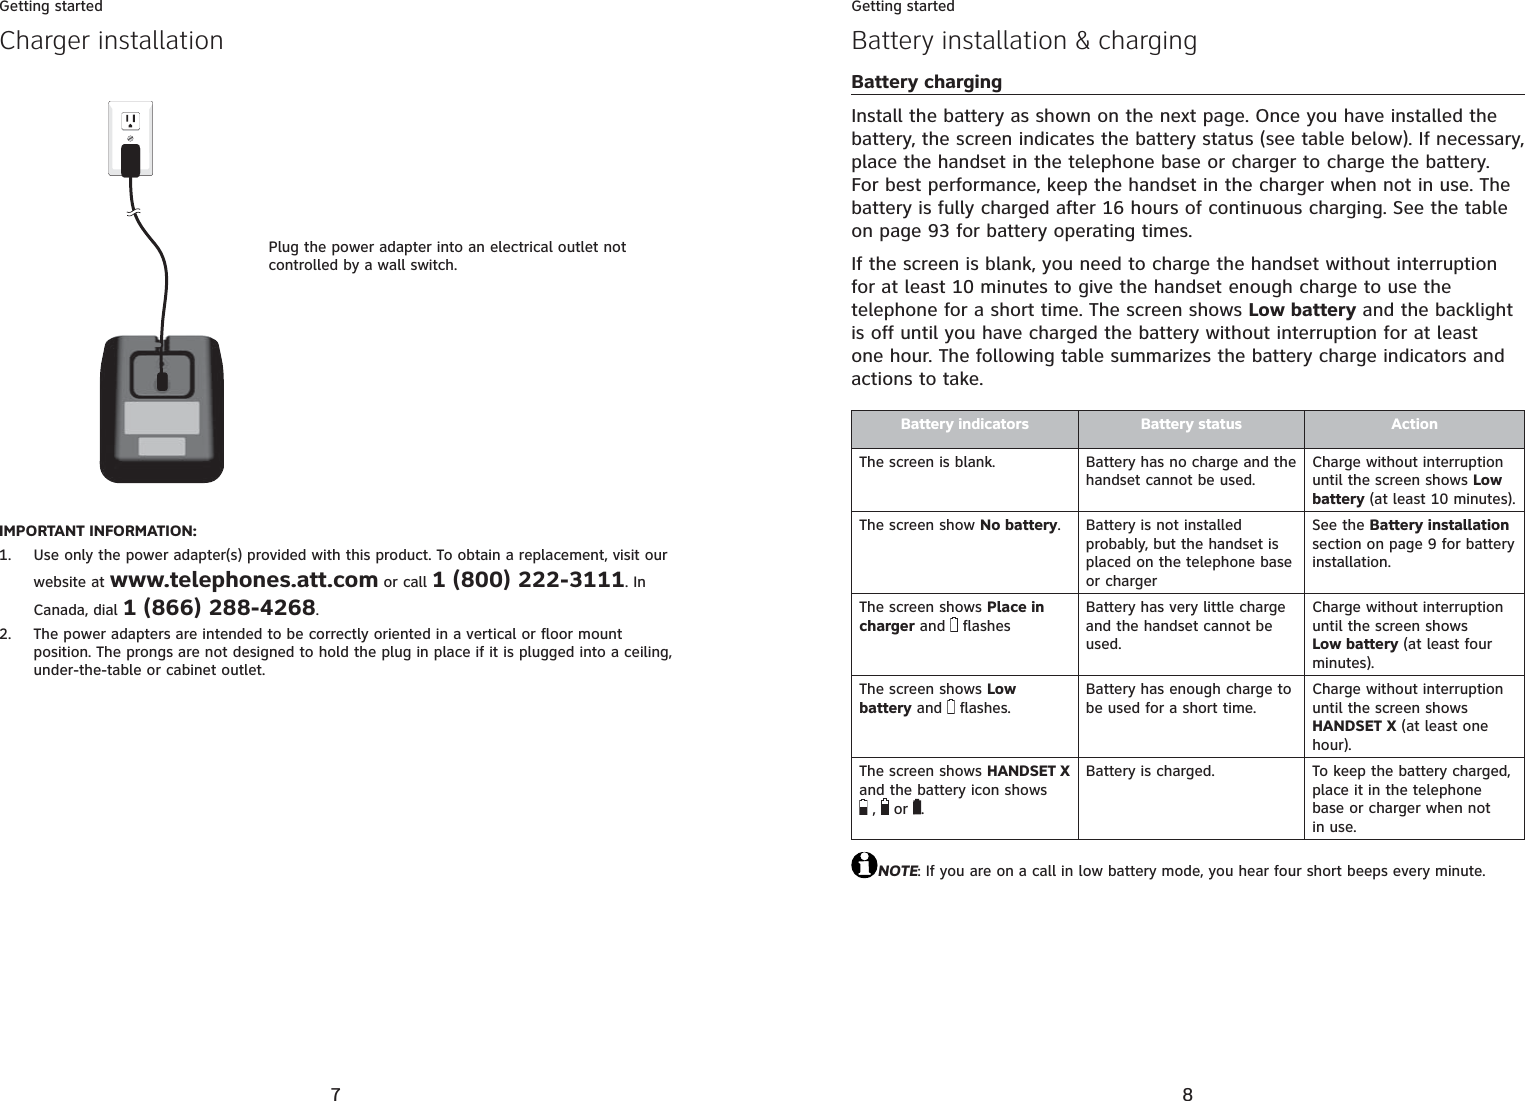
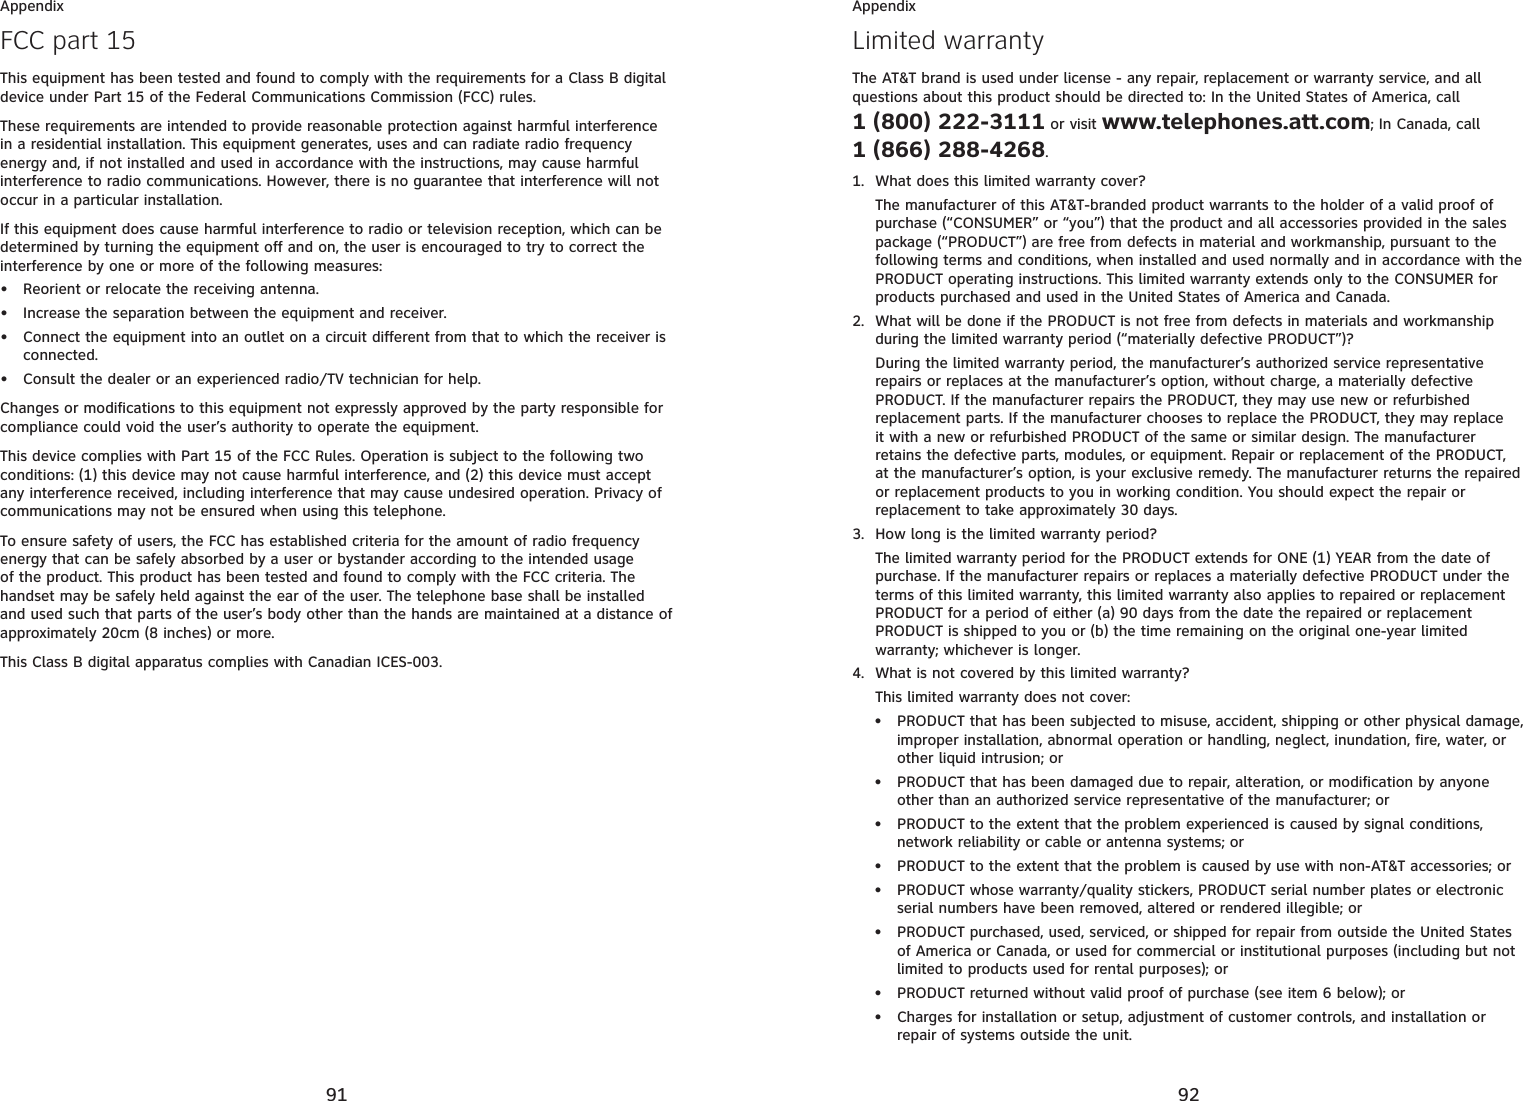


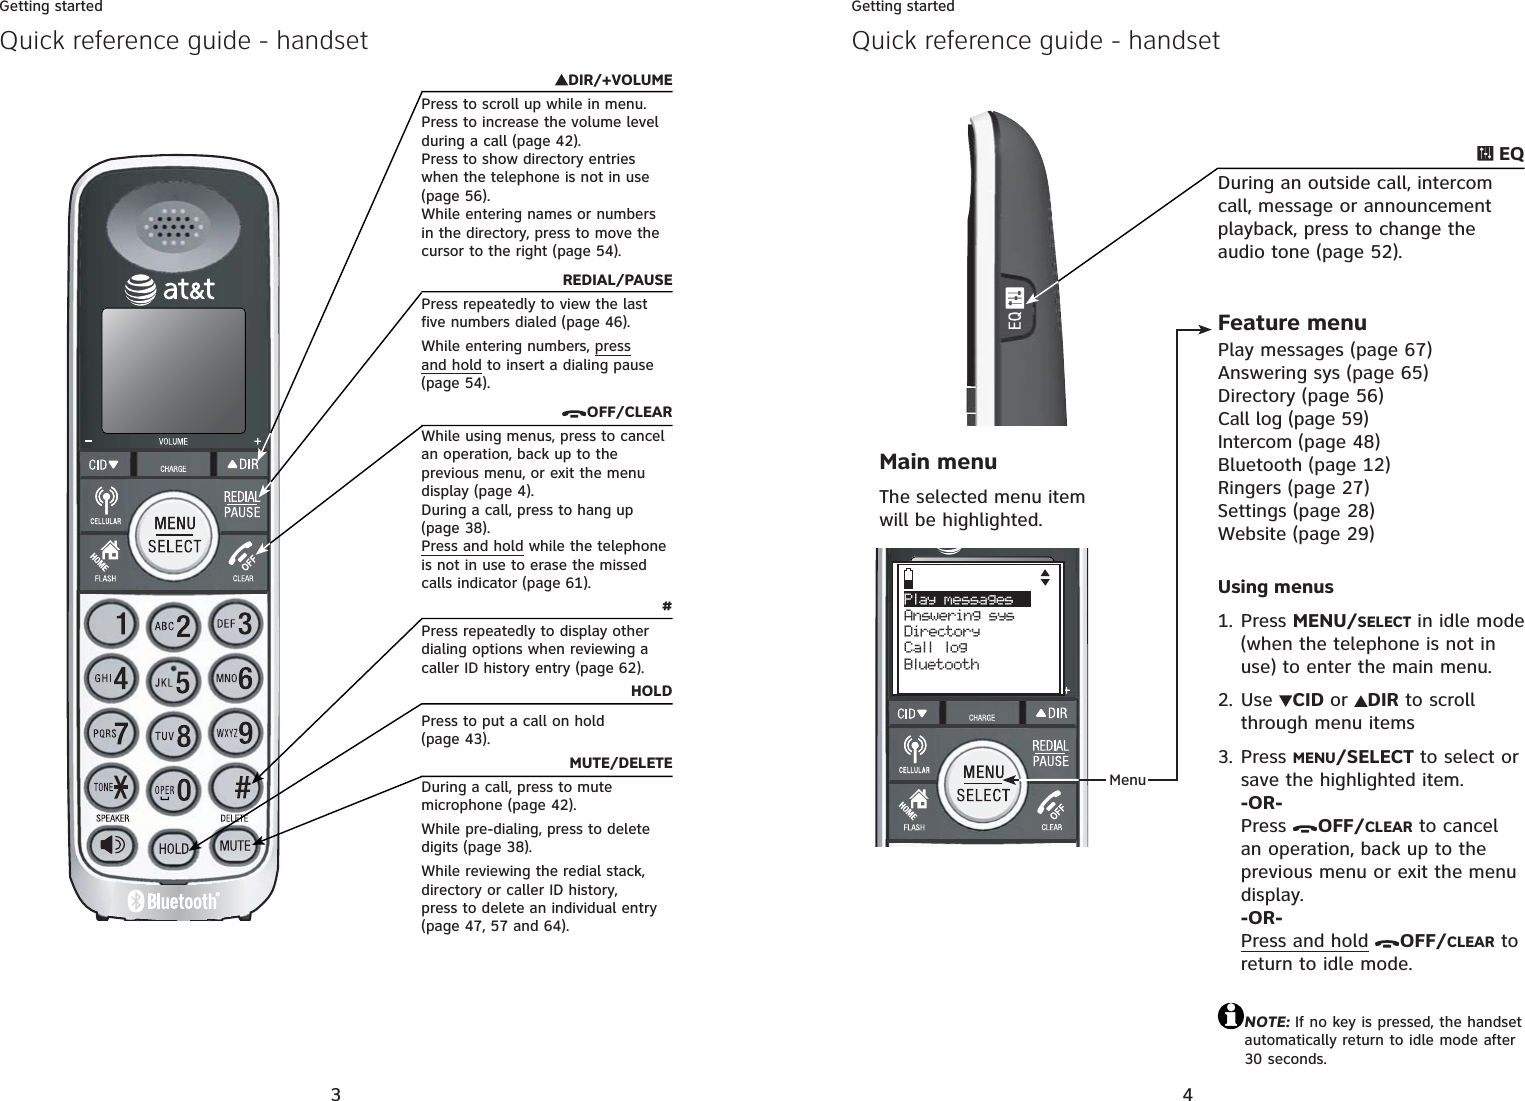
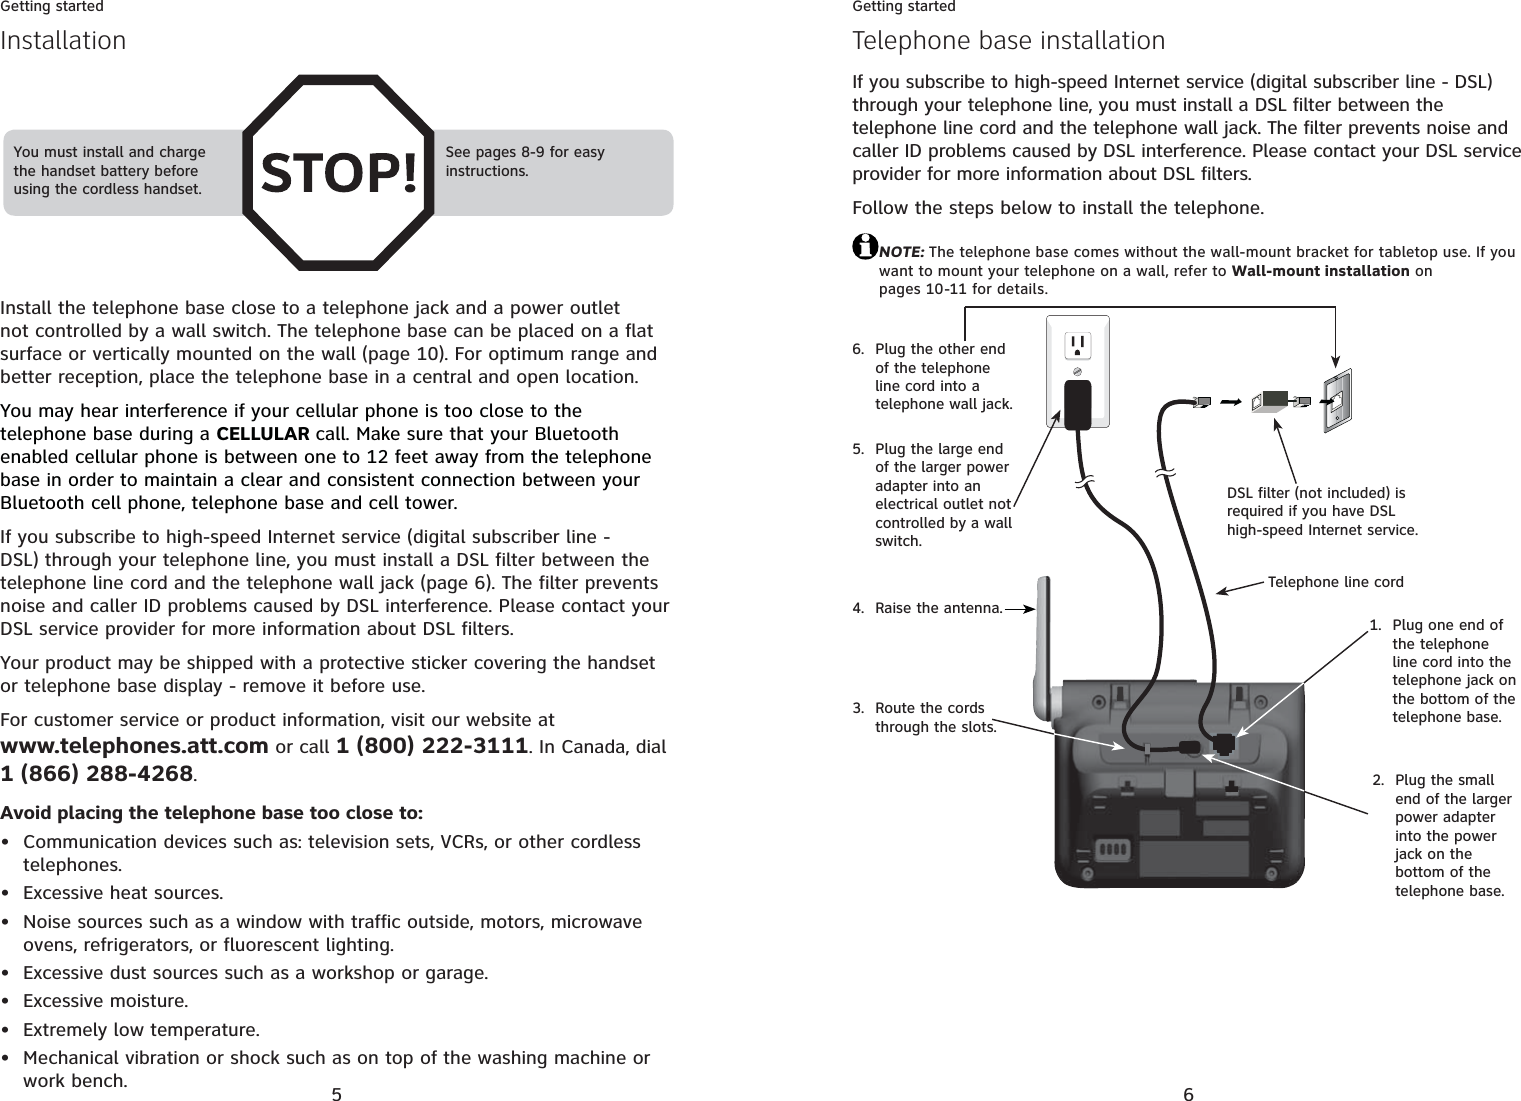

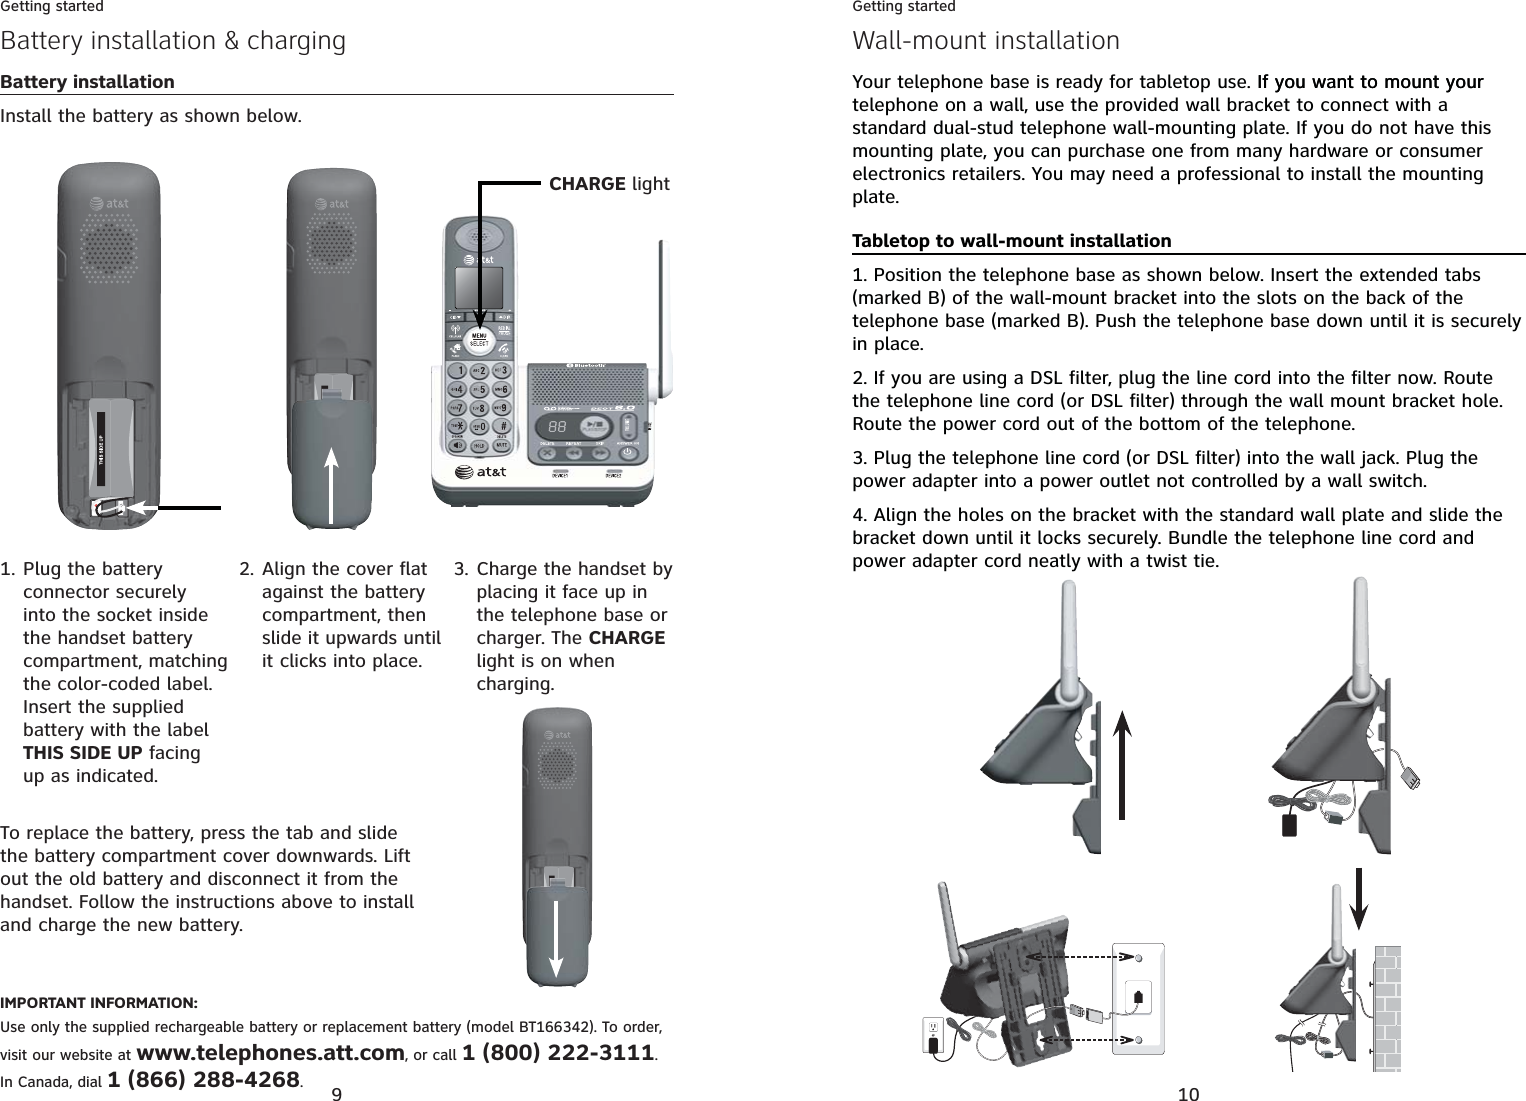

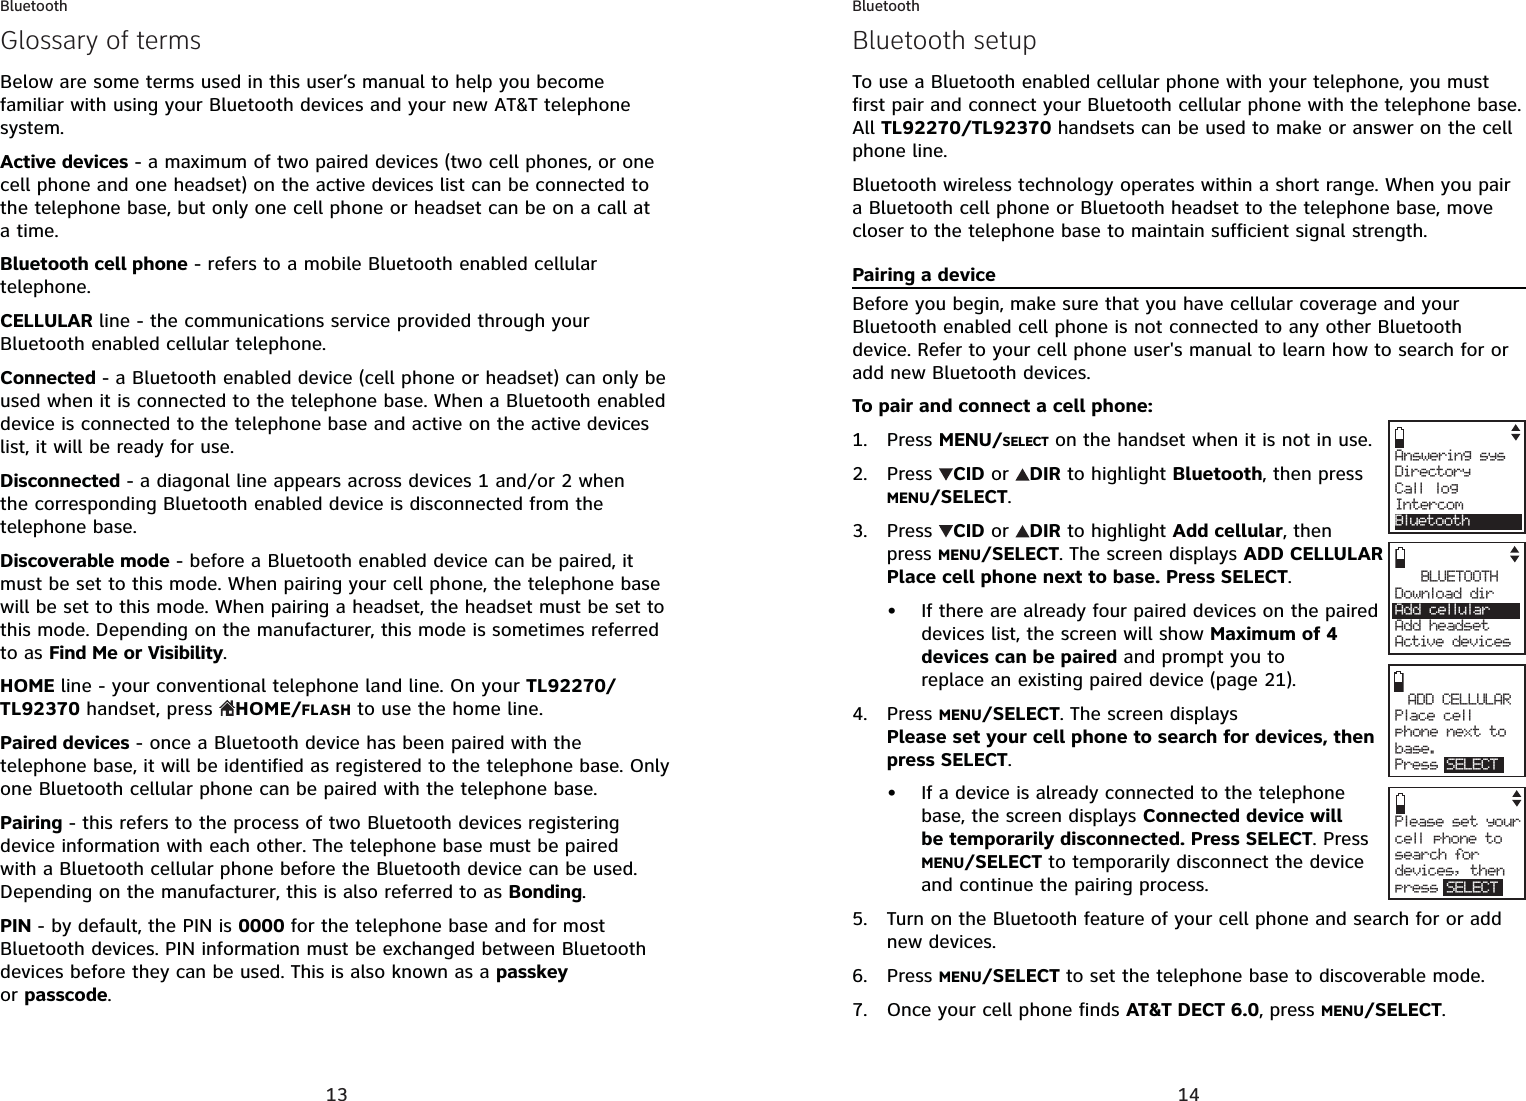
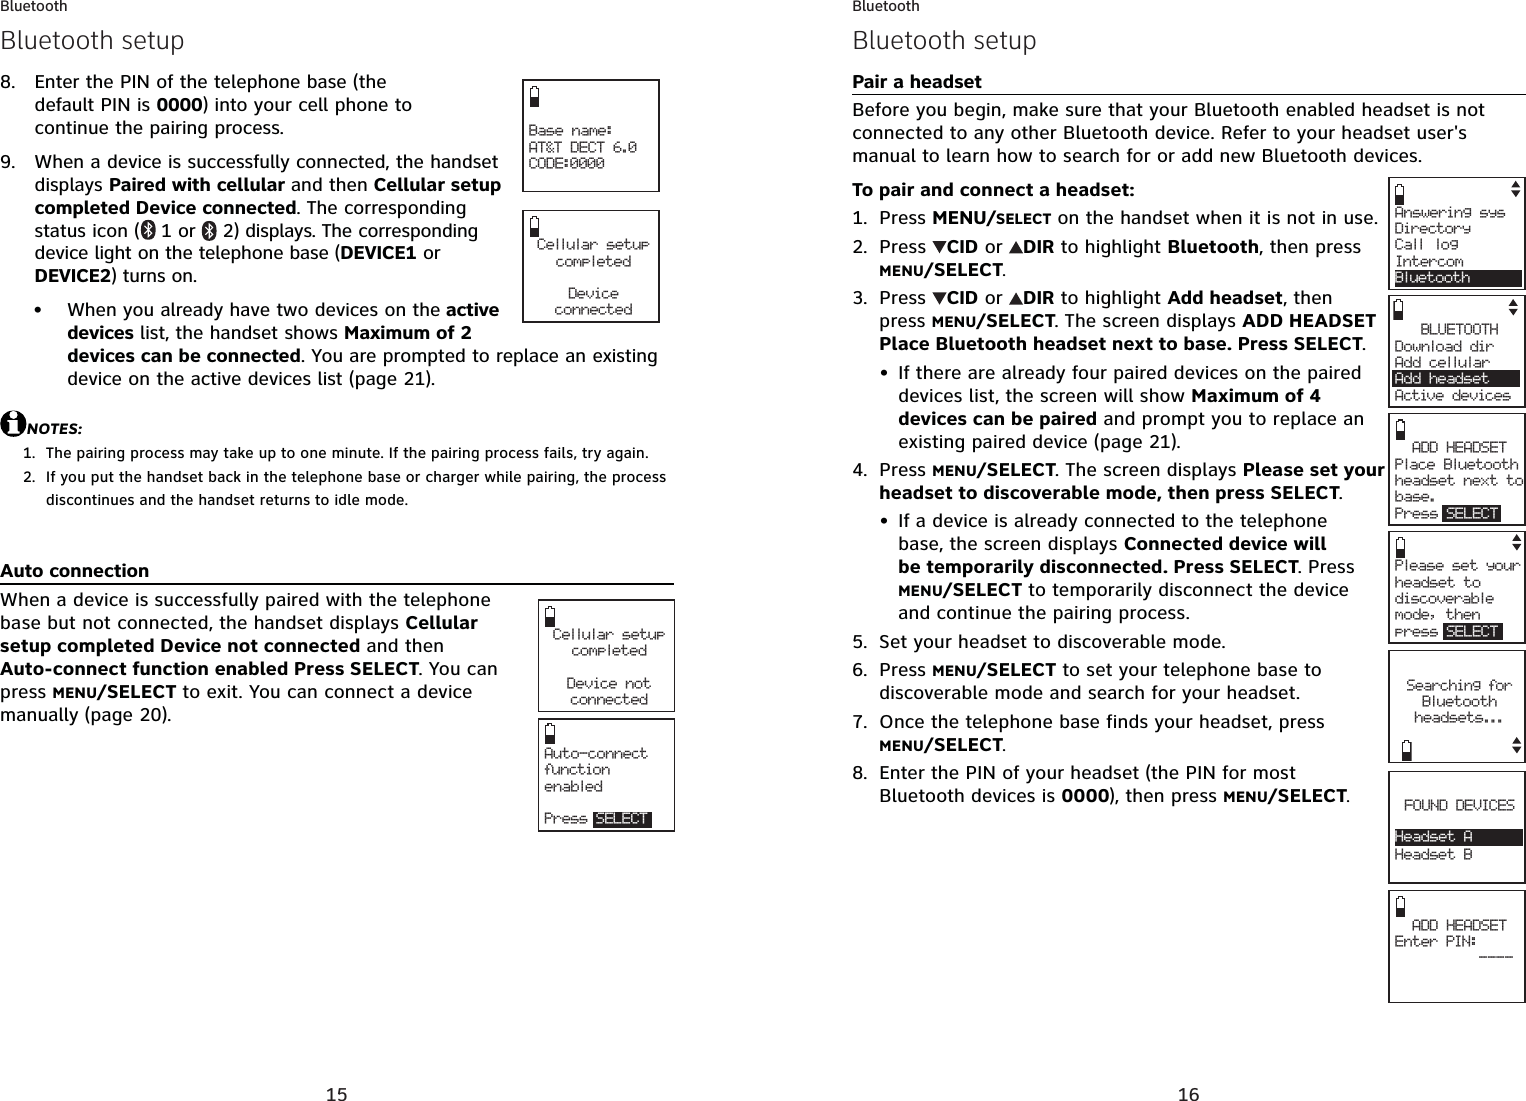
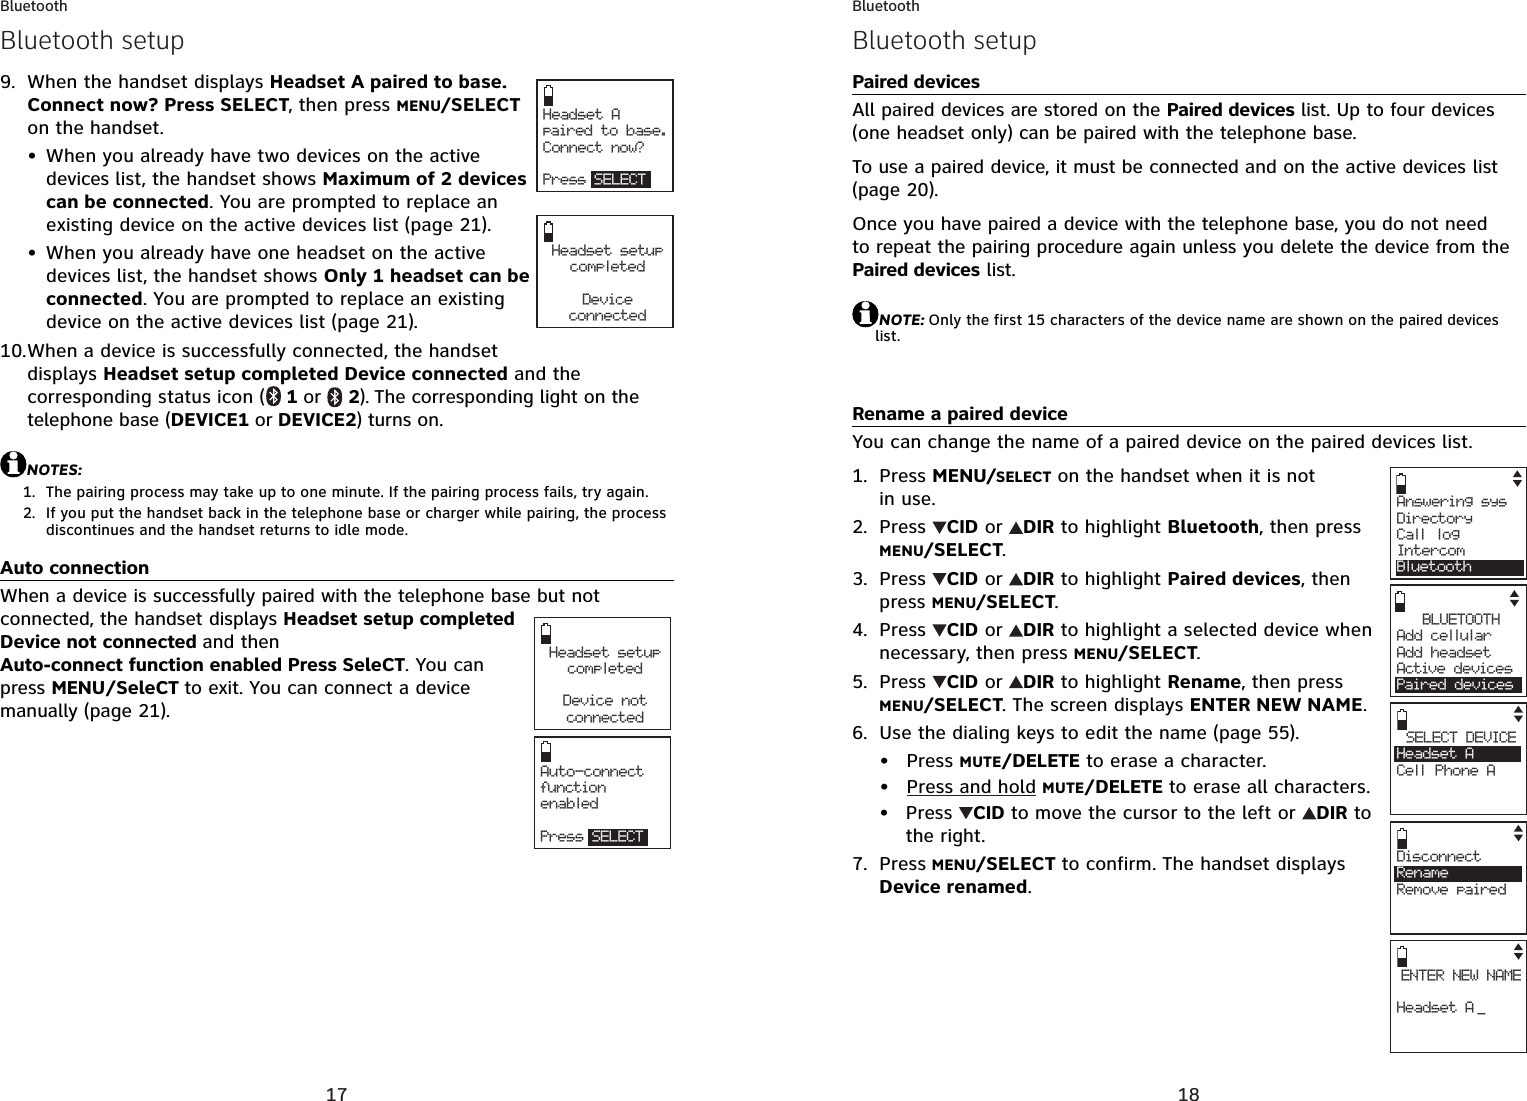
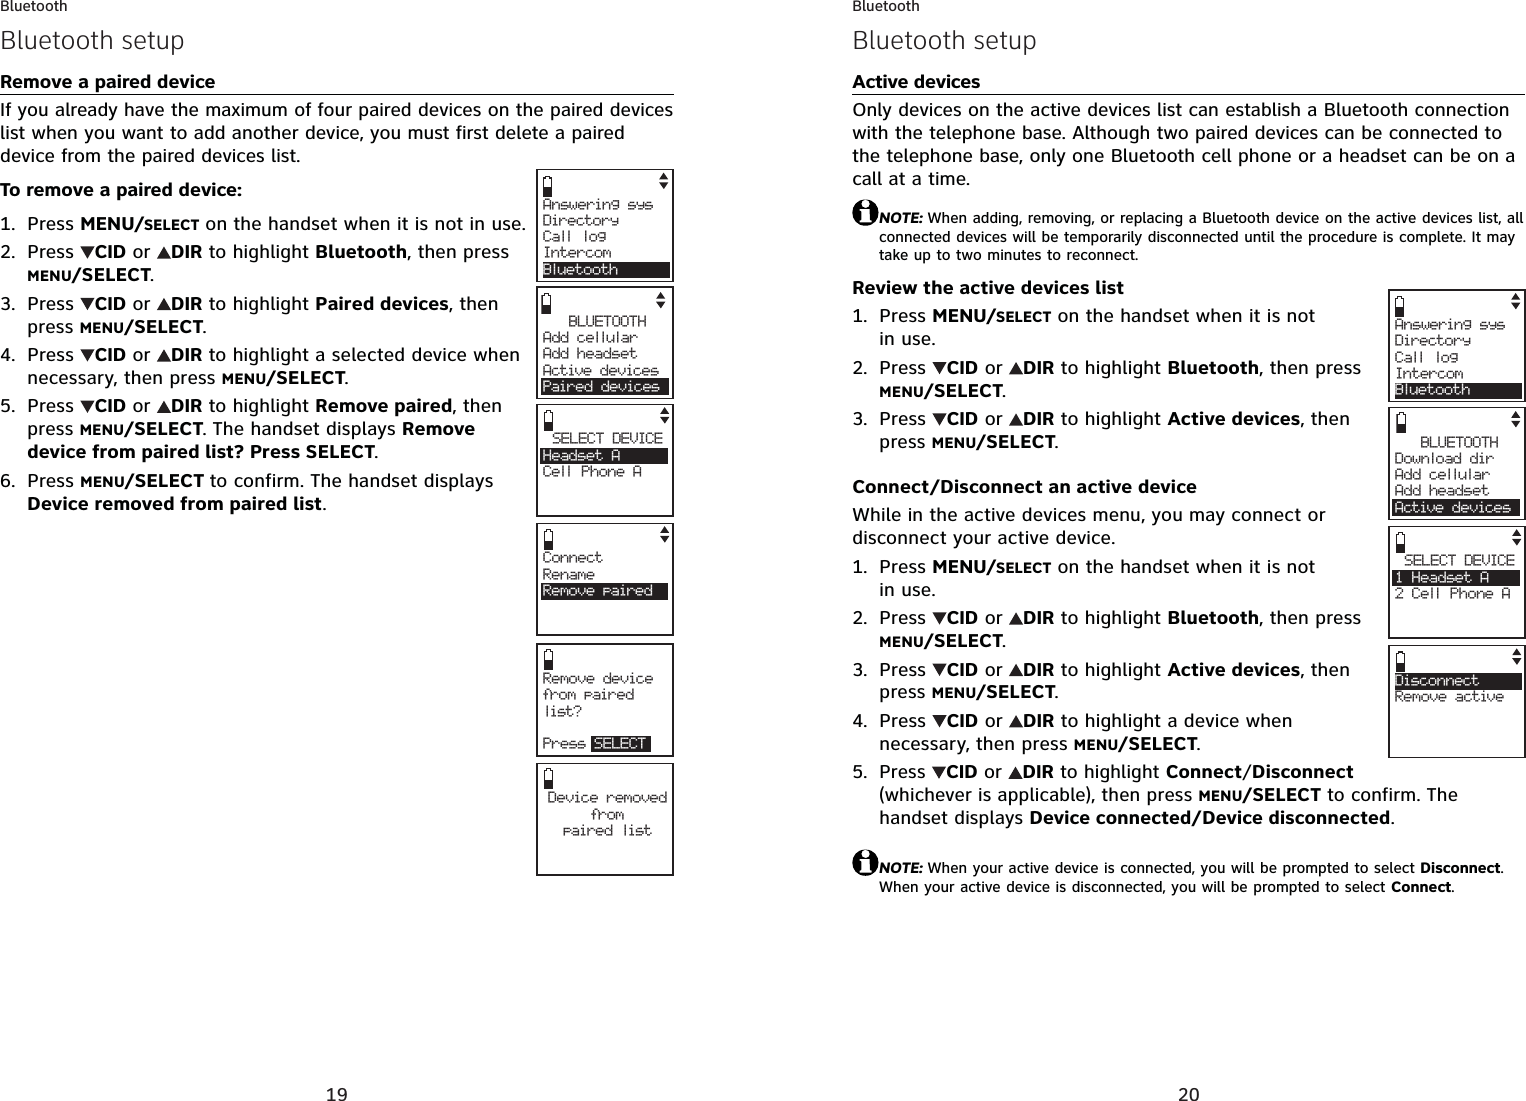
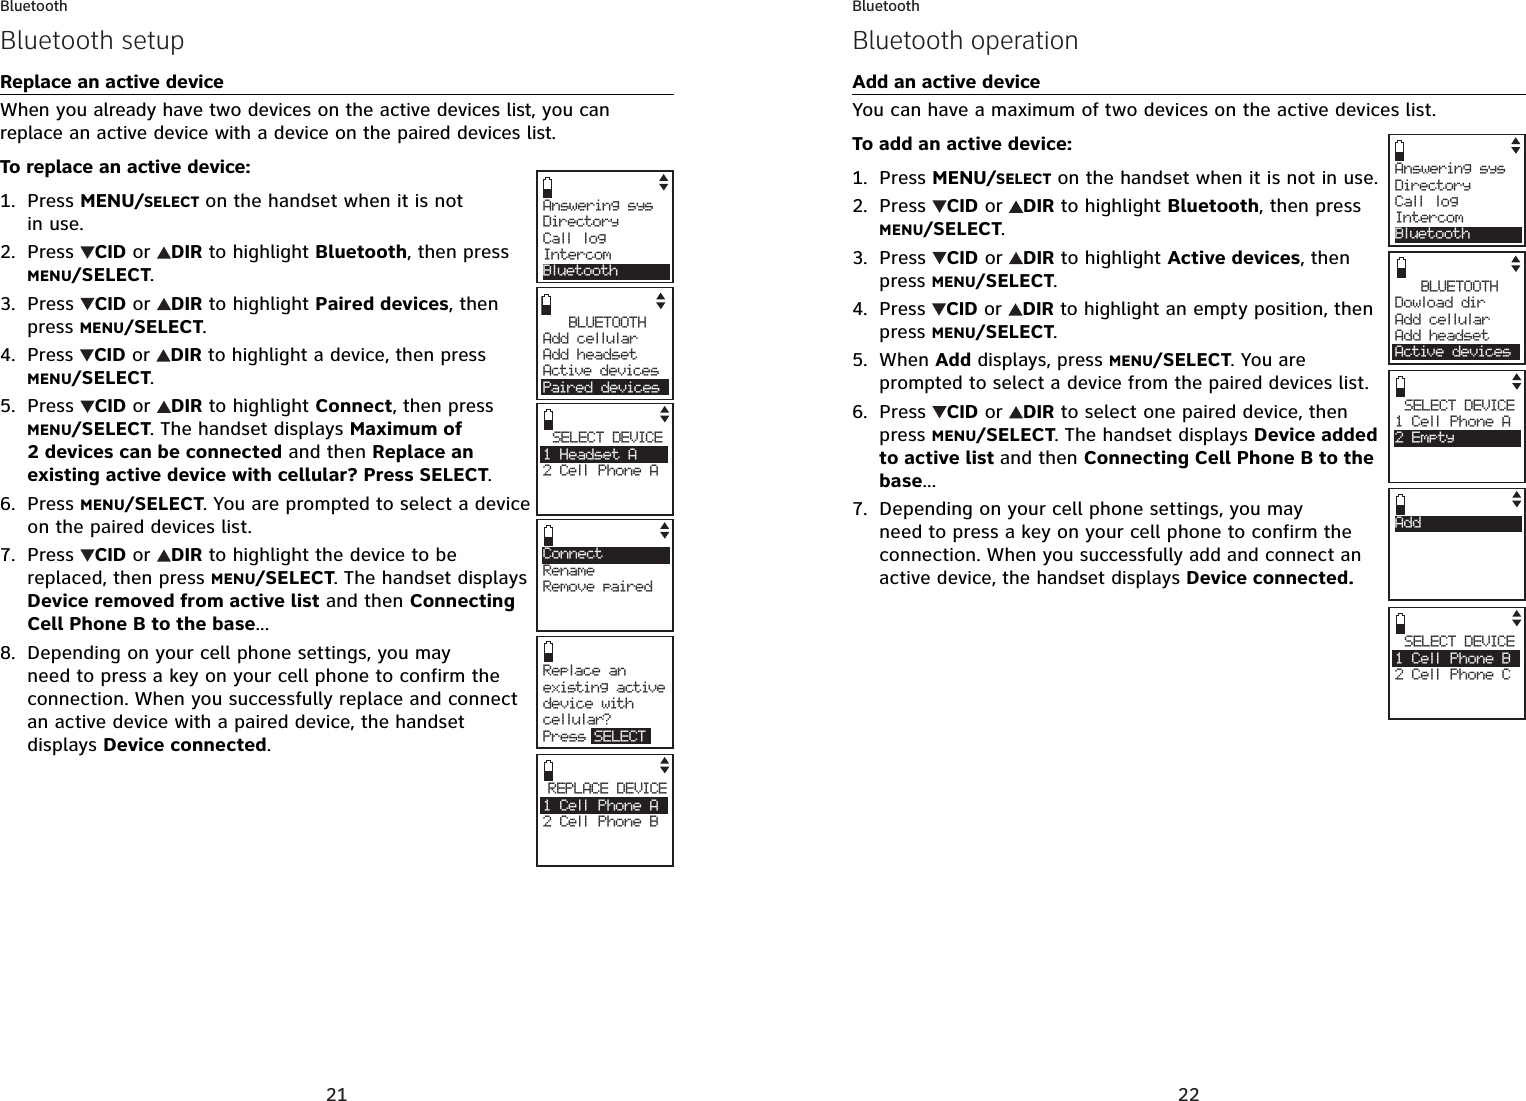
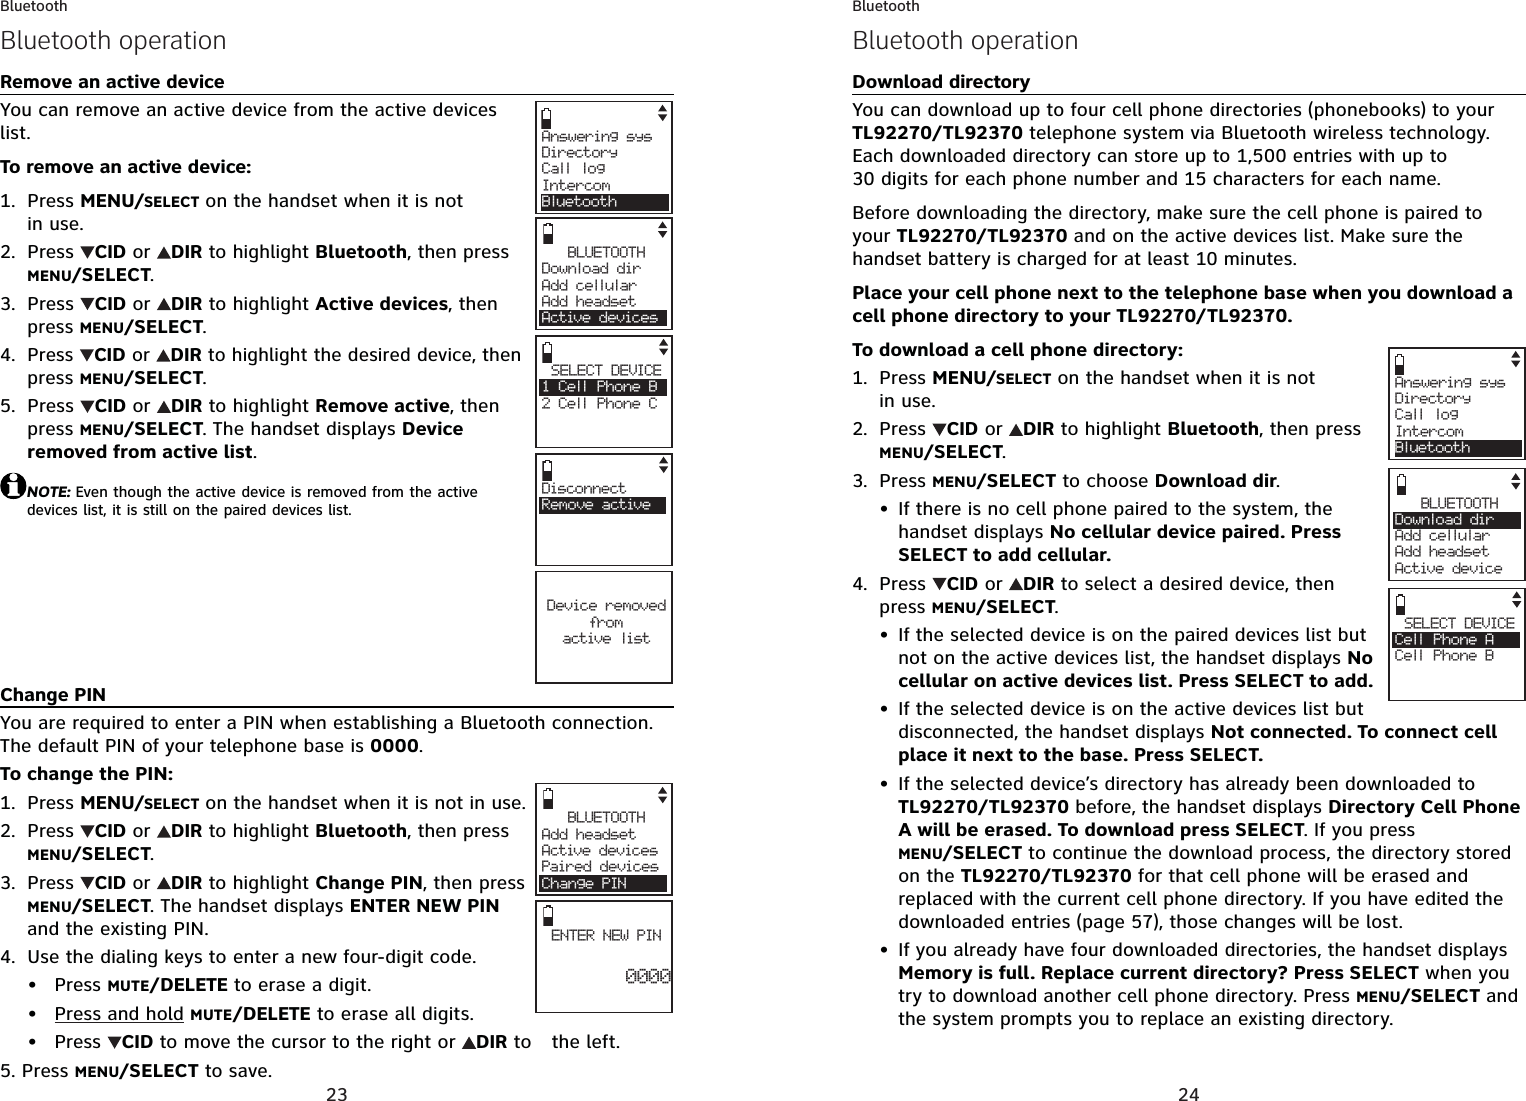
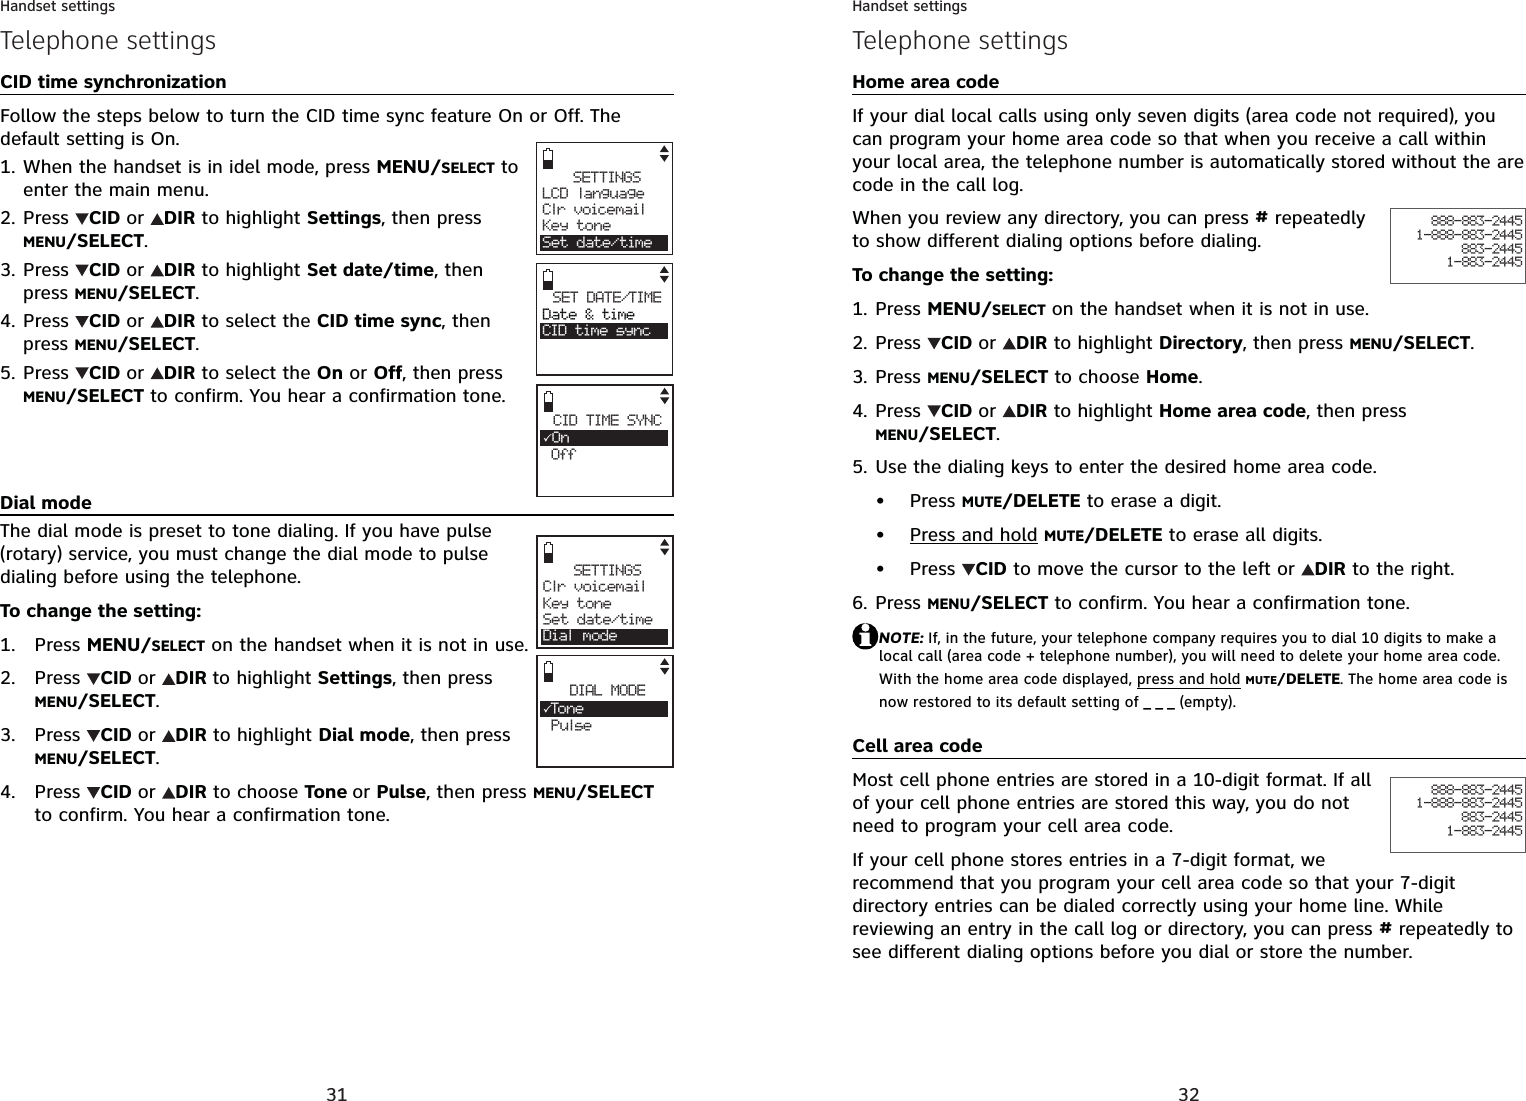
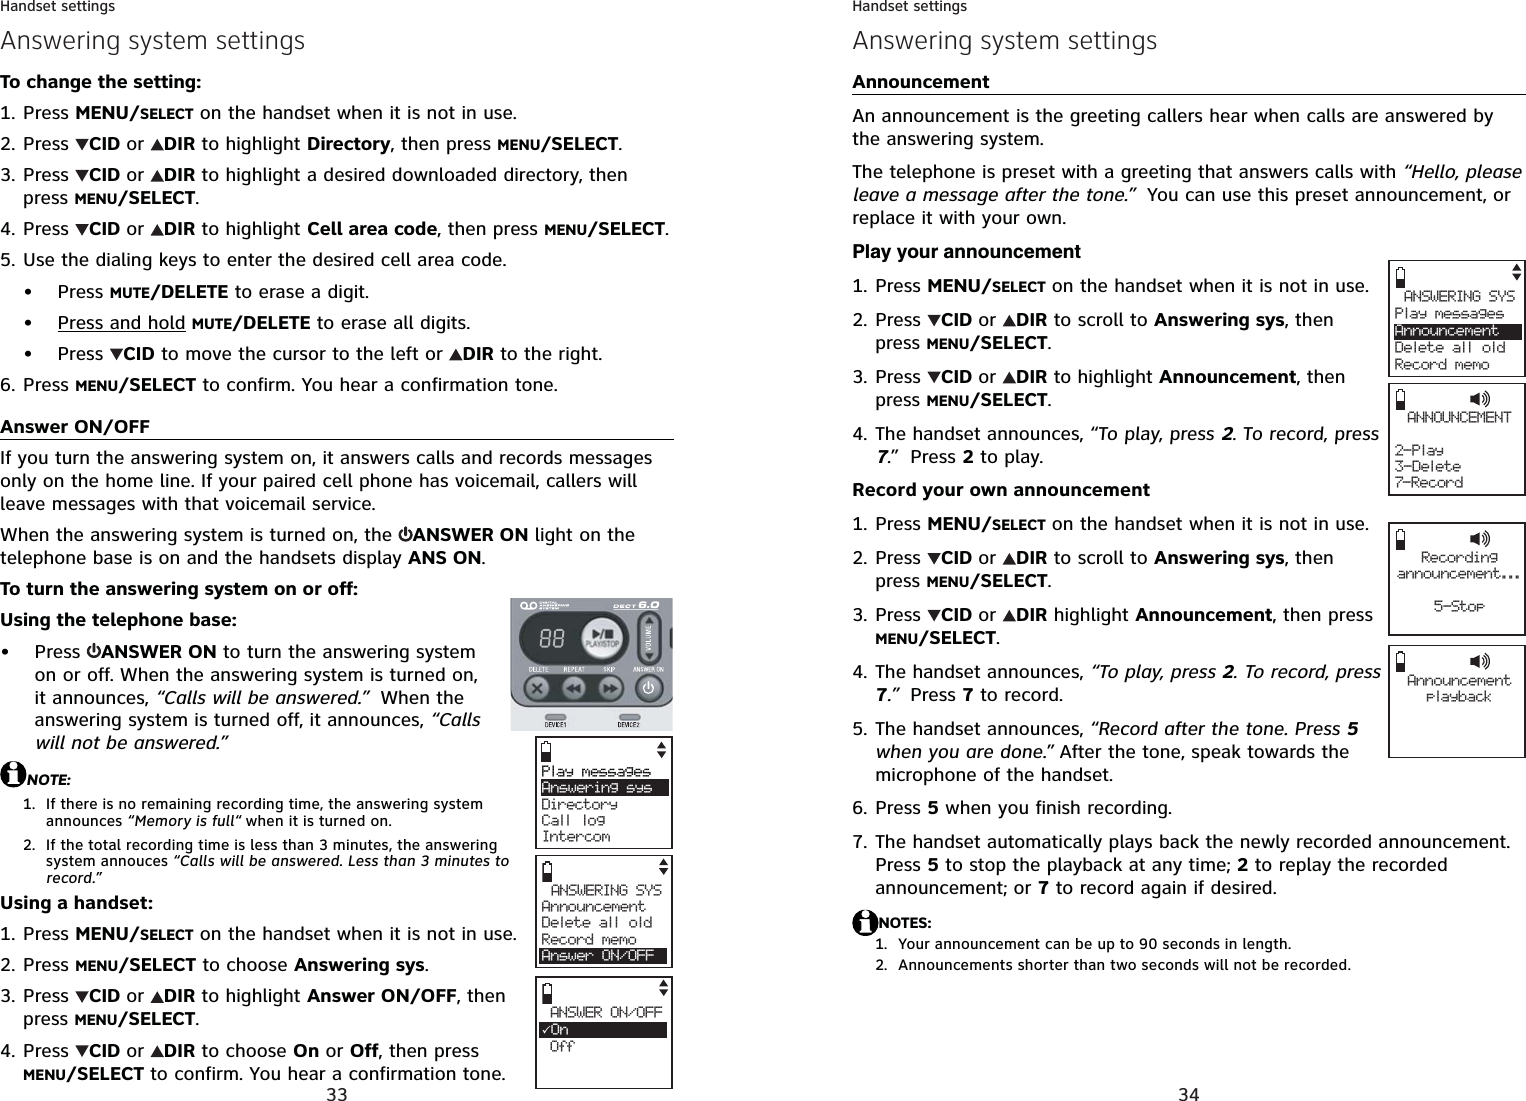
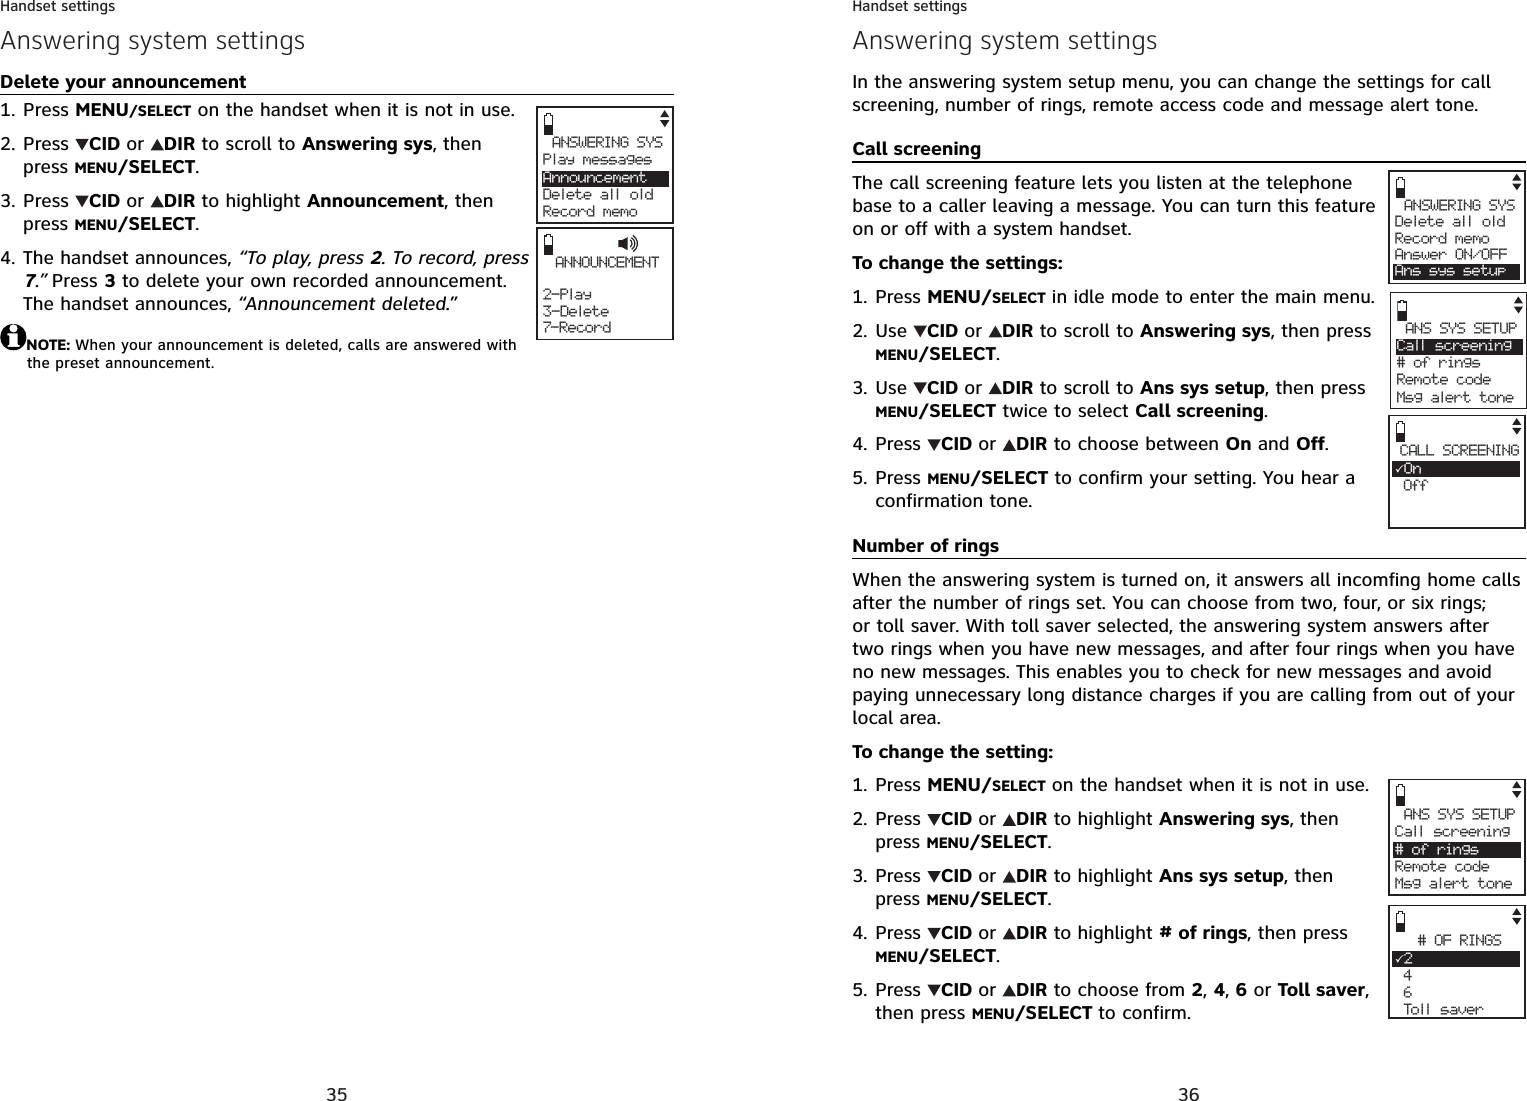
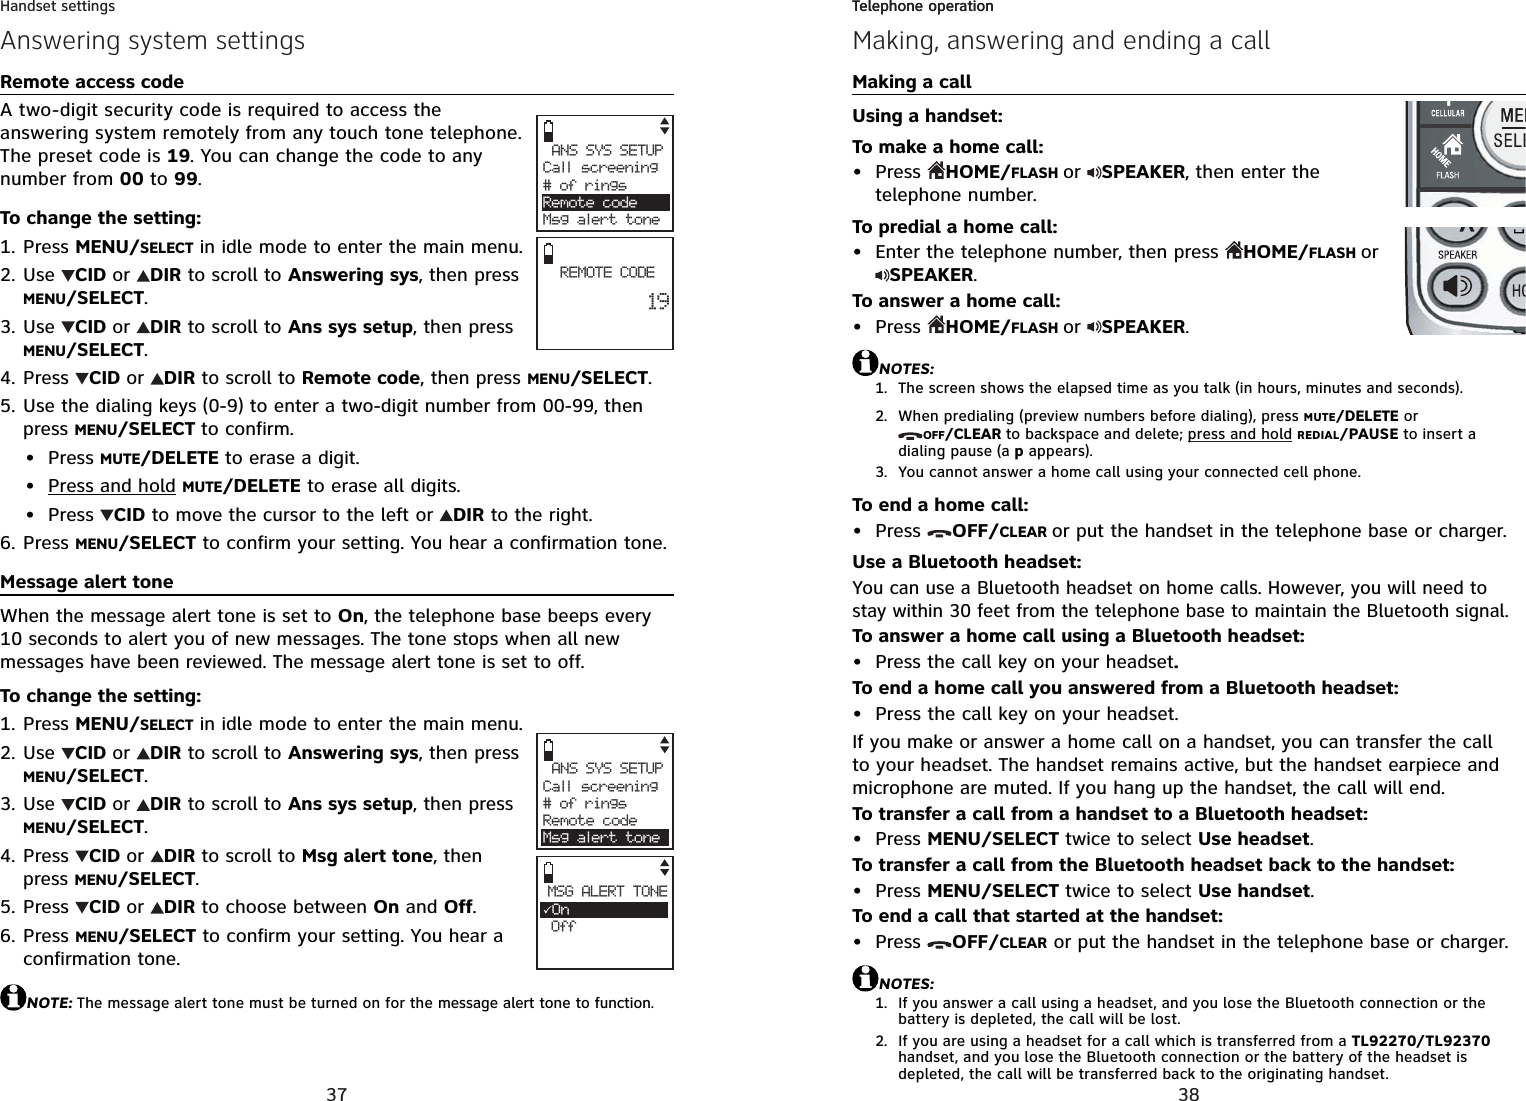

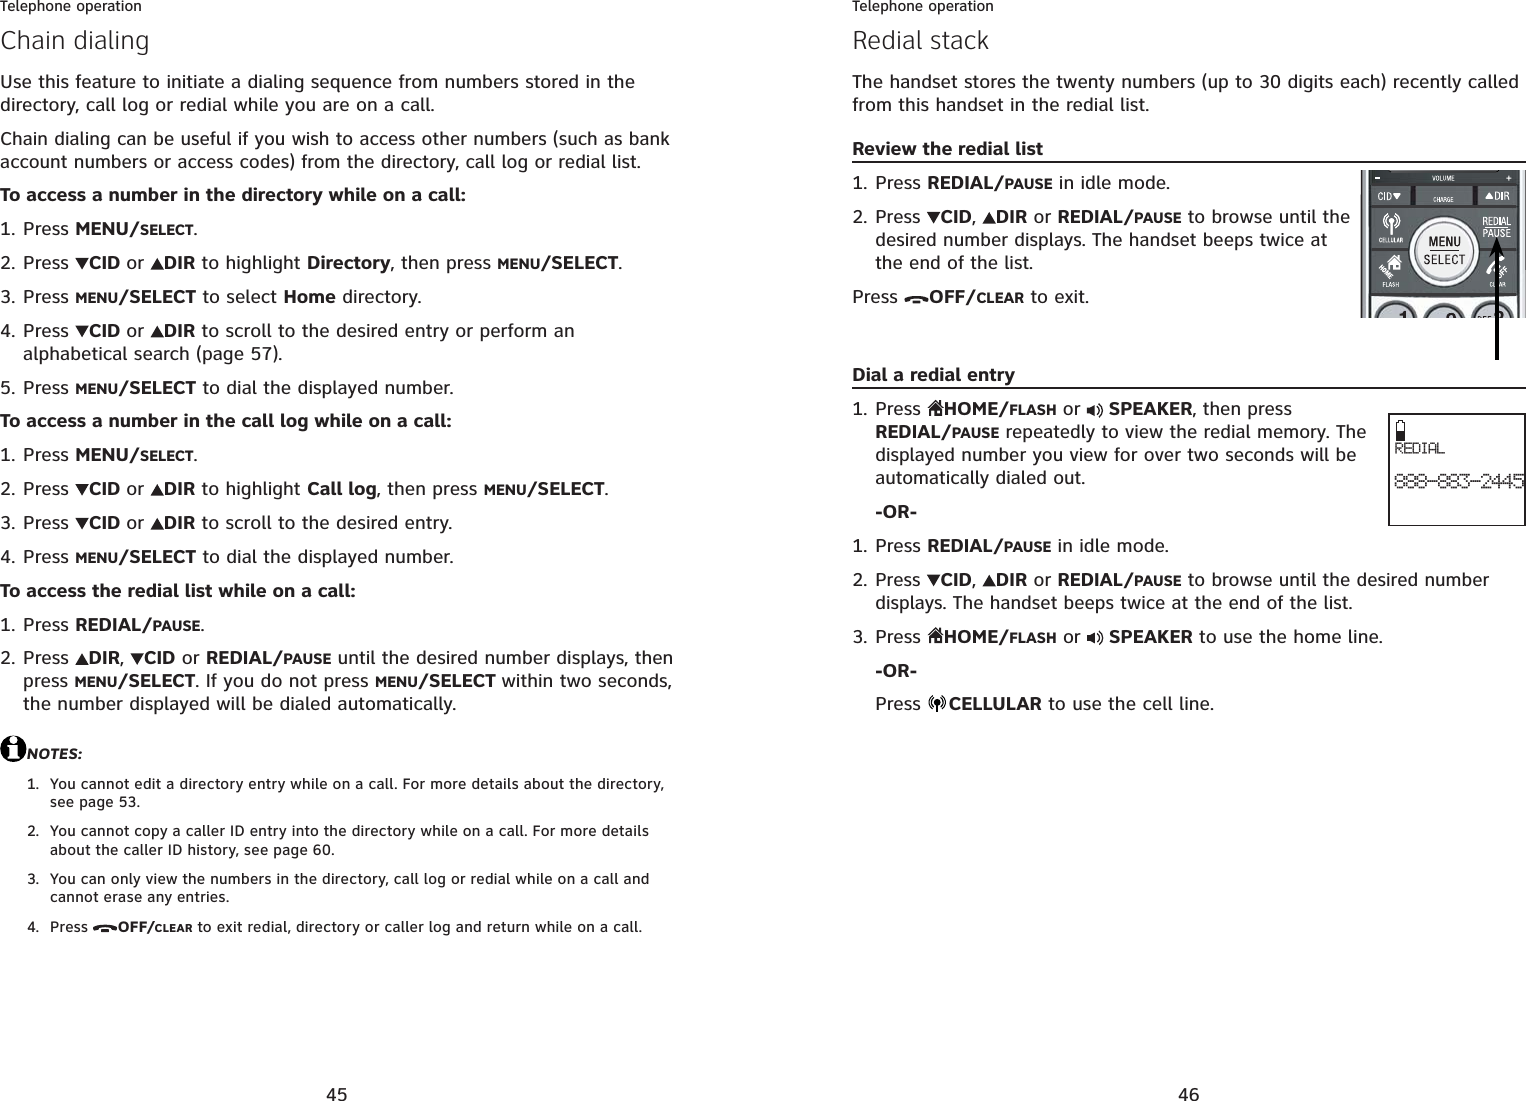
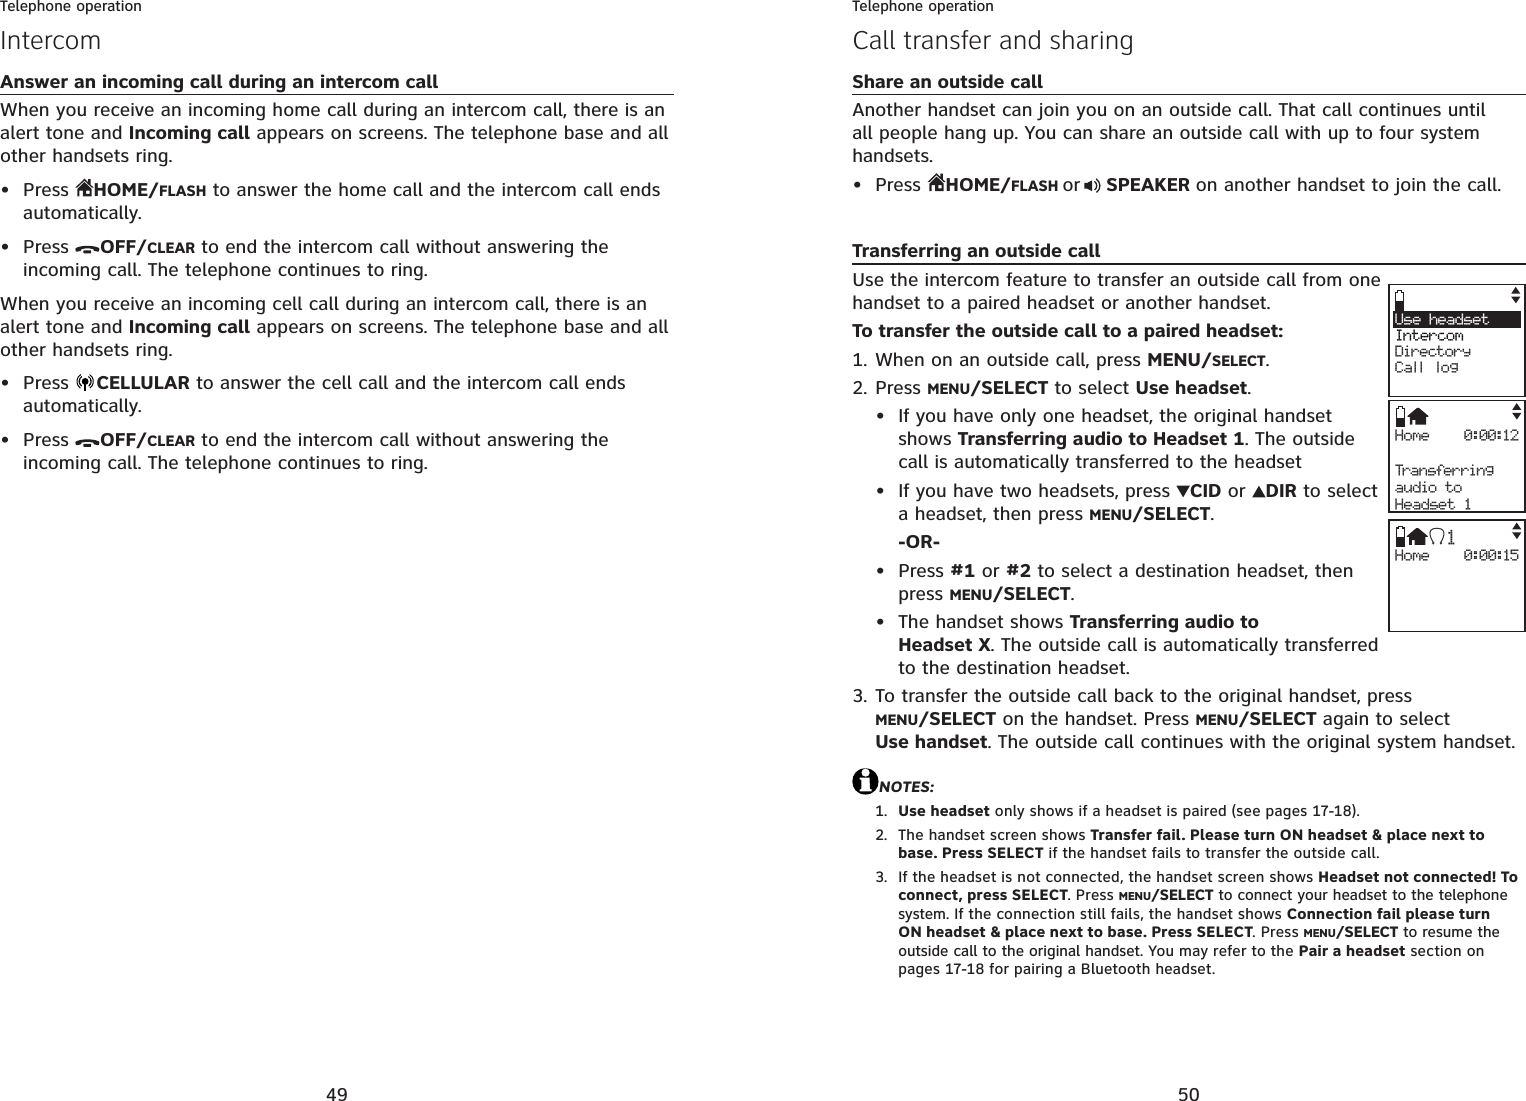
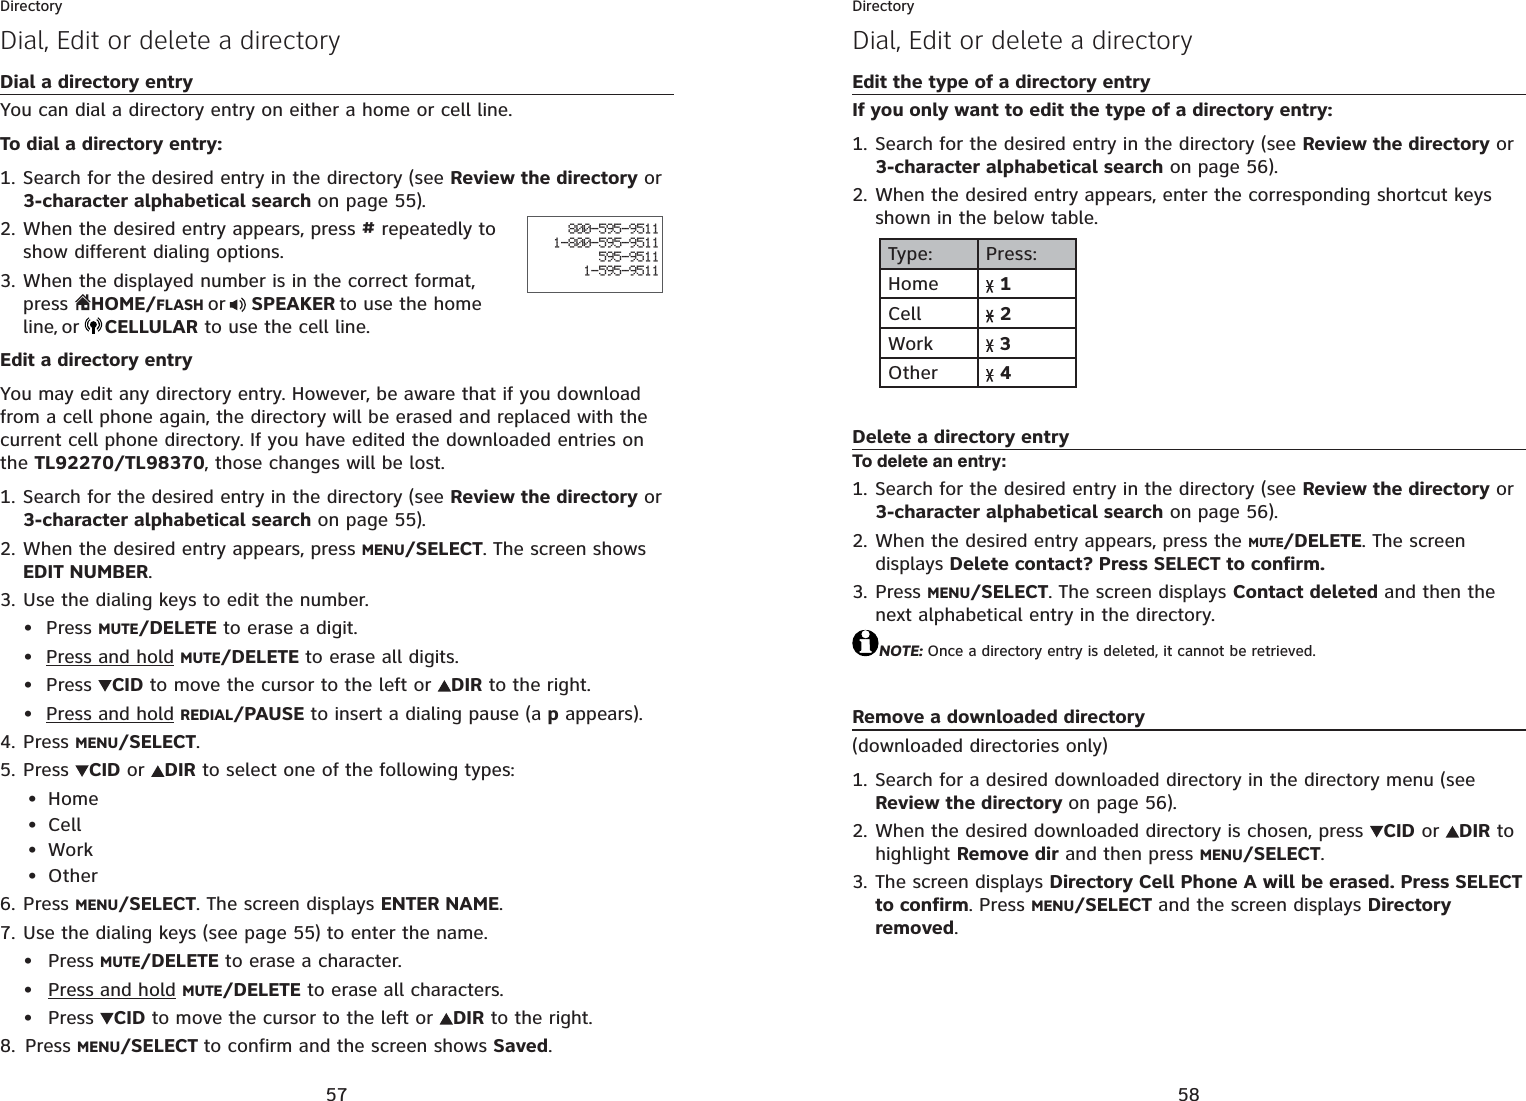
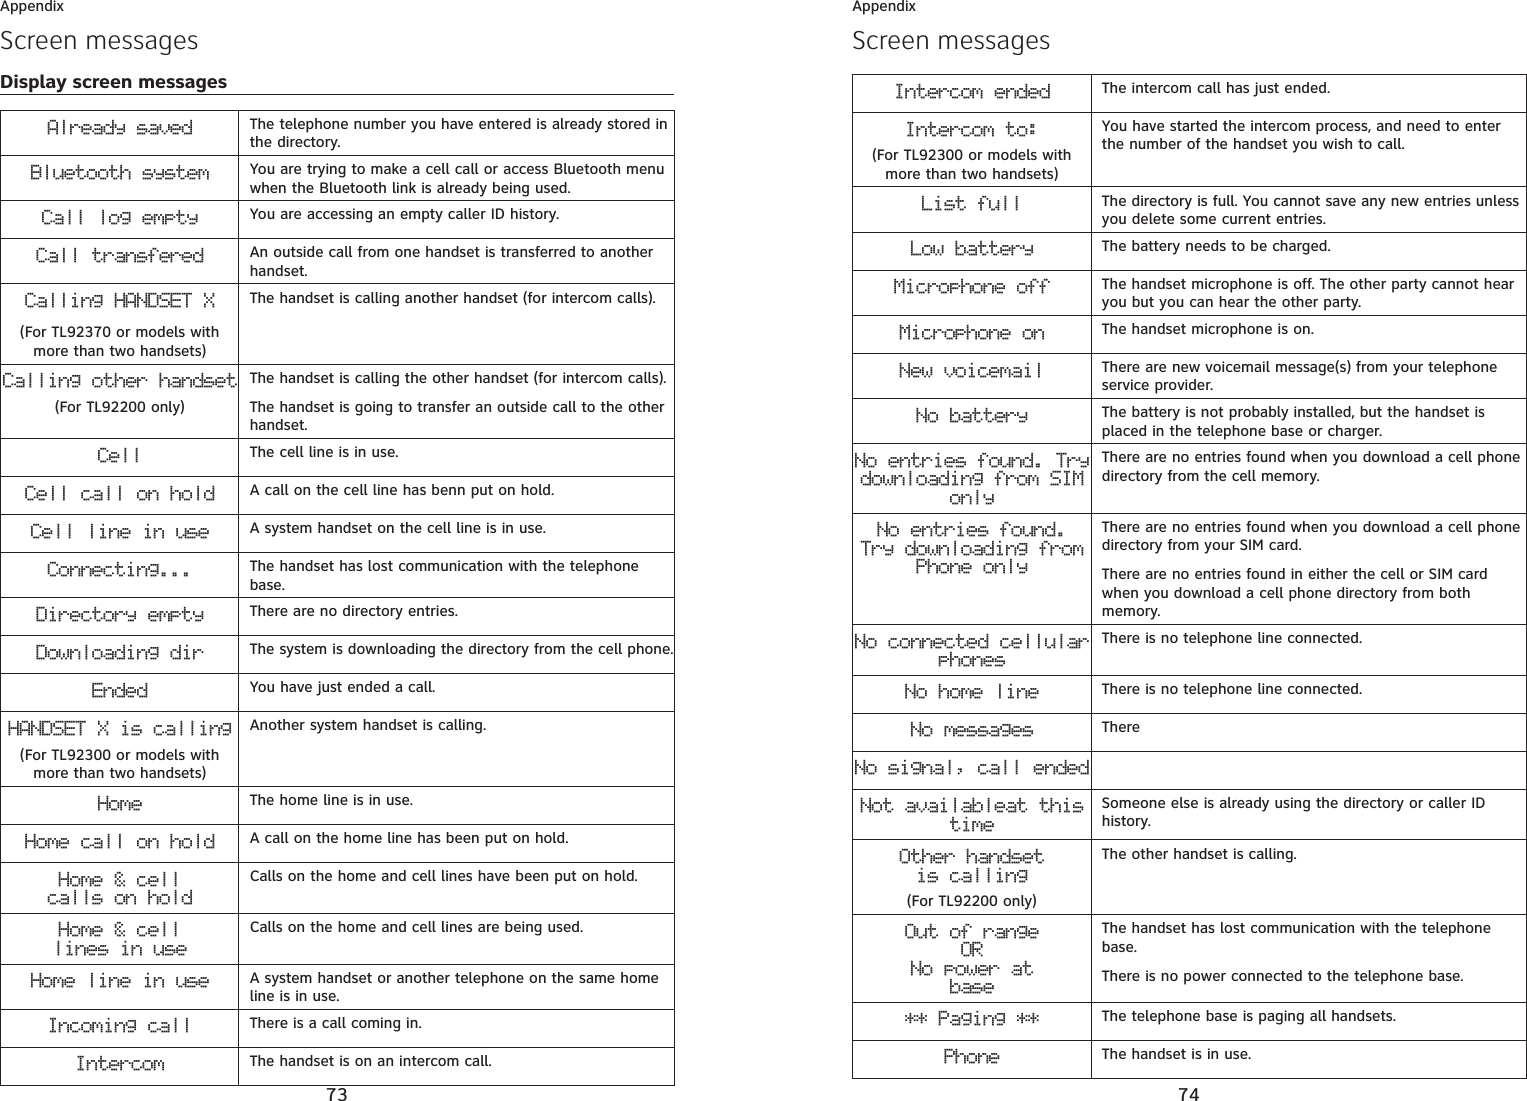
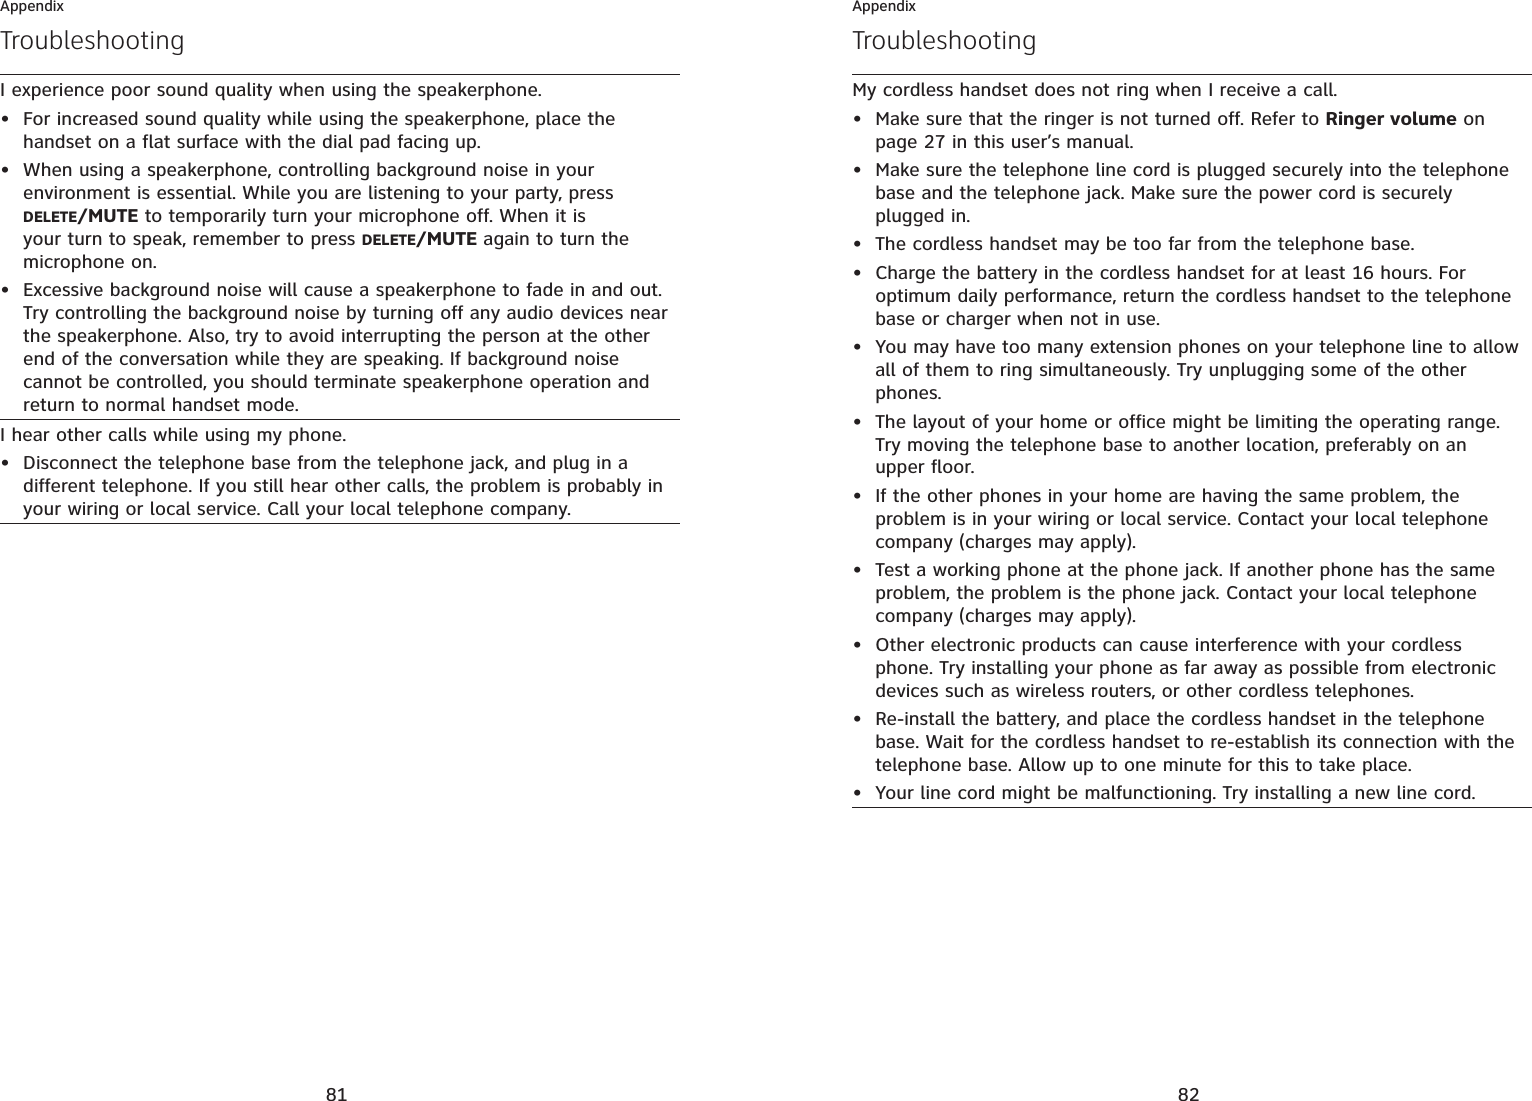
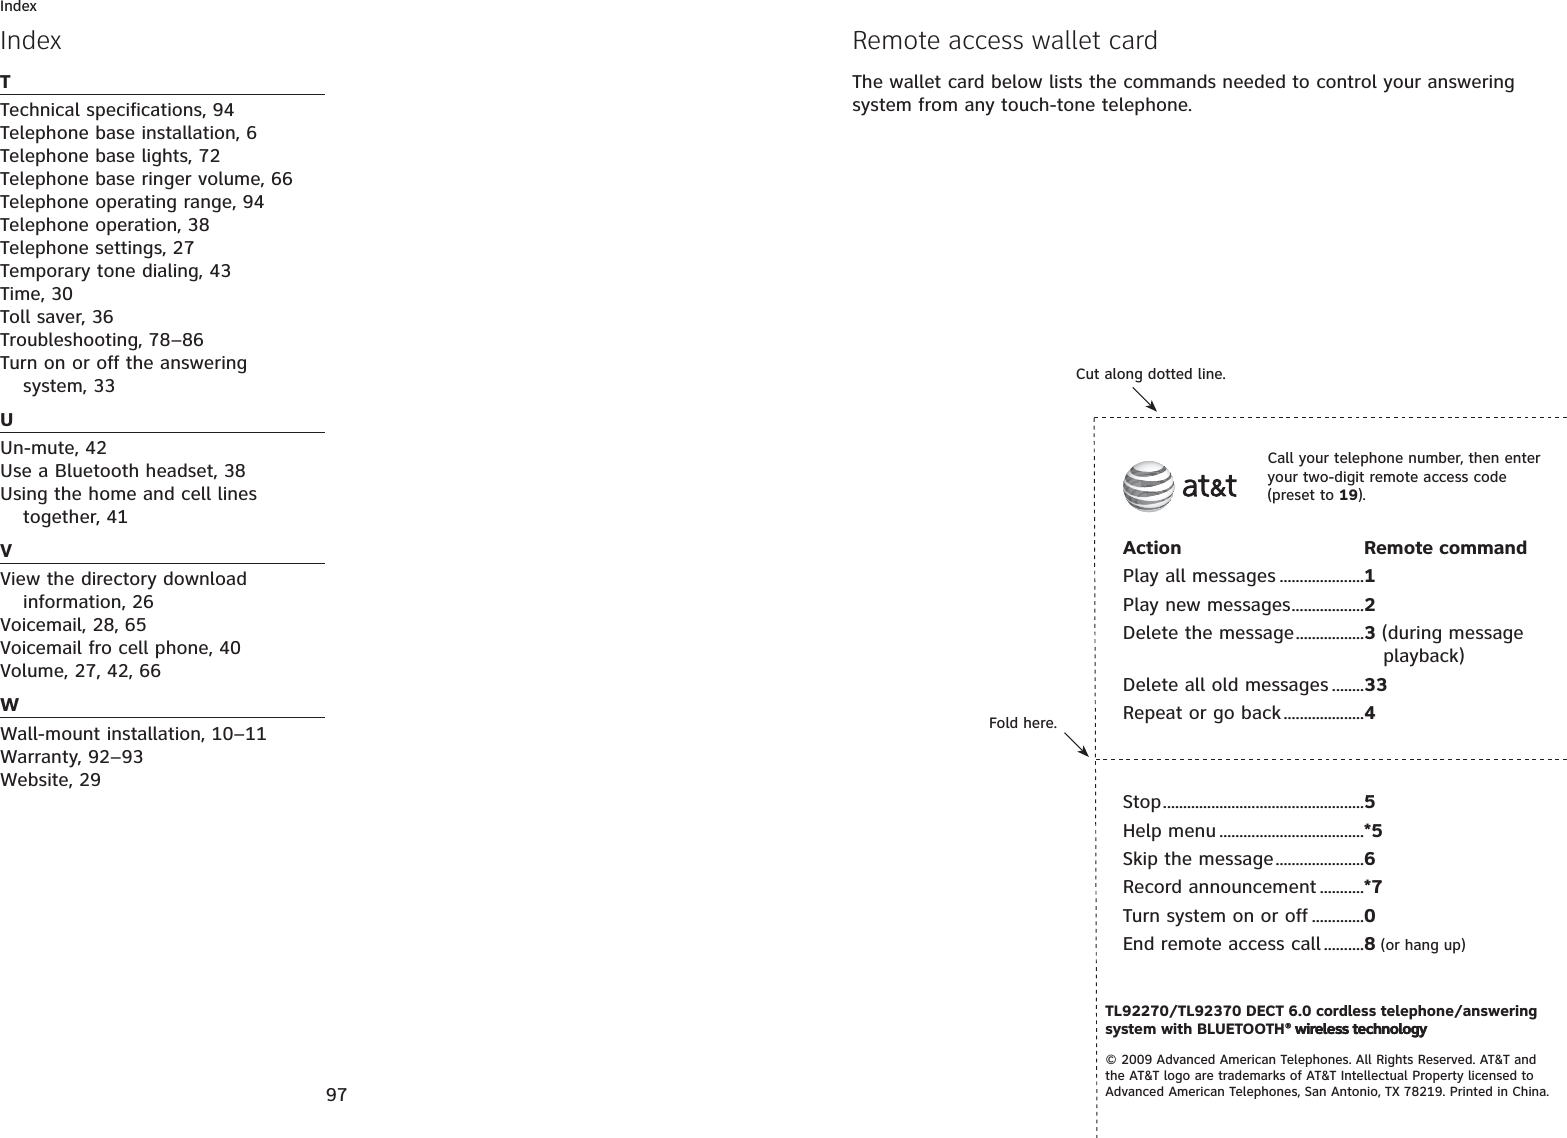
![67Answering systemMessage playbackIf you have new messages, the telephone plays only the new messages (oldest first). If there are no new messages, the telephone plays back all messages (oldest first).When playback begins, the handset screen displays PLAYING MESSAGESand you hear the total number of messages followed by the day and time of the message. After the last message, the telephone announces, “End of messages.” and the screen displays End of messages. If the recording time is less than three minutes, you hear, “Last and three minutes to record.“ (see Message capacity on page 65)To listen to messages with the telephone base:Press /PLAY/STOP to listen to messages.Options during playback:Press +VOLUME or -VOLUME to adjust the speaker volume.Press SKIP to skip to the next message. Press REPEAT to repeat the message currently playing. Press REPEAT twice to listen to the previous message.Press X DELETE to delete the current message. The system advances to the next message.Press /PLAY/STOP to stop.To listen to messages with a handset:Press MENU/SELECT when in idle mode. Press MENU/SELECT again to select Play messages. If new and old messages are saved in the answering system, the screen displays Play new msgs and Play old msgs. PressCID or DIR to select and then press MENU/SELECT.Options during playback:Press EQ button to adjust the message playback tone.Press +VOLUME or -VOLUME to adjust the speakerphone volume.Press 6 to skip to the next message.Press 4 to repeat the message currently playing. Press 4 twice to listen to the previous message.Press 3 to delete the current message. The system advances to the next message.Press 5 to stop.The system announces the number of messages, then begins playback. The message sequence is shown on the handset screen. If there are no recorded messages, the handset screen shows You have: No message with voice prompt “You have no message.“NOTE: If the answering system is off and there is an incoming call, the system answers after 10 rings and announce to the caller, “Please enter your remote access code.” For more information about remote access codes, see page 70.1.•••••1.2.••••••You have:3 New messagesPLAYING MESSAGE3-Delete 5-Stop4-Repeat 6-Skip Msg#[ 2/3 ] 10:00pm 12/25Play messagesAnswering sys Directory Call logIntercomPlay new msgsPlay old msgs68Answering systemMessage playbackDelete all old messagesUsing the telephone base:Press X DELETE when the phone is not in use. The telephone announces, “To delete all old messages, press DELETE again.” Press X DELETE again. All previously heard messages are erased and the telephone announces, “Allold messages deleted.”Using a handset:Press MENU/SELECT on the handset when it is not in use.Press MENU/SELECT to choose Answering sys.Press CID or DIR to highlight Delete all old, then press MENU/SELECT.The handset displays Delete all old messages? Press SELECT to confirm. Then press MENU/SELECT to confirm. NOTE: You can only delete old messages, which are messages you have played.Record and play memosMemos are your own recorded messages used as reminders for yourself or others using the same answering system. You can record your own memos using a system handset. Playback and delete them the same way as incoming messages.To record a memo:Press MENU/SELECT on the handset when it is not in use.Press MENU/SELECT to choose Answering sys.Press CID or DIR to highlight Record memo, then press MENU/SELECT.The system announces, “Recorded after the tone. Press 5 when you are done.” After the tone, speak towards the microphone.Press 5 when you finish recording. The handset announces, “Recorded” and then return to the previous menu.NOTES:The system announces “Memory is full”, if you record a memo when the memory is full.Each memo can be up to four minutes in length.Memos shorter than one second are not recorded.To play back a memoPlay memos the same way as messages. See Message playback on page 67.1.2.3.4.1.2.3.4.5.1.2.3.Play messagesAnswering sysDirectory Call logIntercomANSWERING SYSAnnouncementDelete all oldRecord memoAnswer ON/OFFRecoringmemo...5-Stop](https://usermanual.wiki/VTech-Telecommunications/80-7305-00.Users-Manual/User-Guide-1205211-Page-44.png)

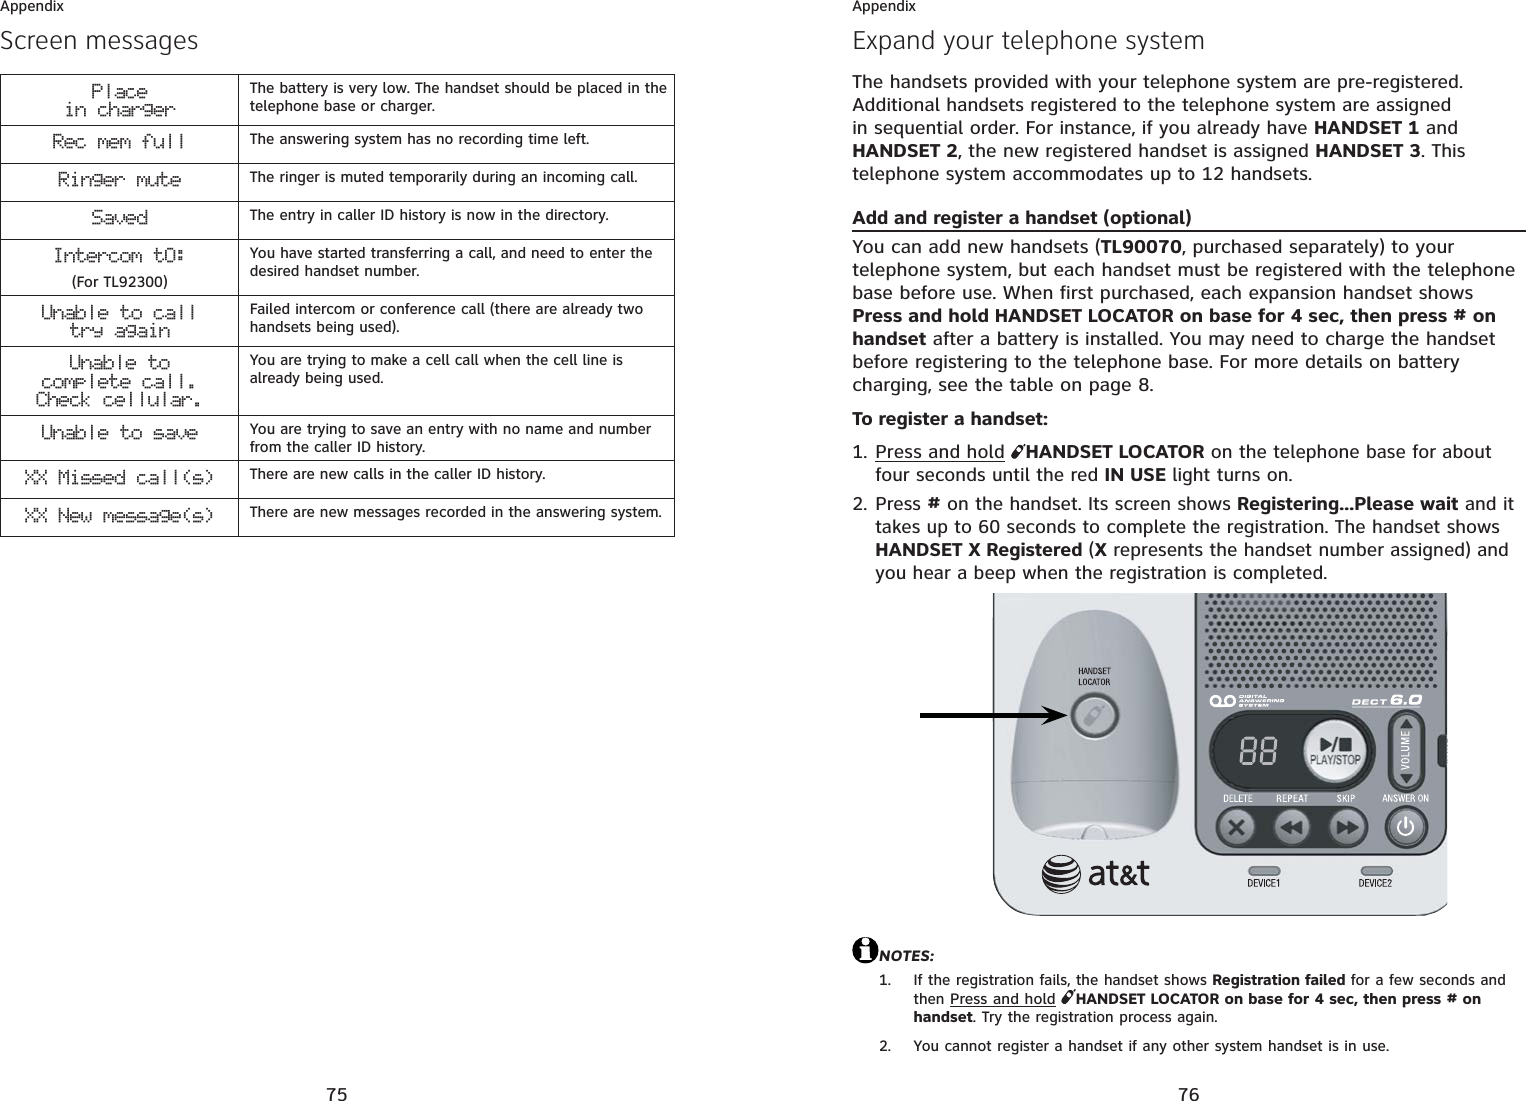
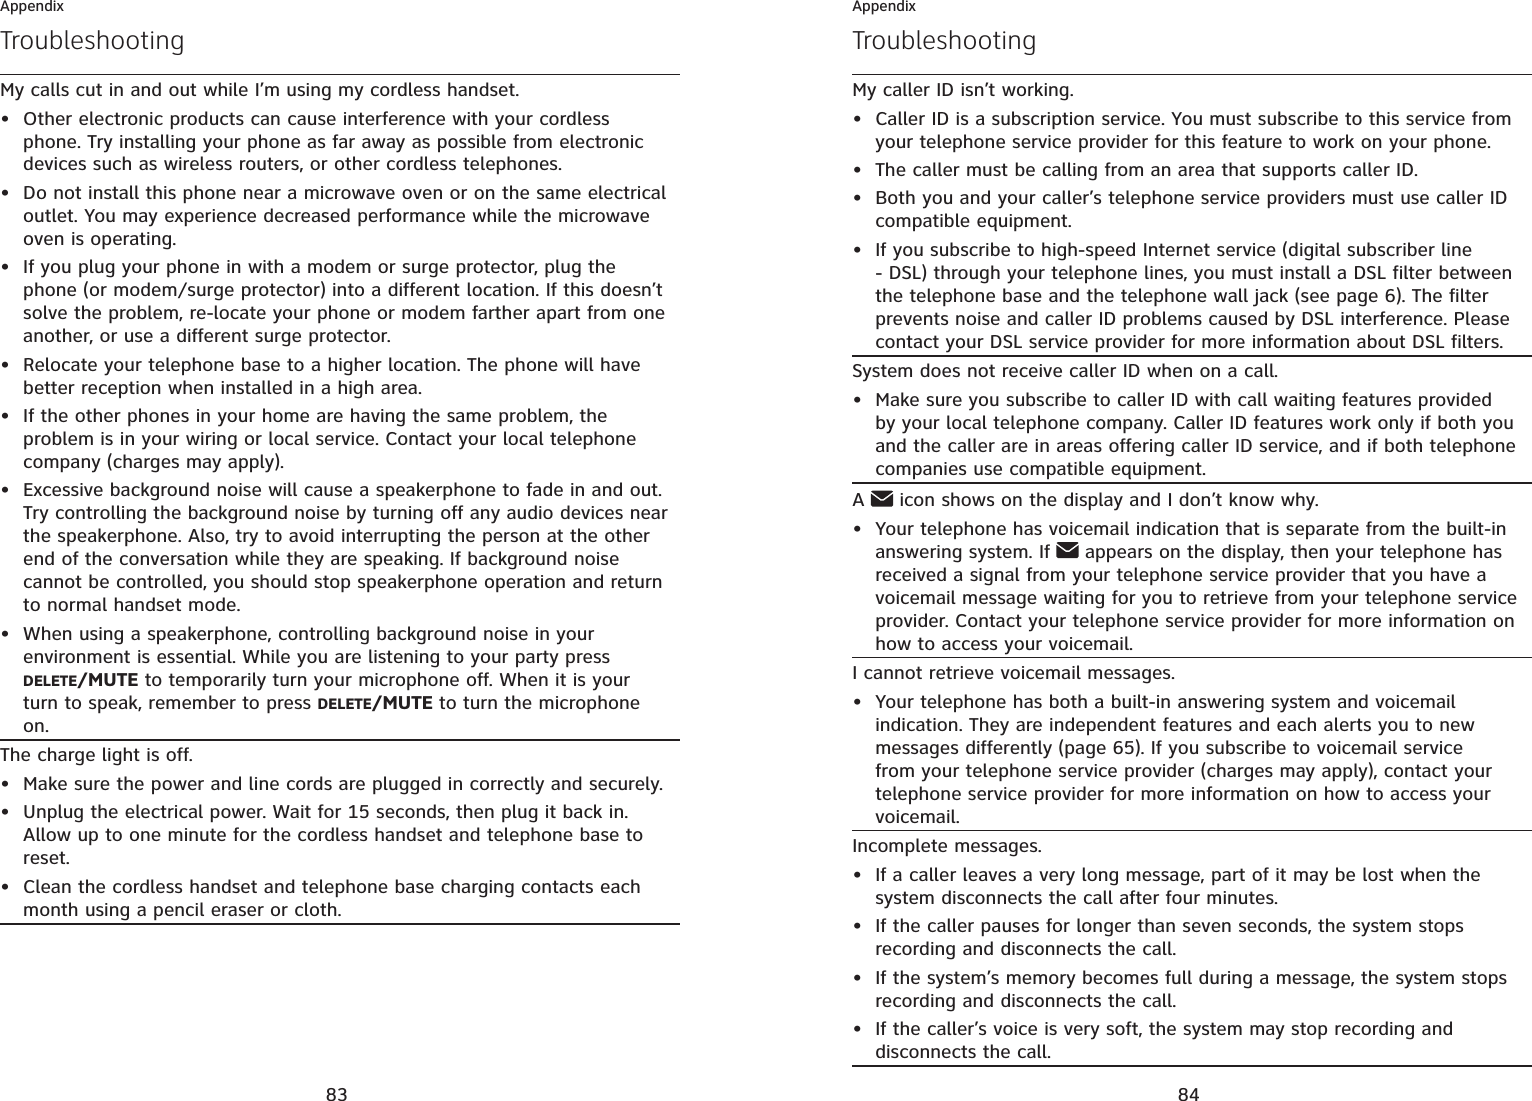
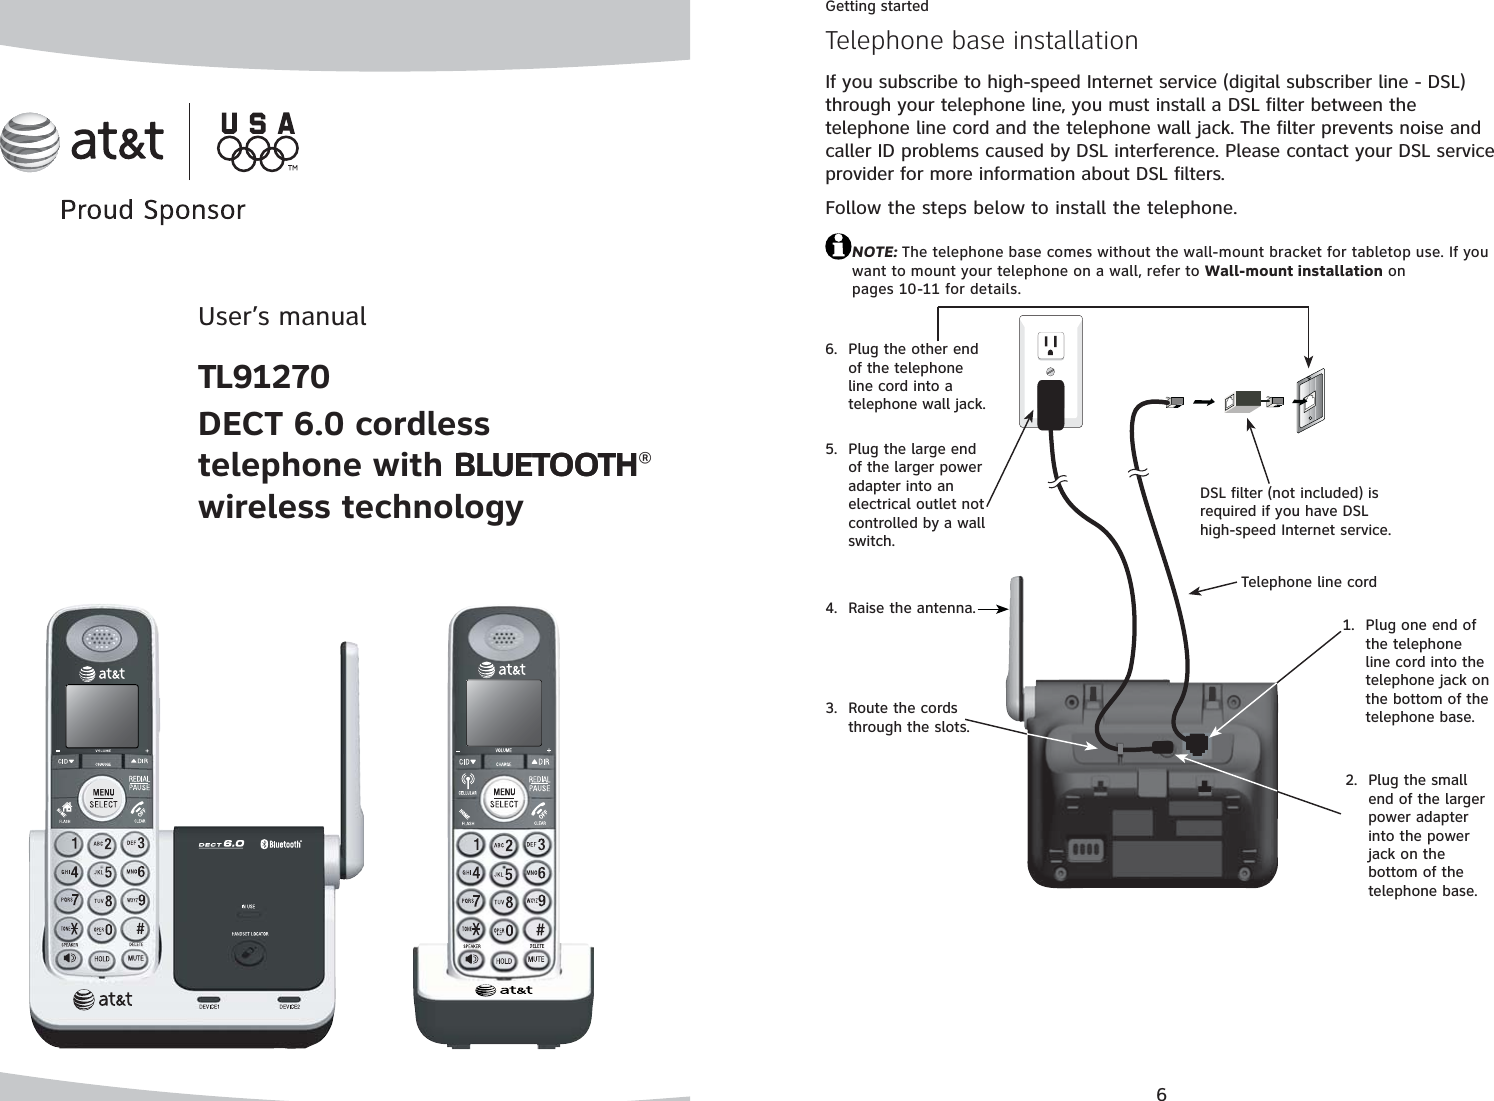
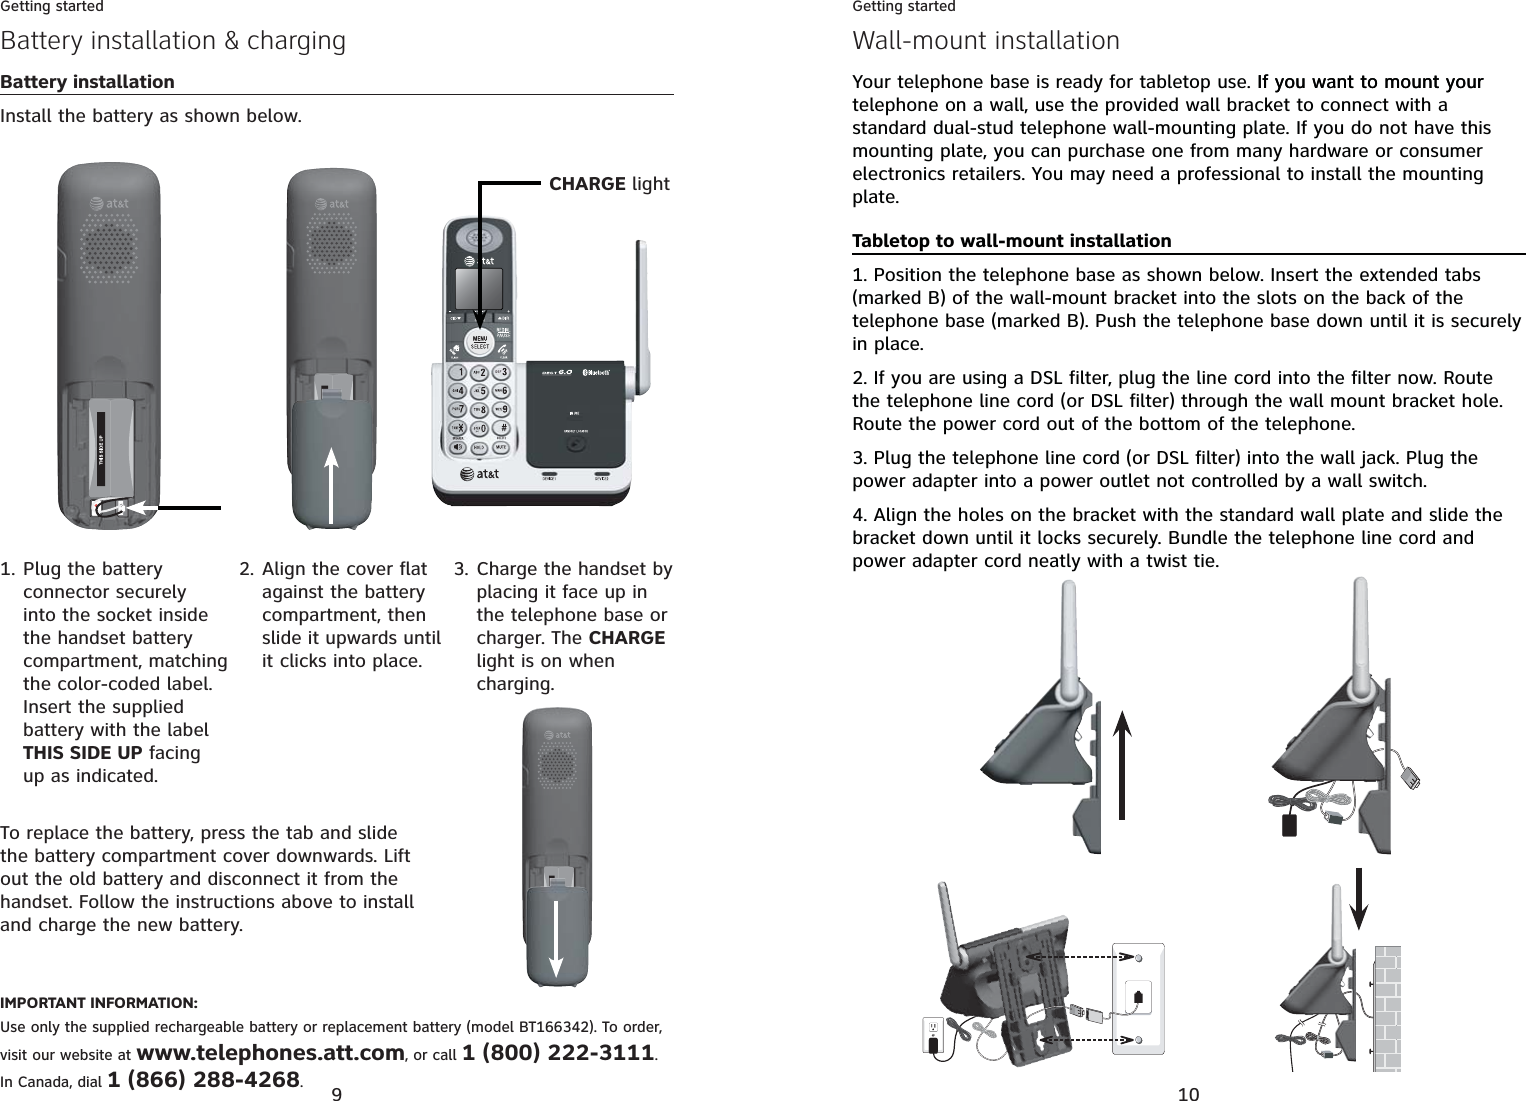
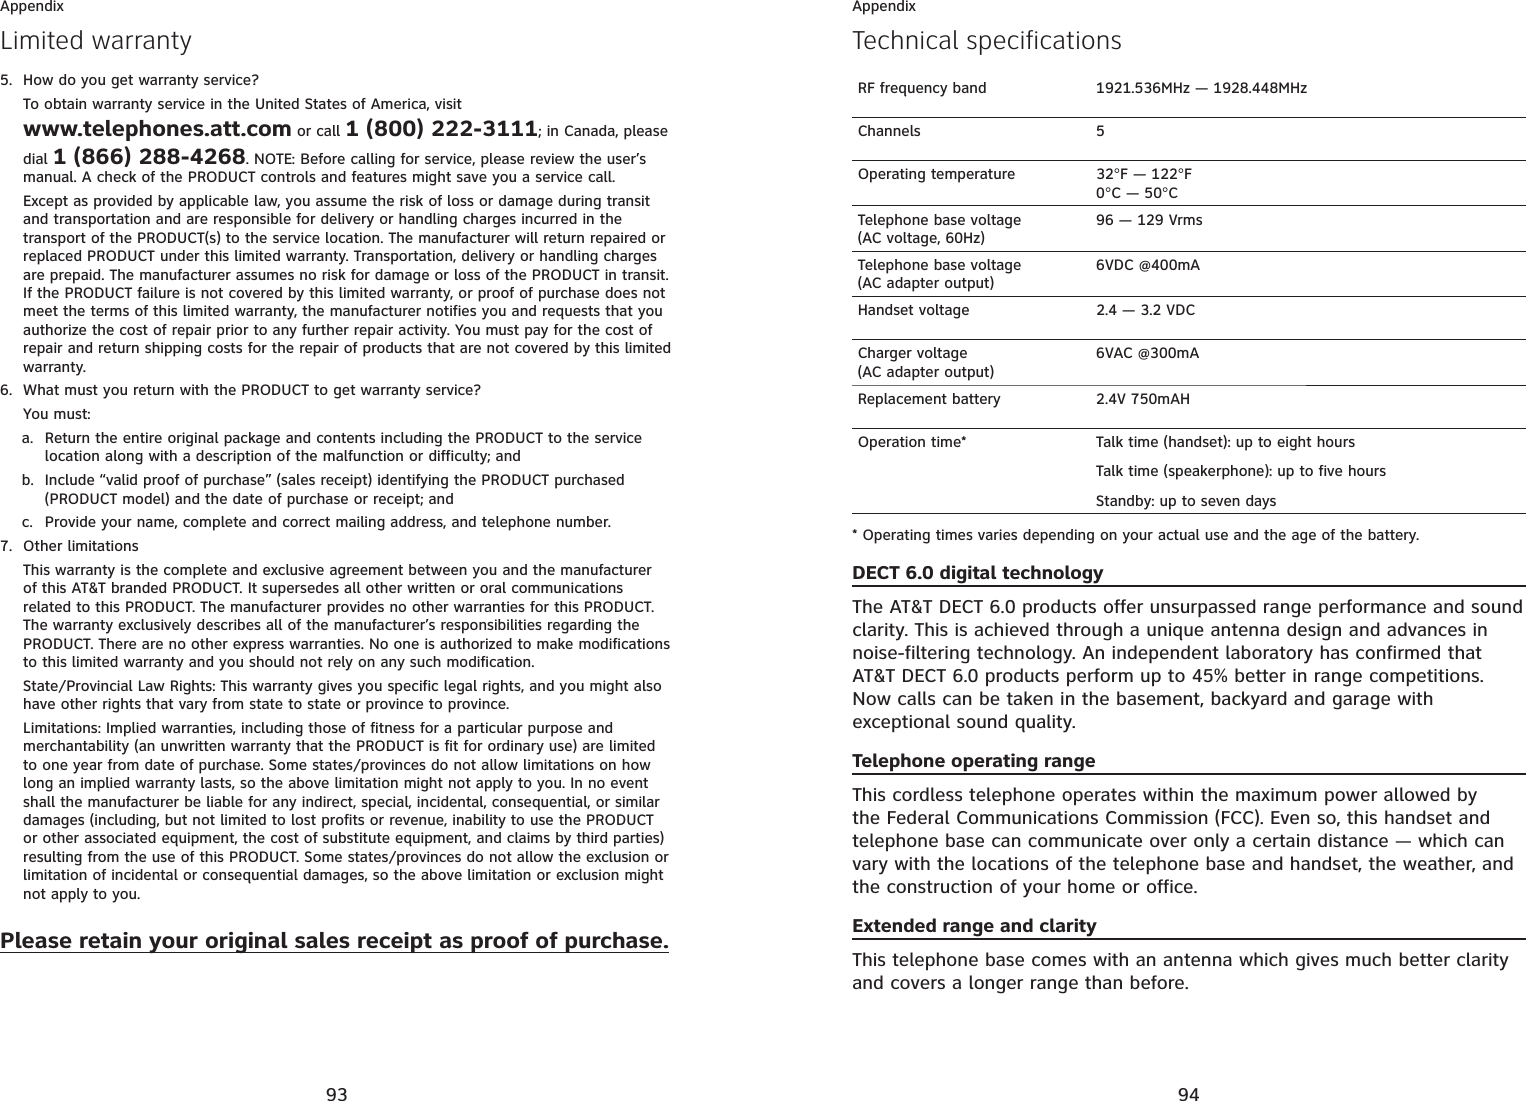
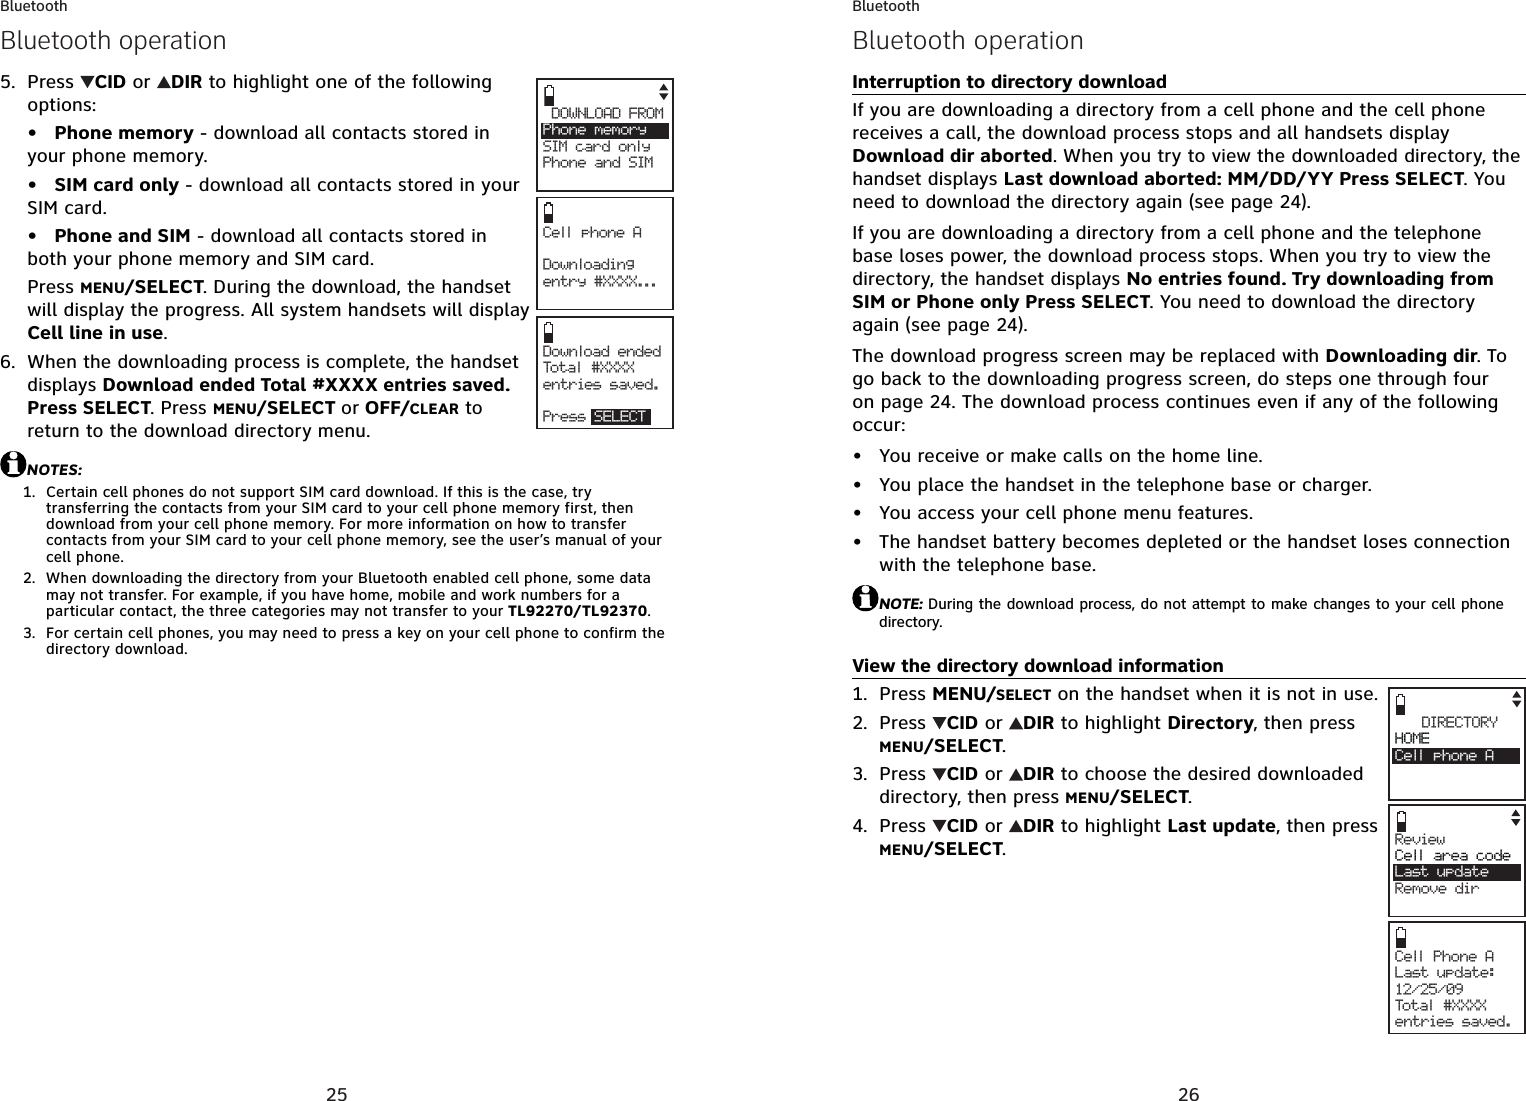
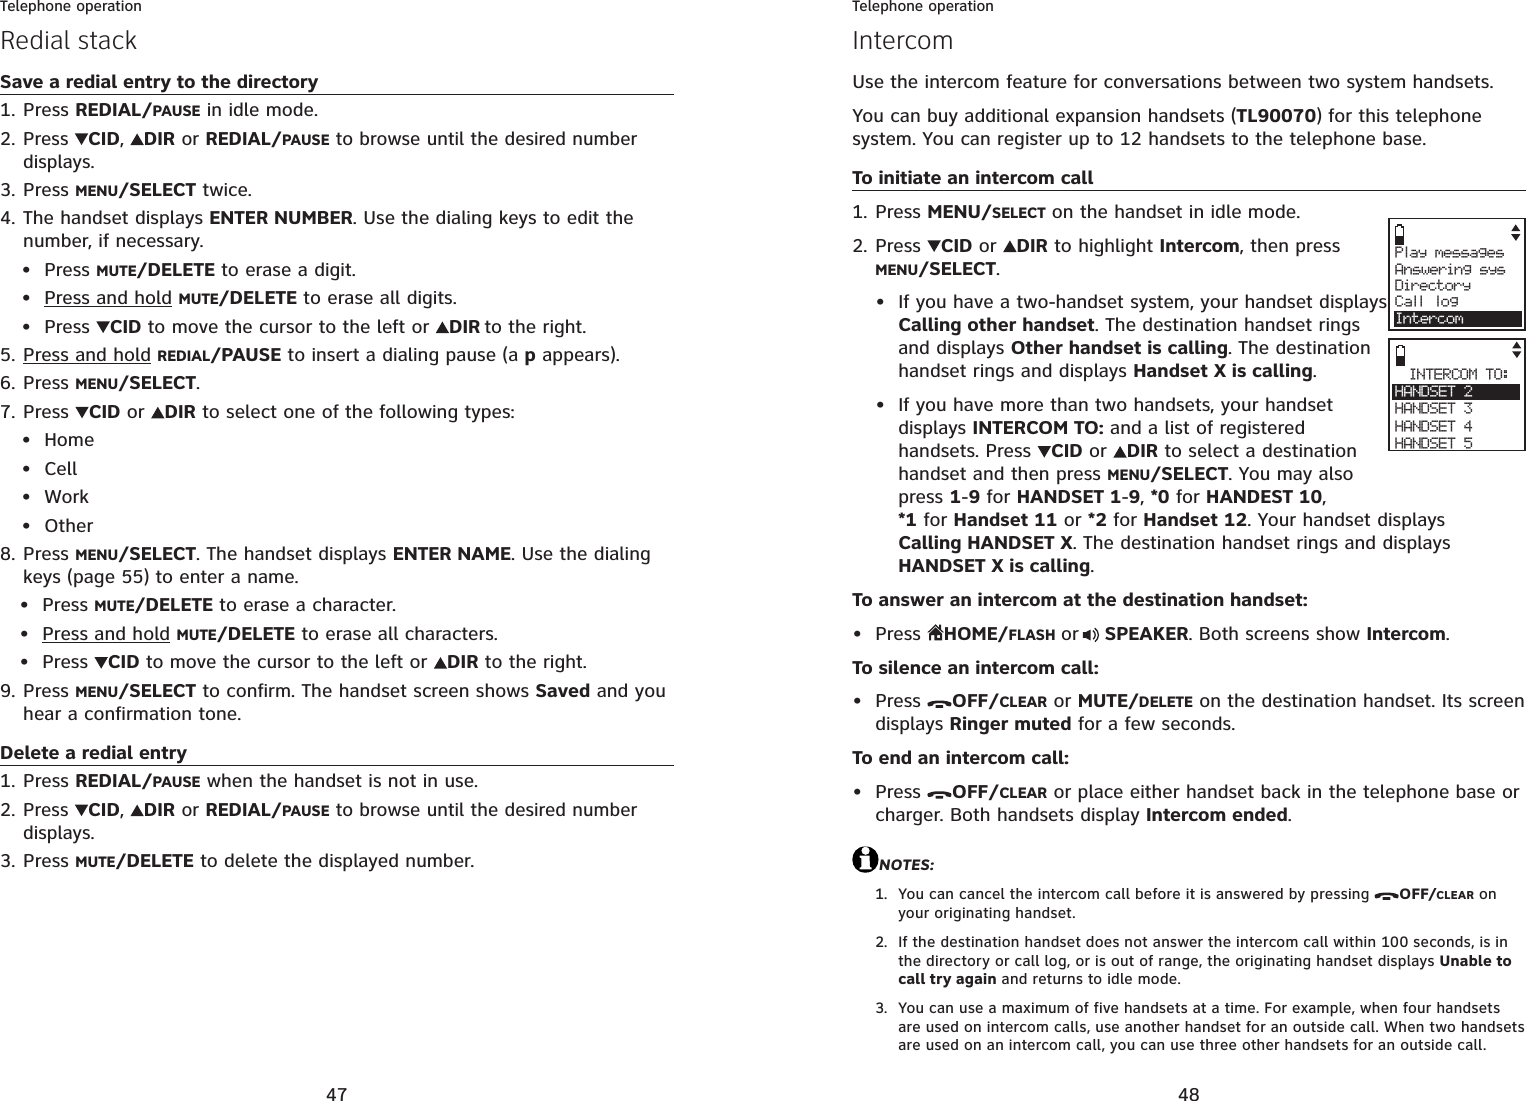
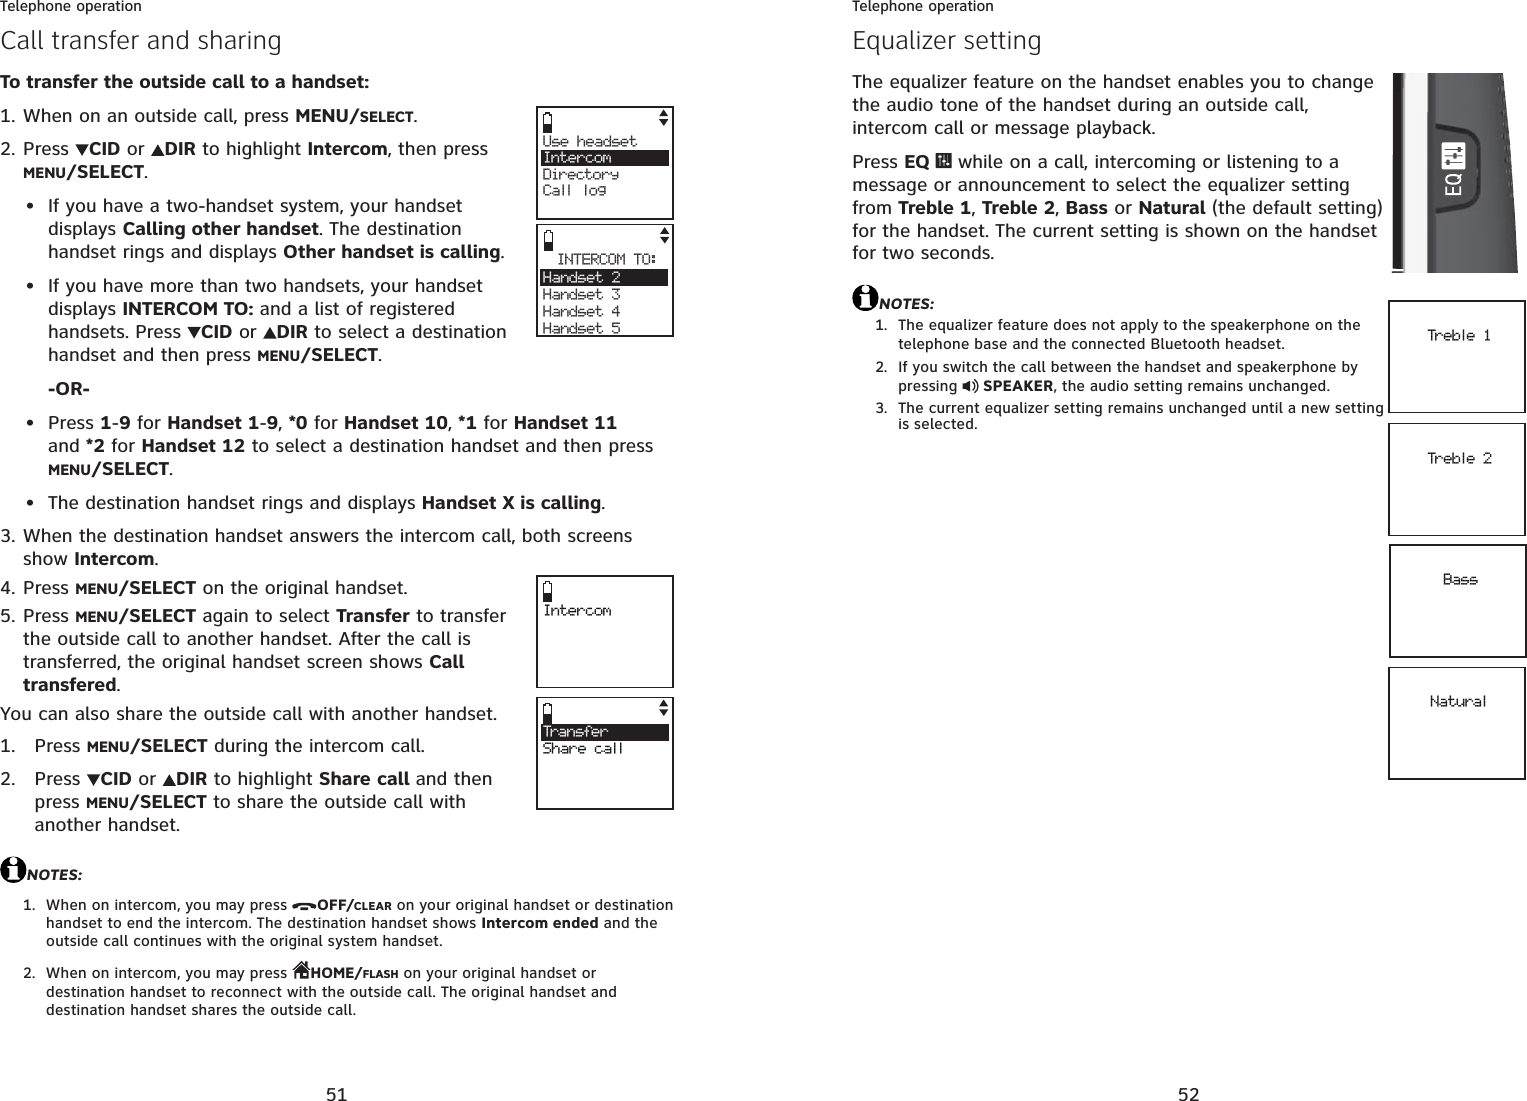
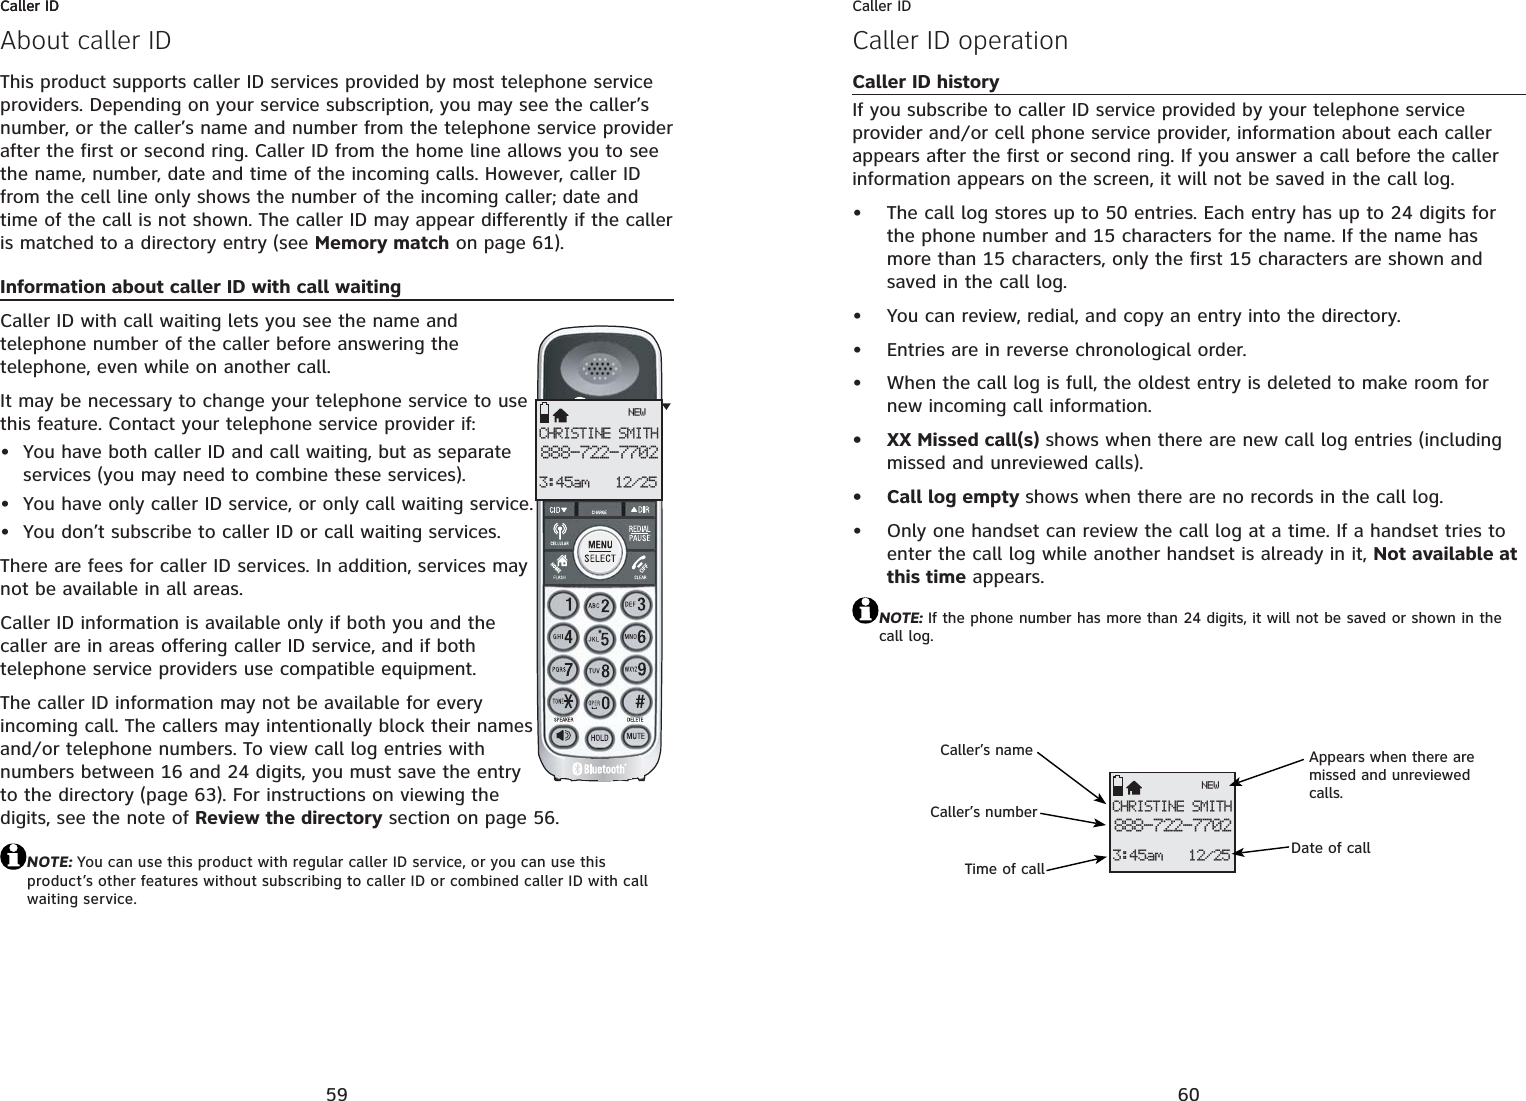
![71AppendixHandset screen iconsHOME - On steadily when the home line is in use or there is an incoming home call.12CELL line- On steadily when the cell line is in use or there is an incoming cell call.1 2 Bluetooth connected device(s) - There are Bluetooth connected devices on the active devices list.12 Bluetooth disconnected device(s)- There are Bluetooth disconnected devices on the active devices list. 12Wireless Bluetooth headset - On steadily when a wireless Bluetooth headset is in use on the home line.(flashing)Battery status - Battery Low battery; place handset in telephone base or charger to recharge.Battery status - Battery is charging.Speakerphone - The speakerphone is in use.Ringer off - The handset ringer is turned off.New voicemail - New voicemail received from the local telephone company.ANSONAnswering system on - Answering system is turned on.New answering system message - New message in the answering system.NEW New call log - Missed and unreviewed calls.MUTE Mute - Microphone is muted.Msg#[10/16] Message counter - number of messages playing.CHRISTINE SMITH888-722-77023:45am 12/2512 ANSONAppendix72AppendixHandset alert tonesTwo short beeps You are pressing DIR or CID when the volume is already at its highest or lowest setting.-OR-You have reached the end of the caller ID history.Three short beeps Out of range while the handset is on a call.Three short high-pitched beeps The telephone has completed the command successfully.Four short beeps Low battery warning.Telephone base alert tonesBeeps every 10 seconds Message alert.Alert tones and lightsHandset indicator lightsTelephone base indicator lightsCHARGE lightOn when the handset is charging in the telephone base or charger.Backlight (lighted display and dial pad)On when the handset is lifted from the telephone base or charger.On when a key is pressed. SPEAKER lightOn when the speakerphone is in use.IN USE lightOn when the handset is in use or when the answering system is answering an incoming call.Flashes when another telephone on the same line is in use.Flashes quickly when there is an incoming call. ANSWER ON lightOn when the answering system is on.](https://usermanual.wiki/VTech-Telecommunications/80-7305-00.Users-Manual/User-Guide-1205211-Page-46.png)