VTech Telecommunications 80-7719-00 1.9GHz Cordless Phone User Manual CS6114 revised
VTech Telecommunications Ltd 1.9GHz Cordless Phone CS6114 revised
UserManual.wiki
>
VTech Telecommunications
>
80 7719 00 User Manual
manual
Navigation menu
Upload a User Manual
Namespaces
Wiki Guide
HTML
PDF
Info
Views
User Manual
Discussion / Help
Navigation


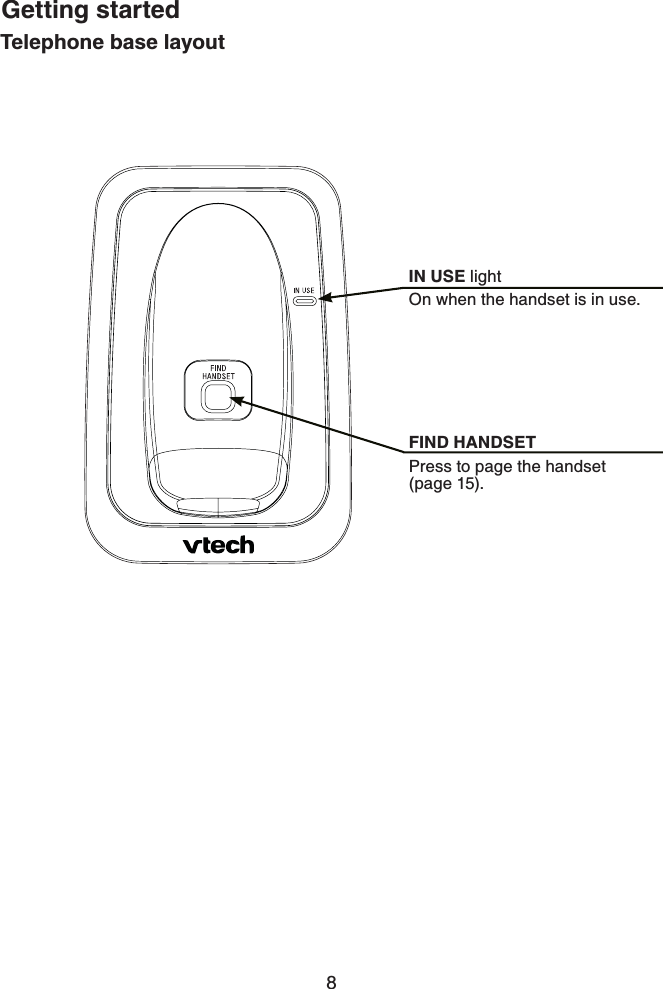

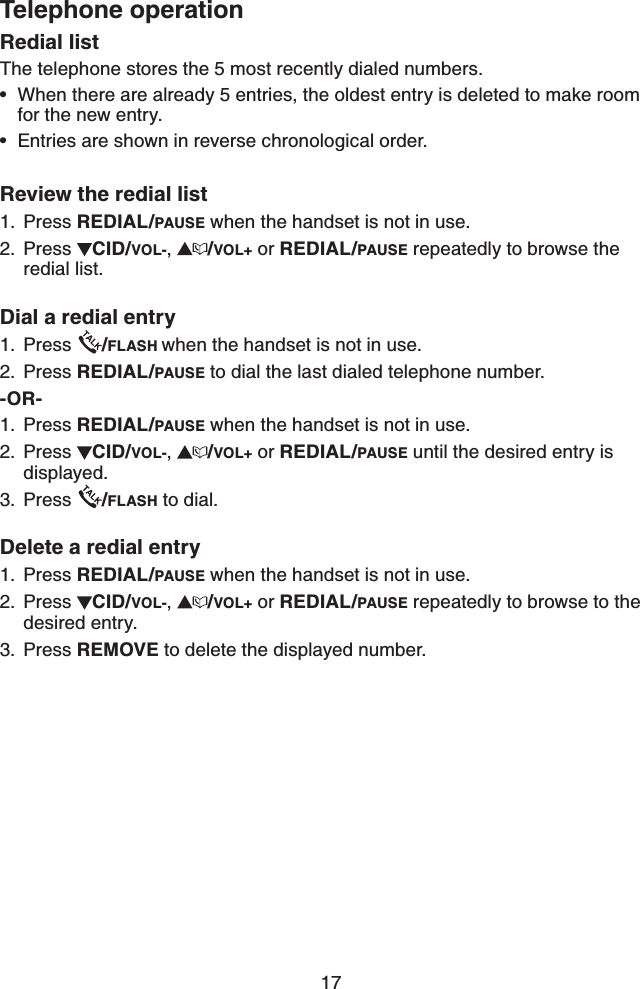

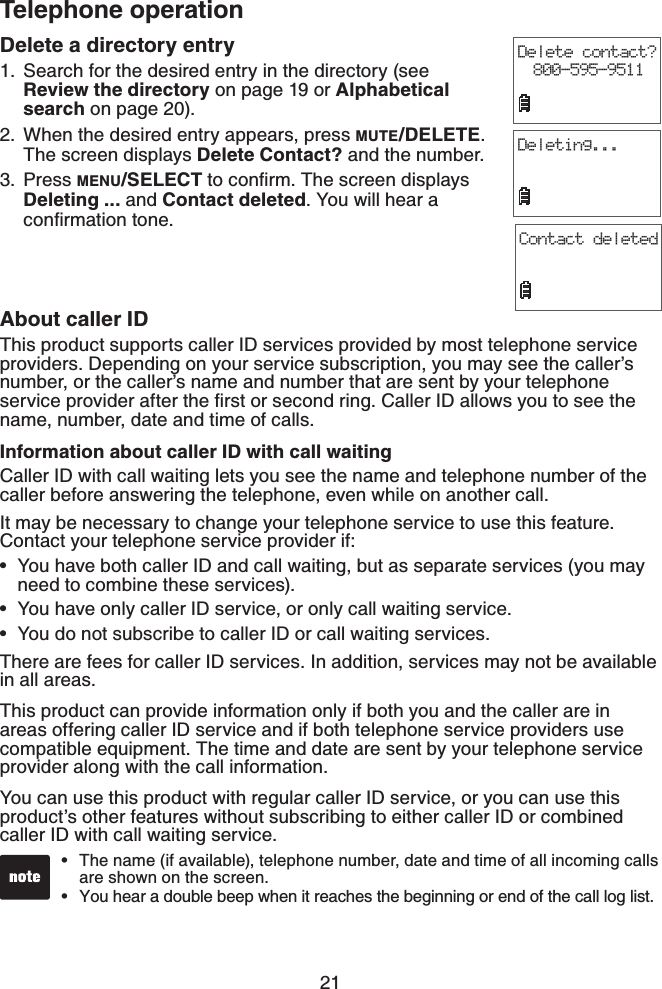
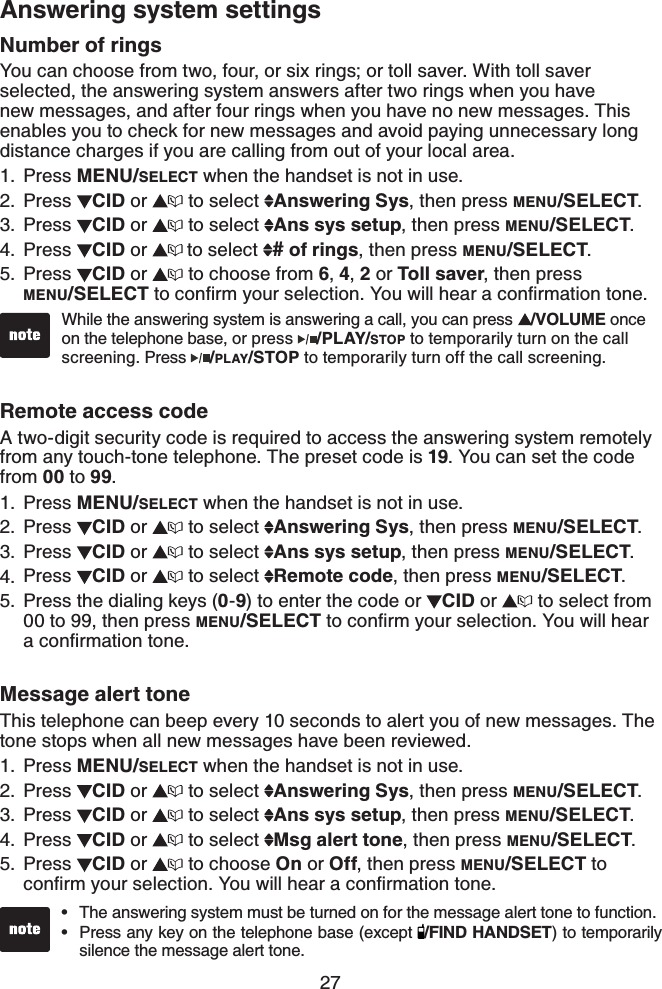
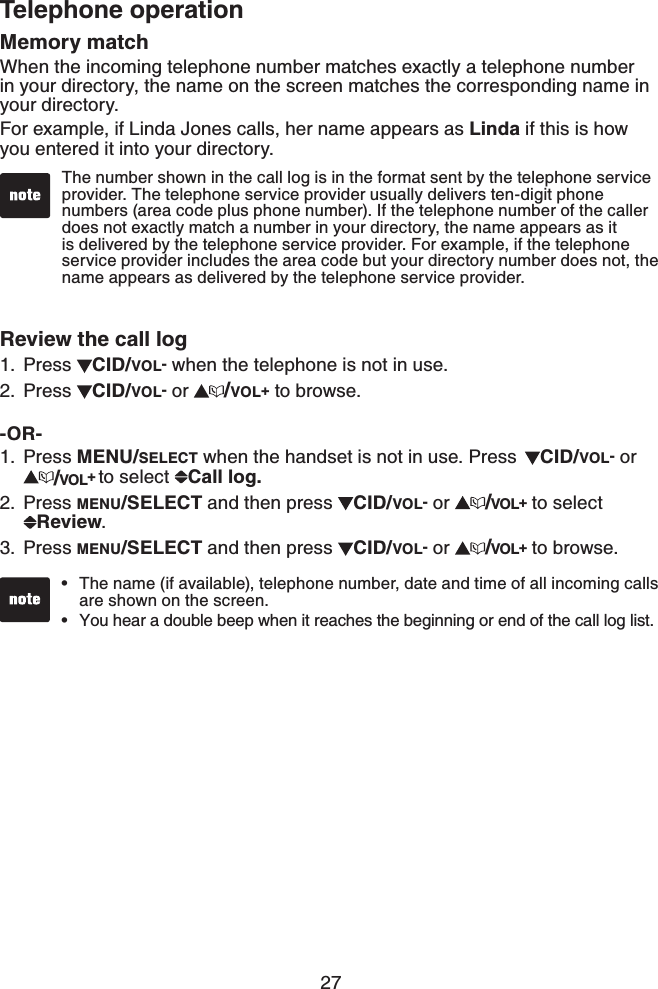
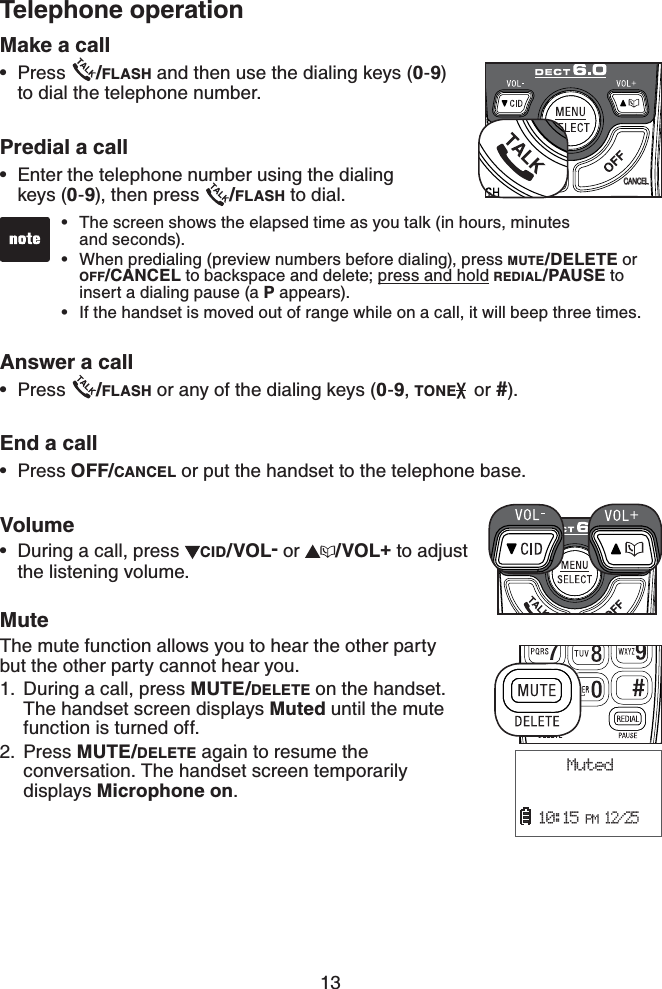
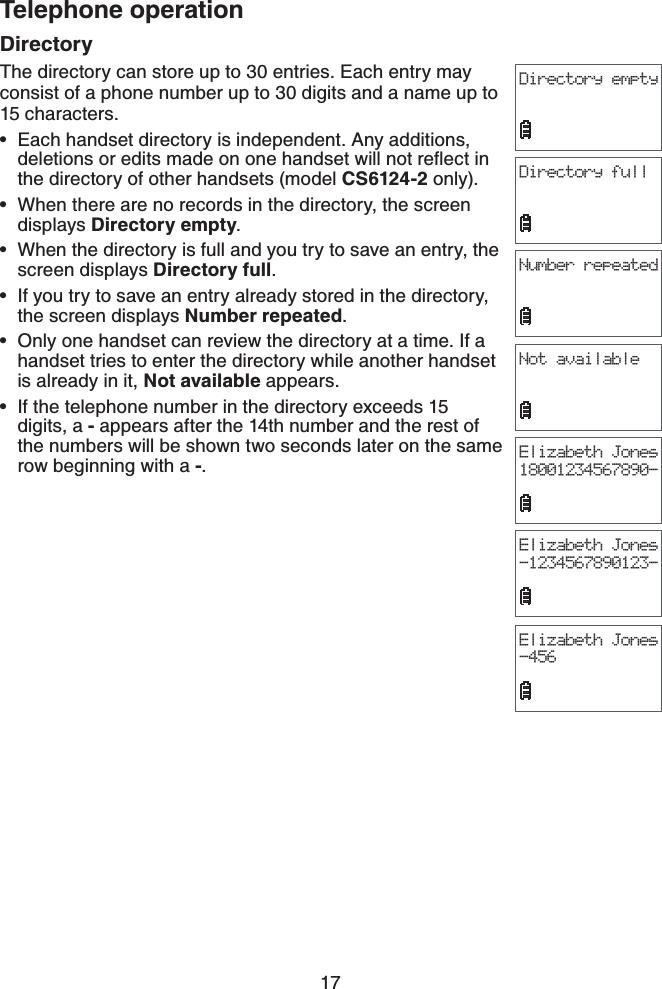
![21Telephone operationReview the directoryEntries are sorted alphabetically. To search the directory:Press /VOL+ when the handset is not in use. The screen displays Directory. -OR- Press MENU/SELECT when the handset is not in use. Press CID/VOL- or /VOL+ to select Directory.Press MENU/SELECT and then press CID/VOL- or /VOL+ to select Review.Press MENU/SELECT and then press CID/VOL- or /VOL+ to browse.Alphabetical searchTo start an alphabetical search:Follow the steps in Review the directory above to enter the directory.Use the dialing keys to enter the letters associated with the name. For example, if you have entries for Jenny, Jessie, Kristen and Laura in your directory, press 5 (JKL) once to see Jenny, twice to see Kristen (if you have more than one stored entry beginning with the same letter, in this case ,GPP[CPF,GUUKGYKVJVJGſTUVGPVT[FKURNC[GF=Jenny], press /VOL+to view all other entries beginning with that letter), or three times to see Laura.If there is no name entry matching your search, the next closest match in alphabetical order appears. If necessary, press CID/VOL- or /VOL+ on the handset to browse.Dial a directory entrySearch for the desired entry in the directory (see Review the directory or Alphabetical search above). When the desired entry appears, press /FLASH to dial.1.2.3.1.2.1.2.Mike Smith800-595-9511REVIEW](https://usermanual.wiki/VTech-Telecommunications/80-7719-00/User-Guide-1507773-Page-24.png)
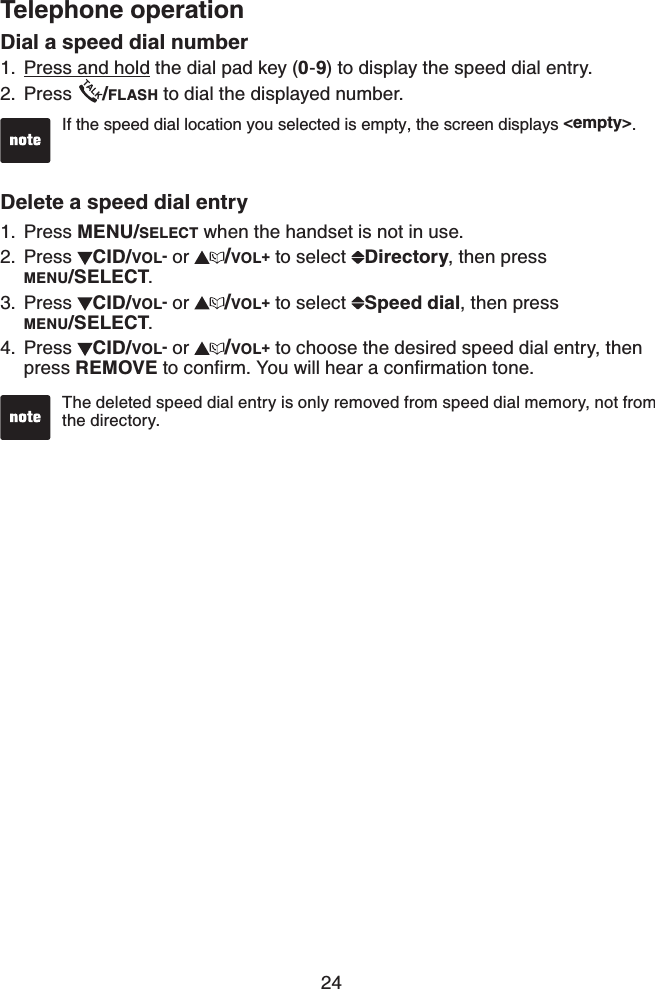
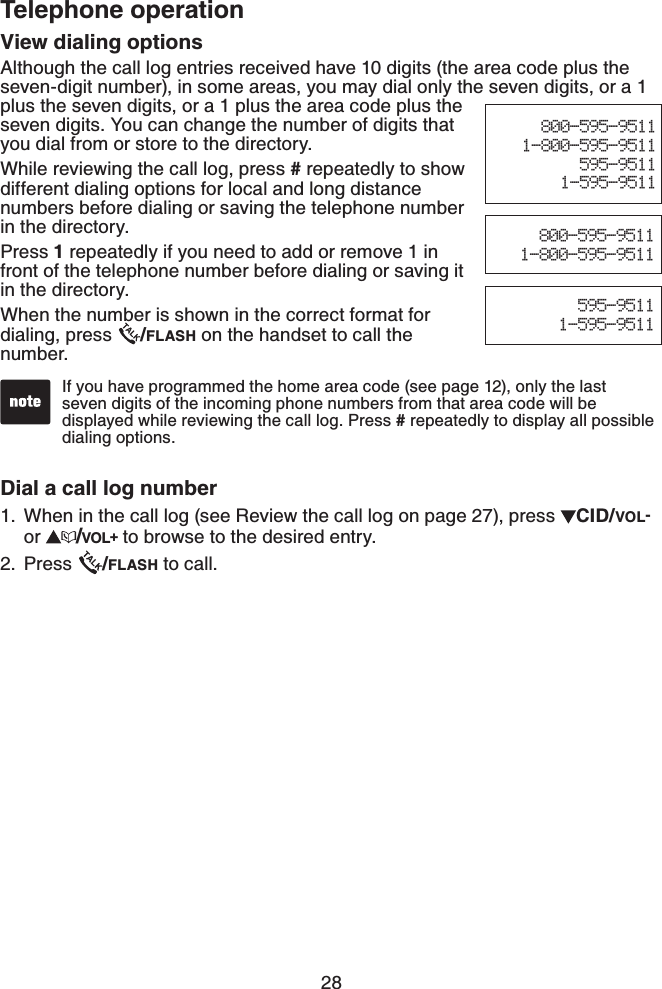


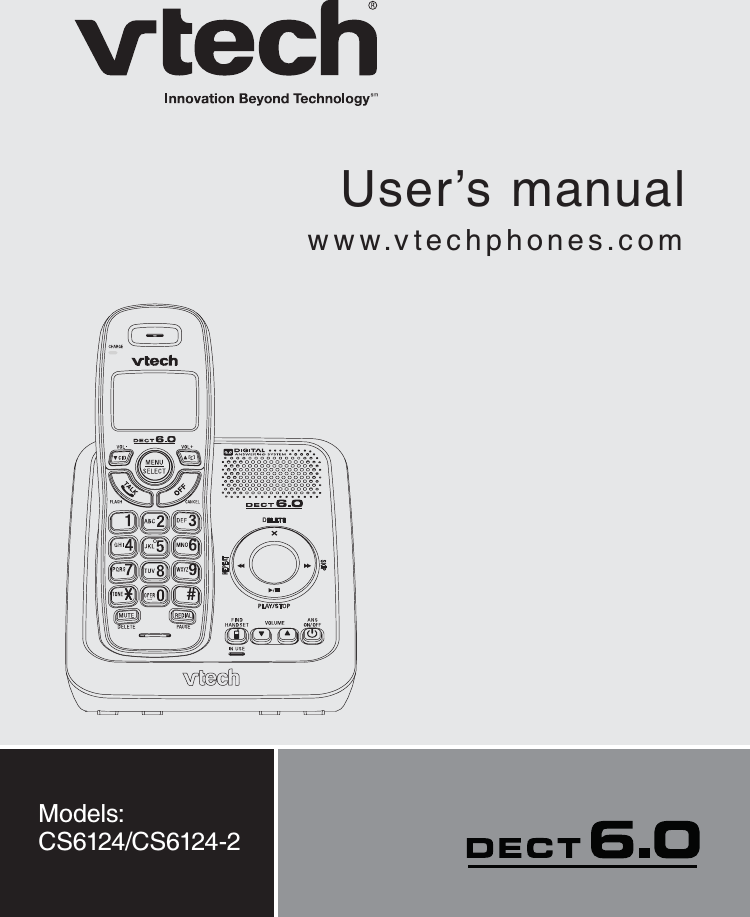
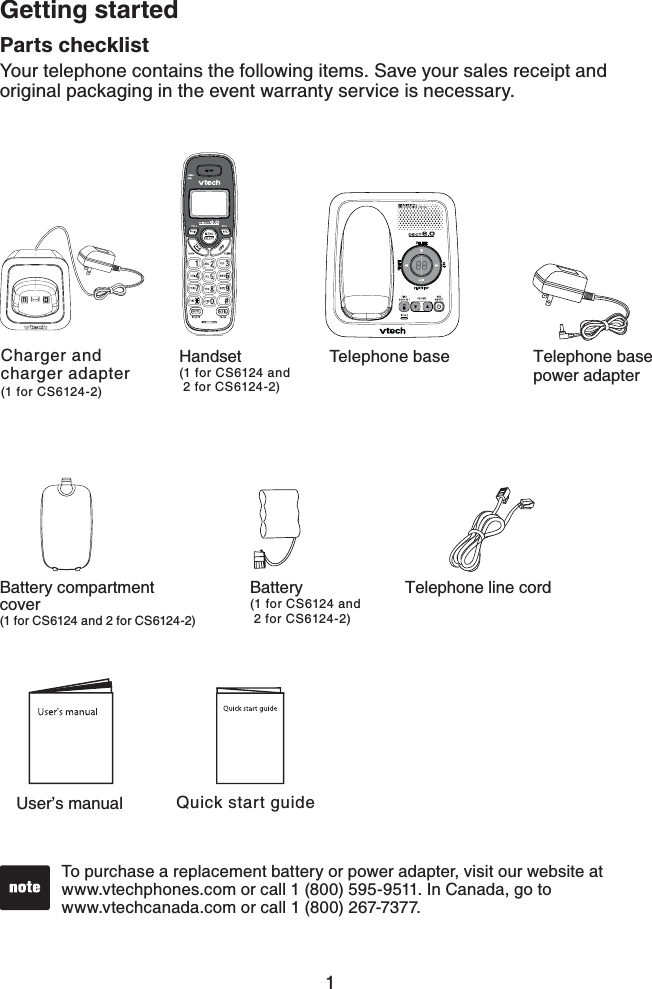
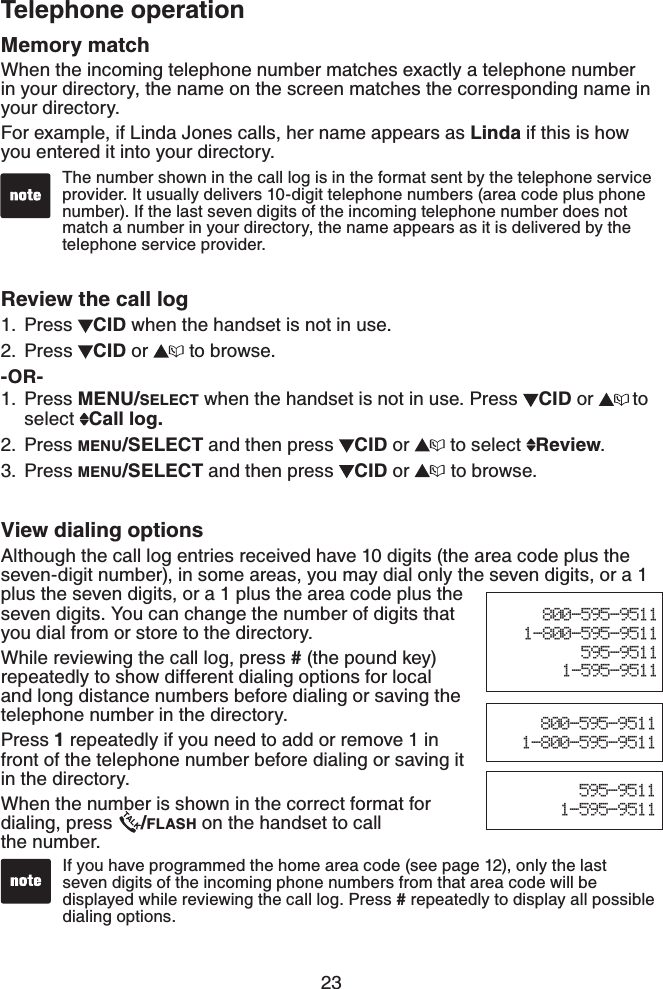
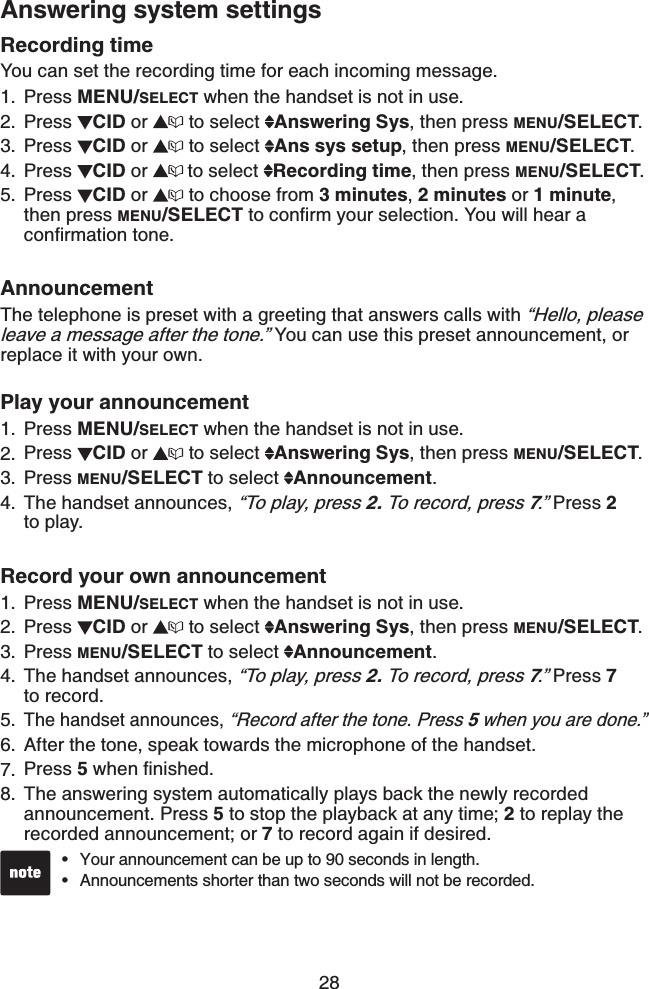
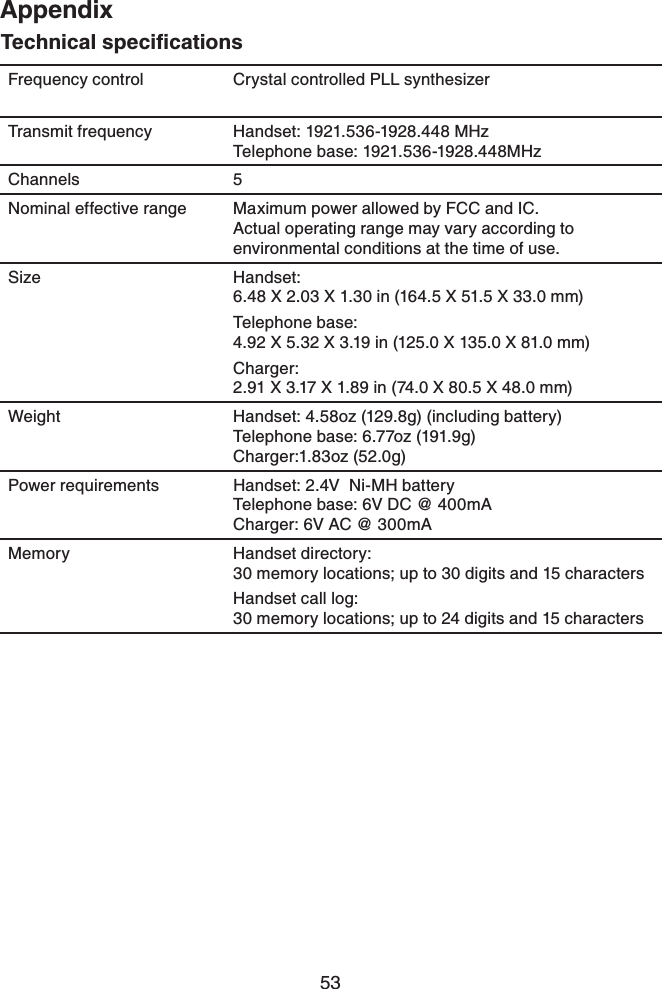
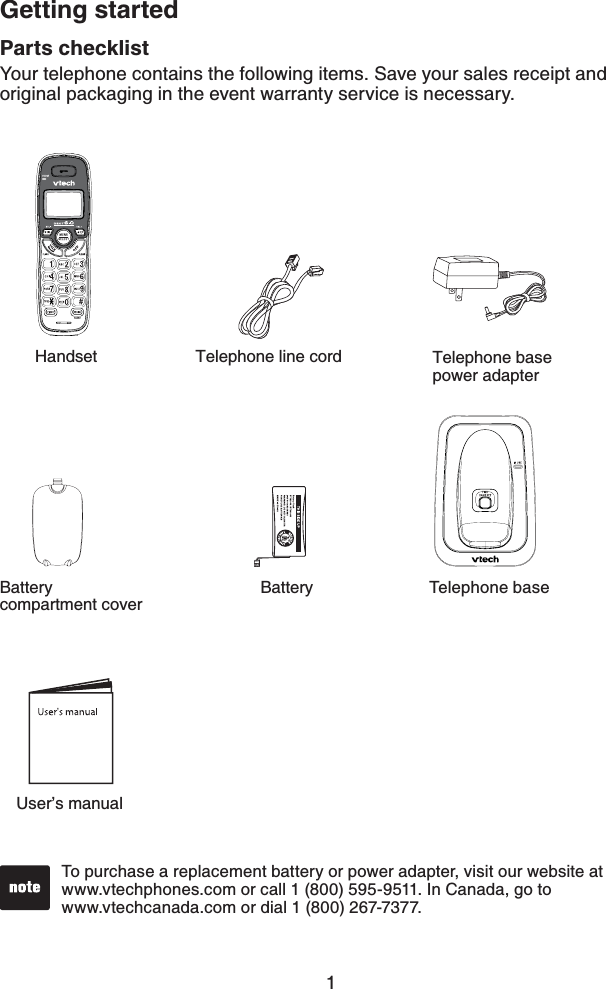
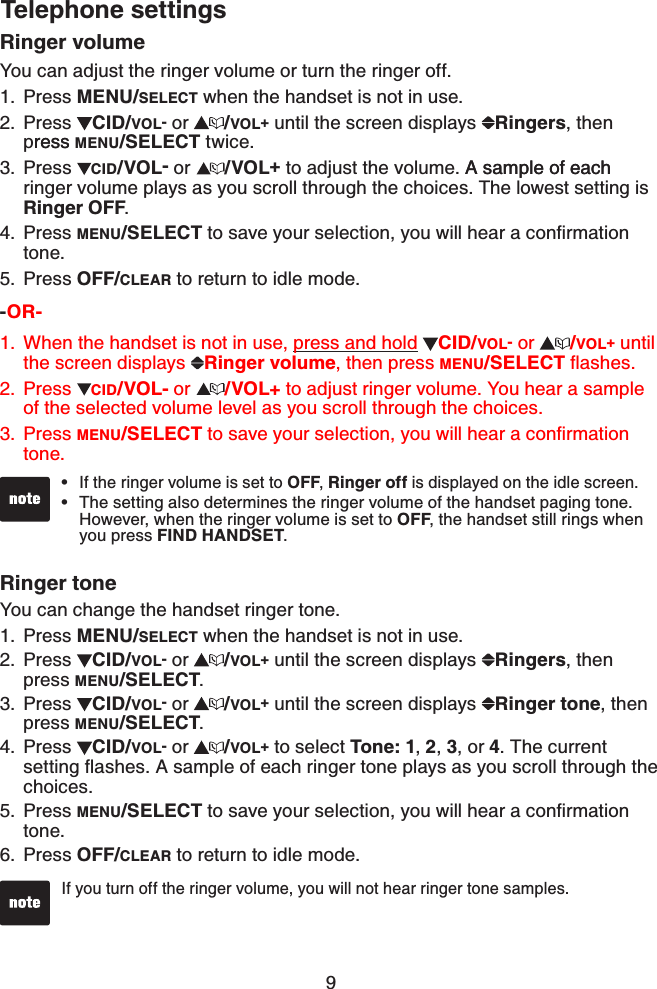
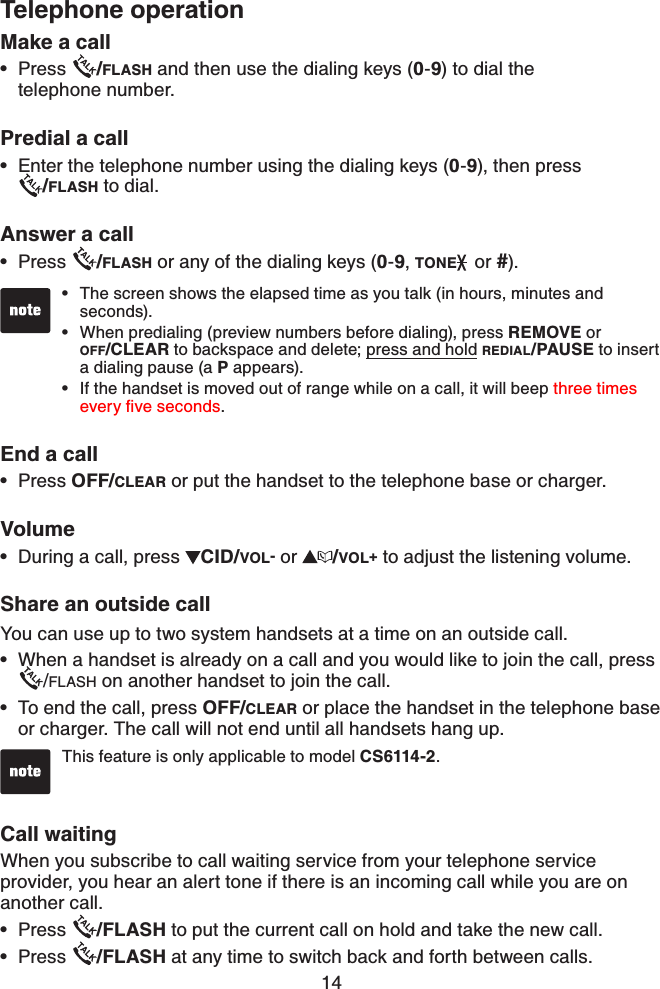
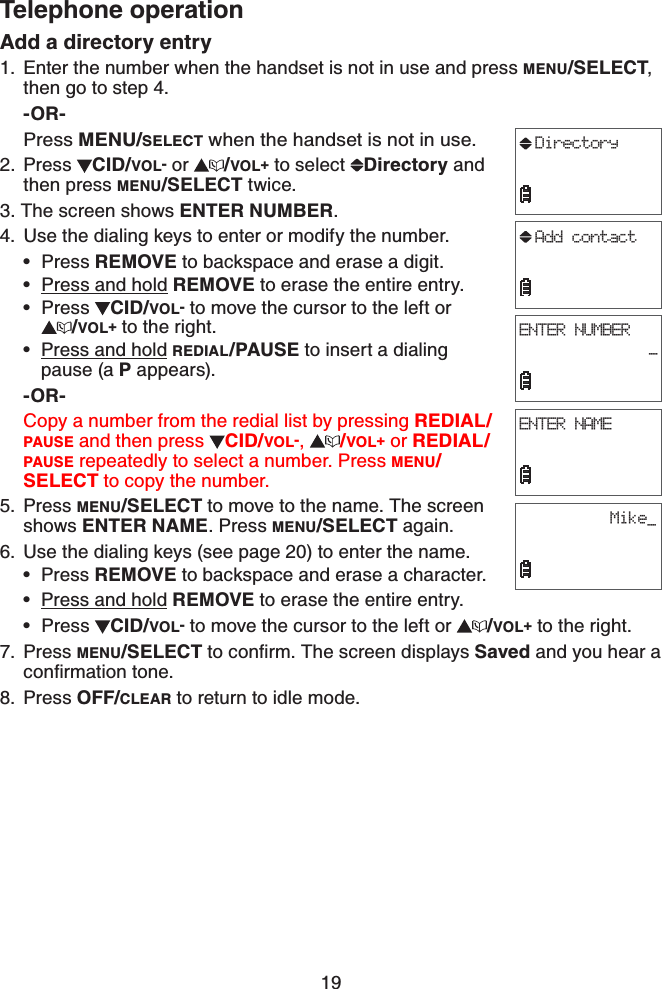
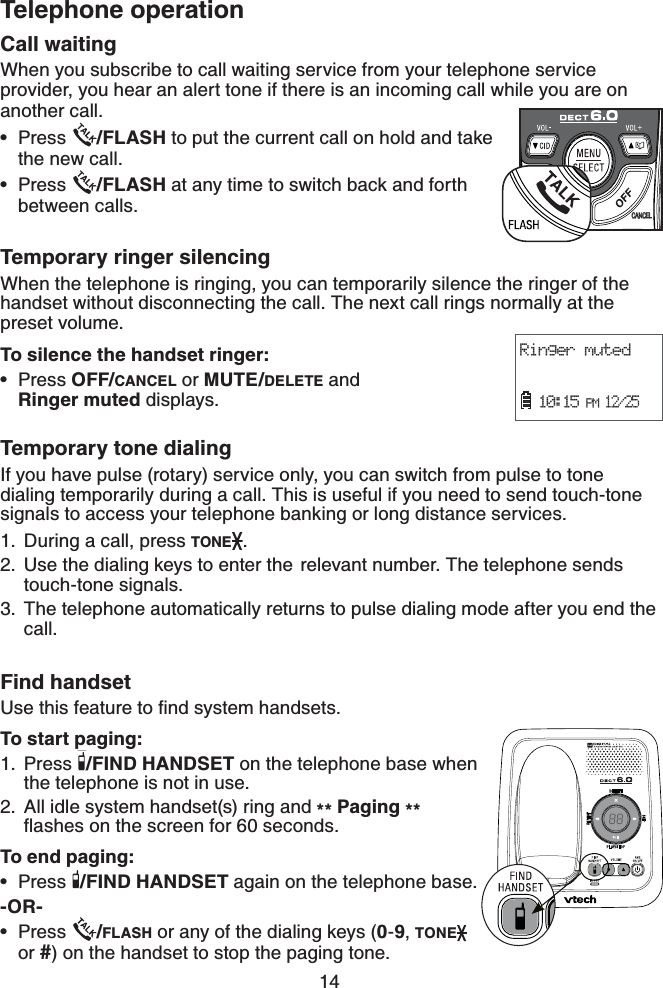
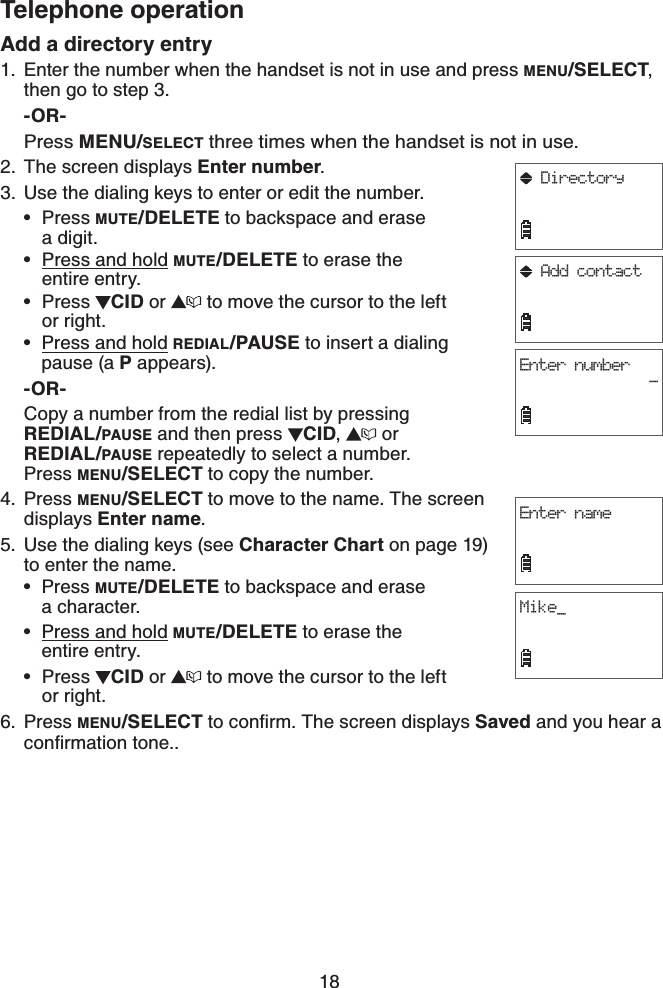
![3Getting startedWall mountingYour telephone comes ready for tabletop use. If you prefer to mount your telephone on the wall (optional), it is designed to mount on a standard telephone wall plate.You can mount the telephone base on the wall by positioning the top hole at the back of the telephone base against the top mounting stud [A]. Then slide the telephone base down on the mounting studs [A] and [B] until it locks into place.Telephone baseMountingstuds[A][B]](https://usermanual.wiki/VTech-Telecommunications/80-7719-00/User-Guide-1507773-Page-59.png)
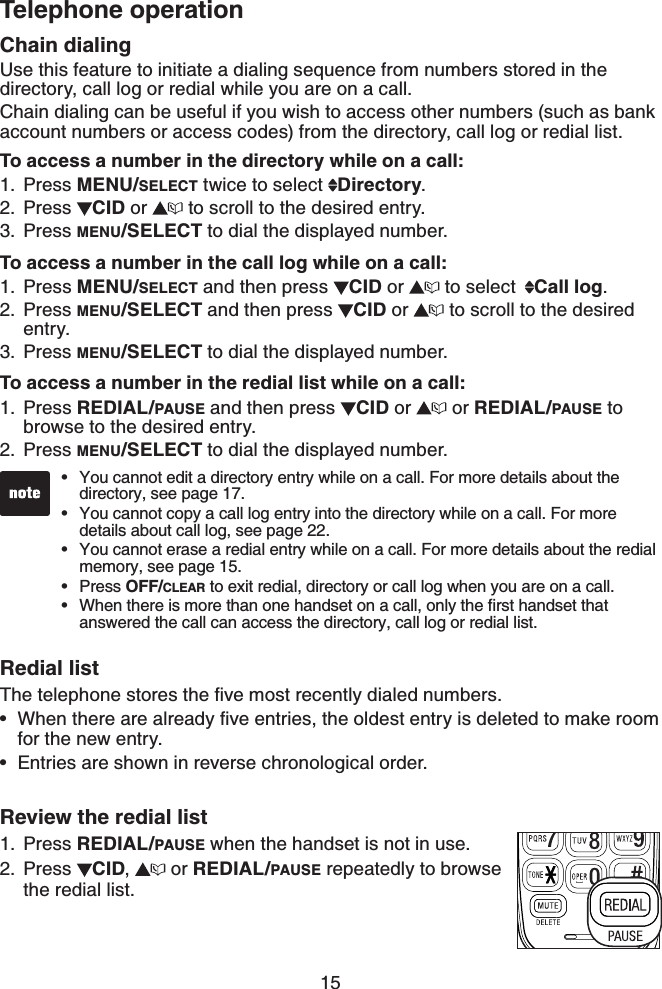
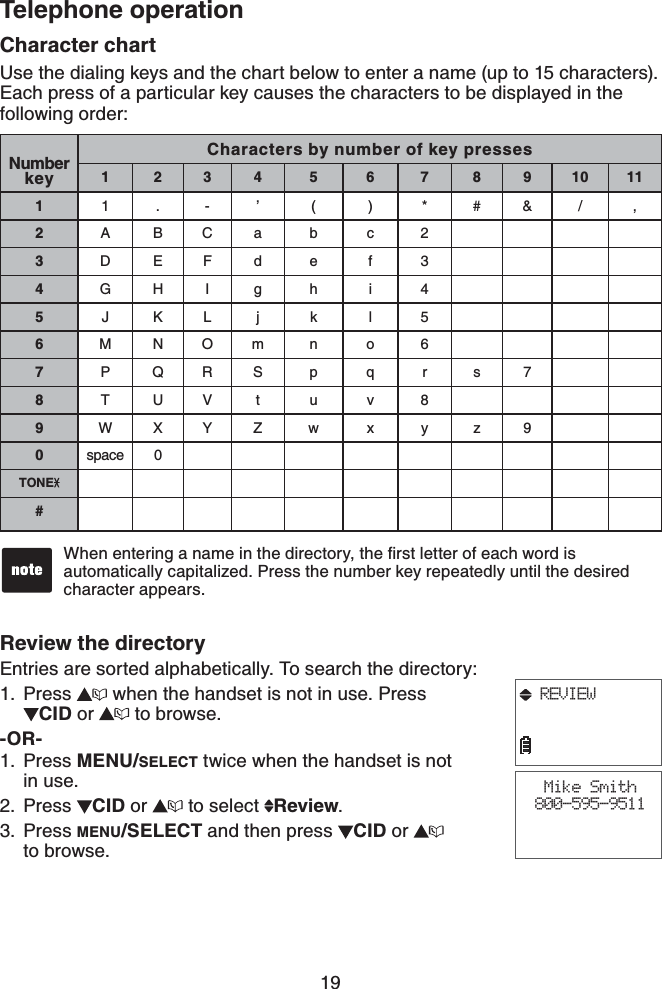
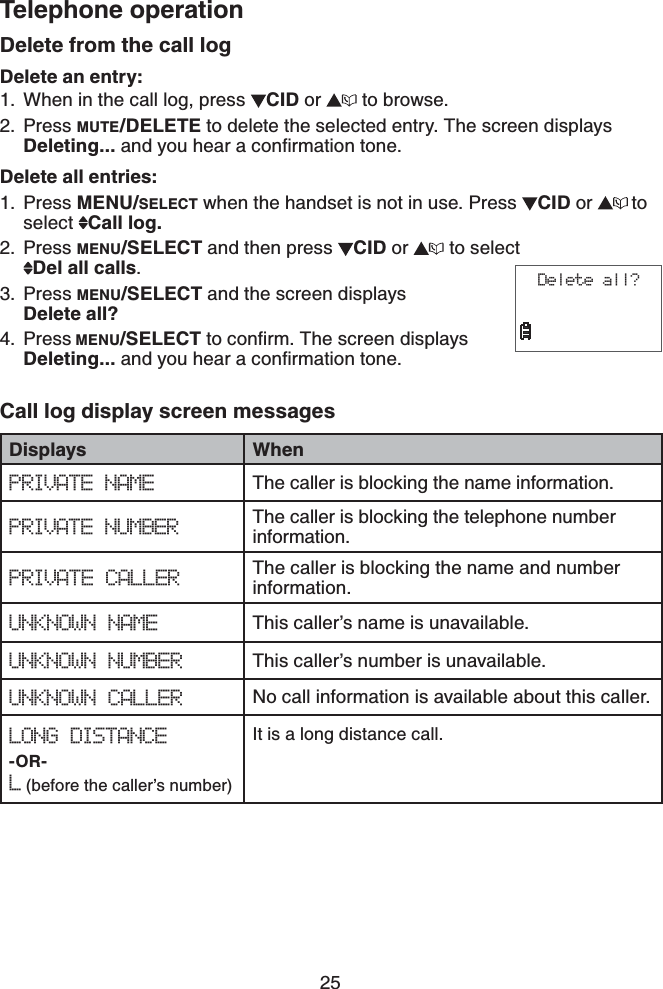
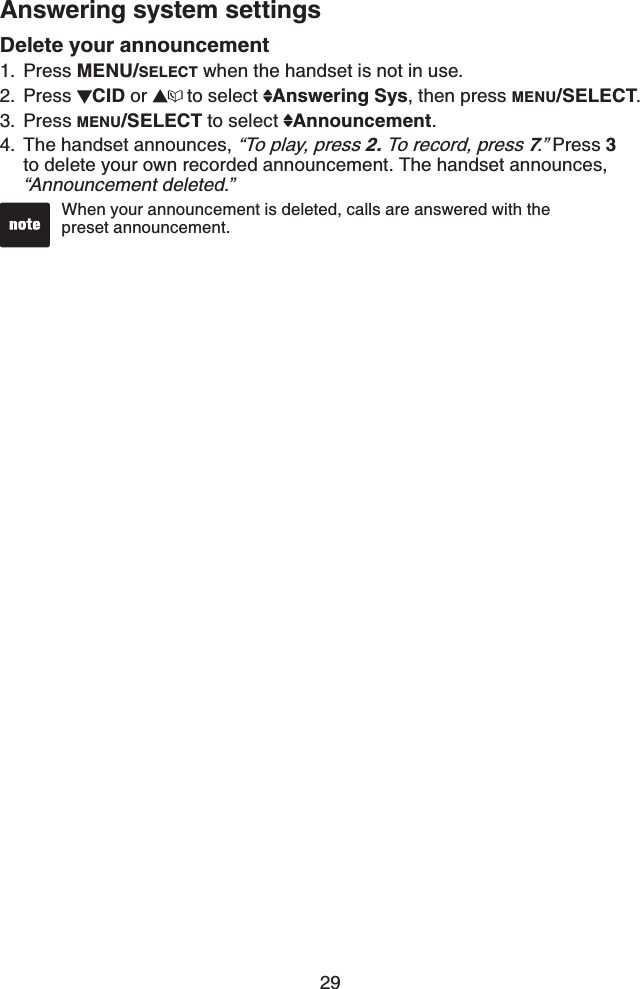
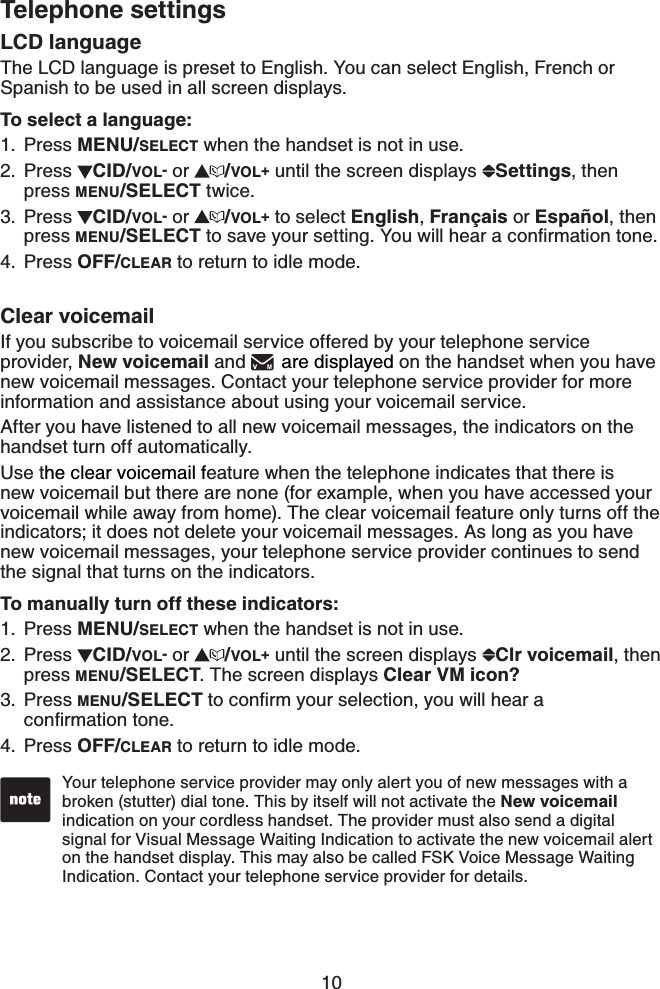
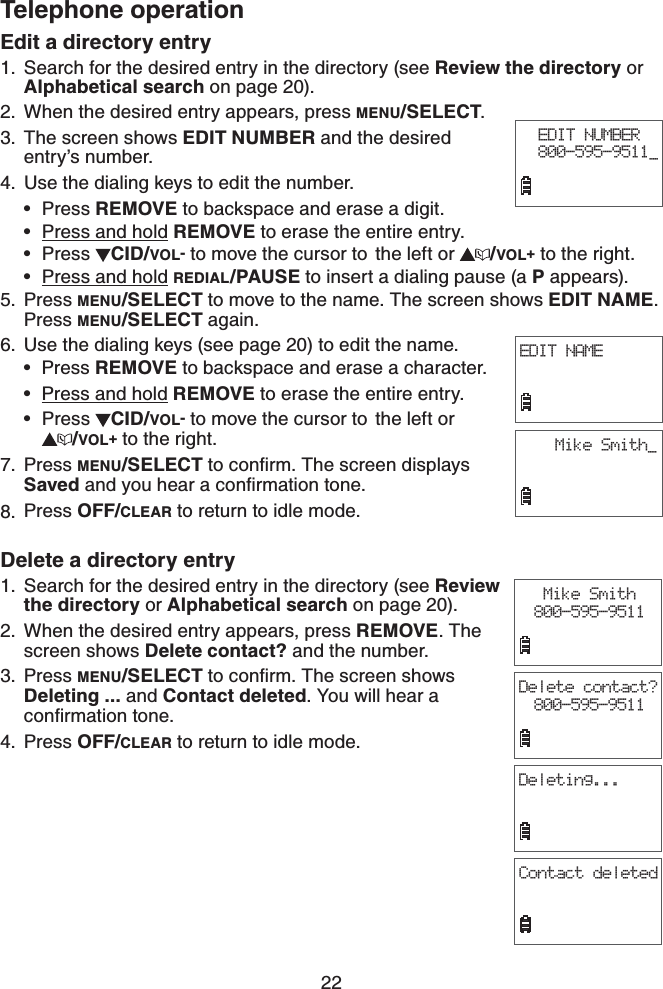
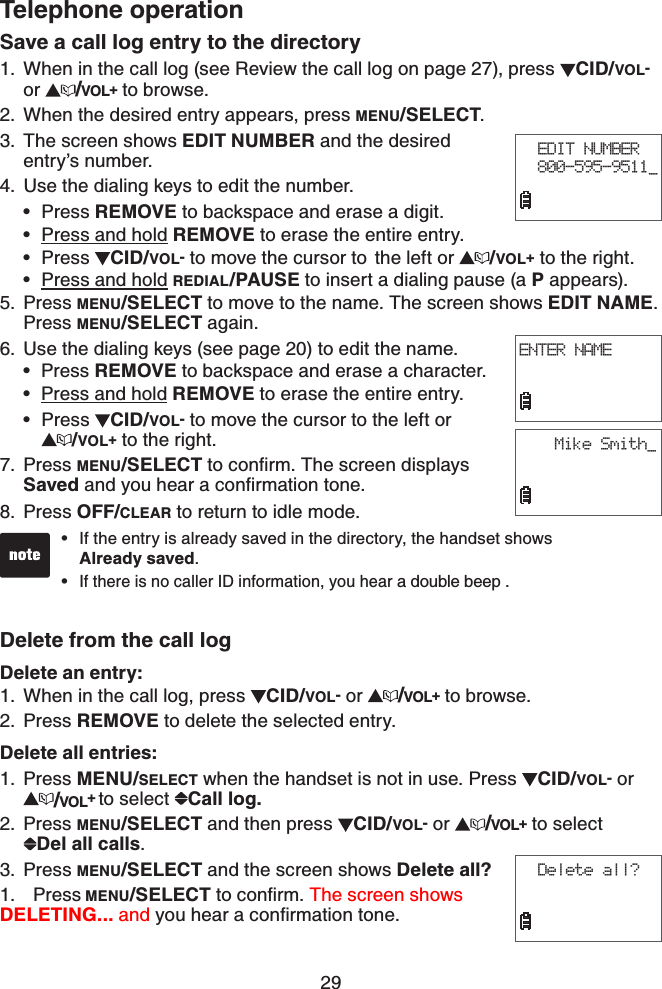
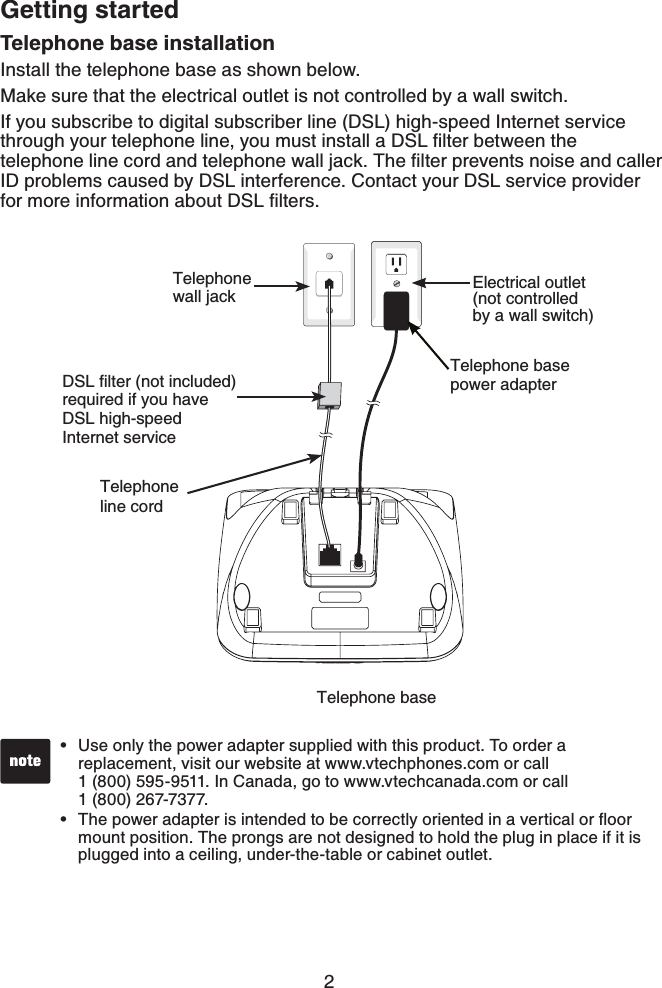
![20Telephone operationAlphabetical searchTo start an alphabetical search:Follow the steps in Review the directory on page 19 to enter the directory.Use the dialing keys to enter the letters associated with the name. For example, if you have entries for Jenny, Jessie, Kristen and Laura in your directory, press 5 (JKL) once to see Jenny, twice to see Kristen (if you have more than one stored entry beginning with the same letter, in this case Jenny CPF,GUUKGYKVJVJGſTUVGPVT[FKURNC[GF=Jenny], press to view all other entries beginning with that letter), or three times to see Laura. If there is no name entry matching your search, the next closest match in alphabetical order appears. If necessary, press CID or on the handset to browse.Dial a directory entrySearch for the desired entry in the directory (see Review the directory on page 19 or Alphabetical search above).When the desired entry appears, press /FLASH to dial.Edit a directory entrySearch for the desired entry in the directory (see Review the directory on page 19 or Alphabetical search above).When the desired entry appears, press MENU/SELECT.The screen displays Edit number and the desired entry’s number.If the number is more than 11 digit, the screen will not display Edit Number but the desired entry’s number only.4. Use the dialing keys to edit the number.Press MUTE/DELETE to backspace and erase a digit.Press and hold MUTE/DELETE to erase the entire entry.Press CID or to move the cursor to the left or right.Press and hold REDIAL/PAUSE to insert a dialing pause (a P appears).Press MENU/SELECT to move to the name. The screen displays Edit name and the desired entry’s name displays.Use the dialing keys (see Character Chart on page 19)to edit the name.Press MUTE/DELETE to backspace and erase a character.Press and hold MUTE/DELETE to erase the entire entry.Press CID or to move the cursor to the left or right.Press MENU/SELECTVQEQPſTO6JGUETGGPFKURNC[USaved and you hear a EQPſTOCVKQPVQPG1.2.1.2.1.2.3.•••••5.6.•••7.Edit nameMike Smith_Edit number800-595-9511_](https://usermanual.wiki/VTech-Telecommunications/80-7719-00/User-Guide-1507773-Page-76.png)