VTech Telecommunications 80-8052-01 1.9GHz Cordless Phone User Manual manual
VTech Telecommunications Ltd 1.9GHz Cordless Phone manual
UserManual.wiki
>
VTech Telecommunications
>
80-8052-01 User Manual
>
users manual
Contents
1.
users manual
2.
user manual
users manual
Navigation menu
Upload a User Manual
Namespaces
Wiki Guide
HTML
PDF
Info
Views
User Manual
Discussion / Help
Navigation
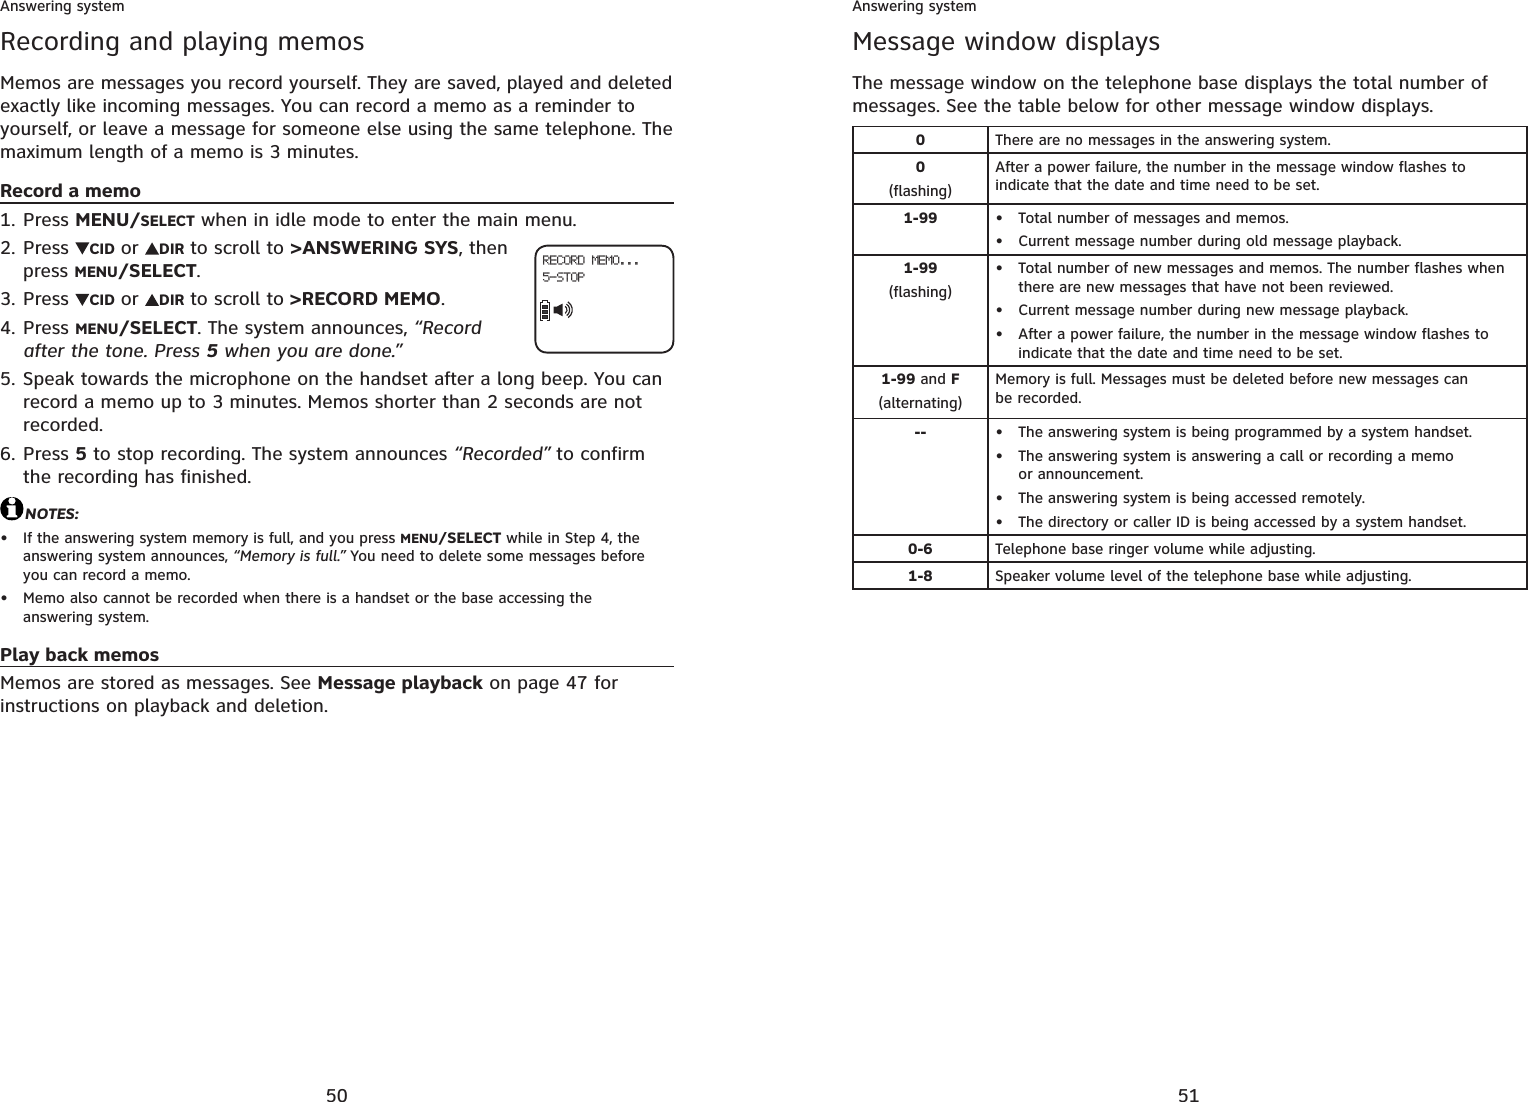
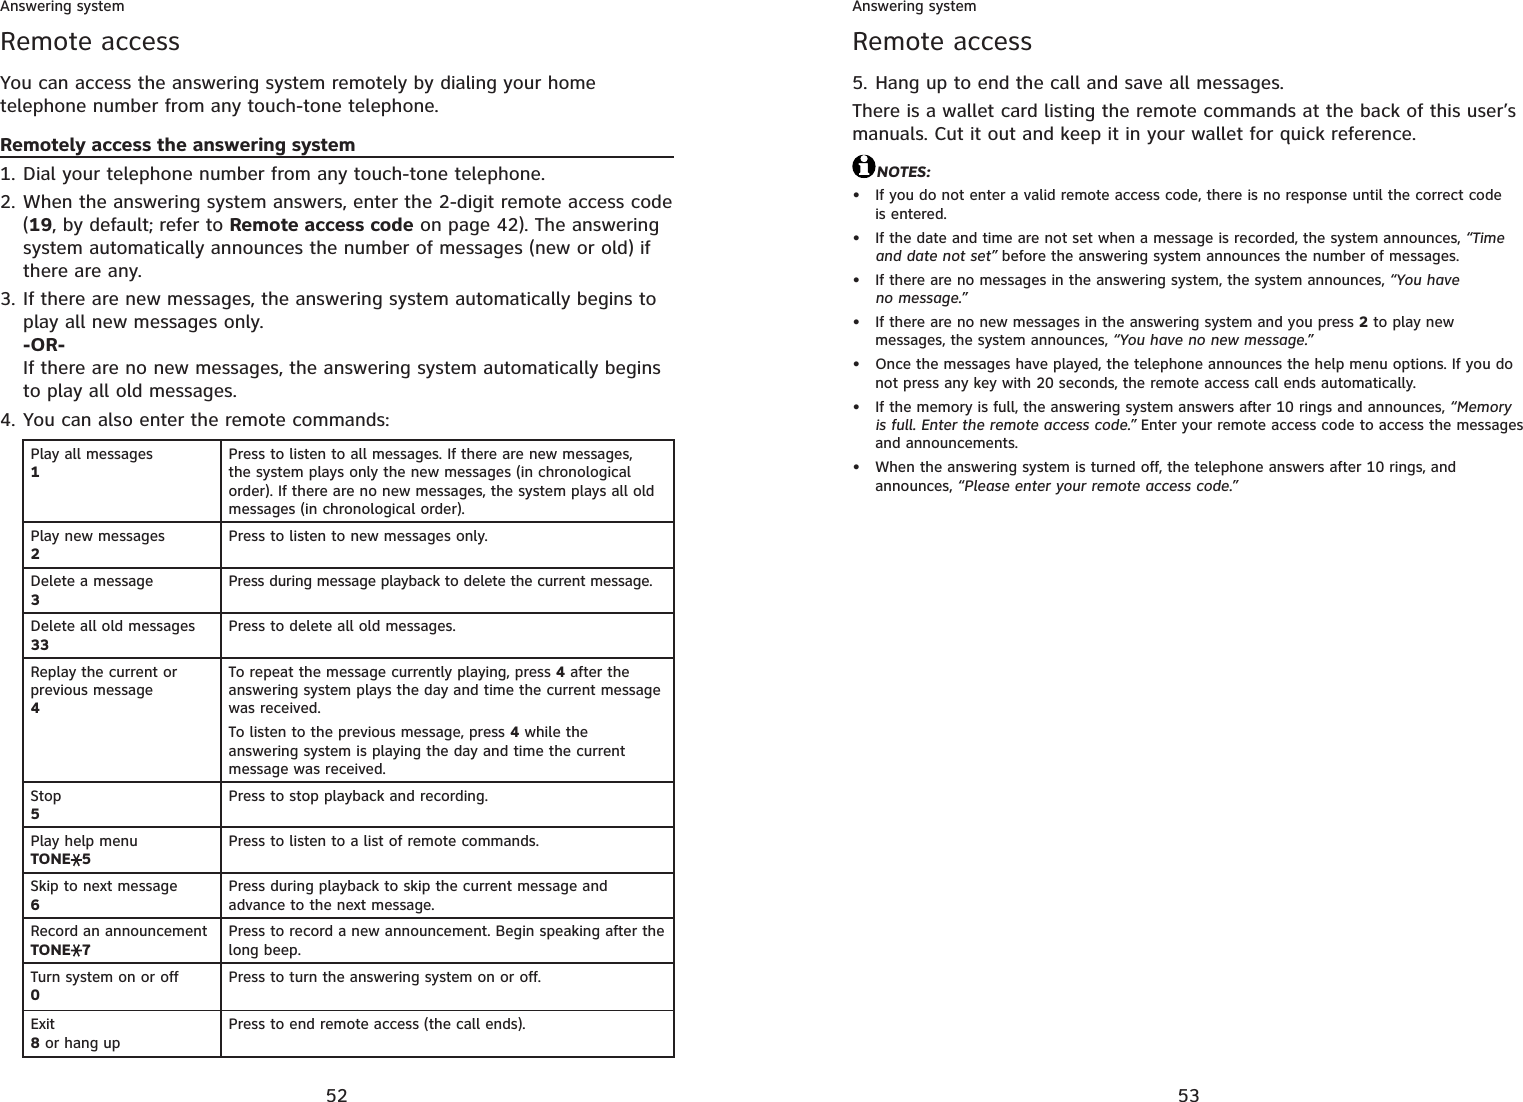
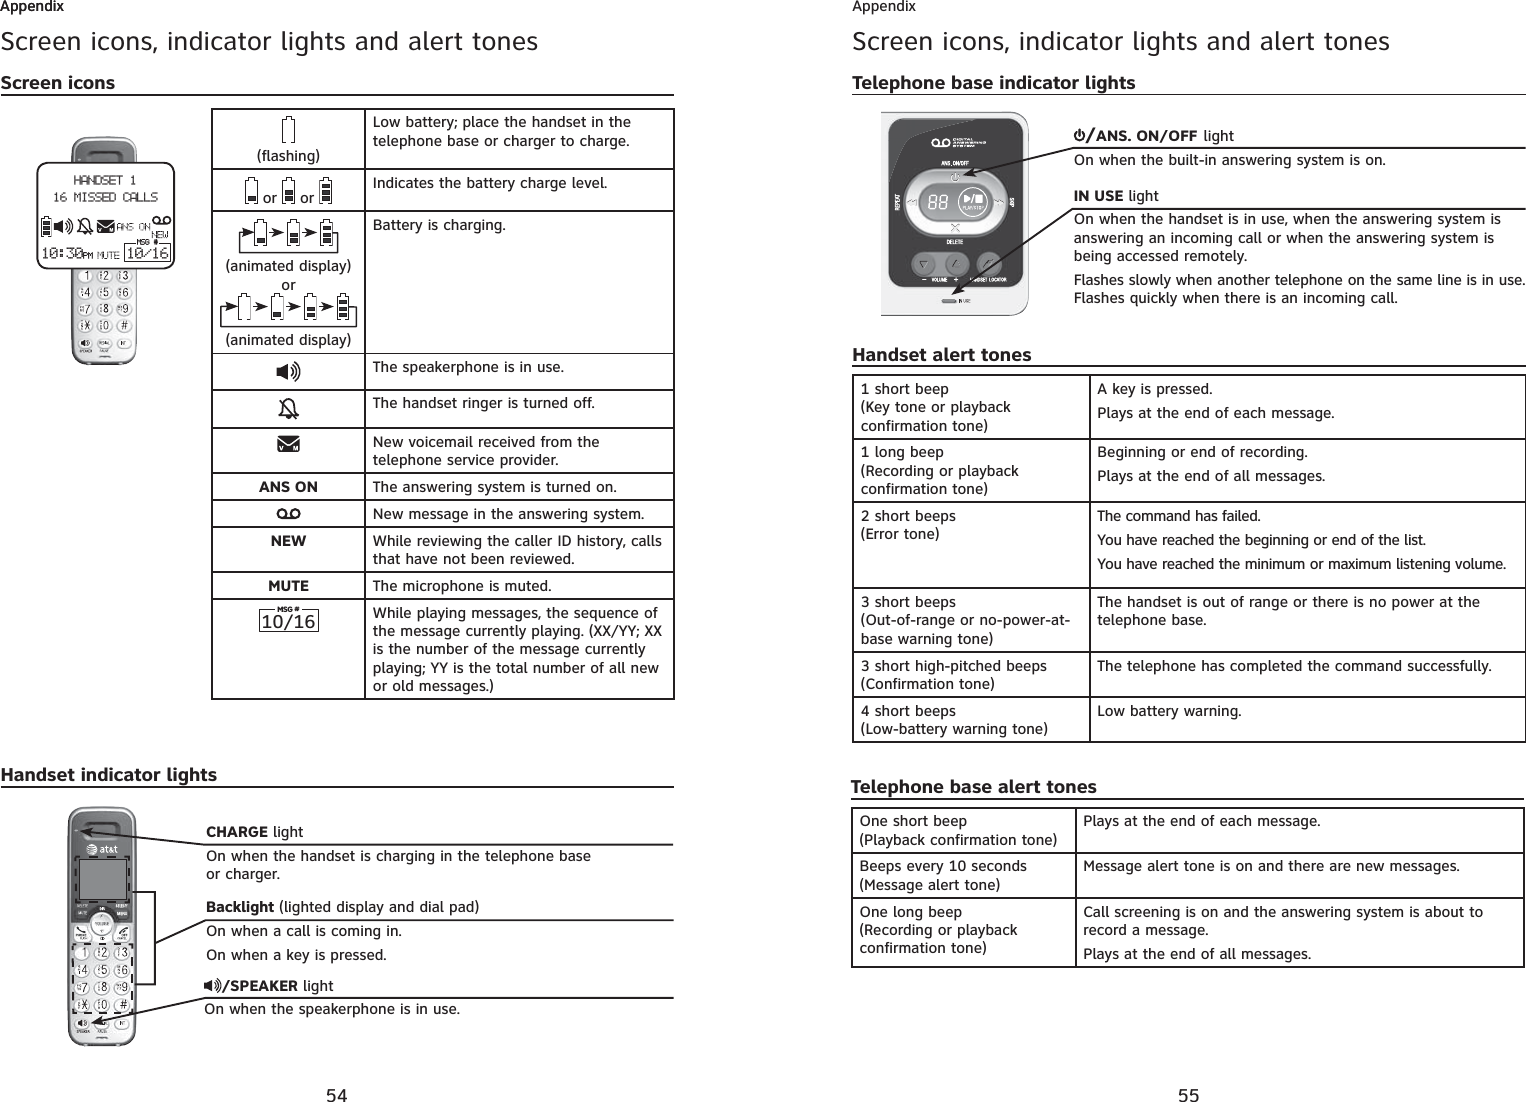
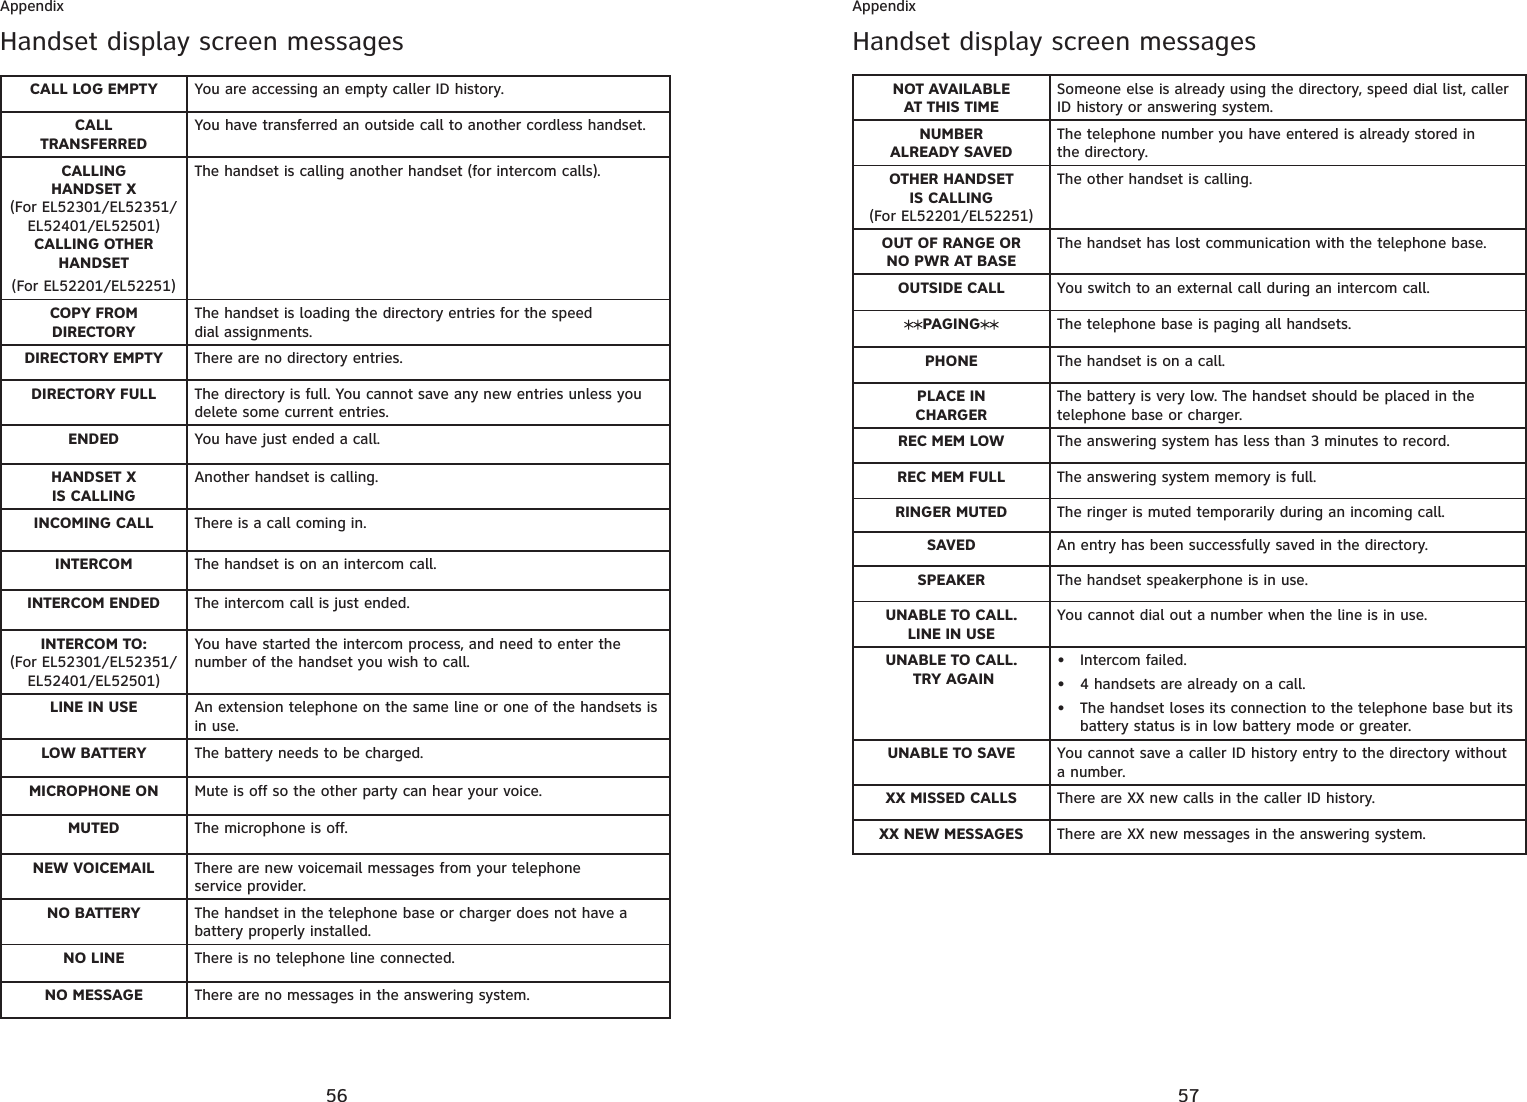
![46Answering systemAnswering system overviewIf call screening is on and you want to adjust the playback volume to a comfortable level (1-8) while it is recording messages, press //-VOLUME+on the telephone base. This volume setting is shared with message playback, so when you play messages at volume 1, they play at a very low volume. If you turn up the volume for playback, the call screening for the next incoming message plays at the same volume level.If call screening is on and you want to silence the telephone base while it is recording messages, press /PLAY/STOP on the telephone base. The call screening will be on for the next incoming call.Call screening at the handset:If the answering system is turned on, when there is an incoming call and it is answered by the answering system, the handset screen shows “TO SCREEN CALL, PRESS [SELECT].” By pressing MENU/SELECT, you can screen the call at the handset.Call interceptWhile call screening, you can stop it manually and speak to the caller.If the call is screened at the base, pressPHONE/FLASH or /SPEAKER on the handset to stop recording and speak to the caller.If the call is screened at the handset, pressPHONE/FLASH on the handset to stop recording and speak to the caller. Then you can press /SPEAKER to switch between the speakerphone and the handset.Temporarily turn off the message alert toneTo temporarily silence the message alert tone:When the telephone base is in idle mode, press any telephone base key (except /HANDSET LOCATOR).The message alert tone is activated again with the next incoming message.NOTES:When the telephone base is in idle mode, if you press X/DELETE to temporarily silence the message alert tone, there is a voice prompt directing you to press X/DELETE again to delete all old messages (see Delete all old messages on page 49). If you are not going to delete all old messages, wait at least 5 seconds to allow the telephone base to return to idle mode.To turn off the message alert tone, see Message alert tone on page 42.•••••47Answering systemMessage playbackListen to messagesYou can use either a handset or the telephone base to play messages. If there are new messages, the system plays back only the new messages (in chronological order). If there are no new messages, the system plays back all old messages (in chronological order).When playback begins, the total number of messages is announced. Before each message, you hear the date and time it was received. After the last message, you hear “End of messages.” If the system has less than 3 minutes of recording time left, you hear “Less than 3 minutes to record.” If the answering system memory is full, you hear “Memory is full.”NOTES:If the date and time is not set when a message is recorded, the system announces, “Time and date not set” before the message is played. To set the date and time, see Set date/time on page 13.Only one handset or the telephone base can access the answering system at a time.While a handset is on a call, you cannot play messages.To listen to messages at the telephone base:Press /PLAY/STOP on the telephone base to listen to the messages.The system announces the number of messages, then begins playback. The message sequence is shown on the message window.Press /PLAY/STOP to stop the playback.NOTE: If there are no messages in the answering system, when in Step 1 above, the system announces, “You have no message.”To listen to messages at the handset:Press MENU/SELECT when in idle mode to enter the main menu.Press MENU/SELECT to select >PLAY MESSAGES.The system announces the number of messages, then begins playback. The message sequence is shown on the handset’s screen.Press 5 to stop the playback.NOTE: If there are no messages in the answering system, the handset shows NO MESSAGE and announces, “You have no message.”•••1.2.3.1.2.3.4.>PLAY MESSAGES ANSWERING SYS16 NEW MESSAGES03 OLD MESSAGES10:30PM3-DELETE 5-STOP4-RESTART 6-SKIPMSG #1/16](https://usermanual.wiki/VTech-Telecommunications/80-8052-01.users-manual/User-Guide-1525960-Page-26.png)