VTech Telecommunications 80-8494-00 1.9GHz DECT Cordless Phone User Manual CL84xx2 CIB i1 Final 010312
VTech Telecommunications Ltd 1.9GHz DECT Cordless Phone CL84xx2 CIB i1 Final 010312
UserManual.wiki
>
VTech Telecommunications
>
80 8494 00 User Manual
User Manual
Navigation menu
Upload a User Manual
Namespaces
Wiki Guide
HTML
PDF
Info
Views
User Manual
Discussion / Help
Navigation
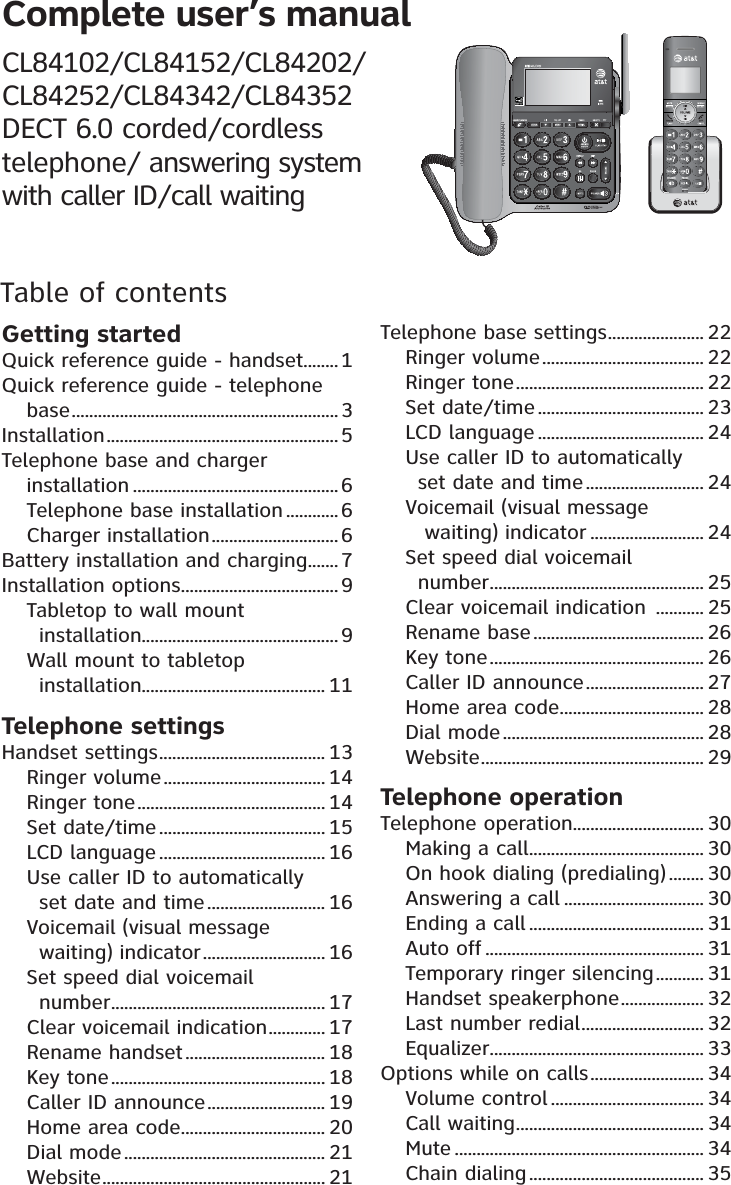
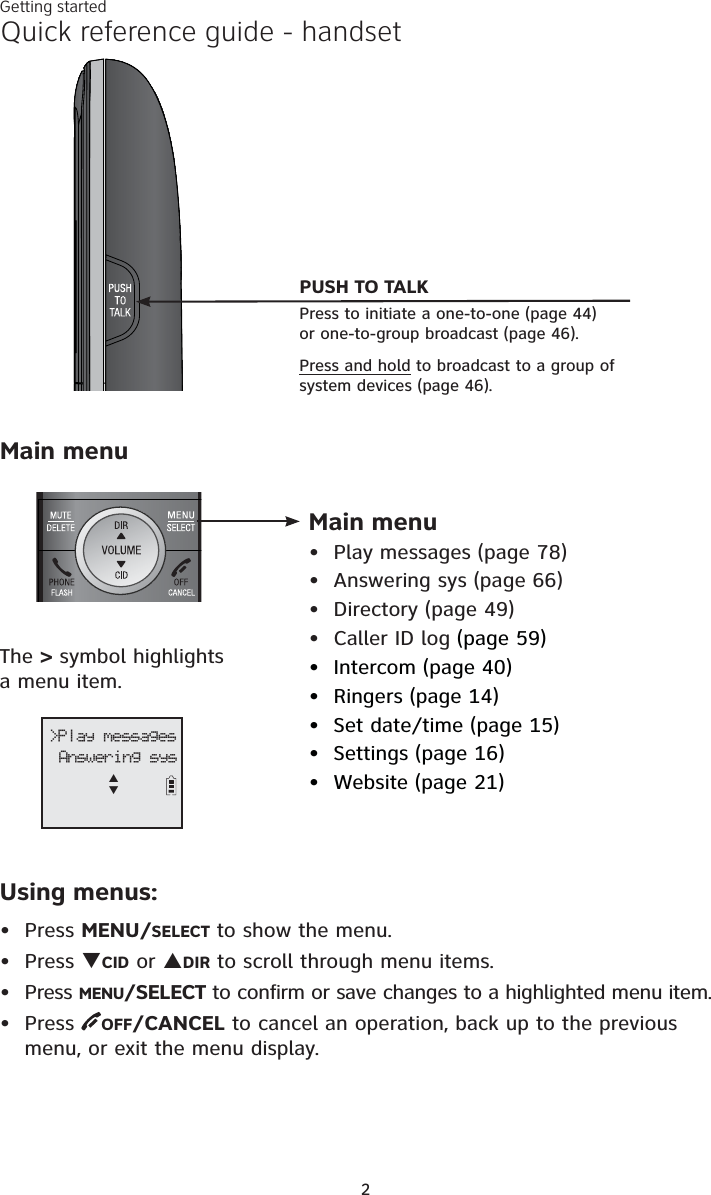
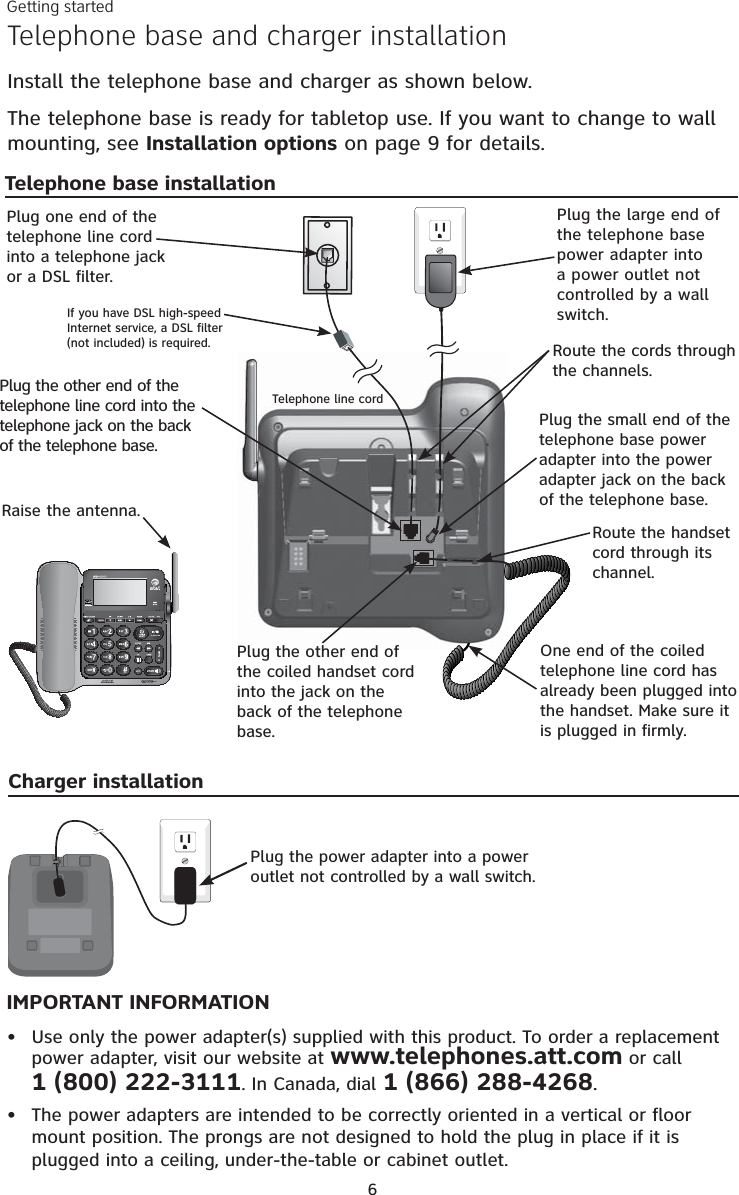


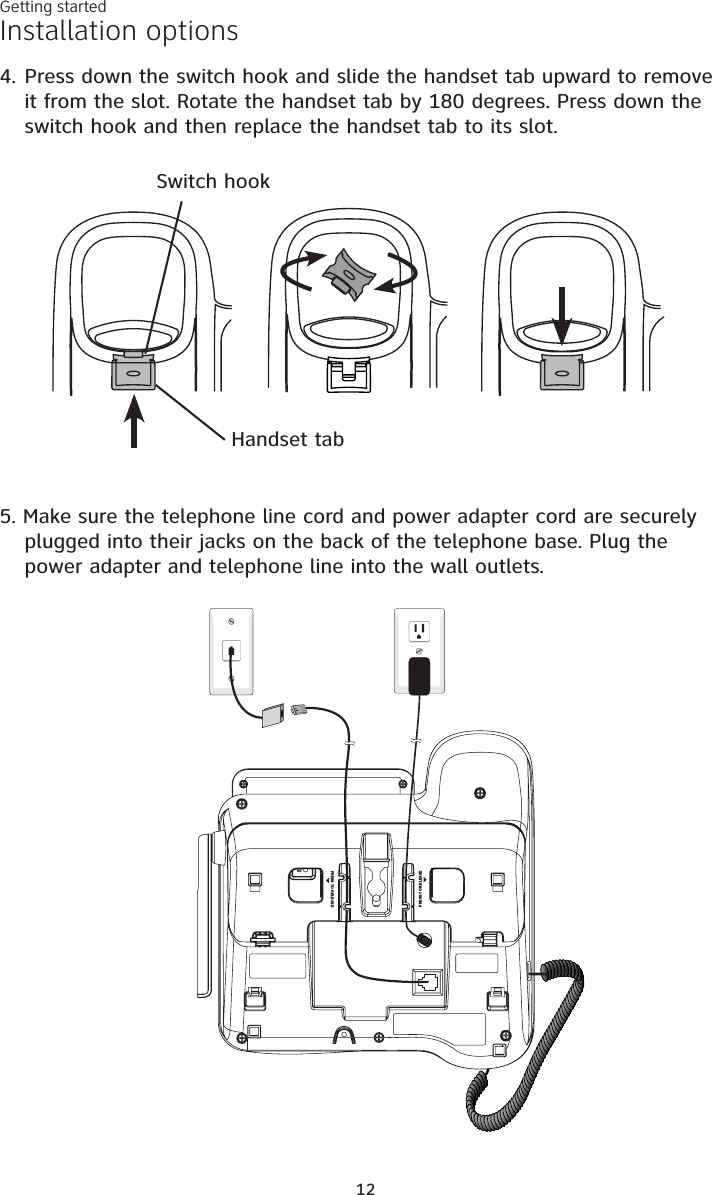
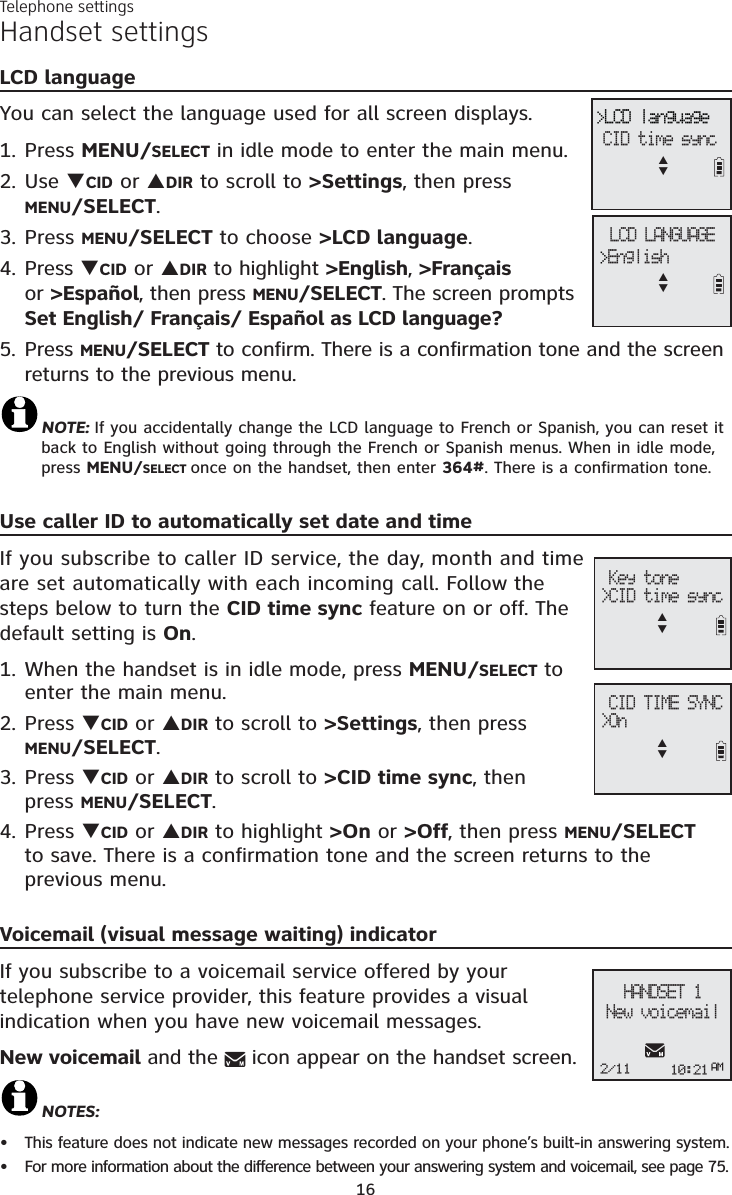
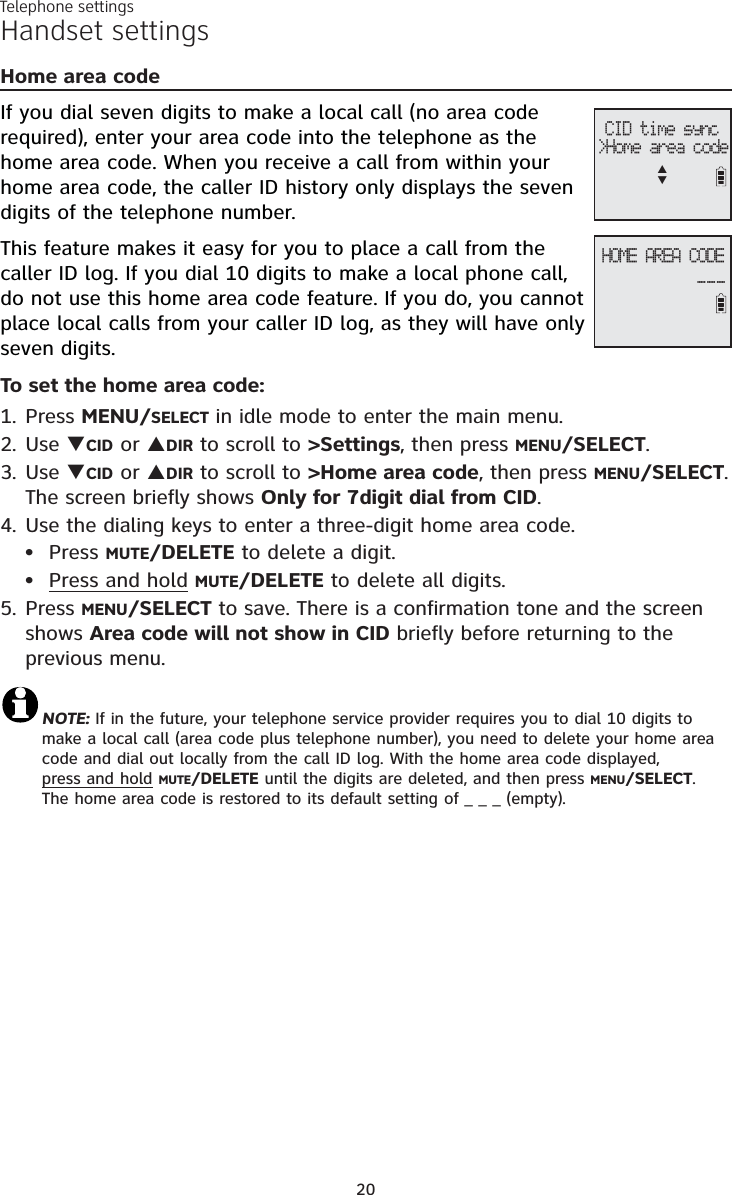
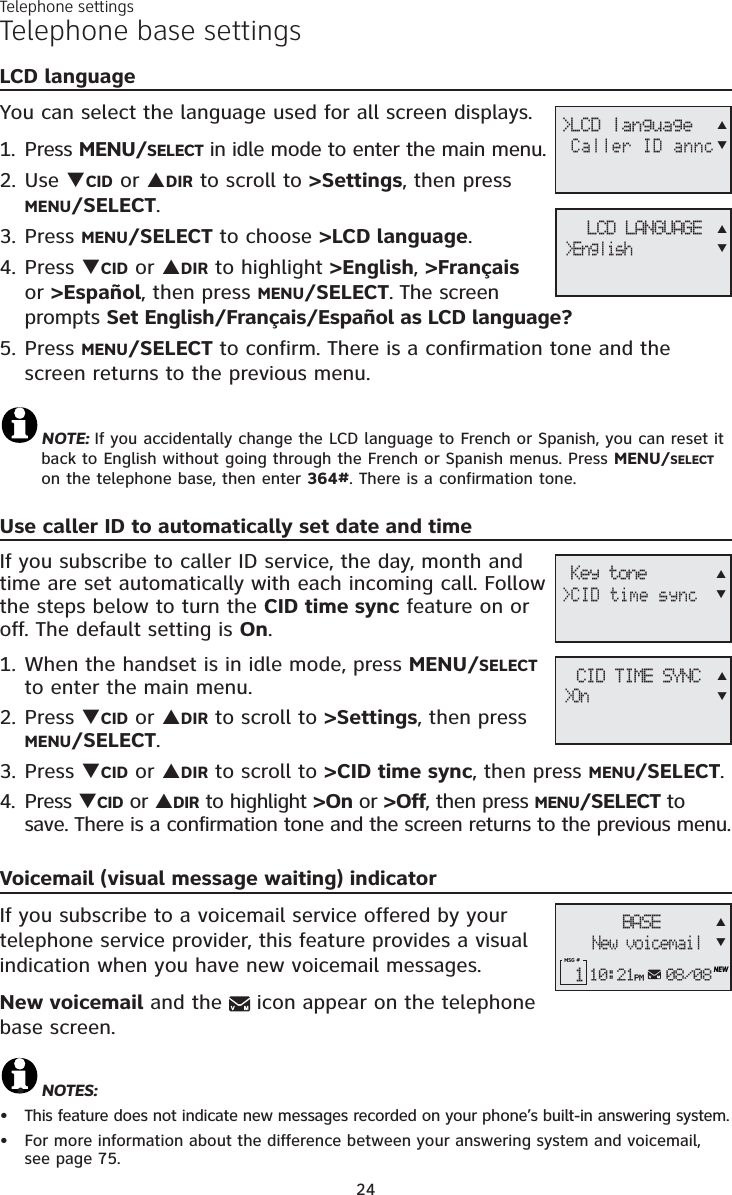

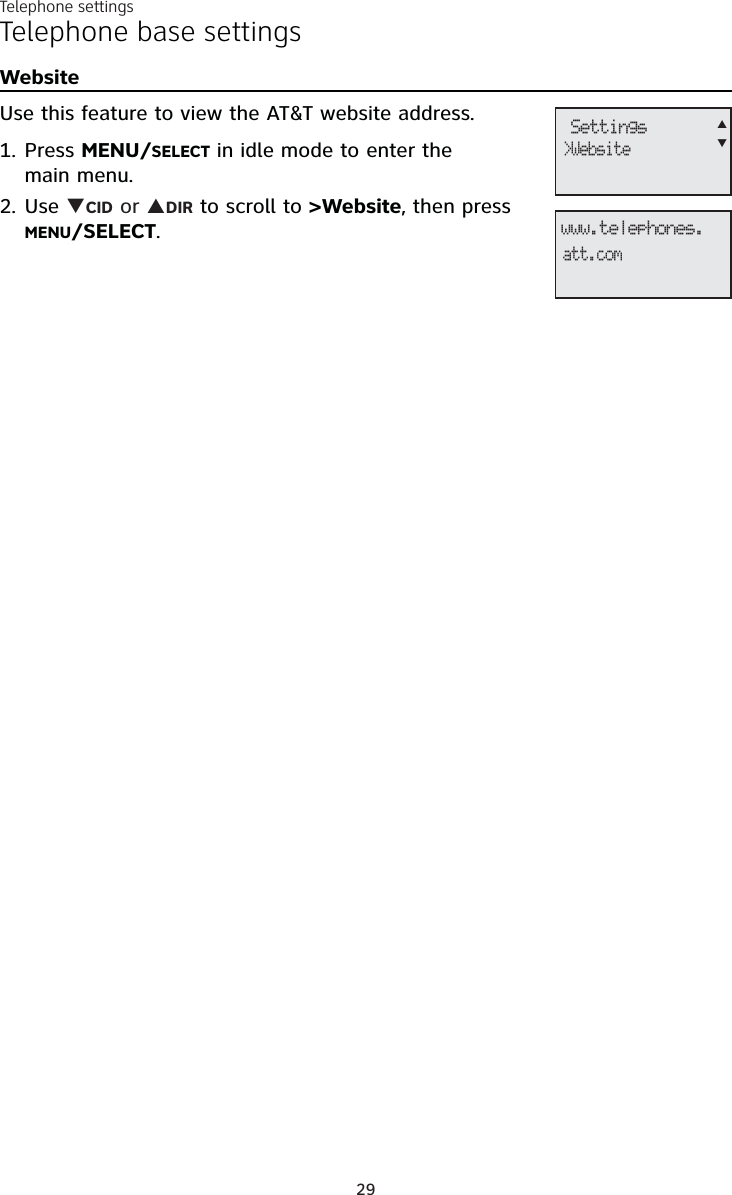
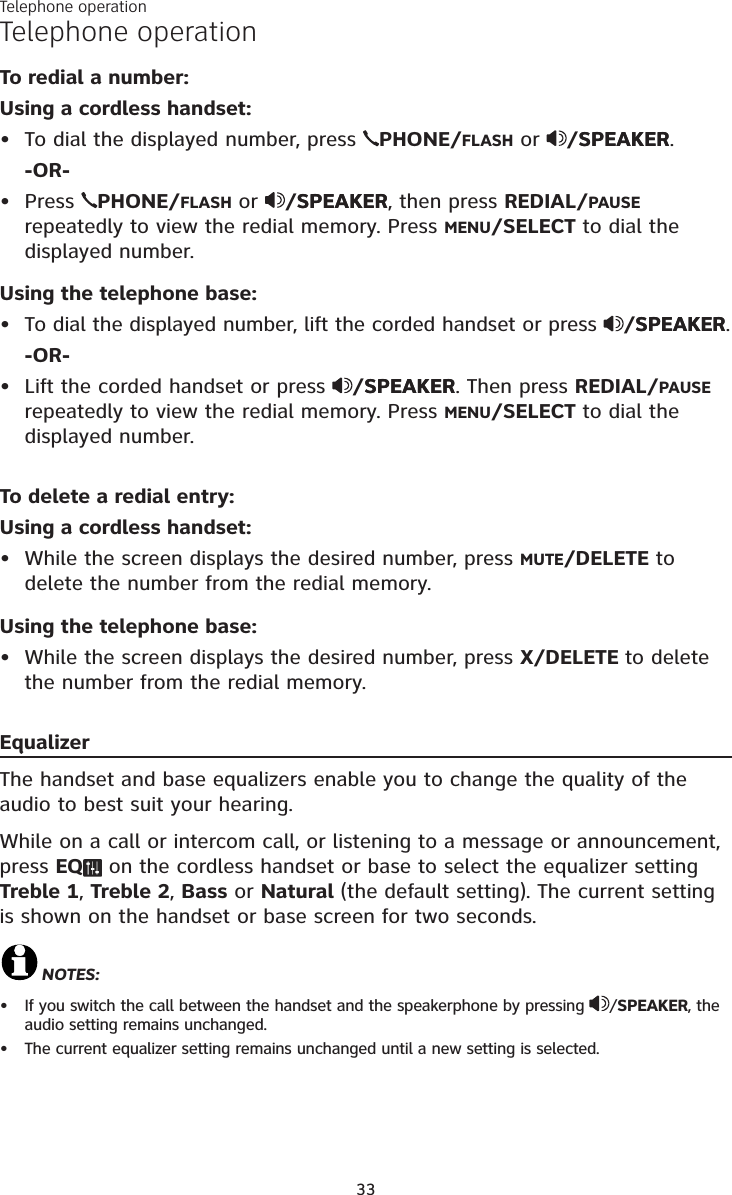
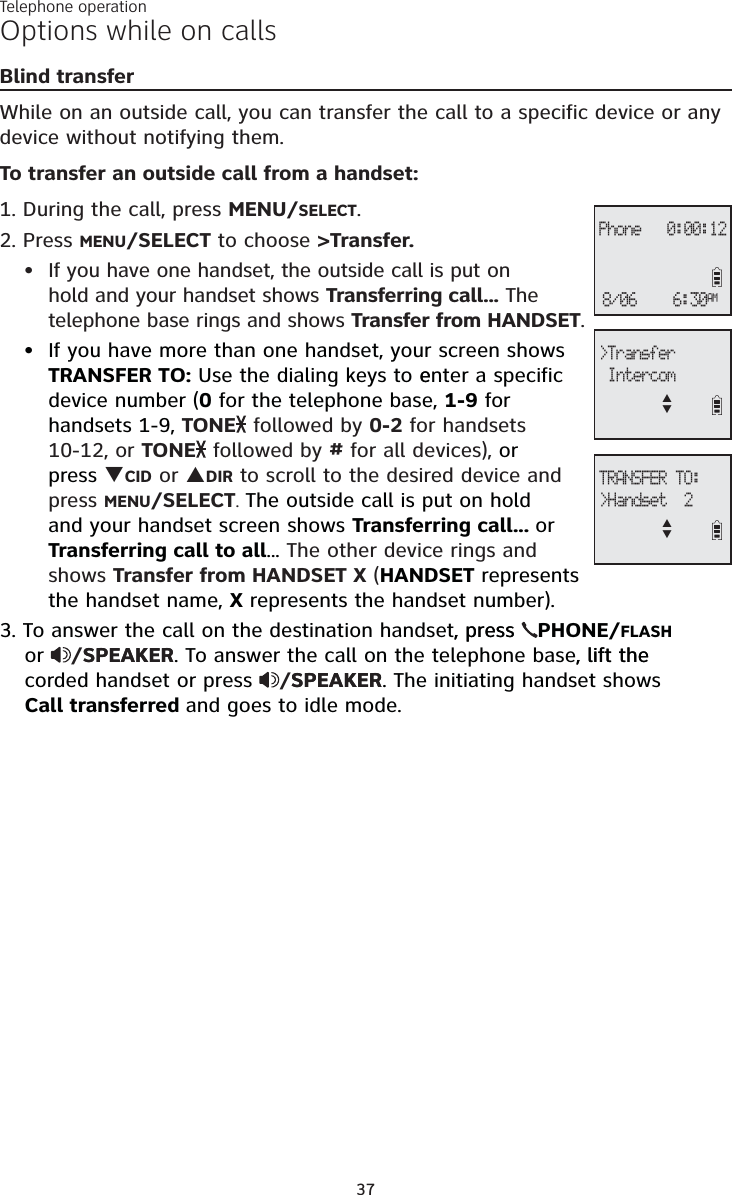
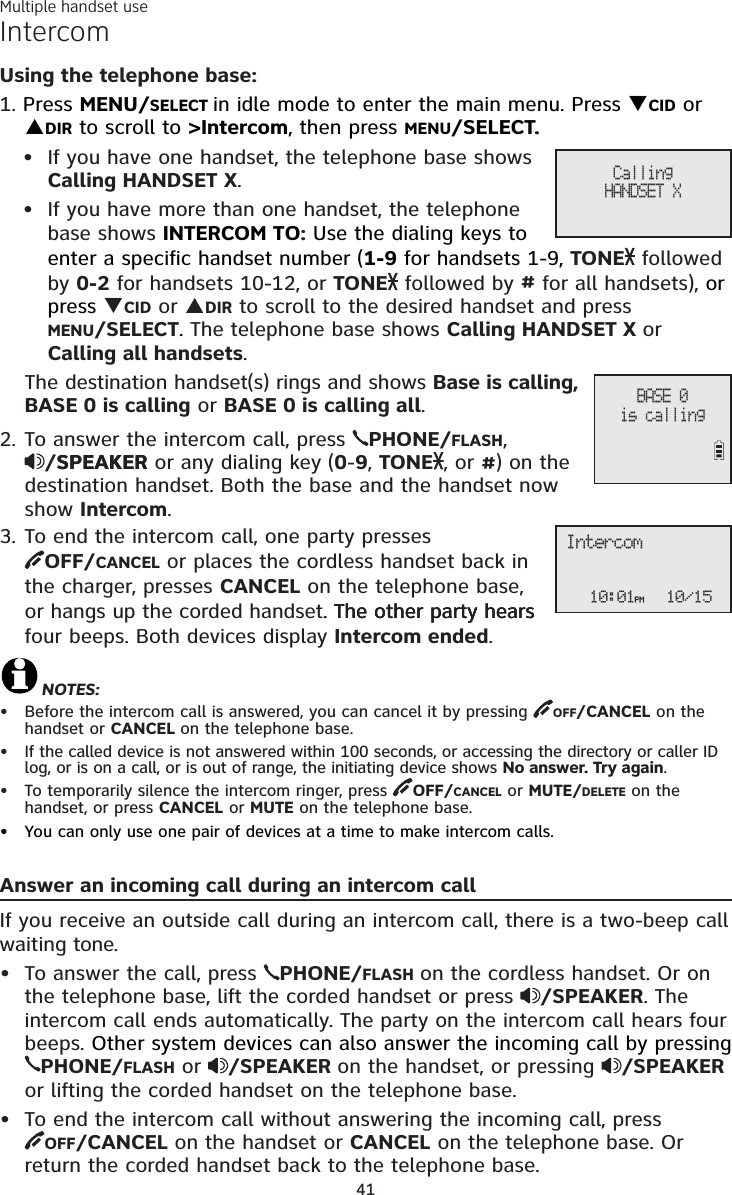
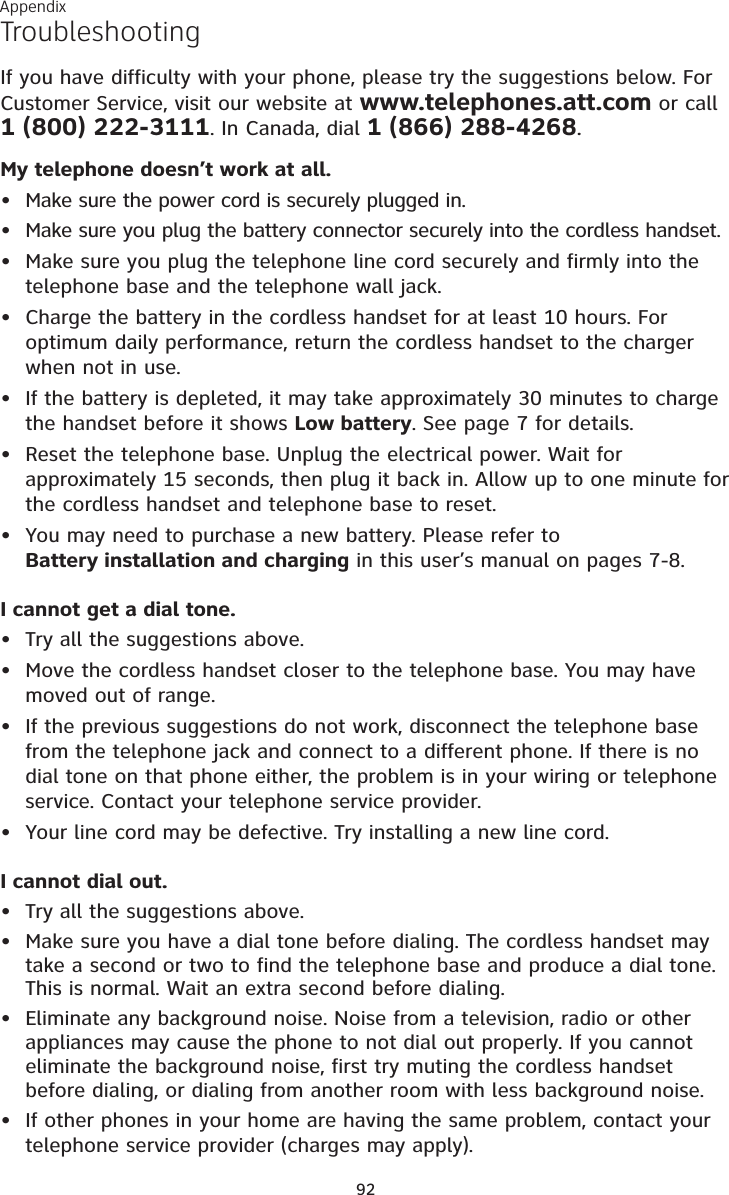
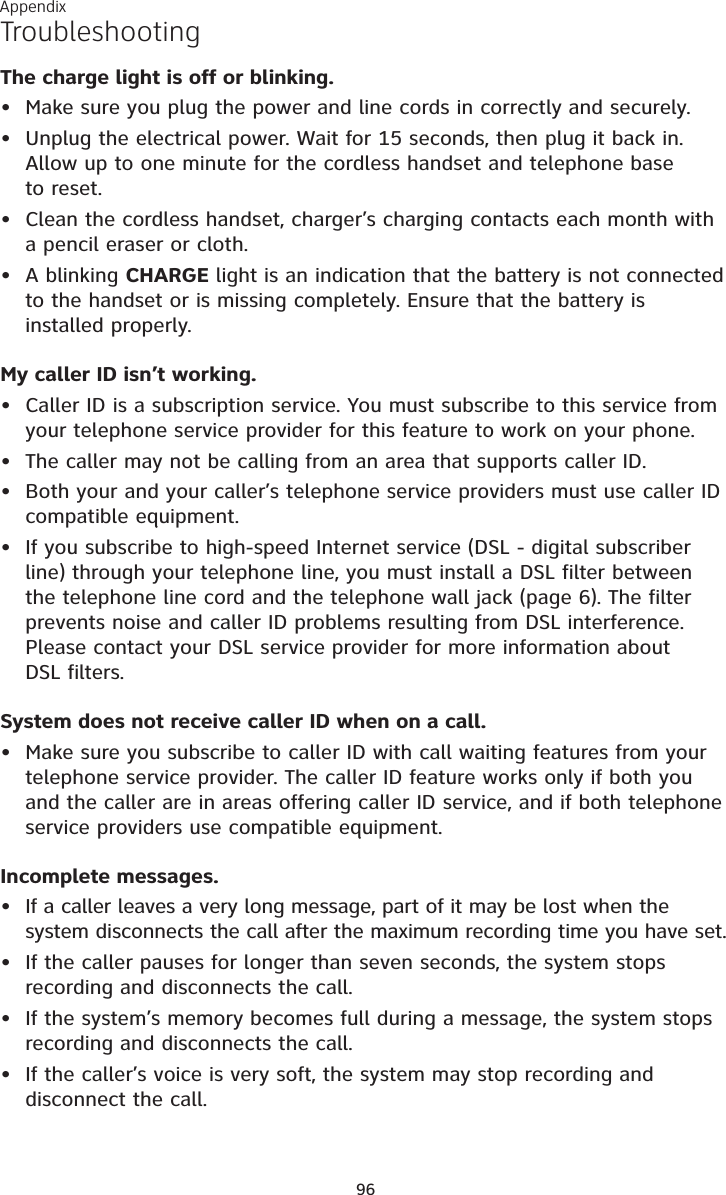
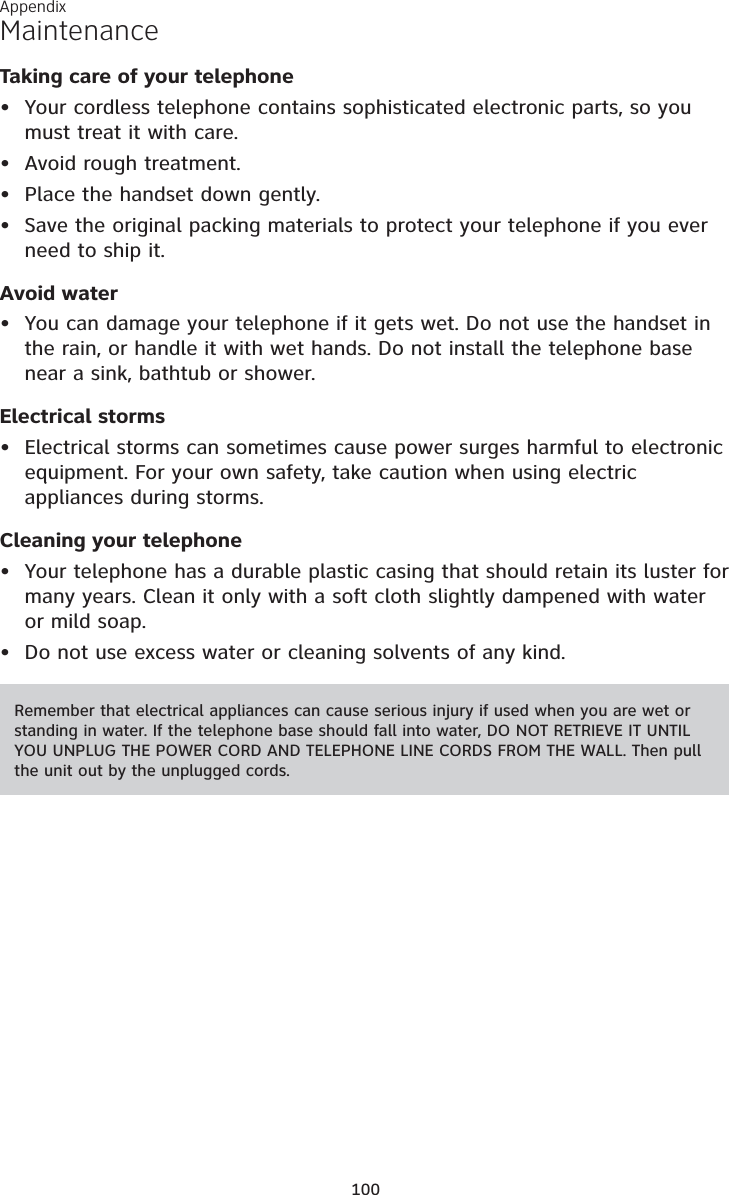
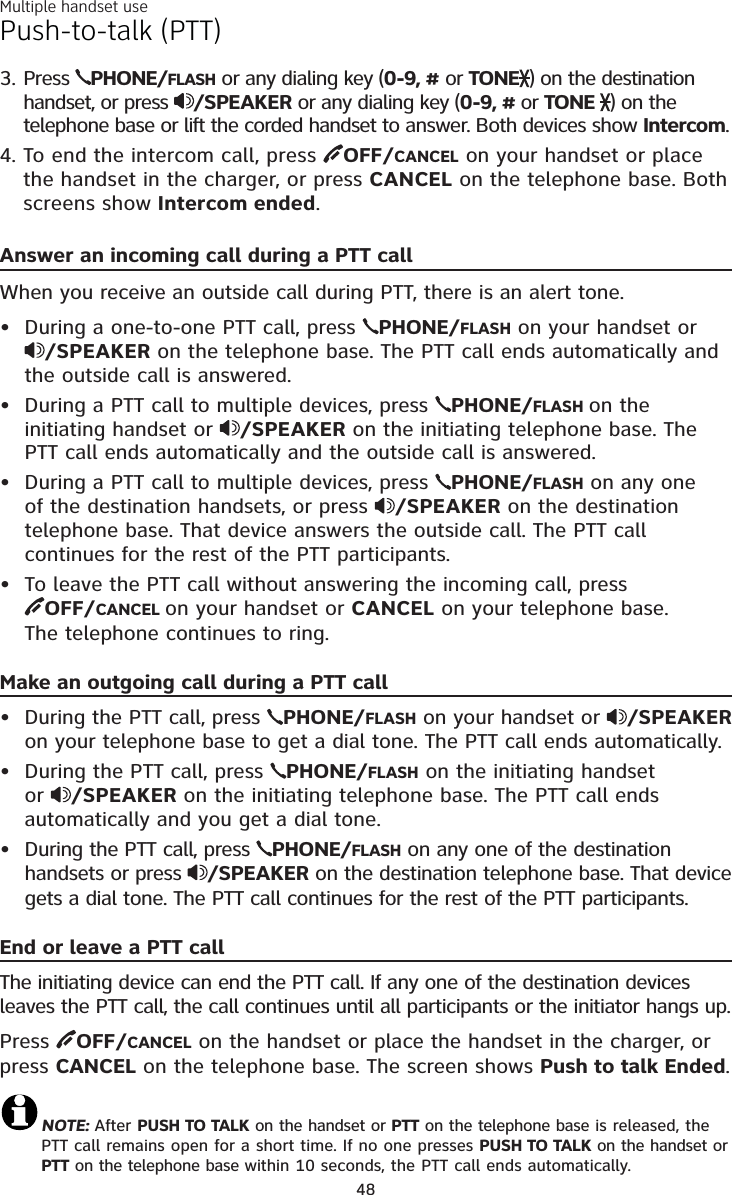
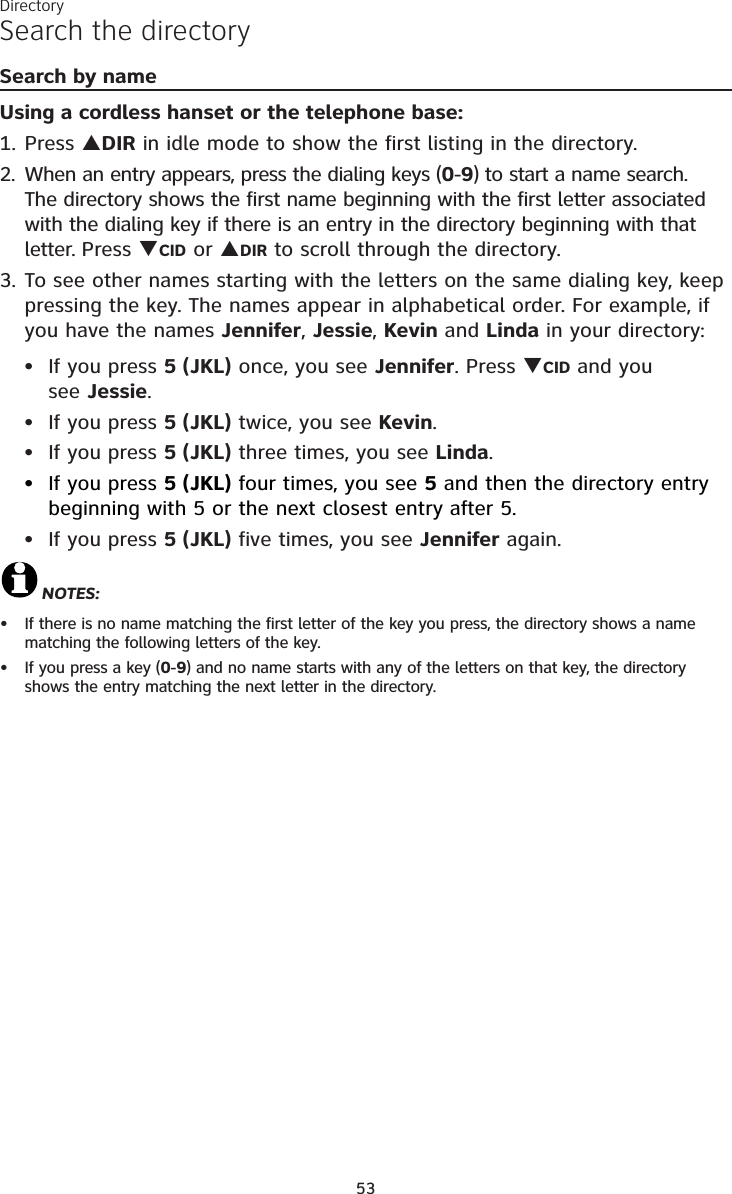
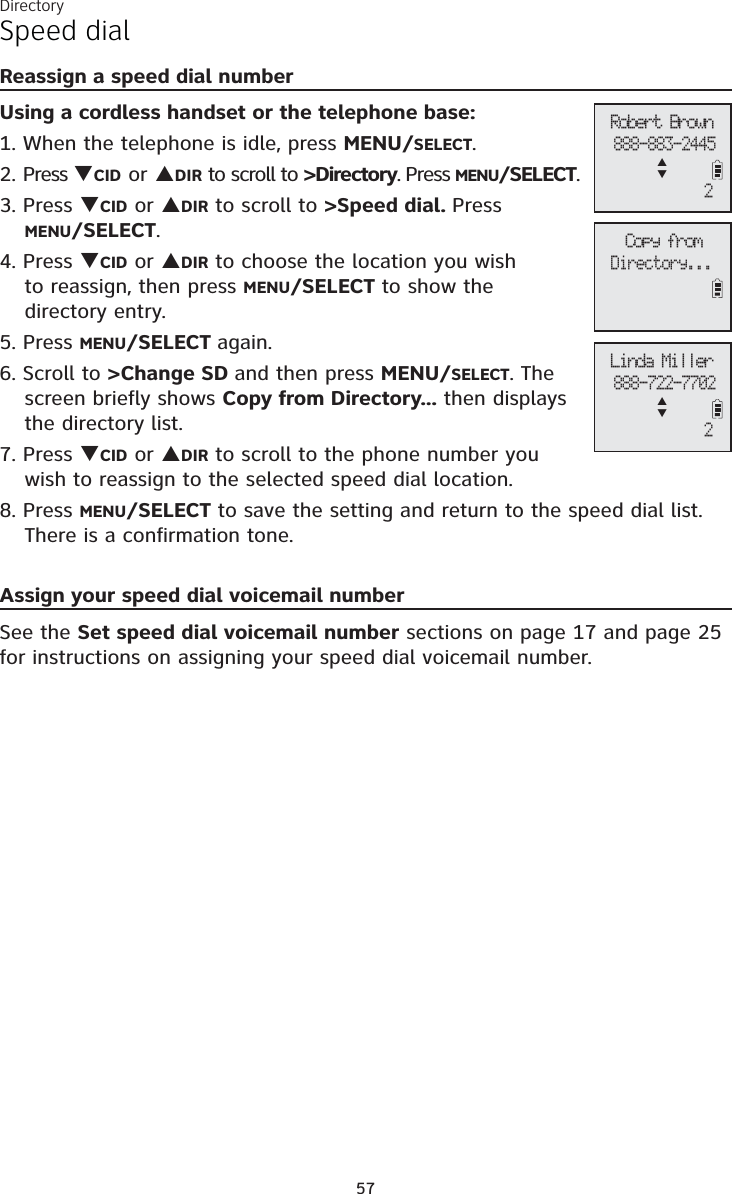
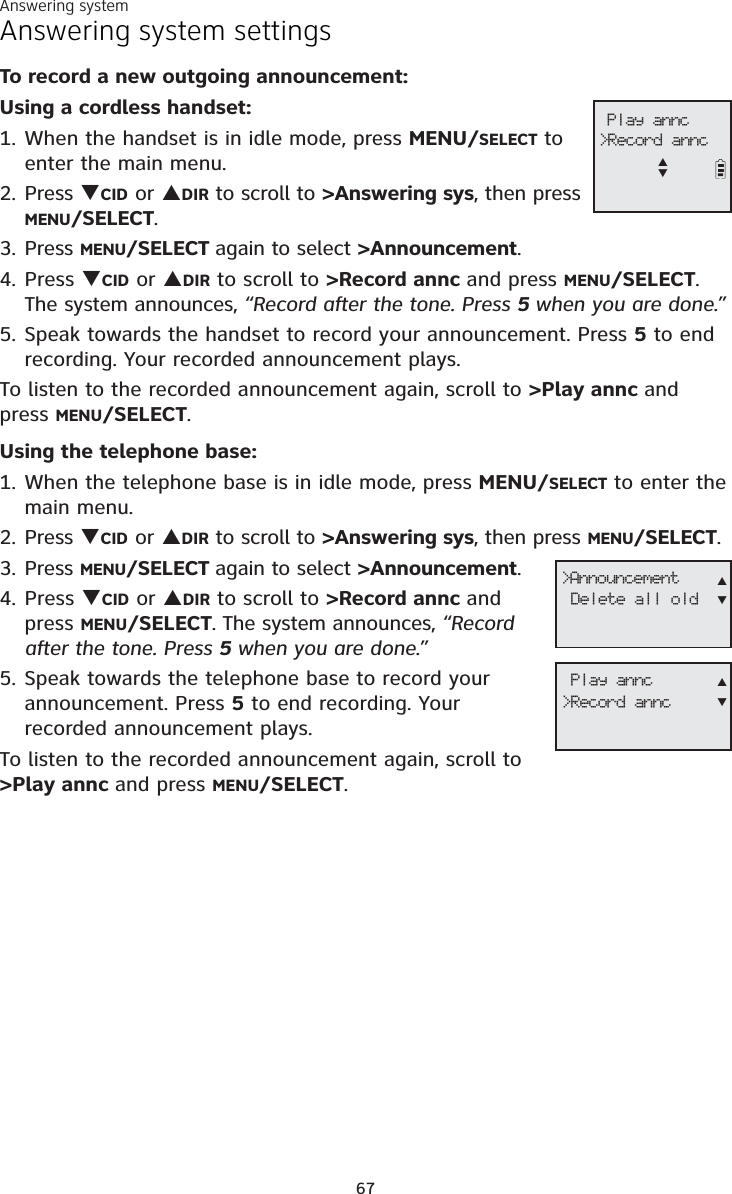
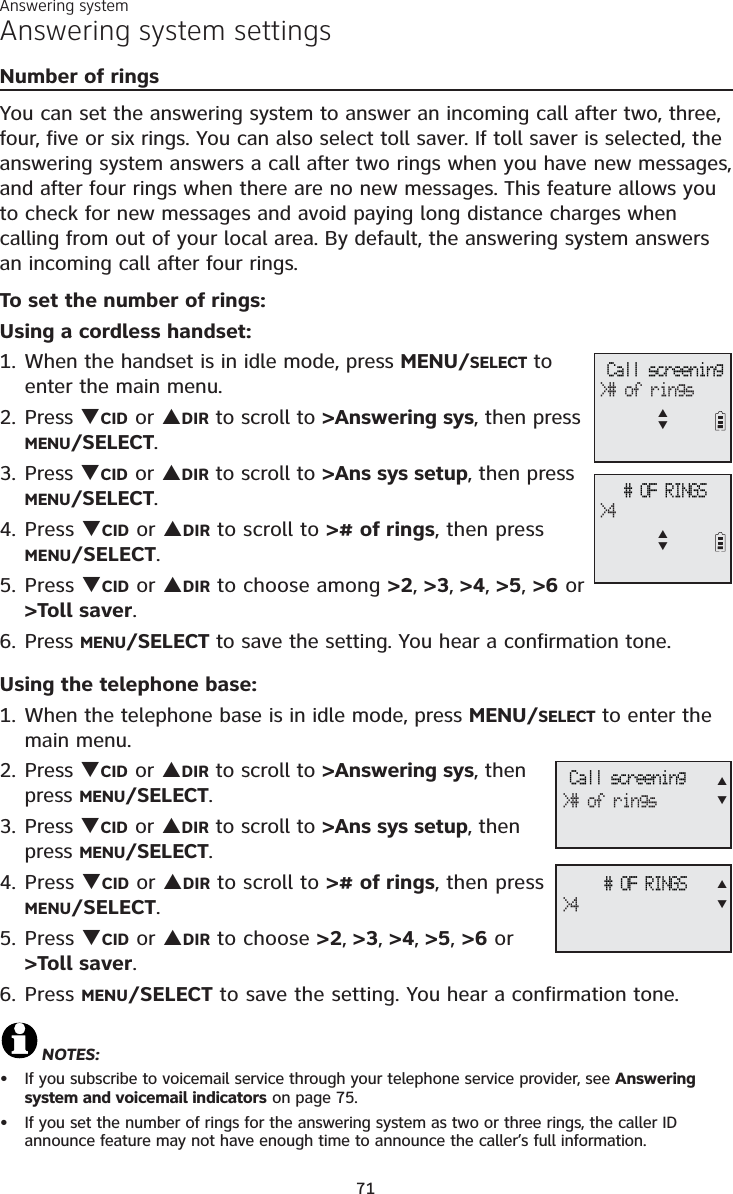
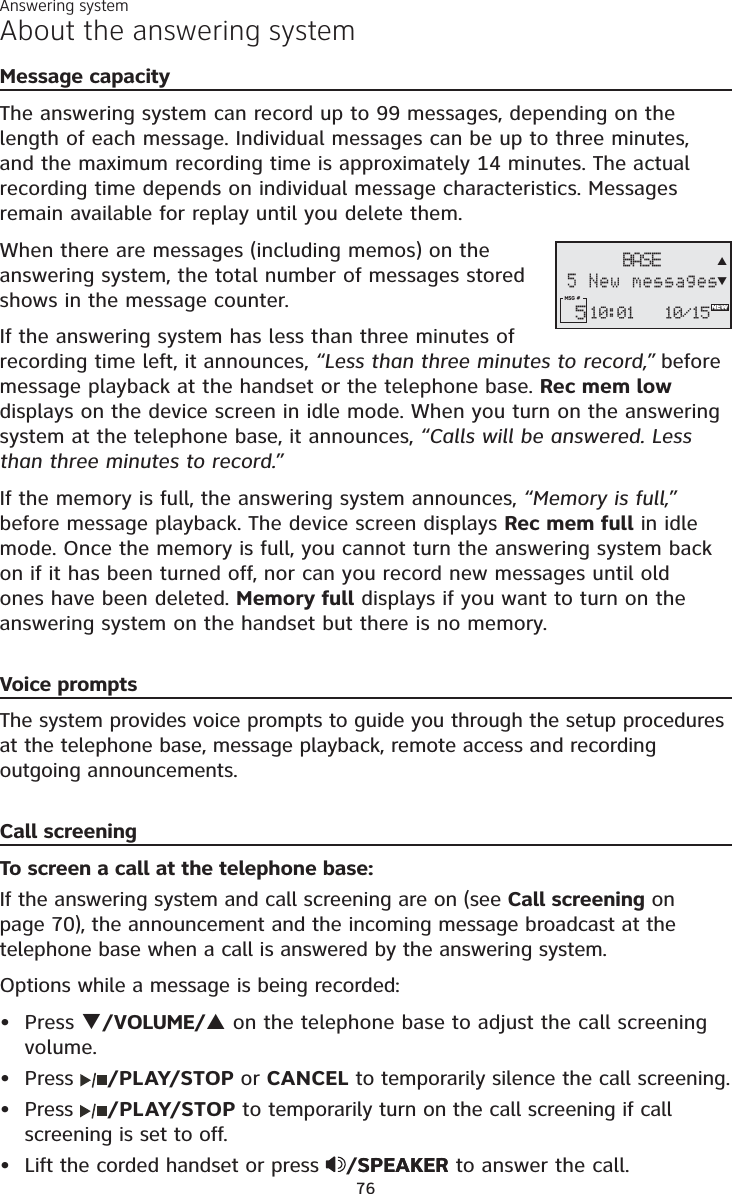
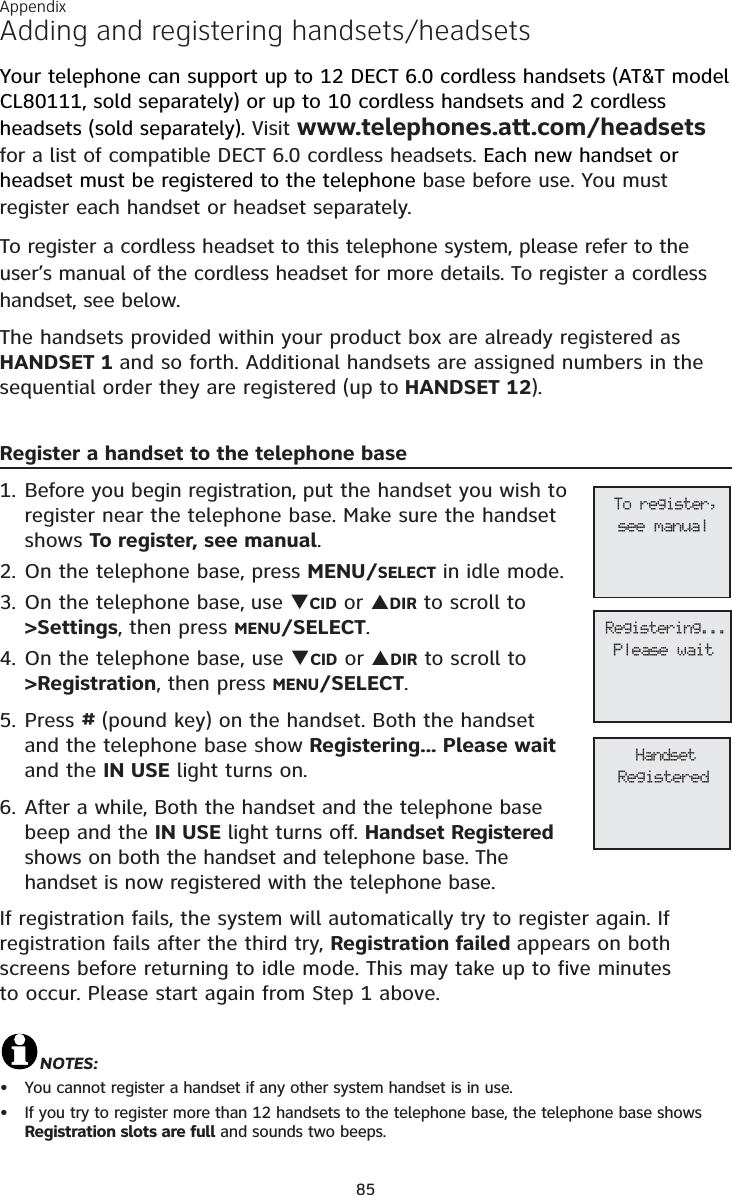
![Multiple handset use44Push-to-talk (PTT)PTT call to a single deviceUsing a cordless handset:There are a few ways to begin a PTT call to a single device. When the handset is not in use:If you have one handset, press and hold PUSH TO TALK.If you have more than one handset: Press PUSH TO TALK on the handset. Then use the dialing keys to enter the destination device number.-OR- Press PUSH TO TALK on the handset. Press TCID or SDIR to highlight the destination device number. Then press MENU/SELECT or PUSH TO TALK.The handset shows Connecting to HANDSET X... (HANDSET represents the handset name, X represents thedestination handset number) or Connecting to BASE 0... (BASE represents the base name)for a few seconds. Whenthe connection is made, both your and the destination device screens display Press and hold [PTT] to talk.Press and hold PUSH TO TALK. A chirp indicates your microphone is on. Speak towards the device. Your voice is broadcast to the destination device. While you are speaking, your handset shows PTT To handset: X or PTT To base.Release PUSH TO TALK after speaking. Both devices beep once again and the screens show Press and hold [PTT]to talk. Then you can press and hold PUSH TO TALK to continue speaking or the destination device can respond (see Answer a PTT call on page 47).To end the PTT call, press OFF/CANCEL or place the cordless handset in the charger. The handset shows Push to talk Endedfor a few seconds.1.••2.3.4.PTT Tohandset: X PUSH TO TALK>Handset XSTConnecting toHandset X...Press and hold[PTT] to talk](https://usermanual.wiki/VTech-Telecommunications/80-8494-00/User-Guide-1619278-Page-50.png)
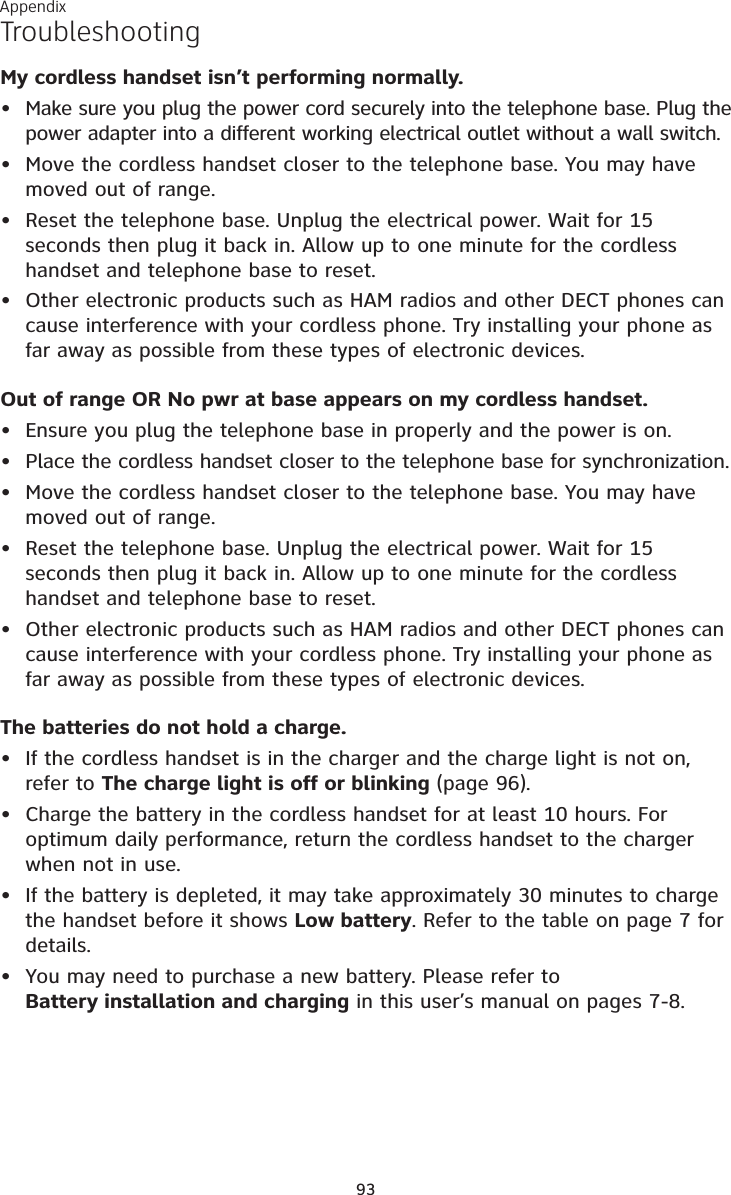
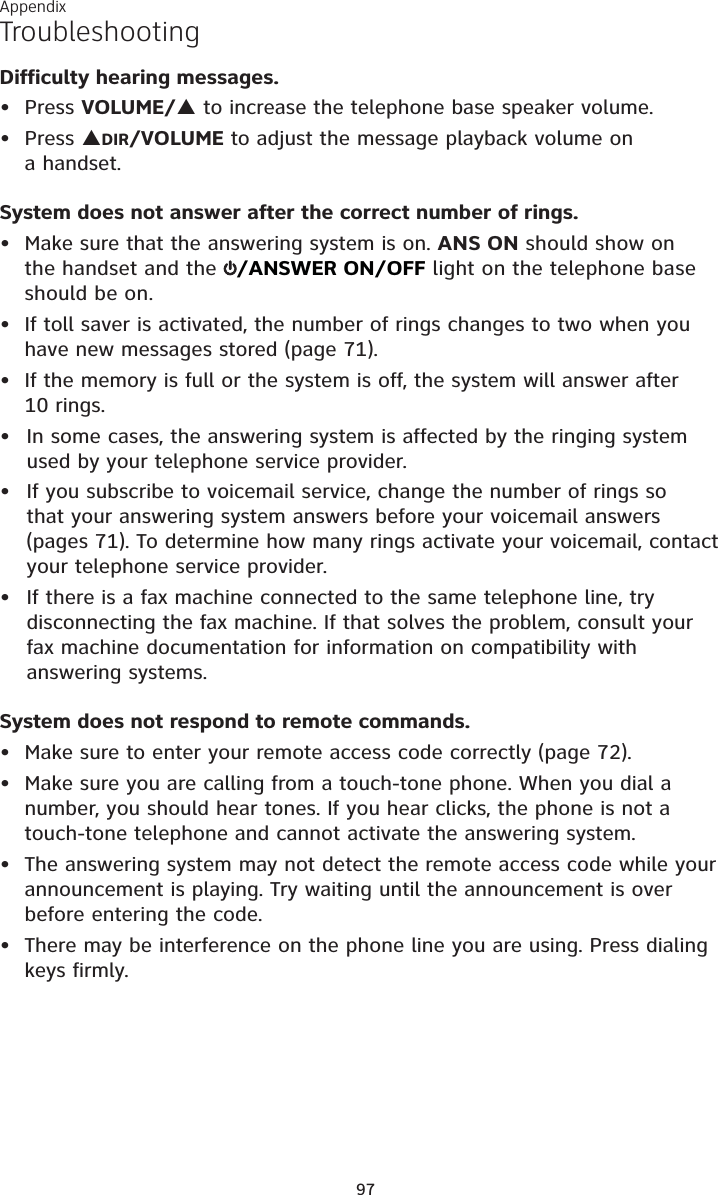
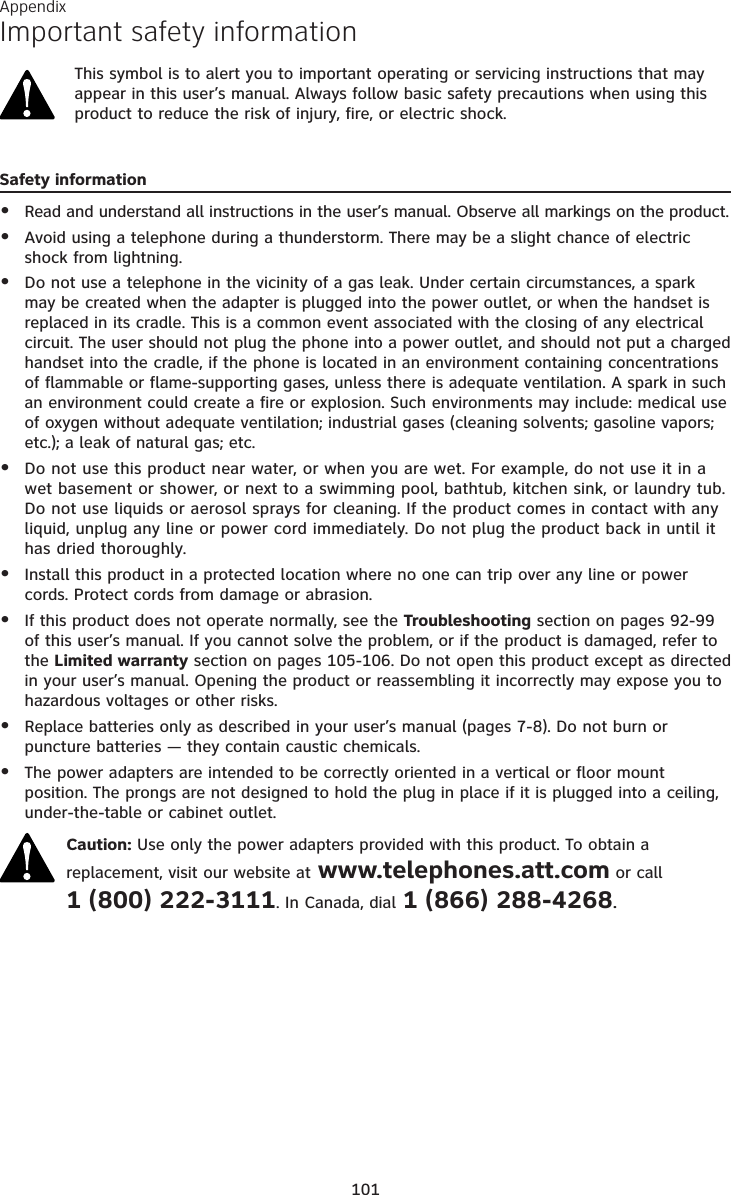
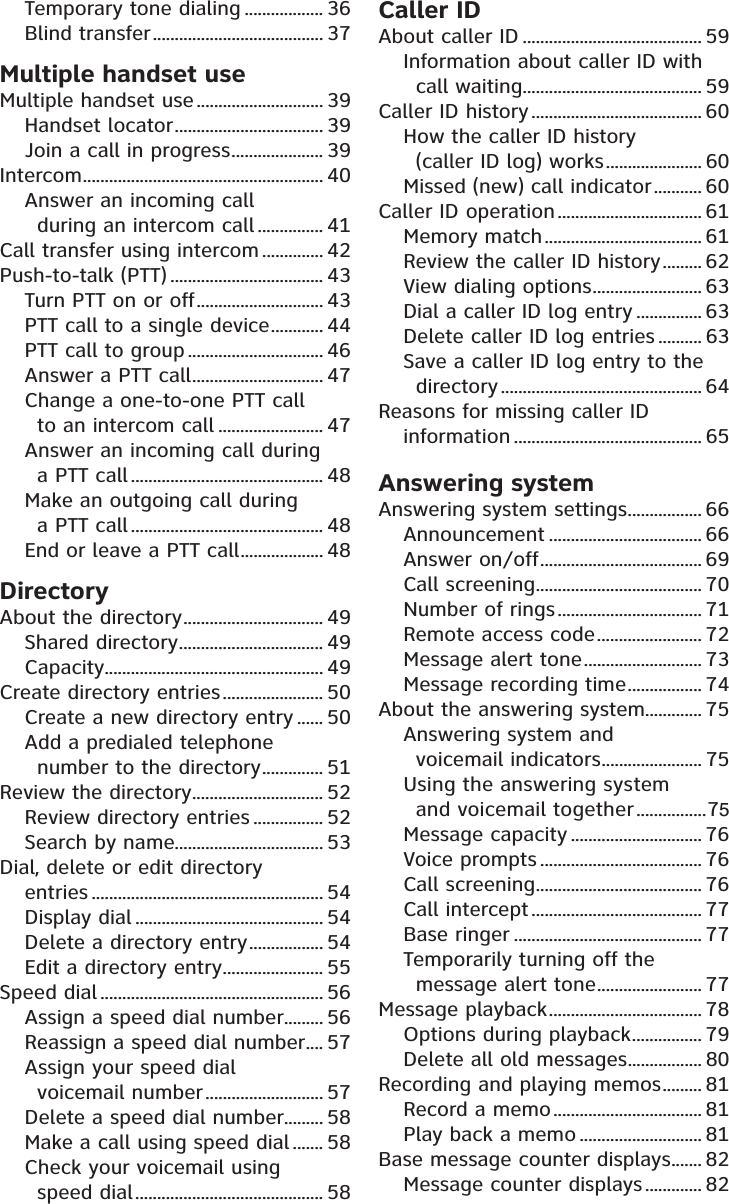
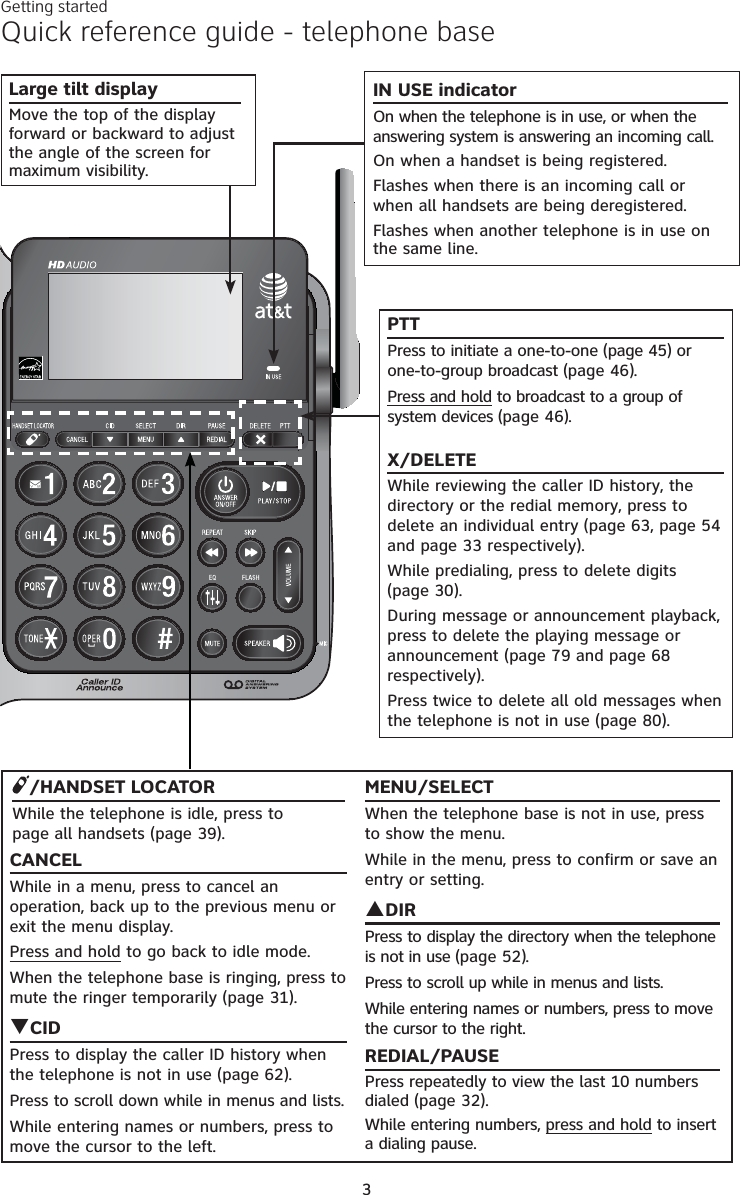
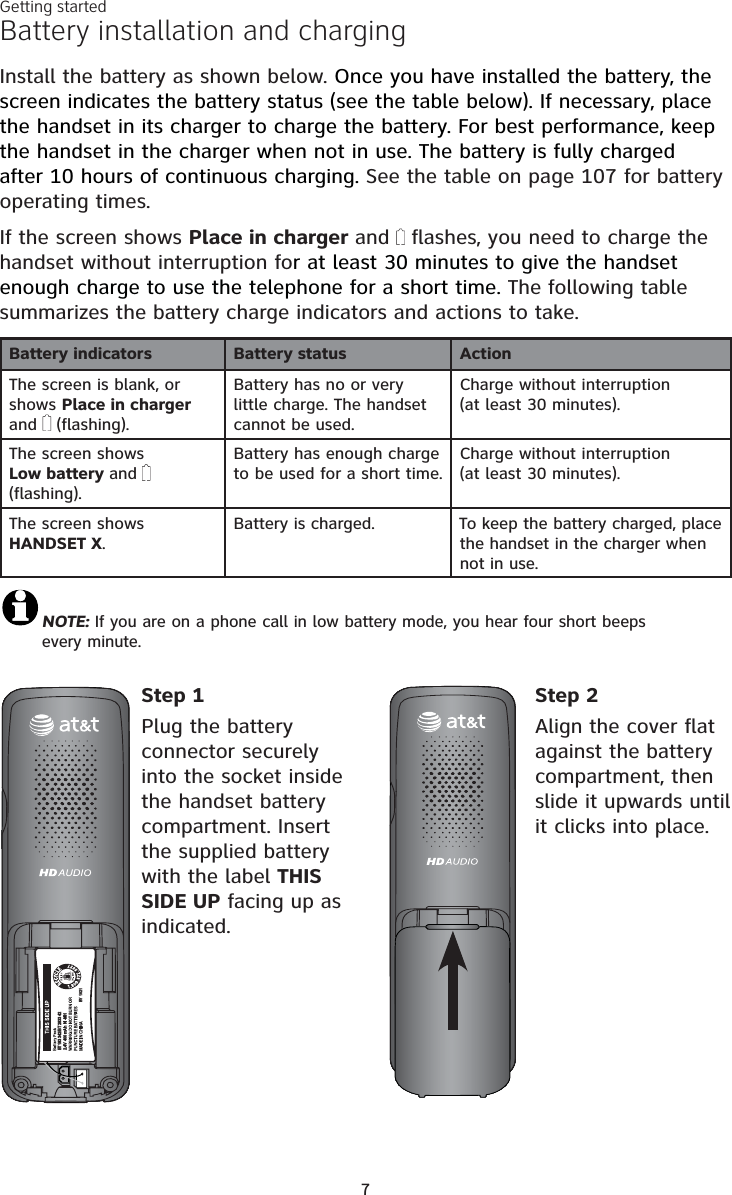
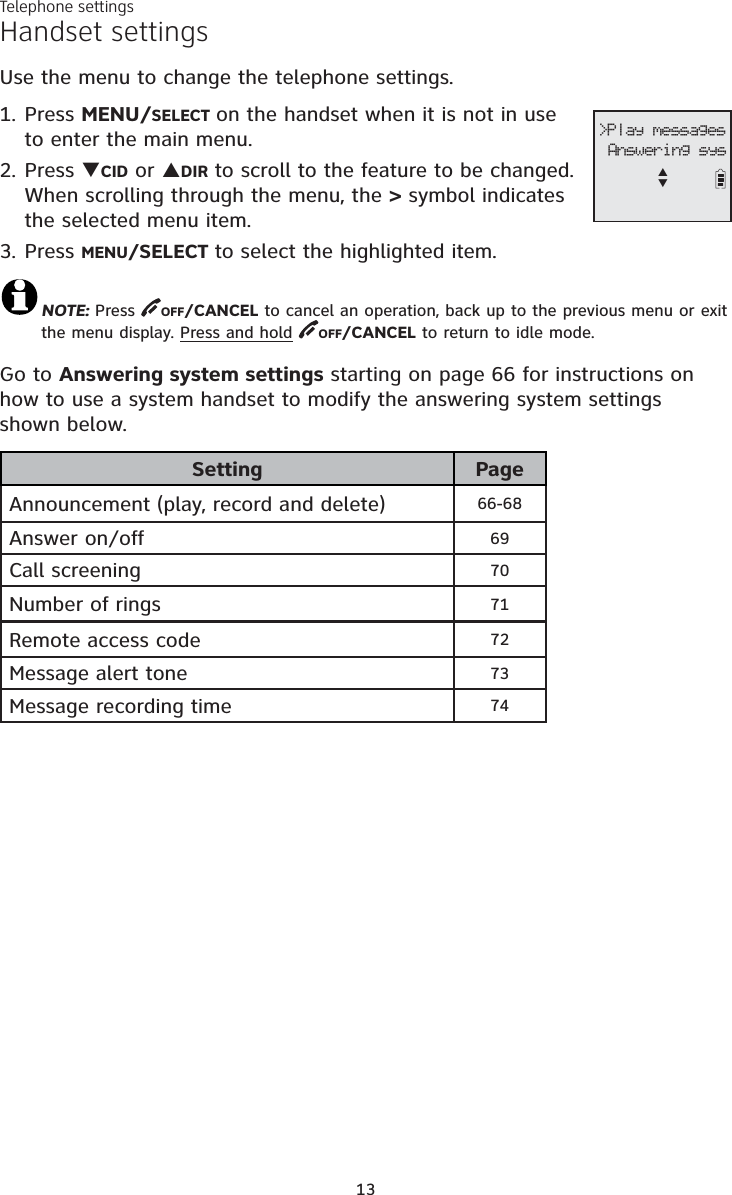
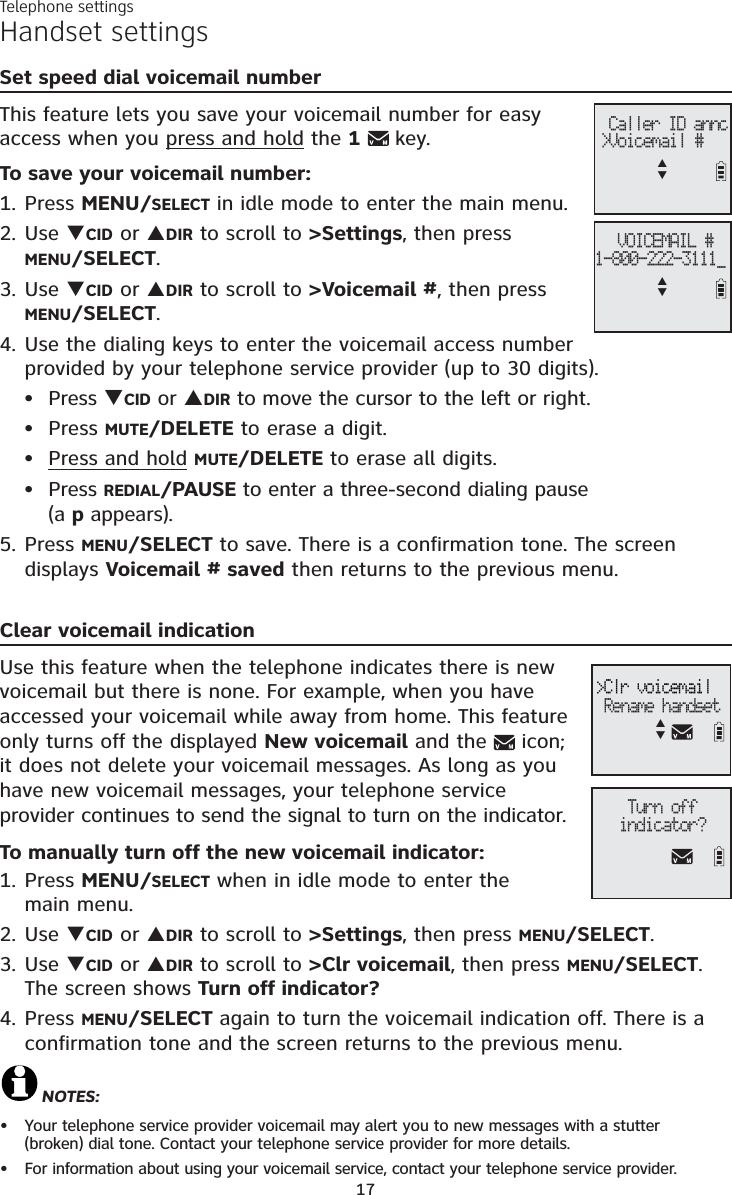
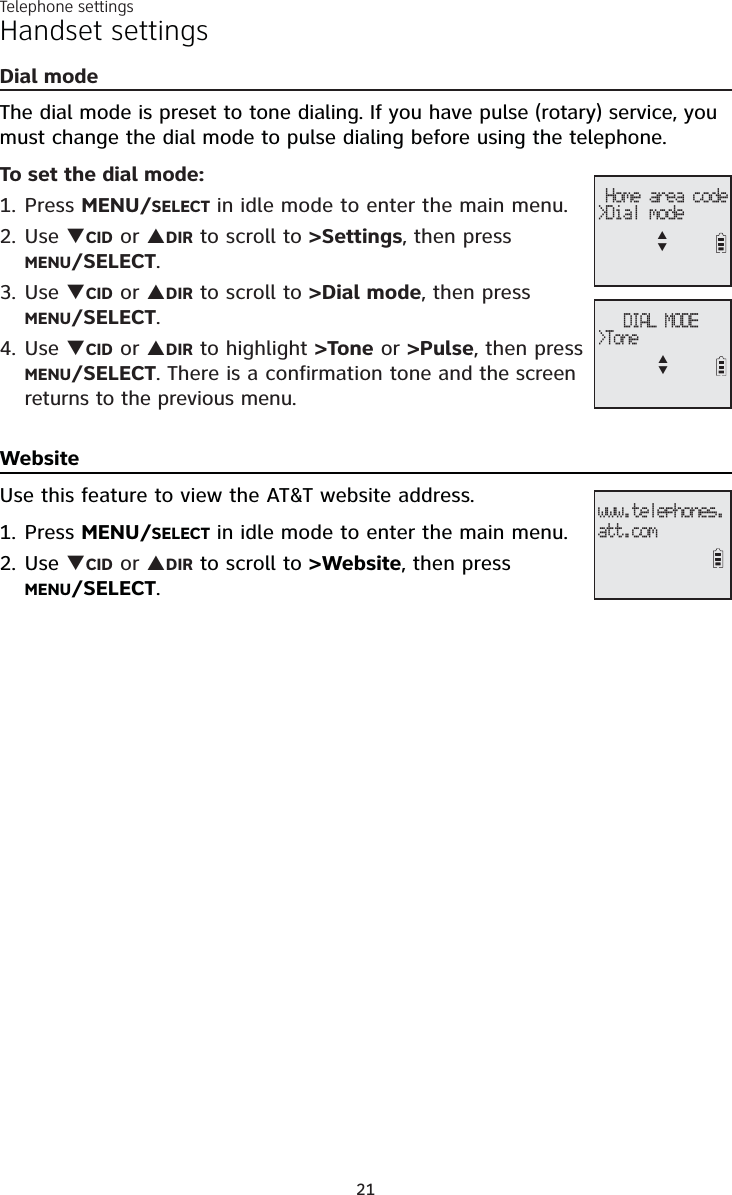
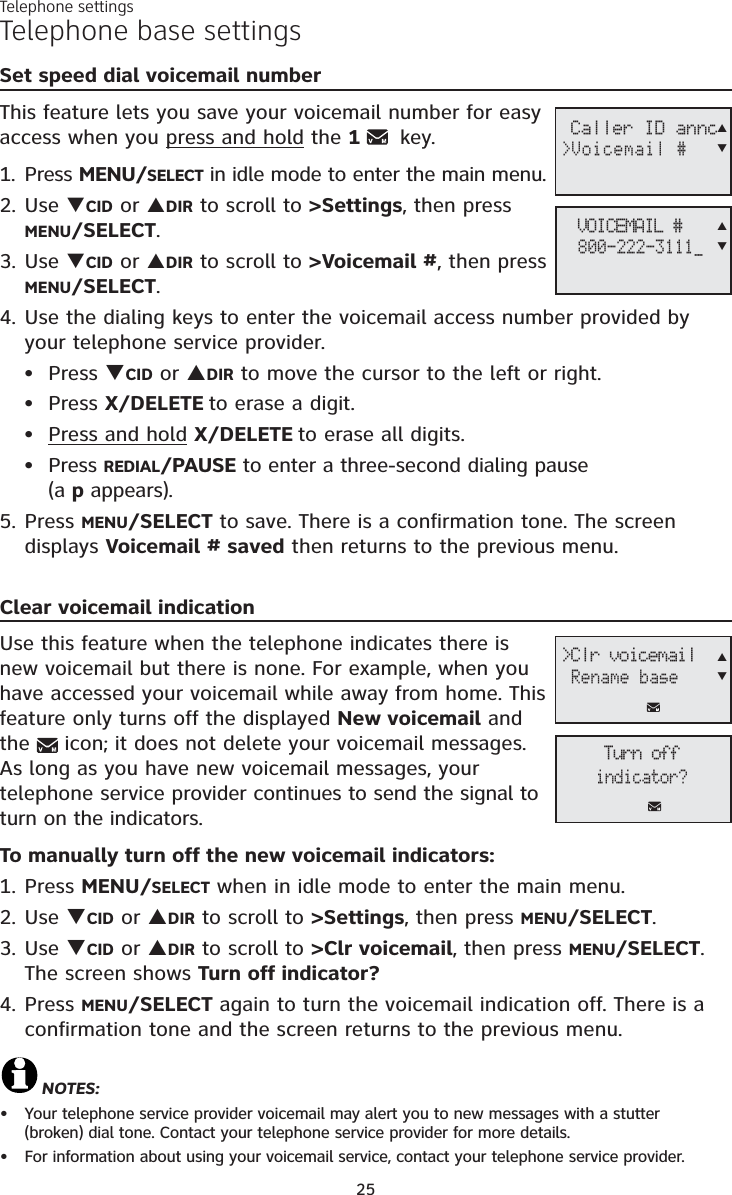
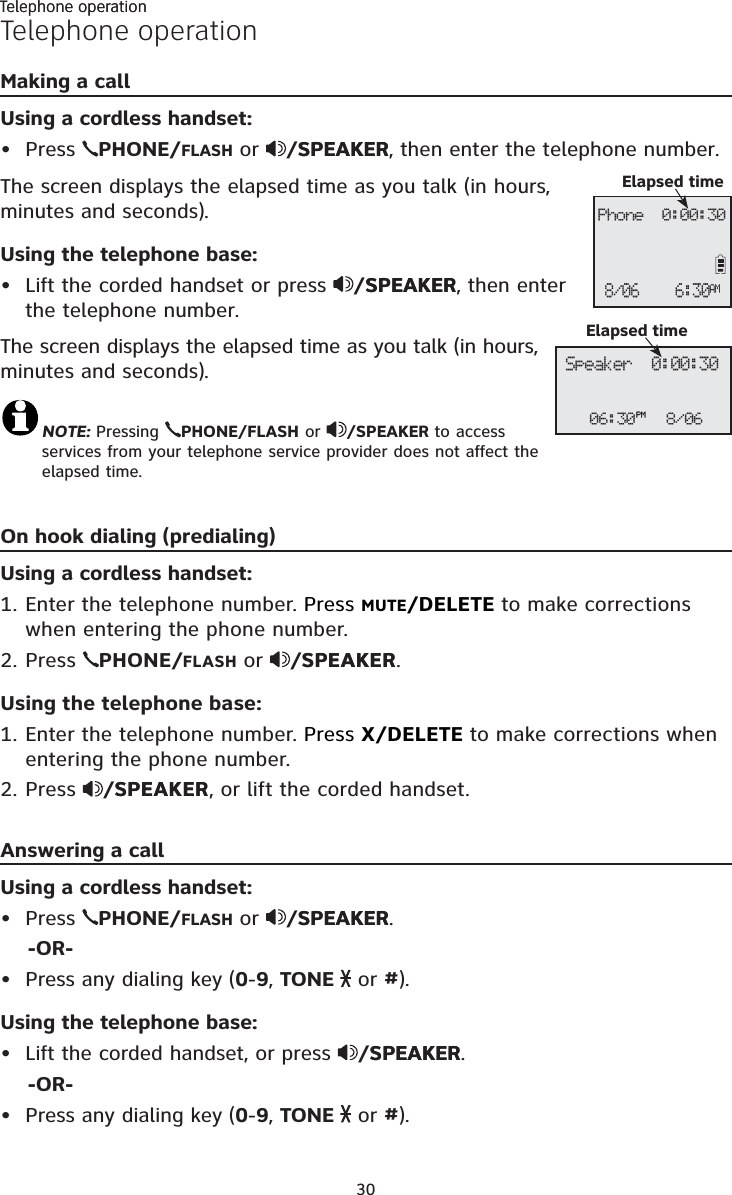
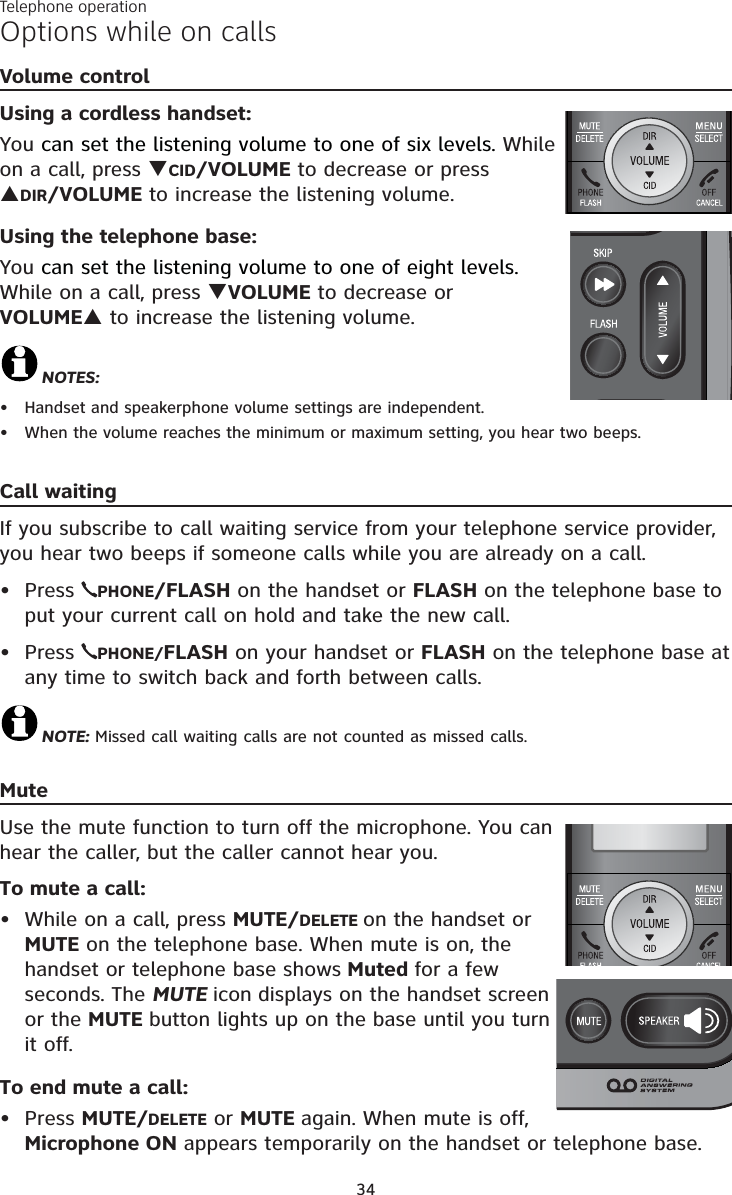
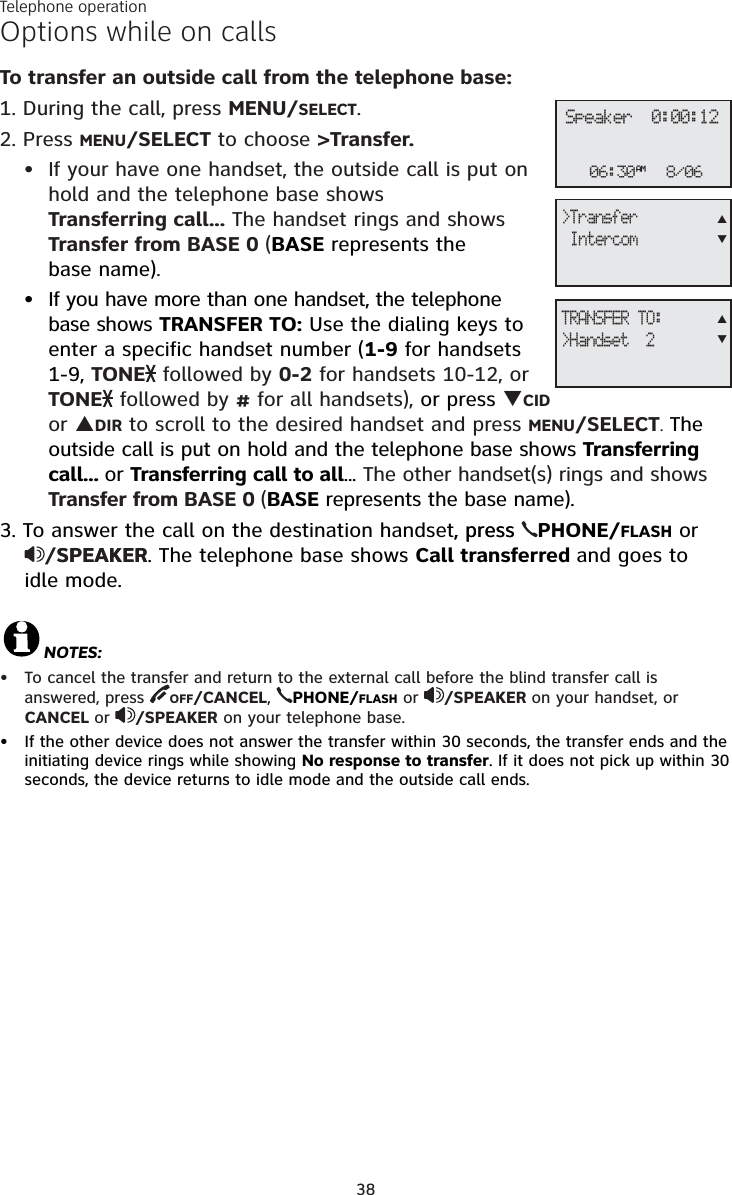
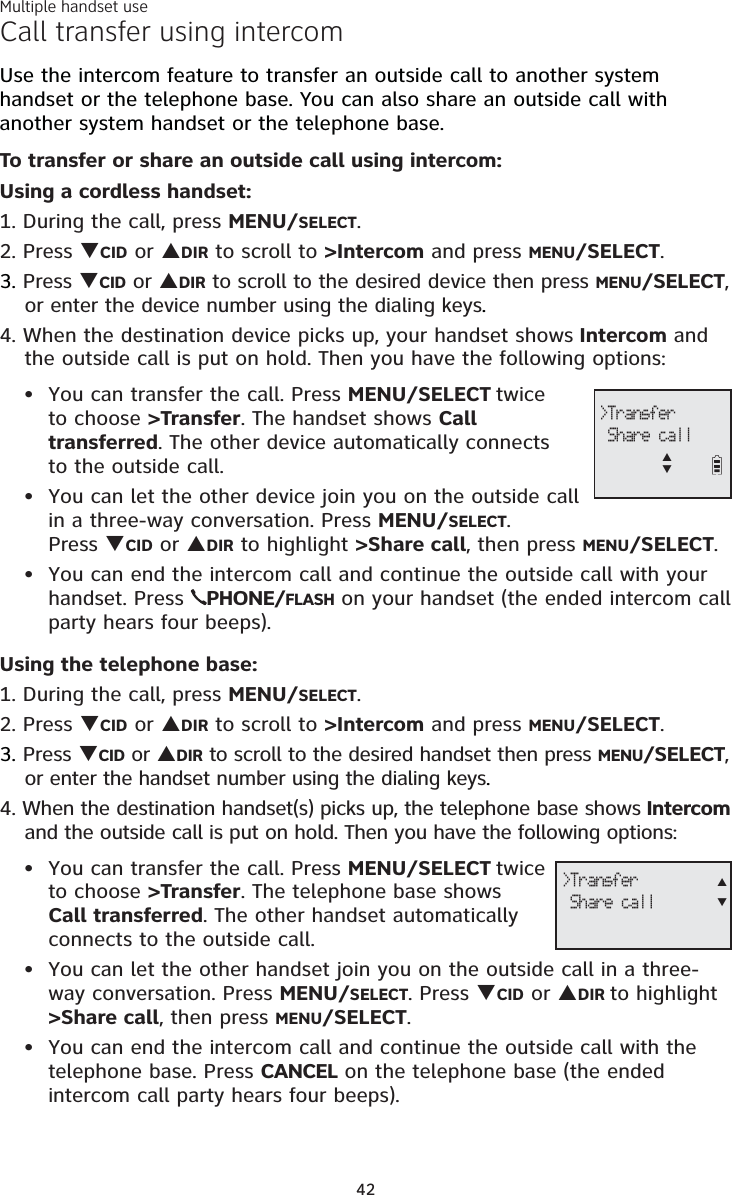
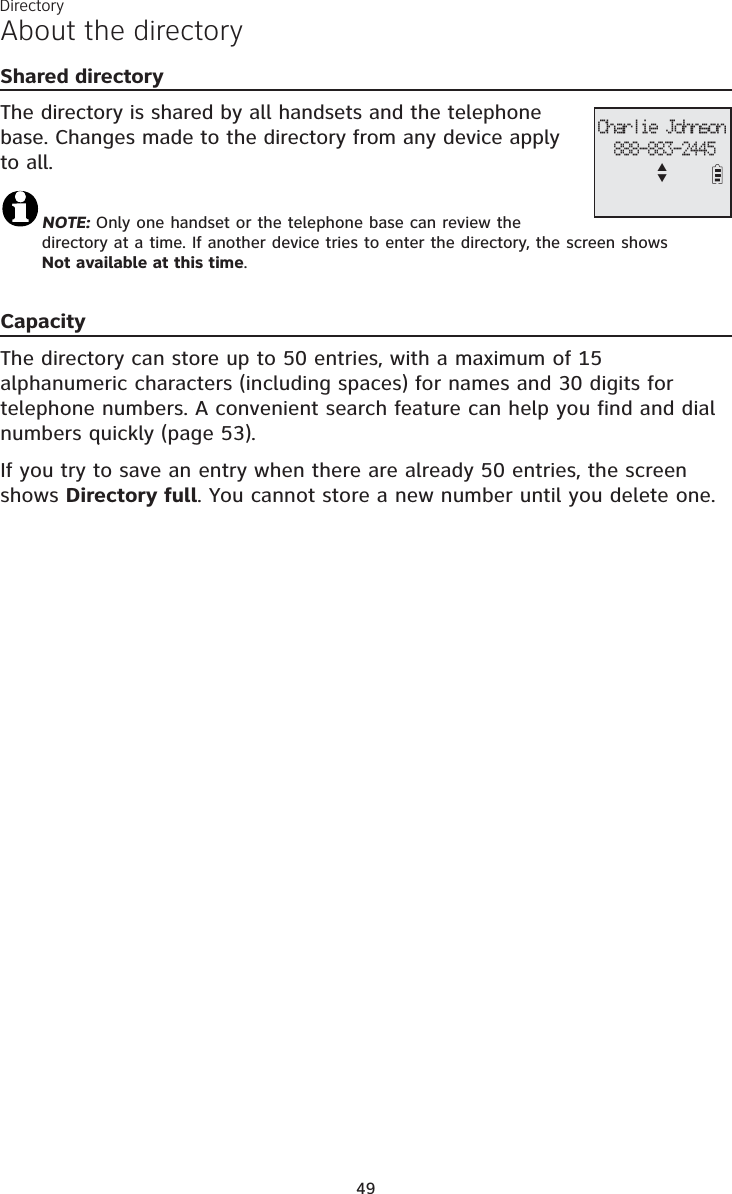
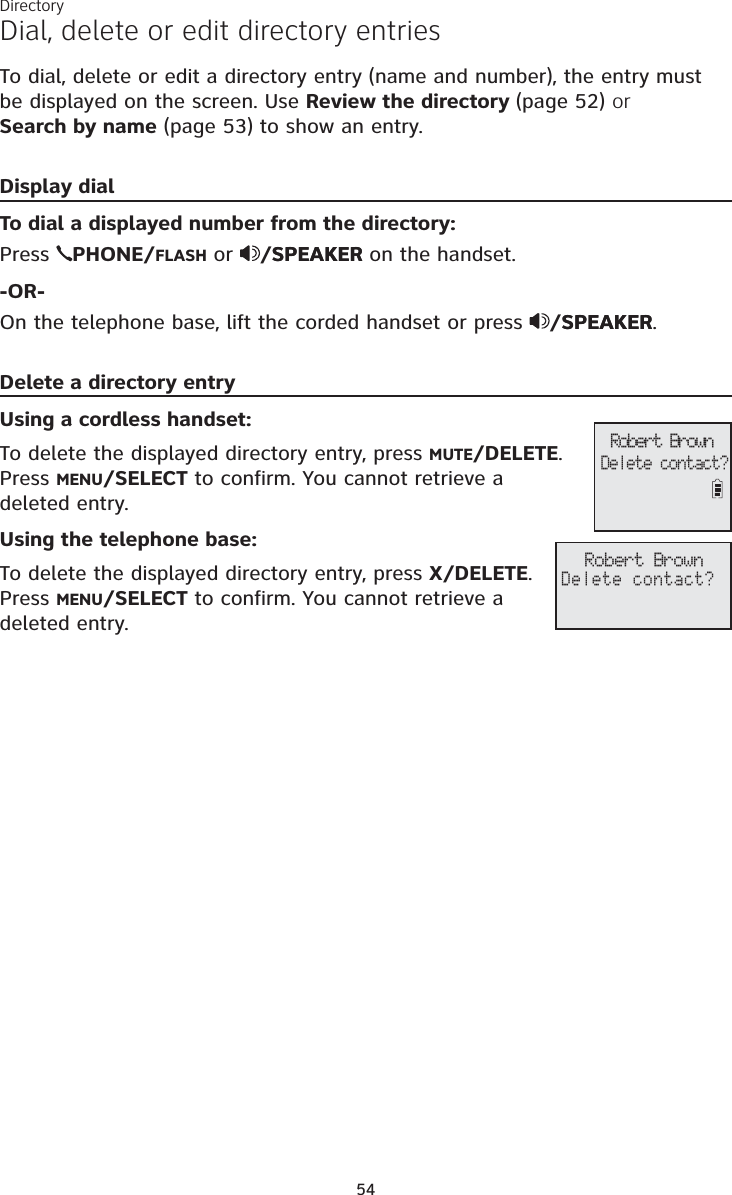
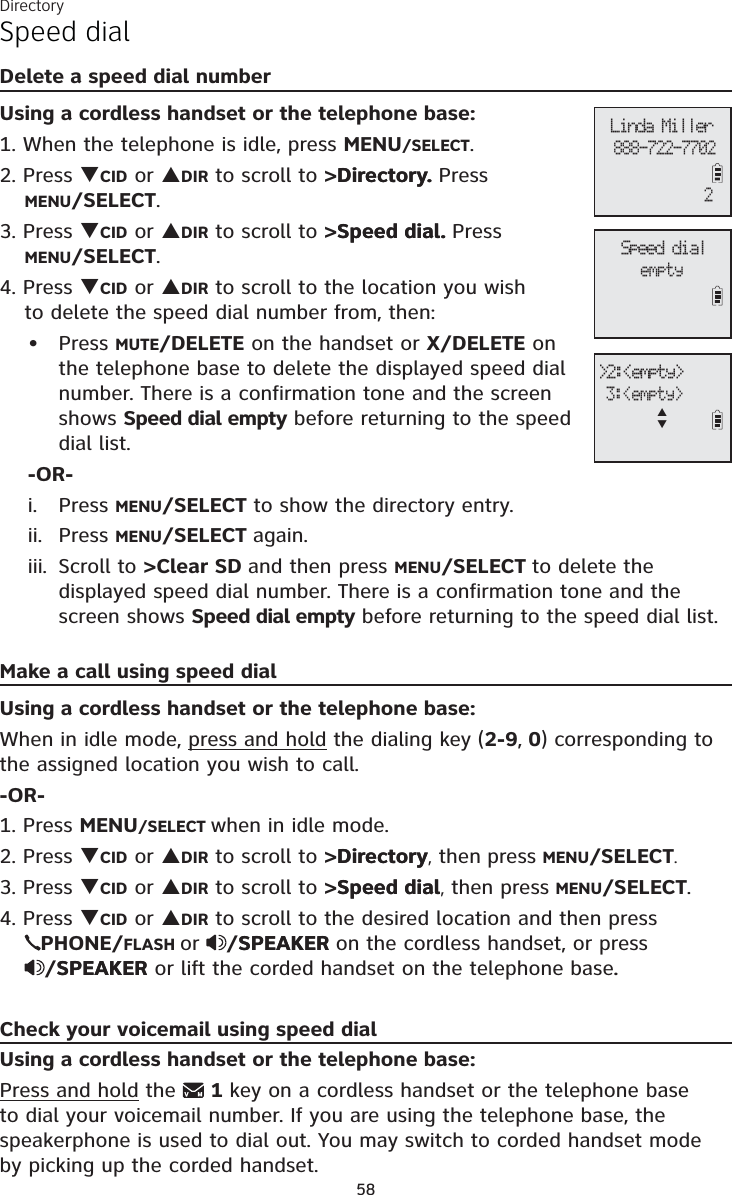
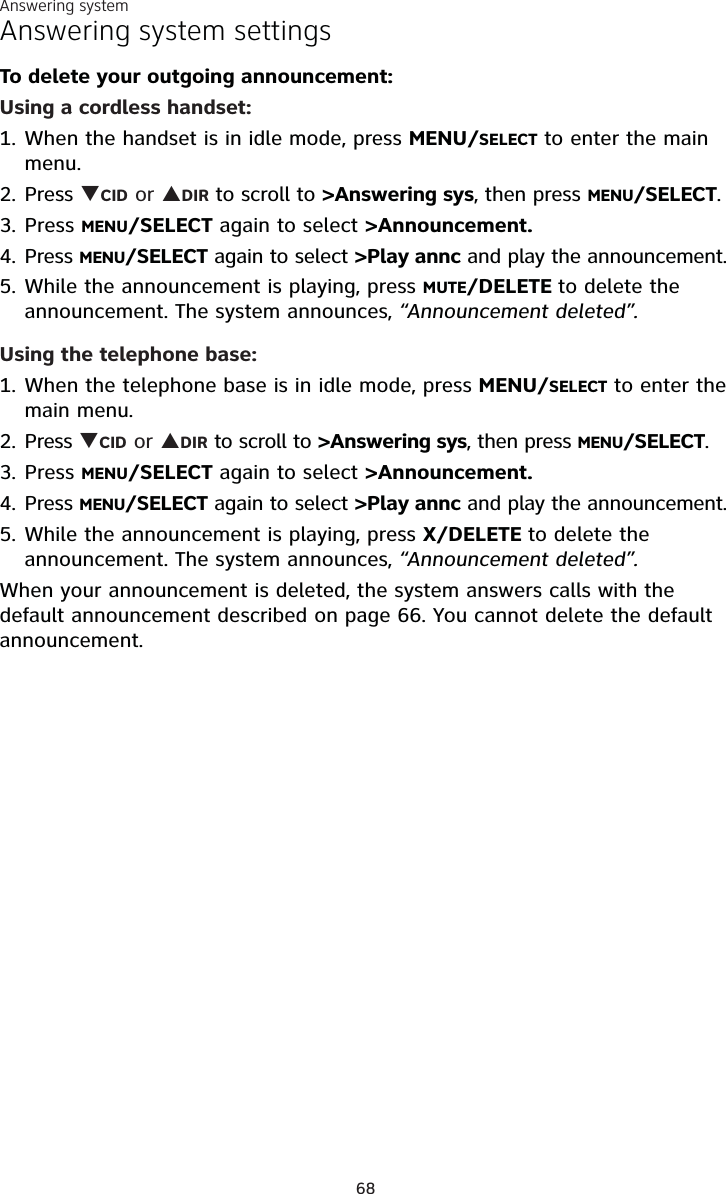
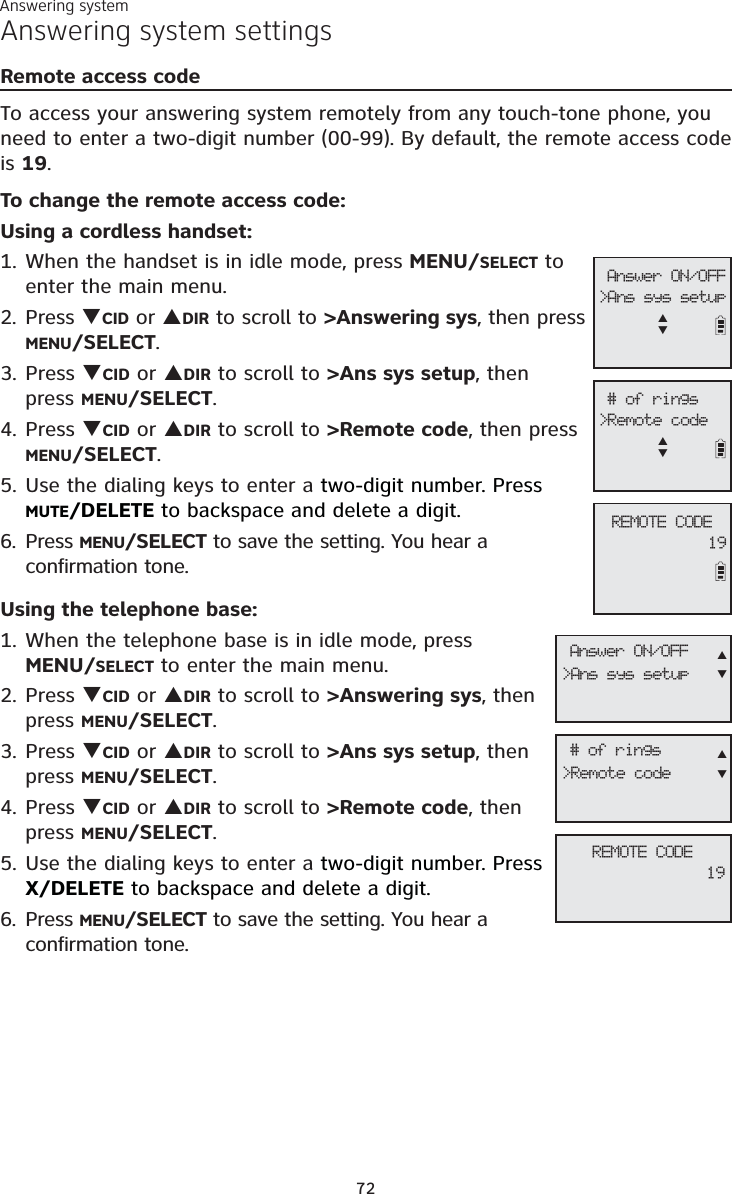
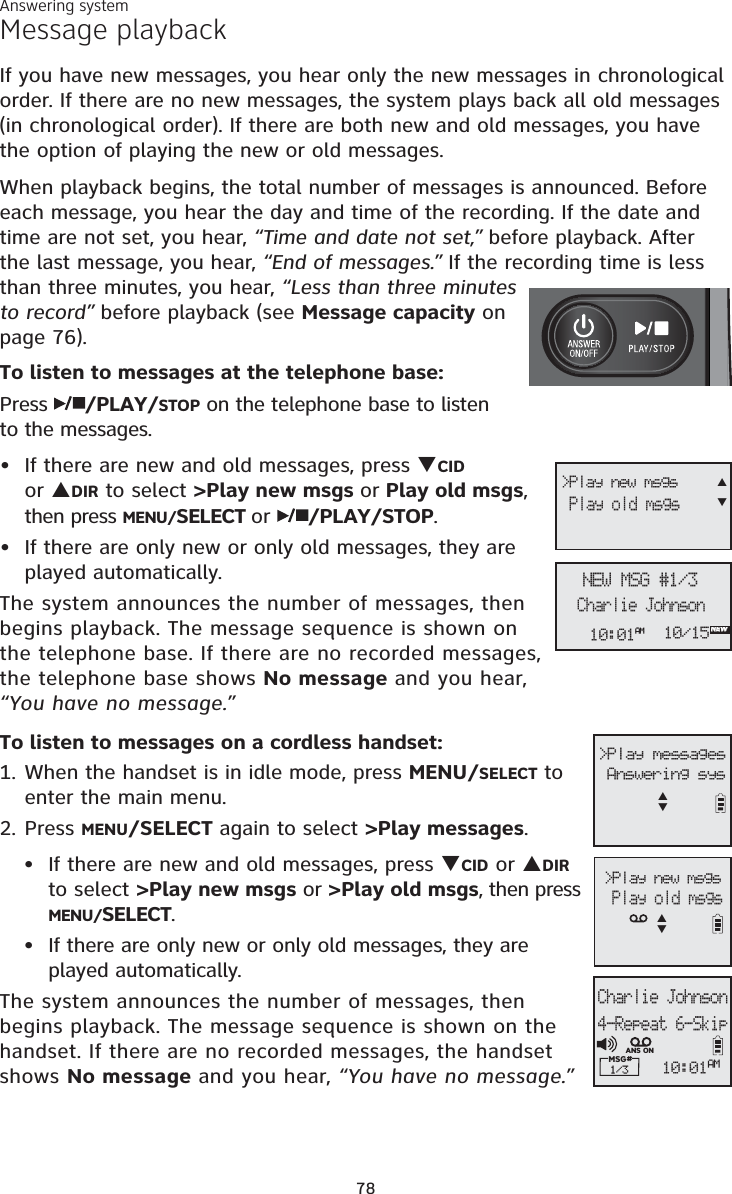
![Multiple handset use45Push-to-talk (PTT)Using the telephone base:1. There are a few ways to begin a PTT call to a single handset. When the telephone base is not in use:If you have one handset, press and hold PTT.If you have more than one handset: Press PTT. Then use the dialing keys to enter the destination handset number. -OR-Press TCID or SDIR to highlight the destination handset number. Then press MENU/SELECT or PTT.The telephone base shows Connecting to HANDSET X... (HANDSET represents the handset name, X represents the destination handset number)for a few seconds. When the connection is made, both the telephone base and destination handset display Press and hold [PTT] to talk.2. Press and hold PTT. A chirp indicates your microphone is on. Speak towards the telephone base. Your voice is broadcast to the destination handset.While you are speaking, the telephone base shows PTT To handset: X.3. Release PTT after speaking. Both devices beep once again and the screens show Press and hold [PTT]to talk. Then you can press and hold PTT to continue speaking or the destination device can respond (see Answer a PTT call on page 47).4. To end the PTT call, press CANCEL. The telephone base shows Push to talk Ended for a few seconds.••PTT Tohandset: XConnecting toHandset X...Press and hold[PTT] to talkPUSH TO TALK>Handset XST](https://usermanual.wiki/VTech-Telecommunications/80-8494-00/User-Guide-1619278-Page-51.png)
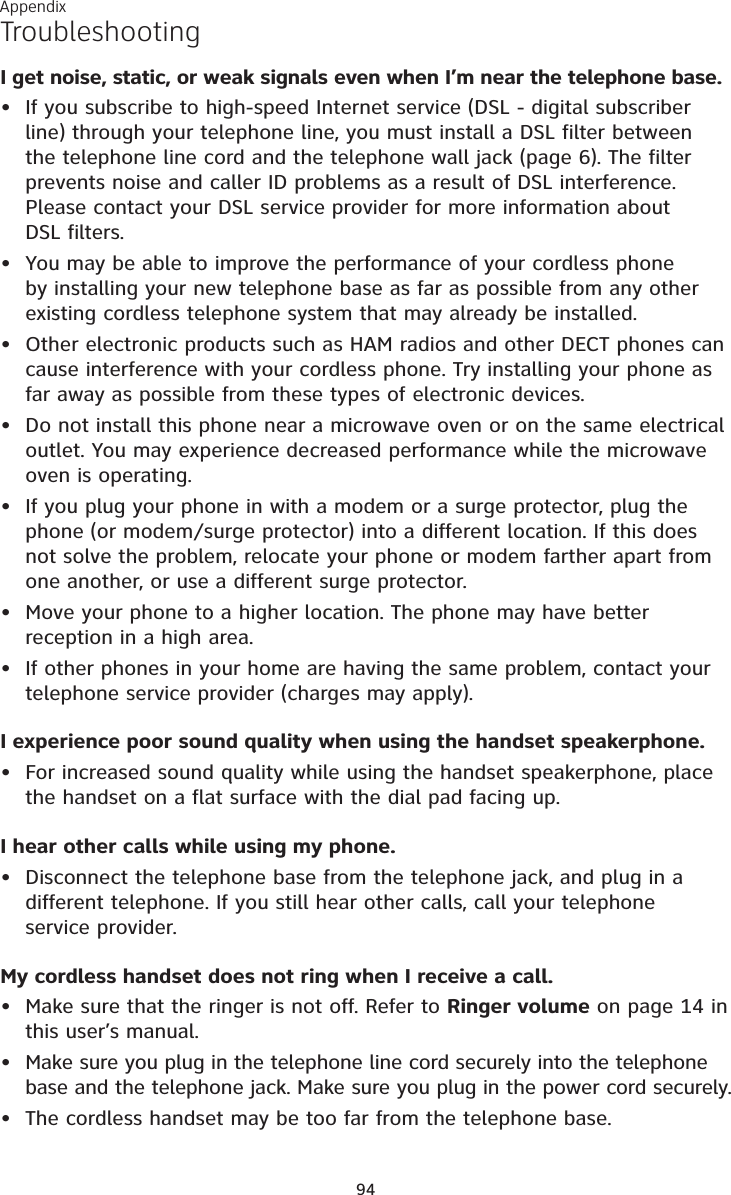
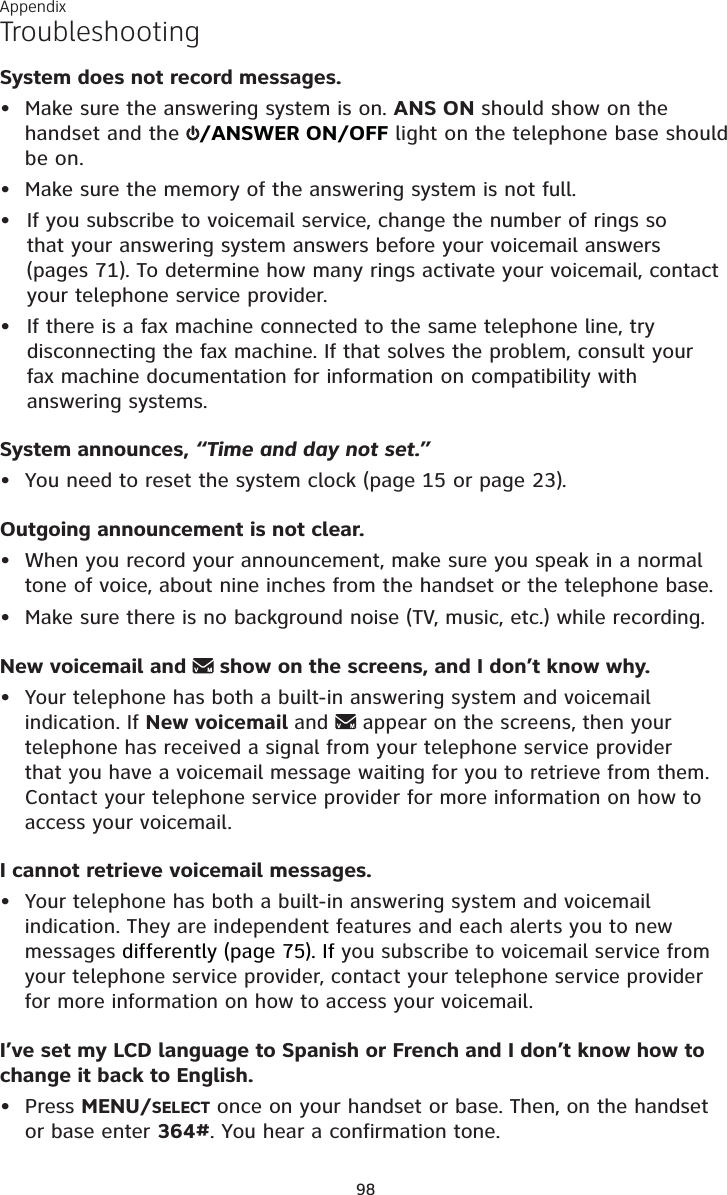
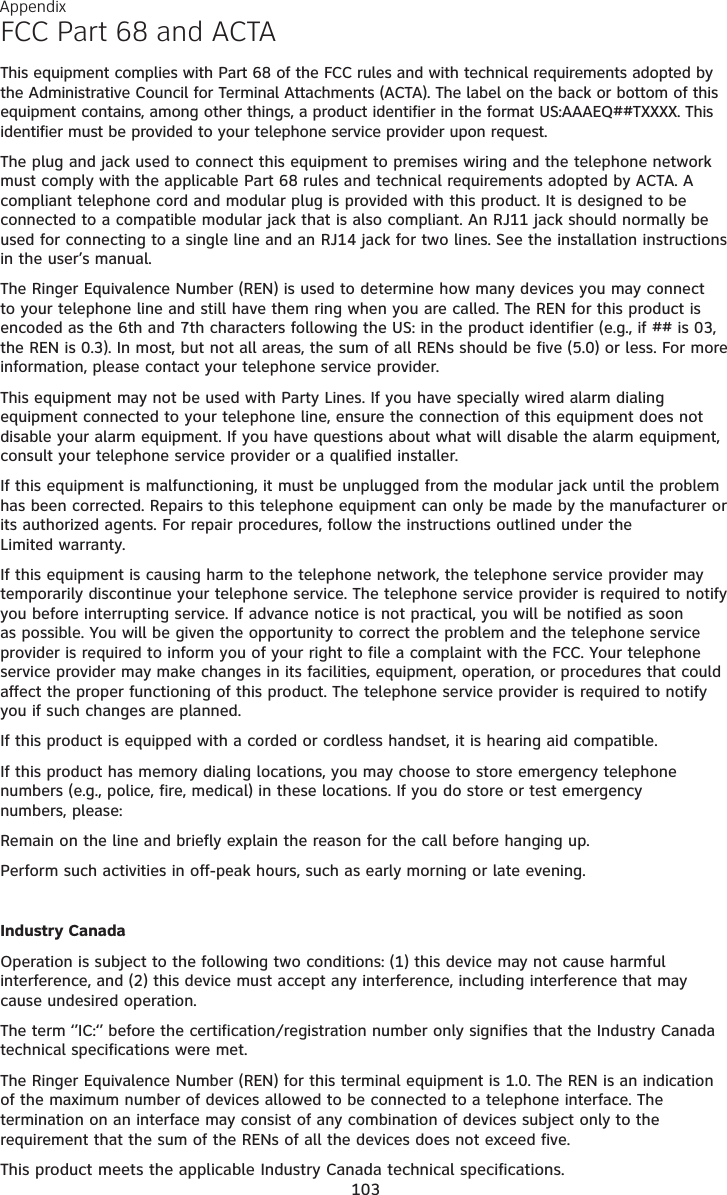
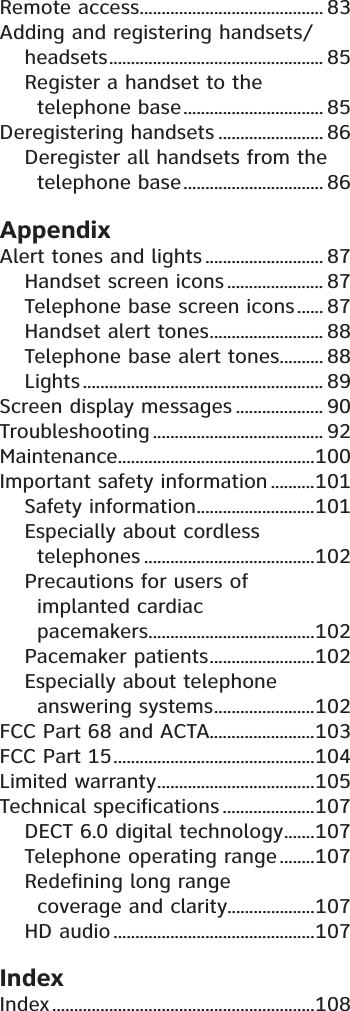
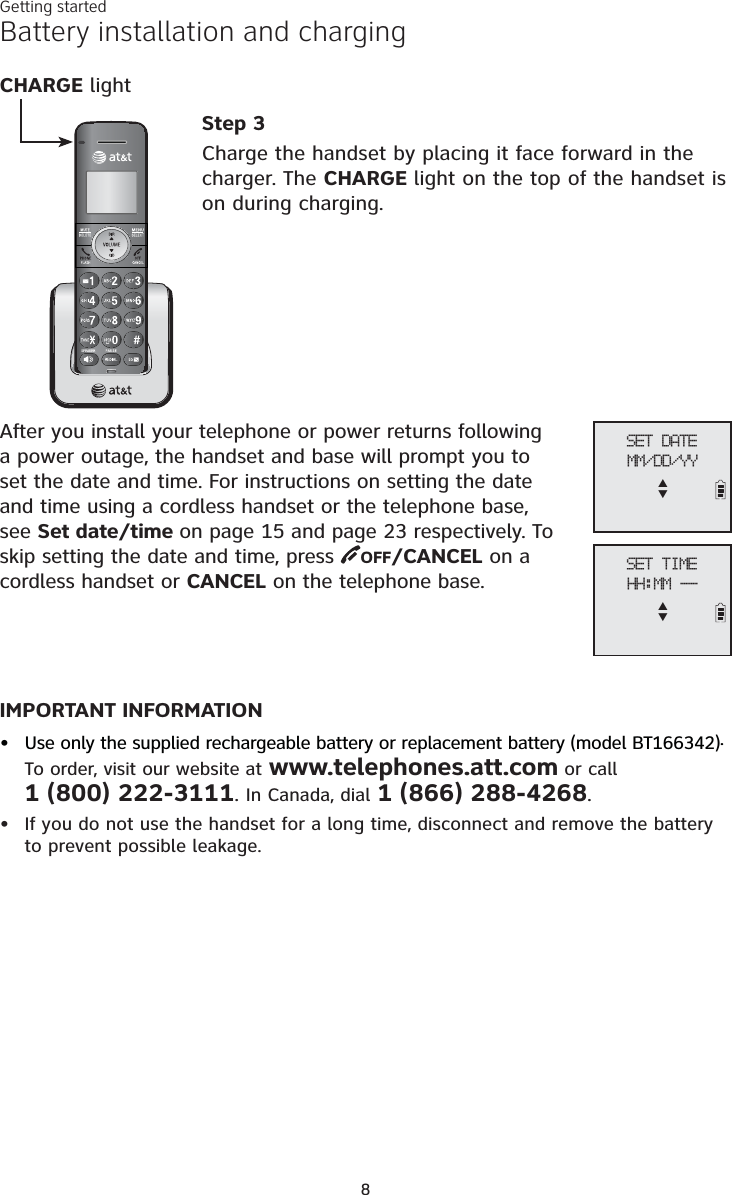
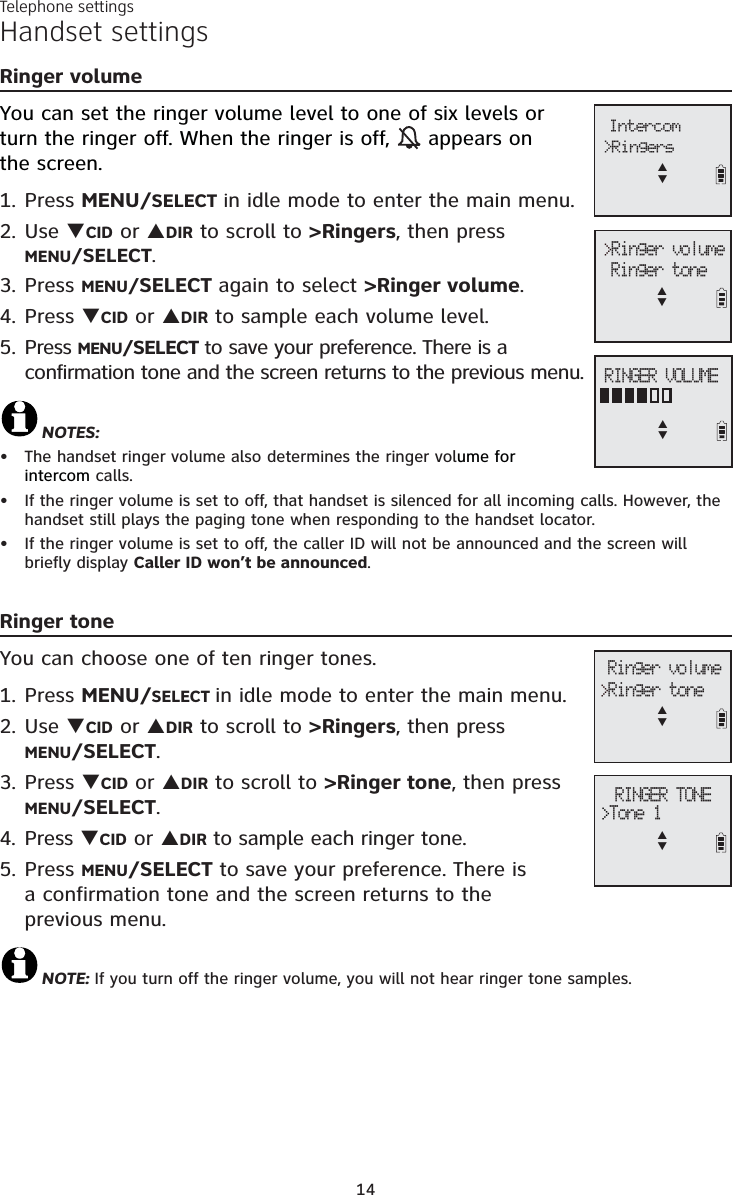
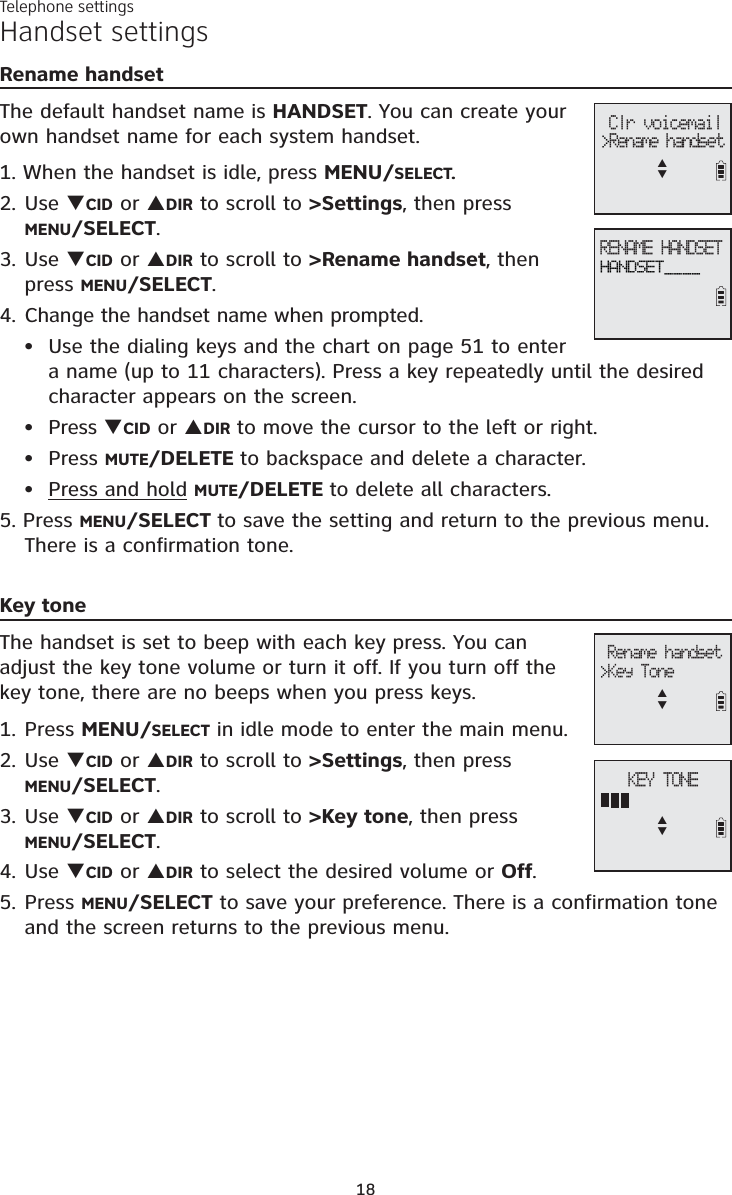
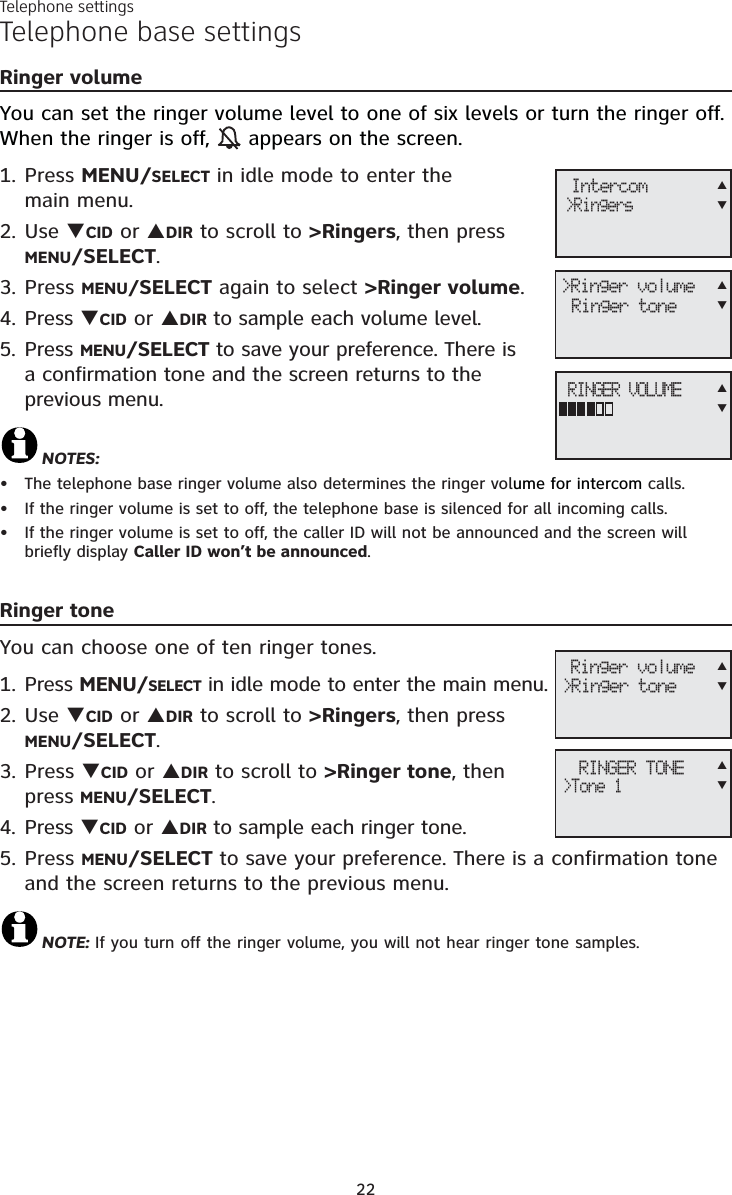
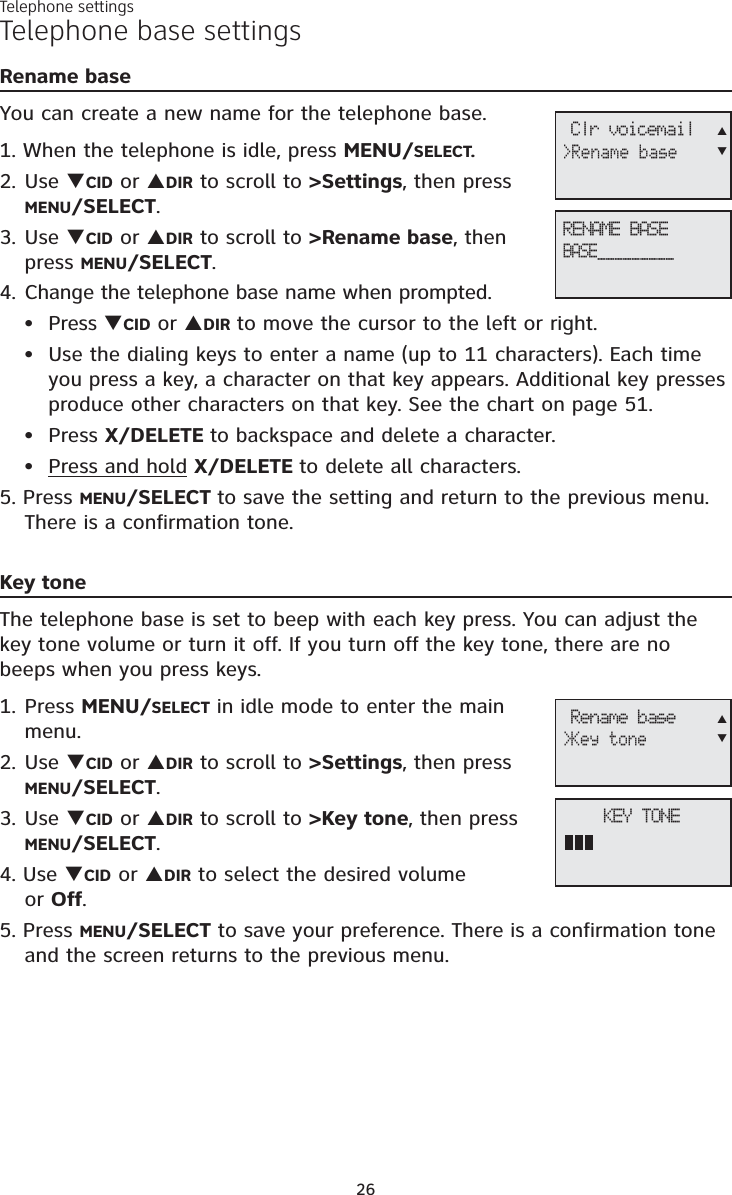
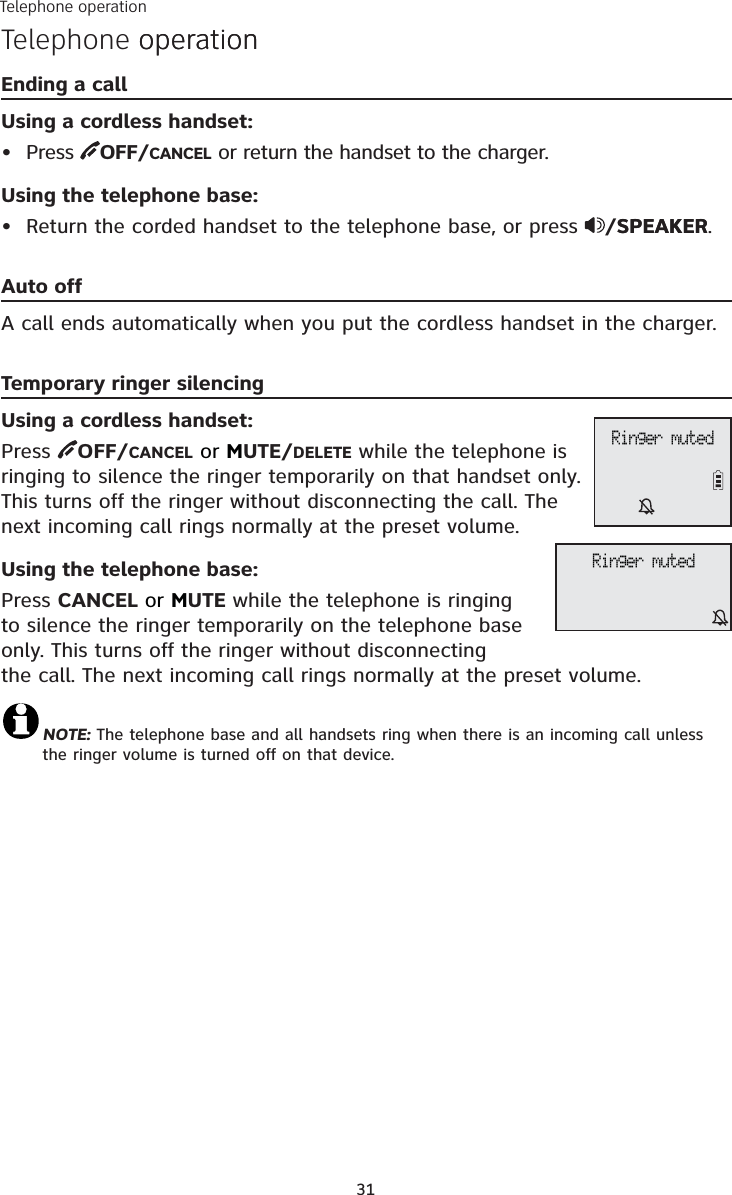
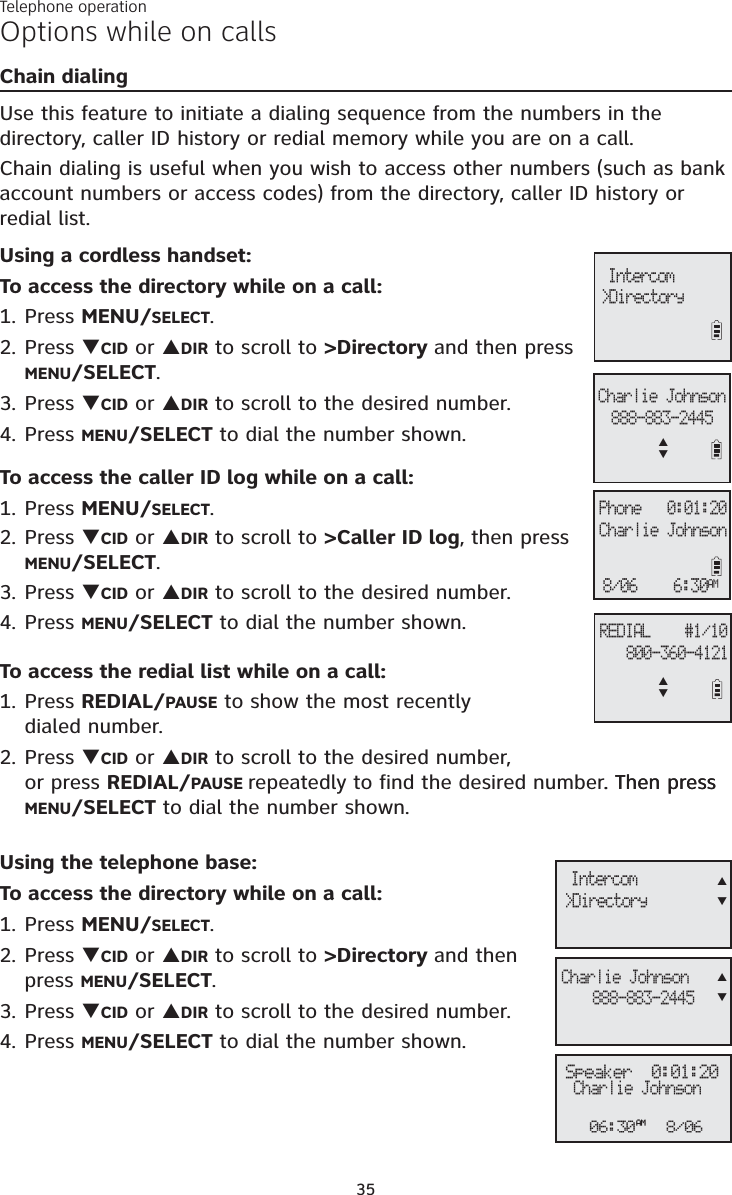
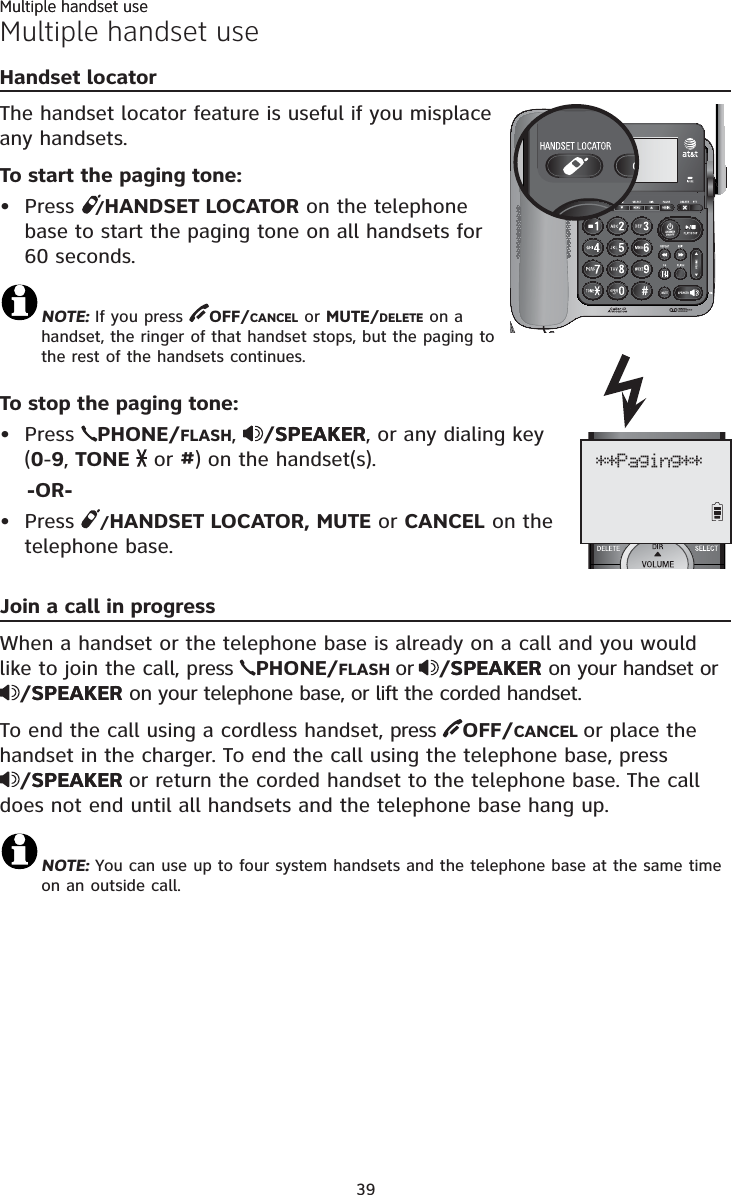
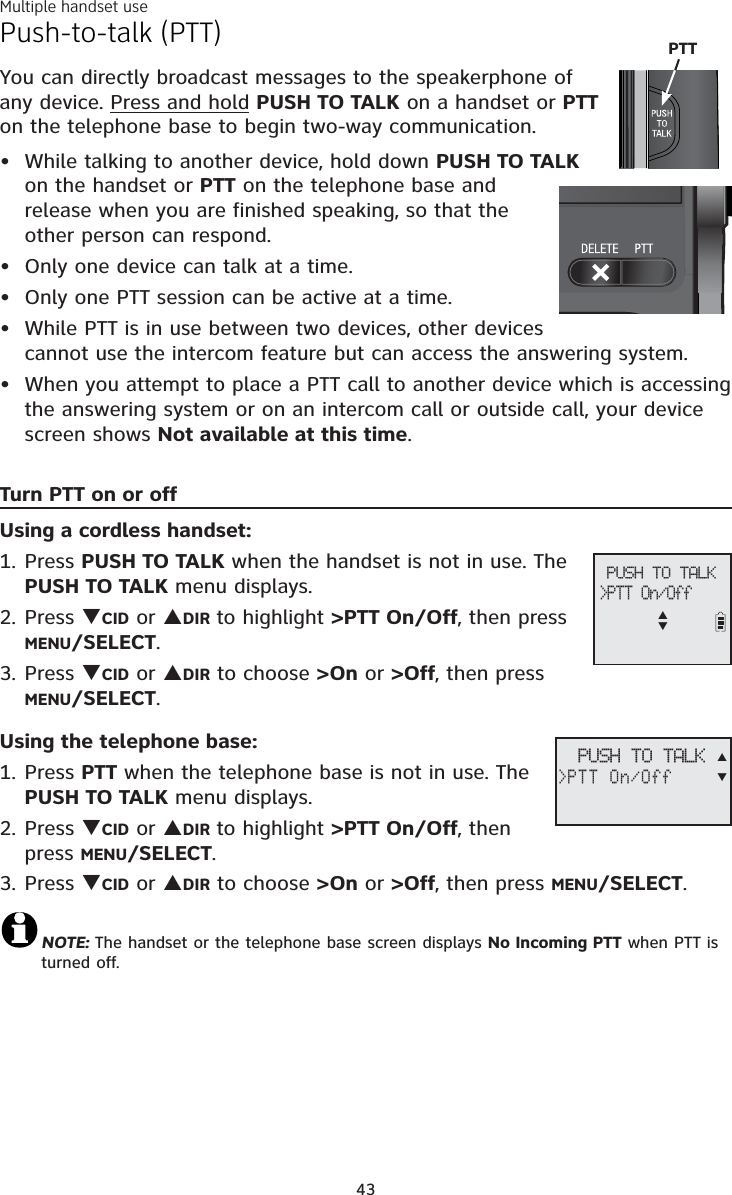
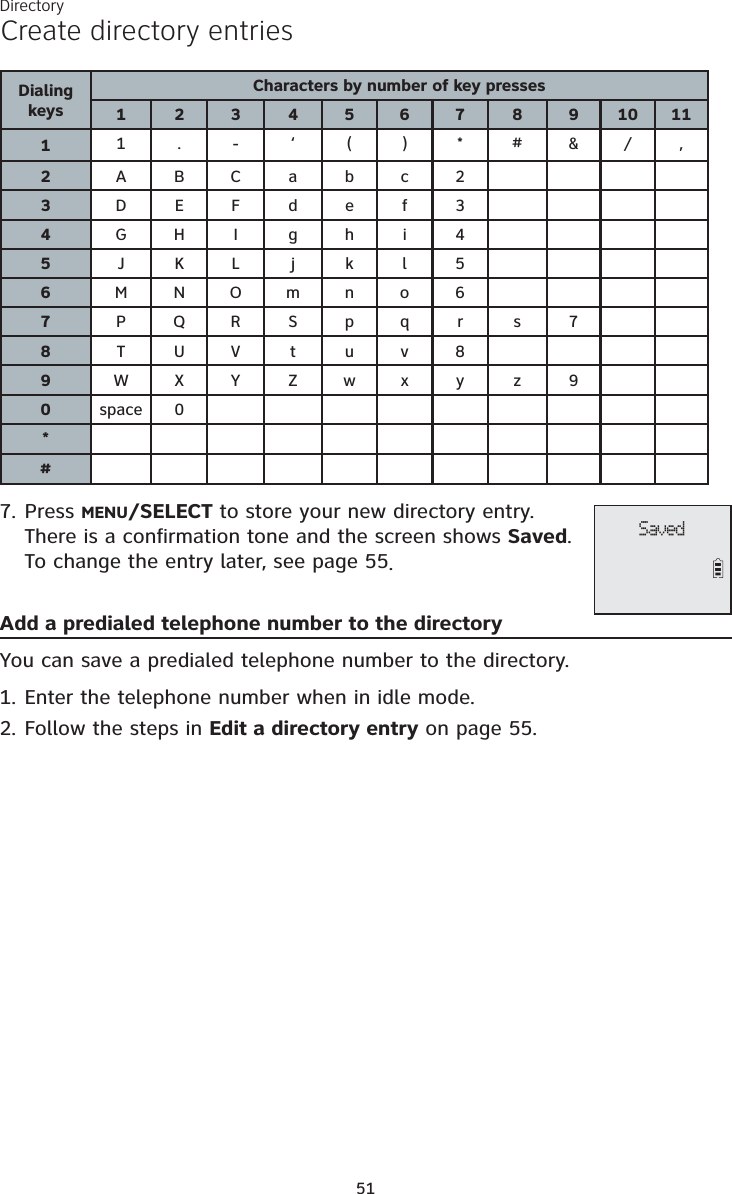
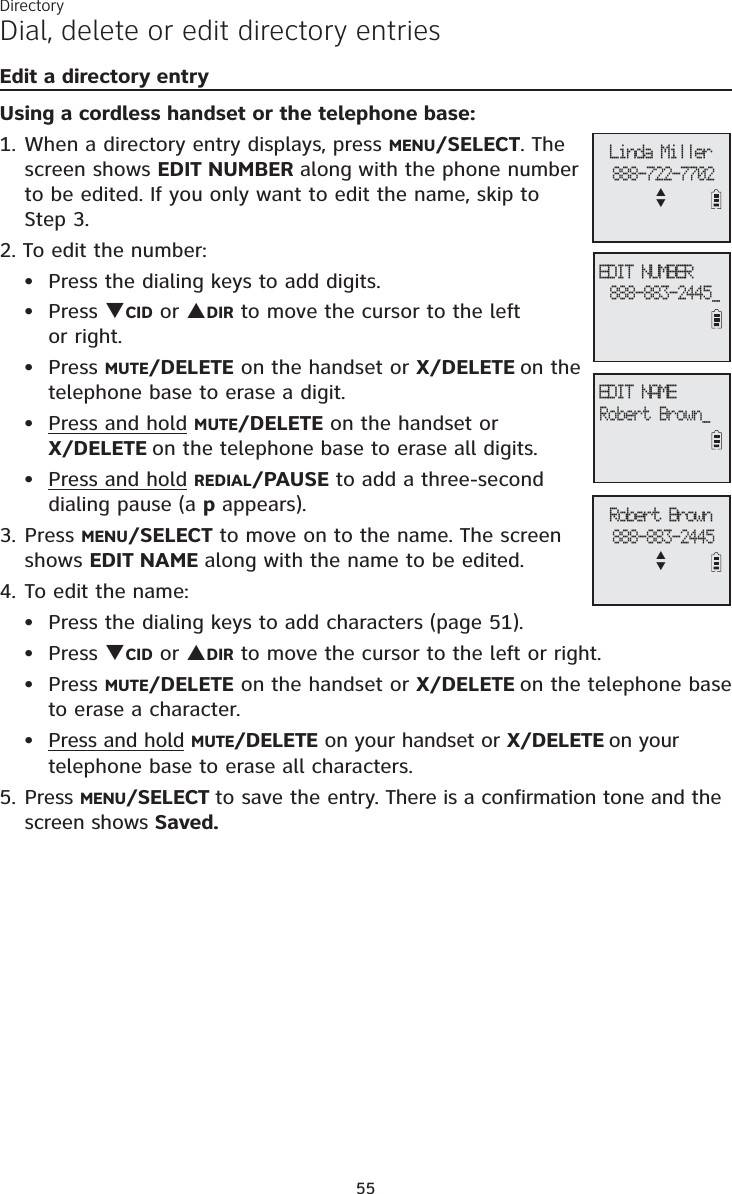
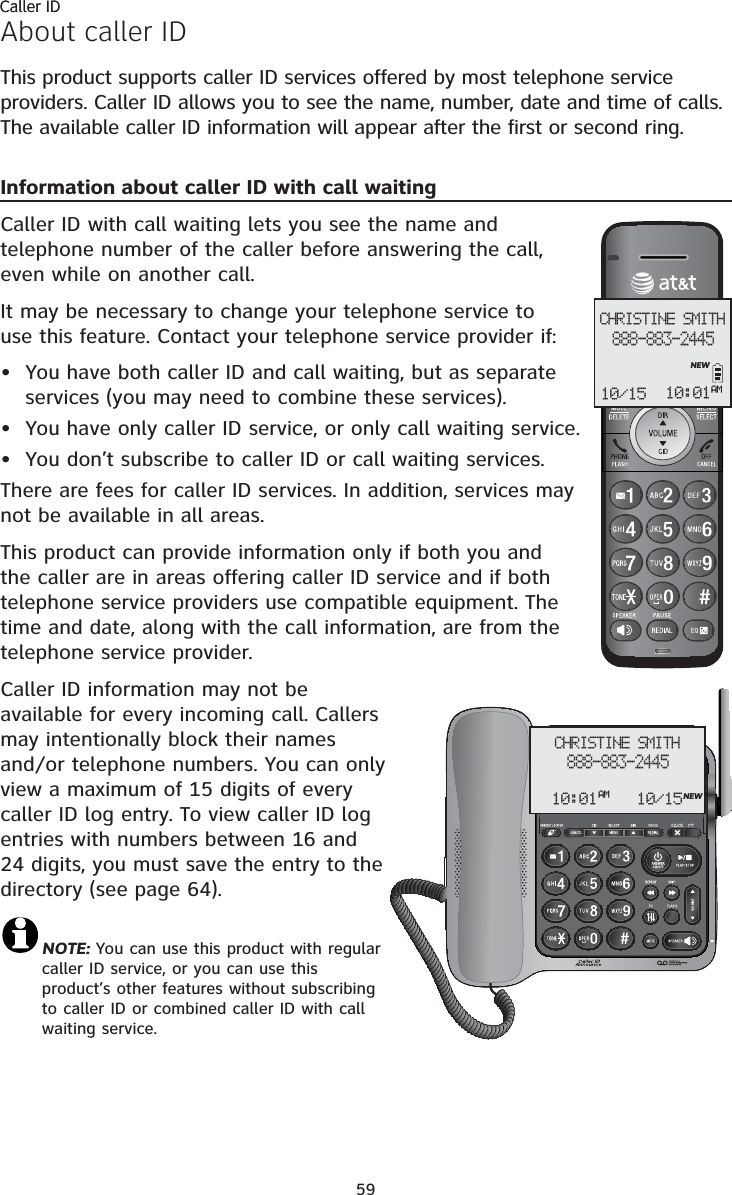
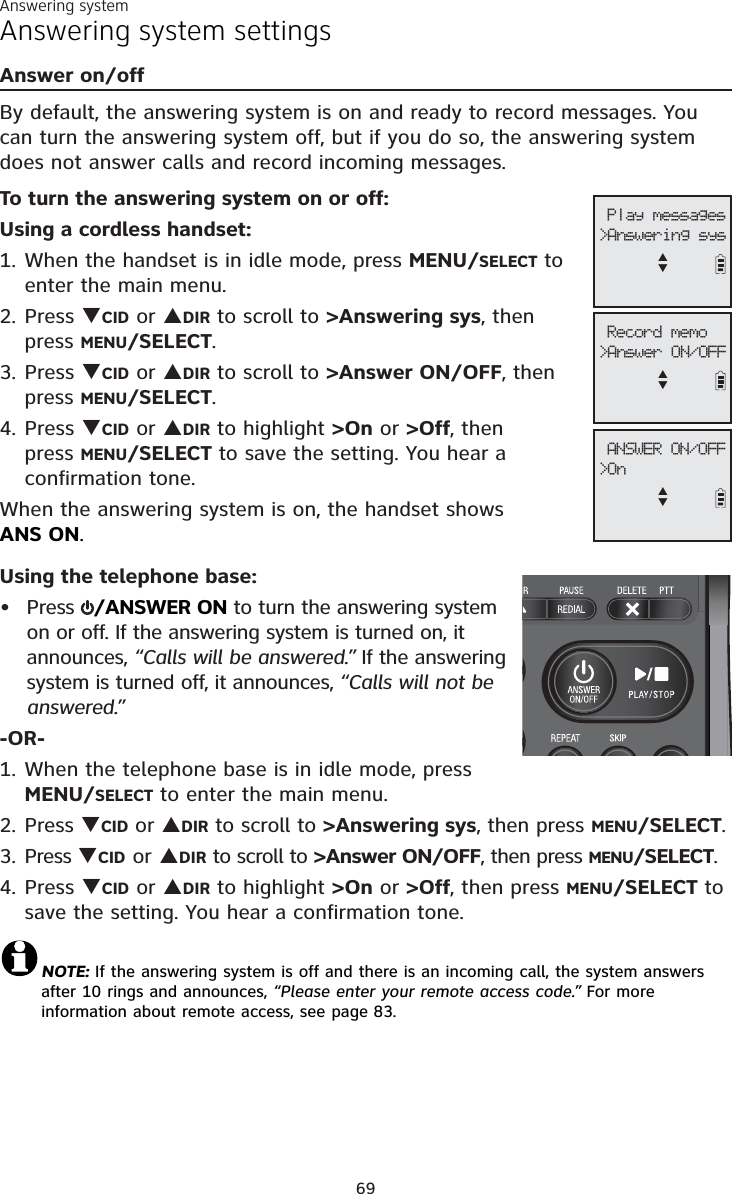
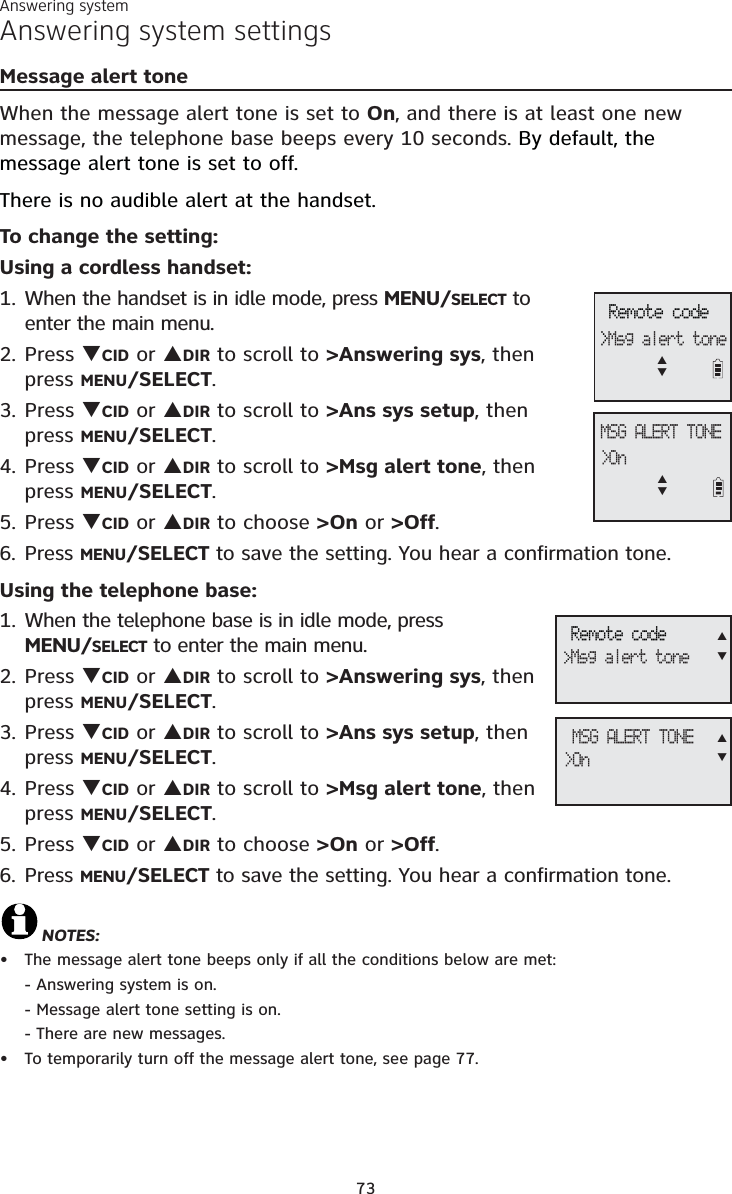
![Multiple handset use47Push-to-talk (PTT)Answer a PTT callYou can respond to a PTT call as described below.When your device receives a PTT call, it beeps and shows Press and hold[PTT] to talk.When the other party is speaking, your speakerphone light is on, and your device shows:PTT From HS X To HS X (the first X represents the initiating handset number, and the second X represents your handset number; a maximum of four handset numbers appear).-OR-PTT From HS X To Base (X represents the initiating handset number) or PTT From HS X To Base & HS X (the first X represents the initiating handset number, and the second X represents your handset number; a maximum of four handset numbers appear).-OR-PTT From Base To HS X (the X represents your handset number; a maximum of five handset numbers appear).When your speakerphone light is off (the screen shows Press and hold[PTT] to talk), press and hold PUSH TO TALK on your handset or PTT on your telephone base. You will hear a chirp. Speak towards the device.While you are speaking, your device shows PTT To Handset: X (Xrepresents the handset numbers of one or more destination handsets; a maximum of five handset numbers appear) or PTT To Base & Handset: X (X represents the handset numbers of one or more destination handsets; a maximum of four handset numbers appear) .Your voice is broadcast to all destination devices.After speaking, release PUSH TO TALK on your handset or PTT on your telephone base. Your device will beep. After the beep, if your speakerphone light is off, you can press and hold PUSH TO TALK onyour handset or PTT on your telephone base to continue speaking, or the destination device can respond.1.2.•••3.••Change a one-to-one PTT call to an intercom callYou can convert a one-to-one PTT session to an intercom call. When your device shows Press and hold [PTT] to talk, press MENU/SELECT.The screen shows >Intercom.Press MENU/SELECT. Your device displays Calling base,Calling BASE0 or Calling HANDSET X. The destination device briefly shows Push to talk Ended and then HANDSET is calling,HANDSET X is calling, Base is calling or BASE 0 is calling. The destination device rings.1.2.](https://usermanual.wiki/VTech-Telecommunications/80-8494-00/User-Guide-1619278-Page-53.png)


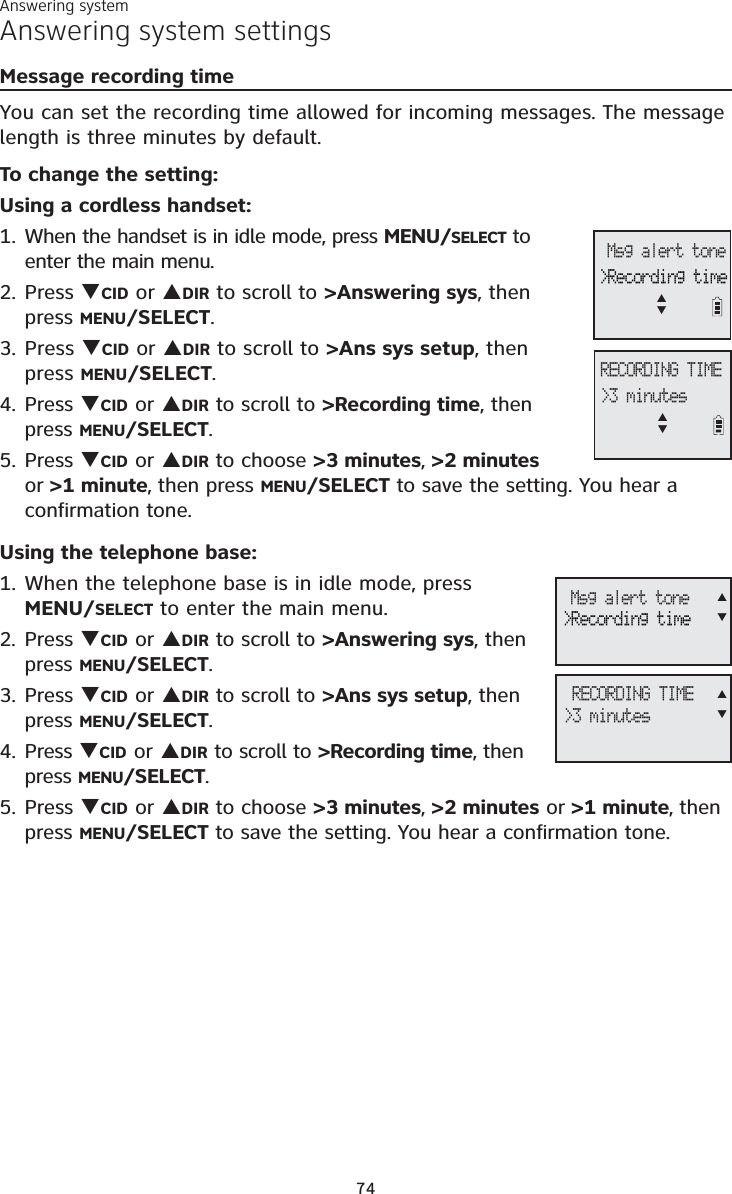
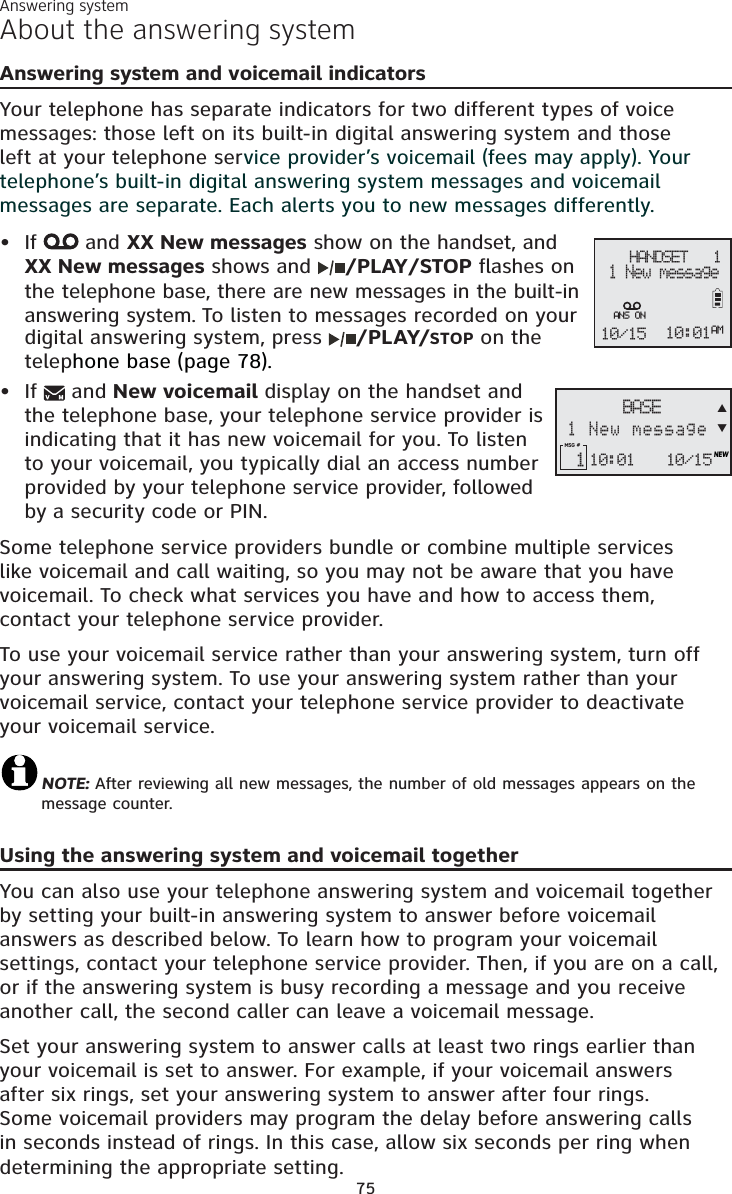
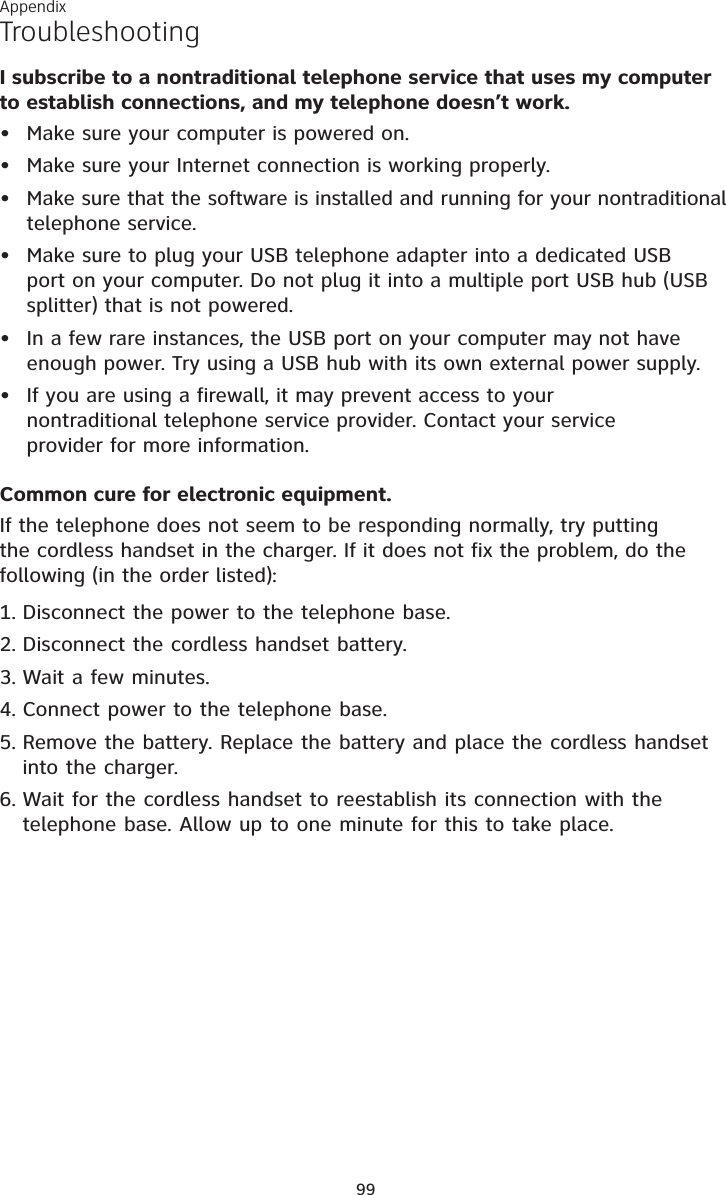
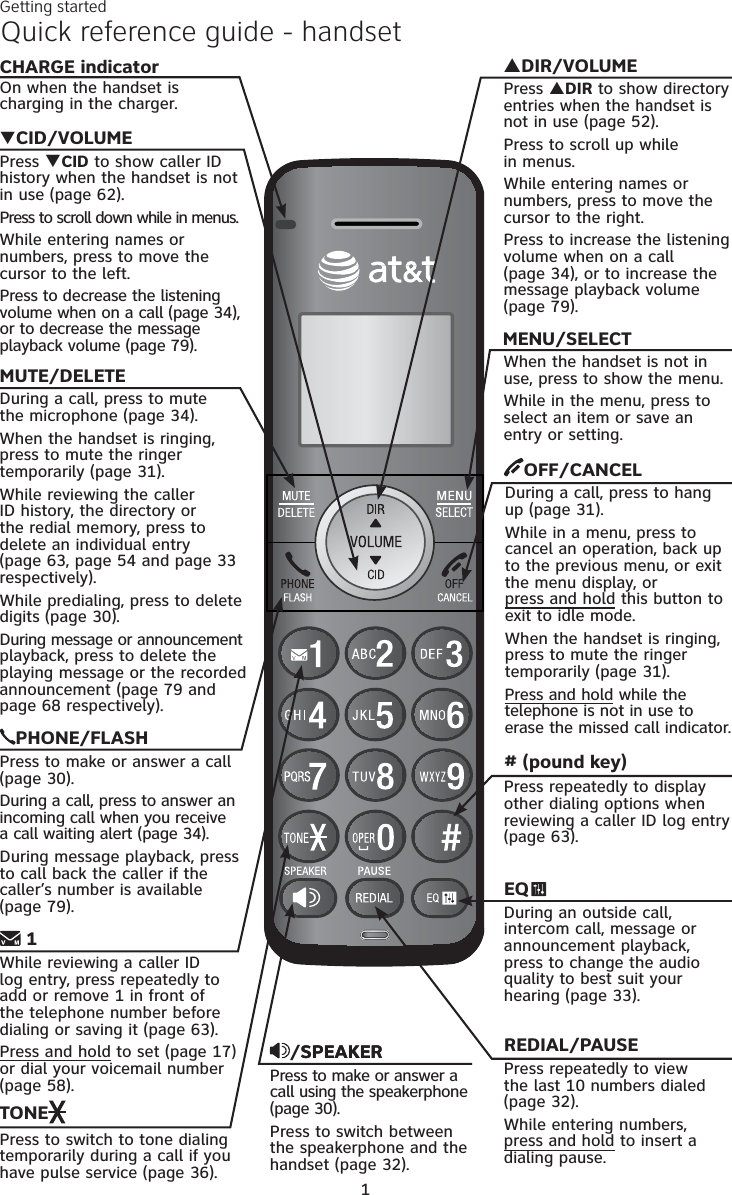
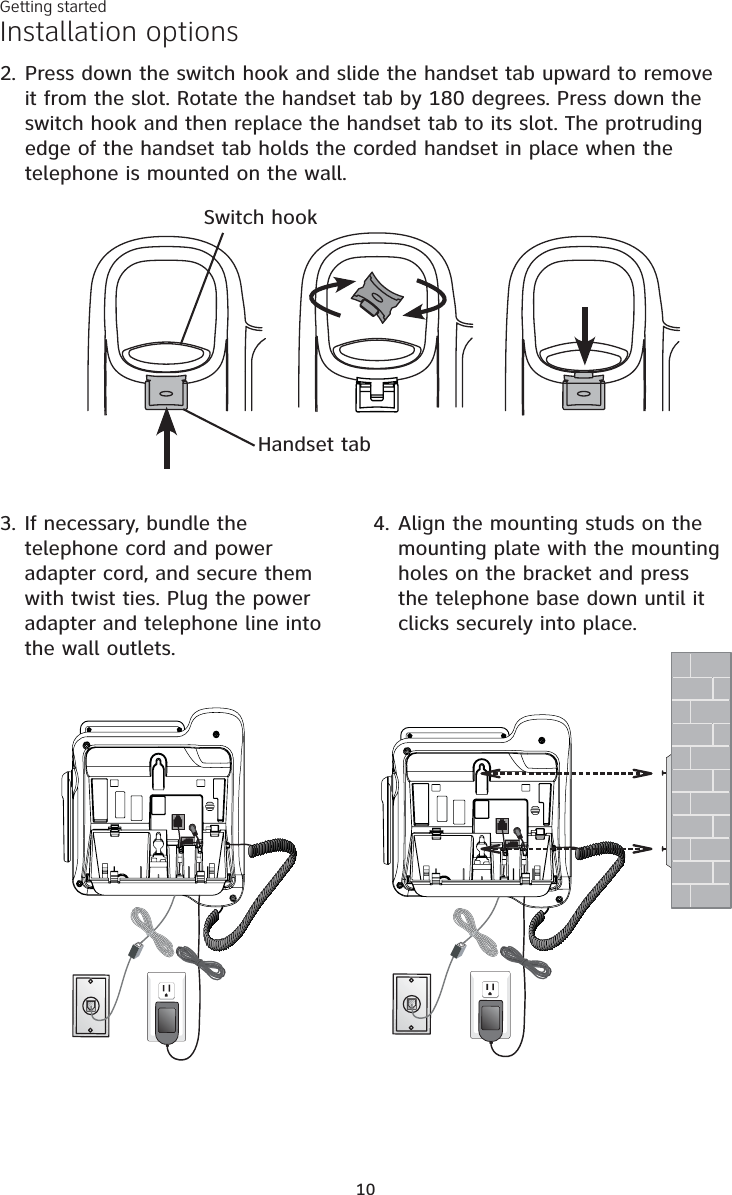
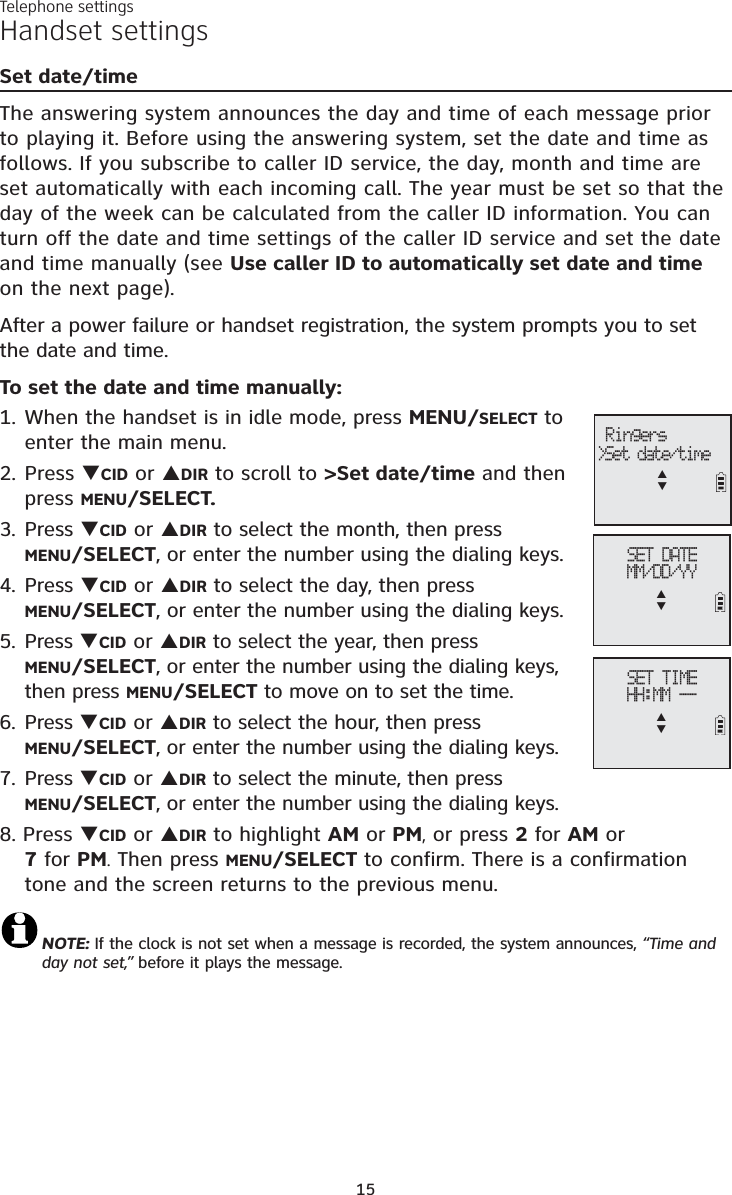
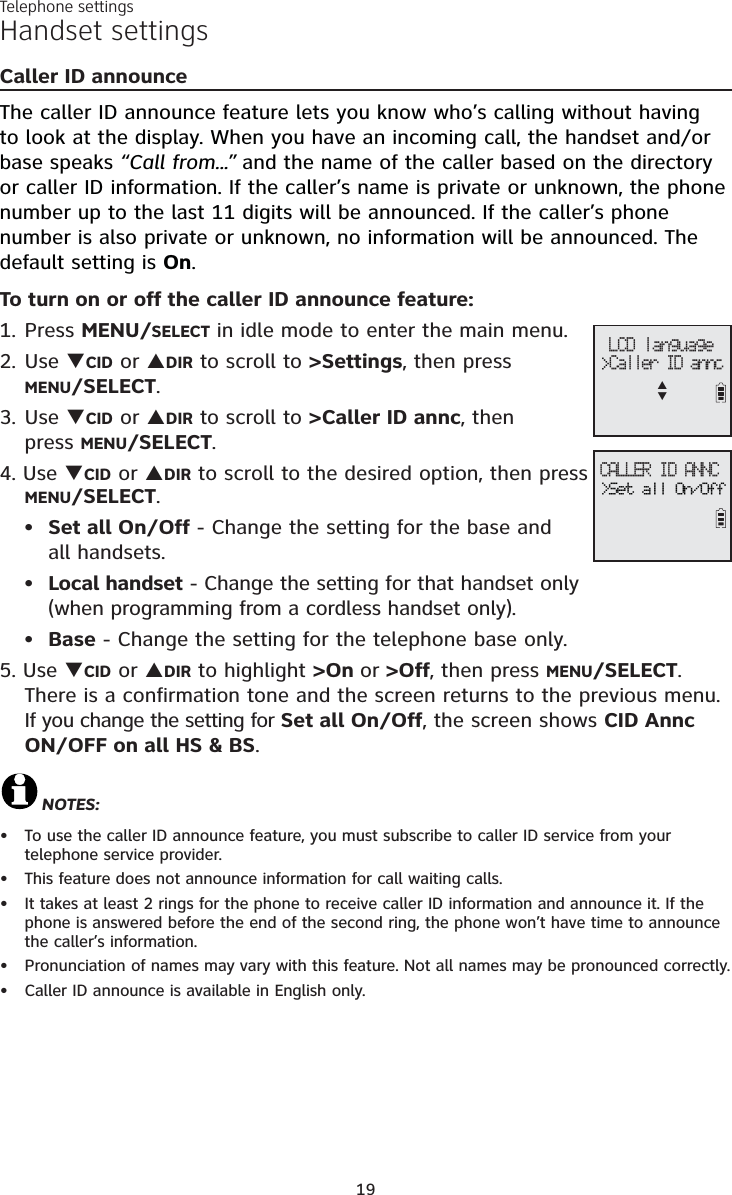
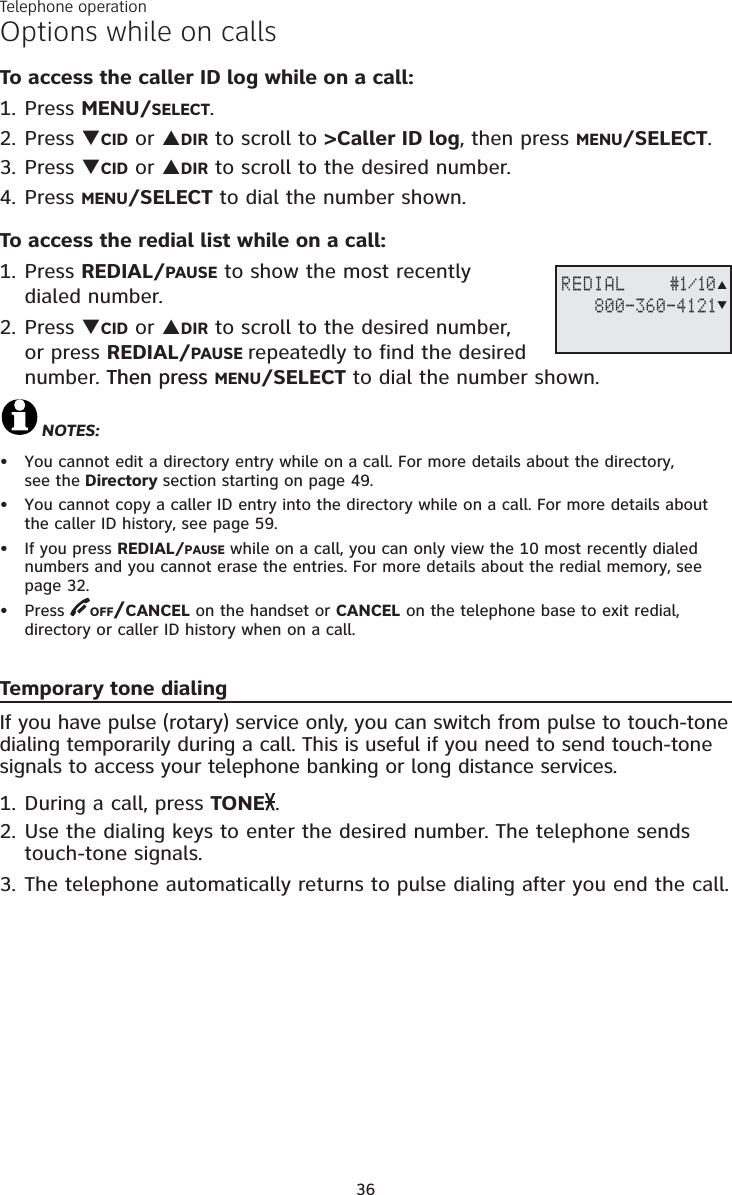
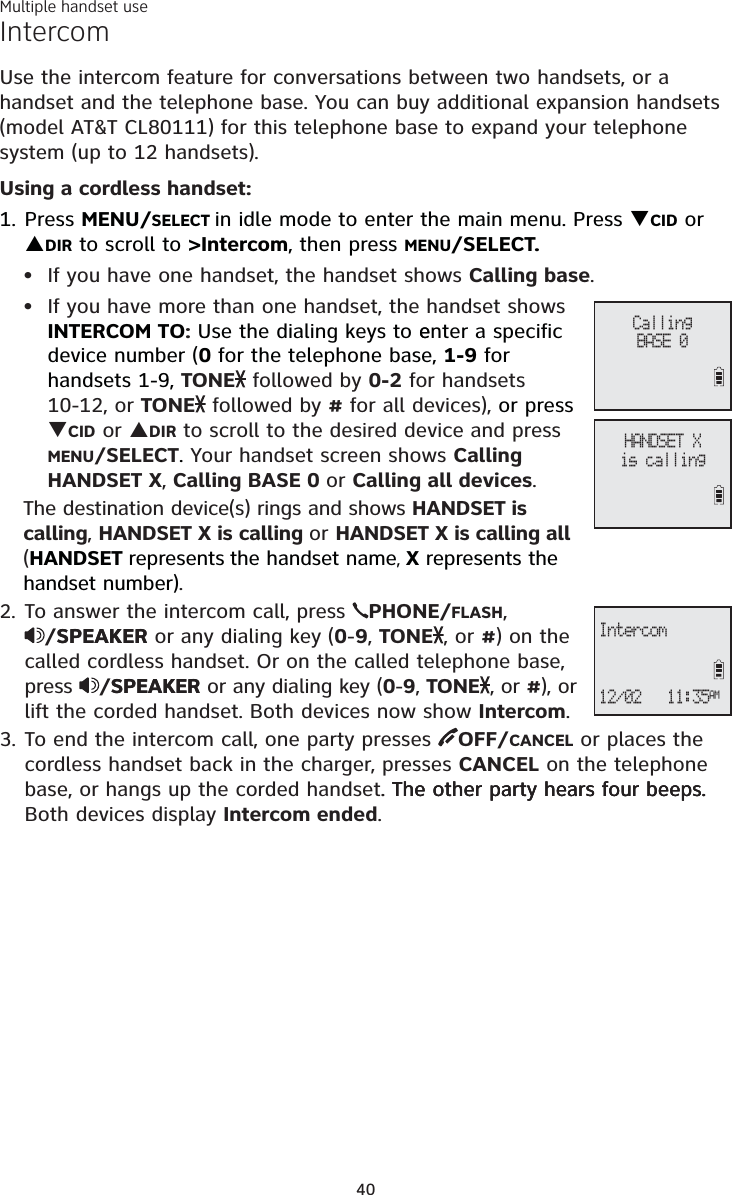
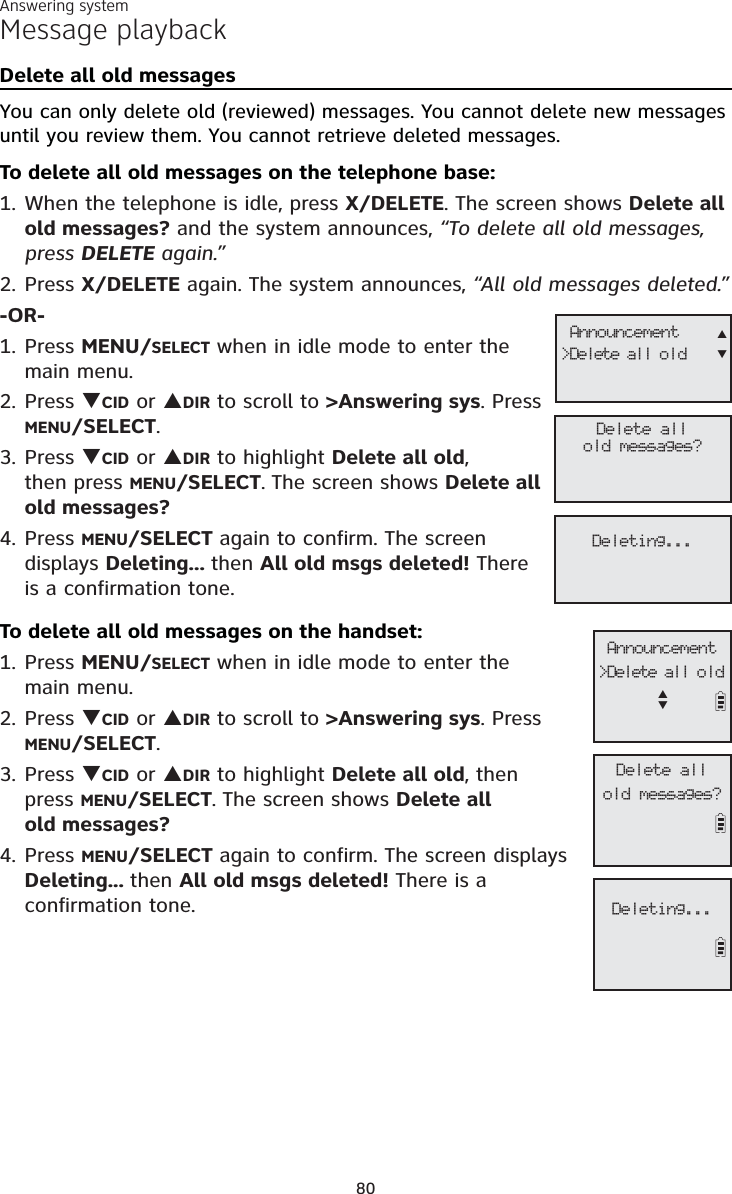
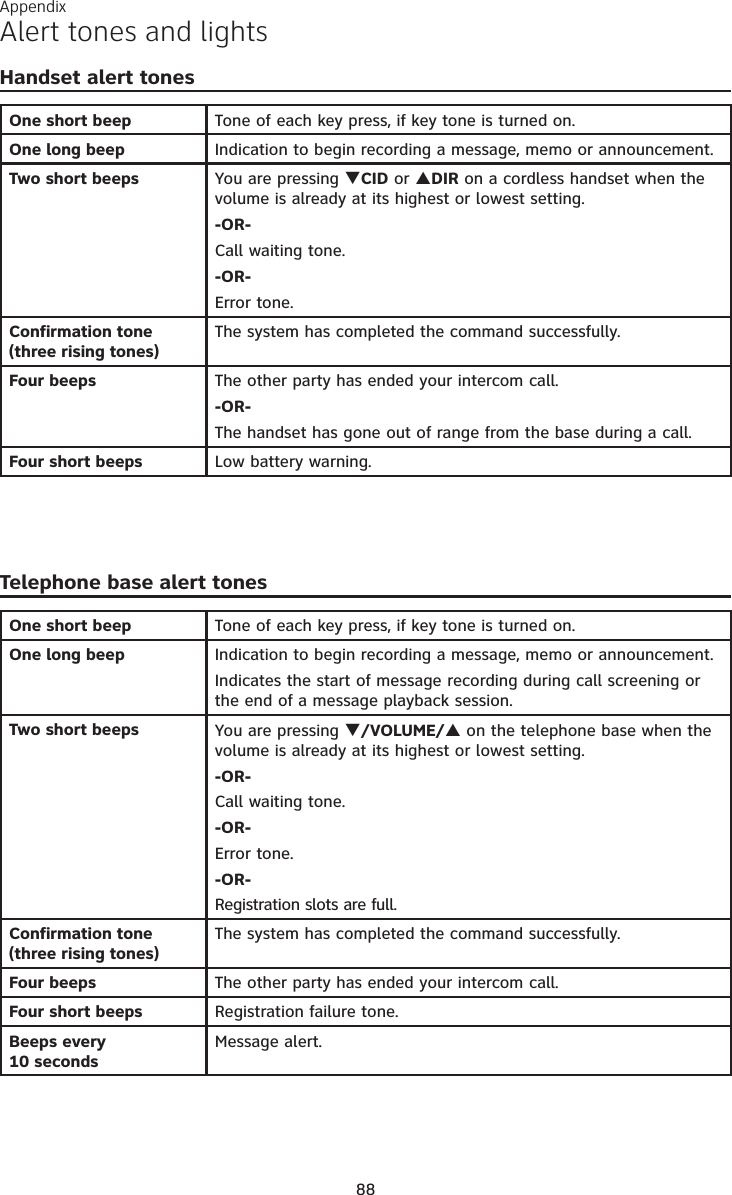
![Answering system77About the answering systemTo screen a call at the handset:If the answering system is on, you can hear the announcement and the incoming message with the handset when a call is answered by the answering system. While a message is being recorded, the handset shows To screen call, press [SELECT]. Press MENU/SELECT to screen the call.Options while screening a call at the handset:Press TCID/VOLUME or SDIR/VOLUME on the handset to adjust the callscreening volume.Press OFF/CANCEL to temporarily silence the call screening.Press MENU/SELECT to temporarily turn on the call screening if call screening is set to off.Press /SPEAKERSPEAKER to turn off the speakerphone and screen the call through the handset earpiece.Call interceptWhile screening a call, you can stop recording and speak to the caller by pressing PHONE/FLASH on the cordless handset, pressing/SPEAKERSPEAKER on the telephone base, or lifting the corded handset.Base ringerPress T/VOLUME/S on the telephone base to adjust the ringer volume when the telephone is not in use.You hear a sample of the ringer while adjusting the volume. The telephone base shows Ringer off and when you set the volume to 0.Temporarily turning off the message alert toneIf the message alert tone is turned on, the telephone base beeps every 10 seconds when there are new messages. Pressing any telephone base key (except /HANDSET LOCATOR) temporarily silences the message alert tone. If you press X/DELETE when in idle mode to temporarily turn off the message alert tone, there is a voice prompt directing you to press X/DELETEagain to delete all old messages. The message alert tone is temporarily off. Only press X/DELETE a second time if you wish to erase all old messages in your answering system.The message alert tone resumes when you receive another message.••••](https://usermanual.wiki/VTech-Telecommunications/80-8494-00/User-Guide-1619278-Page-83.png)
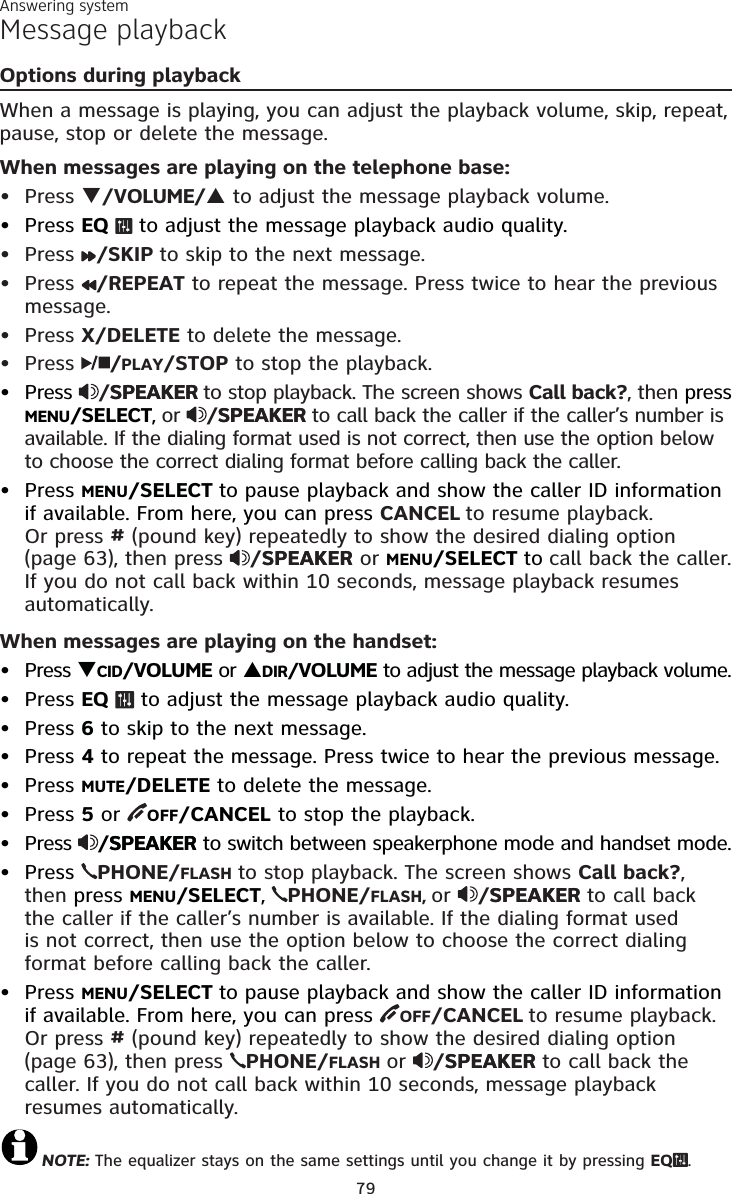

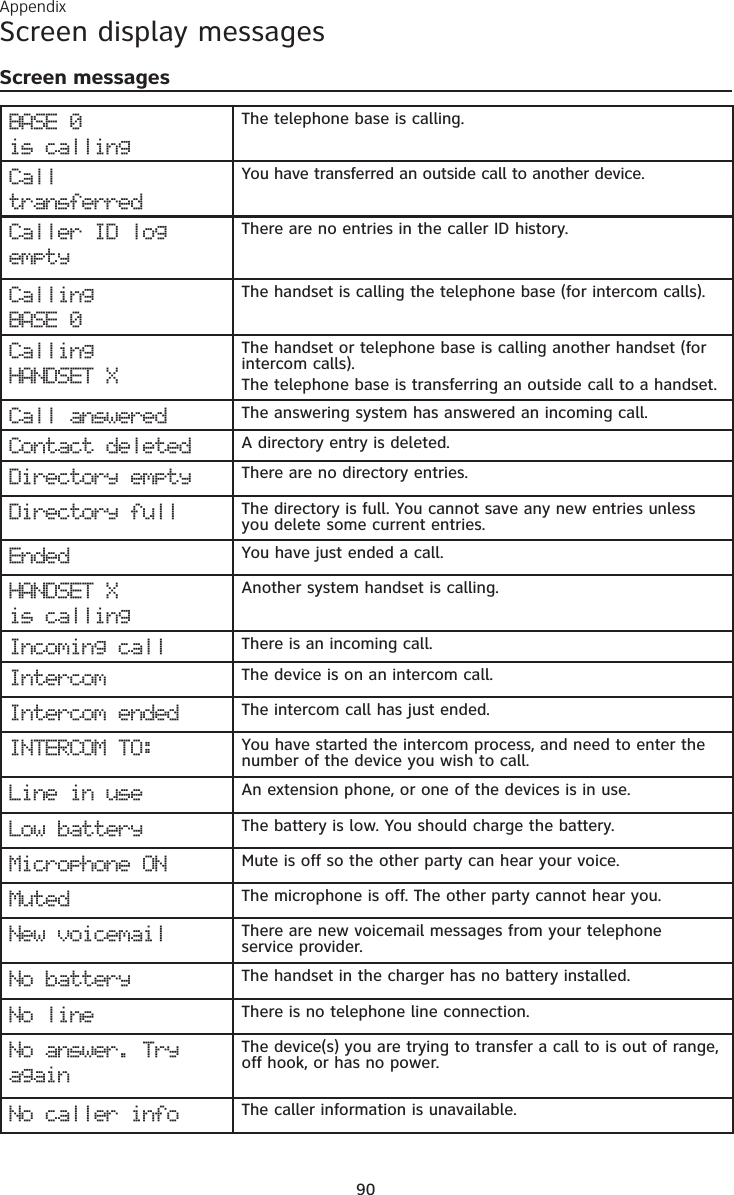
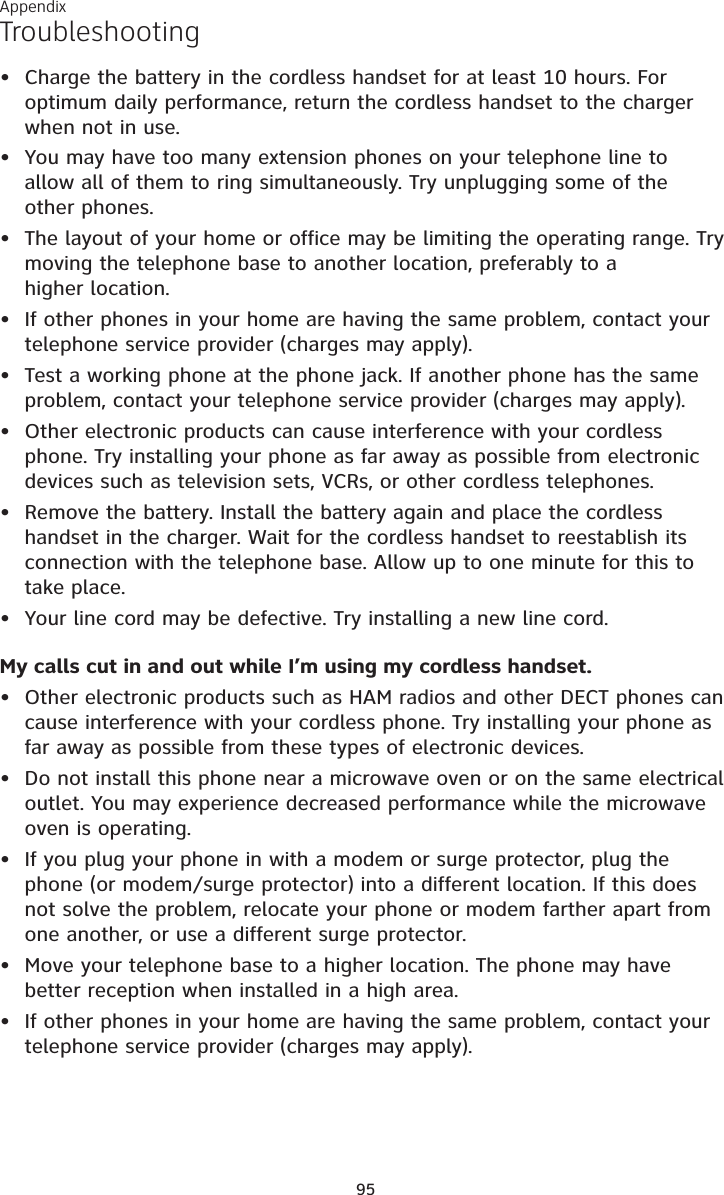
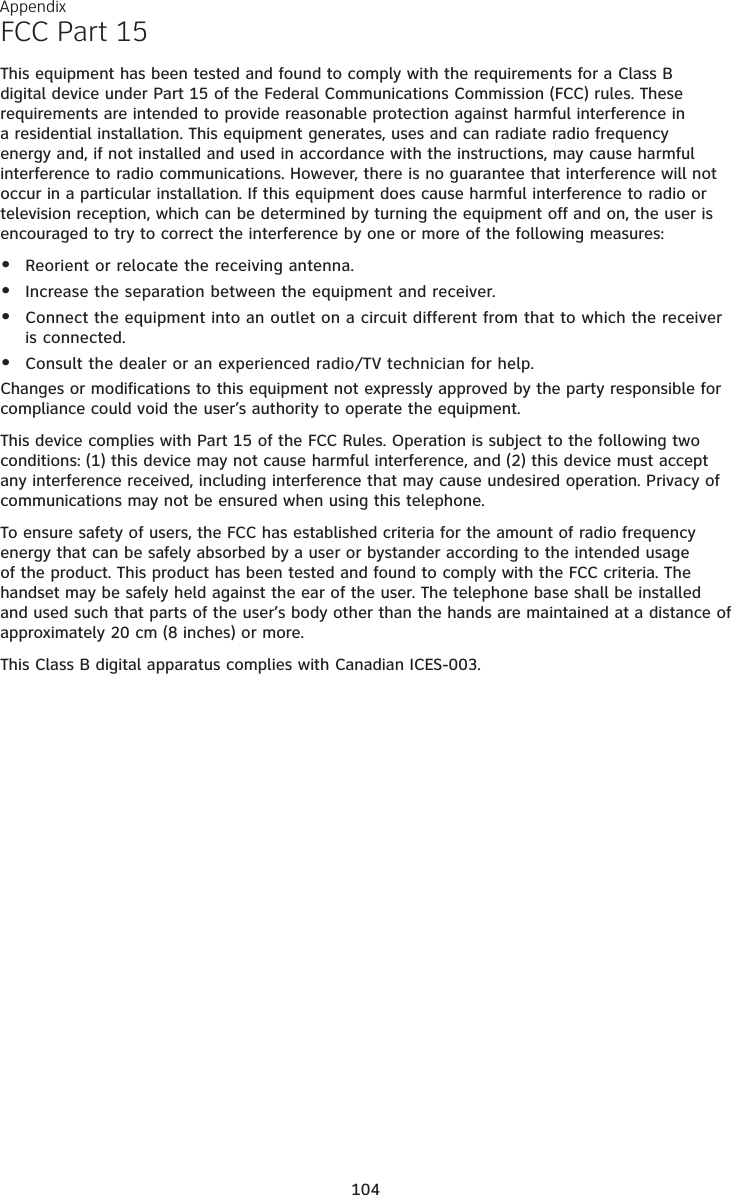
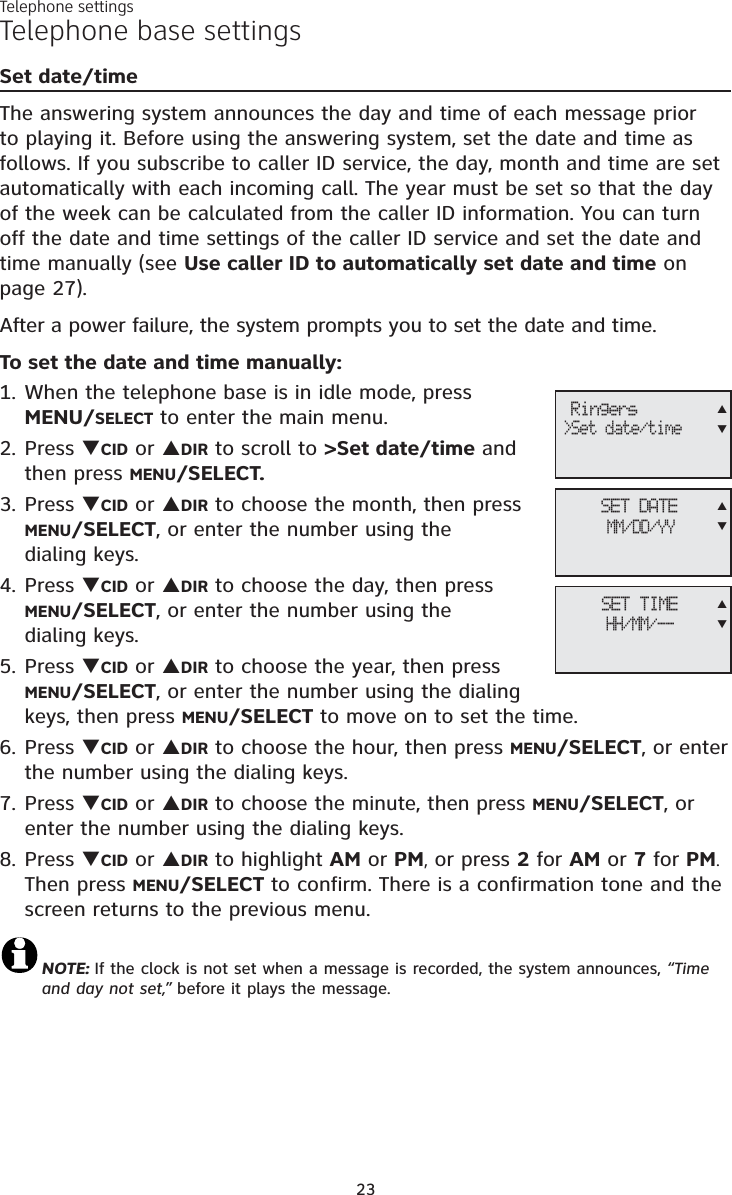
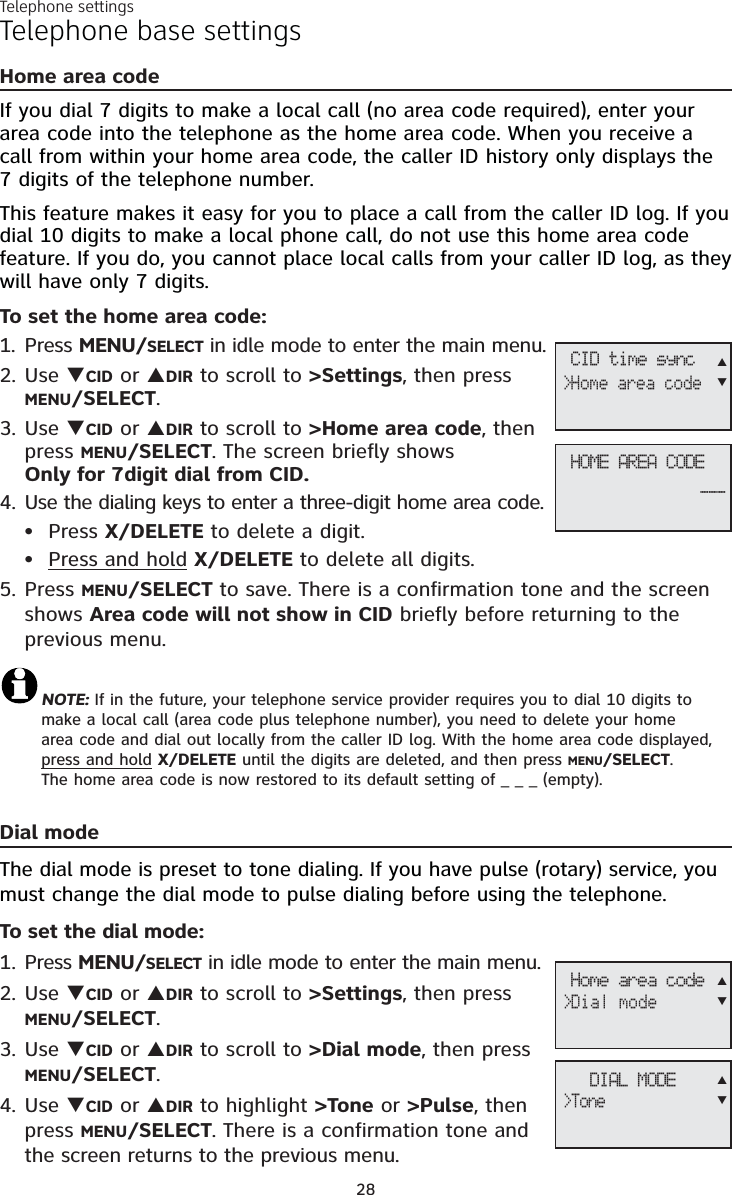
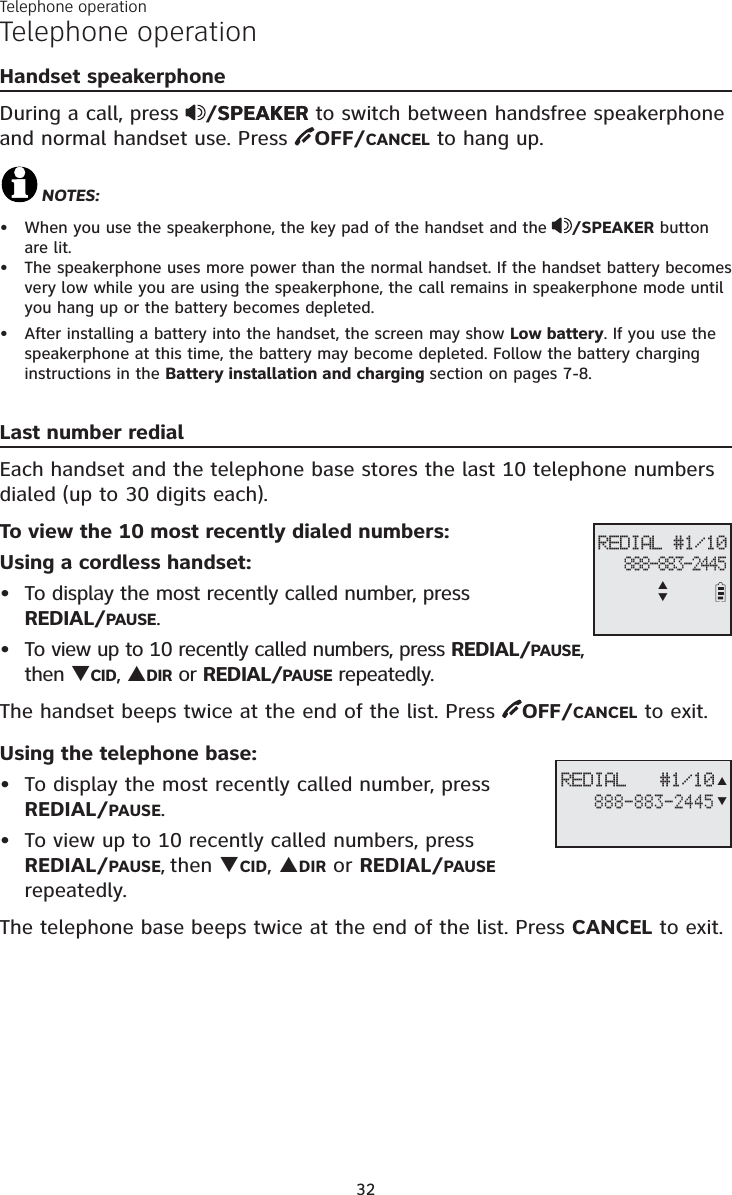
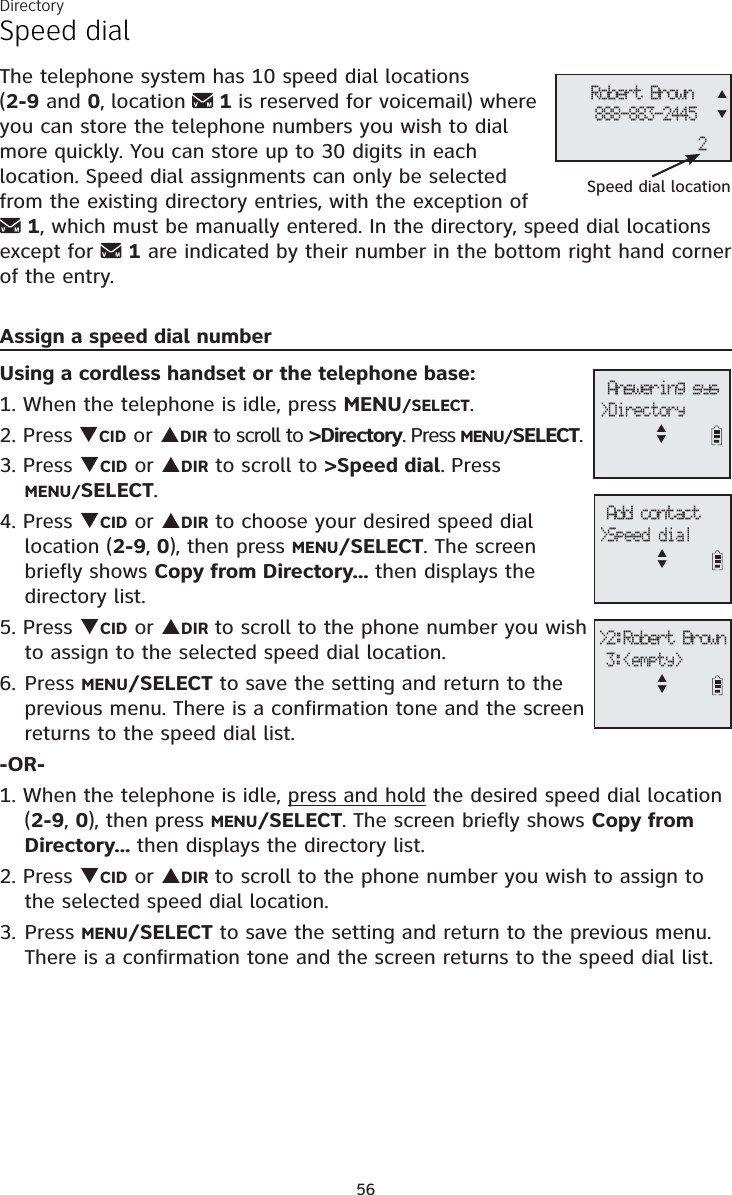
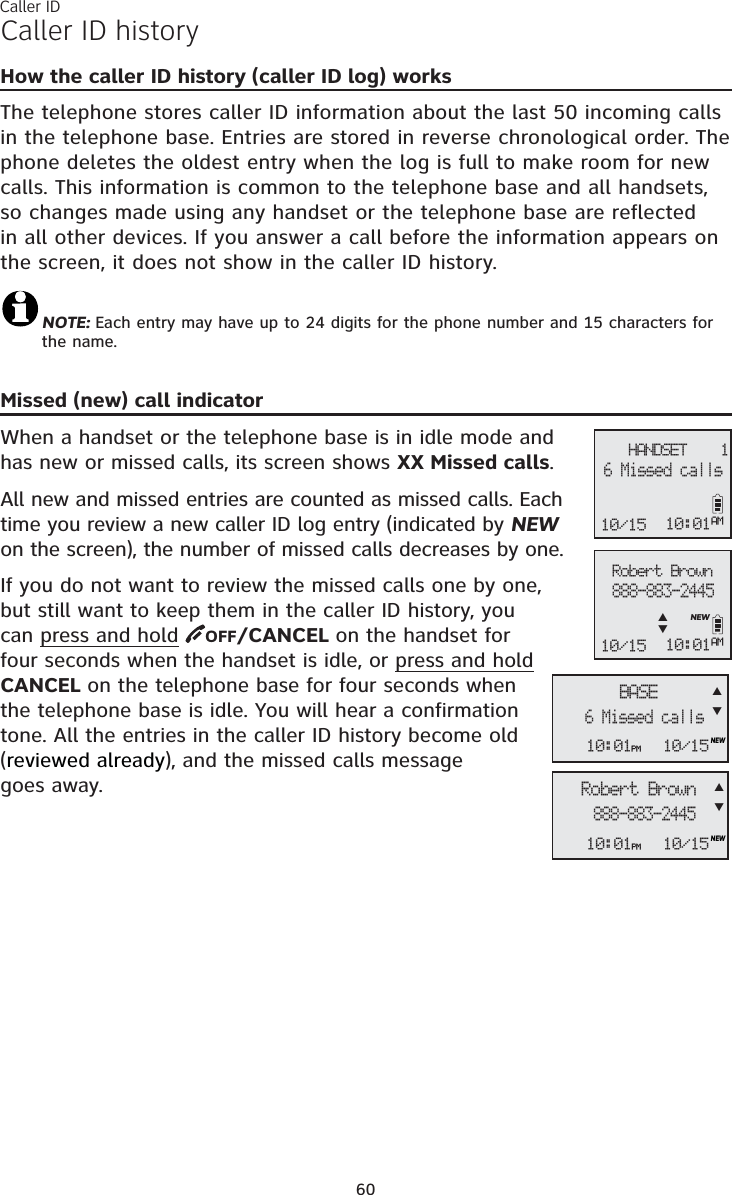
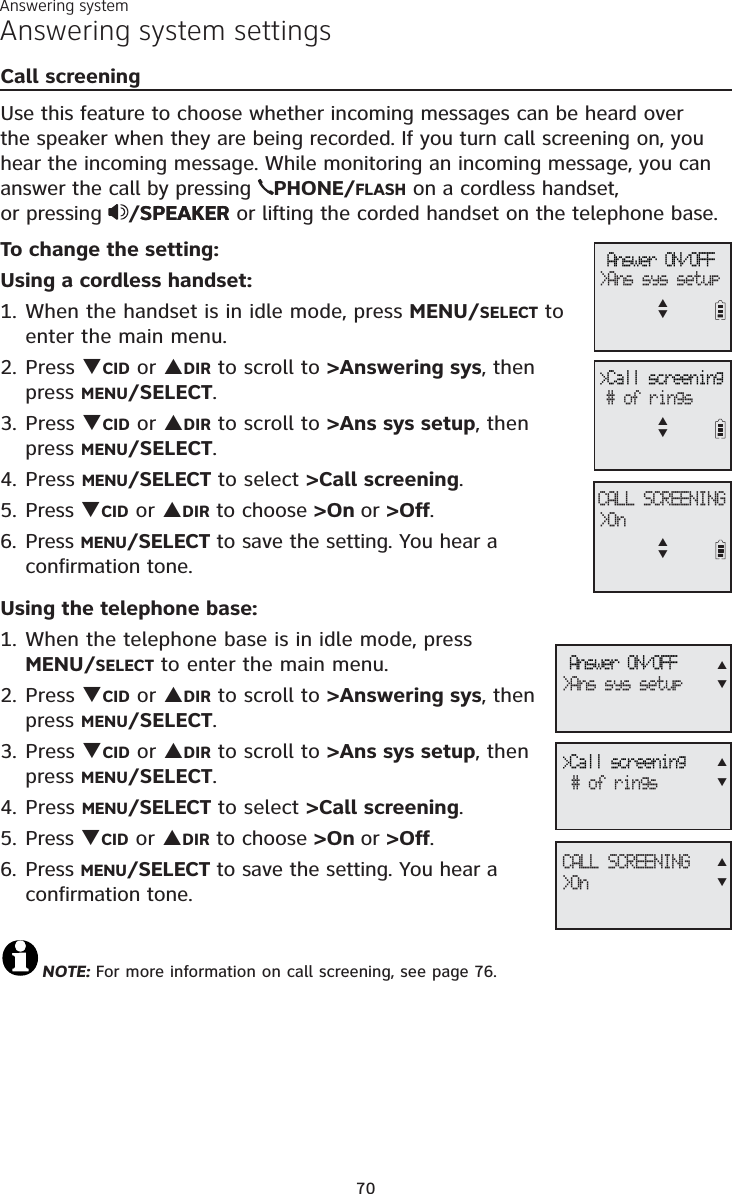
![Appendix91Screen display messagesScreen messagesNumber alreadysavedThe telephone number you have entered is already in the directory.Not availableat this timeSomeone else is already using the directory or caller ID history.No Incoming PTT The incoming PTT function is turned off. The handset will not receive PTT calls.Out of range ORNo pwr at baseThe telephone base has lost power, or the handset is out of range.** Paging ** The cordless handset is paged by the telephone base.Paging allhandsetsThe telephone base is paging all cordless handsets.Phone The handset or telephone base is on a call.Place in charger The battery is very low. The handset should be charged.Rec mem full The system recording memory is full.Rec mem low The system recording time is running short.Recording message The telephone is recording a message.Registering...Please waitHandset registration is in progress.Registerationslots are fullThe telephone base has the maximum of 12 handsets registered to it.Registration failed The handset registration is not successful.Ringer off The ringer is turned off.Ringer muted The ringer is off temporarily while the device is ringing.Saved An entry has been successfully saved in the directory.Speaker The handset or telephone base speakerphone is in use.TRANSFER TO: You have started transferring a call, and need to enter the desired device number or choose all devices.To register,see manual.Screen display before handset registration.To screen call, press [SELECT]Press MENU/SELECT to activate call screening on the handset.Unable to call. Line in useFailed phone call (the telephone line is in use). Unable to call. Try againYou try to join a call when there are already four handsets on that call.You try to make an outside call when another device is transferring a call with the intercom feature.XX Missed calls There are new calls in the caller ID history.XX New messages There are new messages in the answering system.](https://usermanual.wiki/VTech-Telecommunications/80-8494-00/User-Guide-1619278-Page-97.png)