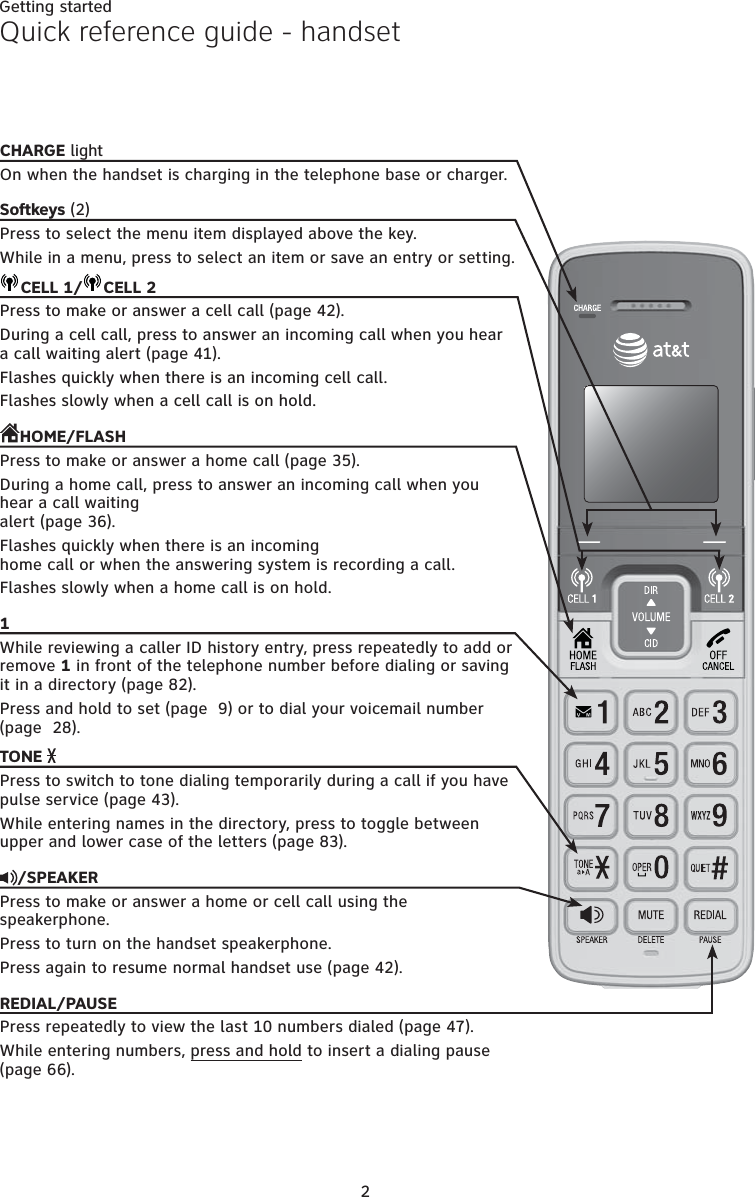
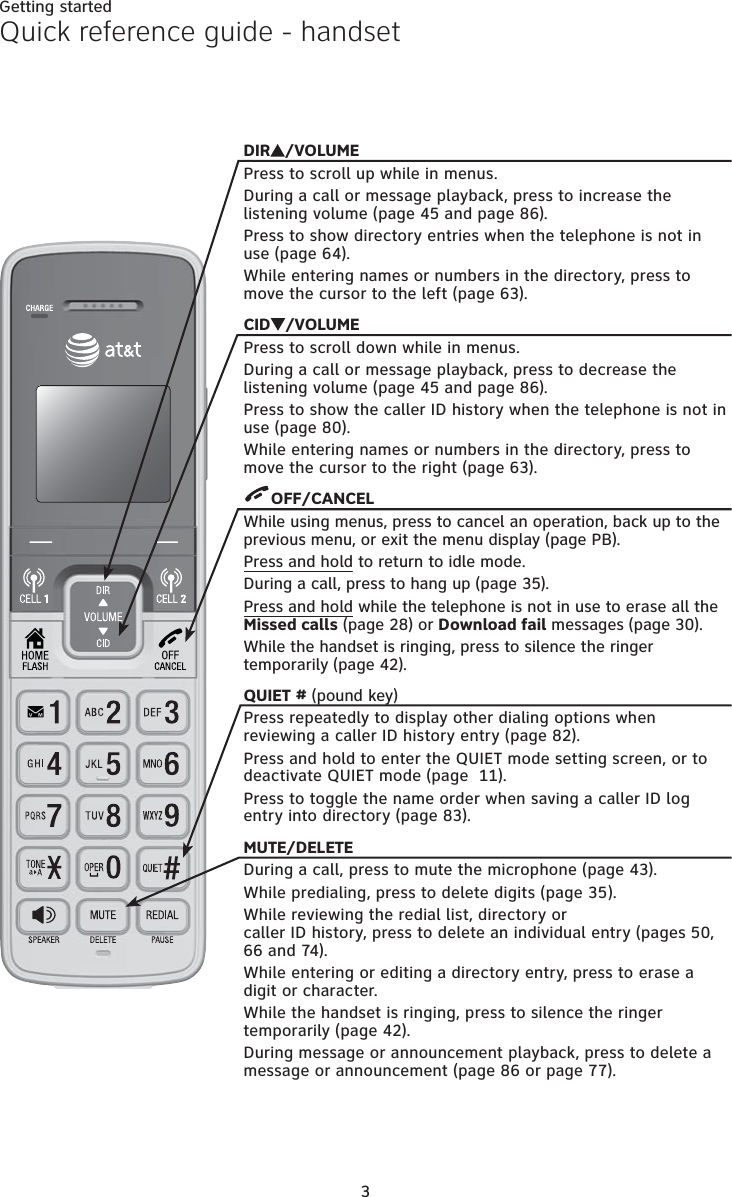
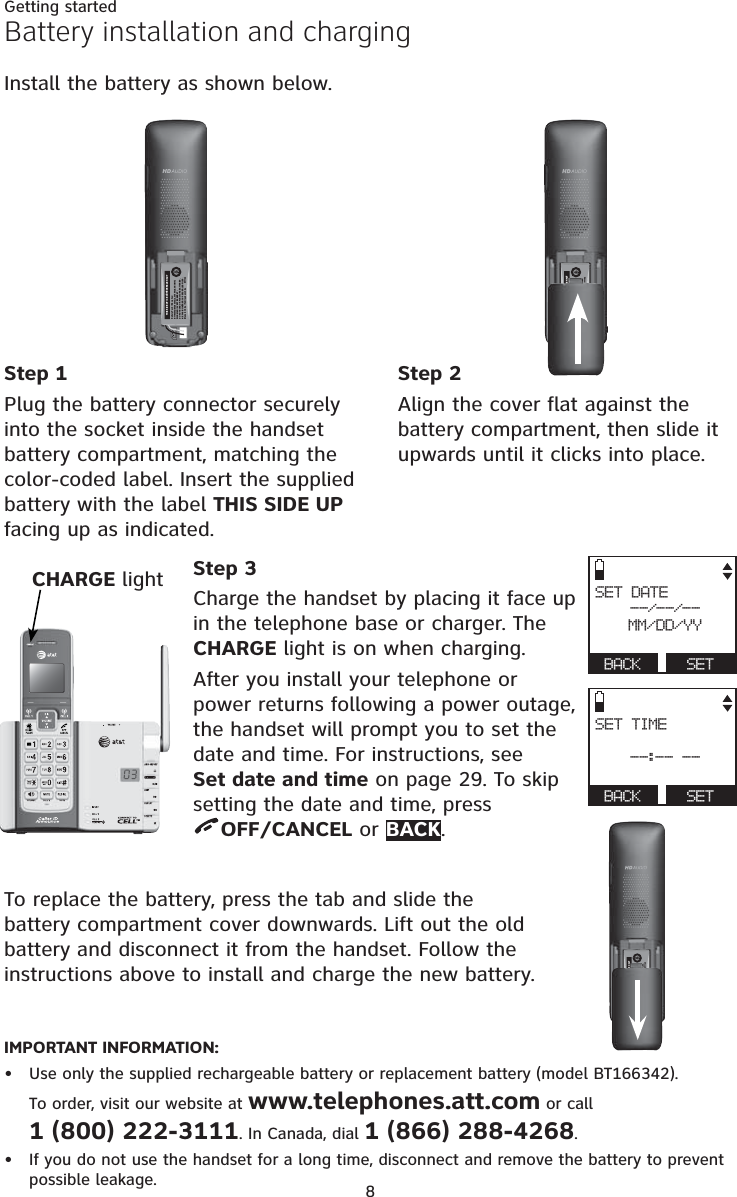
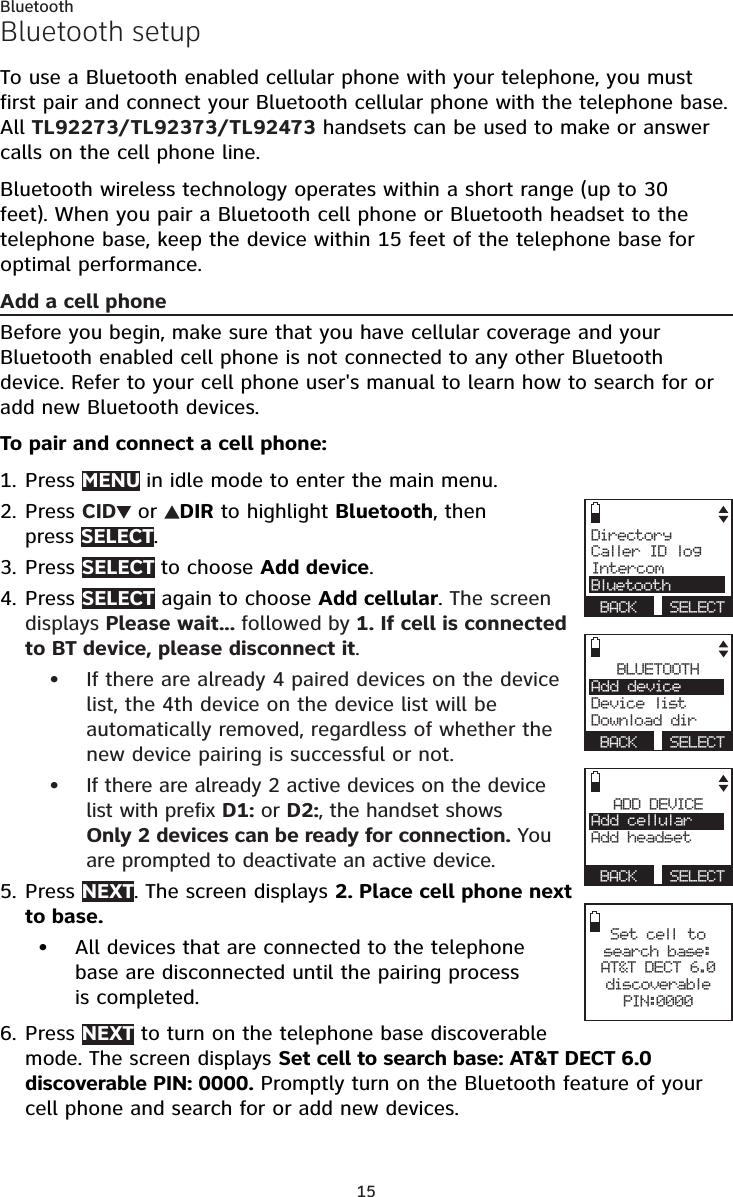
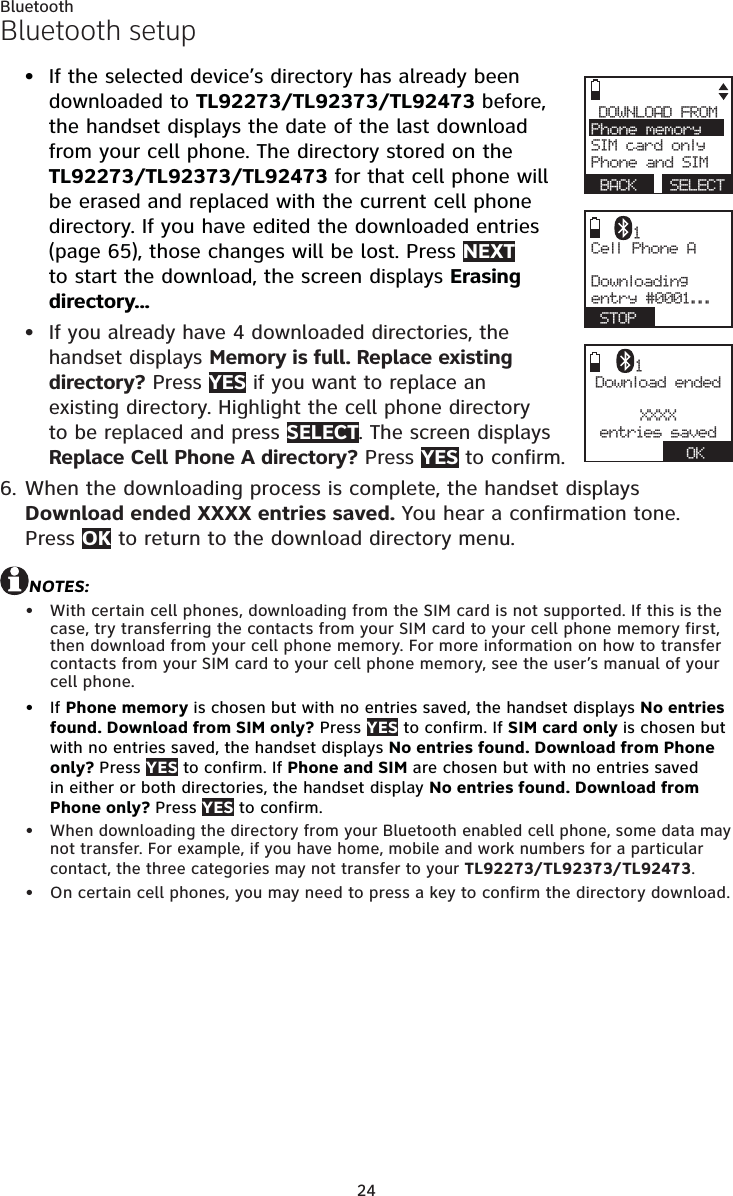
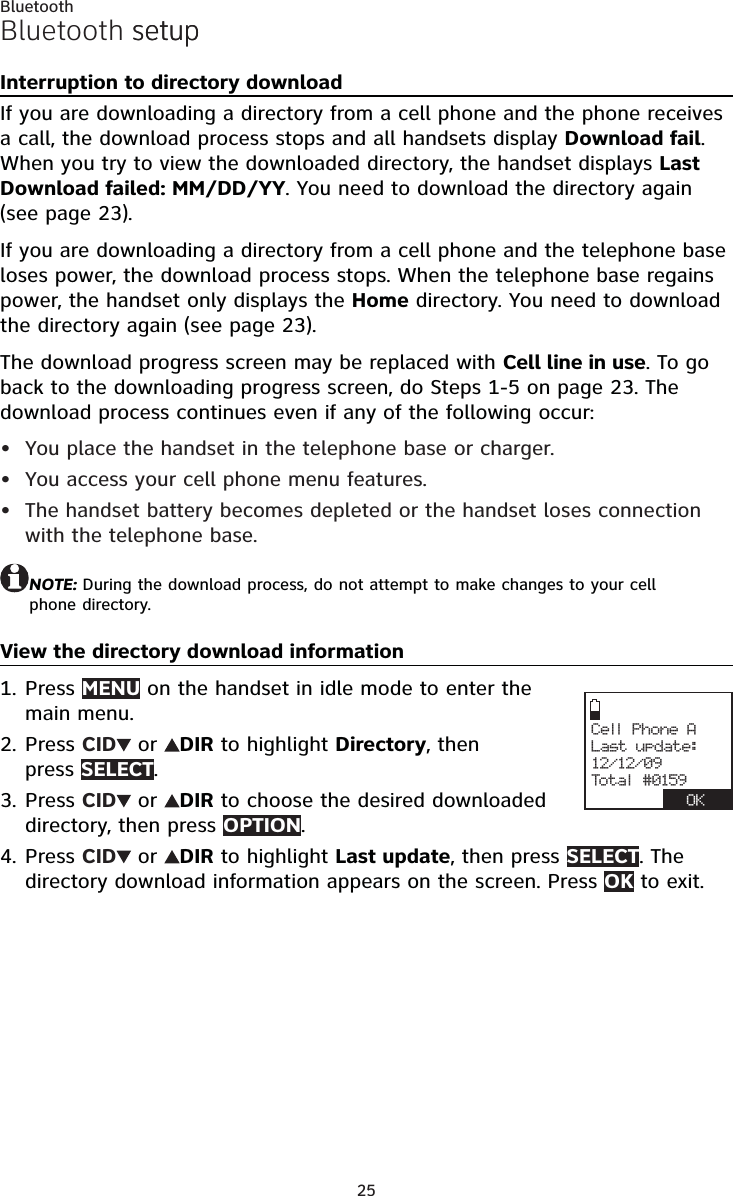
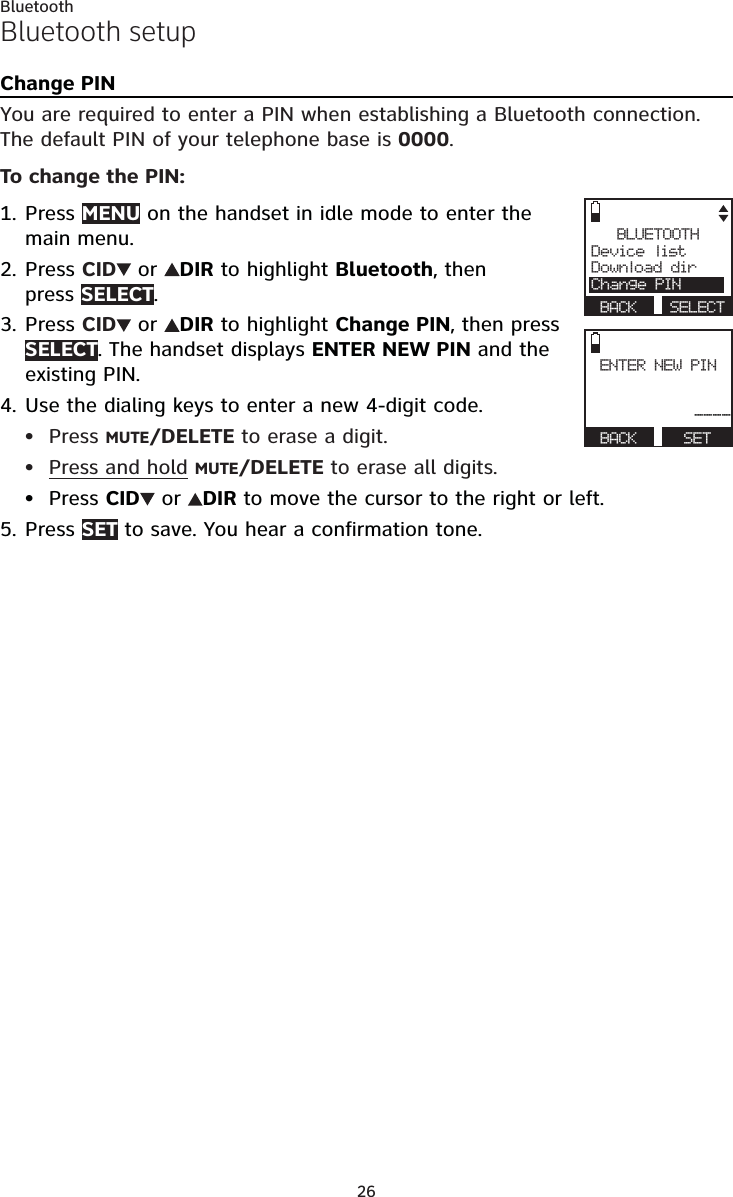
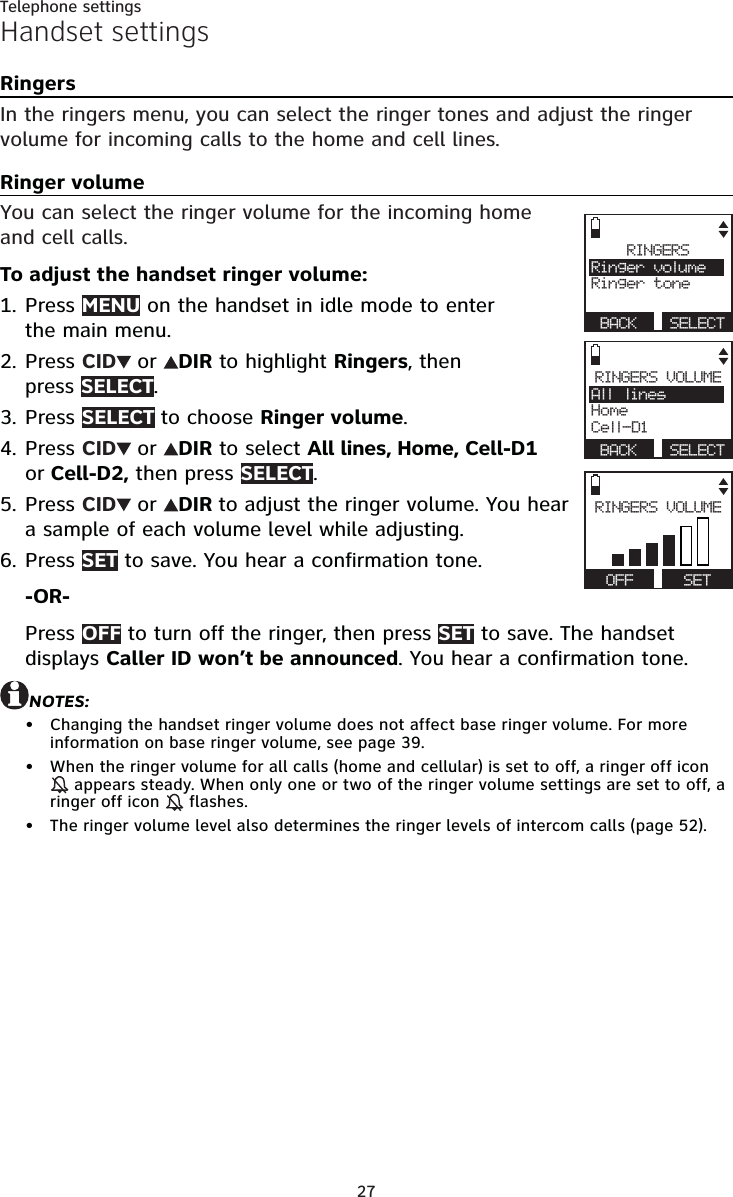
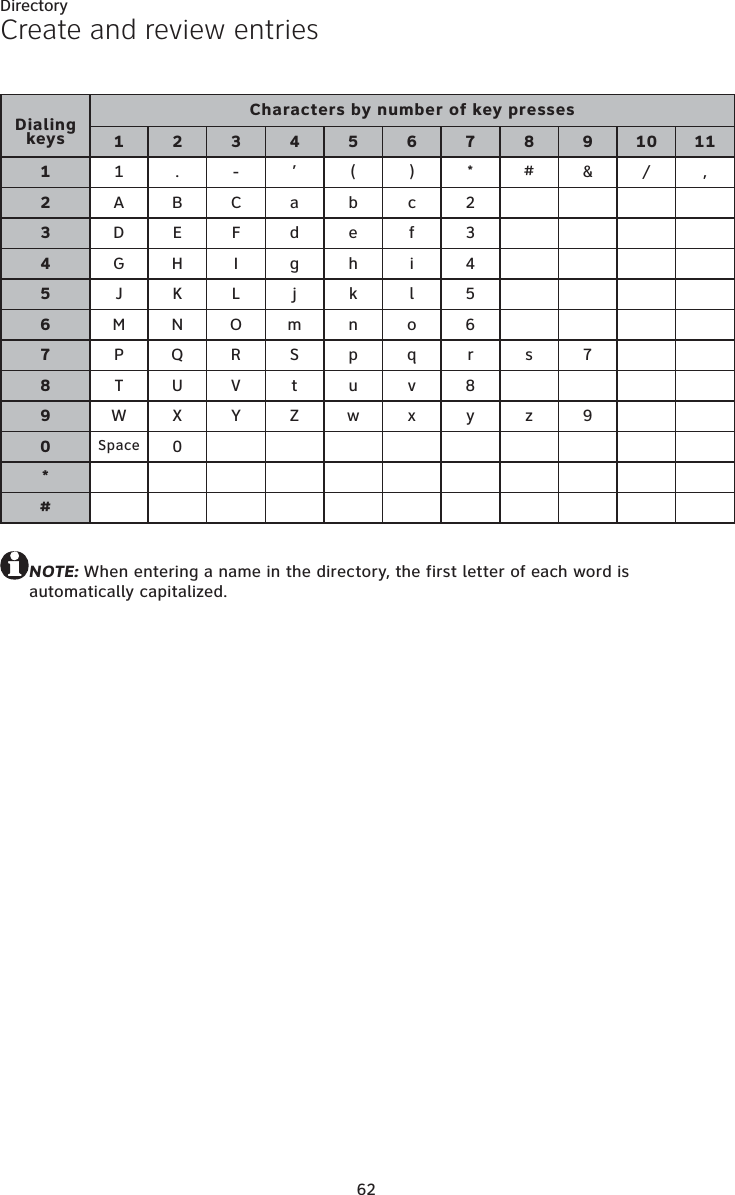
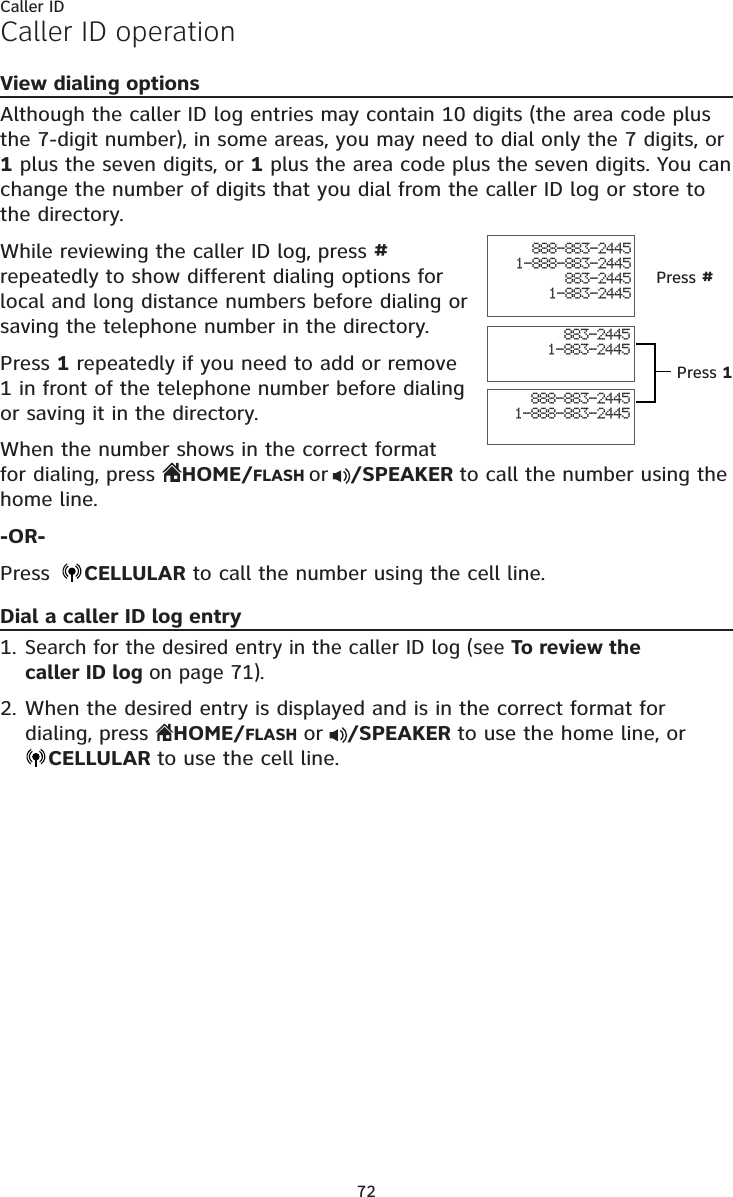
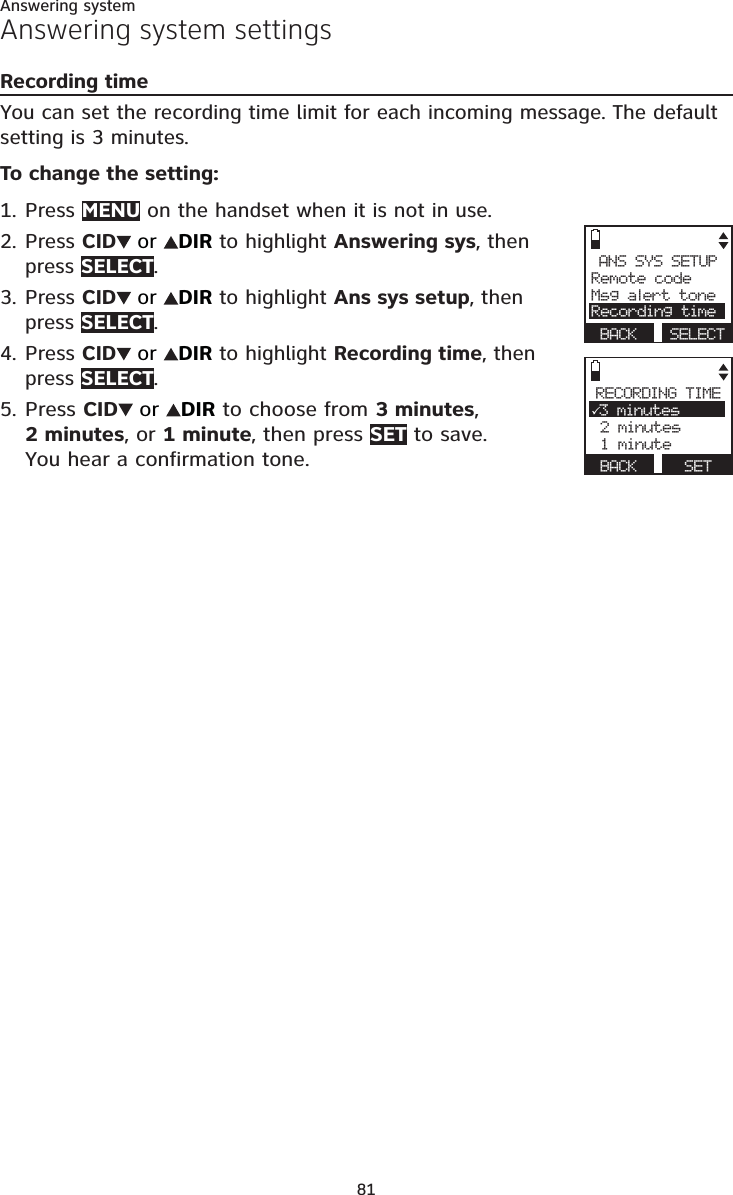
VTech Telecommunications 80-9084-00 1.9GHz Digital Modulation Cordless Phone (Base Unit Bluetooth Portion) User Manual TL92X73 CIB i1 20130116 for approval
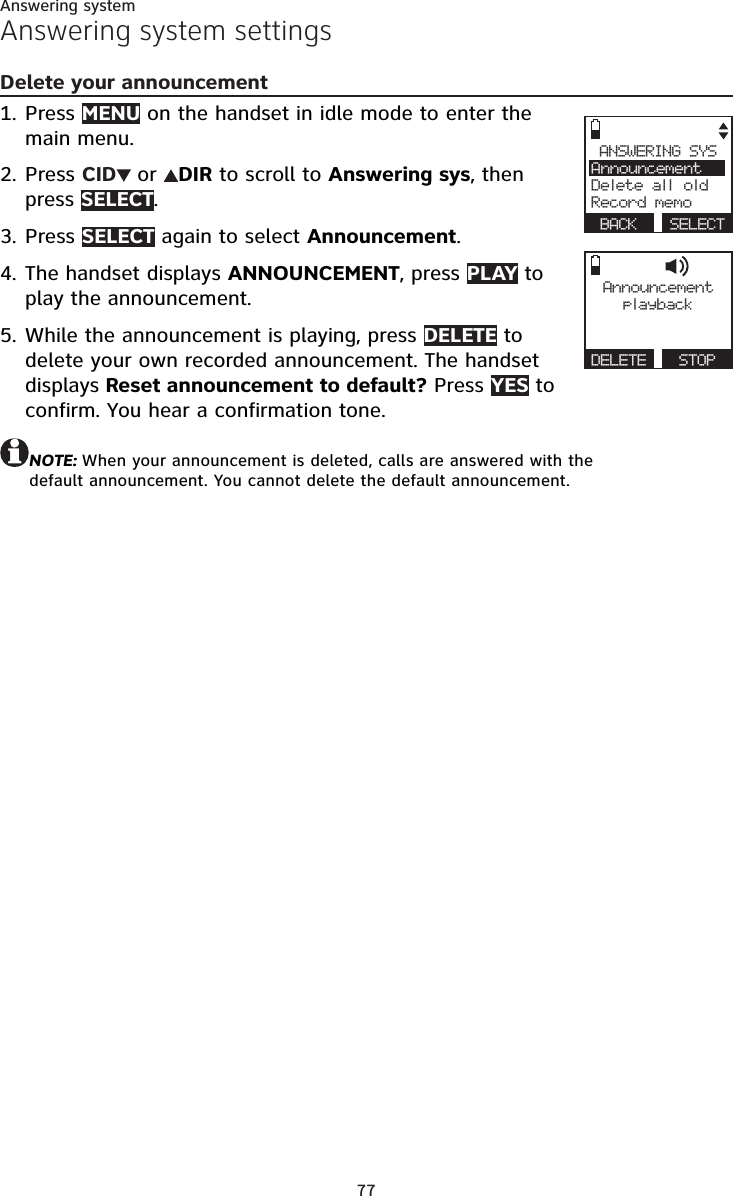
VTech Telecommunications Ltd 1.9GHz Digital Modulation Cordless Phone (Base Unit Bluetooth Portion) TL92X73 CIB i1 20130116 for approval
User Manual


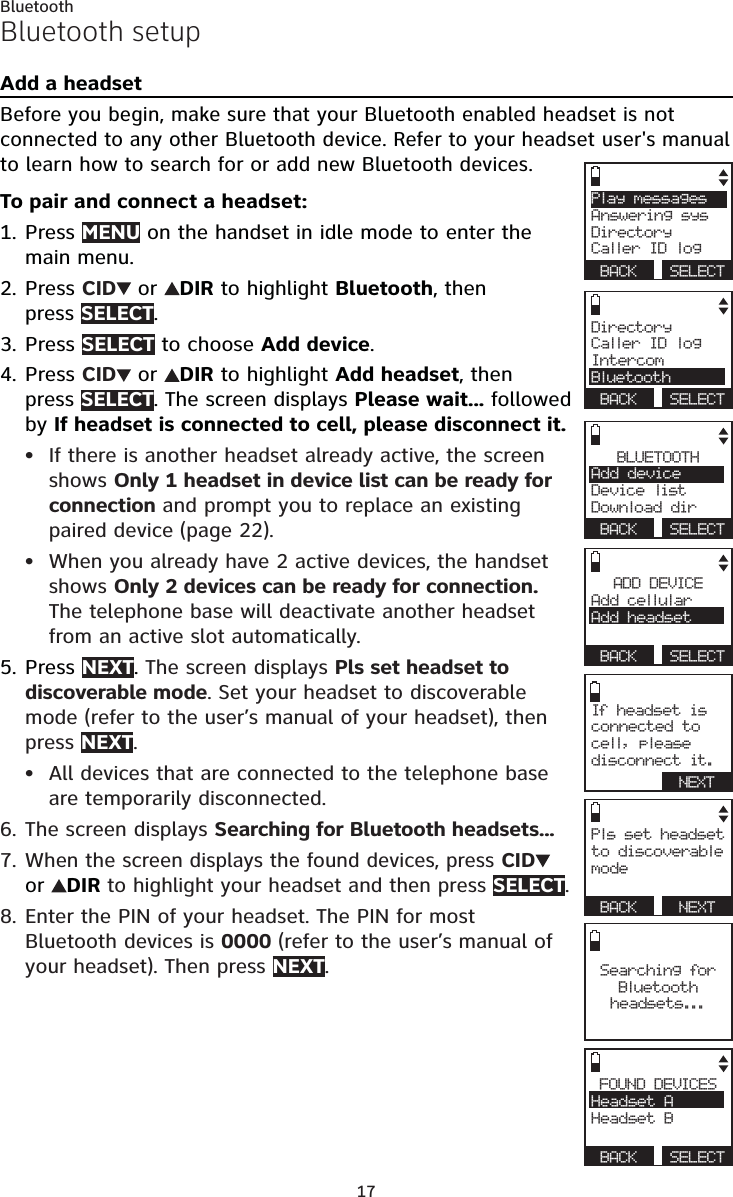


![56Multiple handset usePush-to-talk (PTT)PTT to a single handsetYou have 2 ways to begin a PTT call:If you have two handsets, press and hold PUSH TO TALK when the handset is not in use.-OR-If you have three or more handsets, press PUSH TO TALK when the handset is not in use. Then use the dialing keys to enter a handset number (1-9 for handsets 1-9, TONE and 0 for handset 10, TONE and 1 for handset 11 or TONE and 2 for handset 12), or press CID or DIR to scroll to the desired handset then press SELECT or PUSH TO TALK to create the push-to-talk session.Your handset displays Connecting to HANDSET X... for a few seconds. When the connection is made, both your and the destination handsets display Press and hold [PTT] to talk and beep once.Press and hold PUSH TO TALK on your handset. A chirp indicates your microphone is on. Speak towards the handset. Your voice is broadcast to the destination handset. While you are speaking, the handset displays PTT To HANDSET X (X represents the destination handset number).Release PUSH TO TALK after speaking. Both handsets beep once again. After the handsets beep, you can press and hold PUSH TO TALK to continue speaking or the destination handsets can respond (see Answer a PTT call on page 58).To end the PTT call, press OFF/CANCEL or END. The handset displays Push to talk Ended for a few seconds.-OR-Place the handset in the telephone base or charger to end the PTT call.NOTE: After PUSH TO TALK is released, the PTT call remains open for a short time. If no one presses PUSH TO TALK within 10 seconds, the PTT call ends automatically.1.••2.3.4.5.](https://usermanual.wiki/VTech-Telecommunications/80-9084-00/User-Guide-1913332-Page-62.png)
![57Multiple handset usePush-to-talk (PTT)PTT to a group of handsetsWhen there are multiple handsets registered to the phone system, PTT supports one-to-group calls. PTT supports a maximum of one-to-four calls when two to five handsets are registered, and a maximum of one-to-three calls when six or more handsets are registered. The first 4 registered handsets will be able to use this feature. Other handsets can only use PTT for one-to-one calls. To begin a PTT call to a group of handsets:Press and hold PUSH TO TALK when the handset is not in use.-OR-Press PUSH TO TALK when the handset is not in use. Press TONE and #, or press CID or DIR to highlight Group then press SELECT or PUSH TO TALK.Your handset displays Connecting to group... for a few seconds. When the connection is made, both your and the destination handsets display Press and hold [PTT] to talk and beep once.Press and hold PUSH TO TALK on your handset. A chirp indicates your microphone is on. Speak towards the handset. Your voice is broadcast to the destination handset. While you are speaking, the handset displays PTT To handset X (X represents the destination handset numbers).Release PUSH TO TALK after speaking. All handsets beep once again. After the handsets beep, you can press and hold PUSH TO TALK to continue speaking or the destination handsets can respond (see Answer a PTT call on page 58).Press OFF/CANCEL or END to end the PTT call. The handset displays Push to talk Ended for a few seconds.-OR-Place the handset in the telephone base or charger to end the PTT call.NOTE: After PUSH TO TALK is released, the PTT call remains open for a short time. If no one presses PUSH TO TALK within 10 seconds, the PTT call ends automatically.1.••2.3.4.](https://usermanual.wiki/VTech-Telecommunications/80-9084-00/User-Guide-1913332-Page-63.png)
![58Multiple handset usePush-to-talk (PTT)Answer a PTT callYou can respond to a PTT call whenever the speakerphone light is off, as described below.When your handset receives a PTT call, the handset beeps and displays Press and hold [PTT] to talk.When someone else is speaking, your speakerphone light is on, and you handset displays PTT From HANDSET X To handset: Y (the first X represents the initiating handset number and Y represents your handset number; a maximum of 4 handset numbers appear).When your speakerphone light is off (the handset displays Press and hold [PTT] to talk), you hear a beep. Press and hold PUSH TO TALK on your handset. When you hear a chirp, speak towards the handset.While you are speaking, your handset displays PTT To handset X (X represents the handset numbers of one or more destination handsets; a maximum of 4 handset numbers appear).Your voice is broadcast to all destination handsets.Release PUSH TO TALK when you finish speaking. Your handset will beep. After the beep, if your speakerphone light is off, you can press and hold PUSH TO TALK to continue speaking or the destination handsets can respond.Change a one-to-one PTT call to an intercom callYou can convert a one-to-one PTT conversation to an intercom call.When your handset displays Press and hold [PTT] to talk, press INTCOM. Your handset displays Switch to Intercom? Press SELECT to confirm. If you have a two-handset system, your handset displays Calling other handset. The destination handset temporarily displays Push to talk Ended and then Other handset is calling.If you have three or more handsets, your handset displays Calling HANDSET Y (Y represents the destination handset number). The destination handset temporarily displays Push to talk Ended and then HANDSET X is calling (X represents the originating handset number).On the destination handset, press HOME/FLASH or /SPEAKER to answer the intercom call. Both handsets now display Intercom.To end the intercom call, press OFF/CANCEL or place the handset in the telephone base or charger. Both handsets display Intercom ended.1.2.3.••1.••2.3.](https://usermanual.wiki/VTech-Telecommunications/80-9084-00/User-Guide-1913332-Page-64.png)

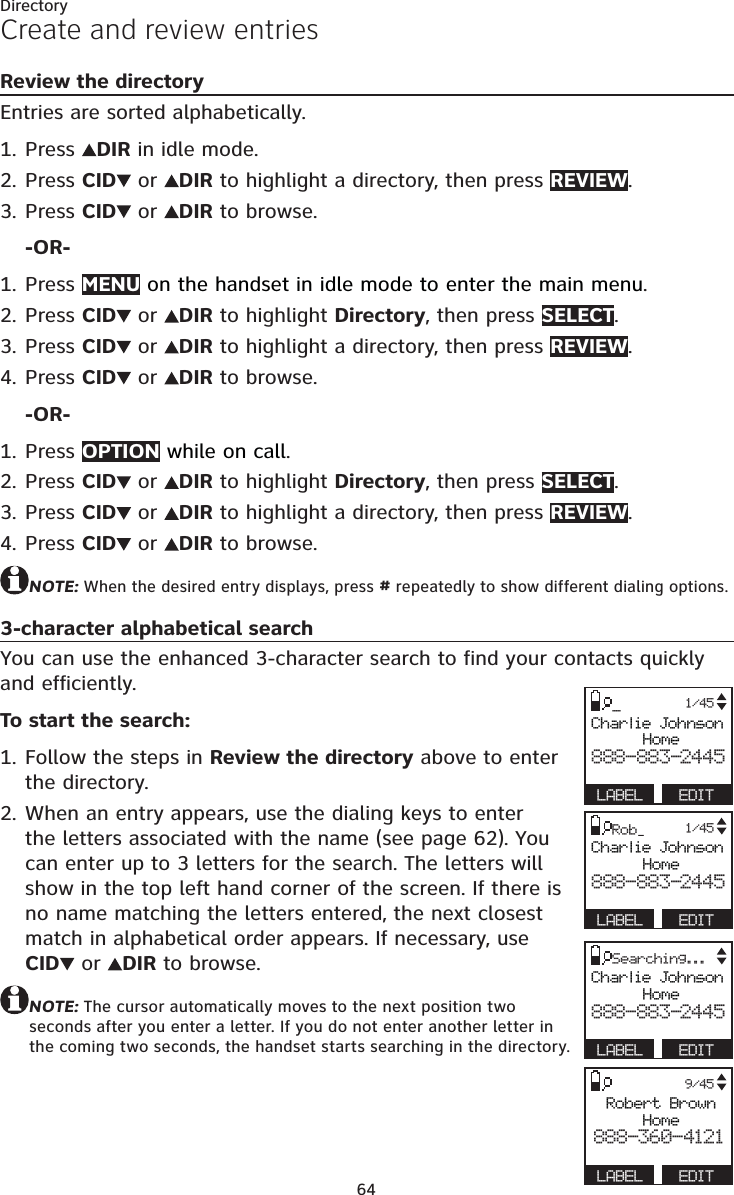
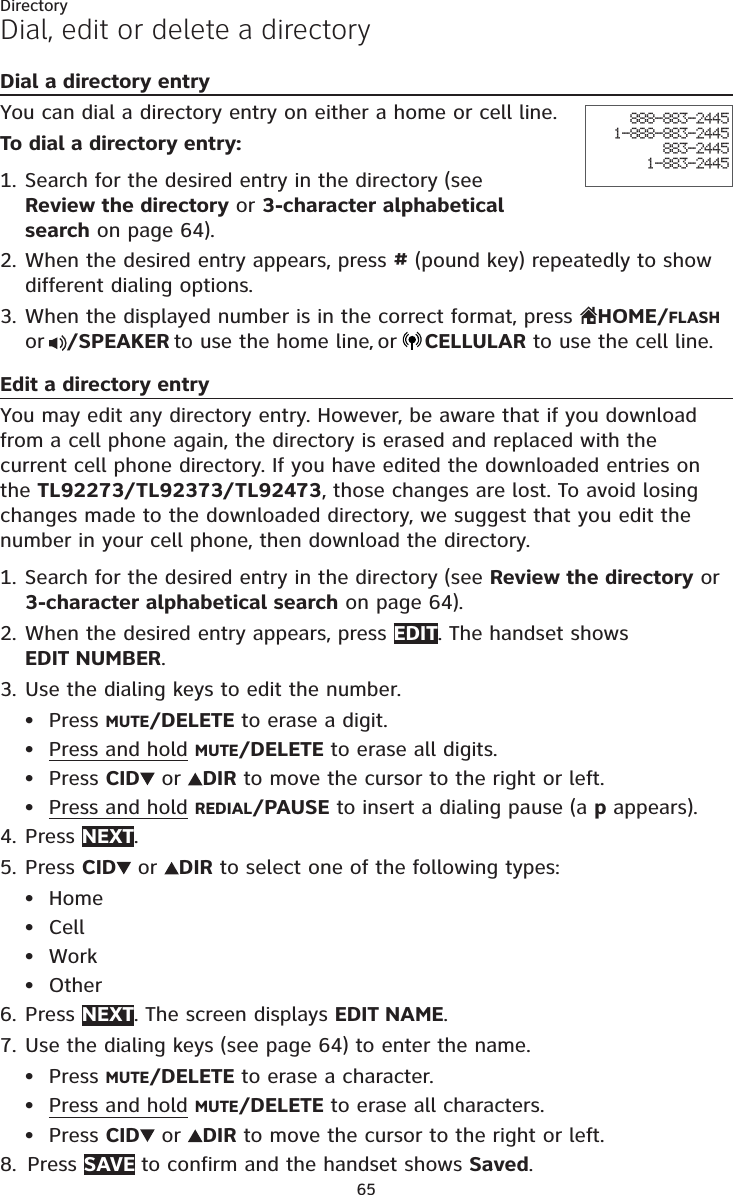

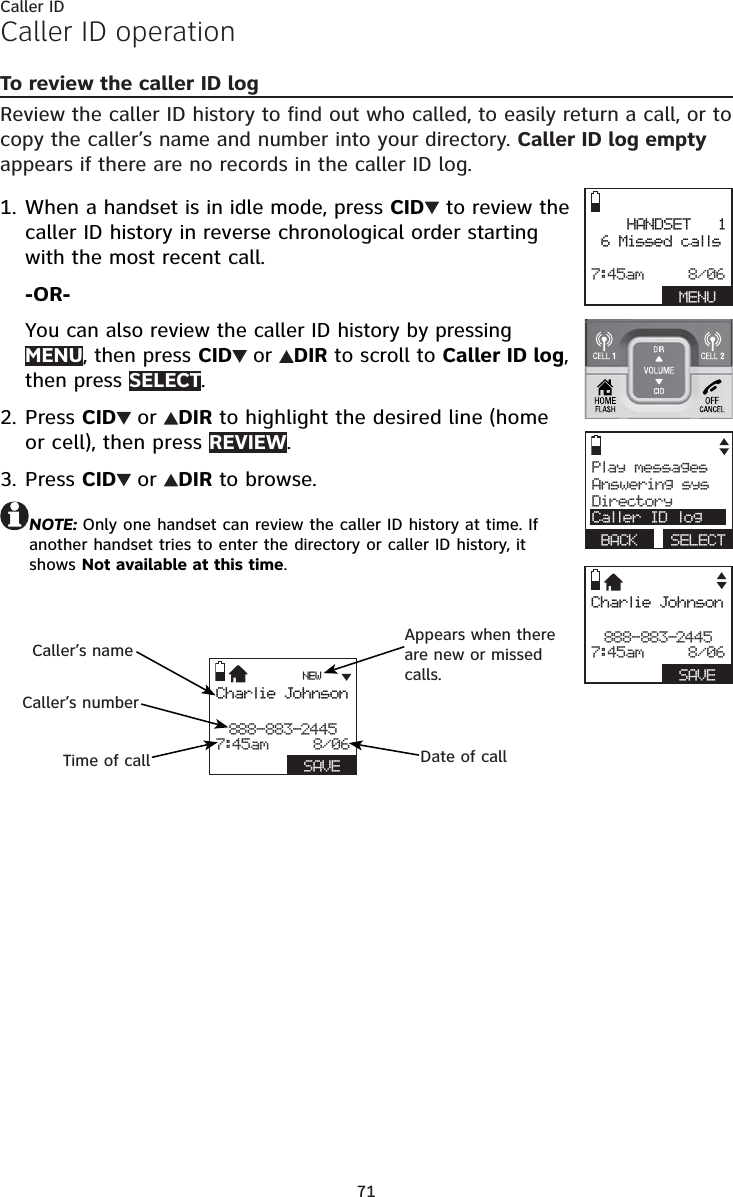
![73Caller IDCaller ID operationSave a caller ID log entry to the directoryCaller ID log entries can only be saved to the Home directory.Select a desired entry in the caller ID log (see To review the caller ID log on page 71).When the desired entry appears, press # repeatedly to show different dialing options.When the number is in the correct format, press SAVE. The handset shows EDIT NUMBER.Use the dialing keys to edit the number.Press MUTE/DELETE to erase a digit.Press and hold MUTE/DELETE to erase all digits.Press CID or DIR to move the cursor to the right or left.Press and hold REDIAL/PAUSE to insert a dialing pause (a p appears).Press NEXT.Press CID or DIR to highlight one of the following types:HomeCellWorkOtherPress NEXT. The screen displays EDIT NAME and [*]-Order.Use the dialing keys (see page 62) to edit the name. Press MUTE/DELETE to erase a character.Press and hold MUTE/DELETE to erase all characters.Press CID or DIR to move the cursor to the right or left.Press TONE to toggle the name order. For example, Robert Brown becomes Brown Robert when you press TONE .Press SAVE to confirm and the screen shows Saved. You hear a confirmation tone.NOTES:If the name received from the telephone service provider is in all capital letters, the first letter of every word remains a capital letter. However, the next letter after the prefix “Mac”, “Mc”, or “O’”, is kept as a capital letter. For example, the “D” in “MacDonald” is kept as a capital letter.When you try to save a caller ID entry without any caller ID information, the handset displays Unable to save.When you try to save a number already stored in the directory, the screen shows Already saved.1.2.3.4.••••5.6.••••7.8.••••9.•••](https://usermanual.wiki/VTech-Telecommunications/80-9084-00/User-Guide-1913332-Page-79.png)
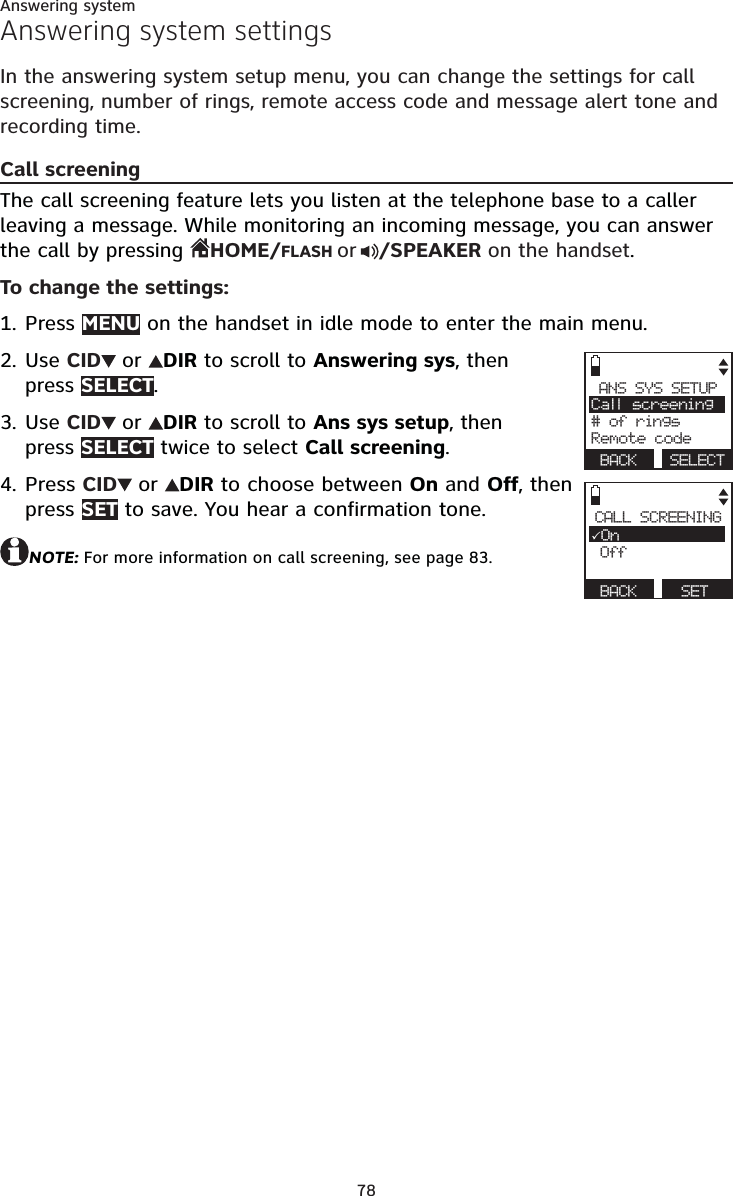
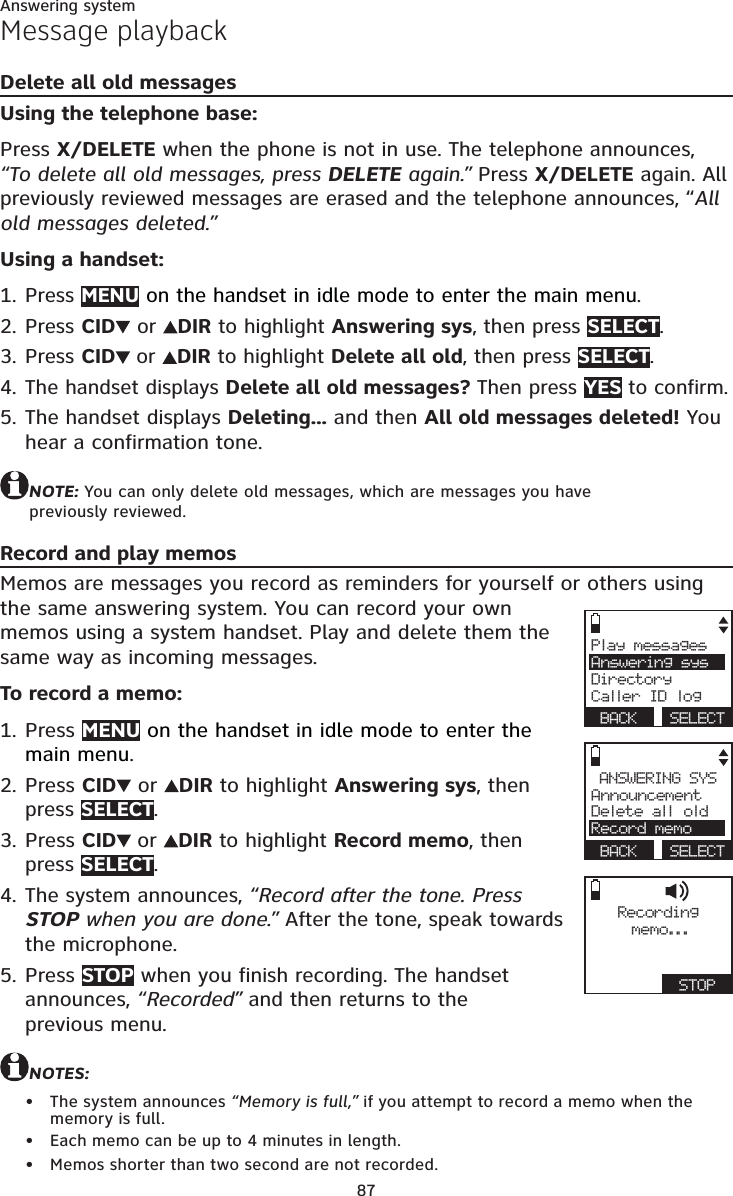
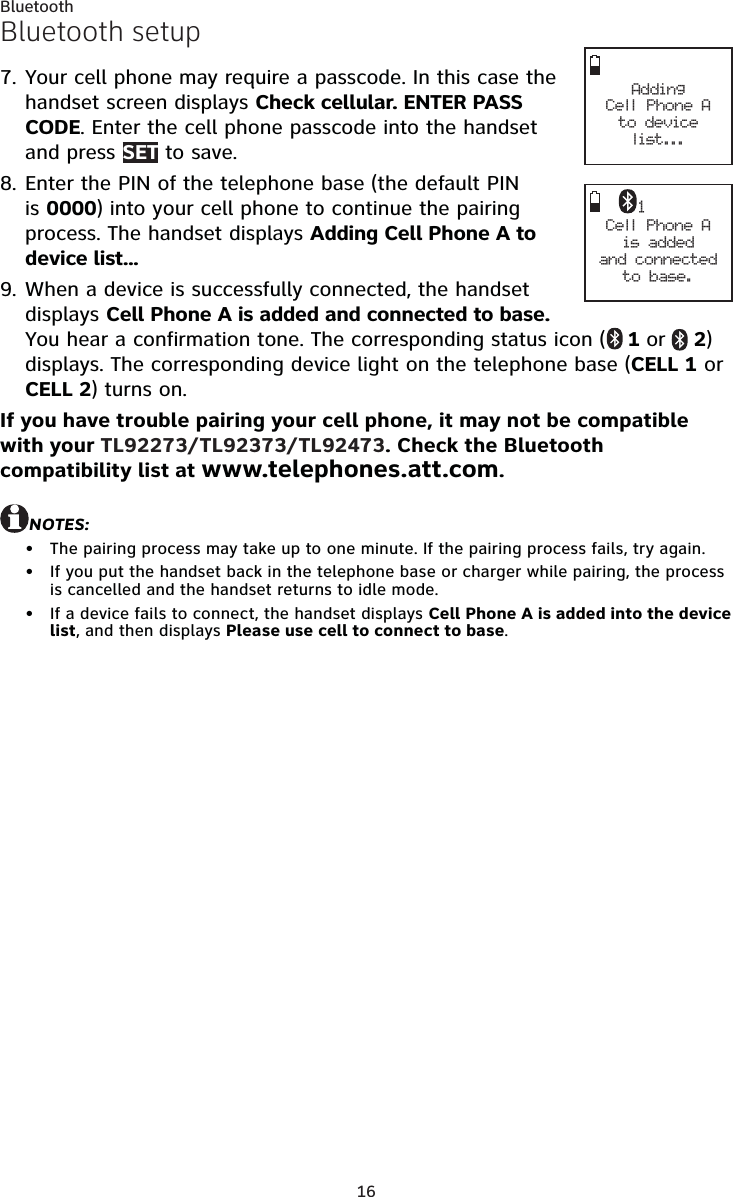
![86Answering systemMessage playbackTo listen to messages with a handset:Press MENU in idle mode. Press SELECT to select Play messages. If you have either new or old messages, the messages play automatically. If you have both new and old messages:To play new messages, press SELECT to select Play new msgs.To play old messages, press CID or DIR to highlight Play old msgs, then press SELECT.When the handset is playing a message, its screen shows [2]-Call info and the caller’s name or number. If the caller’s information is unavailable, the handset shows No caller info.Options during playback:Press EQ button to adjust the message playback audio quality.Press /SPEAKER to play the messages through the handset earpiece.Press CID /VOLUME/DIR to adjust the speakerphone volume.Press SKIP to skip to the next message.Press REPEAT to repeat the message currently playing. Press REPEAT twice to listen to the previous message.Press MUTE/DELETE to delete the current message. The handset displays Message deleted briefly and the system advances to the next message.Press 2 to pause the playback and show the caller ID information. If necessary, press # (pound key) or 1 to show different dialing options. Press HOME/FLASH, DIAL or /SPEAKER to use the home line, or press CELLULAR to use the cell line to call back the caller. Press OFF/CANCEL or BACK to resume the playback. If you do not call back within 10 seconds, message playback resumes.Press HOME/FLASH or CELLULAR to pause the message playback. The handset displays Call back? with the caller ID information. Press YES to call back the caller, or NO to resume the message playback. If the dialing format used is not correct, then use the option above to choose the correct dialing format before calling back the caller.Press OFF/CANCEL to stop. NOTES:When the answering system has less than three minutes of recording time left, it announces, “Less than three minutes to record.” and the handset displays Rec mem low.When the telephone is not in use, if F and the number of messages are flashing alternately in the message window, or the handset displays Rec mem full, the memory is full. Delete some messages to make room for more.1.2.•••••••••••••](https://usermanual.wiki/VTech-Telecommunications/80-9084-00/User-Guide-1913332-Page-92.png)