VTech Telecommunications 80-9449-00 DECT 6.0 Cordless Telephone User Manual
VTech Telecommunications Ltd DECT 6.0 Cordless Telephone Users Manual
UserManual.wiki
>
VTech Telecommunications
>
80 9449 00 User Manual
Users Manual
Navigation menu
Upload a User Manual
Namespaces
Wiki Guide
HTML
PDF
Info
Views
User Manual
Discussion / Help
Navigation
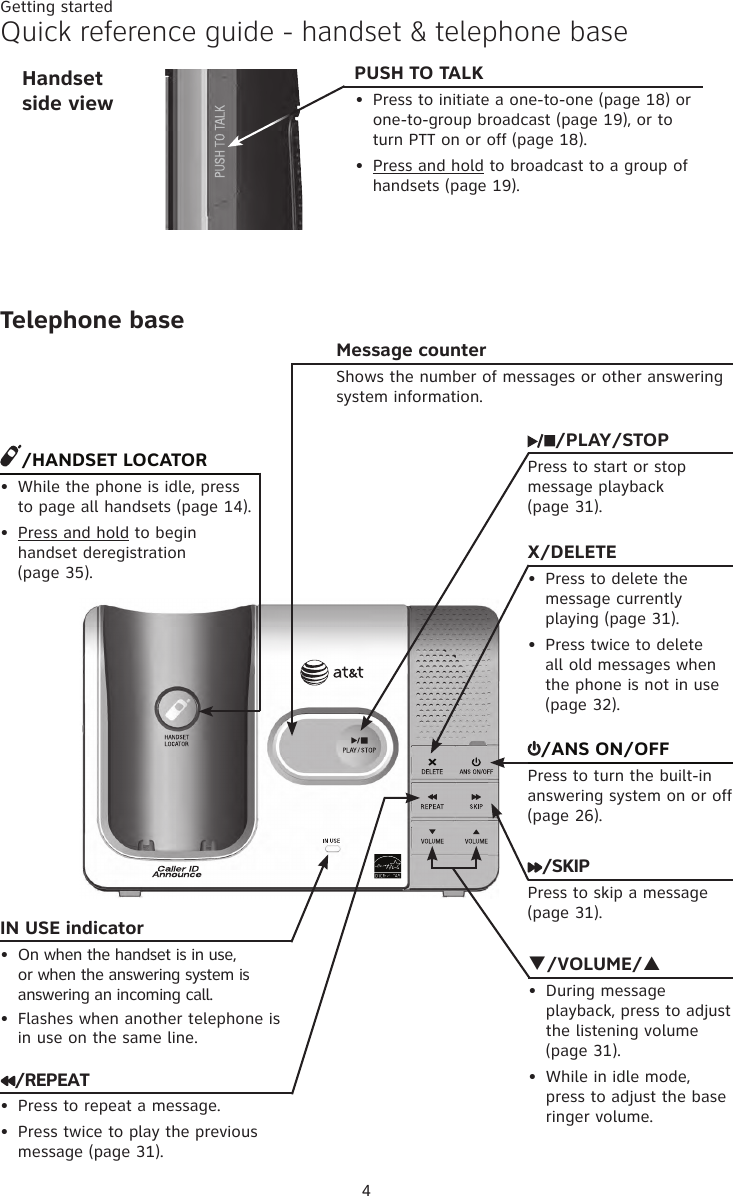
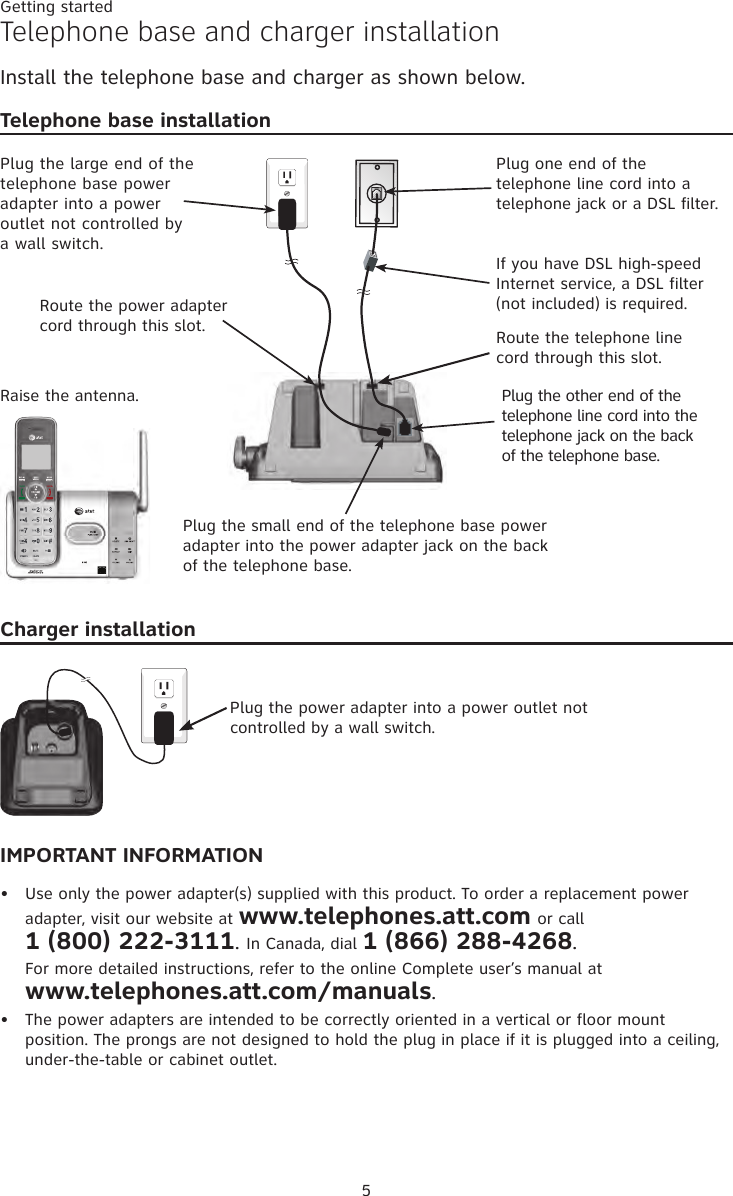

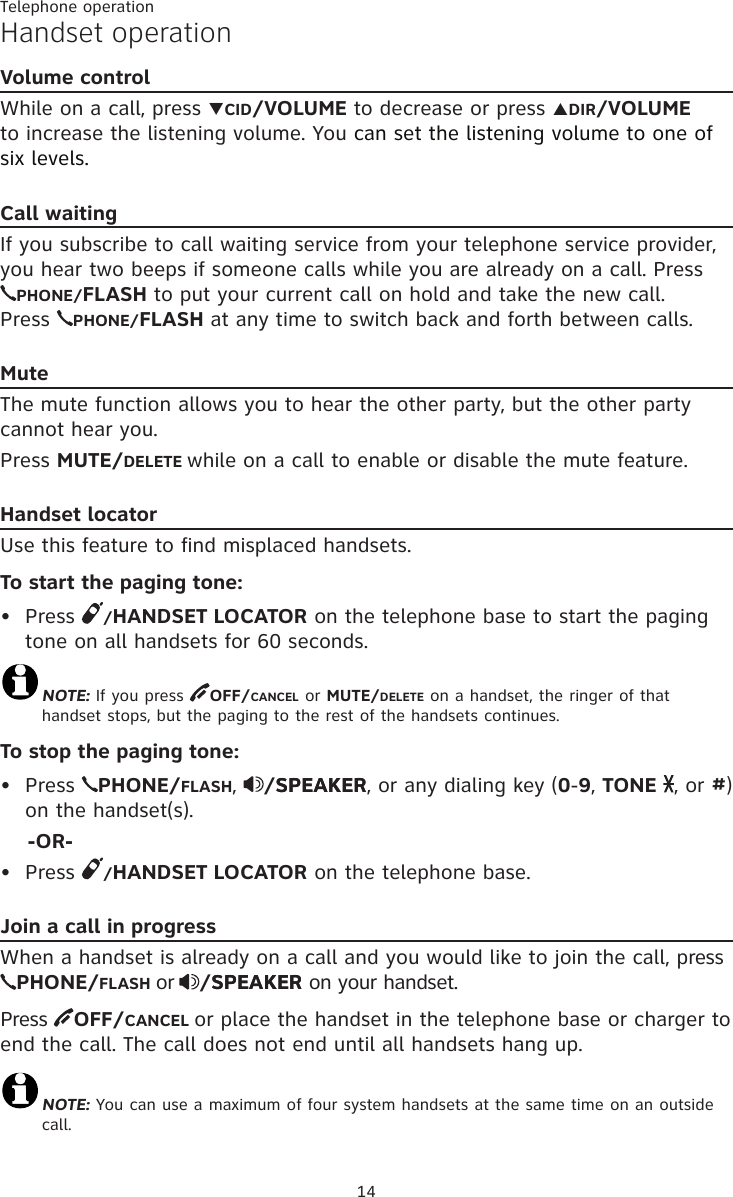
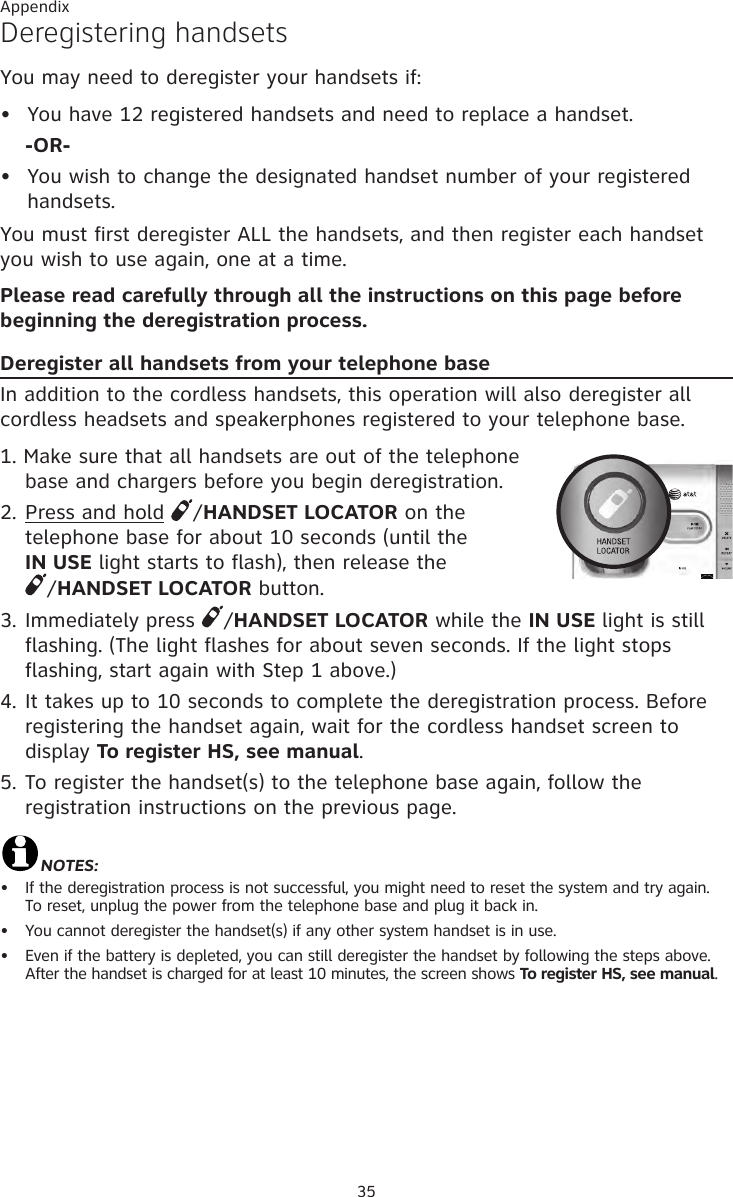
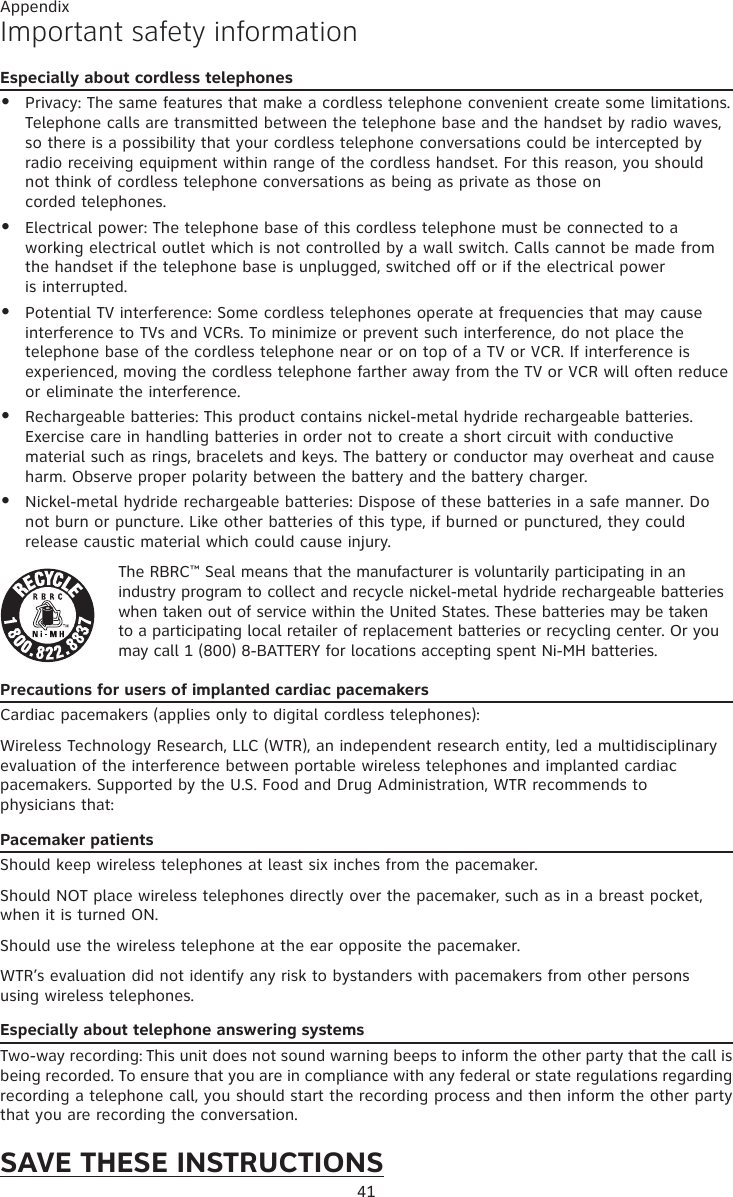
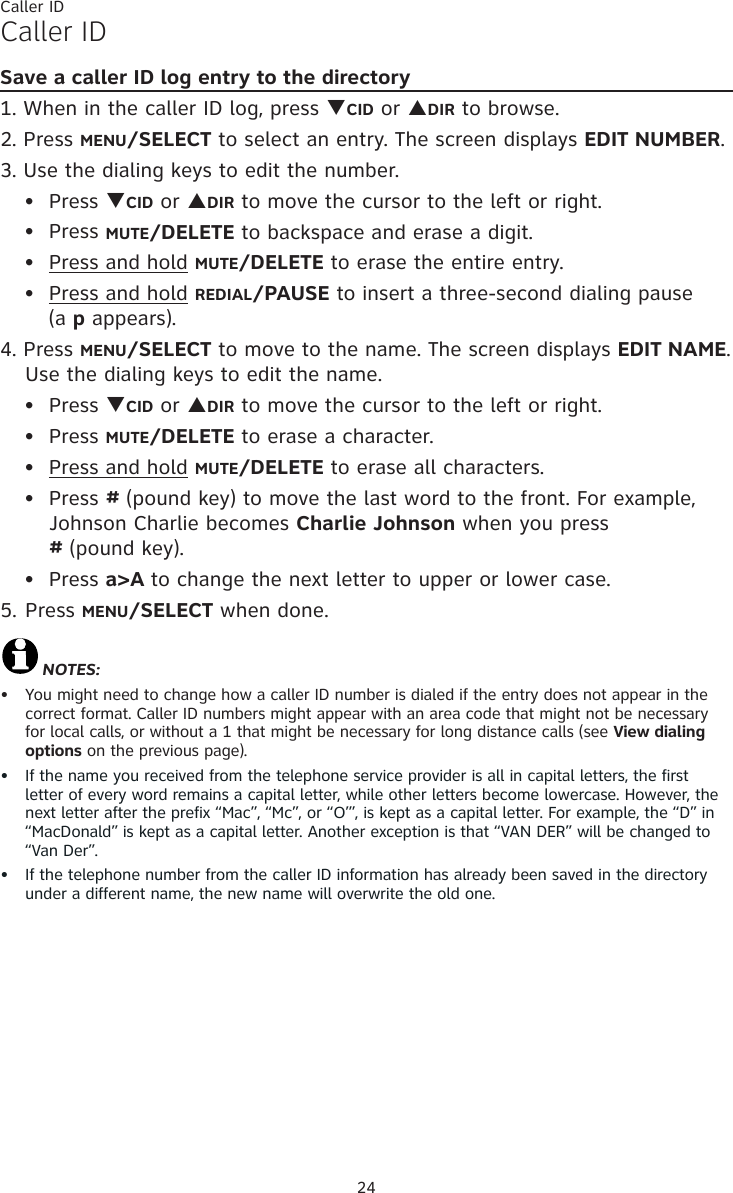
![Multiple handset use18Push-to-talk (PTT)You can directly broadcast messages to the speakerphone of any handset. Any handset you call can respond by pressing the PUSH TO TAL� key to begin two-way communication. Only one handset can talk at a time. To do so, press and hold PUSH TO TAL�. You must release PUSH TO TAL�, so another person can respond.Only one PTT session can be active at a time.While PTT is in use between two handsets, other handsets cannot use the intercom feature but can access the answering system.NOTE: The PTT function is not available when QUIET mode is on.Turn incoming PTT on or off1. Press PUSH TO TAL� when the handset is not in use. The PUSH TO TAL� menu displays.2. Press qCID or pDIR to highlight >PTT On/Off, then press MENU/SELECT.3. Press qCID or pDIR to choose >On or >Off, then press MENU/SELECT.PTT call to a single handset1. When the handset is not in use:If you have a two-handset system, press and hold PUSH TO TAL�.If you have more than two handsets, press PUSH TO TAL�. Press qCID or pDIR to highlight the destination handset number and then press MENU/SELECT or PUSH TO TAL�.Your handset screen shows Connecting to HANDSET X... (X represents the destination handset number) for a few seconds. When the connection is made, both your and the destination handset screens display Press and hold [PTT] to talk. 2. Press and hold PUSH TO TAL� on your handset. A chirp indicates your microphone is on. Speak towards the handset. Your voice is broadcast to the destination handset.3. Release PUSH TO TAL� after speaking. Both handsets beep once again. After the handsets beep, you can press and hold PUSH TO TAL� to continue speaking or the destination handset can respond (see Answer a PTT call on the next page).4. To end the PTT call, press OFF/CANCEL or place the handset in the telephone base or charger.•••••• PTT](https://usermanual.wiki/VTech-Telecommunications/80-9449-00/User-Guide-2238992-Page-22.png)
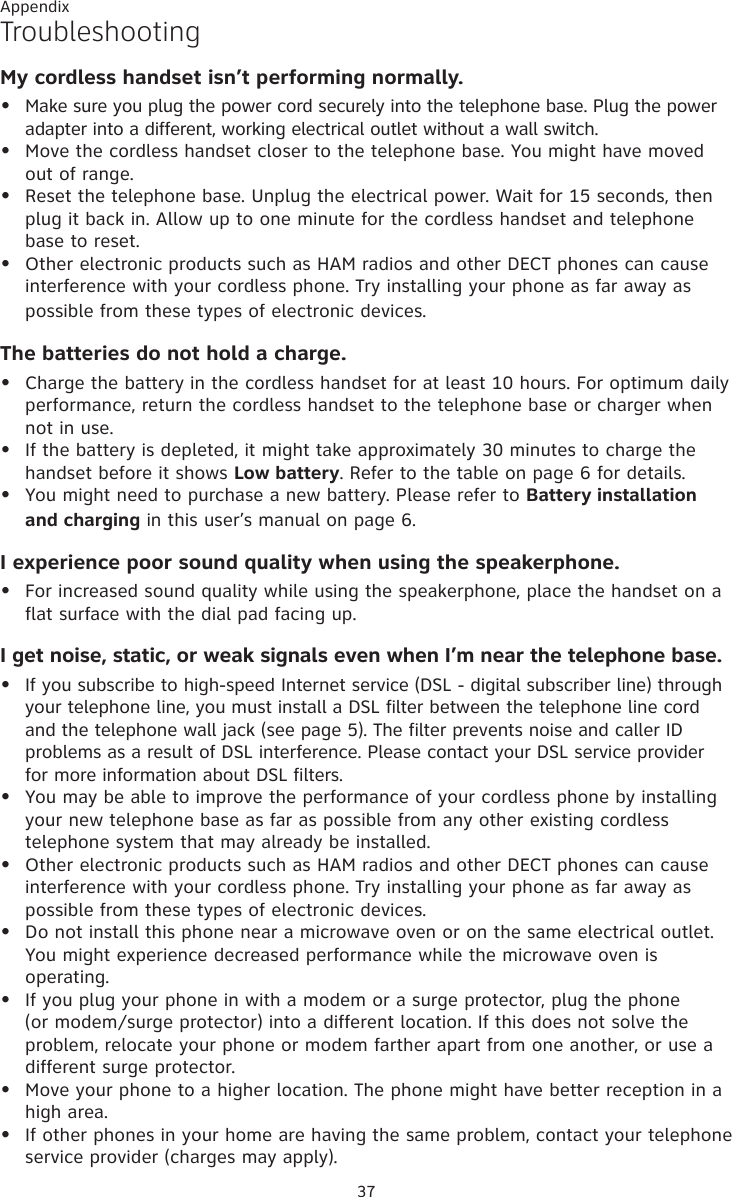
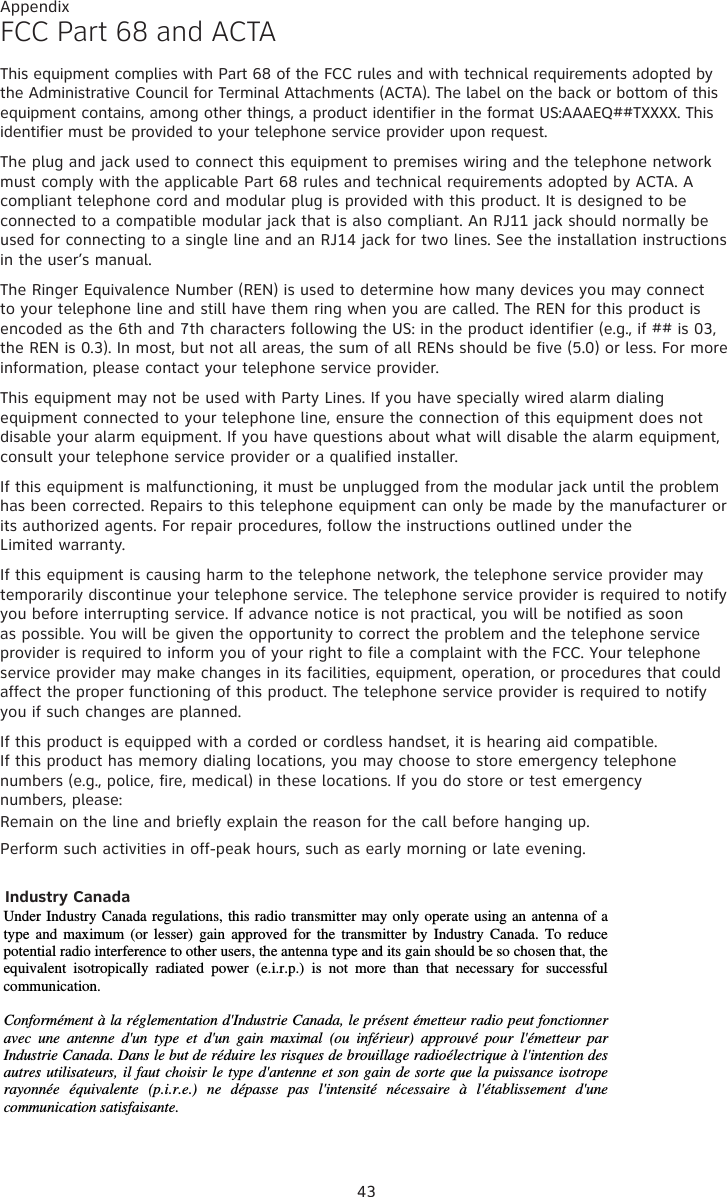
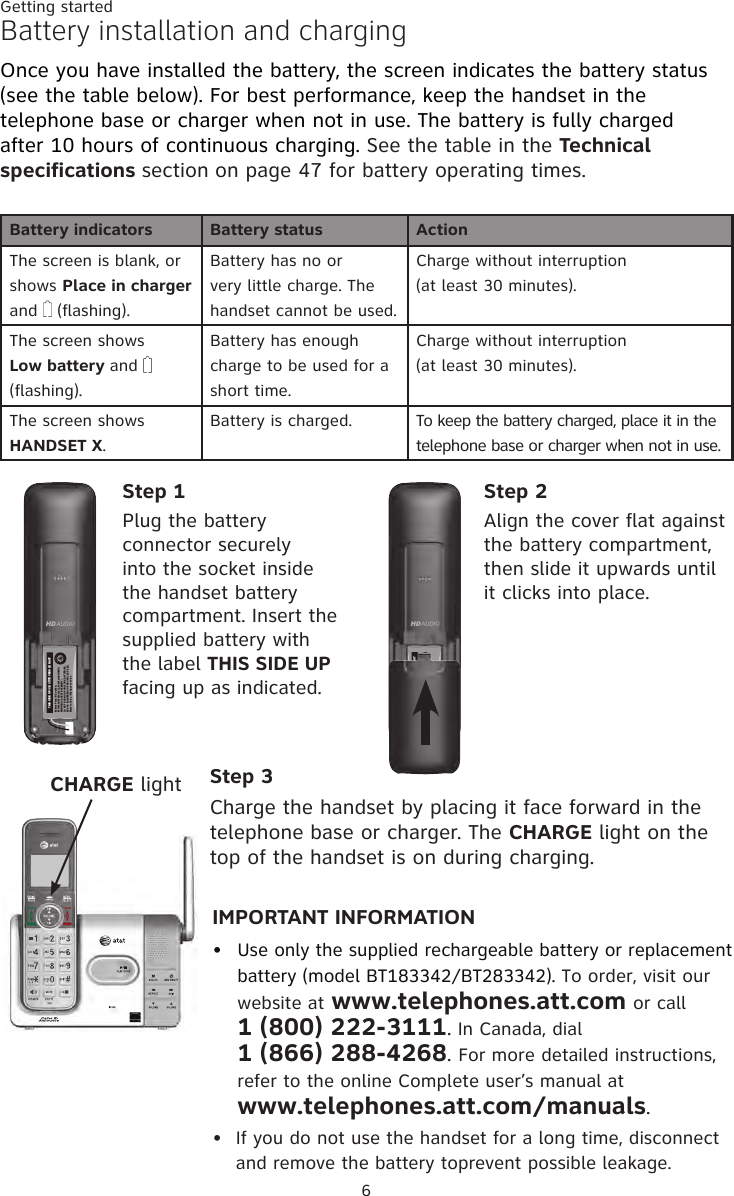
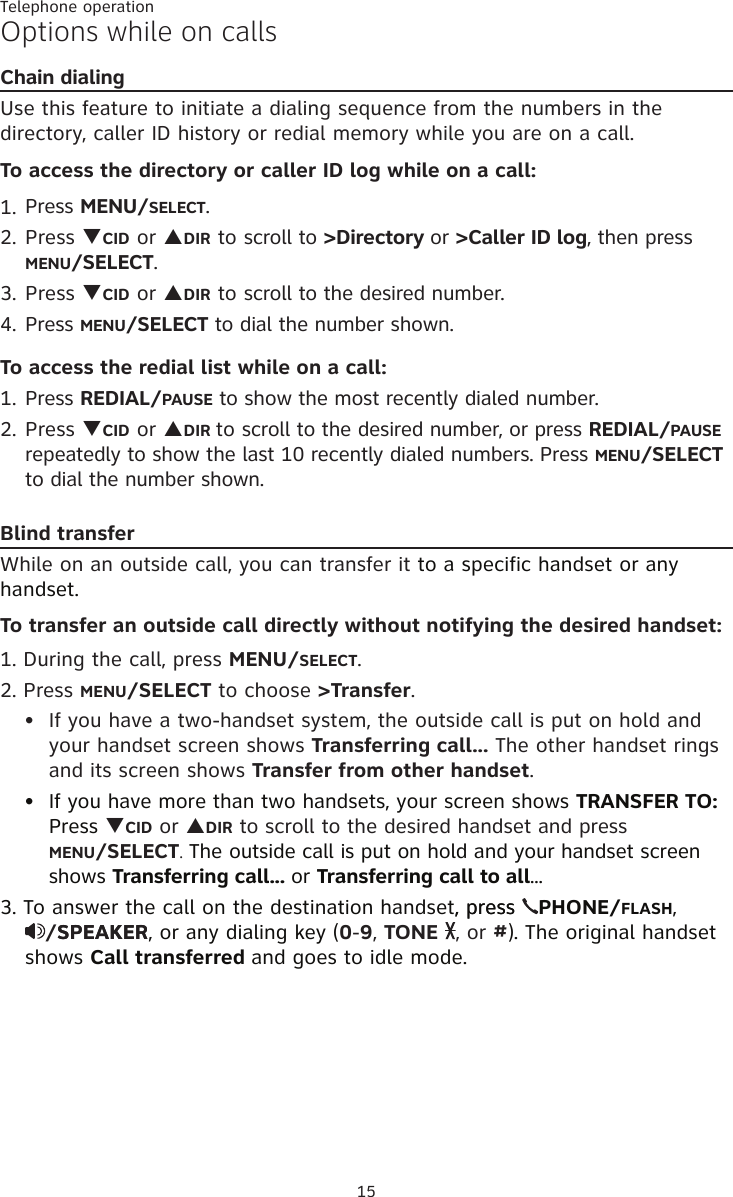
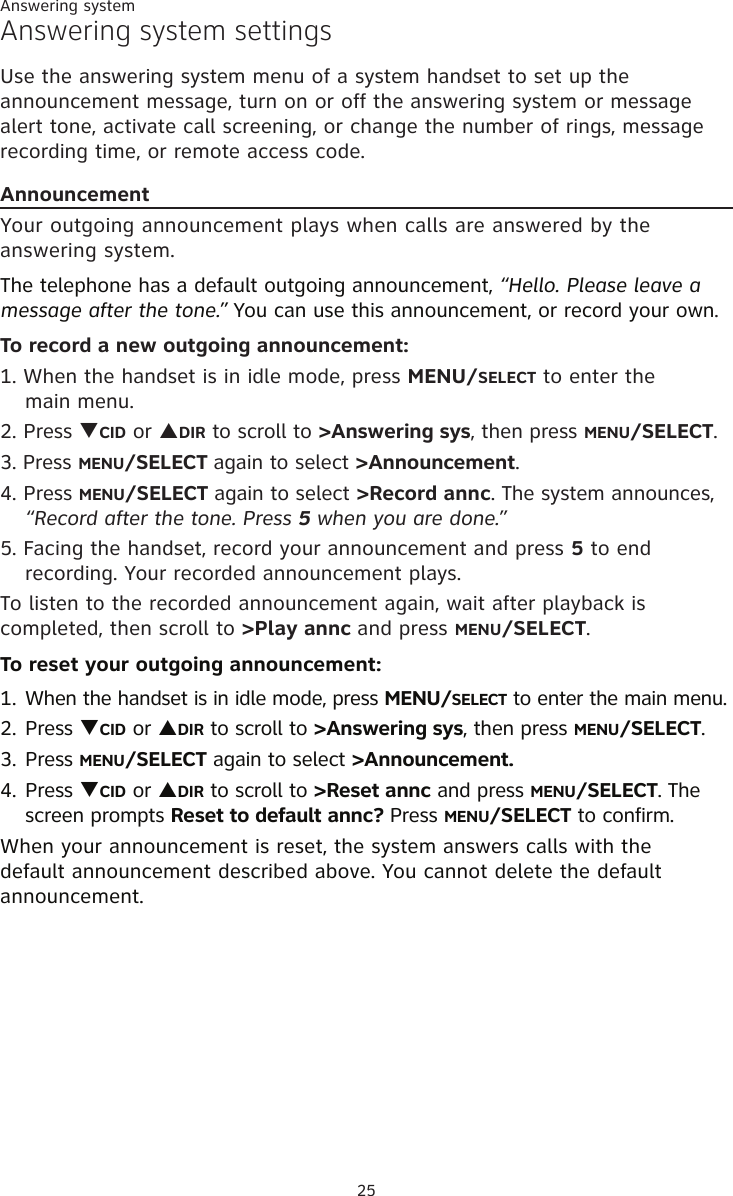
![Multiple handset use19Push-to-talk (PTT)PTT call to a group of handsetsWhen there are multiple handsets registered to the phone system, PTT supports one-to-group calls. PTT supports a maximum of one-to-four calls when two to five handsets are registered, and a maximum of one-to-three calls when six or more handsets are registered. The first four registered handsets will be able to use this feature. To call a group of handsets:1. When the handset is not in use:Press and hold PUSH TO TAL� until your handset screen shows Connecting to group... When the connection is made, both the caller and the destination parties hear a beep. The speakerphones on all other eligible handsets automatically activate. 2. You need to press and hold PUSH TO TAL� when you want to speak. Speak towards the handset. Your voice is broadcast to all eligible handsets.3. Release PUSH TO TAL� after speaking.4. Any handset can reply (see Answer a PTT call below).Answer a PTT callYou can respond to a PTT call whenever the speakerphone light is off, as described below.When your handset receives a PTT call, the handset beeps and the screen shows Press and hold [PTT] to talk. When the other party is speaking, your speakerphone light is on, and your handset shows PTT From HS X To HS X (the first X represents the initiating handset number, the second X represents your handset number; a maximum of four handset numbers appear).When your speakerphone light is off (the screen shows Press and hold [PTT] to talk), press and hold PUSH TO TAL� on your handset. You will hear a chirp. Speak towards the handset. Your voice is broadcast to all destination handsets.After speaking, release PUSH TO TAL�. Your handset will beep. After the beep, if your speakerphone light is off, you can press and hold PUSH TO TAL� to continue speaking, or a destination handset can respond.•1.2.3.](https://usermanual.wiki/VTech-Telecommunications/80-9449-00/User-Guide-2238992-Page-23.png)
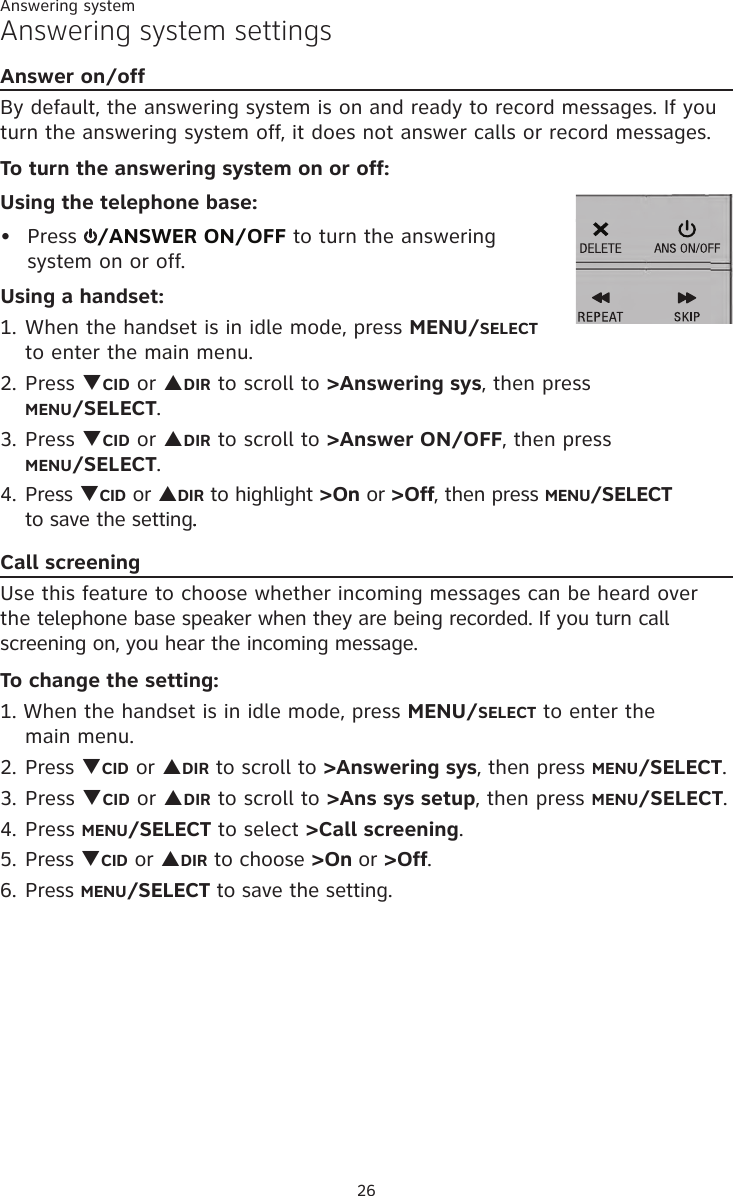
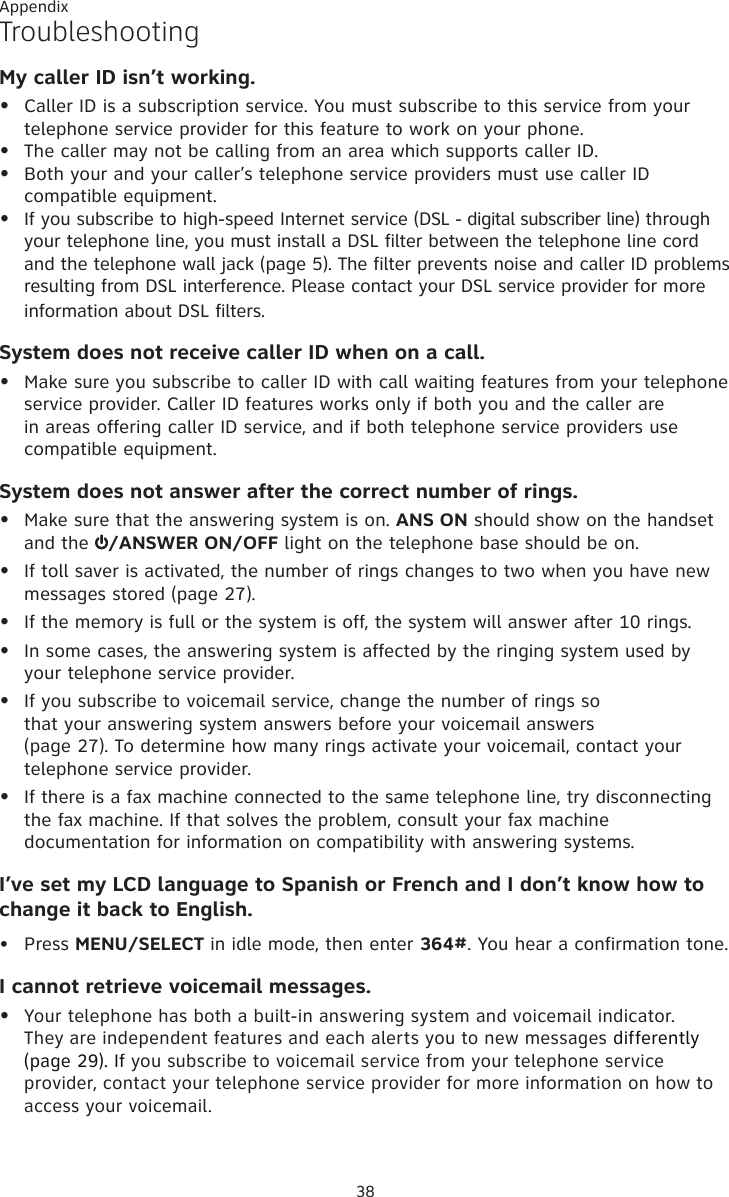
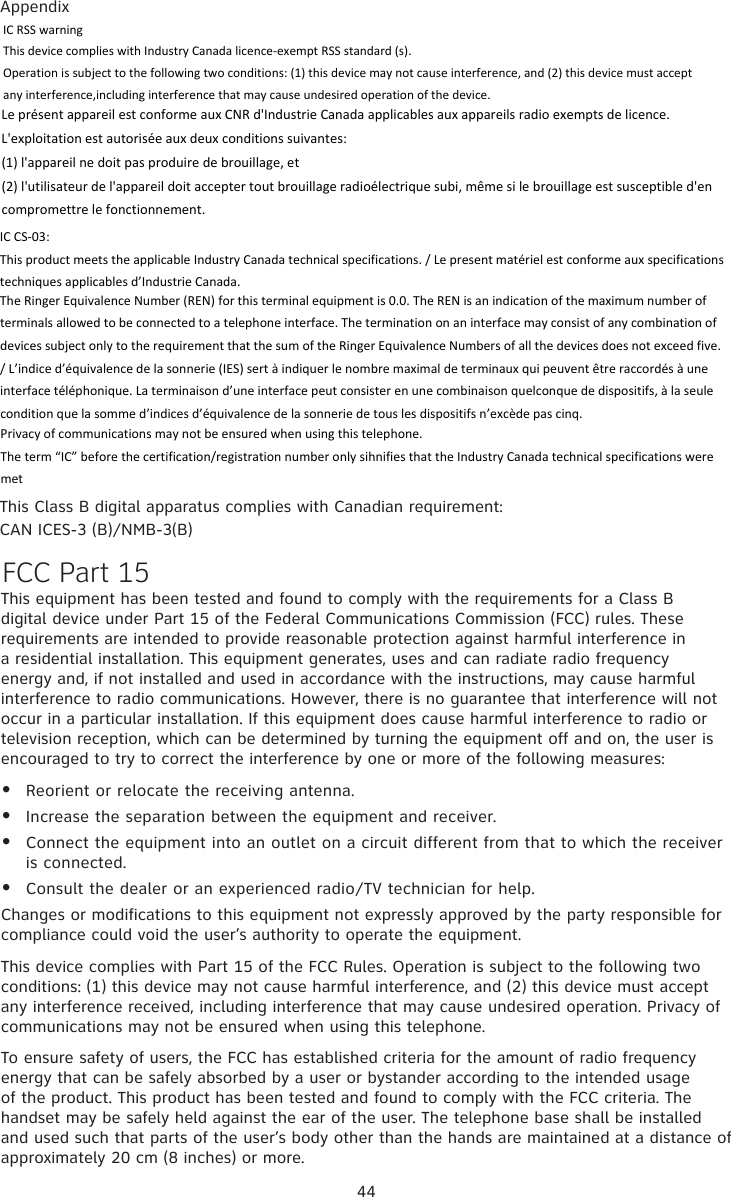
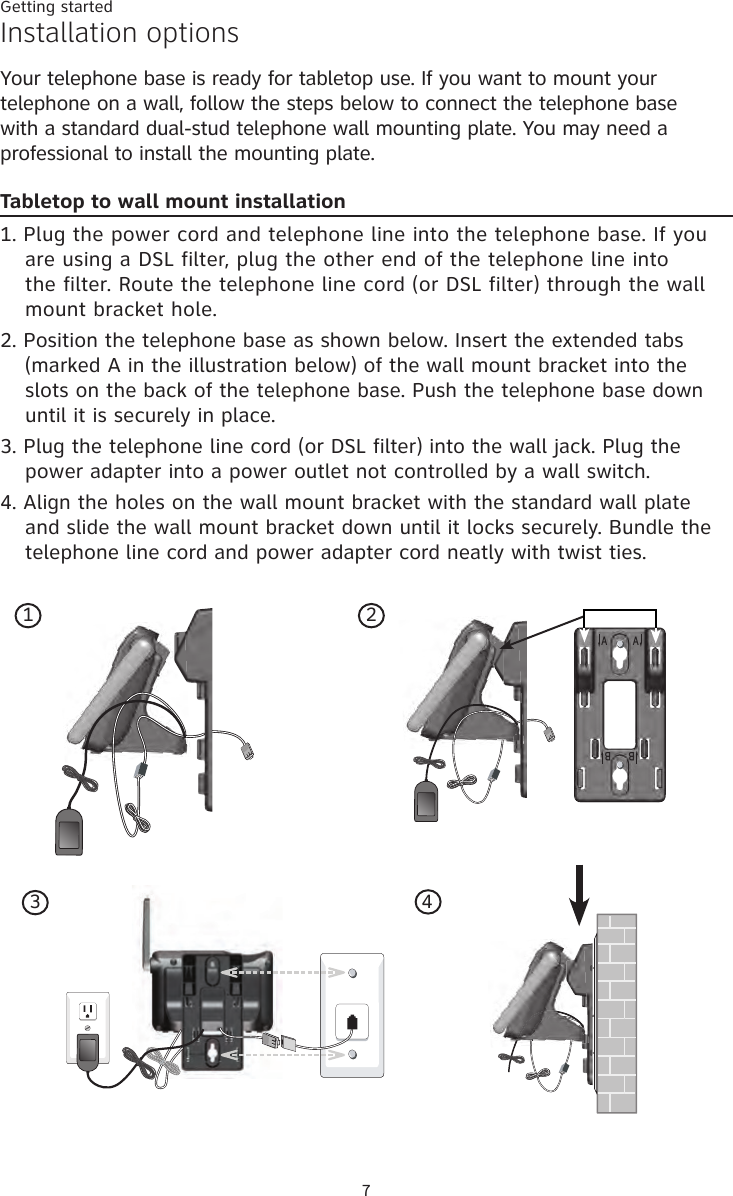
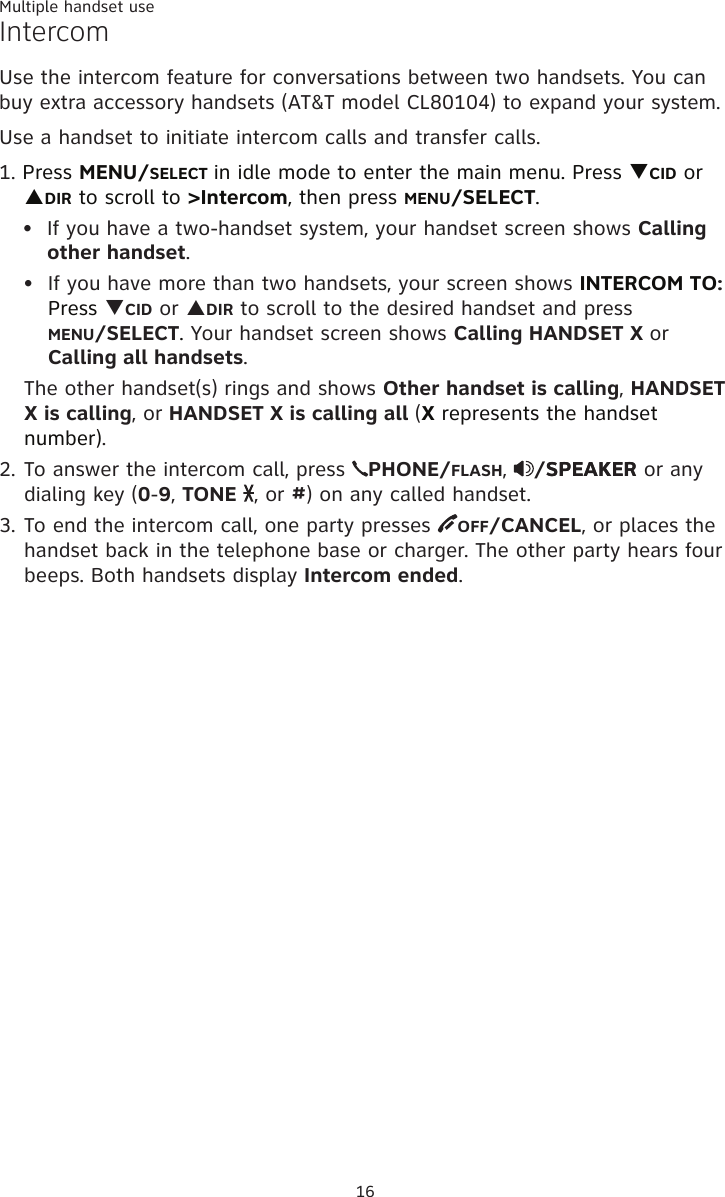
![Answering system30About the answering systemMessage capacityThe answering system can record up to 99 messages, depending on the length of each message. Individual messages can be up to three minutes, and the maximum recording time is approximately 22 minutes. The actual recording time depends on individual message characteristics. Messages remain available for replay until you delete them.Voice promptsThe system provides voice prompts to guide you through the setup procedures at the telephone base, message playback, remote access and recording outgoing announcements. Call screening at the telephone baseIf the answering system and call screening are on, the announcement and the incoming message broadcast at the telephone base when a call is answered at the telephone base.You can turn call screening on or off using the handset (see page 26). When call screening is off, you can temporarily turn on call screening by pressing p/VOL on the telephone base. Call screening will be off for the next incoming call. If call screening is on and you want to silence the telephone base while it is recording messages, press /PLAY/STOP.Call screening at the handsetIf the answering system is on, you can hear the announcement and the incoming message with the handset when a call is answered by the answering system. While a message is being recorded, the handset shows To screen call, press [SELECT]. Press MENU/SELECT to screen the call.Call interceptWhile screening a call, you can stop recording and speak to the caller by pressing PHONE/FLASH on the handset.Temporarily turning off the message alert toneIf the new message alert tone is turned on, the telephone base beeps every 10 seconds when there are new or missed messages. Pressing any telephone base key (except /HANDSET LOCATOR) temporarily silences the message alert tone. If you press X/DELETE in idle mode to temporarily turn off the message alert tone, there is a voice prompt directing you to press X/DELETE again to delete all old messages. The message alert tone is temporarily off. Only press X/DELETE a second time if you wish to erase all old messages.The message alert tone resumes when you receive another message.](https://usermanual.wiki/VTech-Telecommunications/80-9449-00/User-Guide-2238992-Page-34.png)