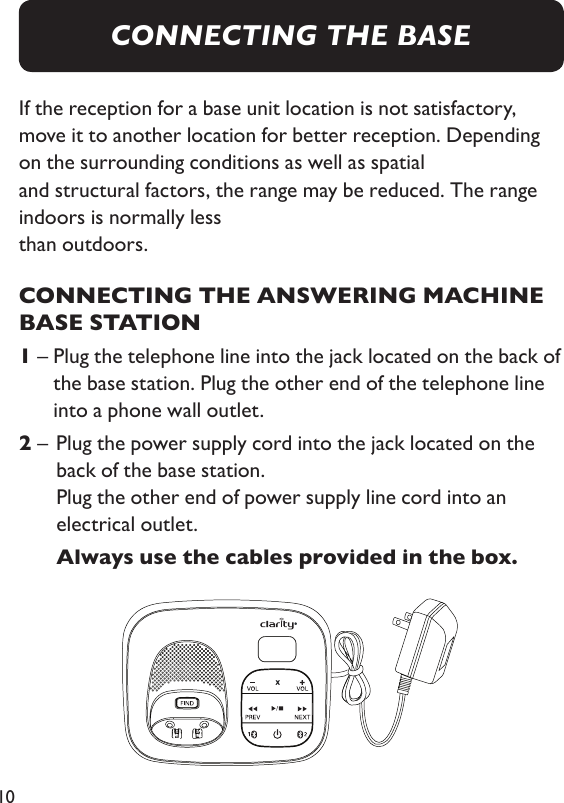
VTech Telecommunications 80-9665-00 1.9GHz Digital Modulation Cordless Phone-Base Bluetooth Portion User Manual
VTech Telecommunications Ltd 1.9GHz Digital Modulation Cordless Phone-Base Bluetooth Portion
UserManual.wiki
>
VTech Telecommunications
>
80 9665 00 User Manual
User Manual
Navigation menu
Upload a User Manual
Namespaces
Wiki Guide
HTML
PDF
Info
Views
User Manual
Discussion / Help
Navigation

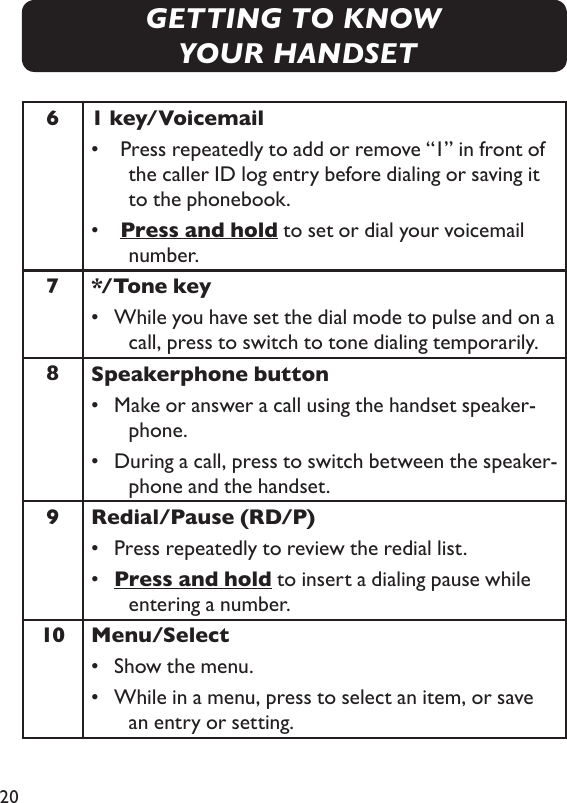
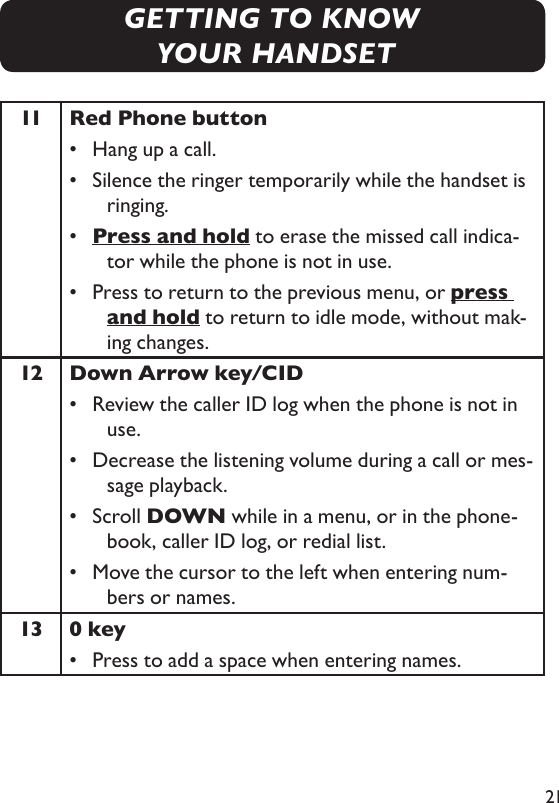
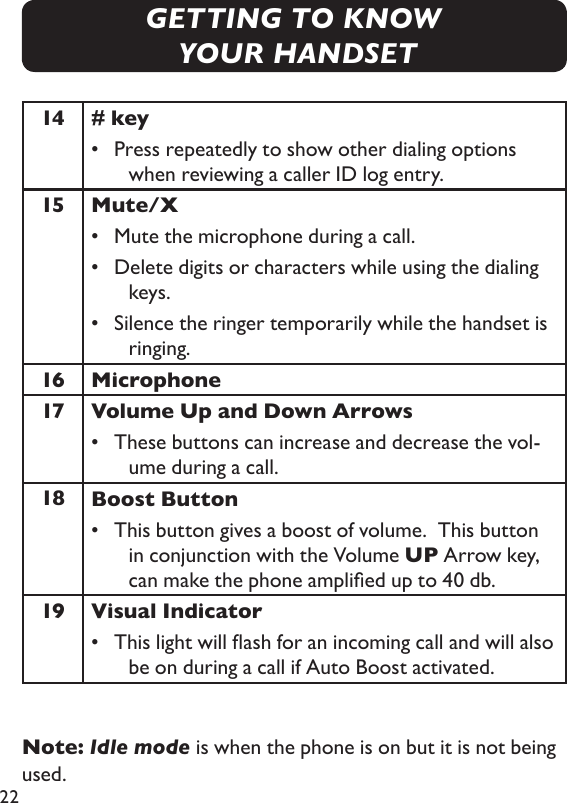

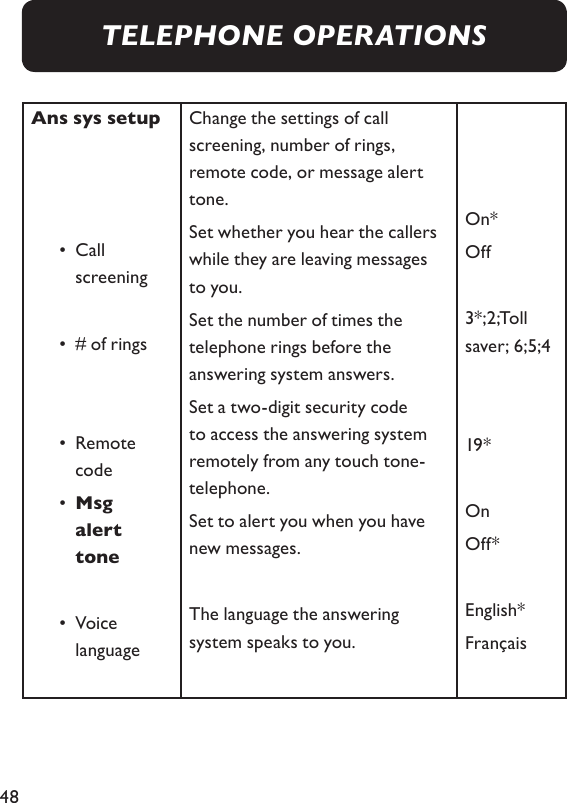
![47Set your built-in answering systemYour answering system has various features, read below for the basic settings. Default settings are indicated by asterisks (*). Menu Description OptionsAnnouncement Play, record, or delete an announcement for incoming calls.Play [2]; Del [3]; Rec [7]Delete all old Delete all old (reviewed) messages.N/ARecord memo Record a memo as reminders for yourself or others using the answering system.N/AAnswer on/off Turn on or off the answering system.OnOffVoice guide Follow audio instructions to set basic features.N/ATELEPHONE OPERATIONS](https://usermanual.wiki/VTech-Telecommunications/80-9665-00/User-Guide-2430183-Page-47.png)