ValuePlus TIZZBIRDN1 SMART TV STICK User Manual
ValuePlus, Inc. SMART TV STICK
User Manual

http://www.emc2000.co.kr
CE TEST REPORT
Report No.: EMC-FCC-R0080
EMC compliance Ltd. Page: 1 of 1
480-5 Shin-dong, Yeongtong-gu, Suwon-city, Gyunggi-do, 443-390, Korea
82 31 336 9919 (Main) 82 31 336 4767 (Fax)
This test report shall not be reproduced except in full, Without the written approval.
Appendix 6.
User manual

TIZZBIRD™ N1
Quick Installation Guide
Smart TV Stick
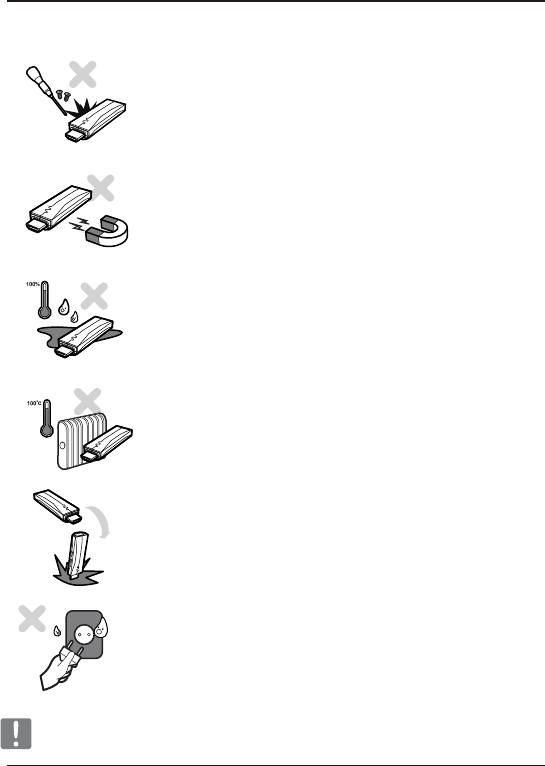
Do not try to disassemble the unit. It may cause malfunction or fire.
Keep away the unit from magnetized devices. It may erase the data stored in
the HDD drive inside.
Do not place the unit in places that are exposed to oil, water, dust, humidity,
rain or wind.
Do not drop or shock the unit from heights. Doing so may cause serious
damage to the parts inside.
Do not touch the power plug with wet hands or use defective power cables and
electric outlets. It may cause electric shocks or fire.
Keep away the unit from overheated areas, such as heaters. Place it well
ventilated location. Ensure that a free airflow is maintained around the unit.
Quick Installation Guide
1.Safety Notice
Unplug the power cable when the device is not used for a long time.
TizzBird N1
2
Humidity
Disassembly and Label Removal
Magnets
High Temperature
Shock
Electric Shock
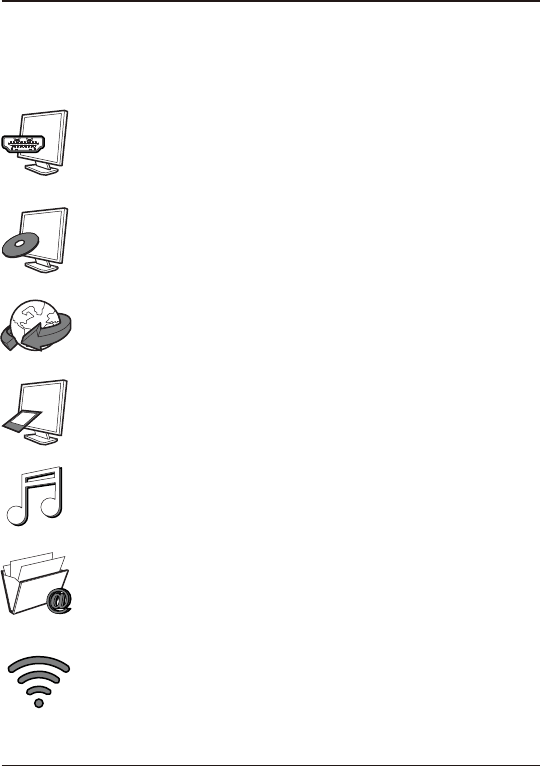
2.Features
Tizzbird playbacks various full HD movie contents including DVD backup
formats as well as AVI, MKV, XVID and TS formats on TV. It supports most
recent video formats such as H264 and VC-1.
Tizzbird N1 is so small that let you install it directly to HDMI port of any TV. The
power will be supplied by USB port of TV, so no need to install another power
adapter.
TizzBird provides a full web-browsing capability very similar like PC. Mouse
and keyboard can be attached to support various inputs, which enable slick
Internet surfing even on the big screen TV.
TizzBird playbacks high resolution photo images on TV. It can slideshow the
photos while playing back the music in background. Transition effects such as
fade-in-out or zooming can be applied during transition of each photo.
TizzBird playbacks high quality lossless music such as FLAC, WAV up to 24bit/
96Khz. It also supports compressed MP3, OGG, AAC and CUE format thru
high fidelity Wolfson DAC.
TizzBird runs applications on TV exact same APPs installed on the Android
Smartphone without any conversion. This also includes 3D games or 3D APPs
that utilize the superb OPEN-GL 3D accelerator. Some APPs that fixed
screen-aspect ratio cannot be applicable in some cases.
It also supports 802.11n Wi-Fi which enables faster wireless networking ever
before. TizzBird supports NFS, SAMBA, uPnP network protocols to connect
various servers. It also has multiple mounting drive options and automatic
browsing capability which maximize the network connection experience.
Quick Installation Guide
TizzBird N1
3

3.Specifications
Quick Installation Guide
TizzBird N1
4
Model
System
OS
Video
Audio
Image
Connection
Video Output
Audio Output
File System
Subtitle
Power
Languages
Dimension
TizzBird Stick N1
TCC8925 Cortex-A5 800Mhz CPU/ 256KB L2 Cache,
512M RAM (N1M Model), 1GB RAM (N1G Model) / 4GB T-flash
Android Rev 4.0 Ice cream Sandwich
Format: AVI/ MKV/ MPG/ WMV/ VOB/ TP/ TRP/ M2TS/ MOV/ FLV/ IFO/ ISO
Codec: MPEG 1/2/4, H264, XVID, WMV9(MP@HL4.1) VC-1(AP@L3)
Resolution: Max 1080p 60Hz
MP3/ OGG/ WAV/ AAC/ FLAC/ APE/ WMA
Dolby Digital / DTS Down Mixing and Pass-thru
JPG, JPEG, BMP, PNG, GIF
USB 2.0 Host Port 1 EA
USB 2.0 OTG Port 1EA (by Cable)
Wireless Wi-Fi 802.11n (Embedded)
Network Protocol : Samba (CIFS)/ NFS/ uPnP
HDMI 1.3a
HDMI
NTFS, FAT32
smi, smil, sub, sub/idx, srt, ssa, ass
Use TV USB port as a power supply.
Use bundled 5V 1A power adapter when you experience some problem.
English, French, German, Spanish, Italian, Portuguese, Vietnamese,
Swedish, Czech Norwegian, Danish, Japanese, Korean, Traditional Chinese
75 x 23 x 15 mm
Quick Installation Guide
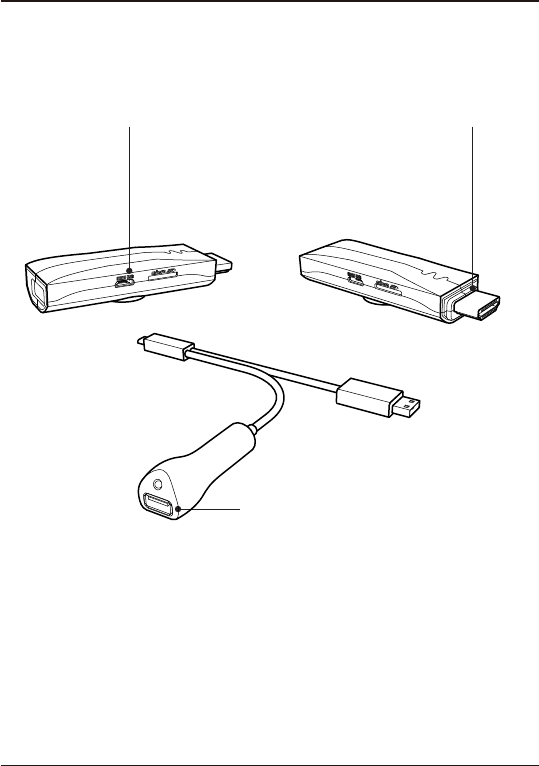
4.Description of Each Part
TizzBird N1
5
Micro USB port
To connect power and IR receiver cable
OTG port
For RF Type USB device.
HDMI port
To connect TV.
Connectors
Please connect the unit to HDMI port of the TV.
Please connect the FLASH DRIVE, MOUSE or KEYBOARD on the USB host port.
Please connect MOUSE or KEYBOARD on the USB OTG port.
* USB host DOES NOT PROVIDE enough POWER to drive 2.5” HDD.
Please use HDD drive with external power supply.
* USB OTG port only allows connection of MOUSE or KEYBOARD.
Quick Installation Guide
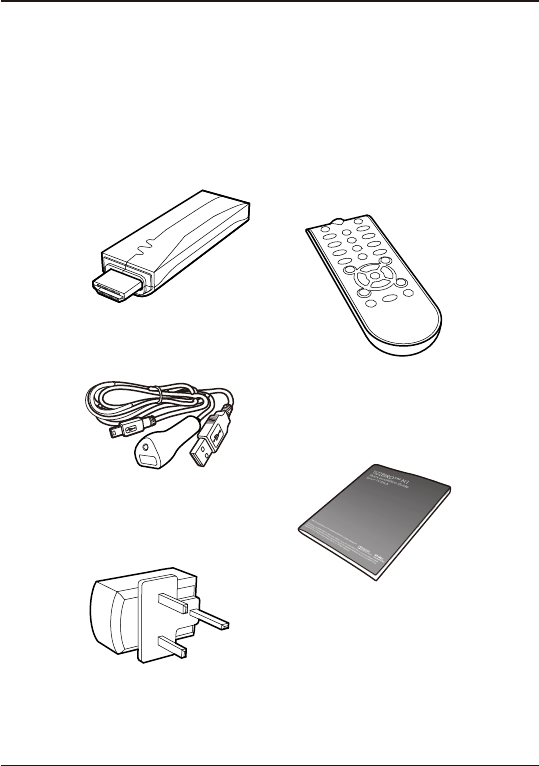
5.Package Contents
TizzBird N1
6
The TizzBird package contains the following items. The shape of items described below may slightly
different from the actual contents.
Components
Main Unit
Quick Guide
Power Adapter
Remote Controller
Y Cable
6.Installation and Connection
Quick Installation Guide
TizzBird N1
7
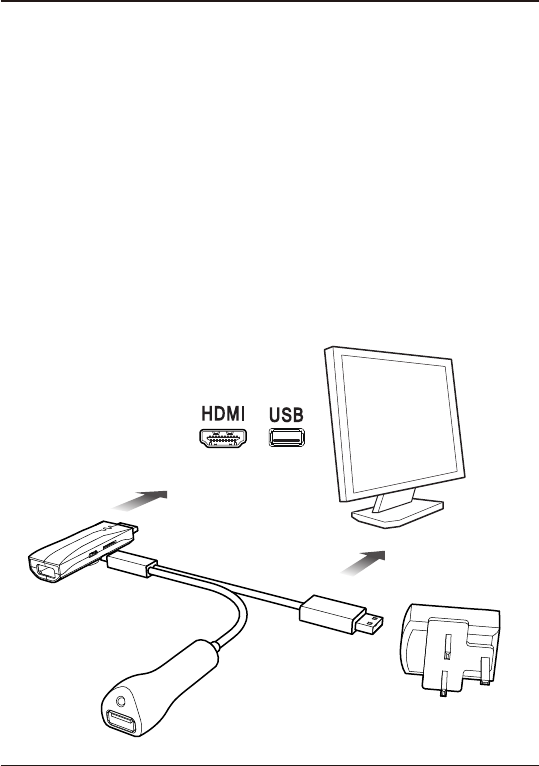
The TizzBird supports HDMI audio and video output for connection to a TV.
Connecting to TV
Connection to HDMI Out Power Cable Connection
Connect the TizzBird N1 HDMI to your TV. HDMI
can also transfer the audio signal and no need to
connect another cable for audio.
Connect the power cable of TizzBird N1 to the
TV USB port like below. If you experience some
problem during playback, you may connect
supplied power adapter.
Quick Installation Guide
TizzBird N1
8
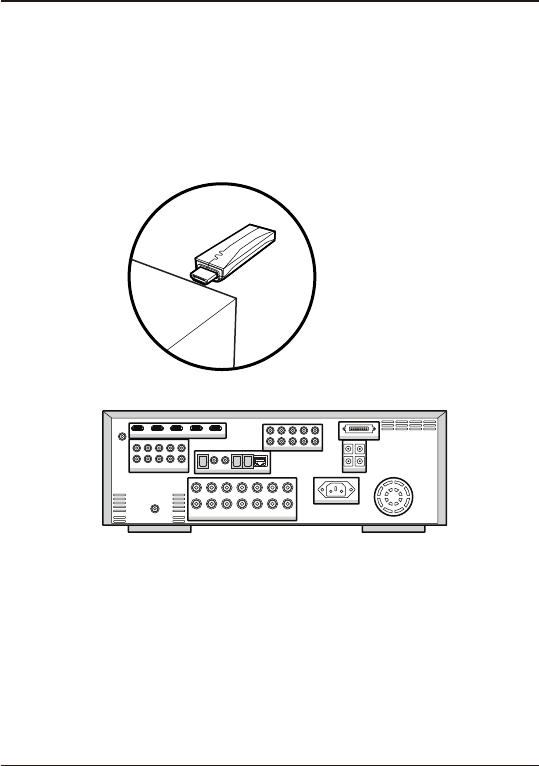
Tizzbird N1 can be connected to HDMI input AV receiver. Please select the appropriate input at the audio
receiver using remote controller after connection.
Connecting to AV Receiver
Connect the Tizzbird N1 HDMI to your AV receivers’ HDMI input. Then connect the AV receivers’ HDMI
output to the TV input.
Quick Installation Guide
TizzBird N1
9
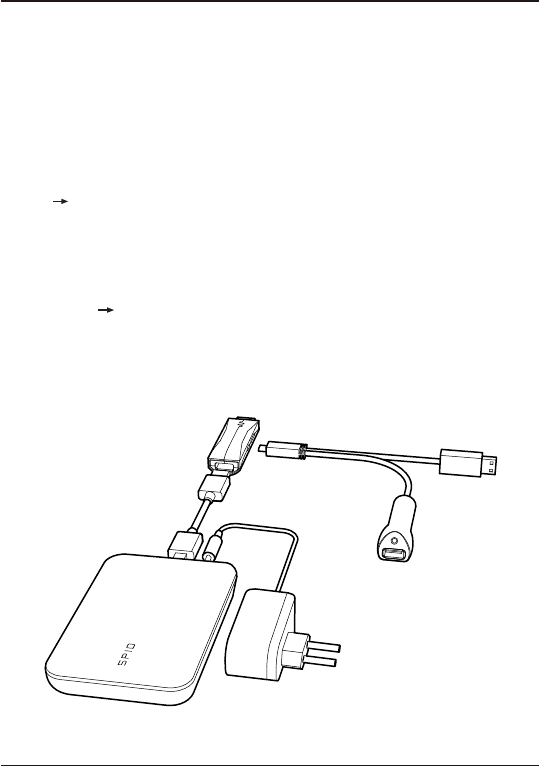
TizzBird provides two USB 2.0 host ports to connect various external devices, such as FLASH MEMORY
drive, external USB HDD enclosure, digital camera/camcorder, keyboard & mouse, or USB video-cam &
microphone.
Caution!! To connect any external 2.5” HDD drive, please DO USE EXTERNAL POWER SUPPLY of
HDD or Y-CABLE for that. The N1 does not guarantee the power to drive the external HDD under any
circumstances. The external HDD should be connected to the USB port of device, not USB port on the
cable.
Recommendation The USB host port on the cable should be used for mouse, keyboard or flash drive.
It’s actually USB 2.0 OTG port so may cause compatibility or performance problem on some devices.
Connecting USB Device
Quick Installation Guide
TizzBird N1
10
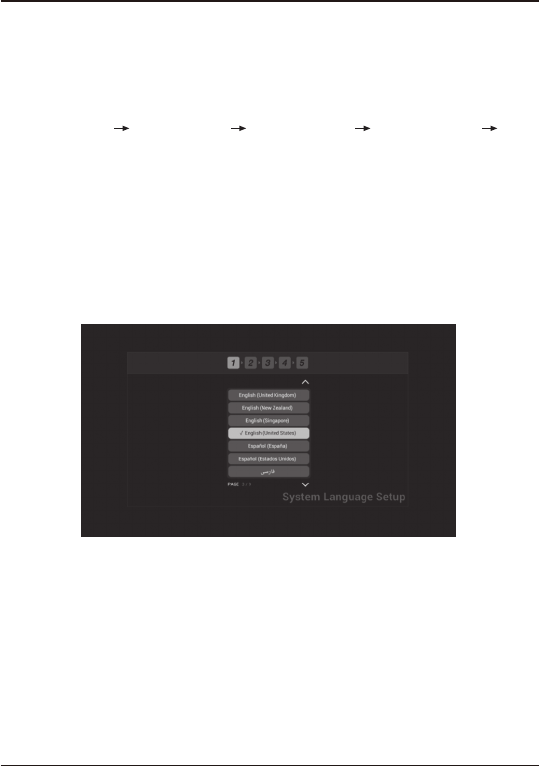
Initial setup consists of 5 steps of WIZARD style sequences. The sequence of WIZARD will be VIDEO
LANGUAGE SETUP OUTPUT SETUP SCREEN FITTING NETWORK SETUP THEME
SELECTION.
The PREV/ NEXT button on the top side of each screen will bring the PREV/ NEXT step.
The first step is setup the menu language. The setup wizard will enumerate all the languages available at
this moment. Please select one of the menu languages for your use.
Initial Setup Wizard
1) Language Setup
Quick Installation Guide
TizzBird N1
11
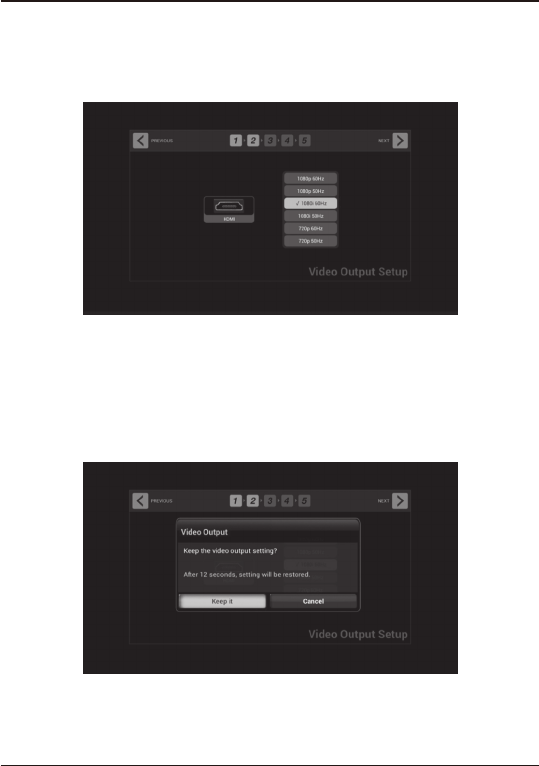
2) Video Output Setup
The video resolution selection screen will appear as above. Please select the appropriate video output for
the display. If you select, the pop-up will ask you keep resolution change or not. If the pop-up screen will
appear, please select “Keep It”.
Quick Installation Guide
TizzBird N1
12
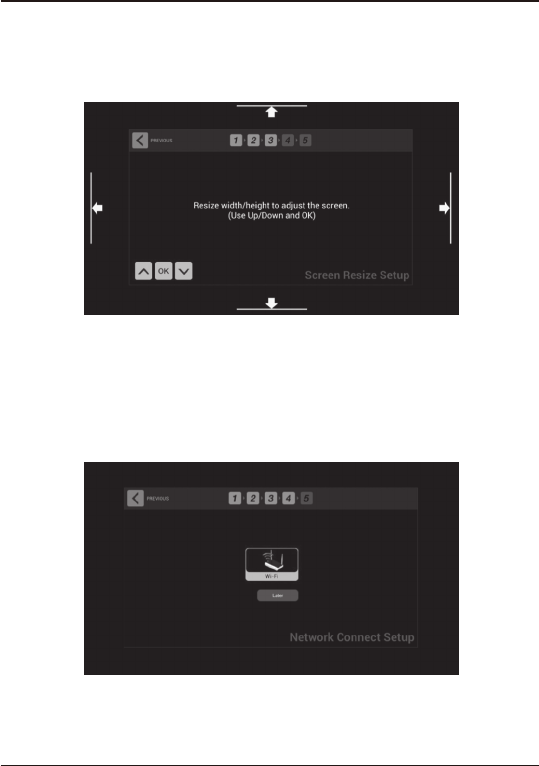
3) Screen Fitting Setup
4) Network Setup
The 3rd step is fitting the screen size according to user’s TV. Clicking UP/DOWN button at left-bottom side
will increase/ decrease the screen size accordingly. Press OK when done.
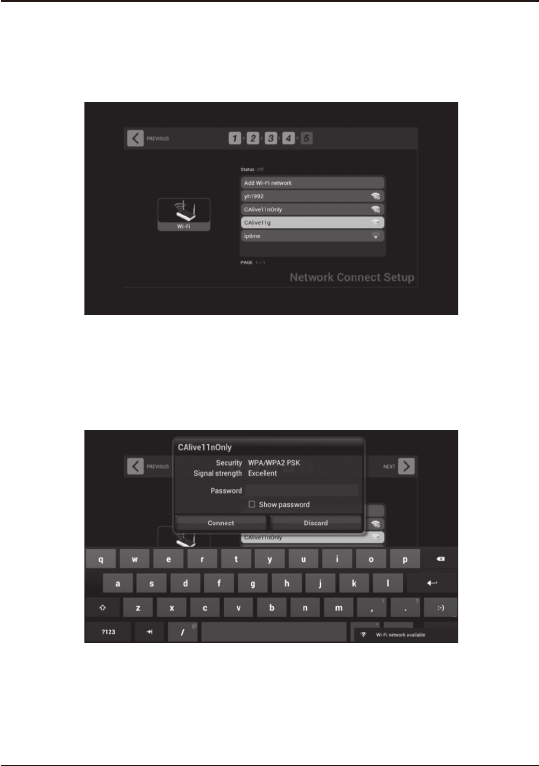
The 4th step is setting up network. Wi-Fi can be configured here. If Wi-Fi button were pressed, the following
screen will enumerate all available Wi-Fi AP. Select one of them and click it.
Quick Installation Guide
TizzBird N1
13
The next page screen will pop up to configure the Wi-Fi.
Typing the password will finalize the Wi-Fi setup and Internet connection will be made.
Quick Installation Guide
TizzBird N1
14
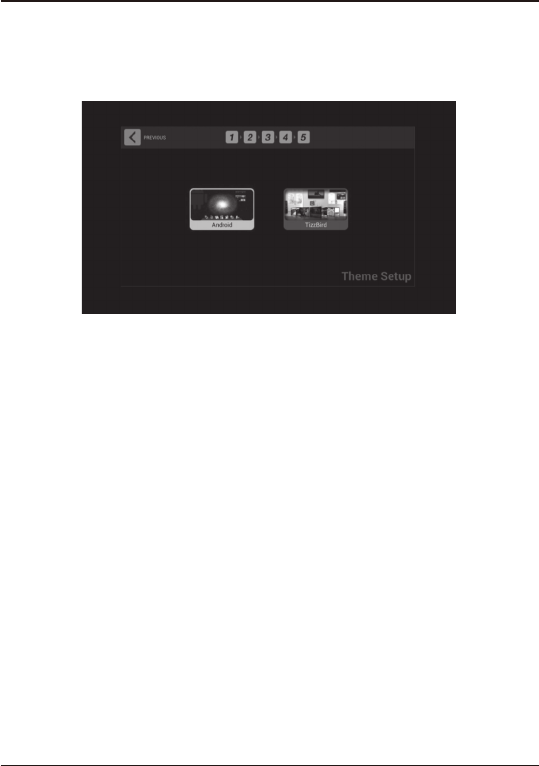
The final step is setting up theme. Tizzbird N1 provides two type of theme, one is the Android theme, the
other is Tizzbird classic theme. If you are familiar with smart phone user interface, please choose “Android”.
If you are more familiar with multimedia player, then choose TizzBird theme. The theme can be selected
freely at settings later.
5) Theme Setup
NOTE: THE GRANTEE IS NOT RESPONSIBLE FOR ANY
CHANGES OR MODIFICATIONS NOT EXPRESSLY APPROVED
BY THE PARTY RESPONSIBLE FOR COMPLIANCE. SUCH
MODIFICATIONS COULD VOID THE USER’S AUTHORITY TO
OPERATE THE EQUIPMENT.
THIS DEVICE COMPLIES WITH PART 15 OF THE FCC RULES.
OPERATIONIS SUBJECT TO THE FOLLOWING TWO
CONDITIONS: (1) THIS DEVICE MAY NOT CAUSE HARMFUL
INTERFERENCE, AND (2) THIS DEVICE MUST ACCEPT ANY
INTERFERENCE RECEIVED, INCLUDININTERFERENCE THAT
MAY CAUSE UNDESIRED OPERATION.
This appliance and its antenna must not be co-located or operation in
conjunction with any other antenna or transmitter. A minimum separation
distance of 20 cm must be maintained between the antenna and the person for
this appliance to satisfy the RF exposure requirements.
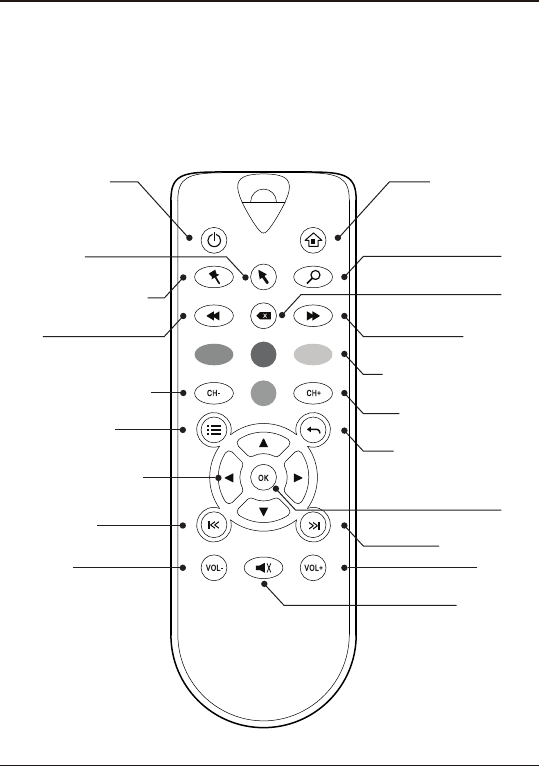
7.Using Remote Controller
The TizzBird package contains the following items. The shape of items described below may slightly
different from the actual contents.
Quick Installation Guide
TizzBird N1
15
Turn power ON/OFF
Rewind
Bookmark the current scene
Mouse ON/OFF
Channel (PVR) or sync up
Channel (PVR) or sync down
Resume to previous screen
Move to next item
Volume up
Select
Volume down
Optional HOT context buttons
Fast - forward
Delete
Search
Go to HOME screen
Pop-up MENU screen
Move to each directed item
Mute the audio
Move to prev item