Verathon 0570-0175 FloSensor, P/N 0570-0175 User Manual 0900 1442 01 60
Verathon FloSensor, P/N 0570-0175 0900 1442 01 60
Verathon >
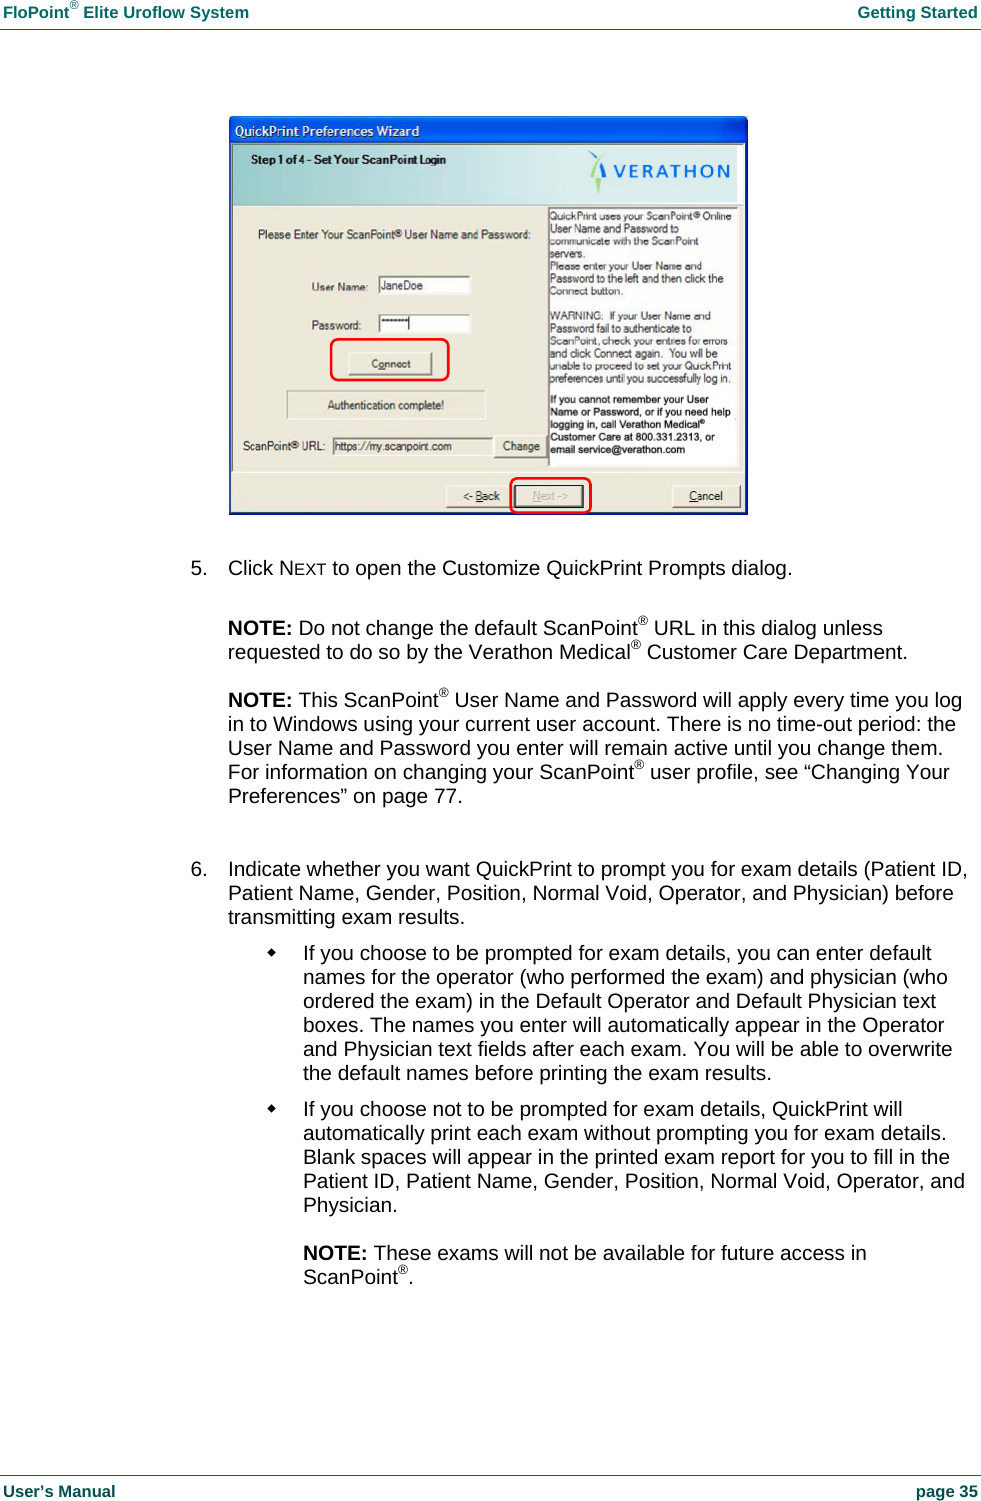
Contents
- 1. User Manual part 1 of 4
- 2. User Manual part 2 of 4
- 3. User Manual part 3 of 4
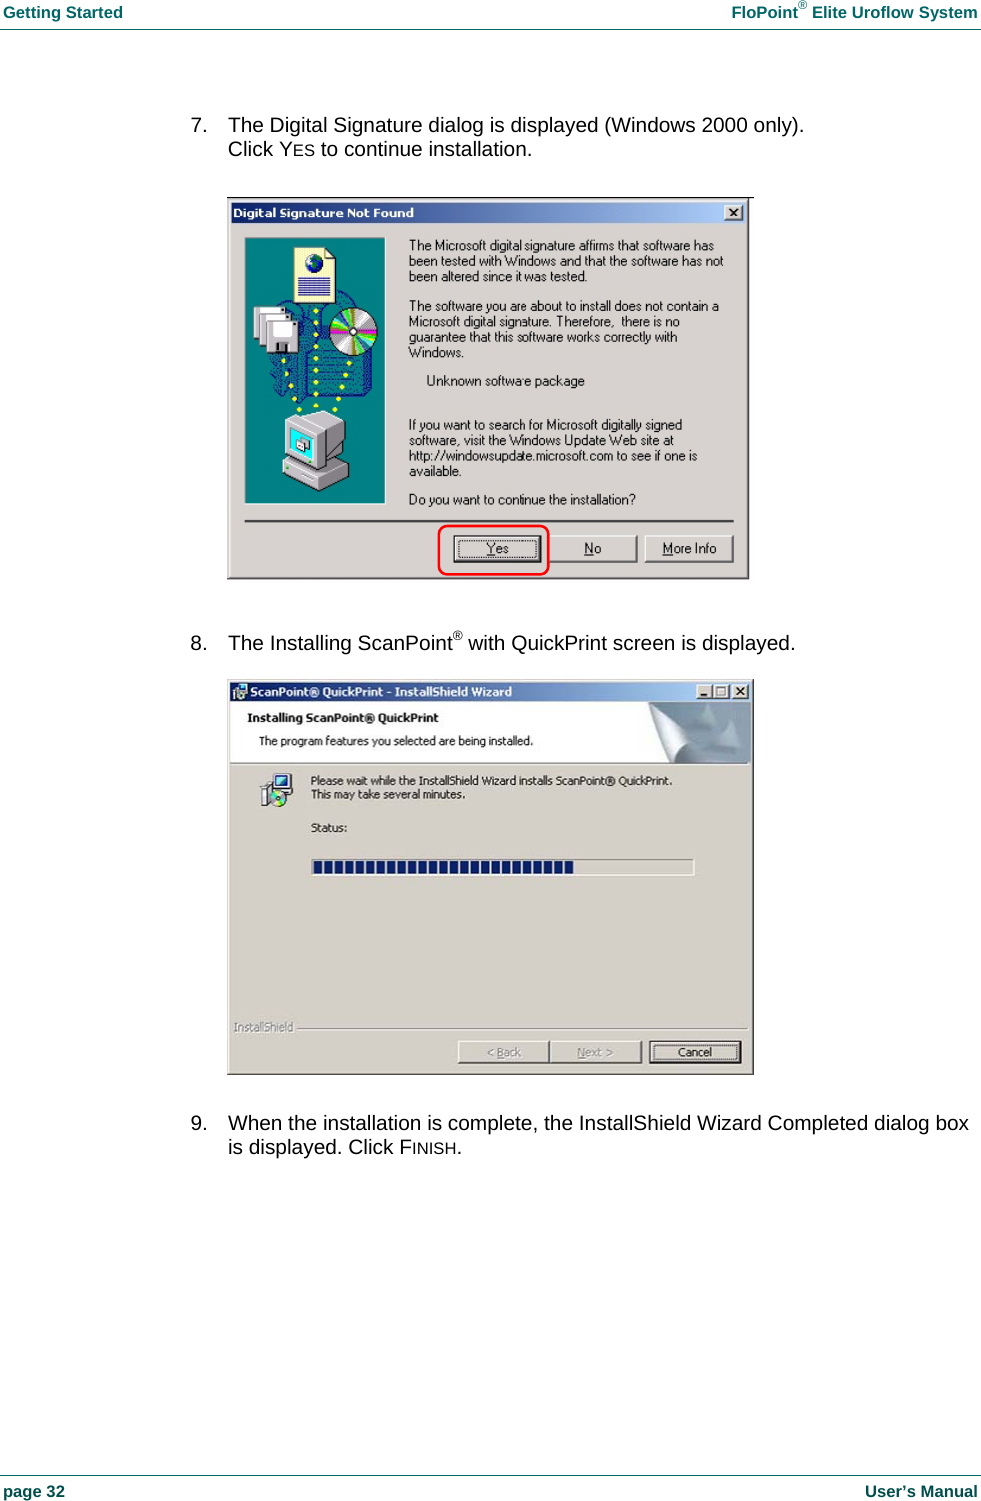
- 4. User Manual part 4 of 4
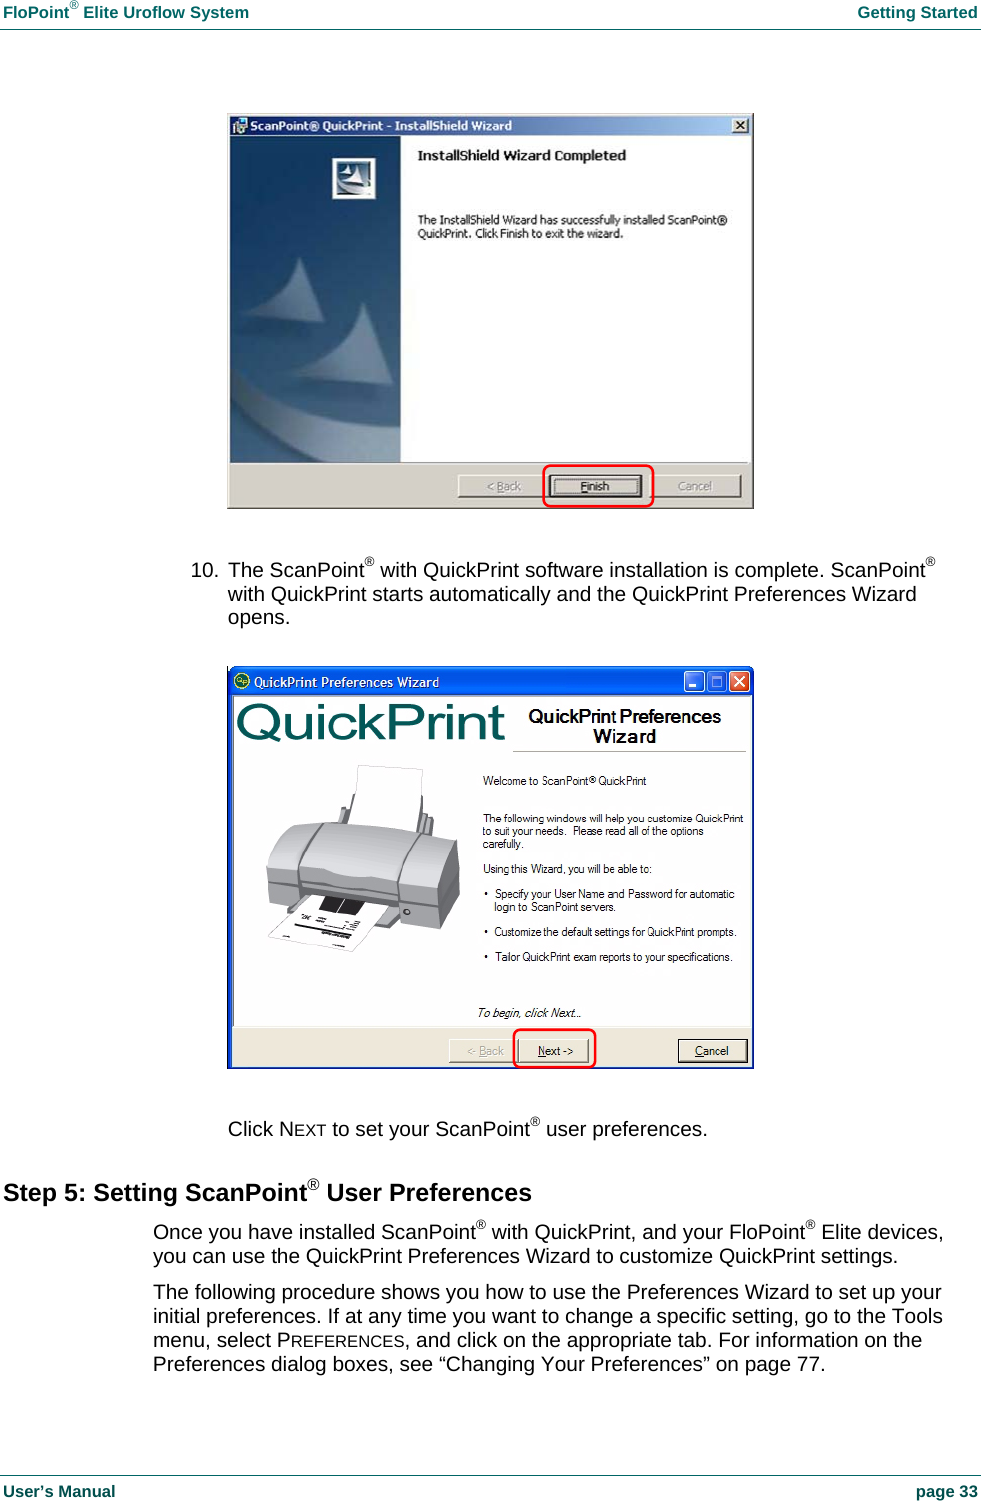
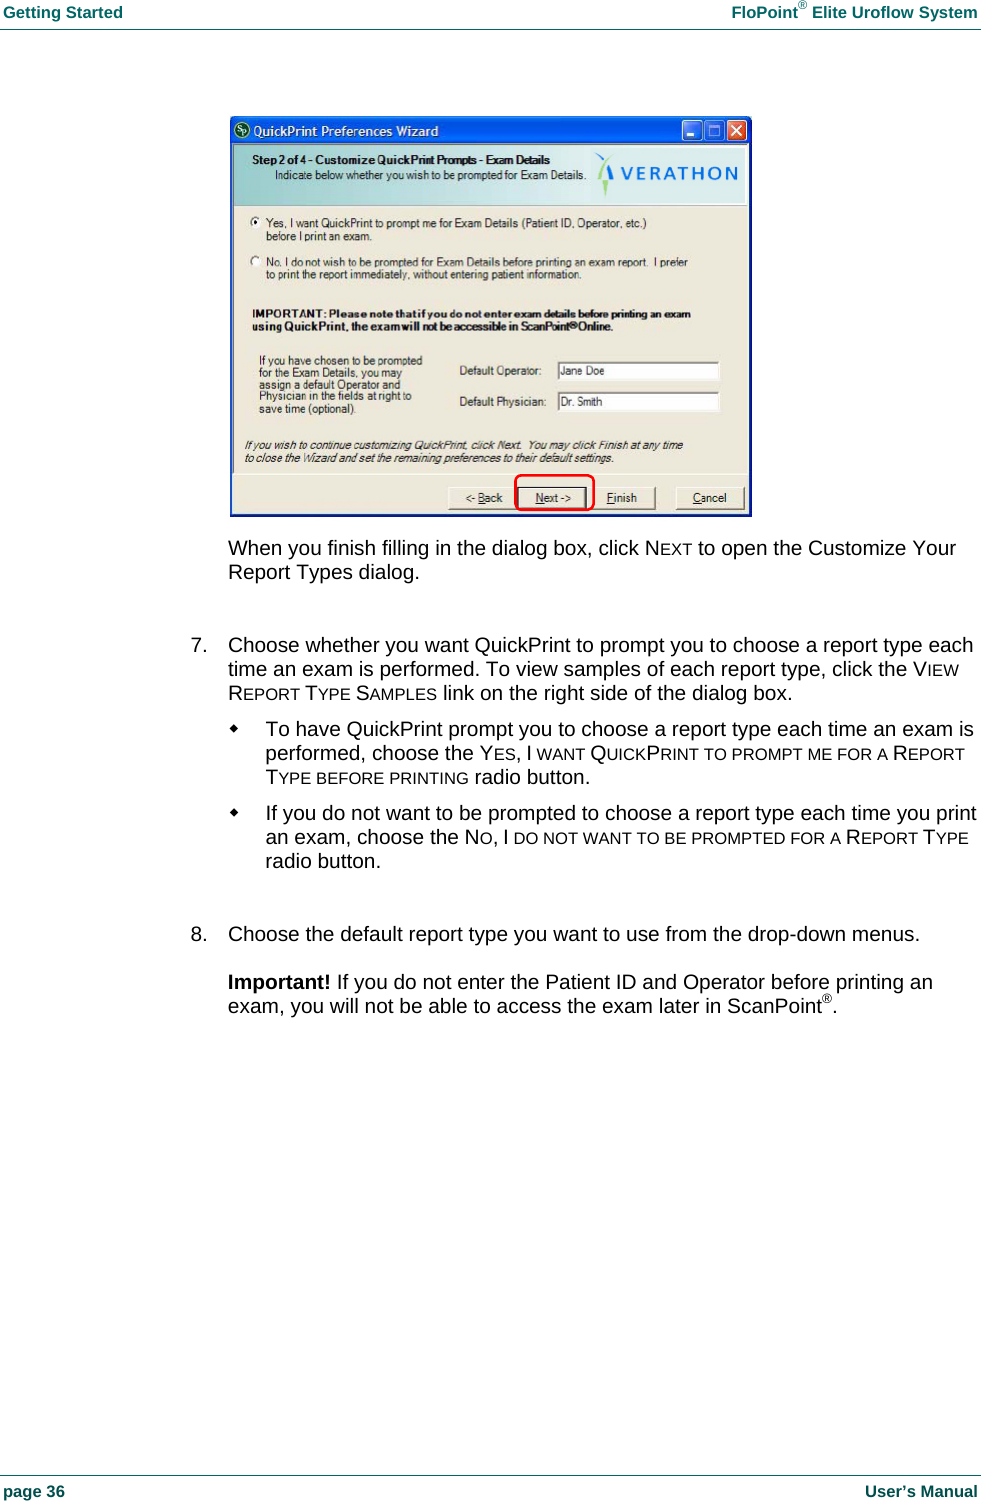
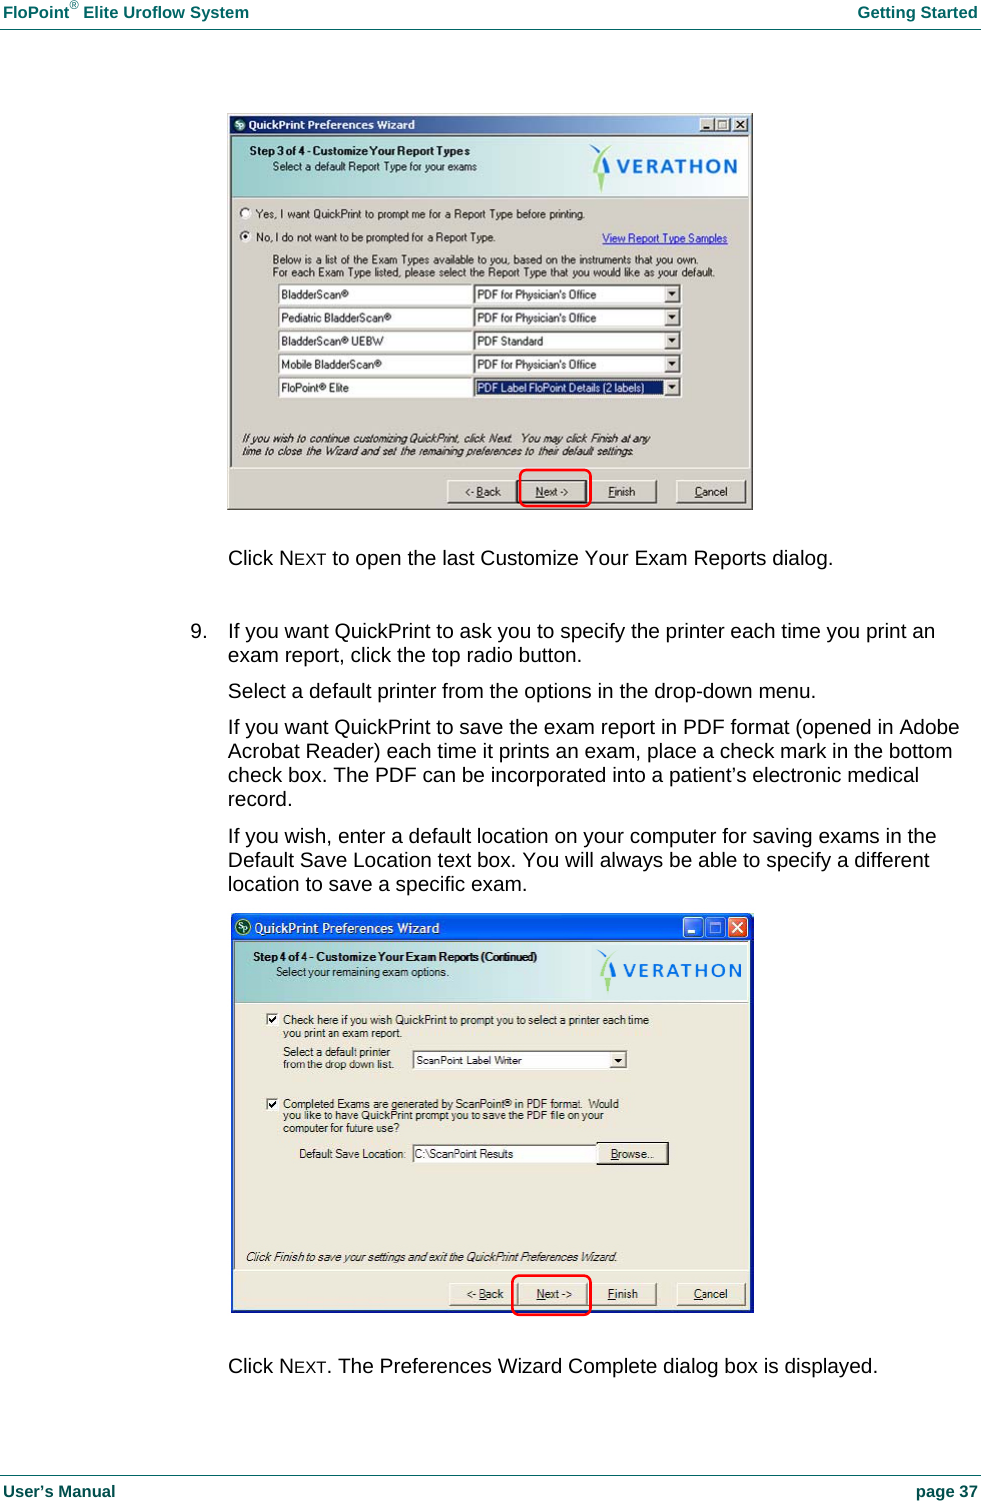
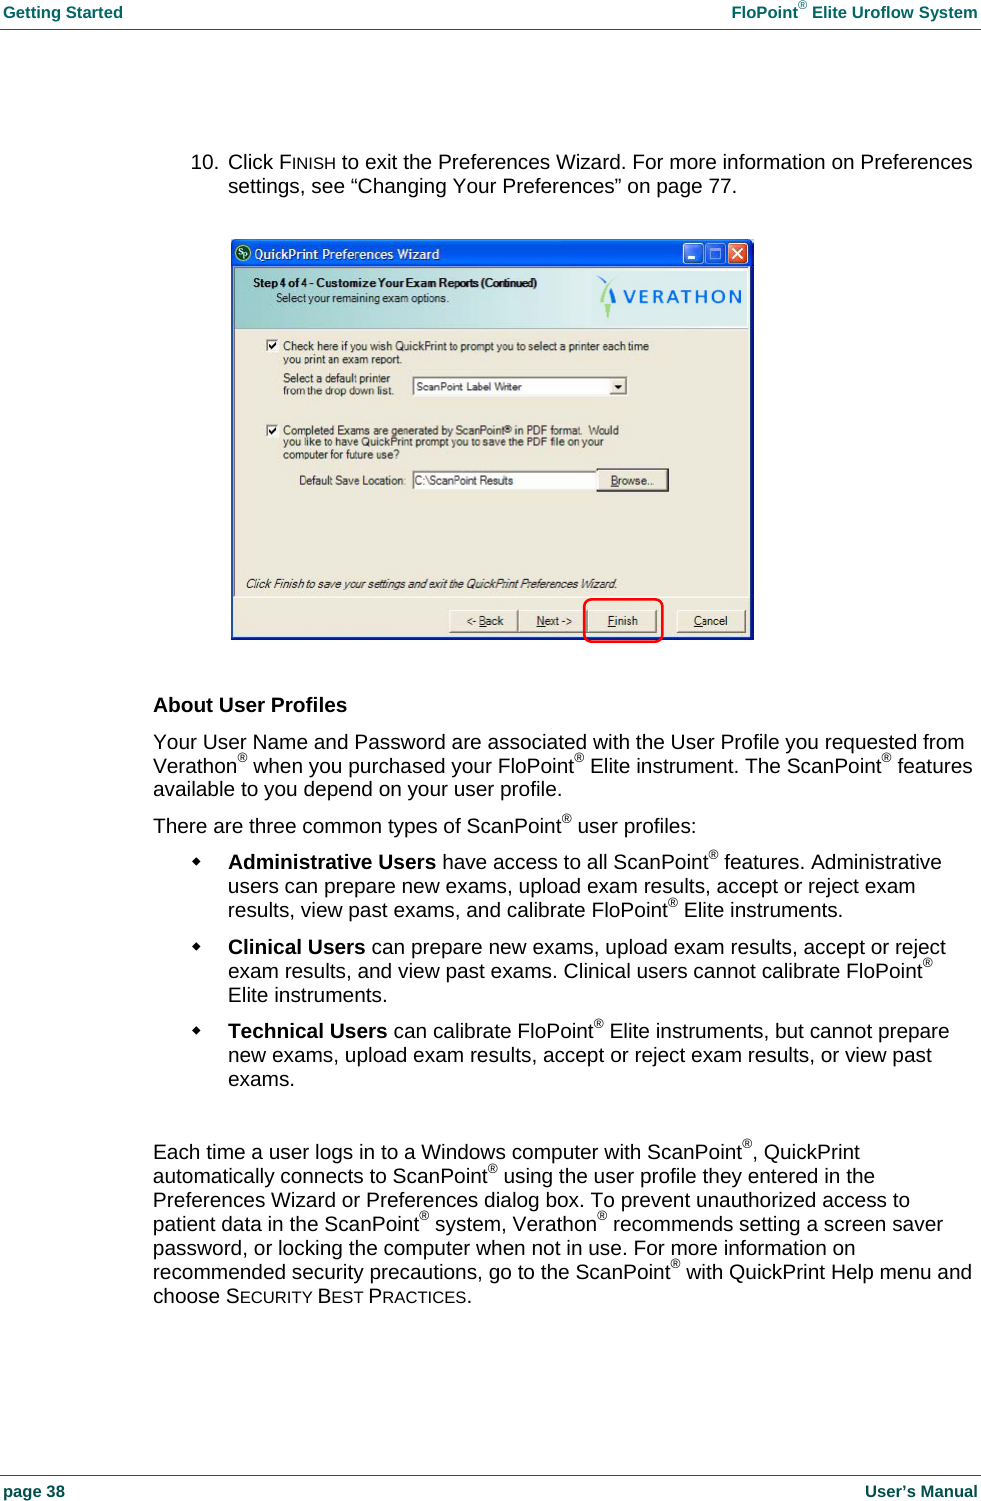
User Manual part 1 of 4