Verifone VX810-CTLS RFID card reader User Manual 24739 book
VeriFone Inc RFID card reader 24739 book
UserManual.wiki
>
Verifone
>
VX810 CTLS User Manual
User manual
Navigation menu
Upload a User Manual
Namespaces
Wiki Guide
HTML
PDF
Info
Views
User Manual
Discussion / Help
Navigation

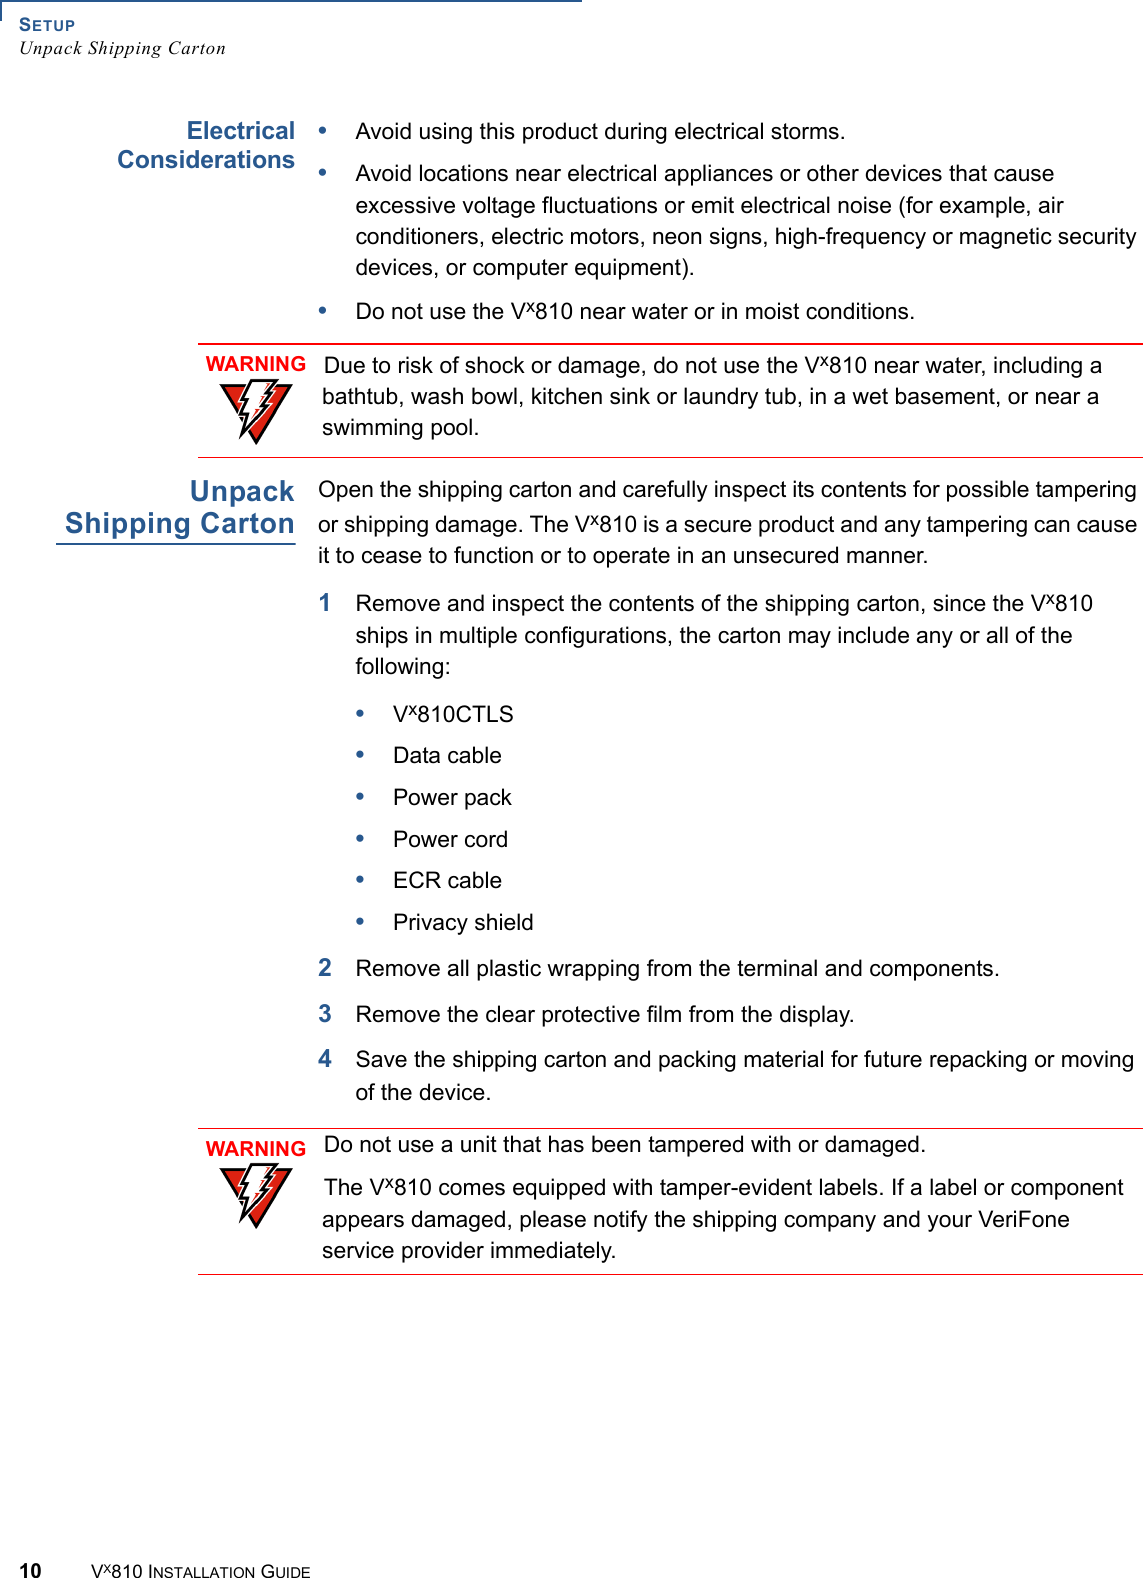
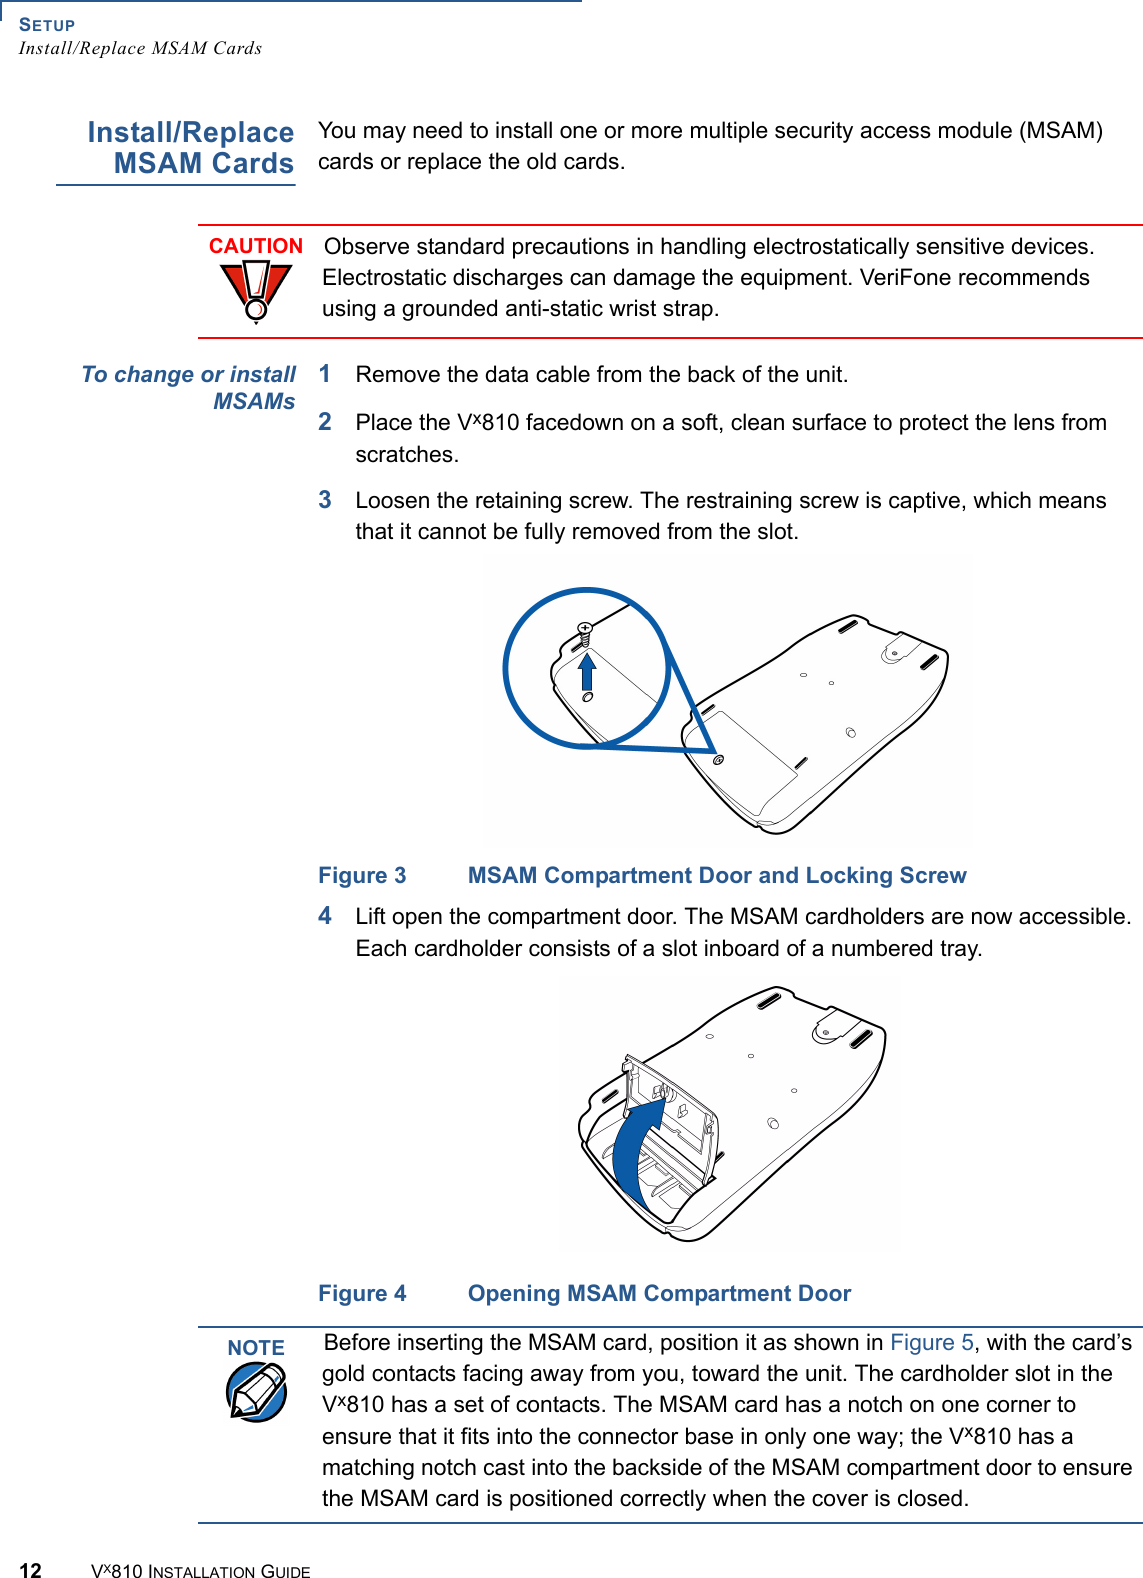
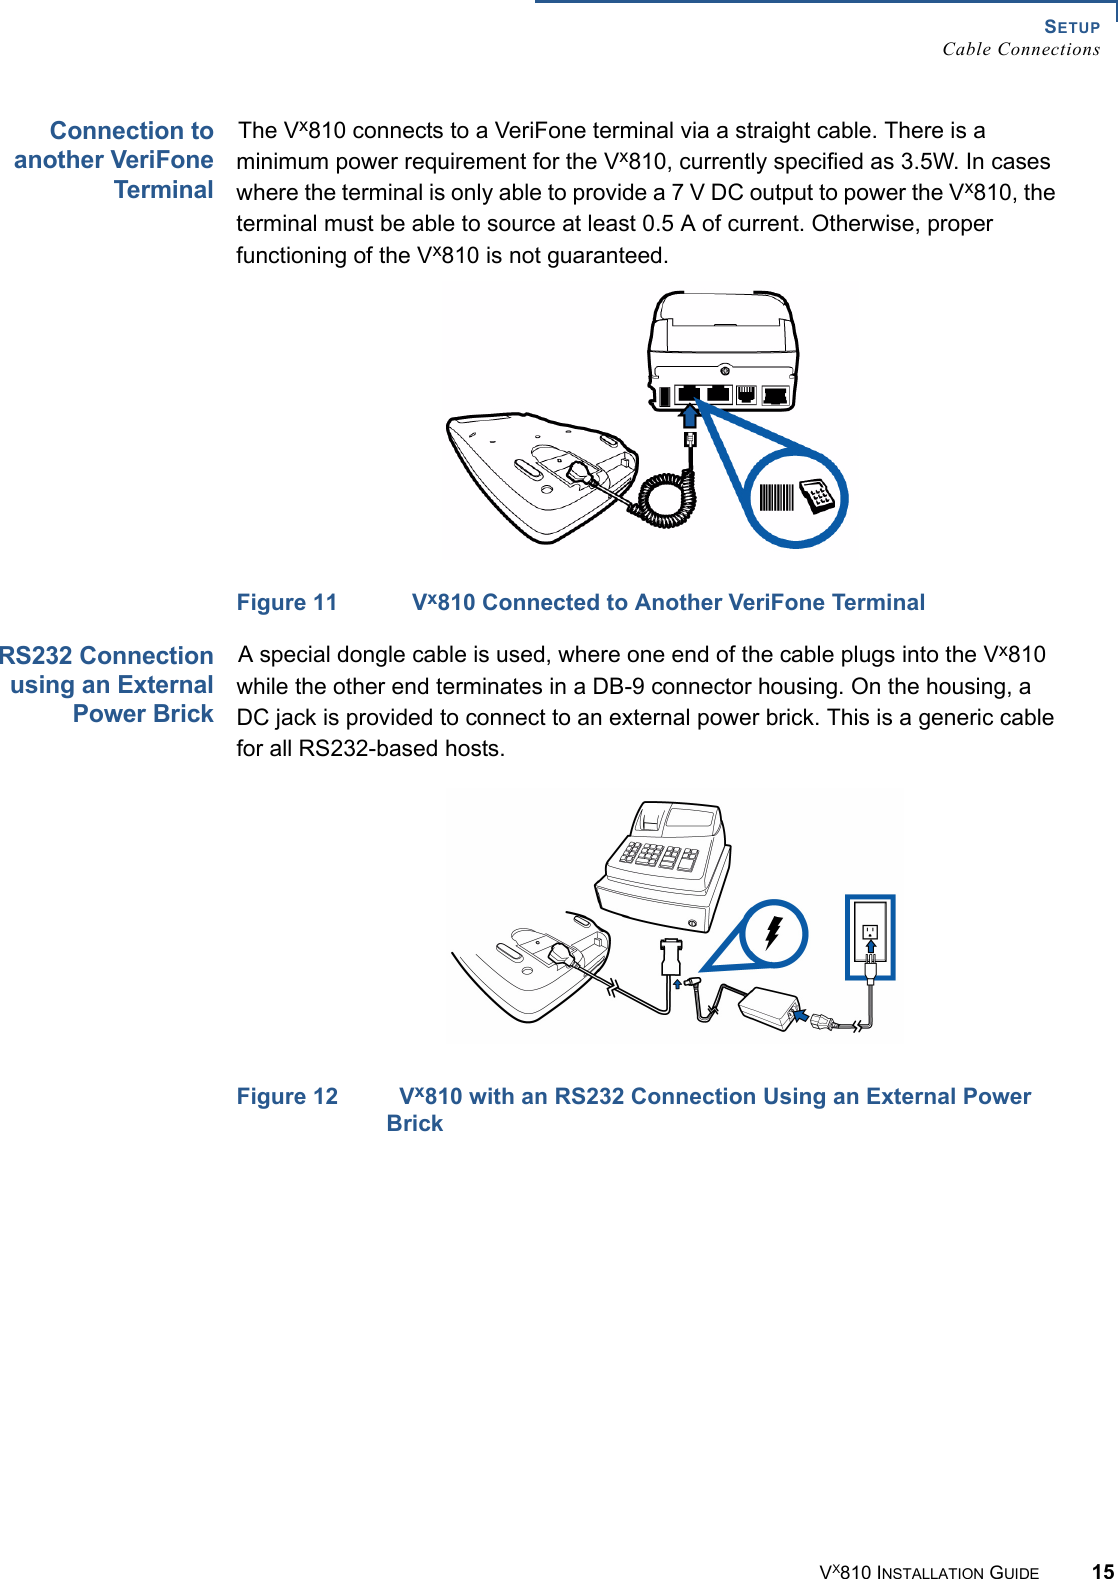
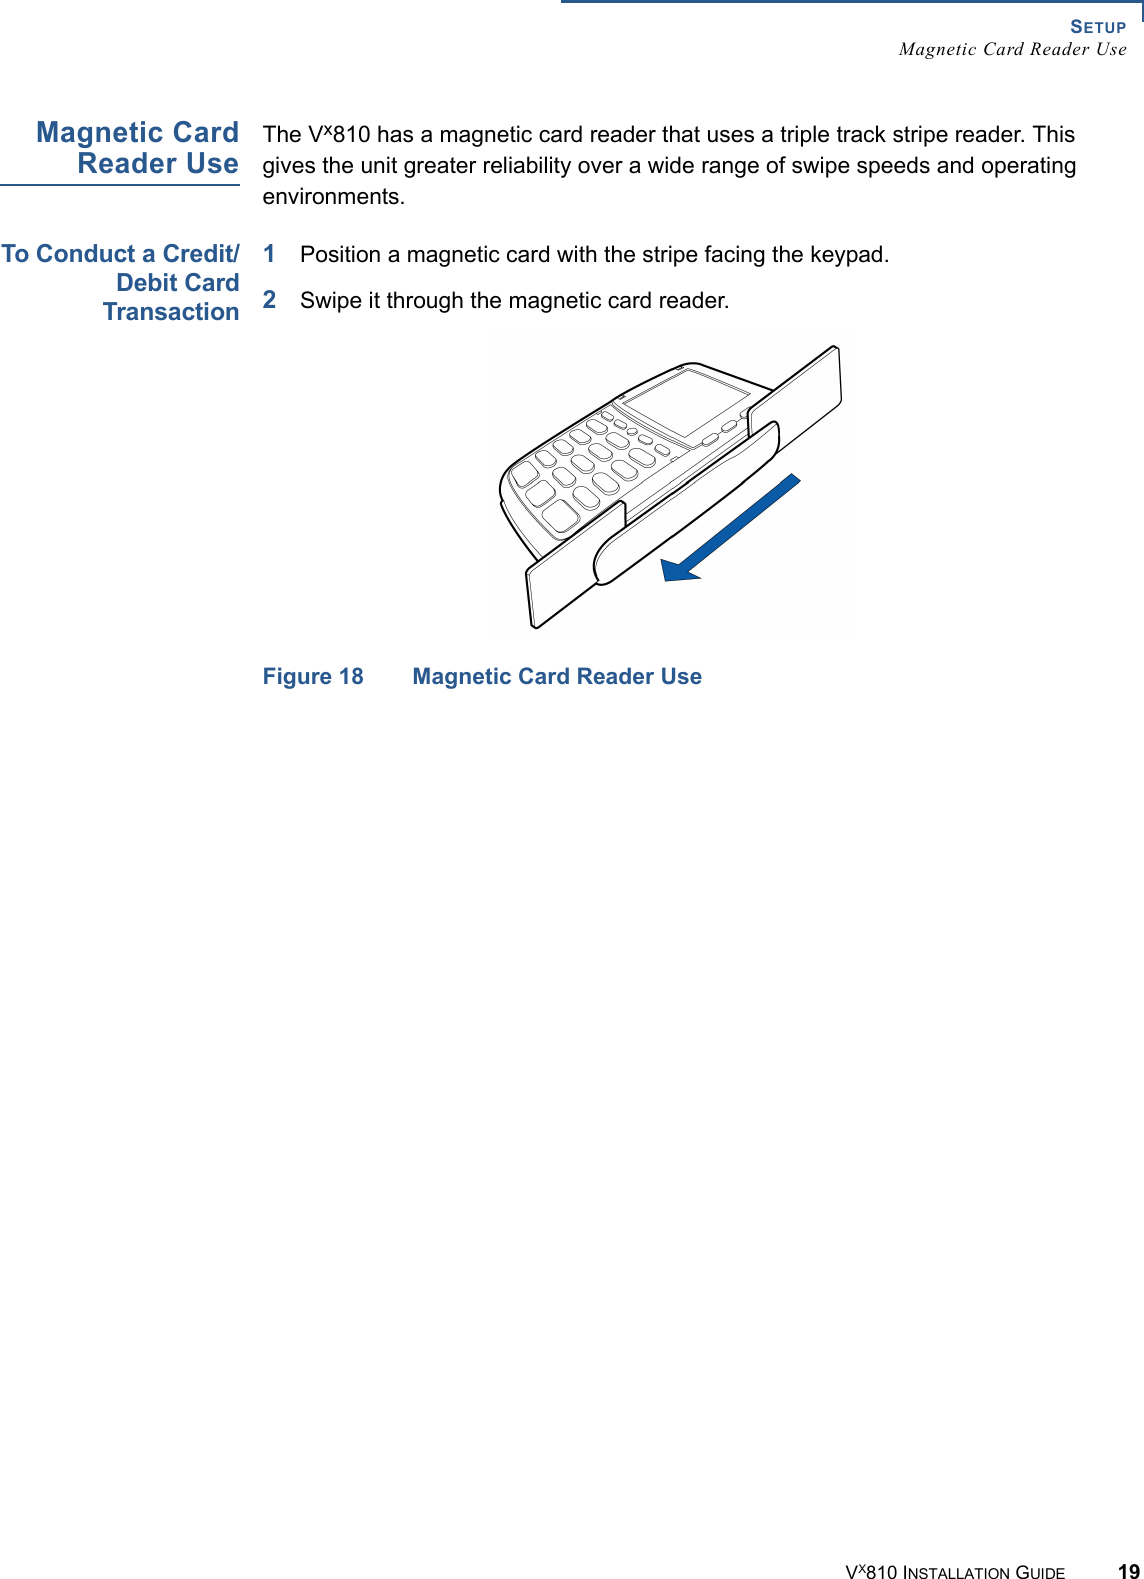
![SETUPExamine Vx810 FeaturesVX810 INSTALLATION GUIDE 11ExamineVx810 FeaturesBefore you continue with the installation process, familiarize yourself with the Vx810 features: Figure 2 Vx810 FeaturesThe Vx810 includes the following features:•A display.•Three types of keys:•Keypad matrix for four ATM-style keys and four Function keys. •Alpha key for entering text.•Three color-coded function keys below the keypad (CANCEL [RED], BACKSPACE [YELLOW], ENTER [GREEN]).•A magnetic card reader, built into the top side. An icon shows the proper swipe direction, with the stripe facing down and towards the keypad.•A smart card reader, built into the unit’s front side. An icon indicates the proper card position and insertion direction. (Optional)•A SAM (Security Access Module) compartment, built into the back side of the unit. The Vx810 contains multiple-SAM (MSAM) cardholders to support multiple stored-value card programs or other merchant card requirements. (Optional)DISPLAYFUNCTION KEYSATM SYLE KEYSALPHATELCO KEYPADCOLOR-CODEDSMART CARDMAGNETIC CARDREADERFUNCTION KEYSREADER(OPTIONAL)(OPTIONAL)](https://usermanual.wiki/Verifone/VX810-CTLS/User-Guide-1031653-Page-13.png)