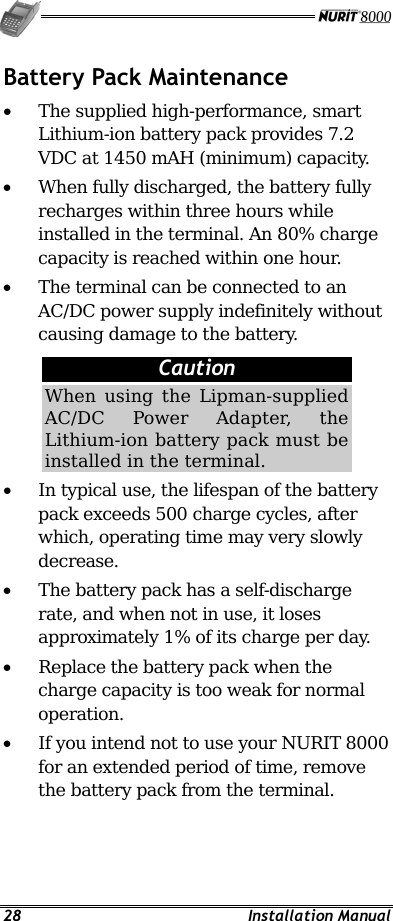
Verifone NURIT8000SSG PCSPayment Terminal User Manual NURIT 8010 Installation Manual Eng DOC00222
Verifone Inc. PCSPayment Terminal NURIT 8010 Installation Manual Eng DOC00222
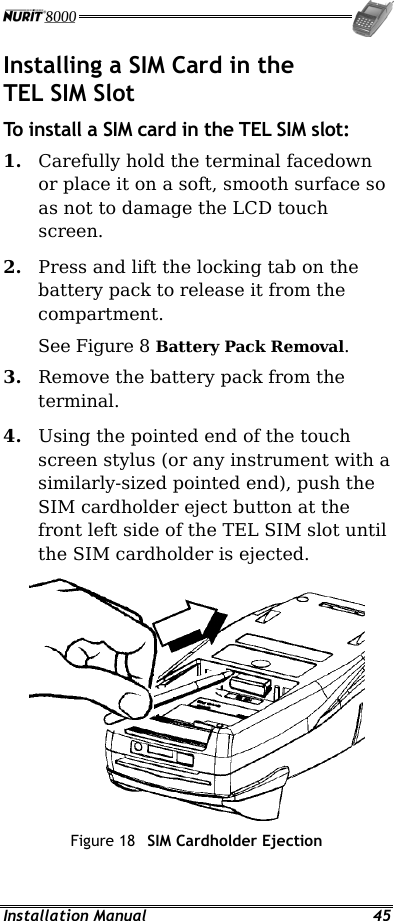
UserManual.wiki
>
Verifone
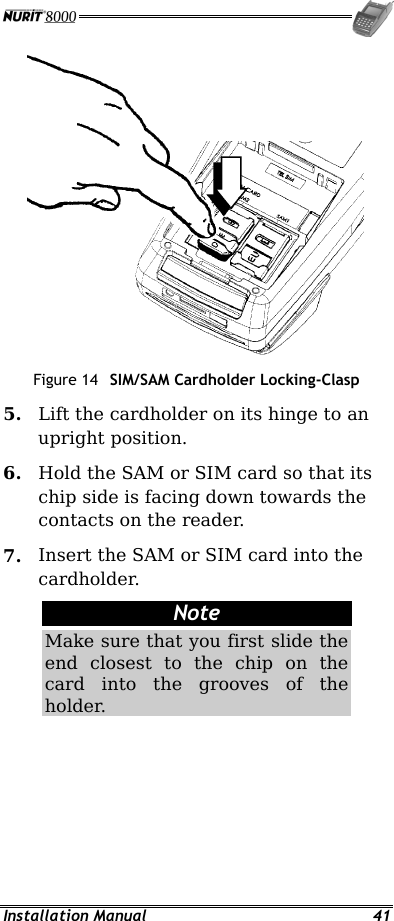
>
NURIT8000SSG User Manual
User Manual
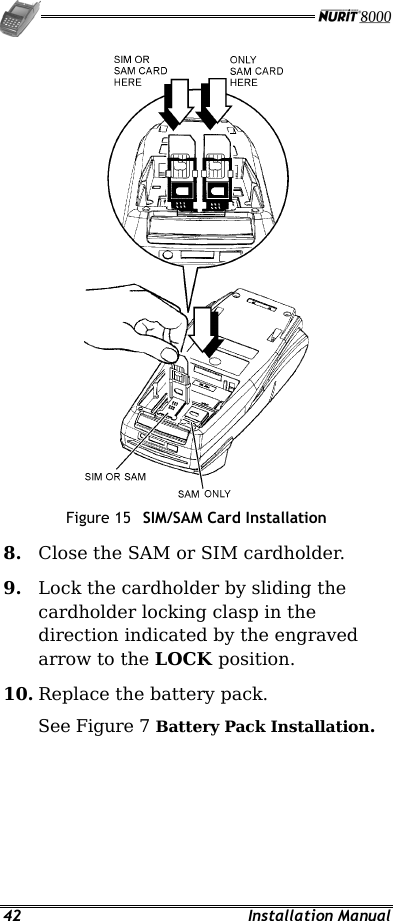
Navigation menu
Upload a User Manual
Namespaces
Wiki Guide
HTML
PDF
Info
Views
User Manual
Discussion / Help
Navigation

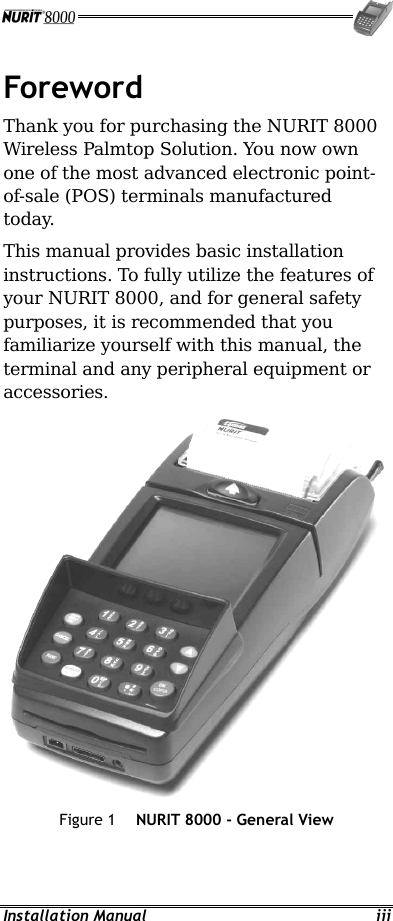
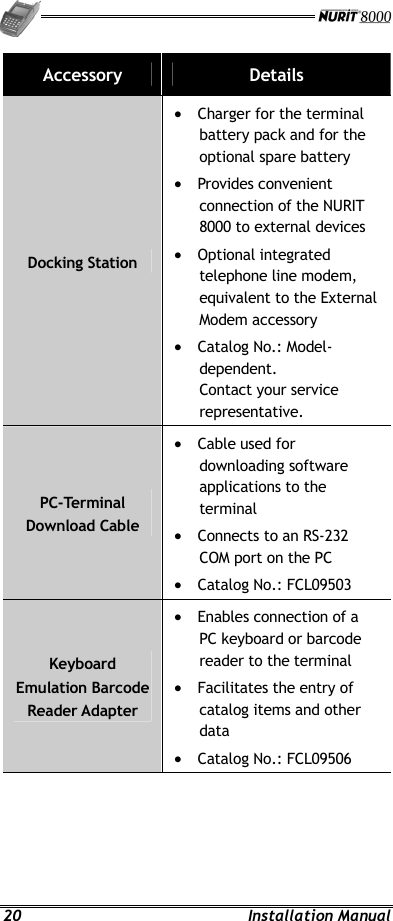
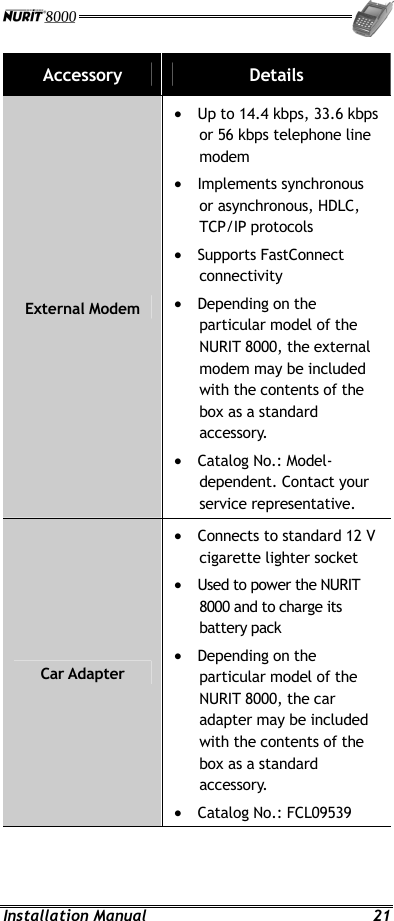
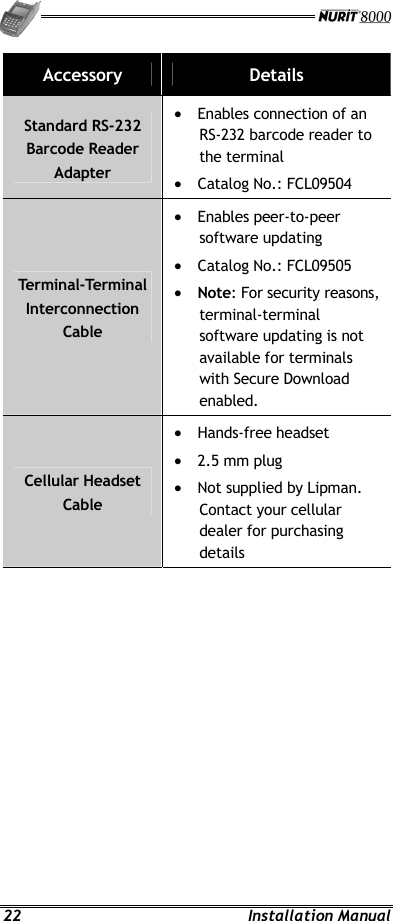
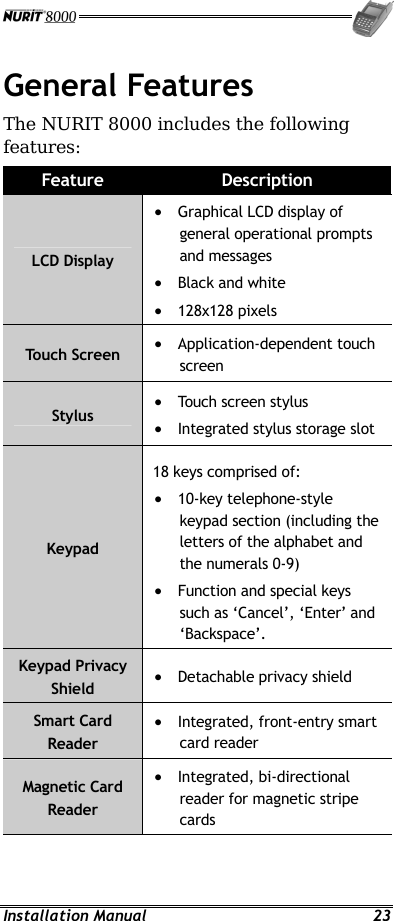
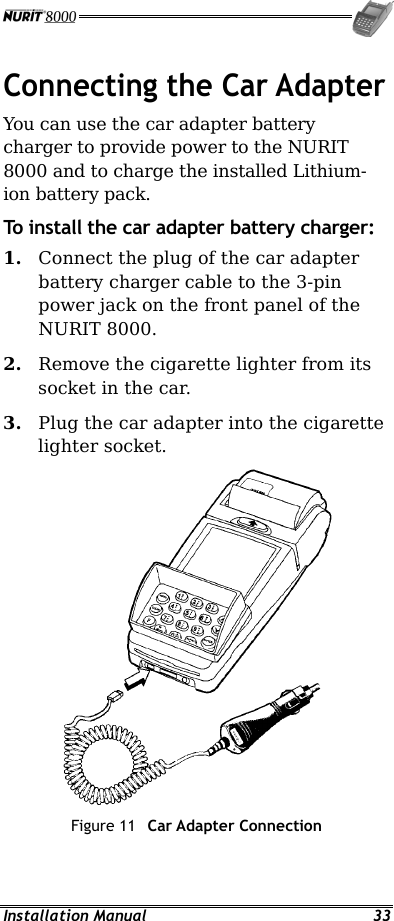
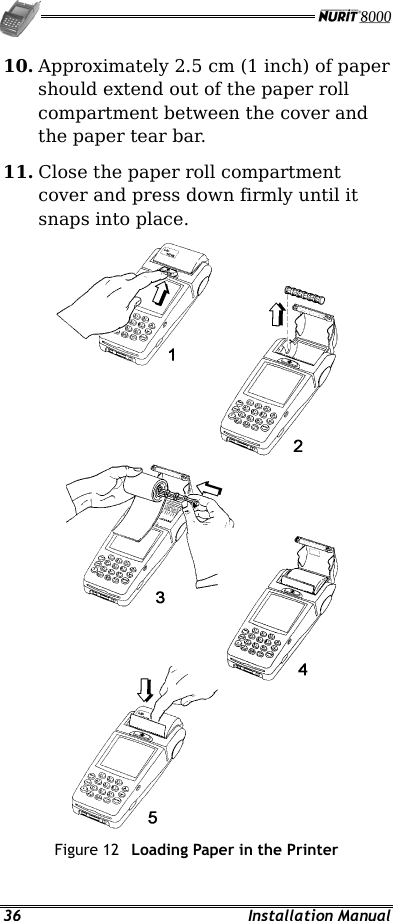
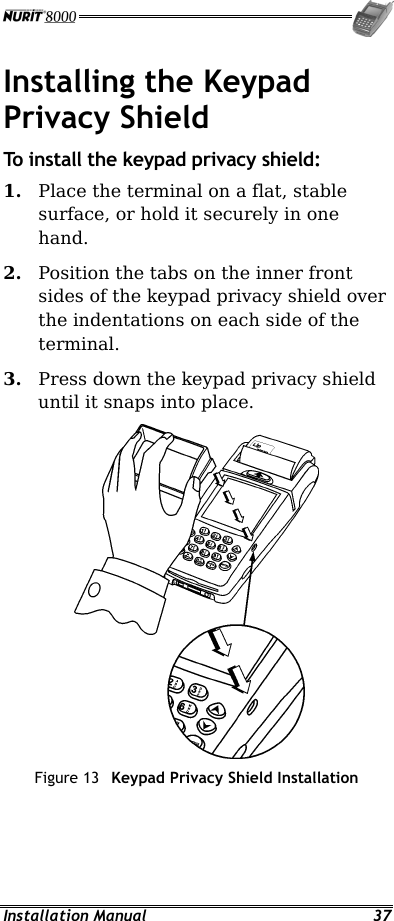
![2 Installation Manual This equipment generates, uses and can radiate radio frequency energy and, if not installed and used in accordance with the instructions, may cause harmful interference to radio communications. However, there is no guarantee that interference will not occur in a particular installation. Operation of this equipment in a residential area is likely to cause harmful interference in which case the user will be required to correct the interference at his/her own expense. If this equipment does cause harmful interference to radio or television reception, which can be determined by turning the equipment off and on, the user is encouraged to try to correct the interference by one or more of the following measures: • Reorient or relocate the receiving antenna. • Increase the separation between the equipment and the receiver. • Connect the equipment into an outlet on a circuit different from that to which the receiver is connected. • Consult your dealer or an experienced technician for help. Connection of peripherals to this unit requires the use of grounded, shielded cables to ensure compliance with the class B limits. FCC Part 68 Requirements [Applicable when using optional NURIT 8000 docking station or NURIT 8000 external modem] The FCC has established rules permitting this device to be directly connected to the telephone network. Standardized FCC Part 68 compliant telephone line cords and modular jacks are used for these connections. This equipment should not be used on party or coin lines.](https://usermanual.wiki/Verifone/NURIT8000SSG/User-Guide-425845-Page-10.png)