Verifone VX675WCDMA Point of Sale Terminal User Manual
VeriFone Inc Point of Sale Terminal
UserManual.wiki
>
Verifone
>
VX675WCDMA User Manual
User Manual.pdf
Navigation menu
Upload a User Manual
Namespaces
Wiki Guide
HTML
PDF
Info
Views
User Manual
Discussion / Help
Navigation

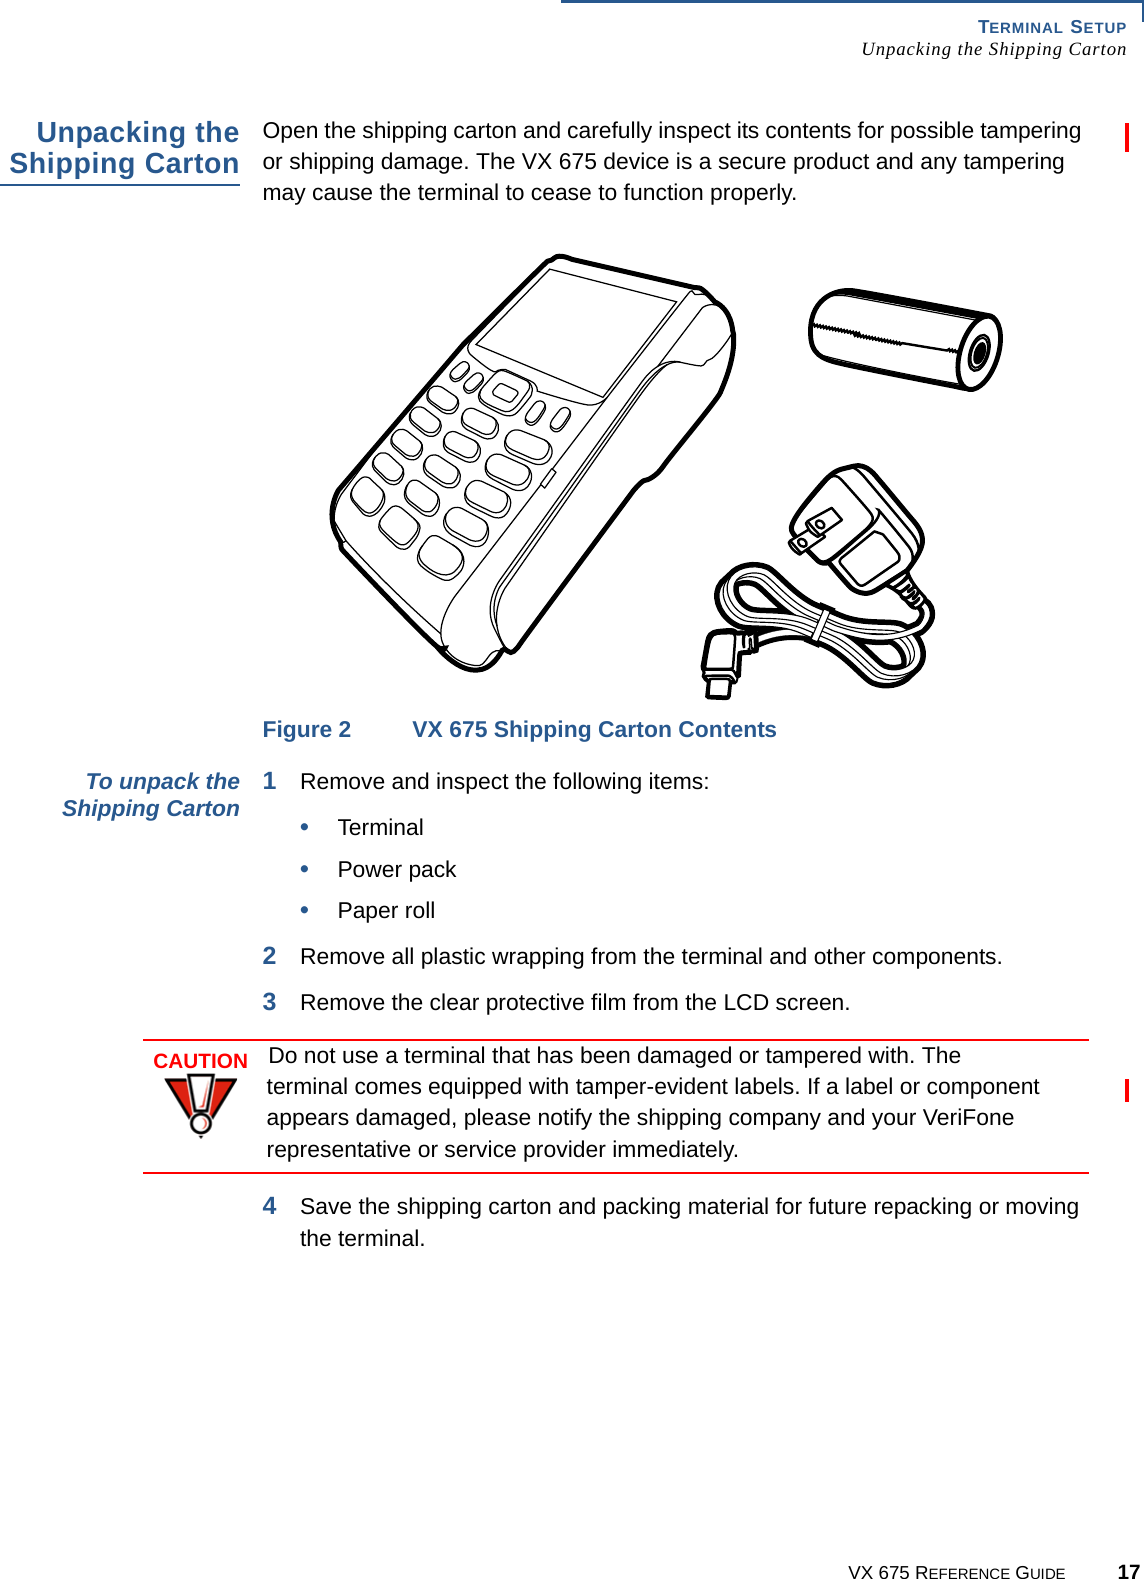

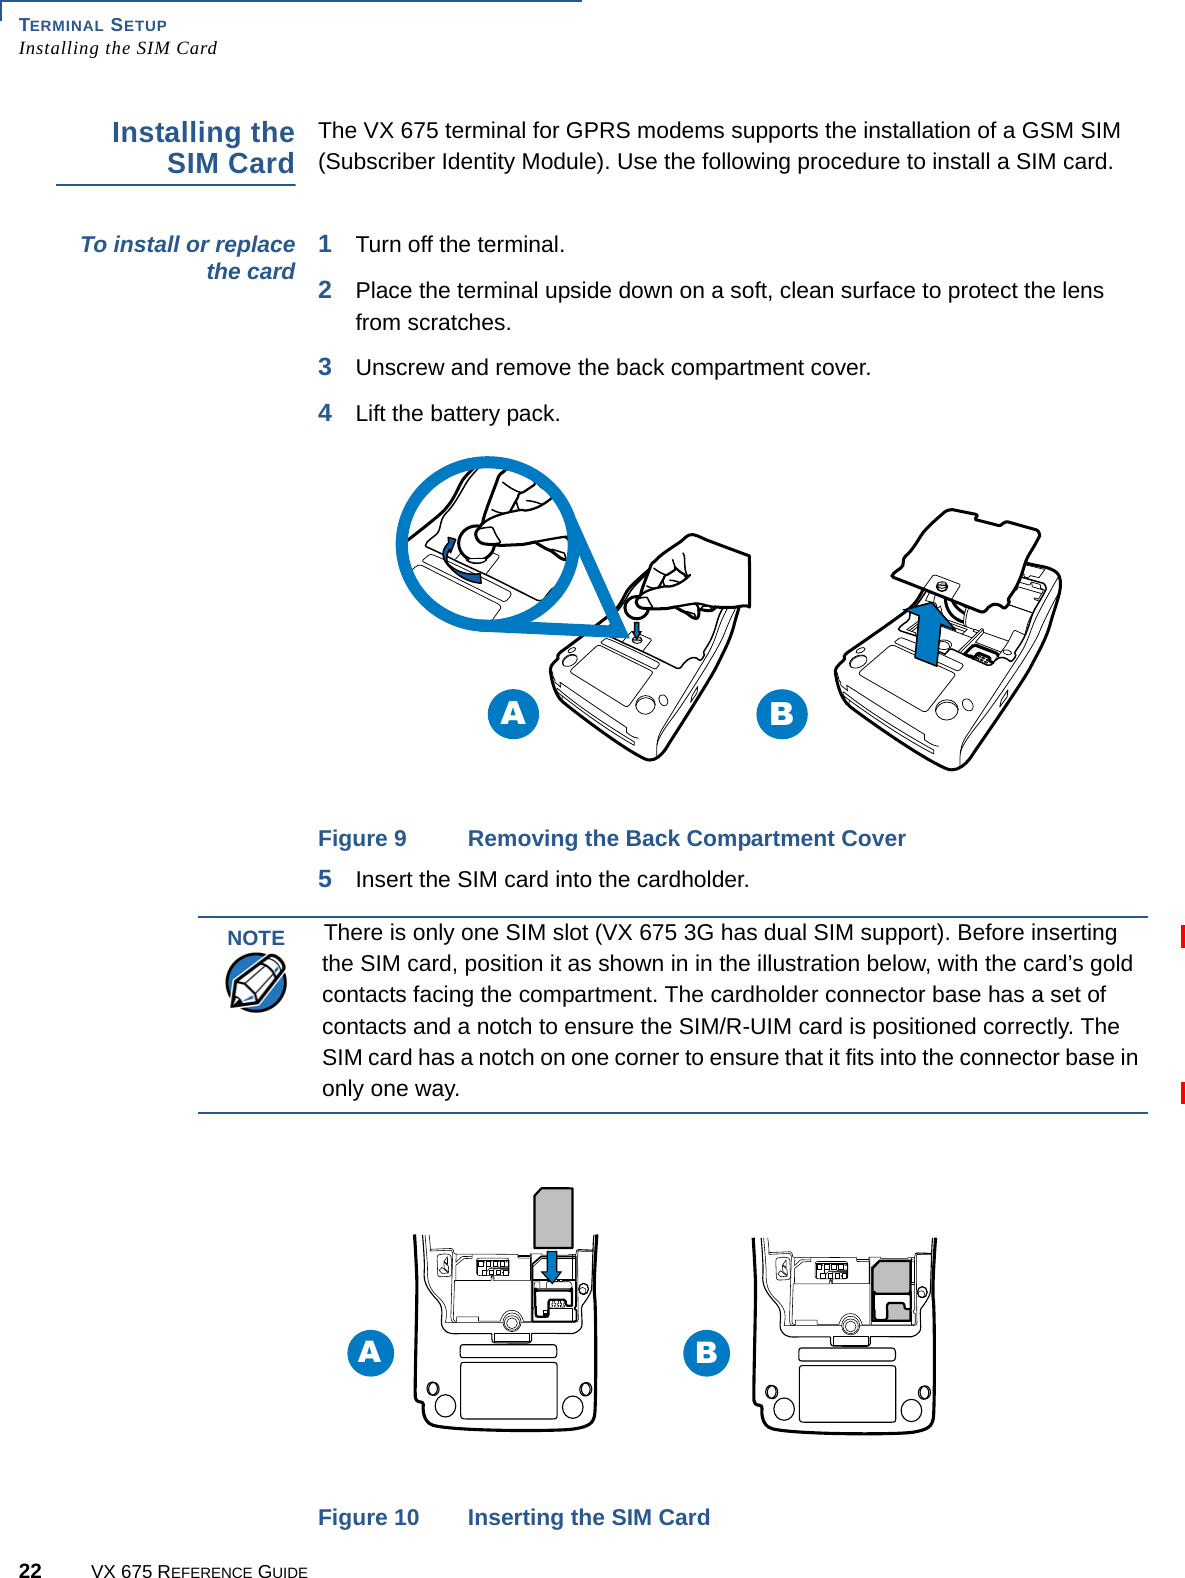
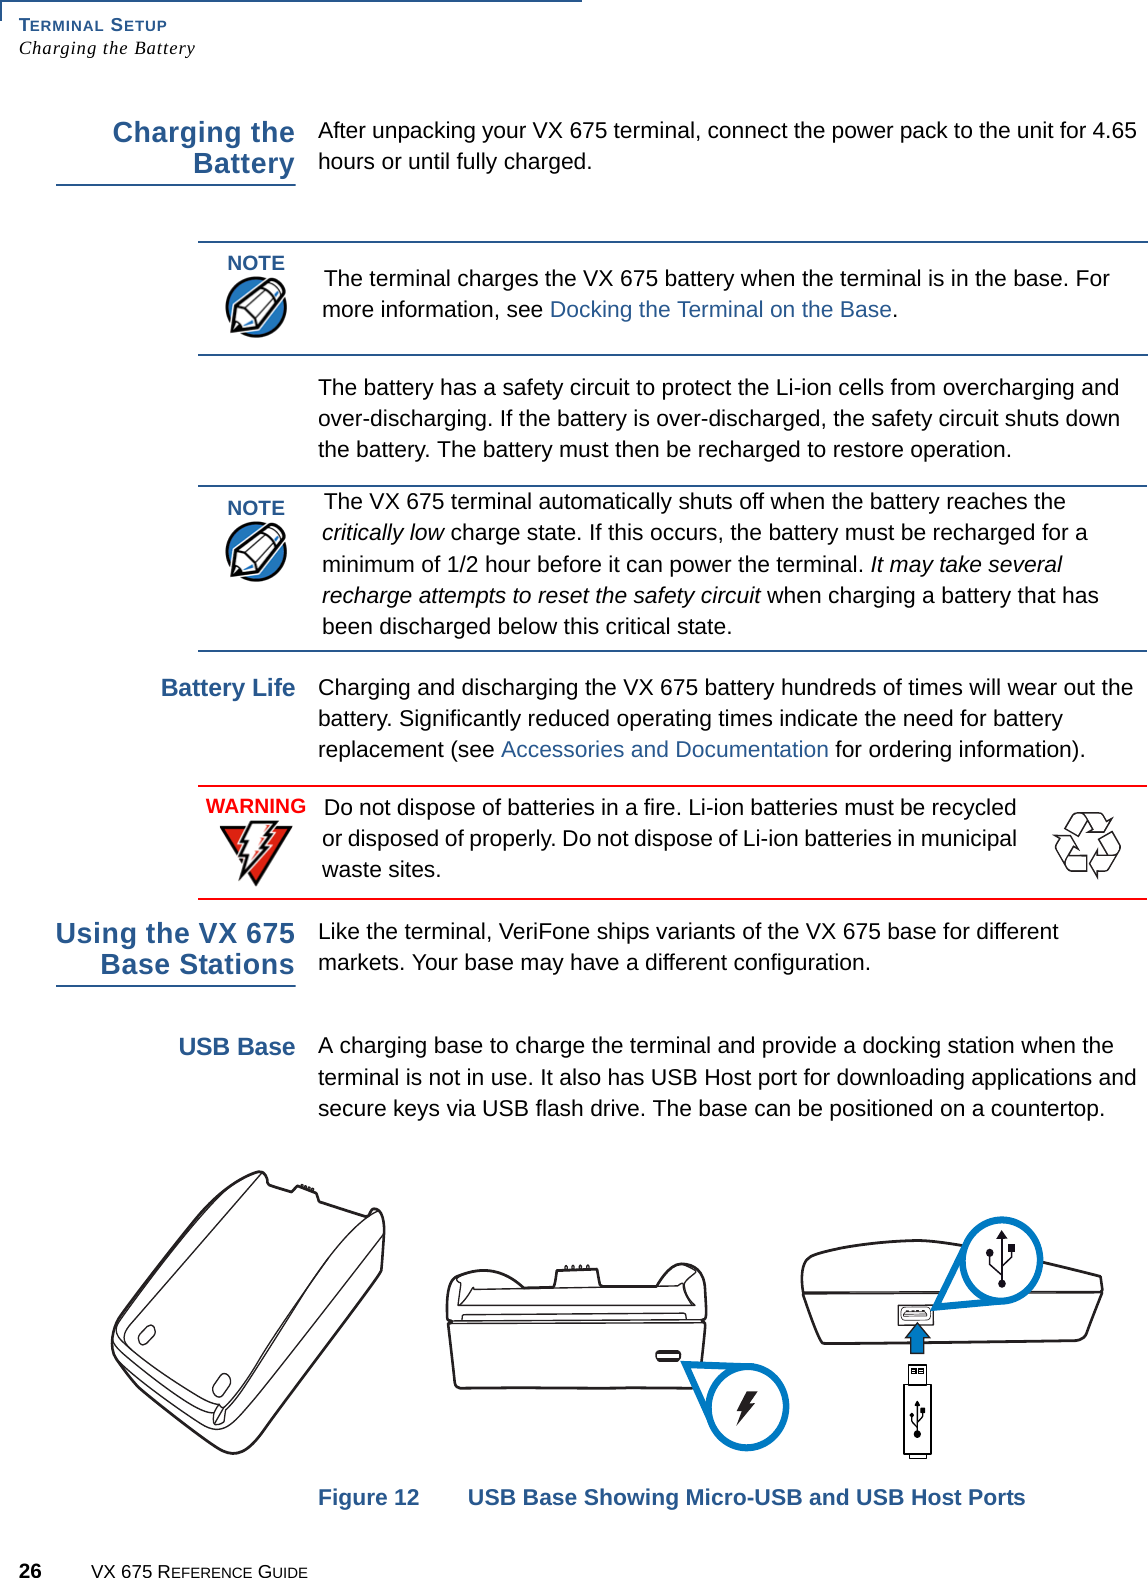
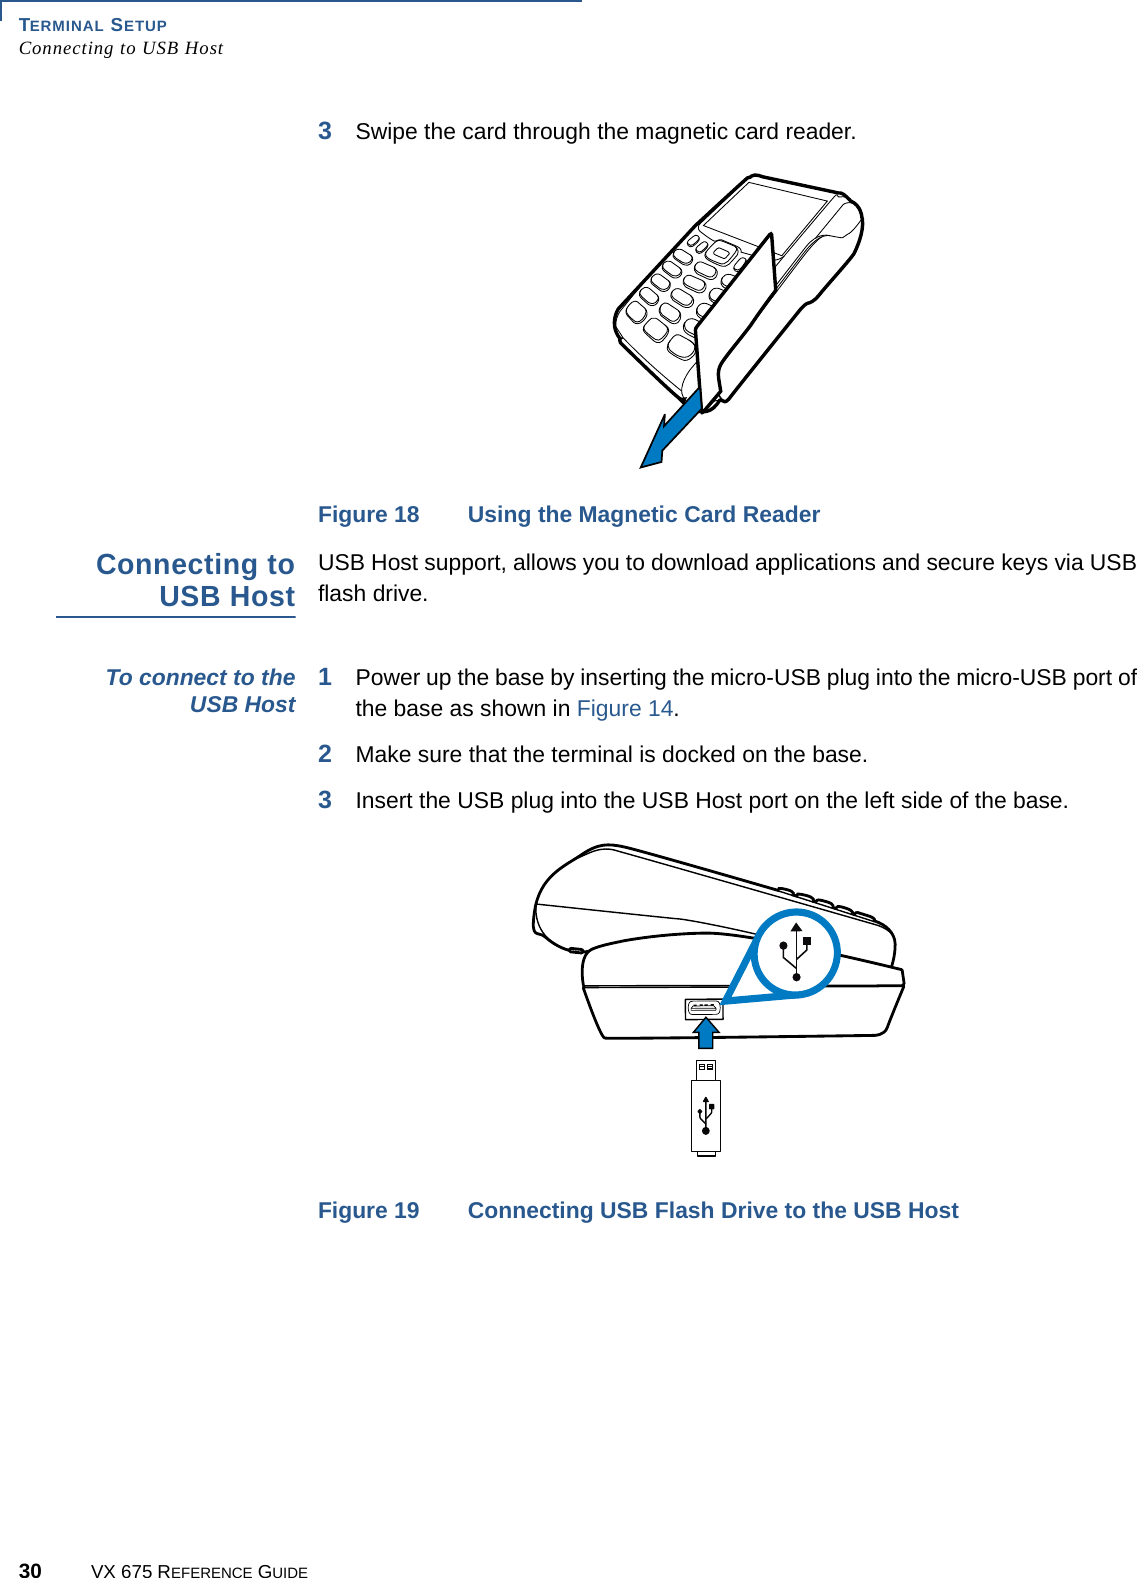

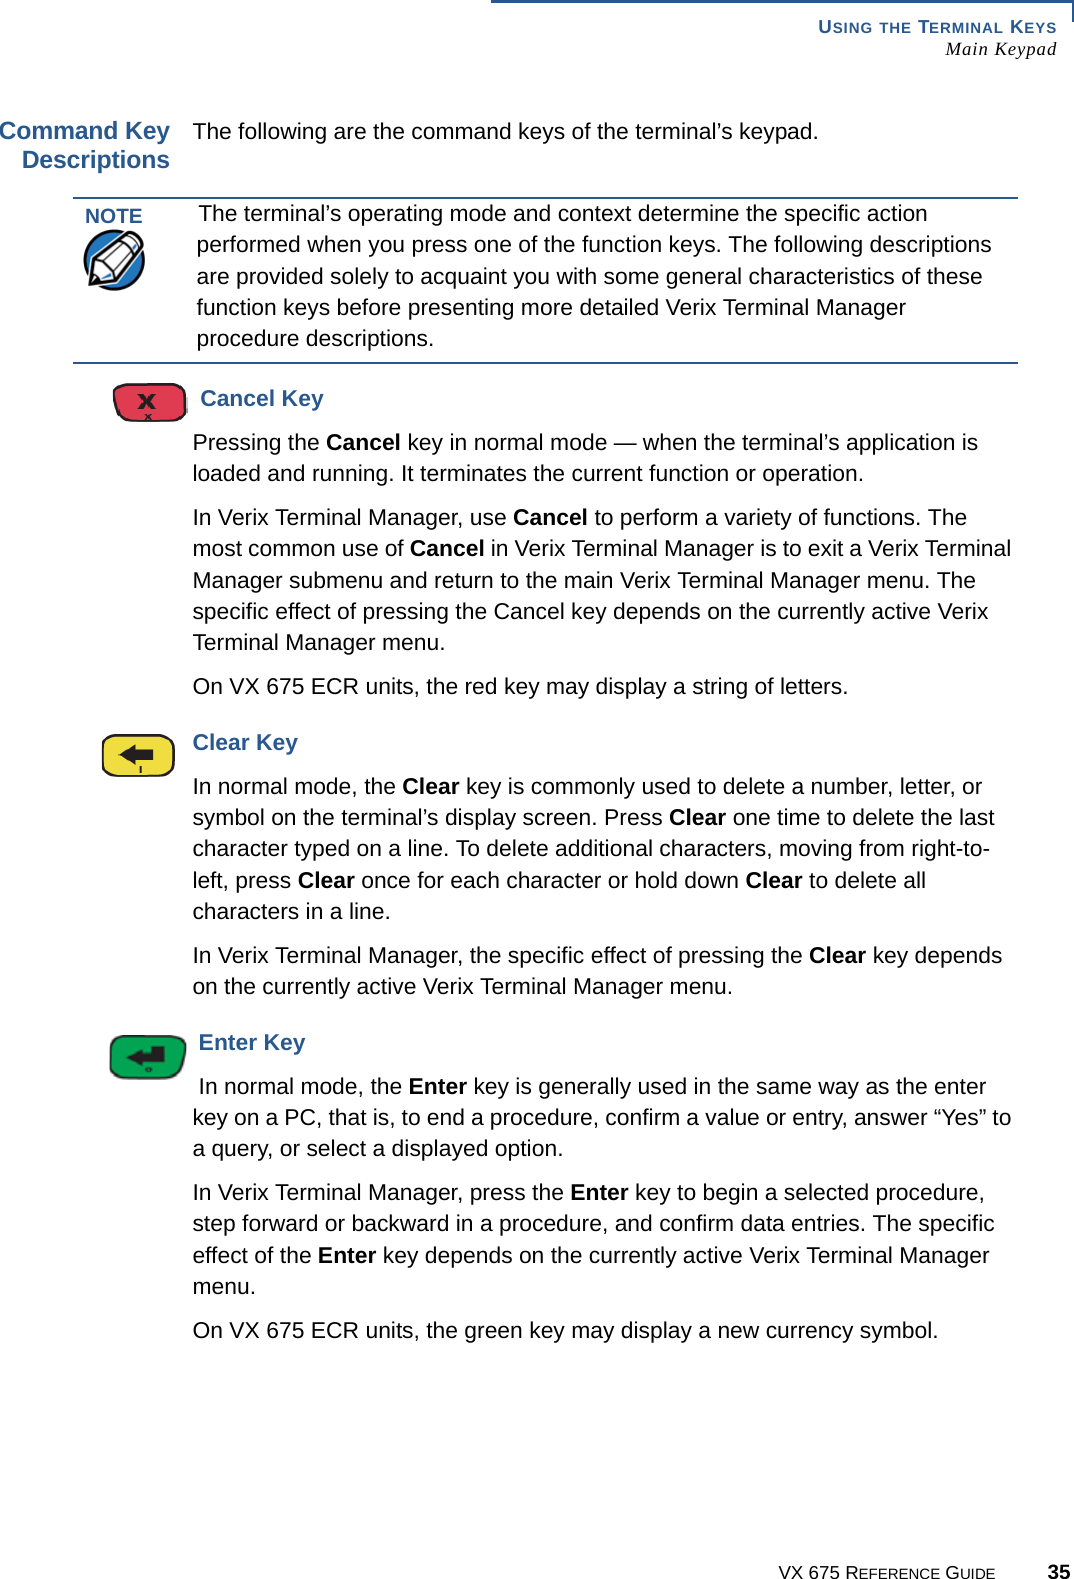
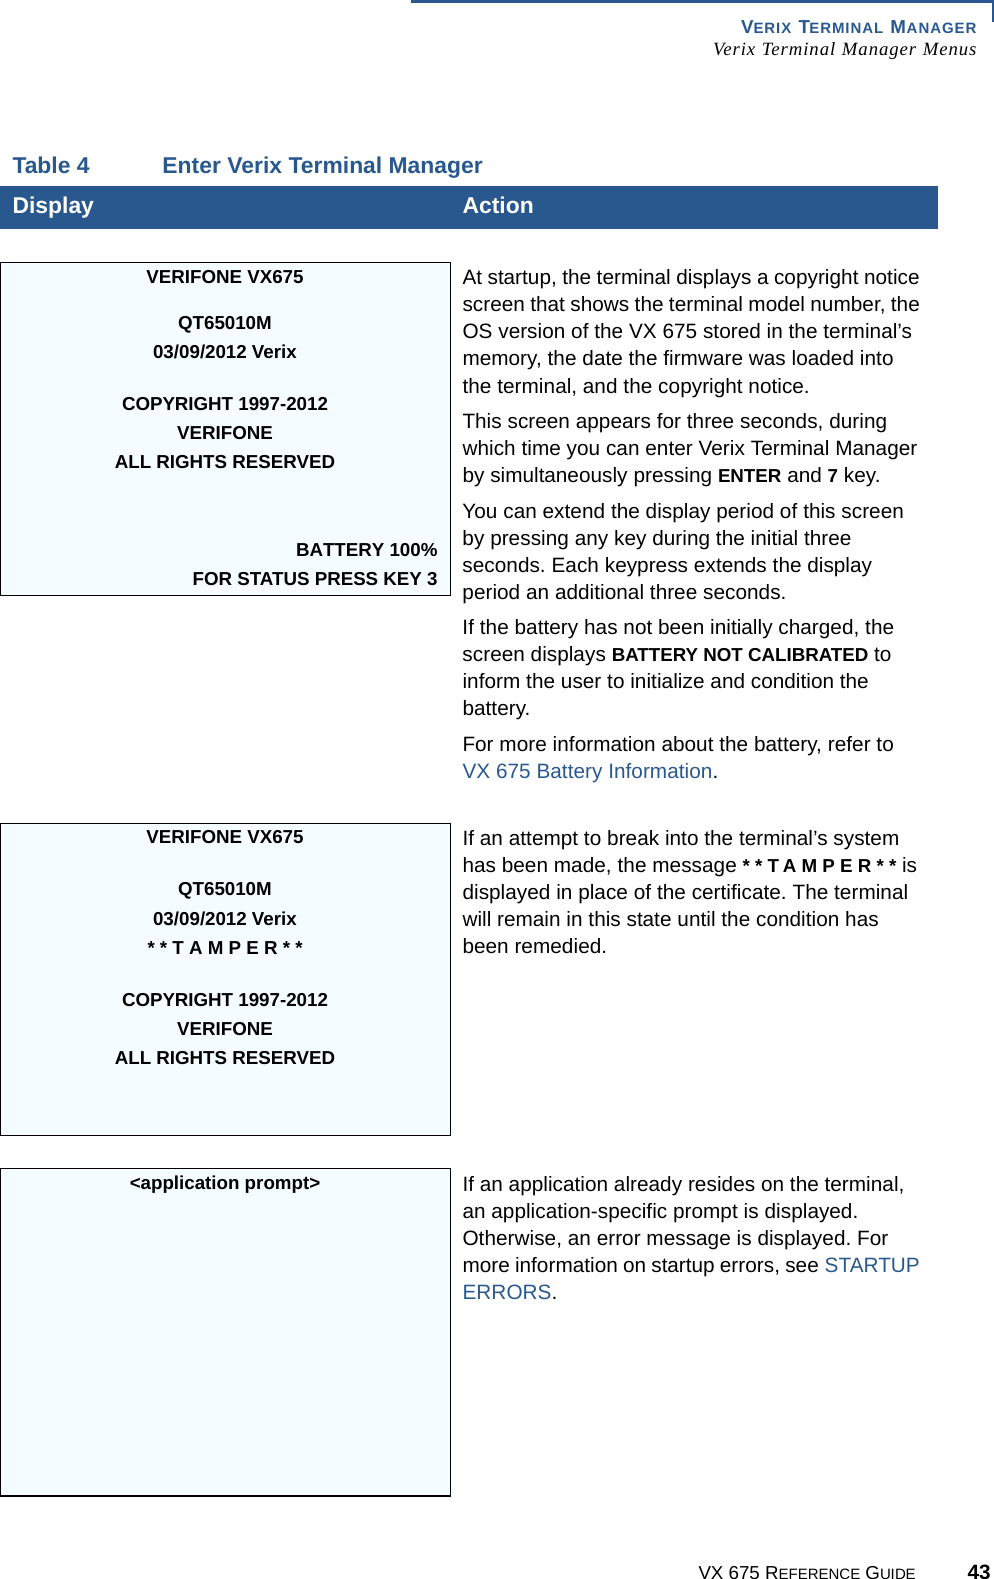

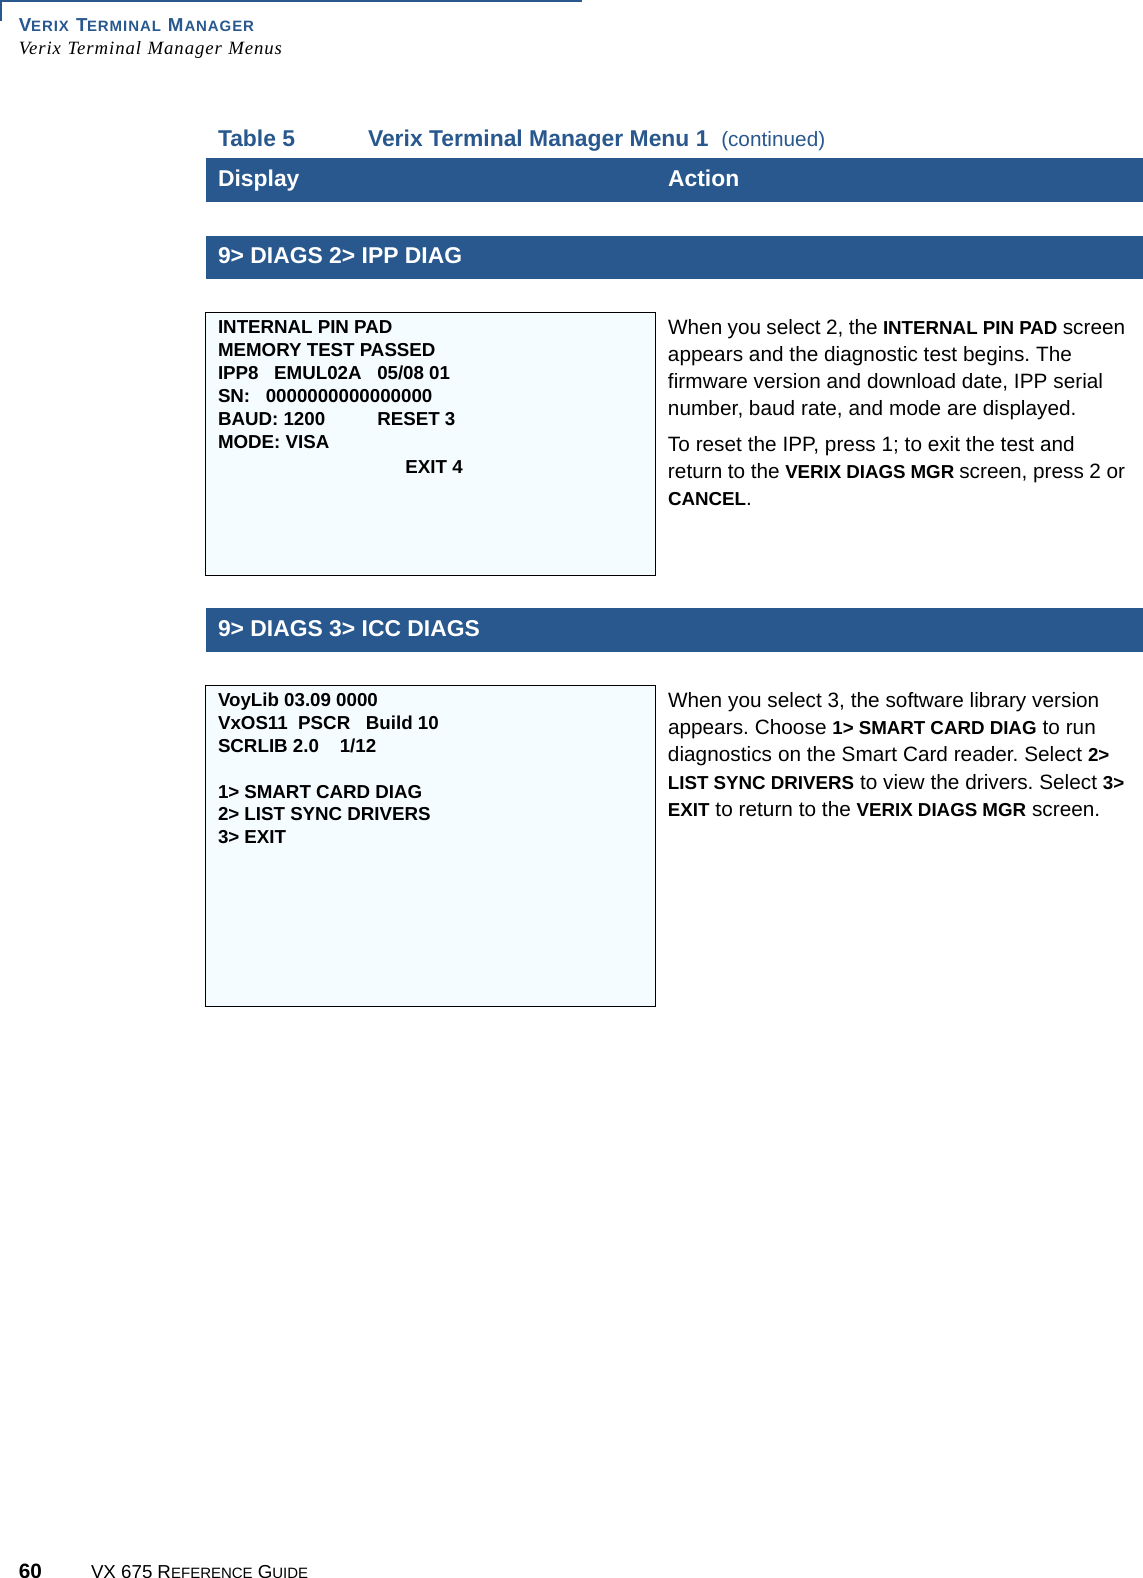

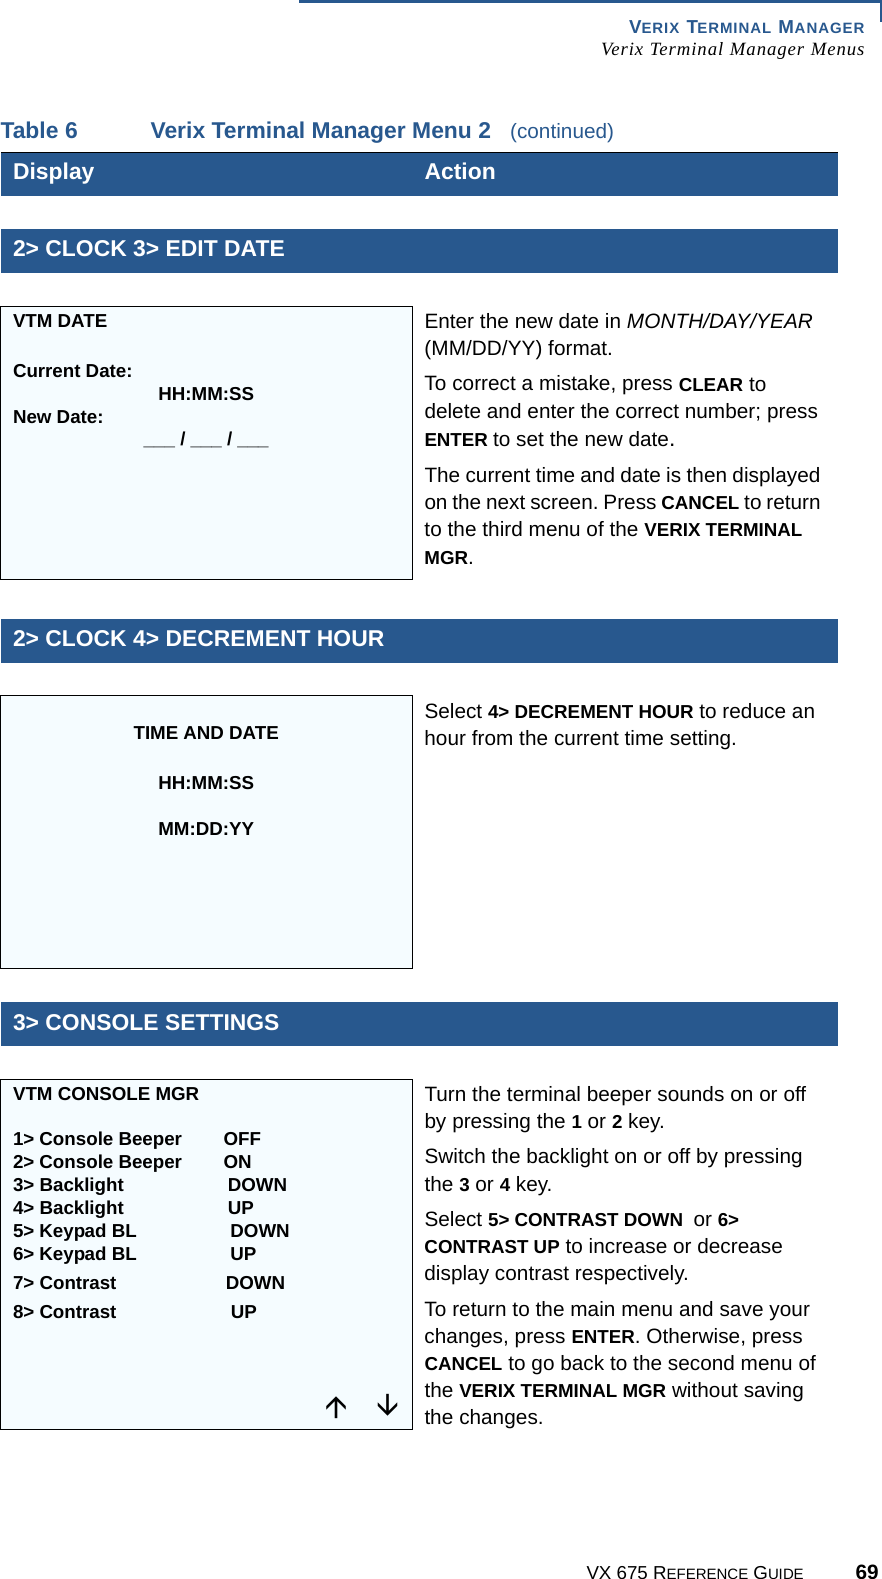
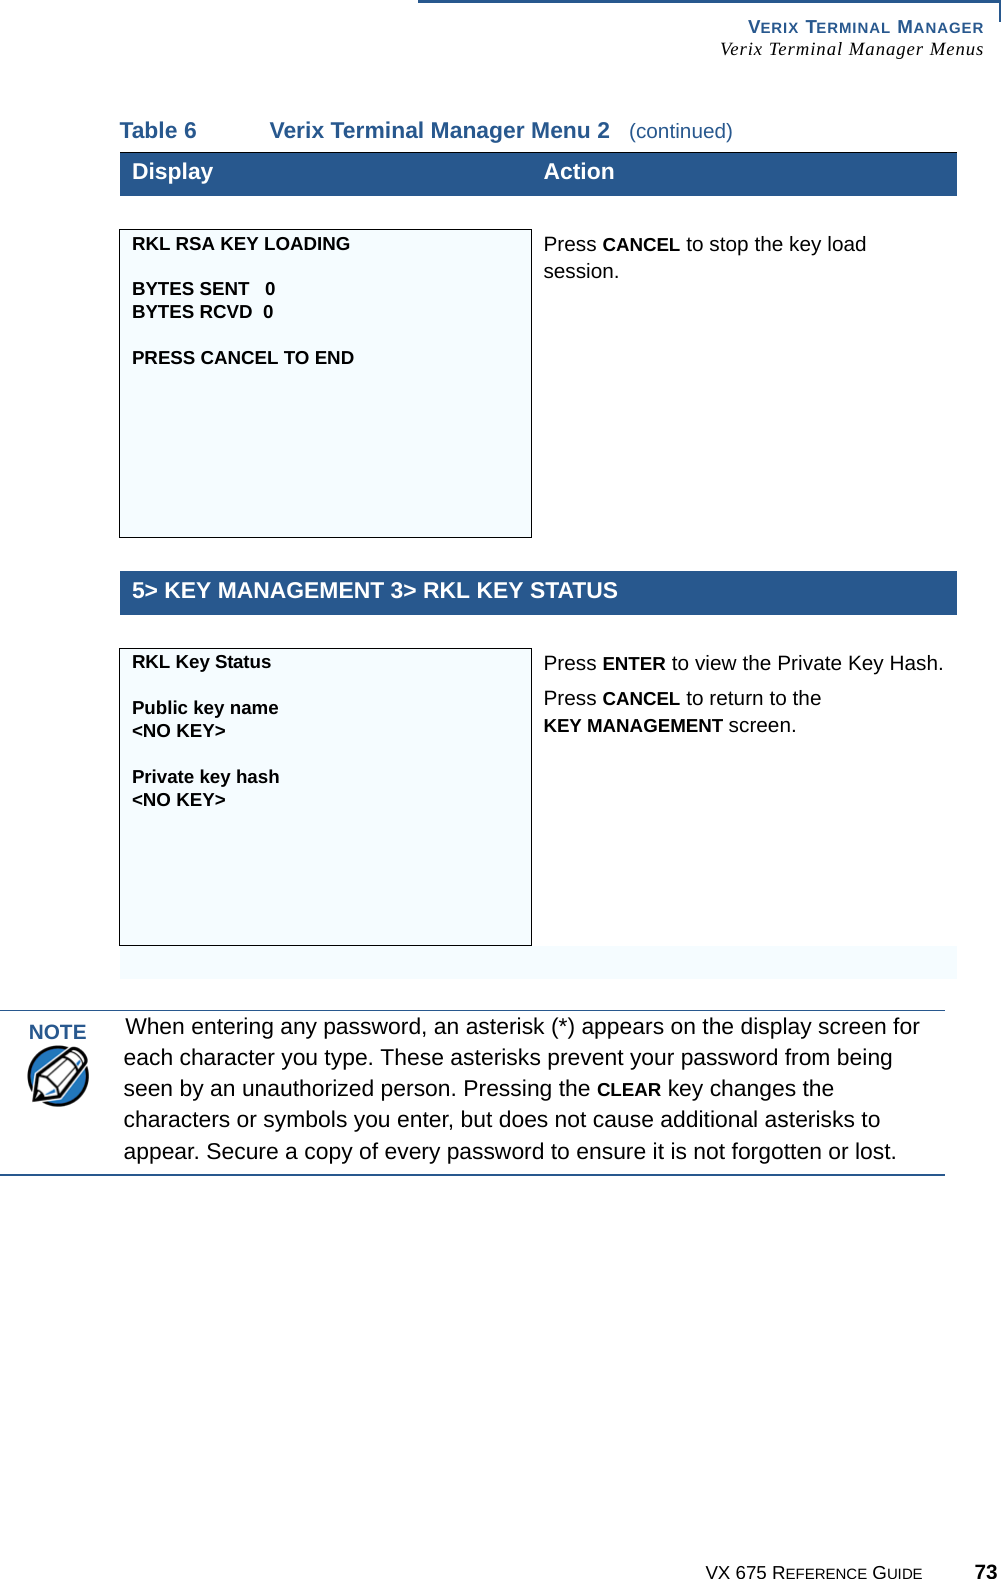

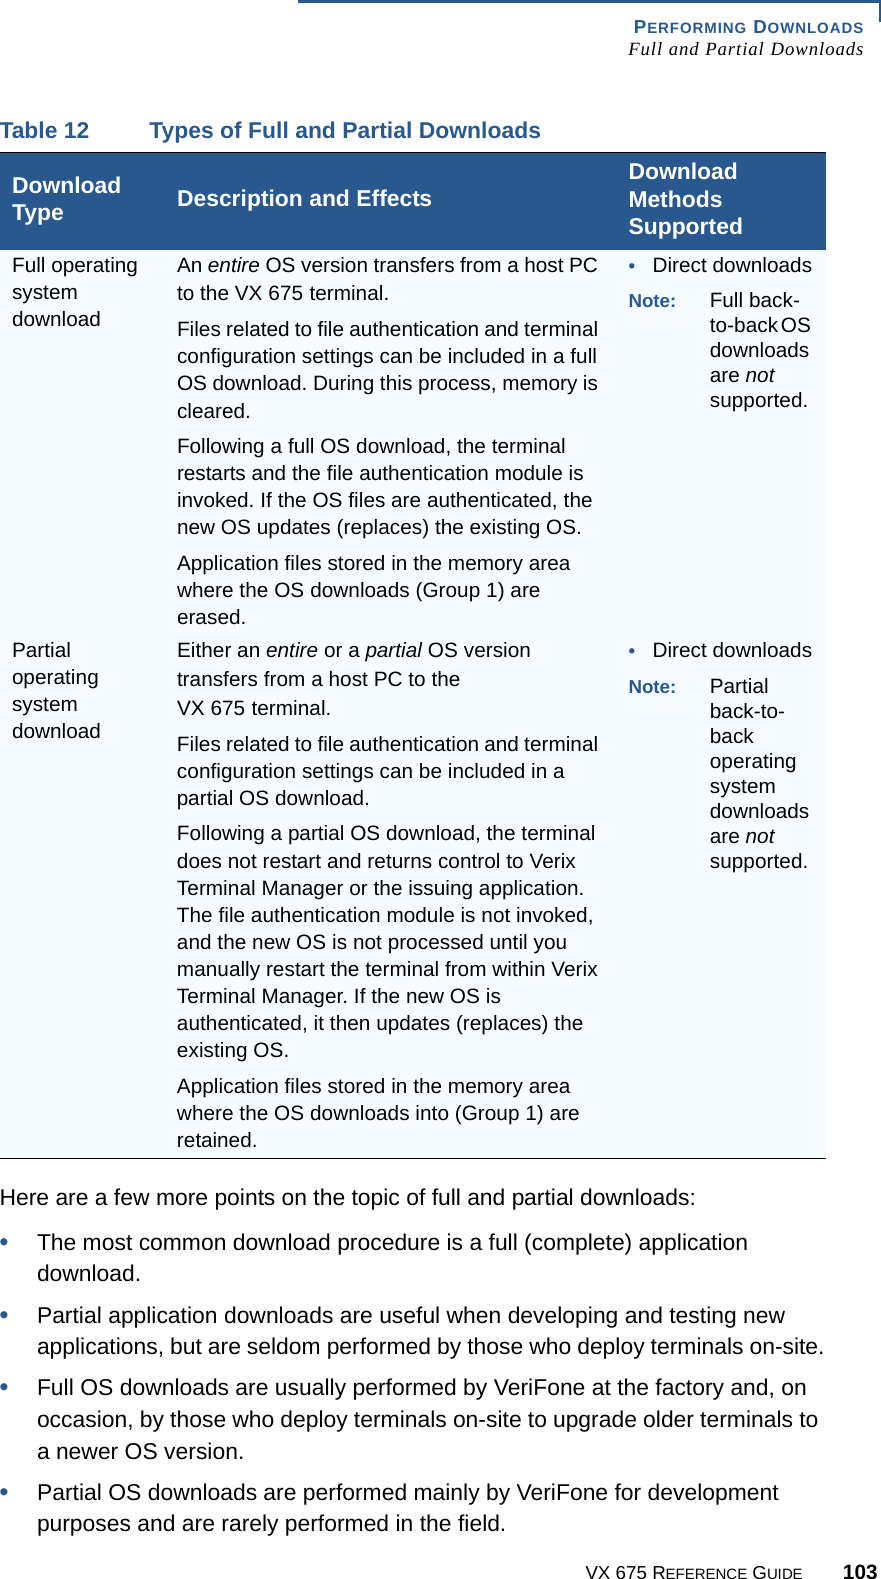
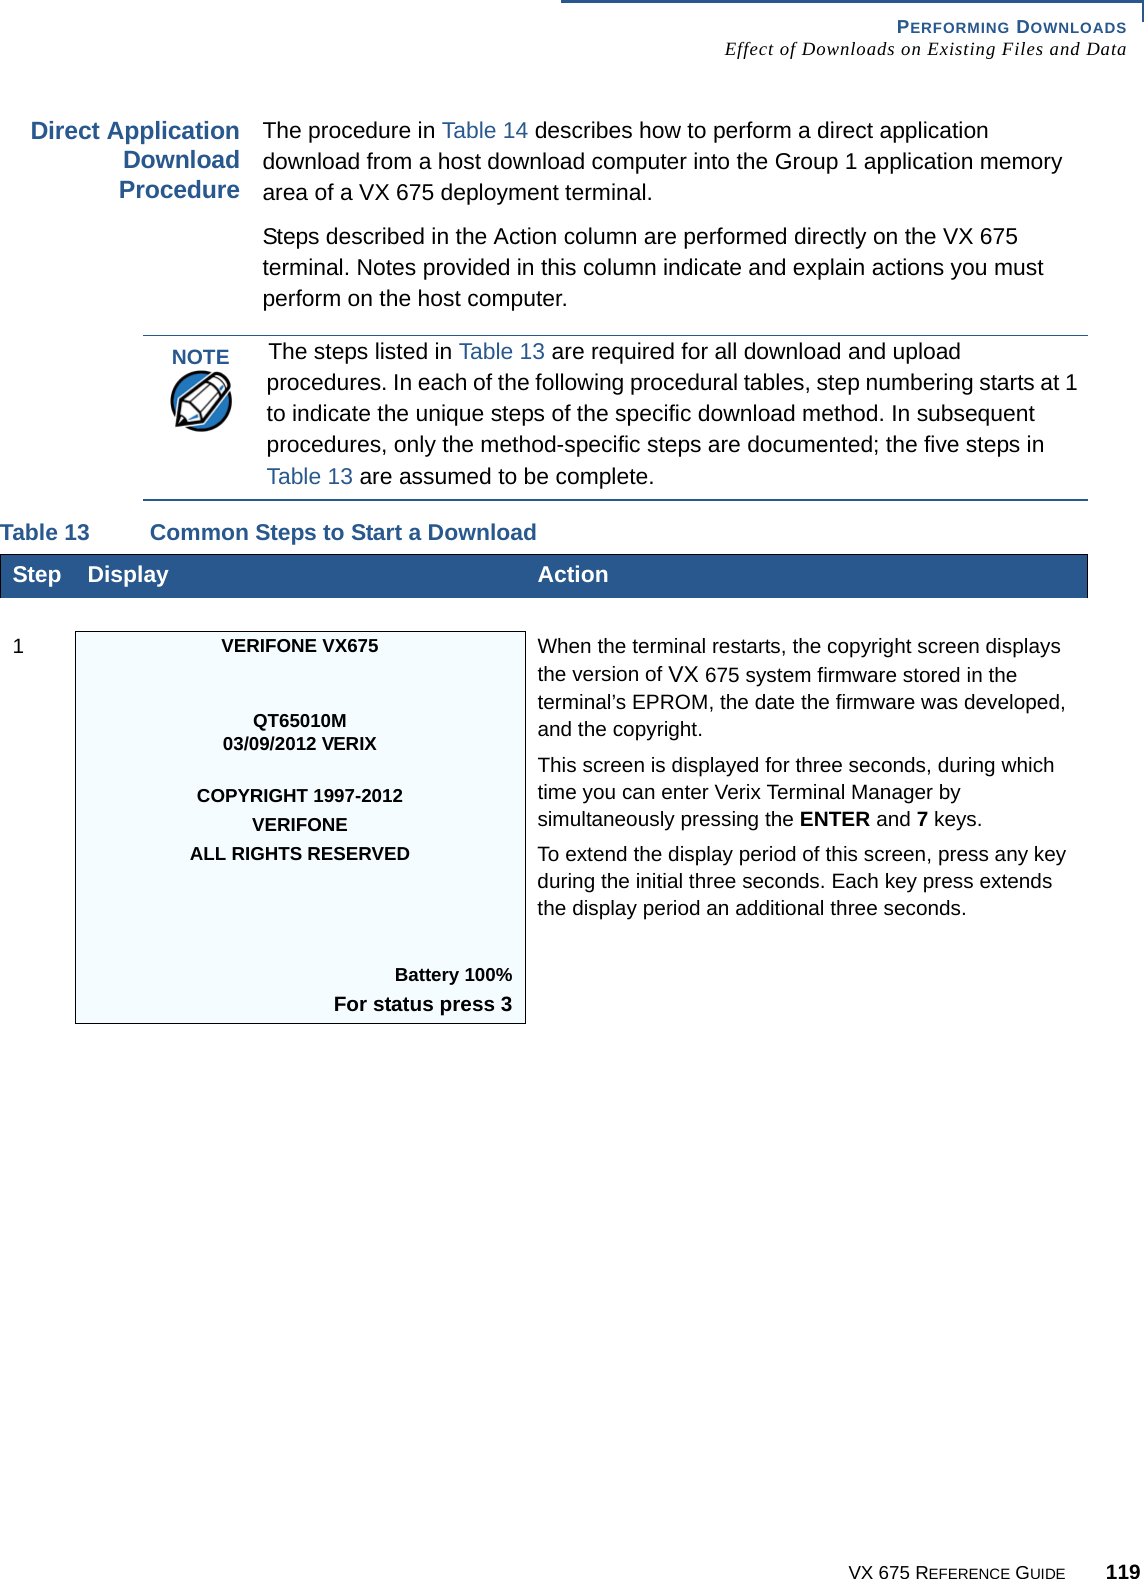
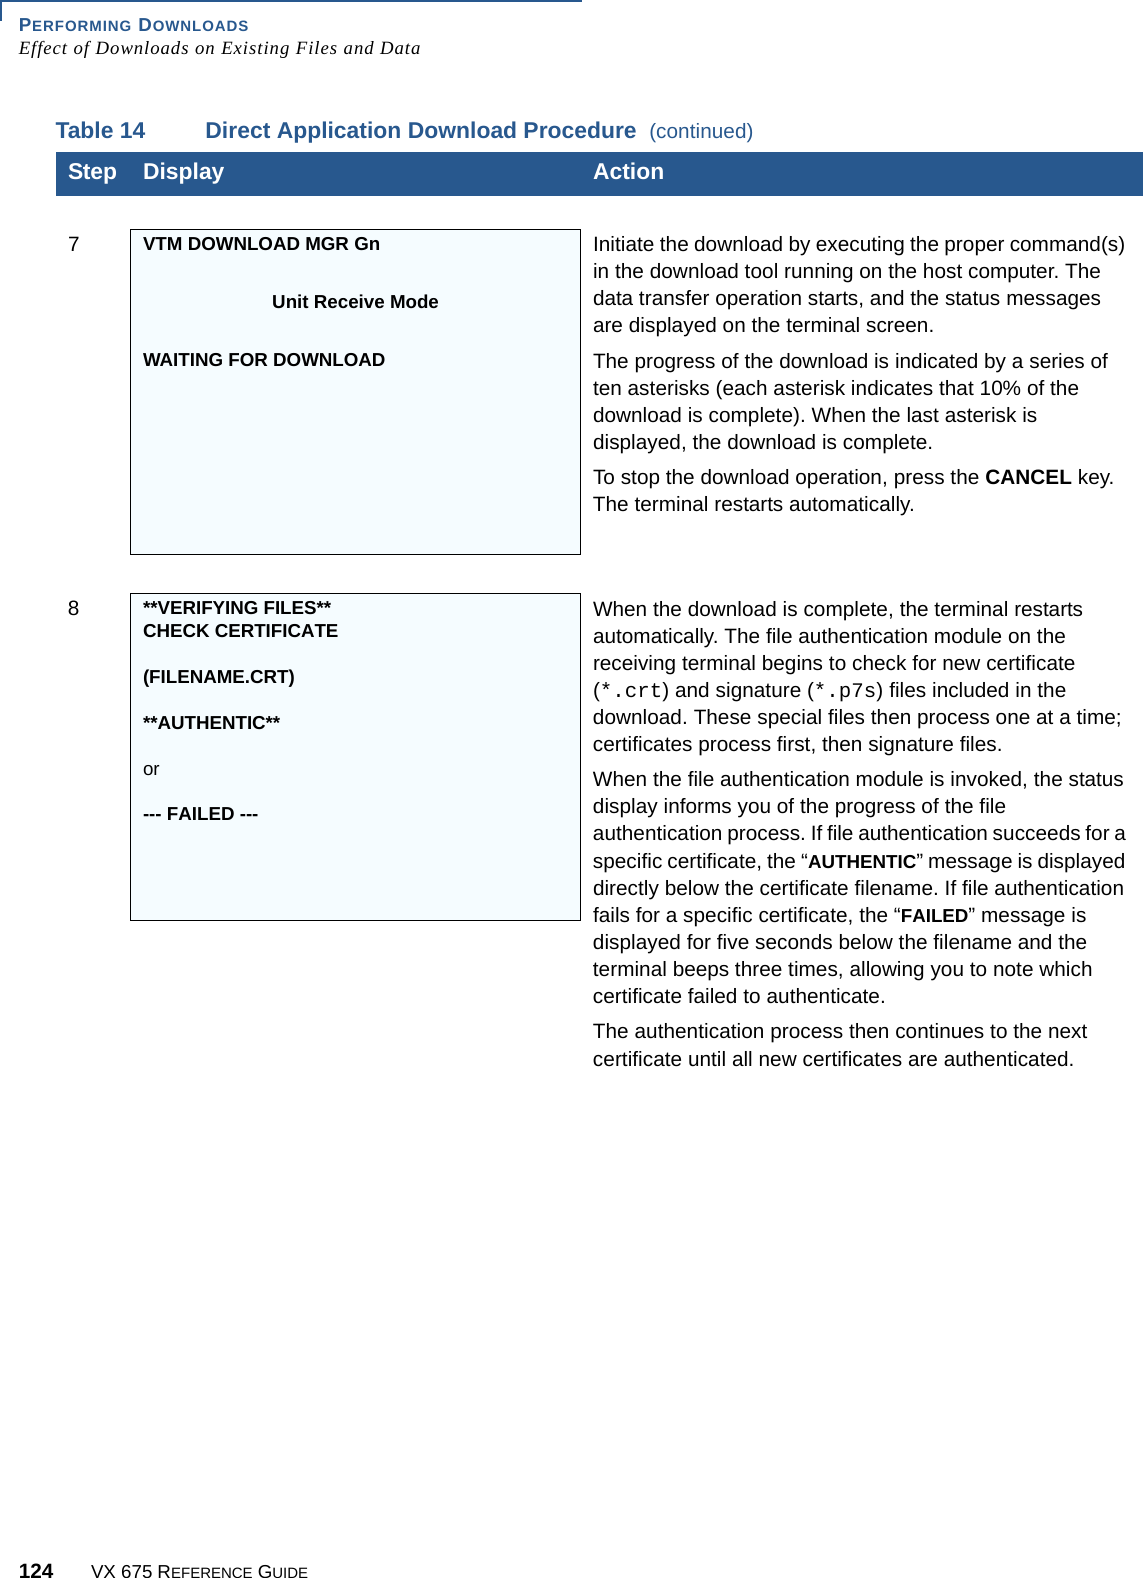
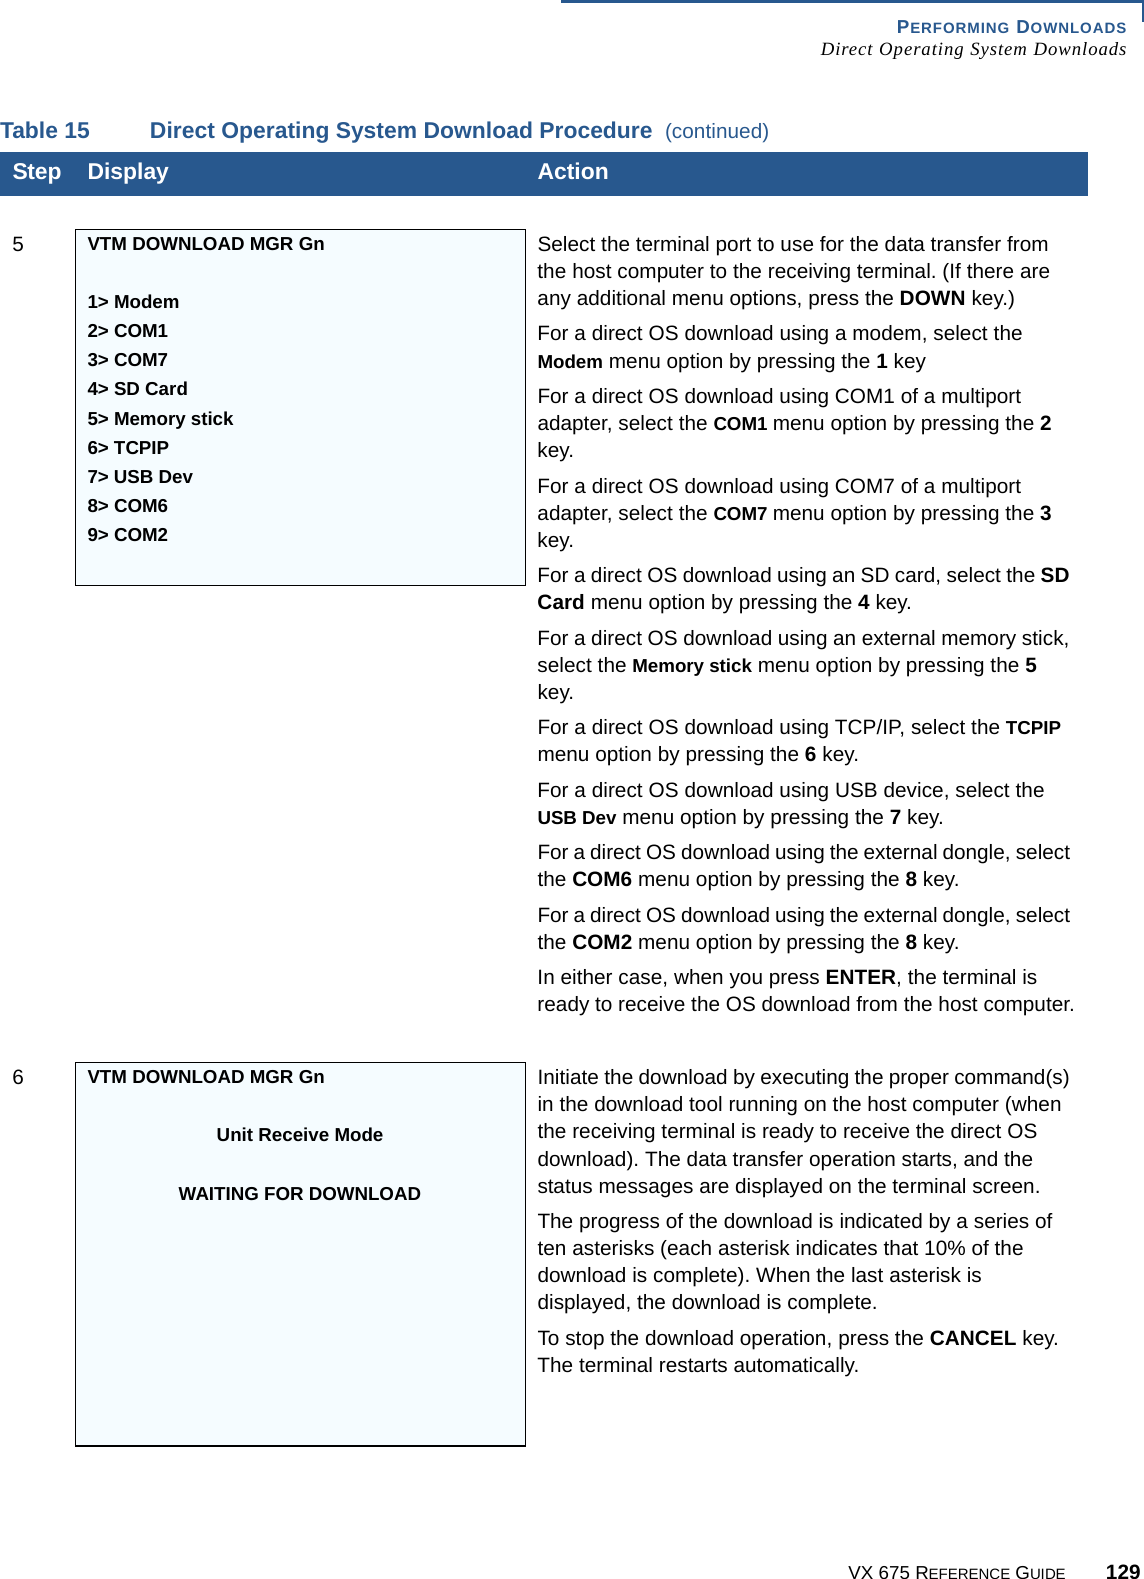
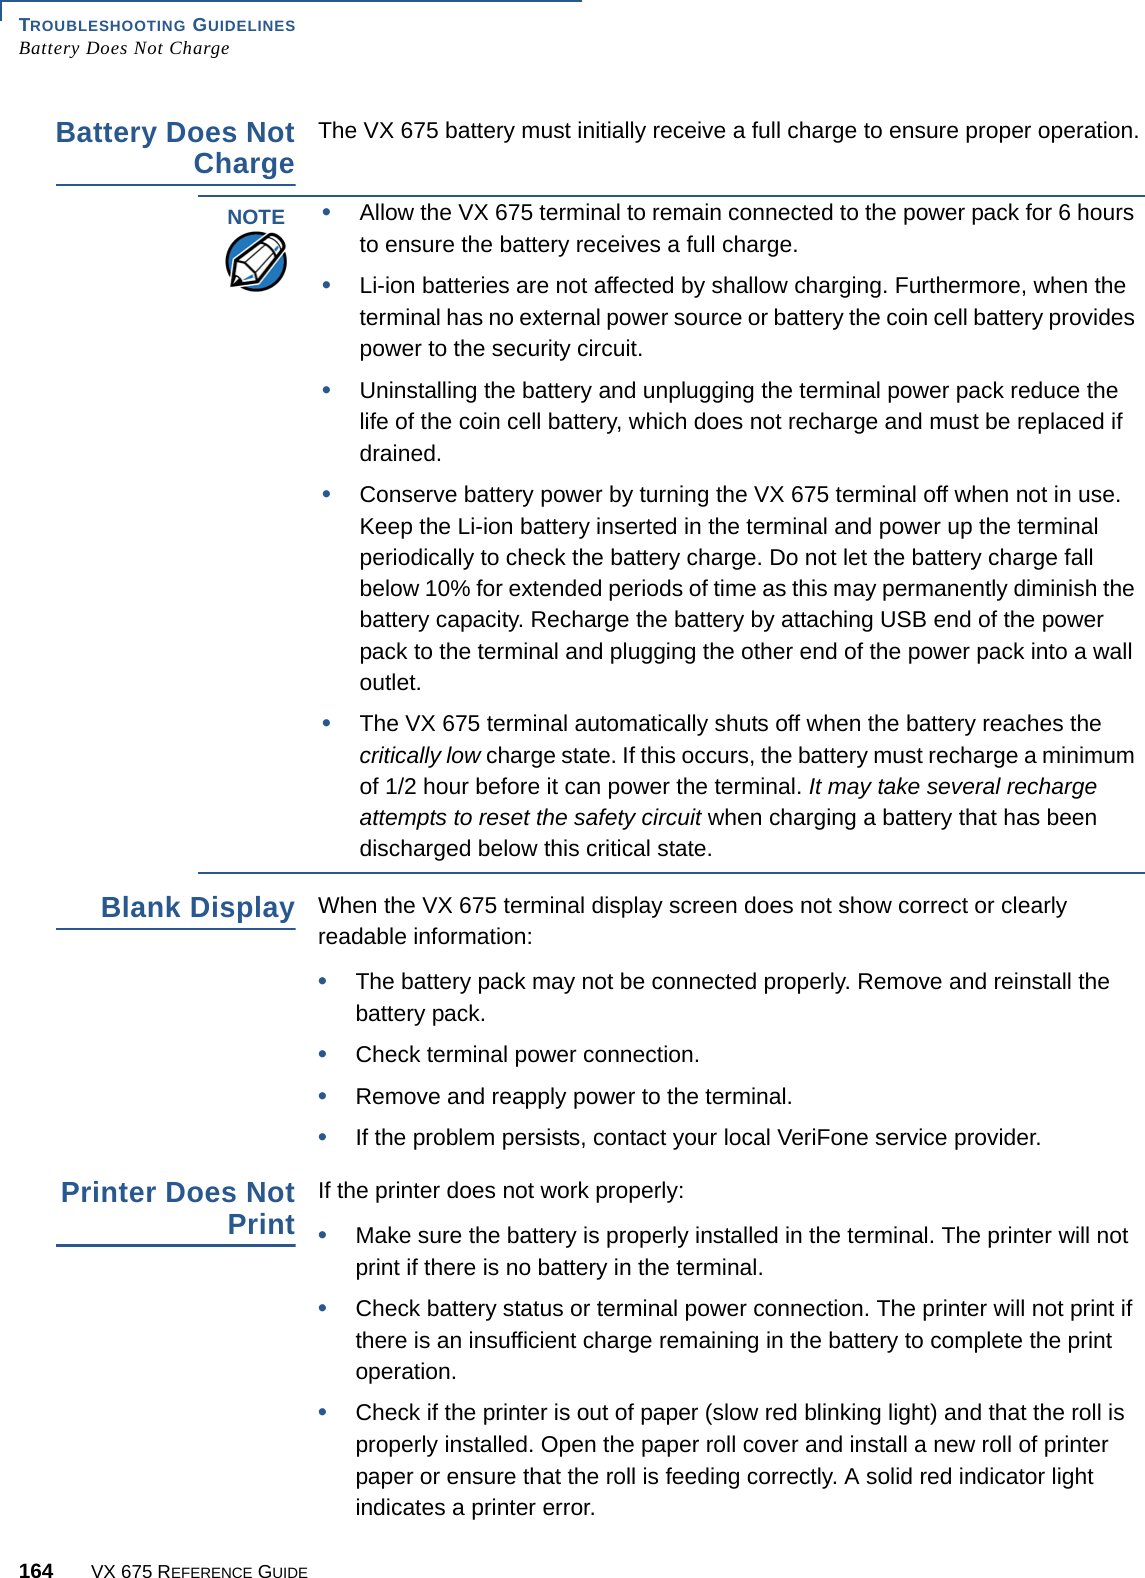
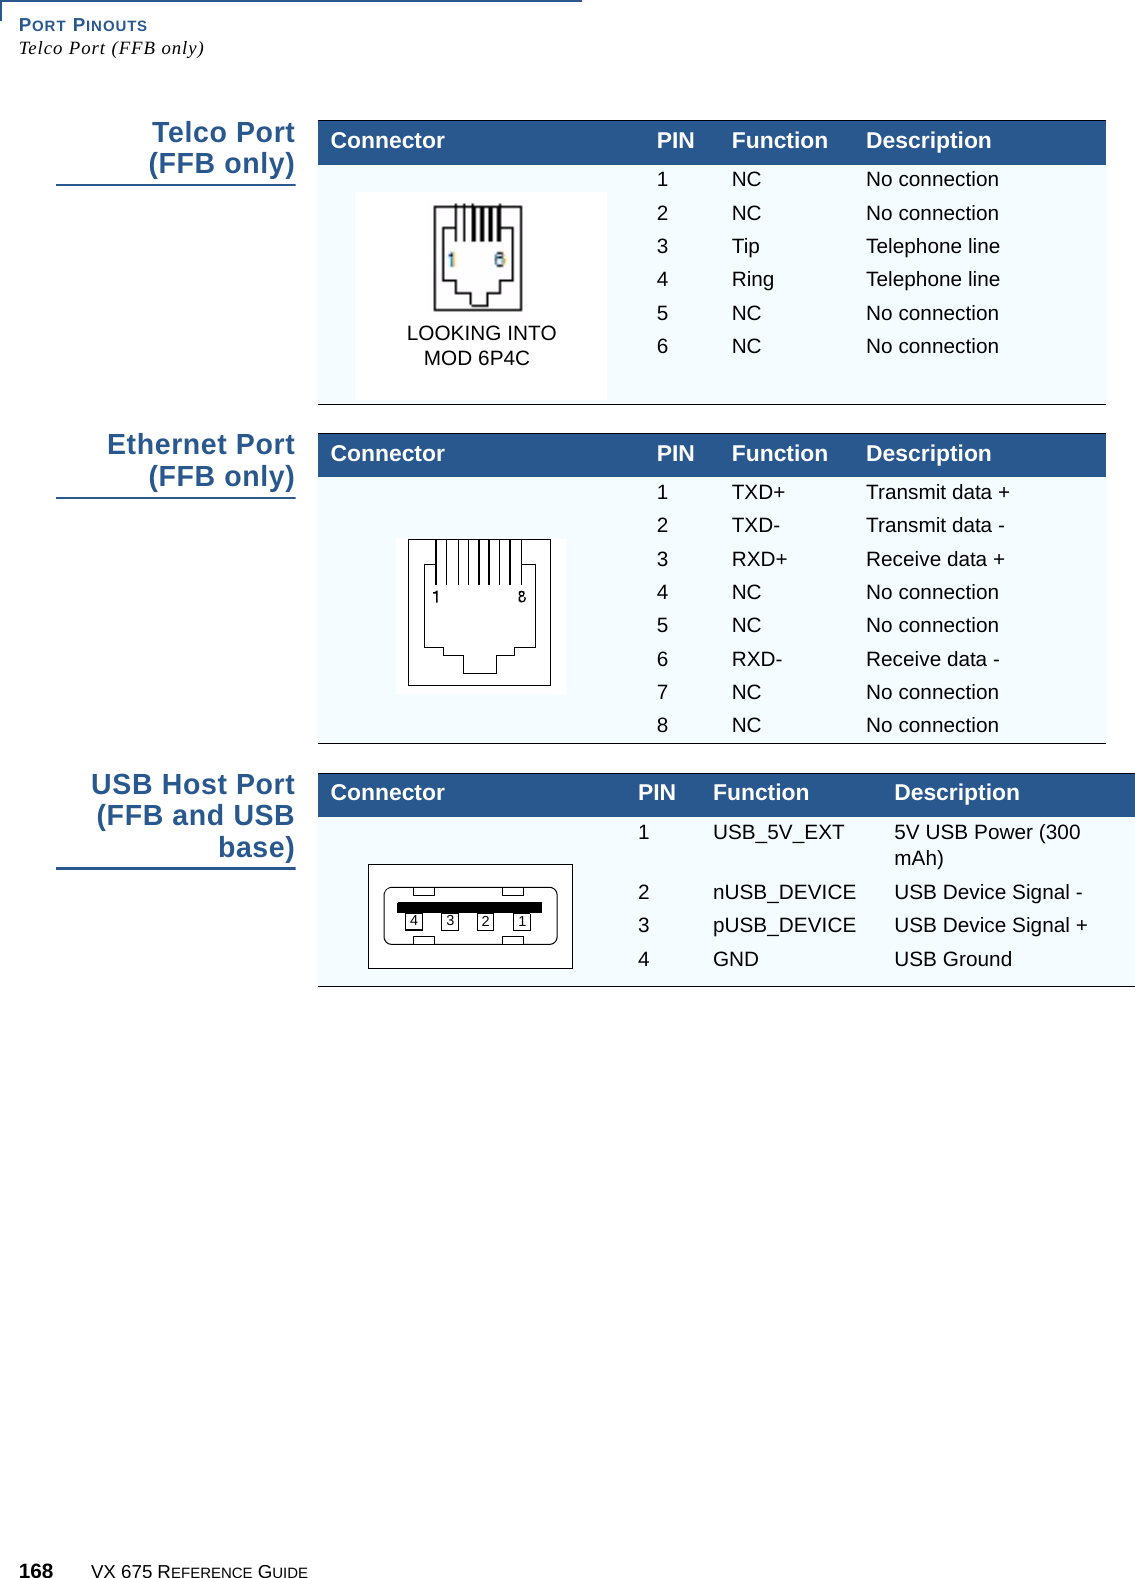
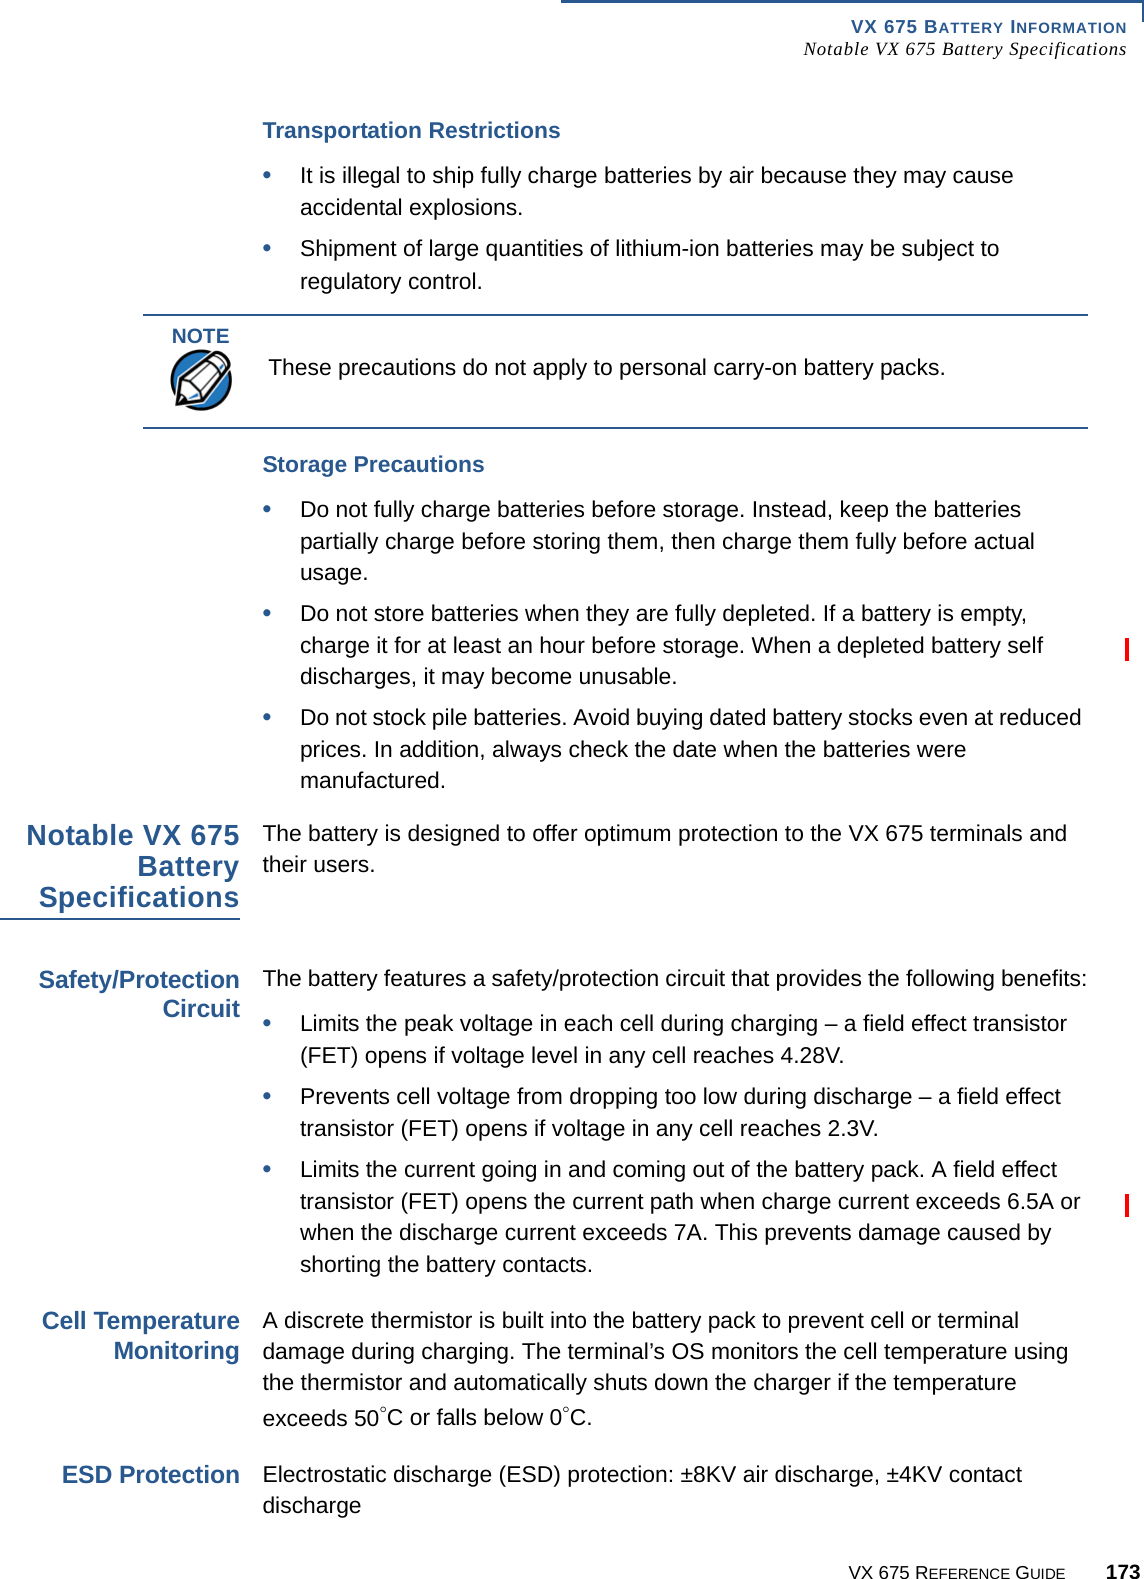
![FILE AUTHENTICATIONVeriShield File Signing Tool98 VX 675 REFERENCE GUIDEapplication’s logical security requirements, other types of files, such as data files and font files, may also need to be signed and authenticated on download.•The -s switch is followed by the name of the signature file to be generated, file.p7s.•The -c switch is followed by the name of the signer certificate to be used for file authentication with the development terminal, “vxsign.crt.”•The -k switch is followed by the name of the signer private key file, vxsign.key. A signer private key is a required input to the file signing process for development terminals and for deployment terminals.Graphical InterfaceMode for theVeriShield FileSigning ToolWhen you execute the VeriShield File Signing Tool file, the FileSign dialog box is displayed (see Figure 30). The FileSign dialog box has four entry fields, each of which is followed by a “next” [...] selection button. There is one check box, and the OK and Cancel buttons.•Press ALT+C or click the [...] button to the right of the Certificate field to locate and select the certificate file (*.crt) to be used to sign the file.•Press ALT+K or click the [...] button to the right of the Key field to locate and select the signer private key file (*.key).•Press ALT+F or click the [...] button to the right of the File to be signed field to locate and select the application file (*.out, *.lib, or other) to sign. If necessary, the filename can also be modified.To store the file in F: drive upon download to the terminal, check the Stored in Flash check box. This adds the F: prefix to the target file name.•Press ALT+S or click the [...] button to the right of the Signature file field to enter a filename for the signature file to be generated. The filename extension must always be *.p7s. You can also choose another directory on the host PC to store the generated signature file.•When all entries are complete, press ALT+O or click the OK button to execute the VeriShield File Signing Tool and generate the signature file, otherwise, press ALT+A or click Cancel to exit the VeriShield File Signing Tool utility.When the necessary signature files are generated to authenticate the application or applications on the VX 680 terminal, perform the application download procedure.For more information about file authentication within the context of specific download procedures, refer to Chapter 6.](https://usermanual.wiki/Verifone/VX675WCDMA/User-Guide-2103601-Page-98.png)
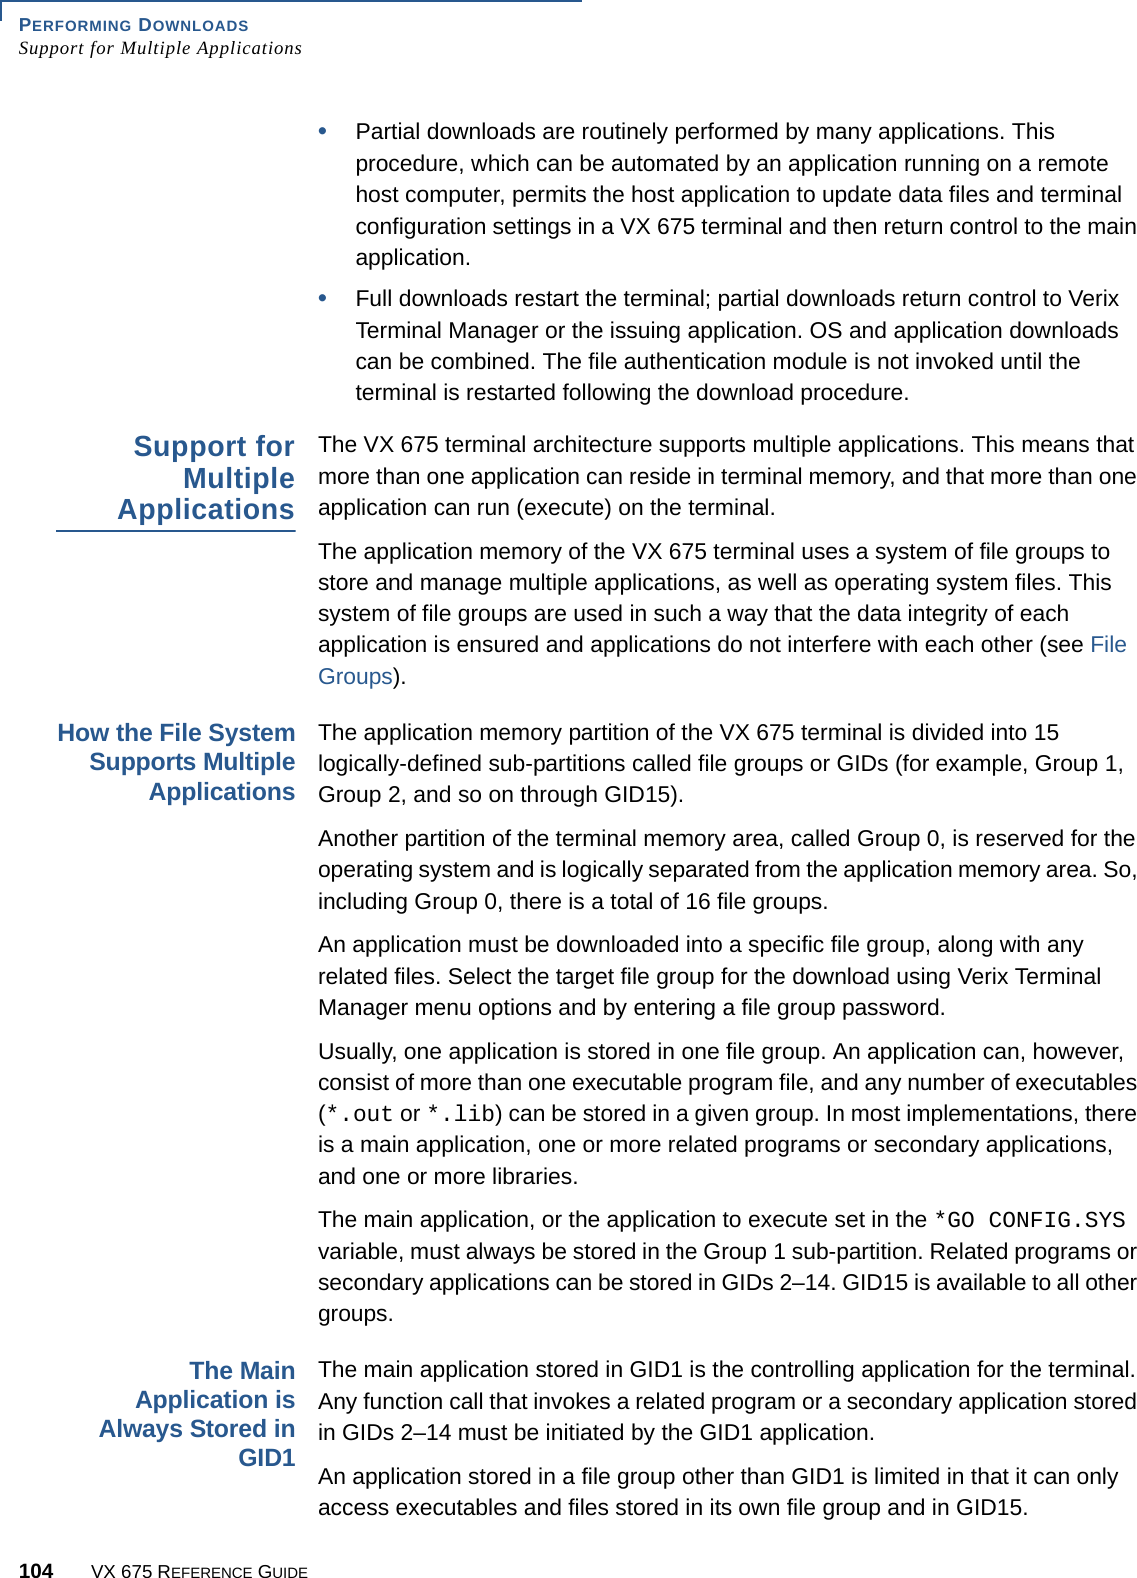
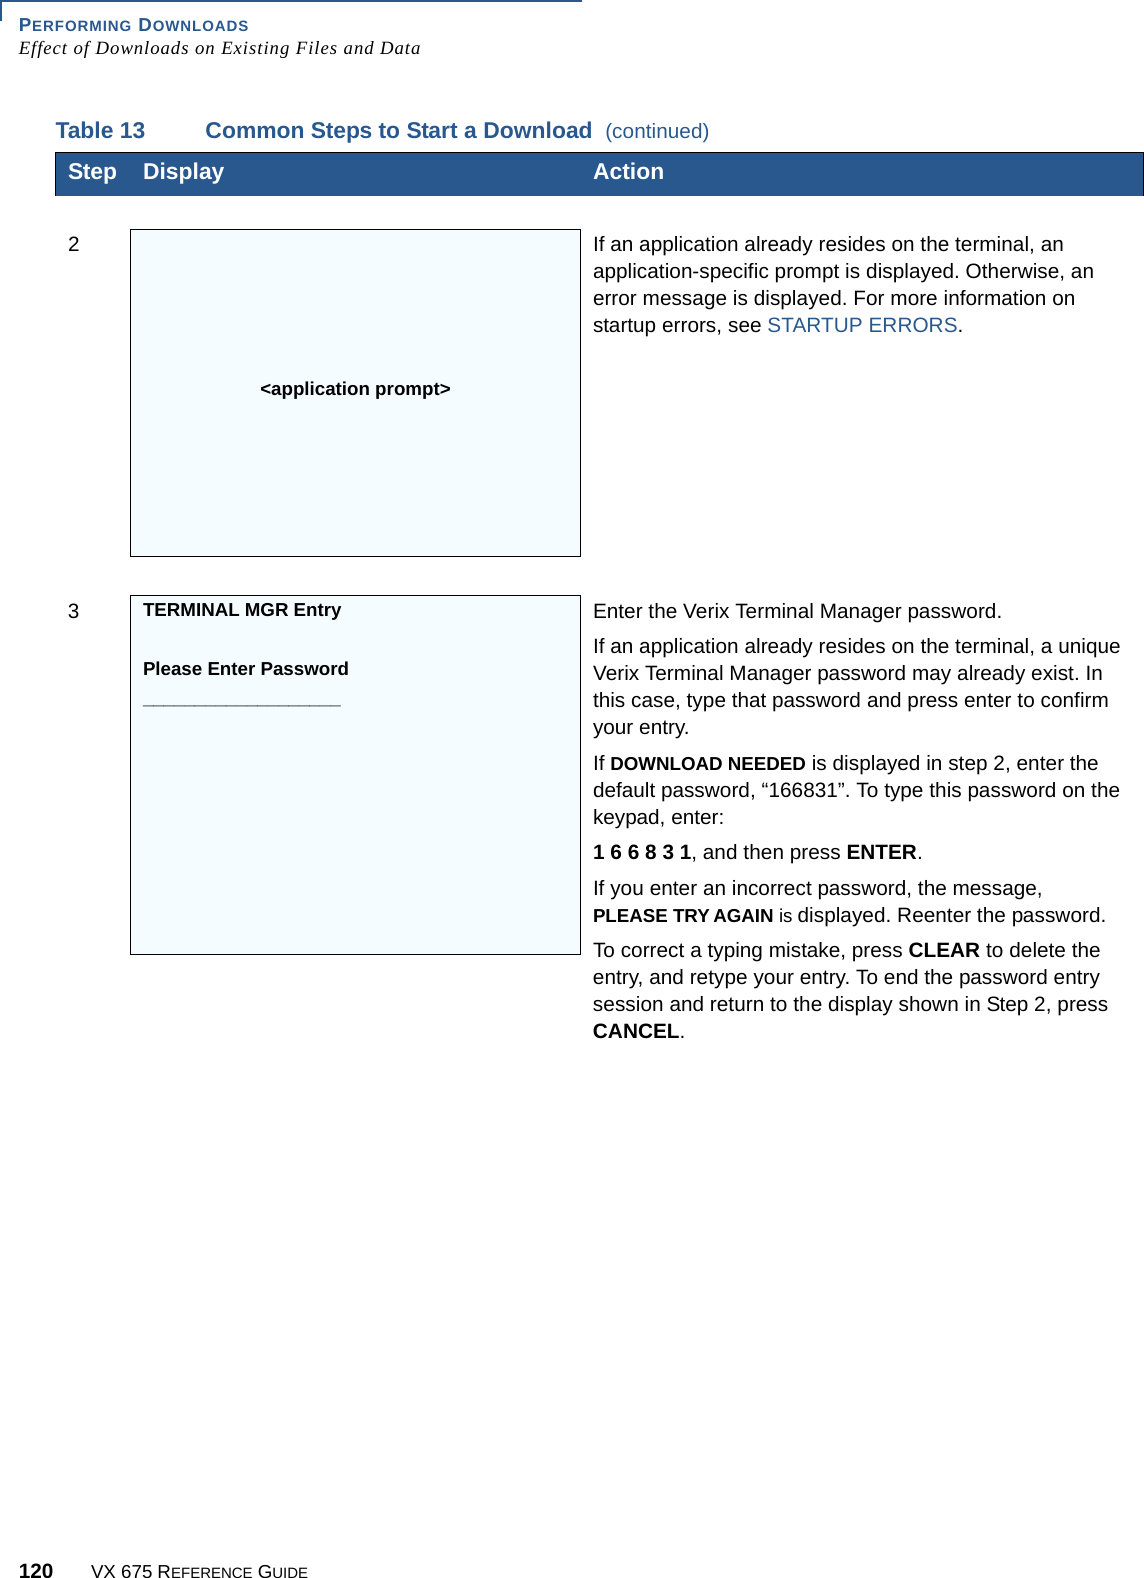

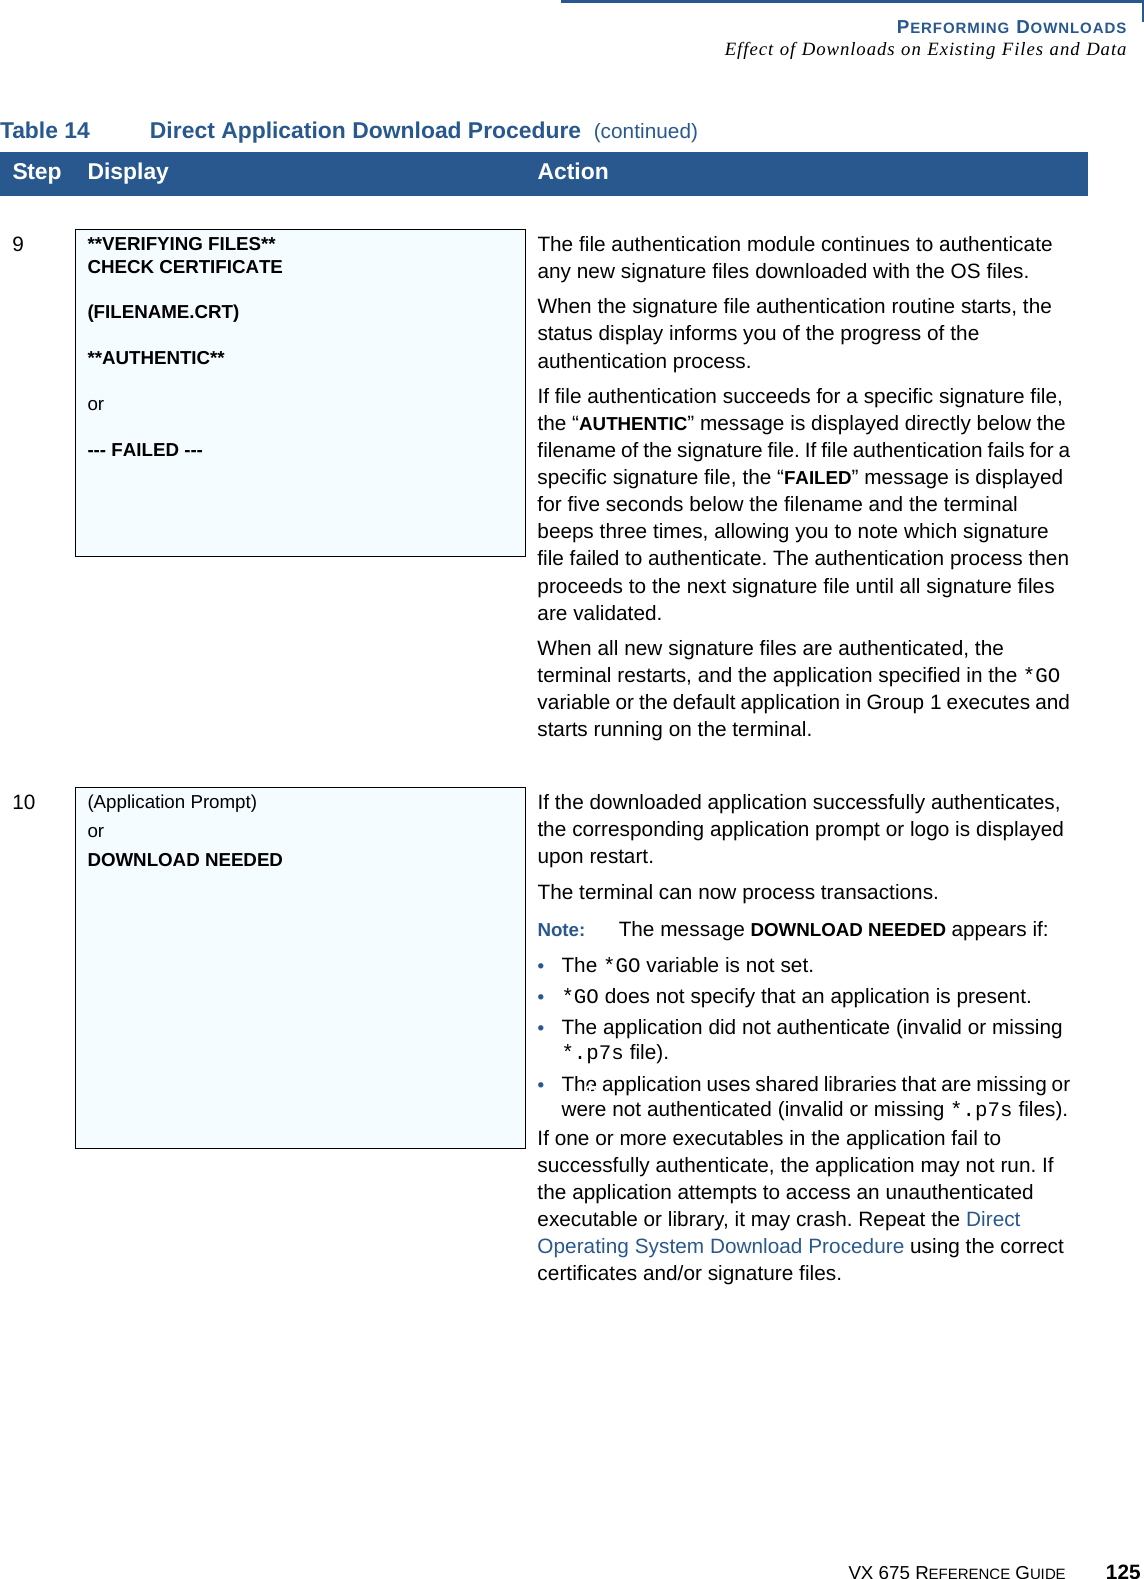

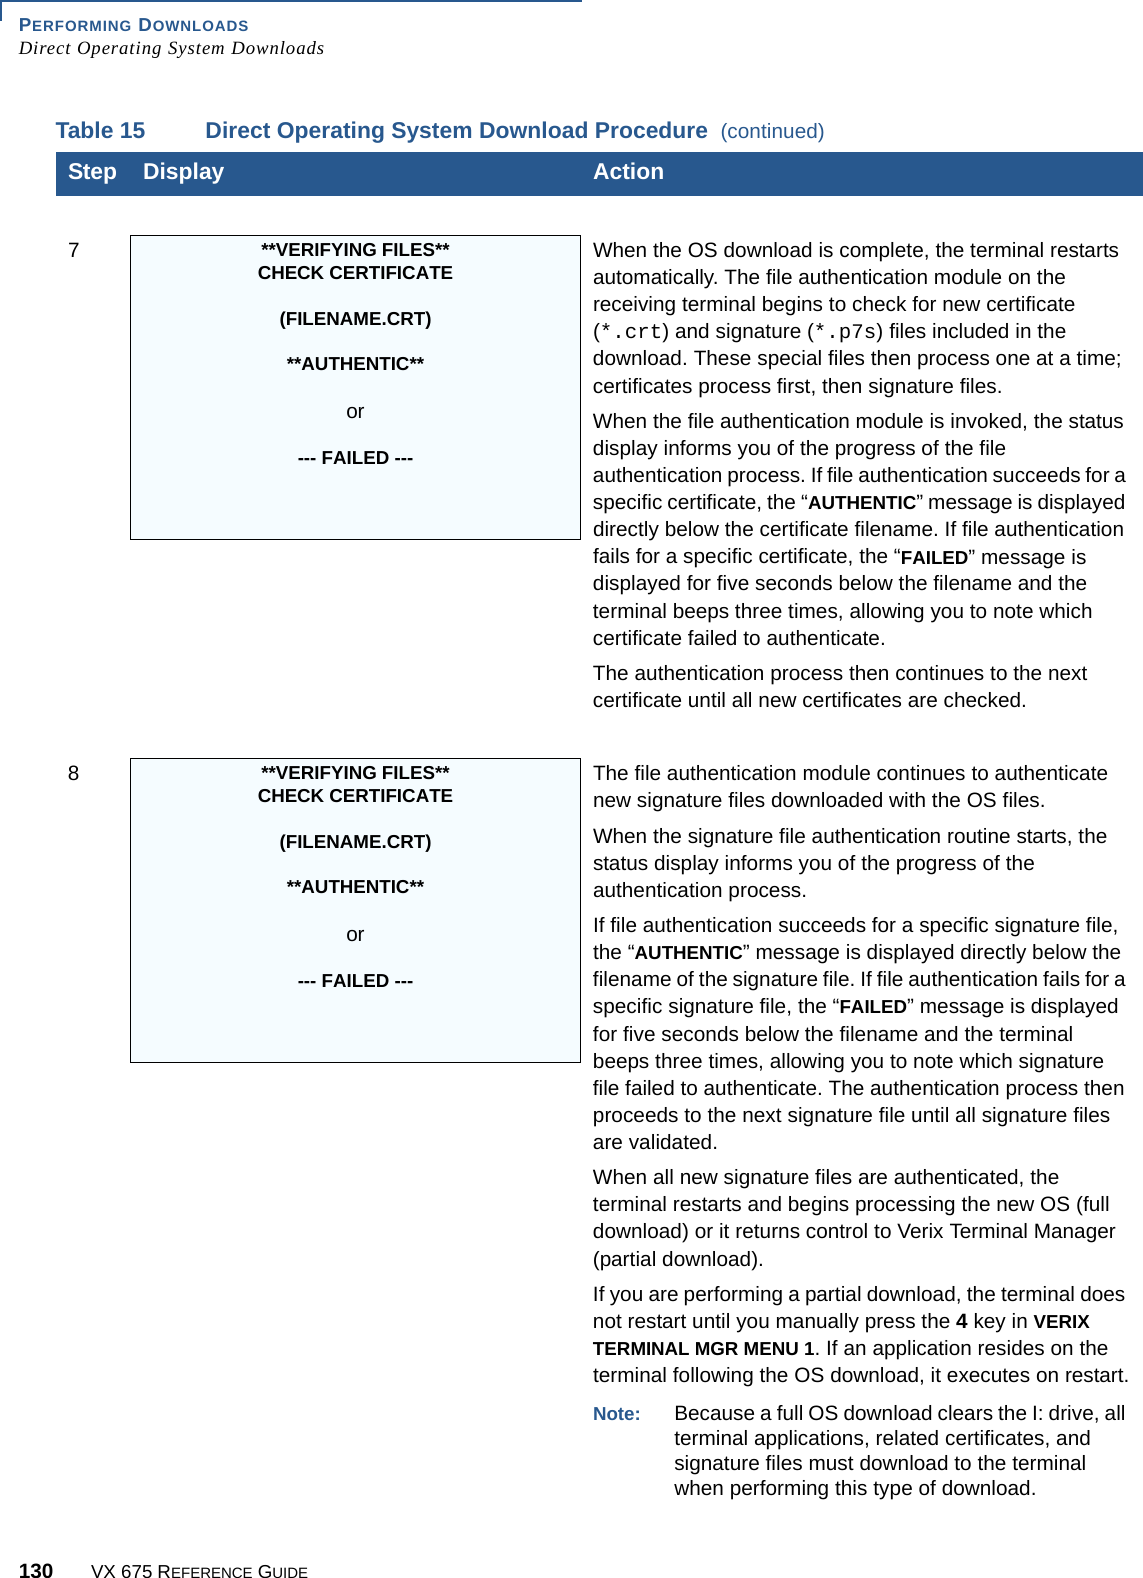
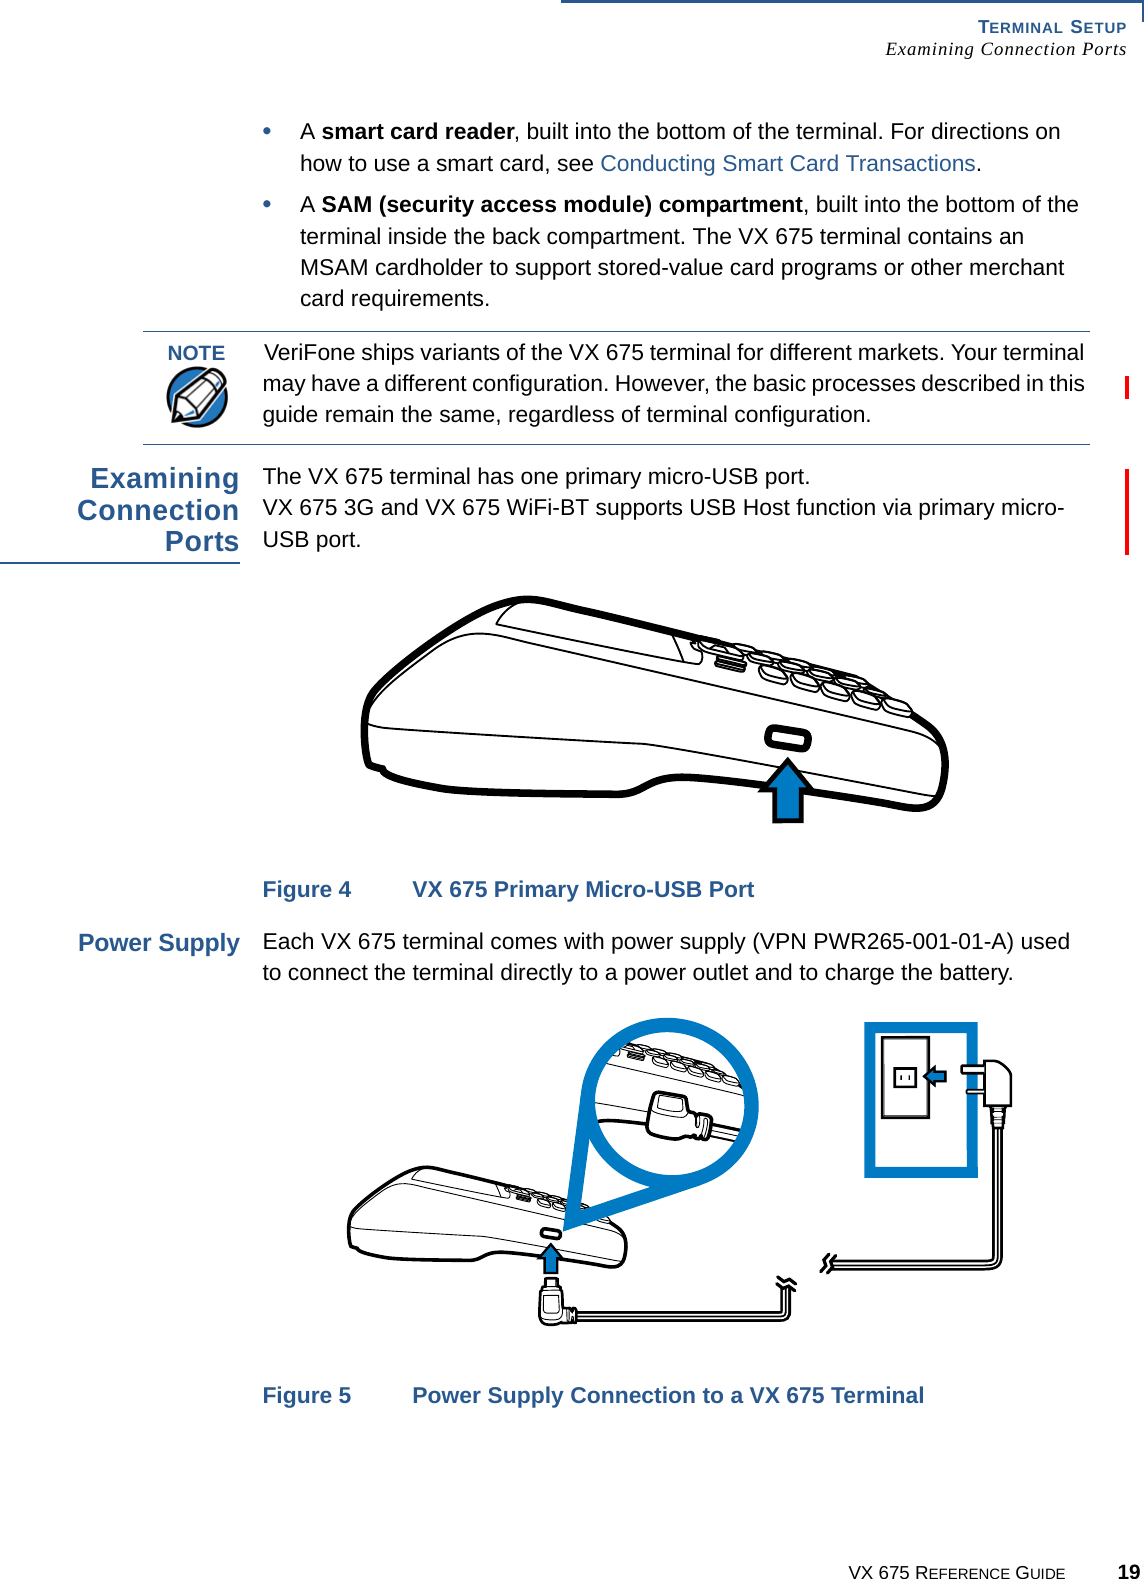
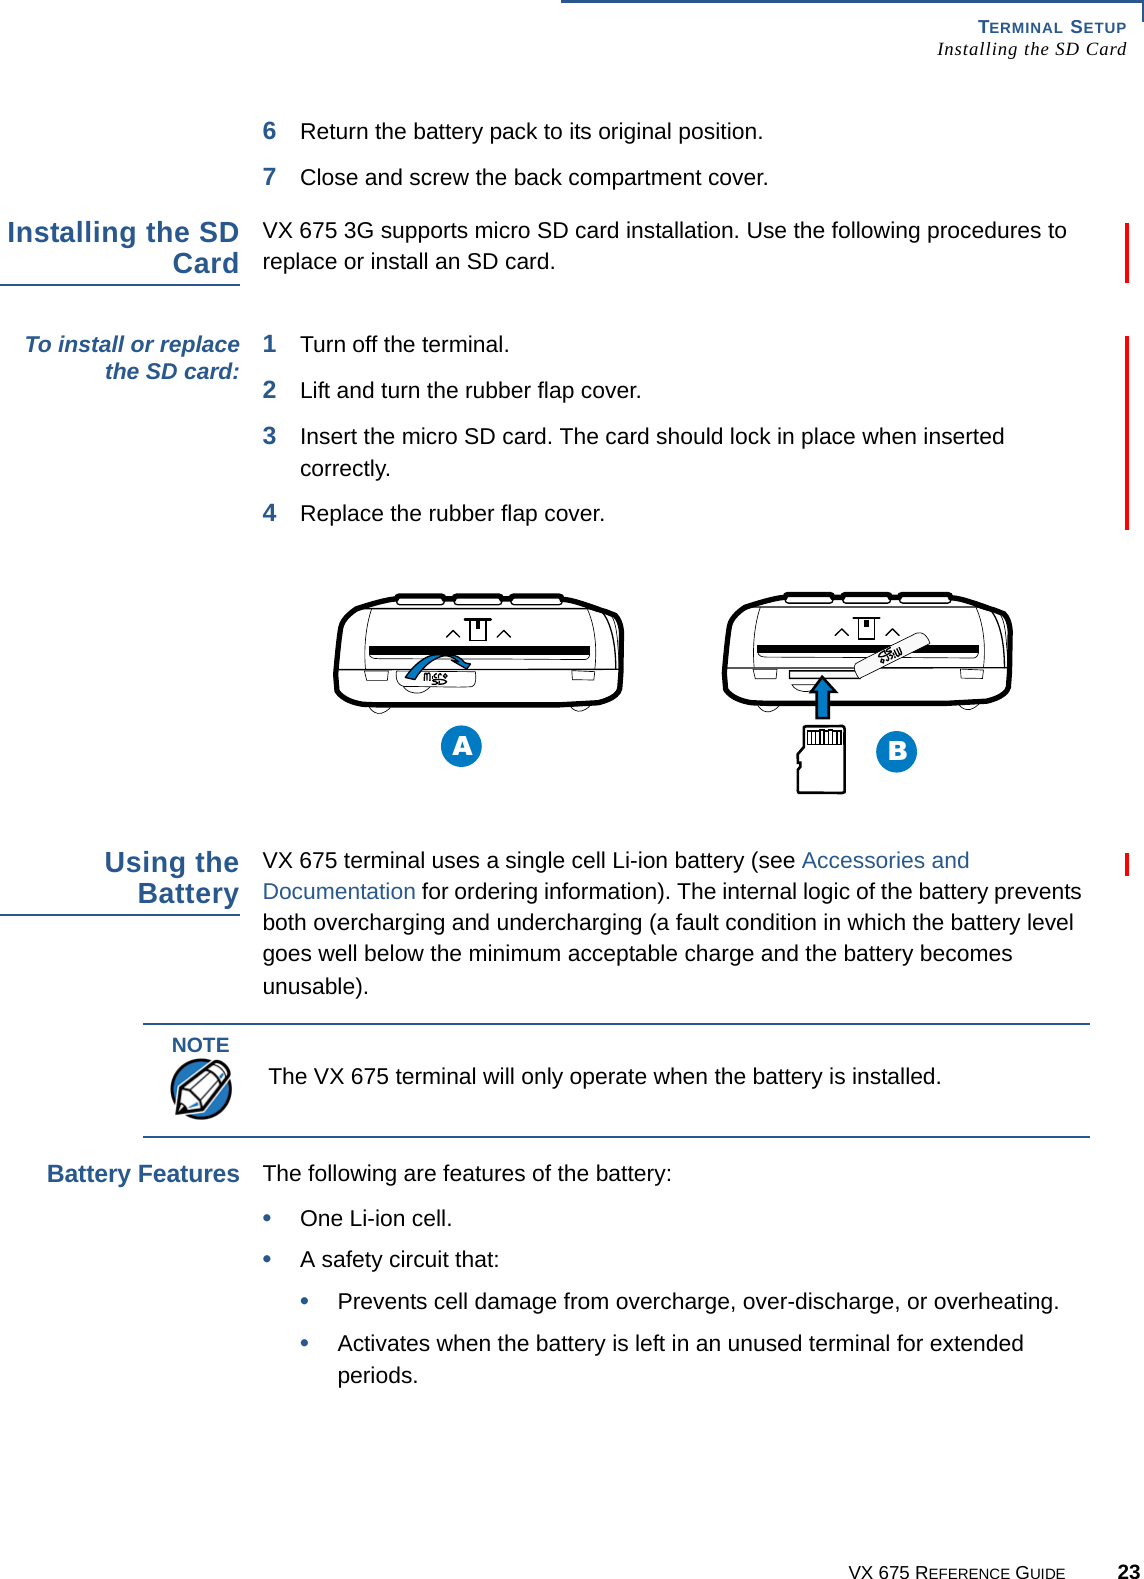
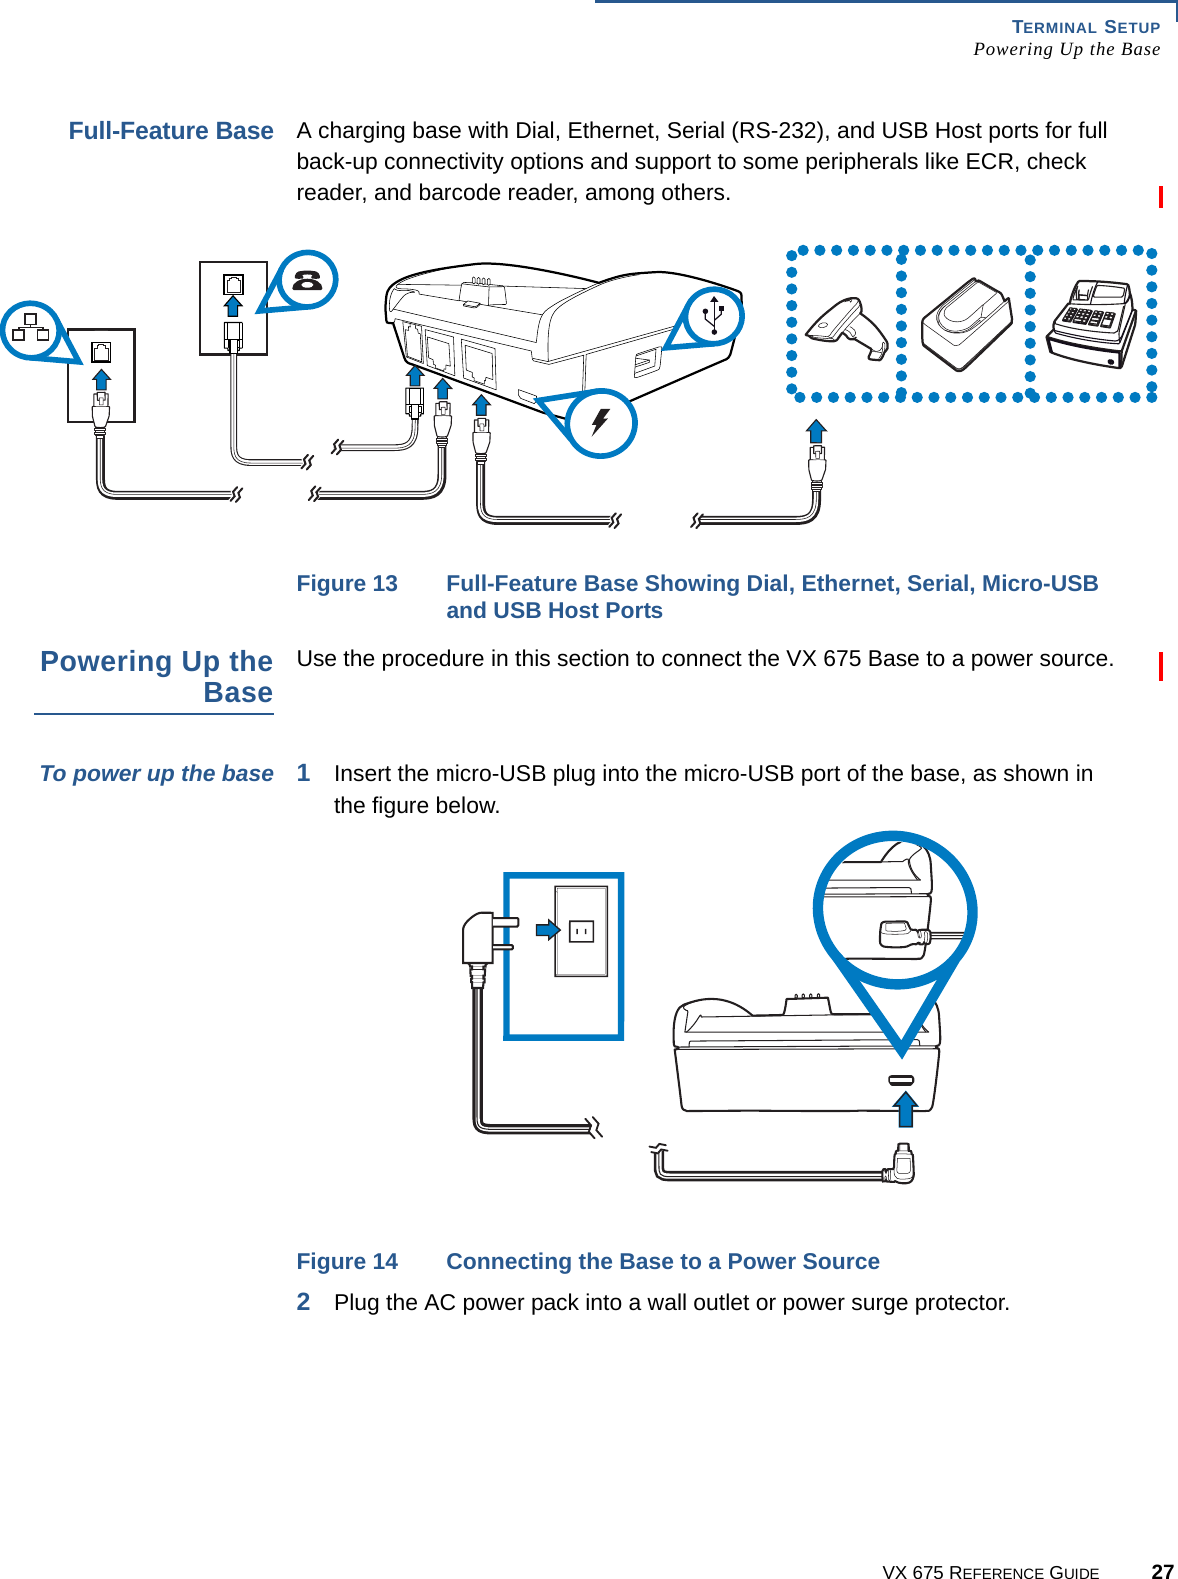
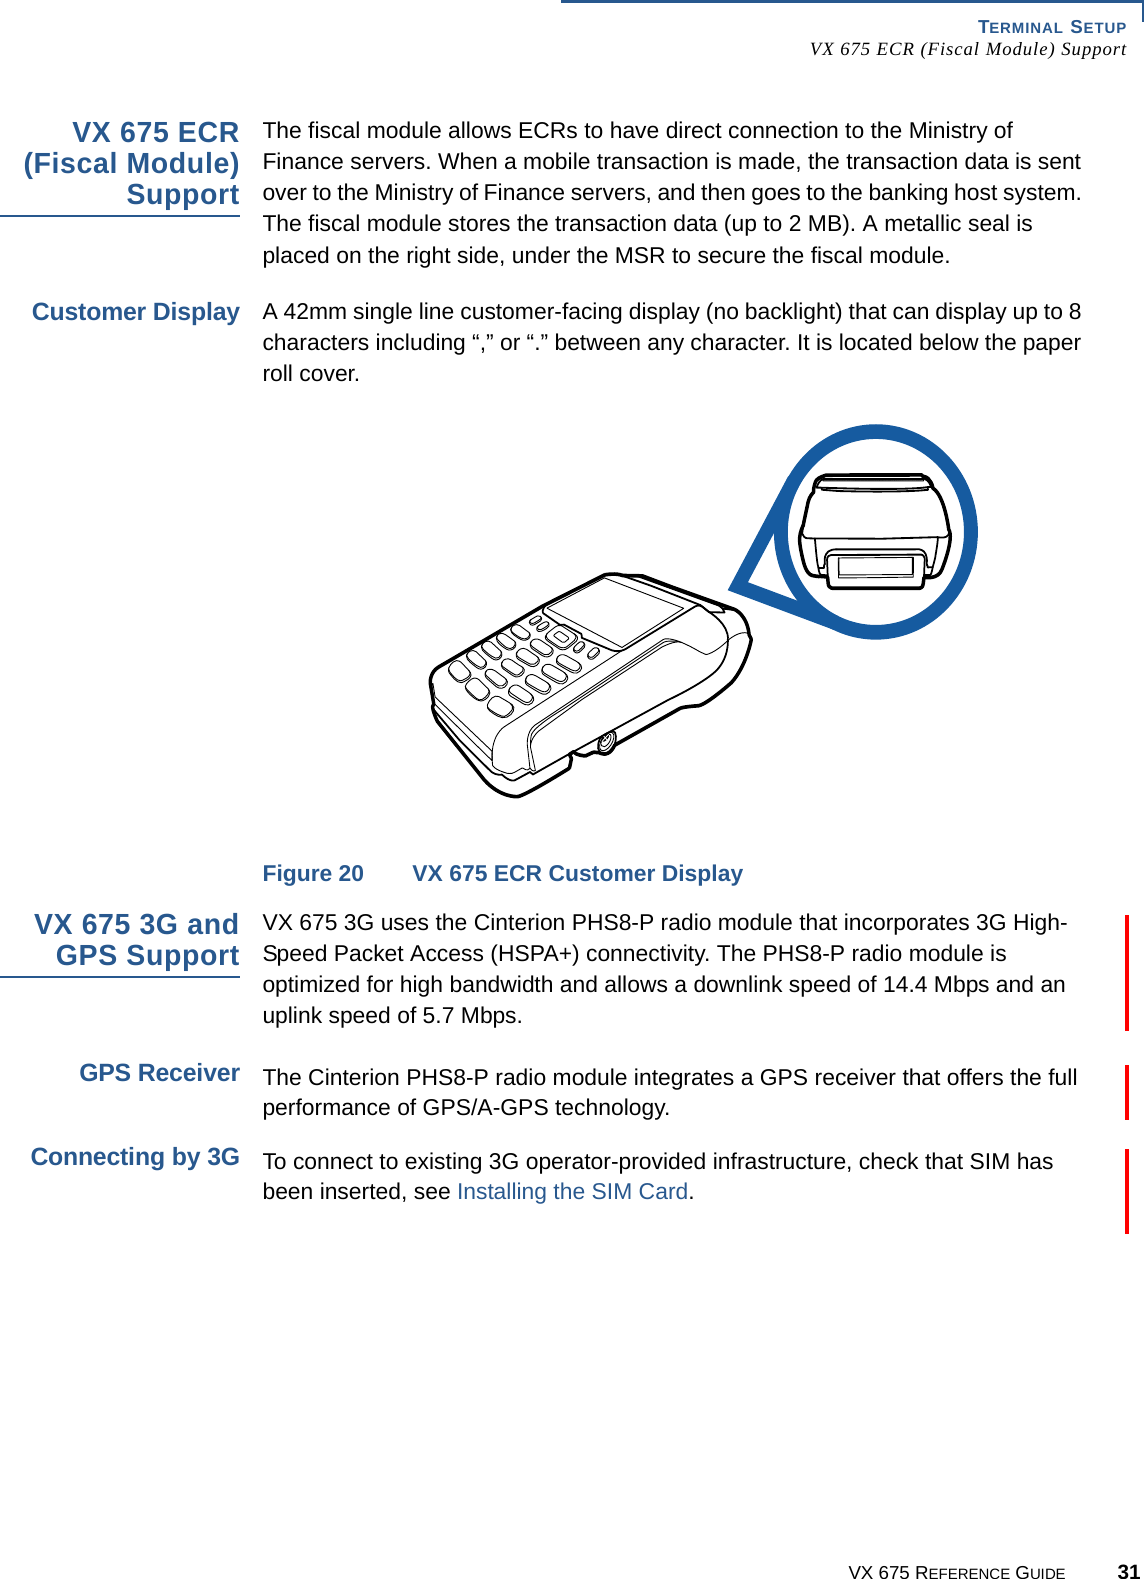
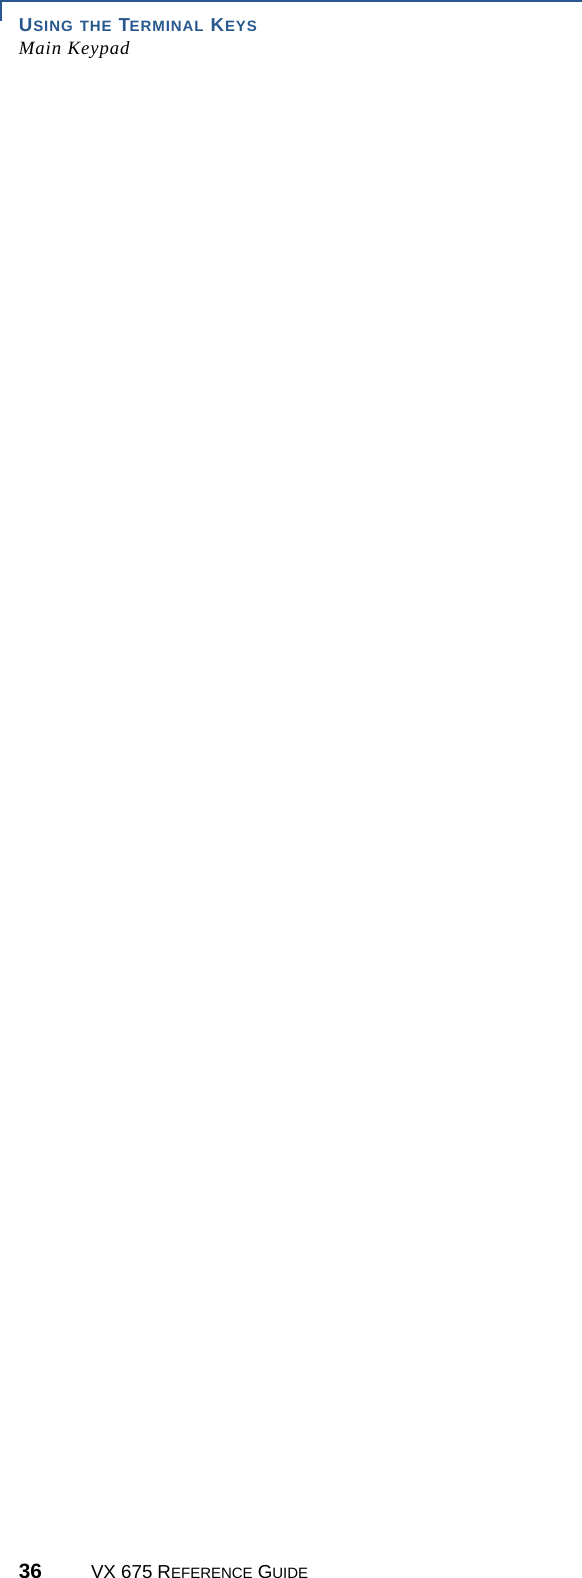
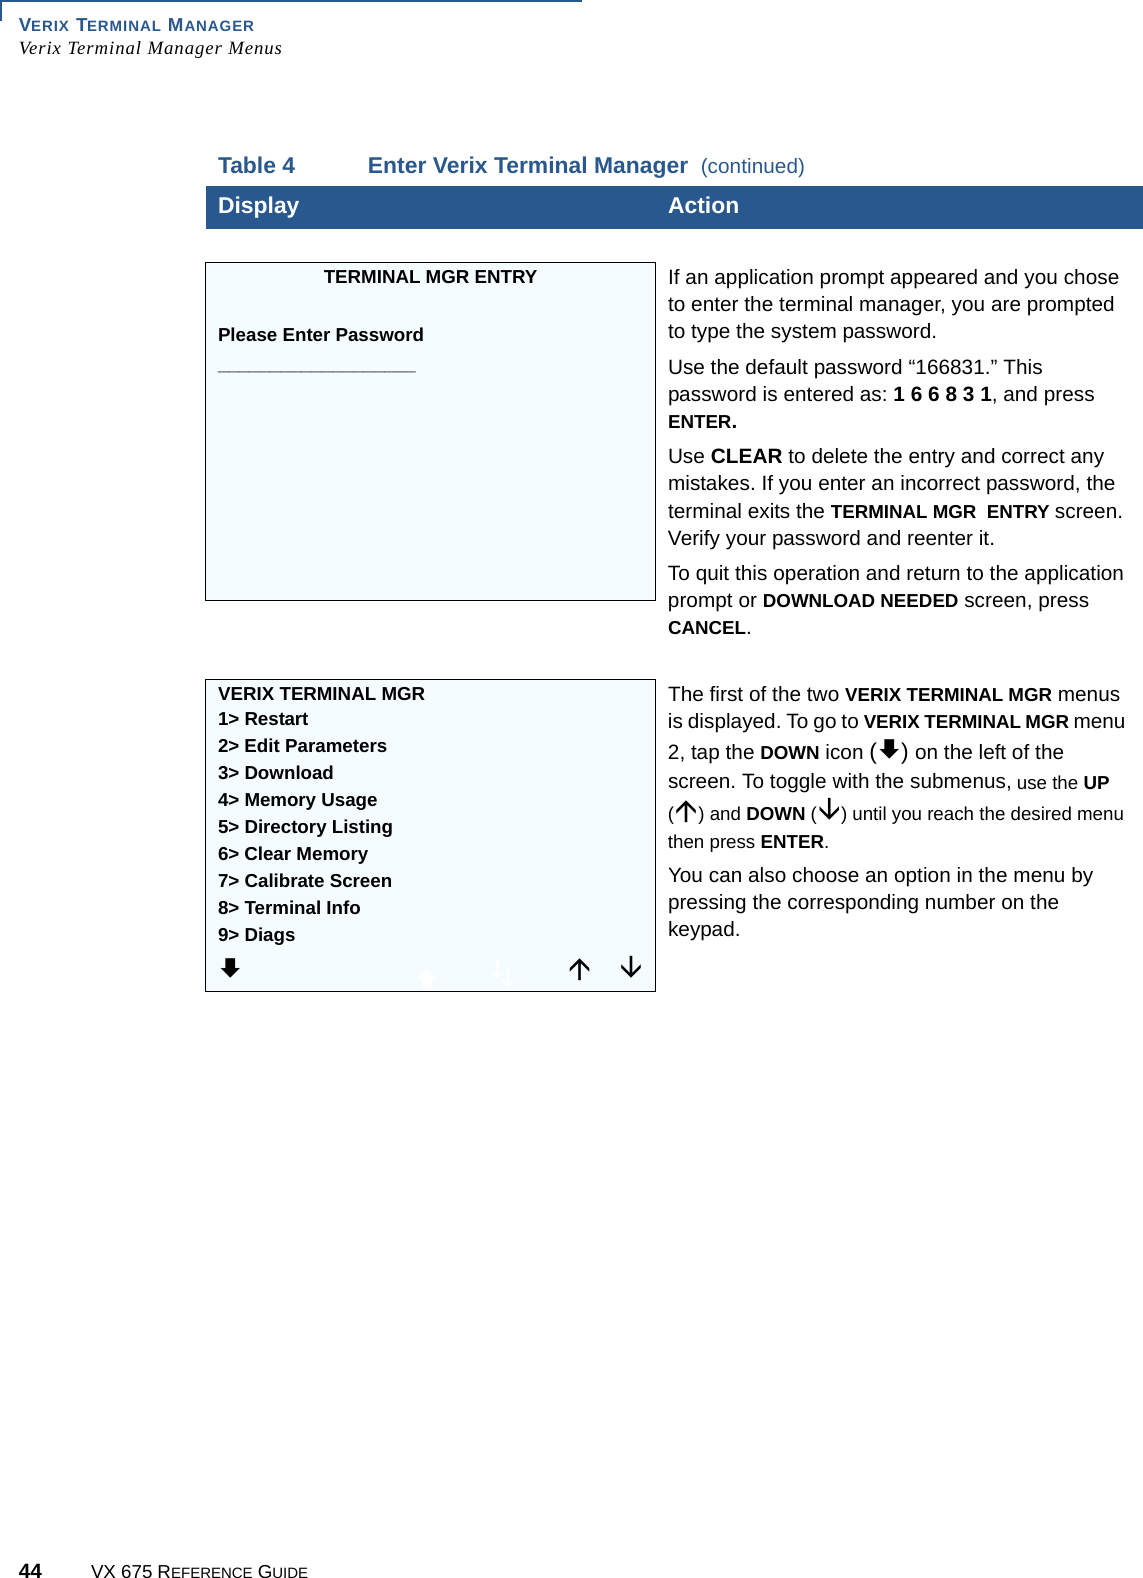
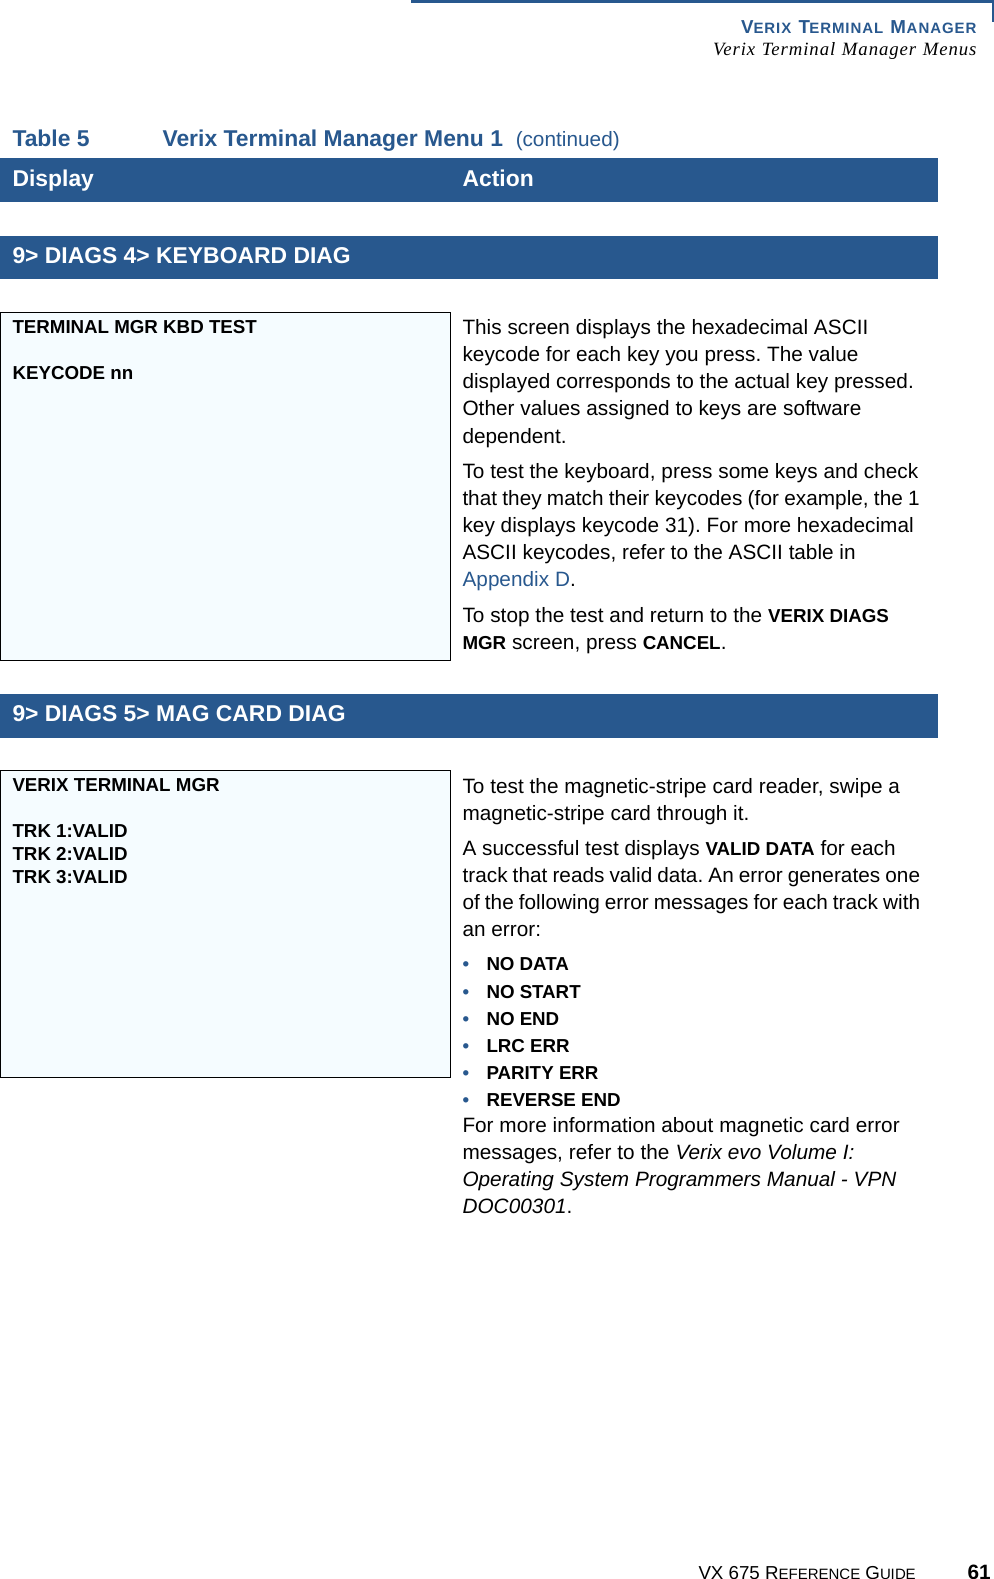
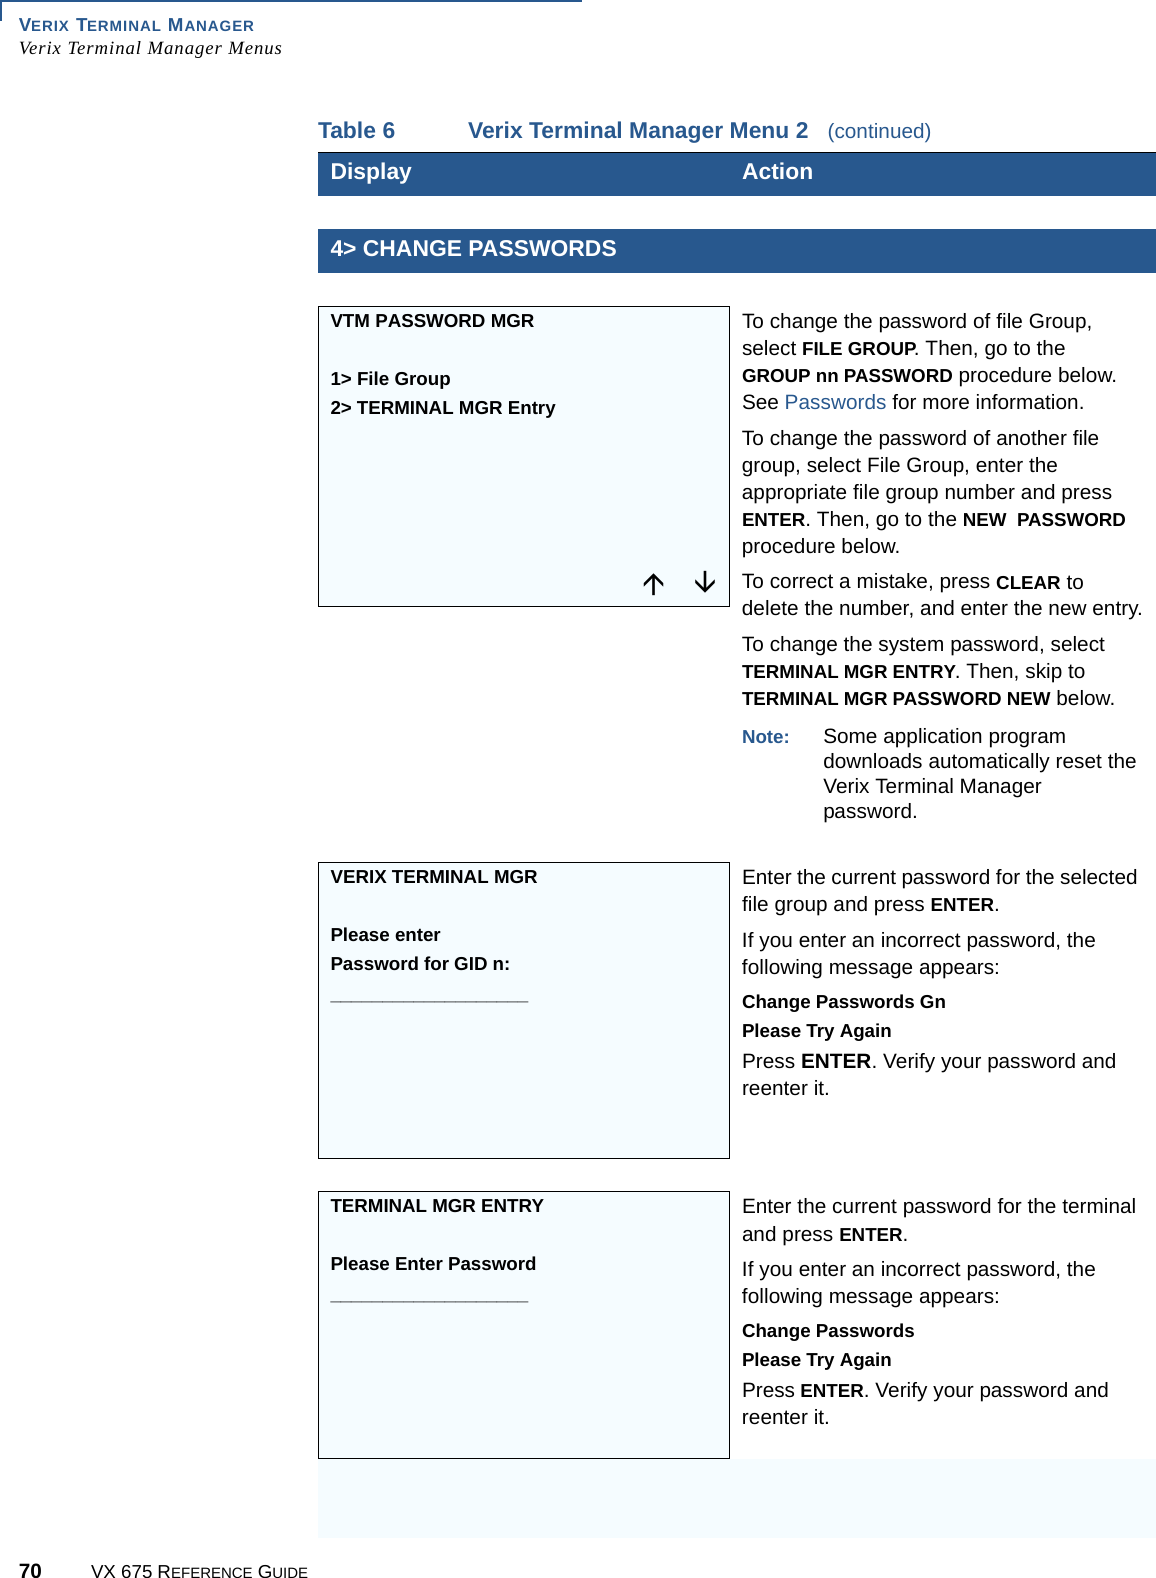
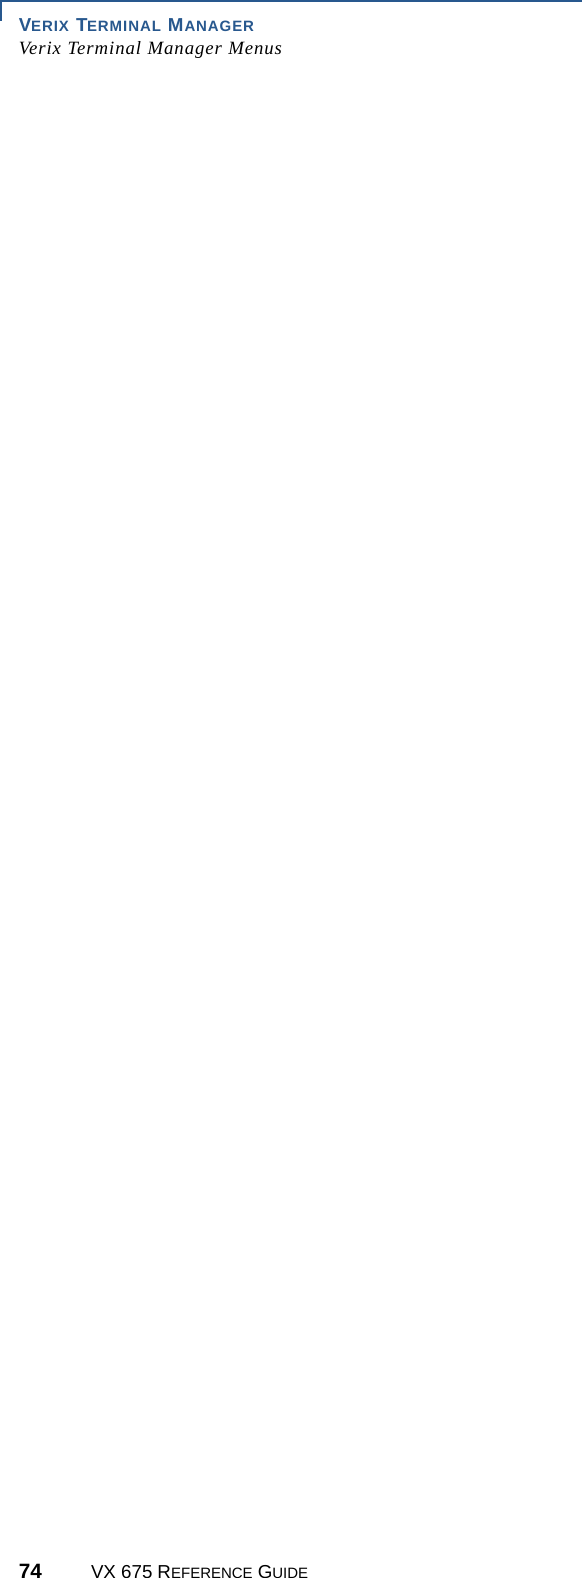
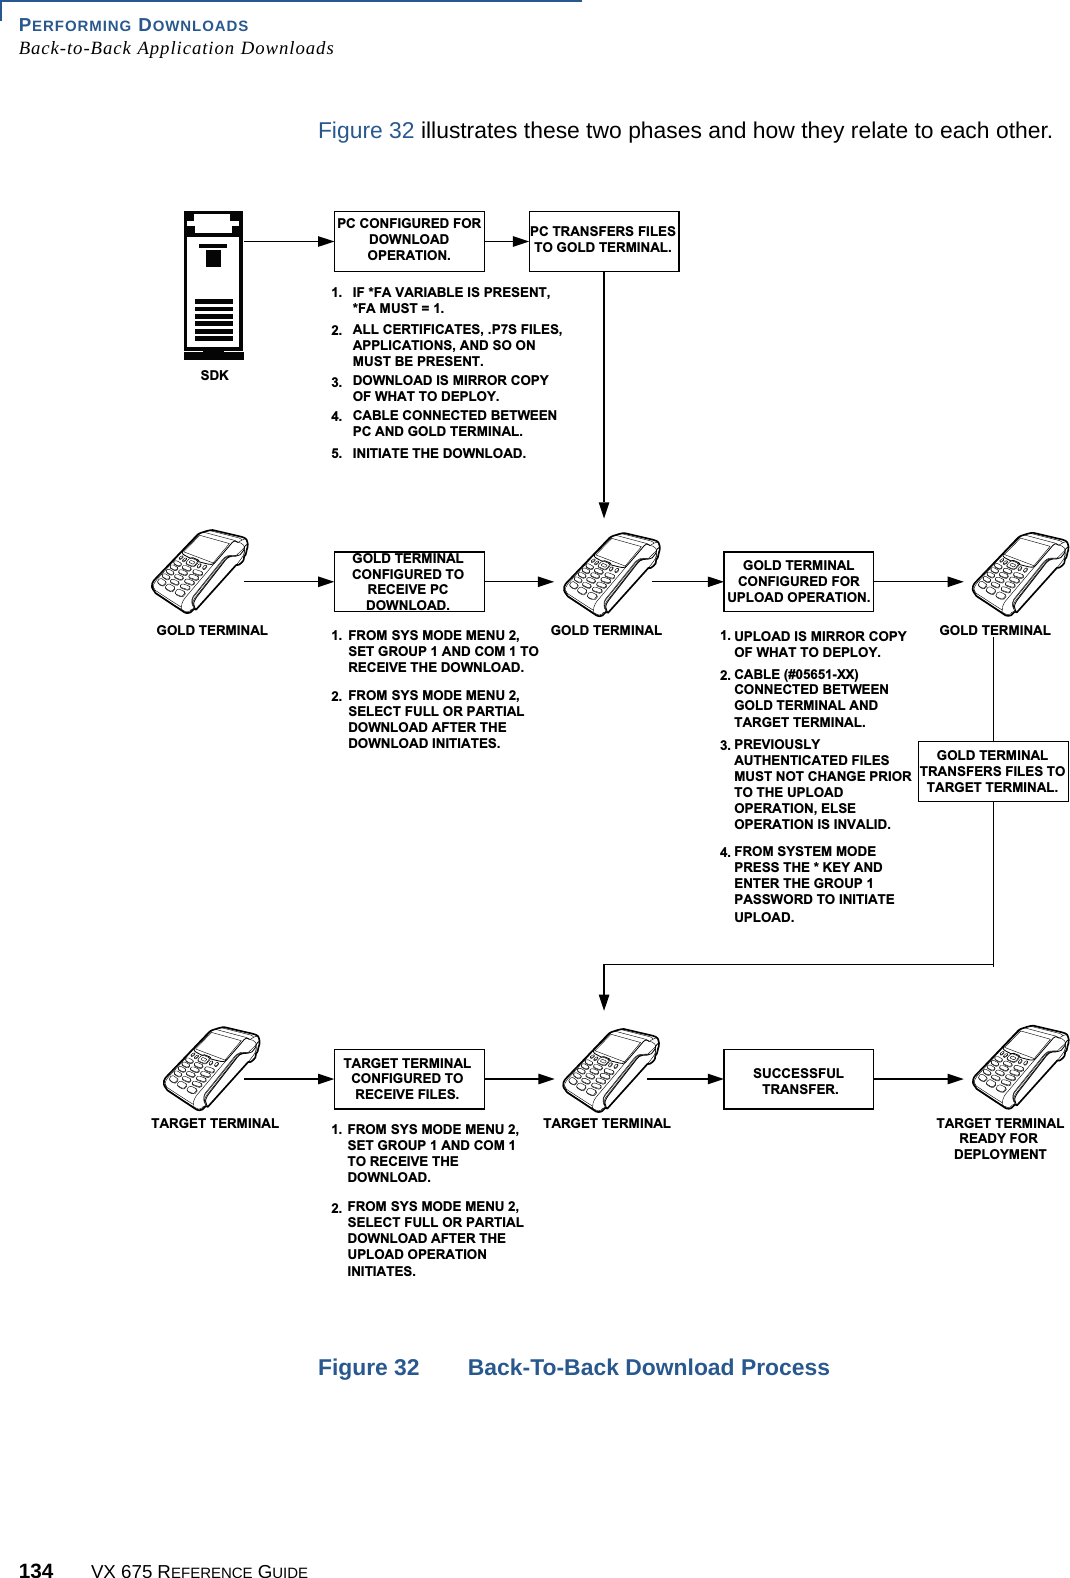
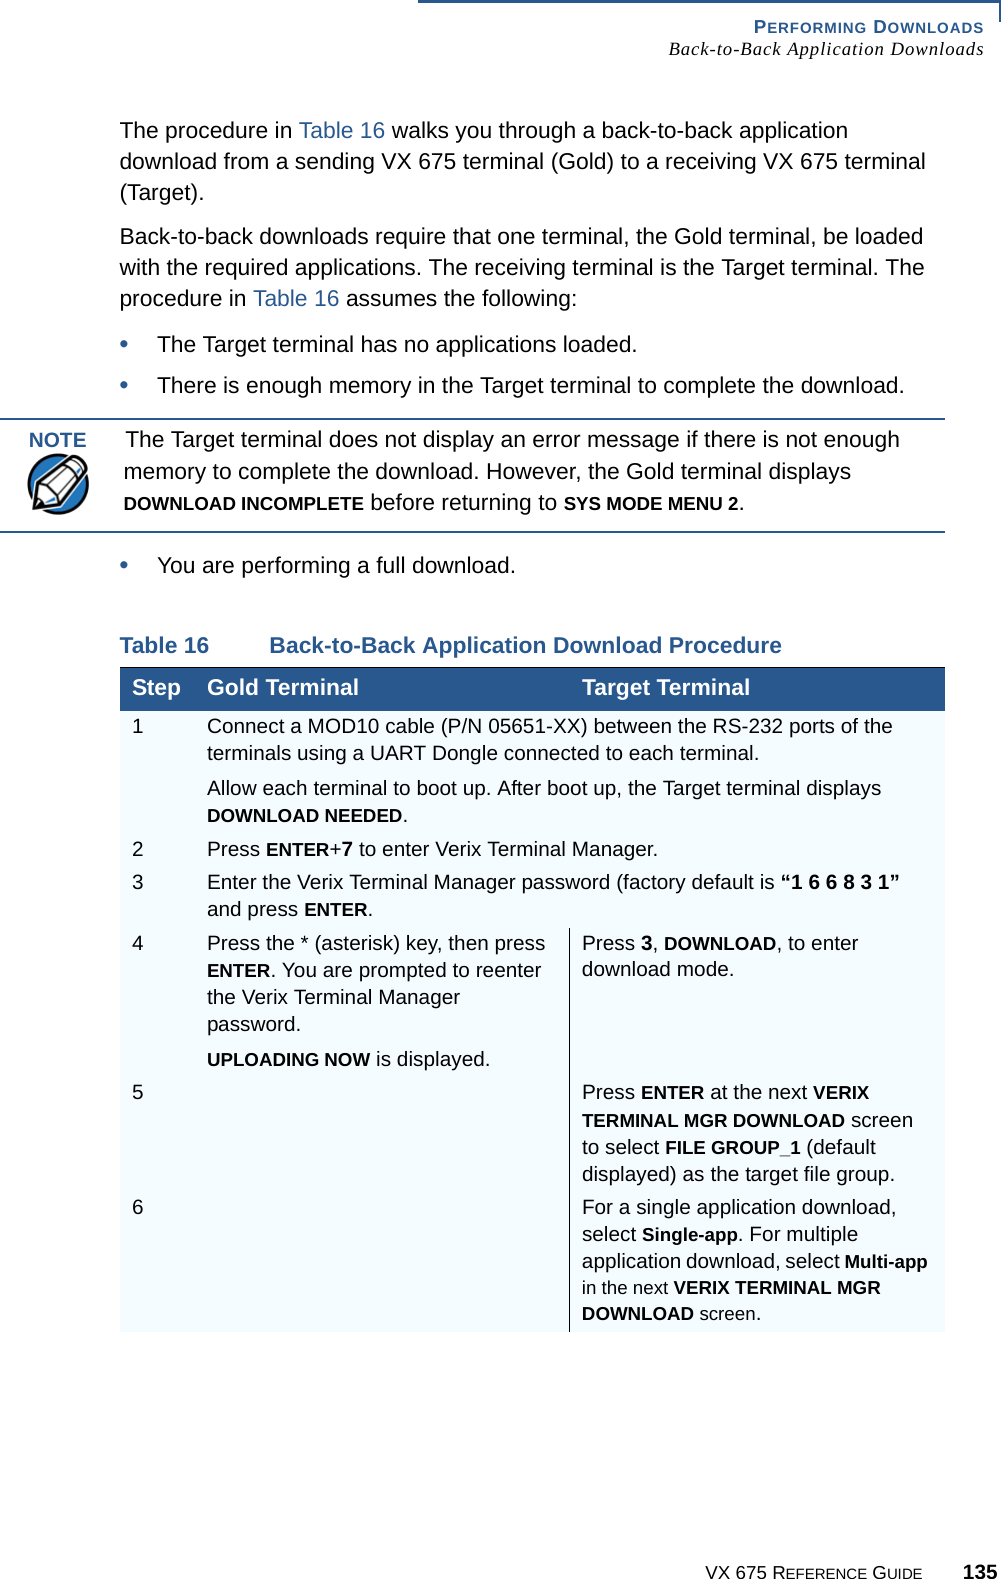
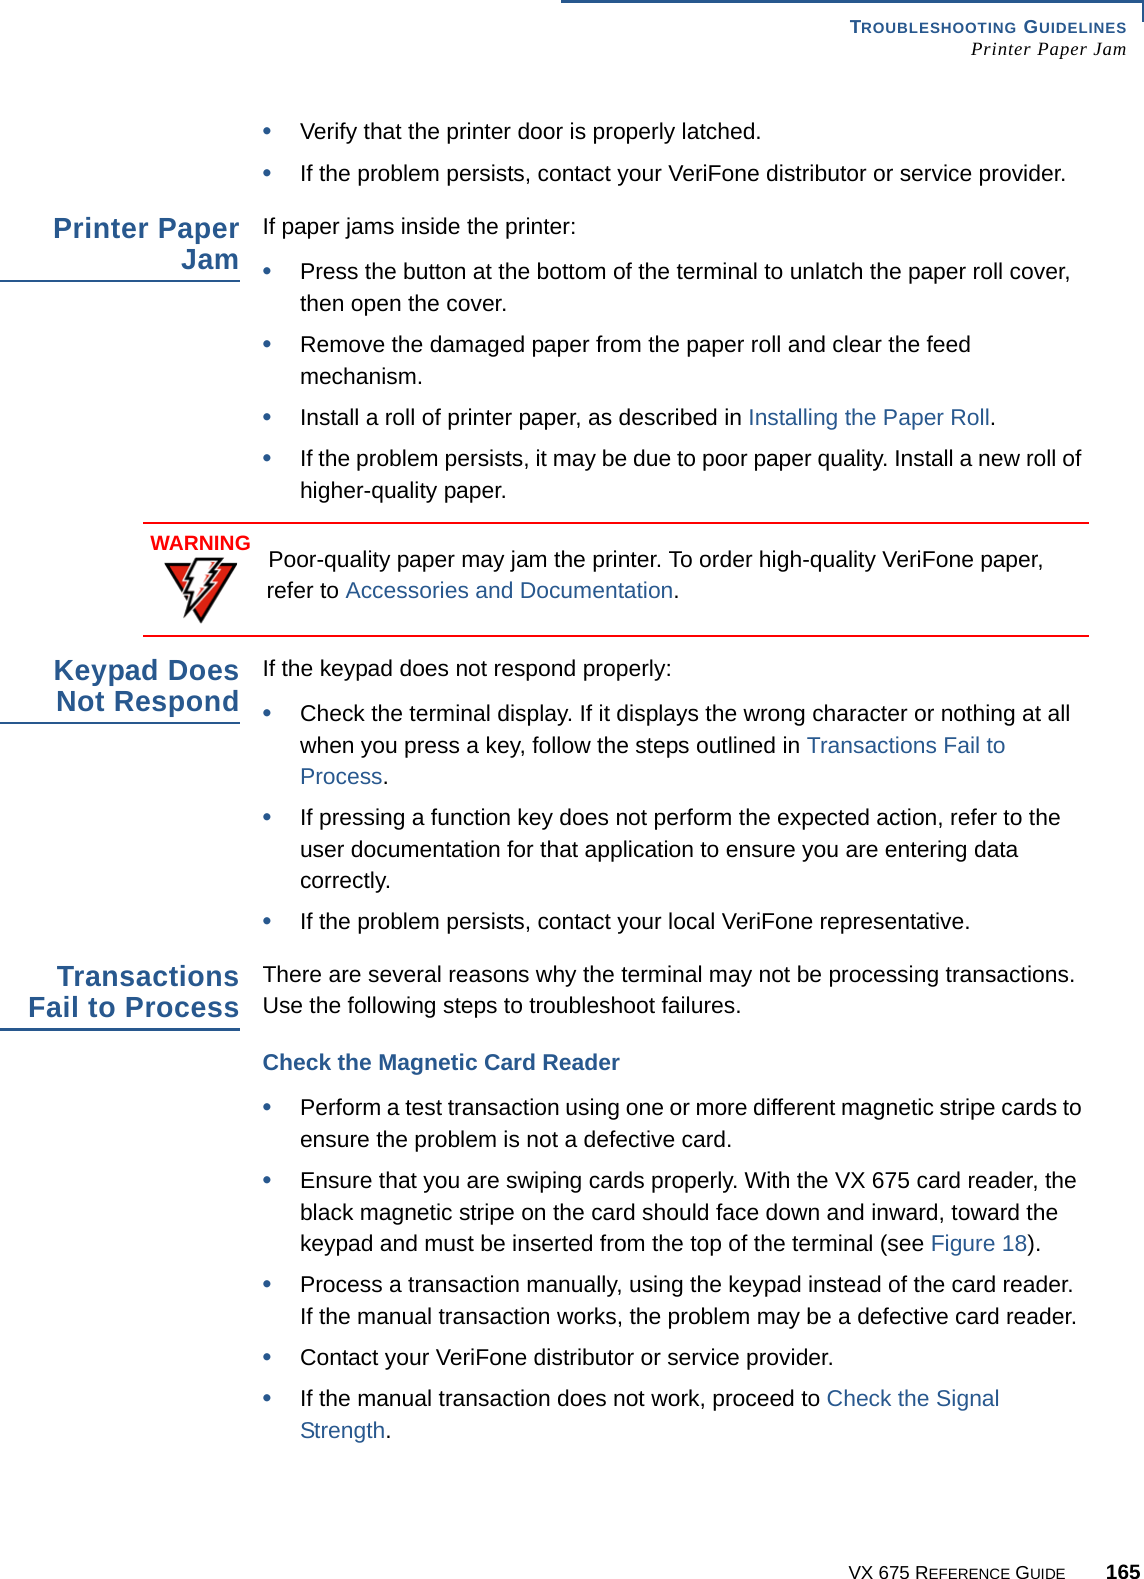
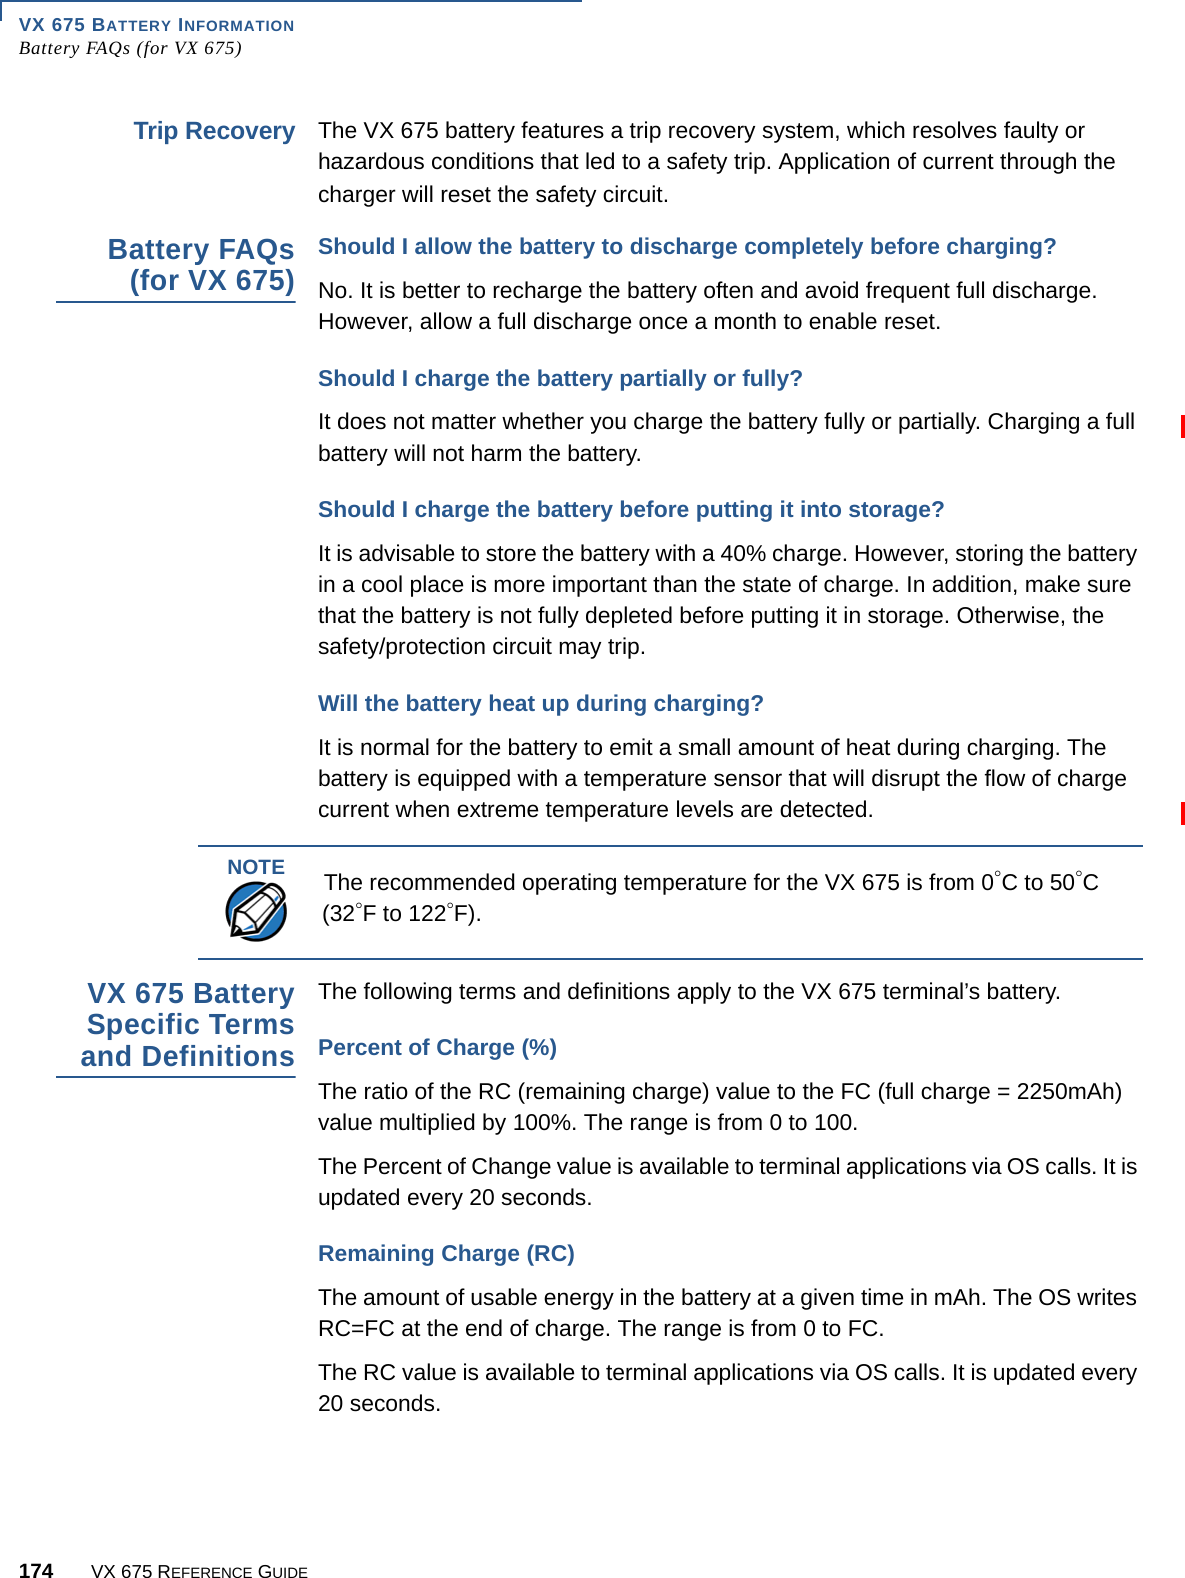
![PERFORMING DOWNLOADSBack-to-Back Application DownloadsVX 675 REFERENCE GUIDE 133The PC transfers files to the Gold terminal.Download Application Files to Target Terminal1Configure a Gold terminal for an application download operation to a deployment terminal:•If the *FA variable (if present in the application) is set to 0, you can reset it to 1. For more information on the *FA variable, refer to the Verix eVo Volume I: Operating System Programmers Manual (VPN DOC00301).•Ensure that the download is exactly what you want your Target terminals to receive.•Ensure that previously authenticated files are not changed prior to the file transfer operation.2Configure the Target terminal to receive an application download from the Gold terminal. From VERIX TERMINAL MGR MENU 1, set Group 1 and COM1 as the port to receive the file transfer.3Connect a cable (VeriFone part number 05651-xx) between the RS-232 serial ports of the Gold and Target terminals using a UART Dongle connected to each terminal.4From any Verix Terminal Manager menu on the Gold terminal, press [*] and enter the GID1 password to initiate the file transfer.5From VERIX TERMINAL MGR MENU 1 on the deployment terminal, select either a full or a partial download. The Gold terminal begins to transfer files to the Target terminal.](https://usermanual.wiki/Verifone/VX675WCDMA/User-Guide-2103601-Page-133.png)
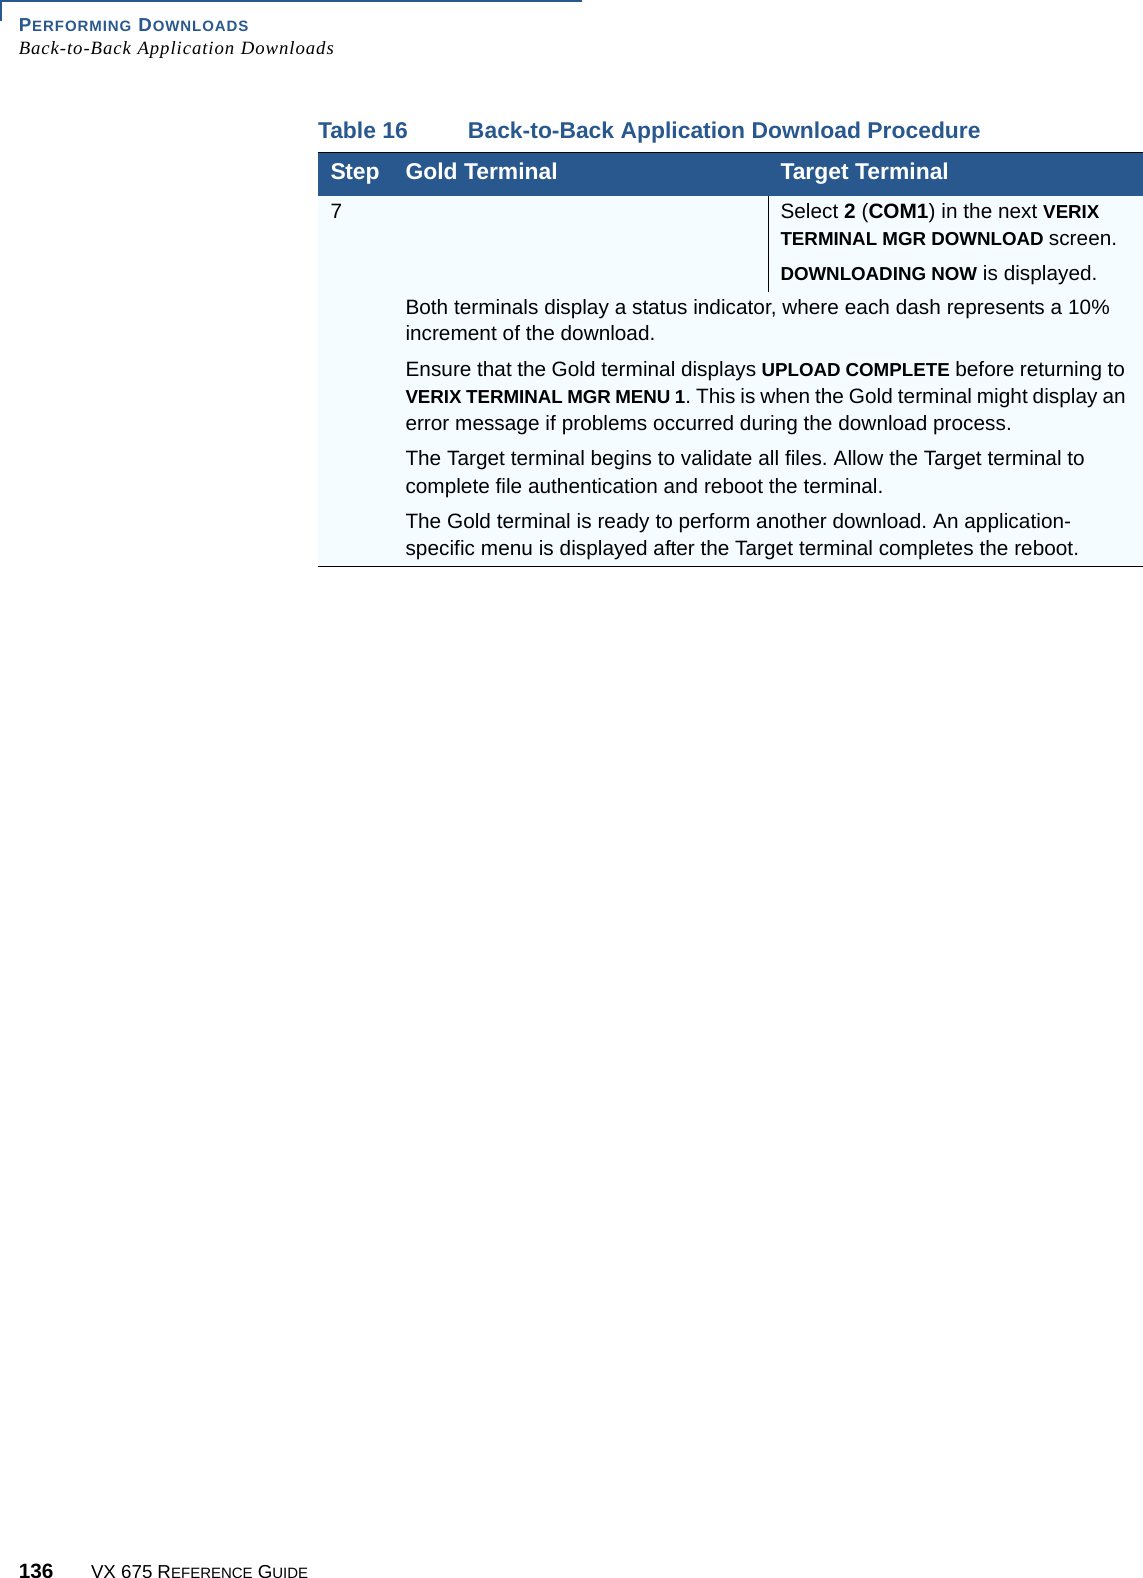


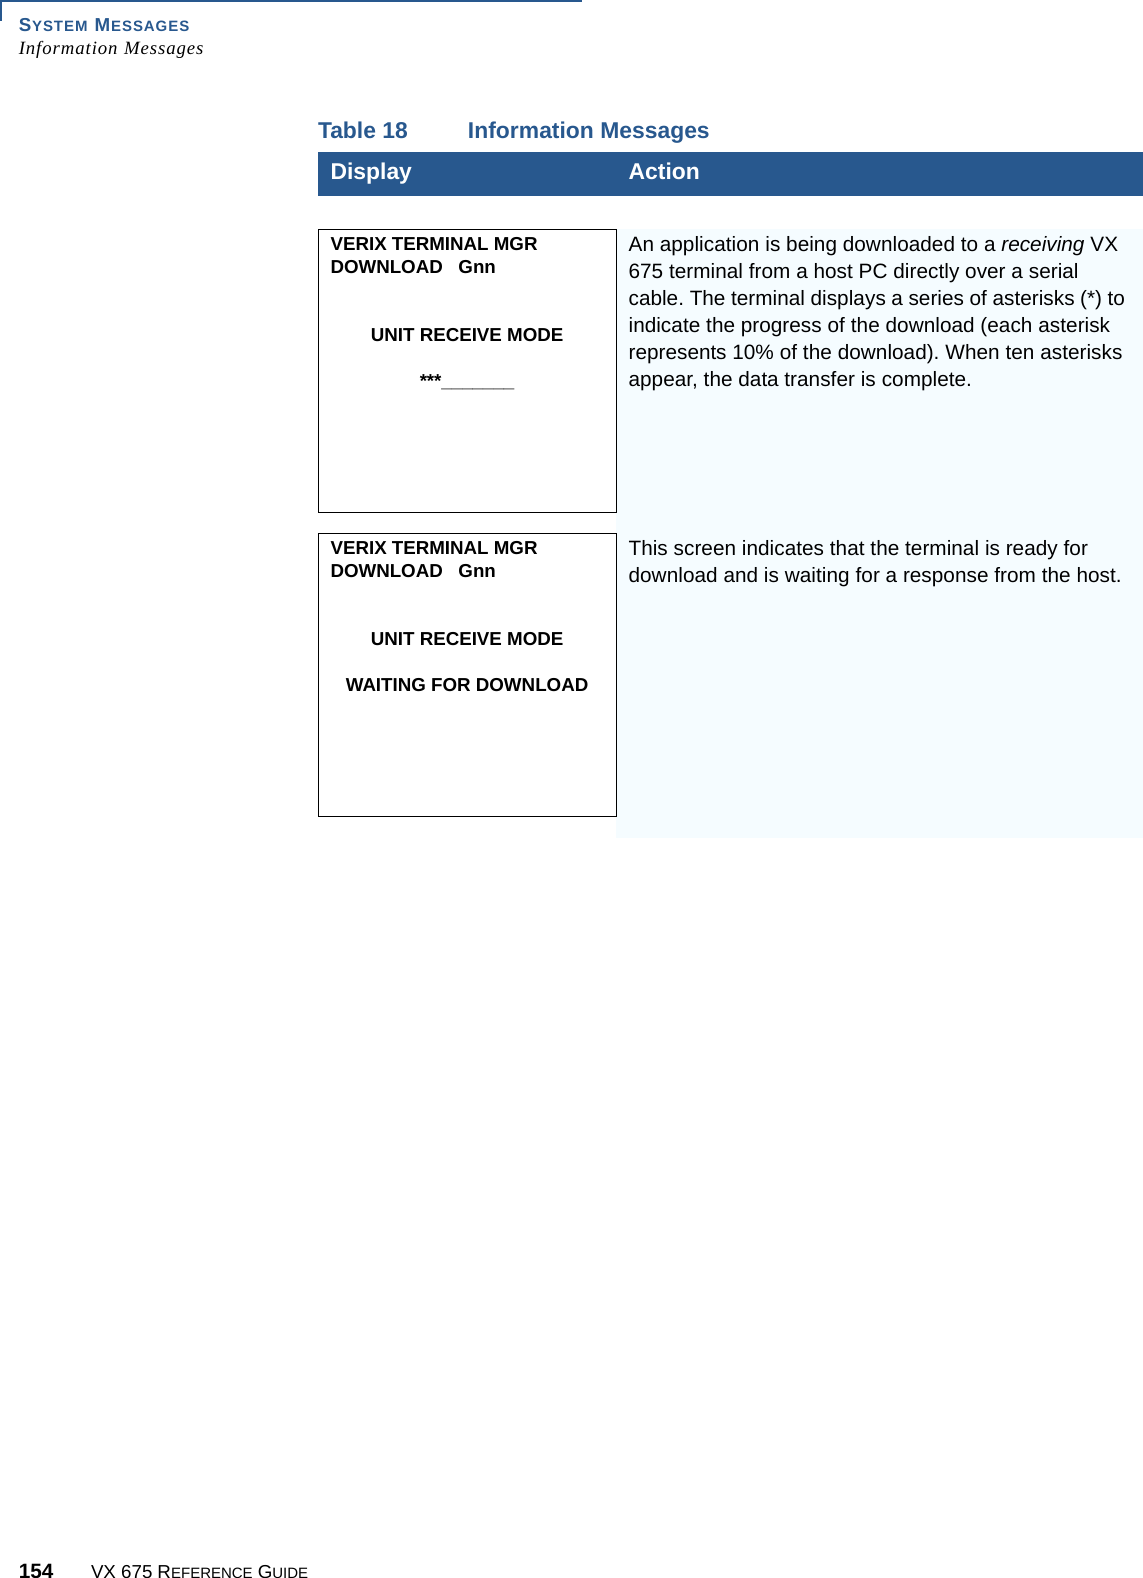
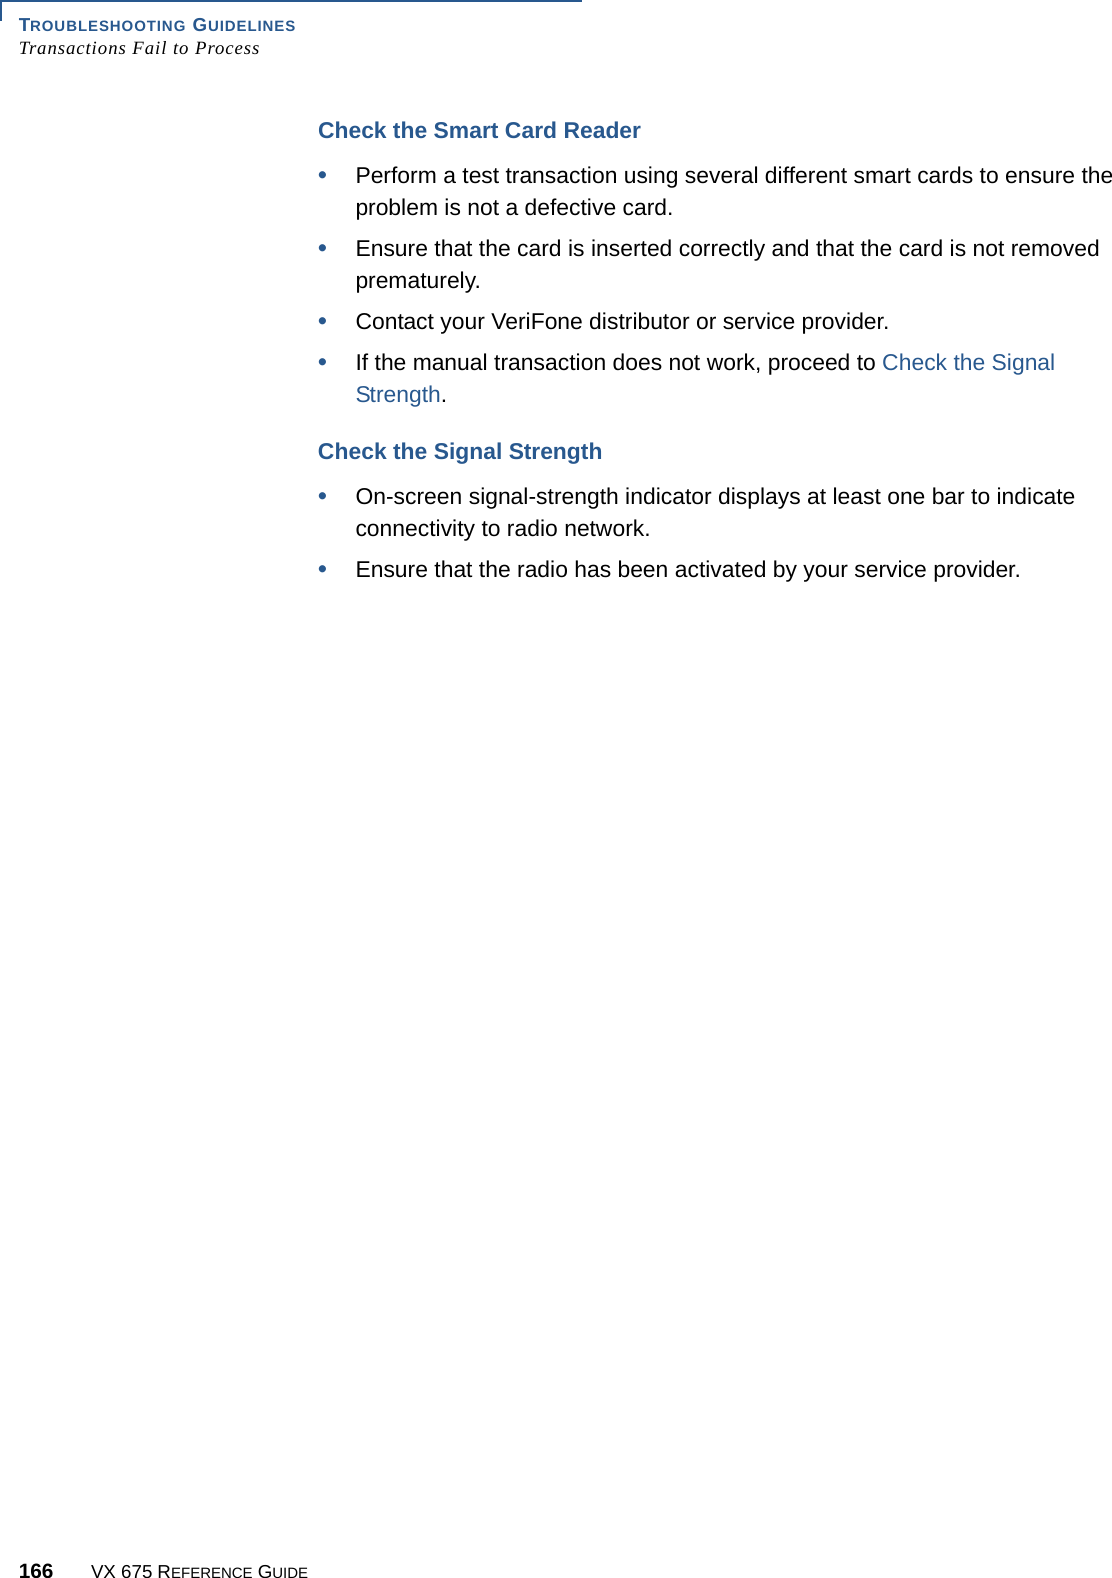
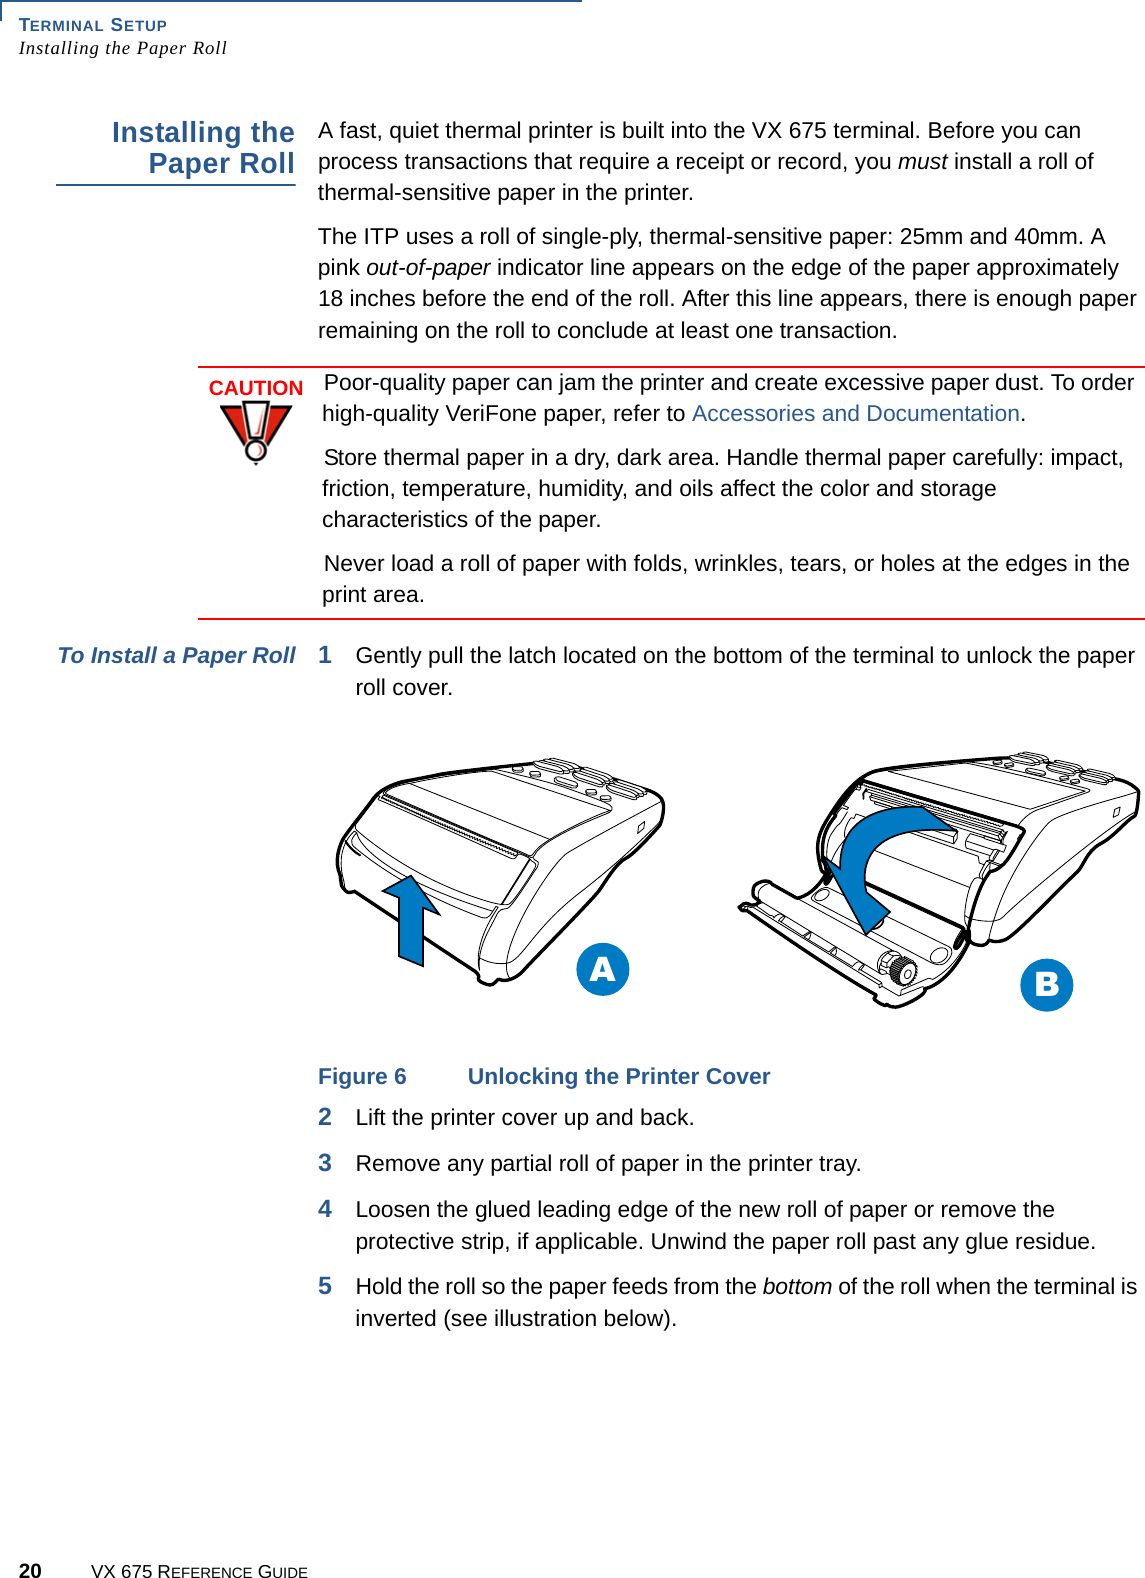
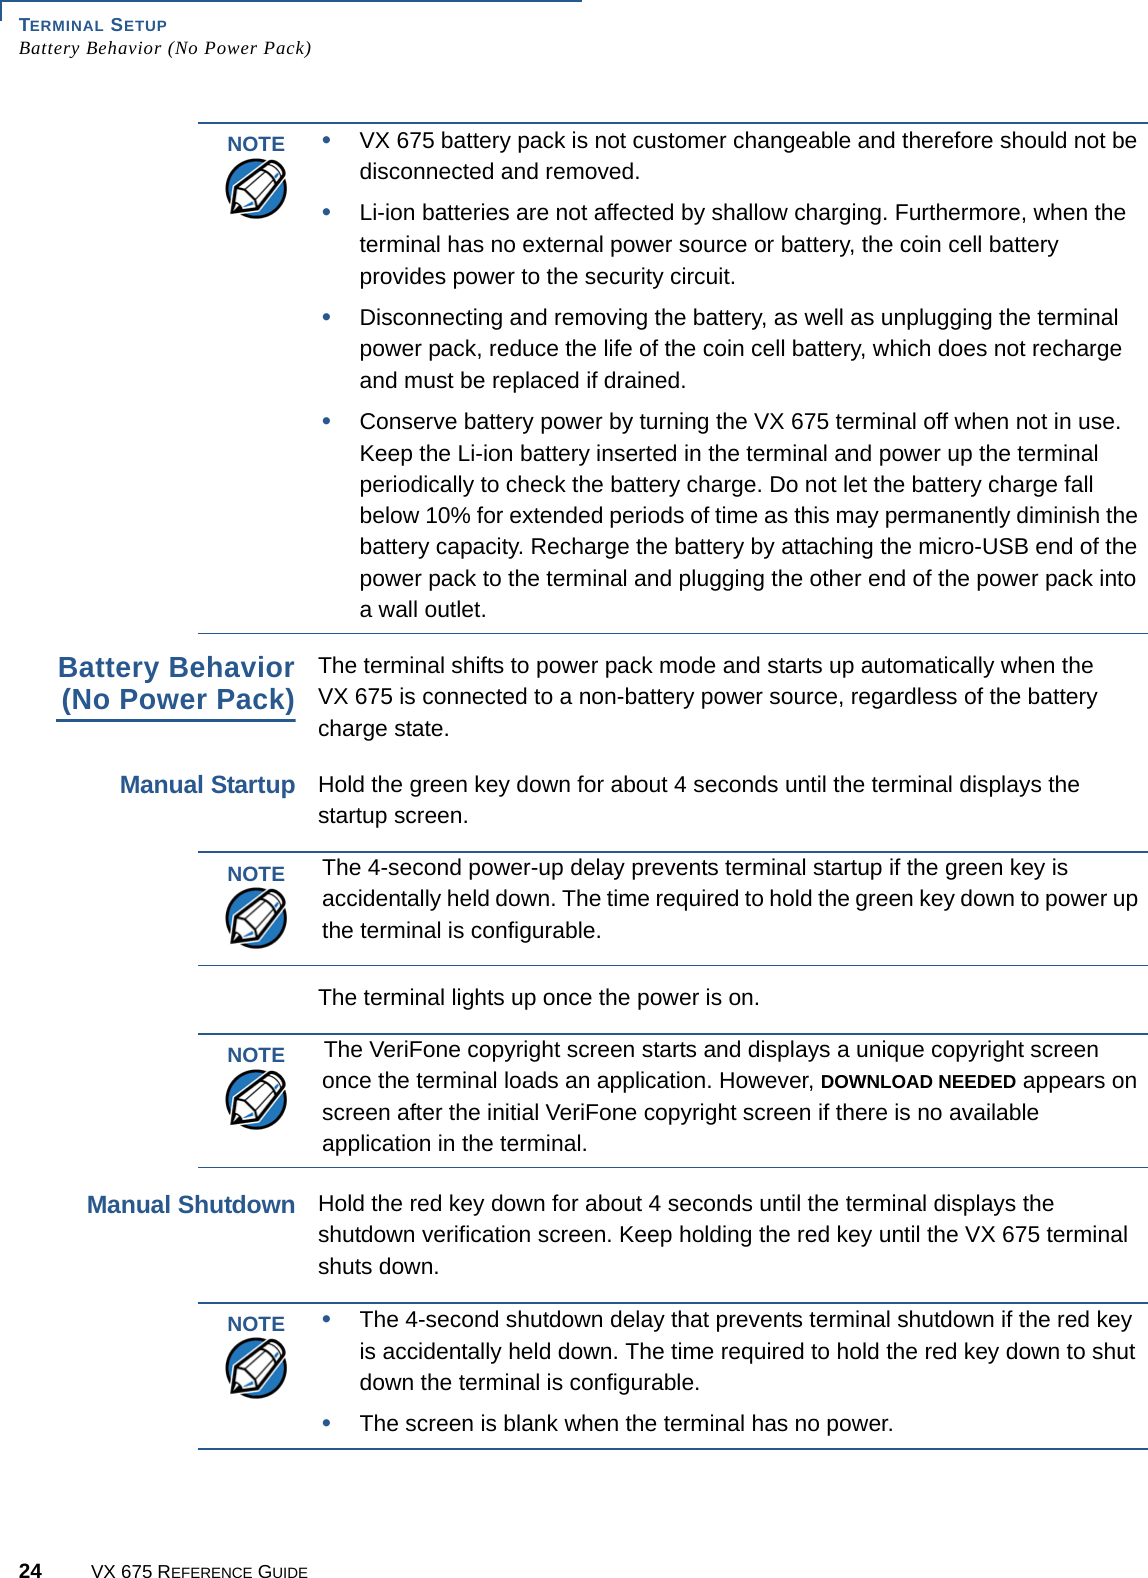
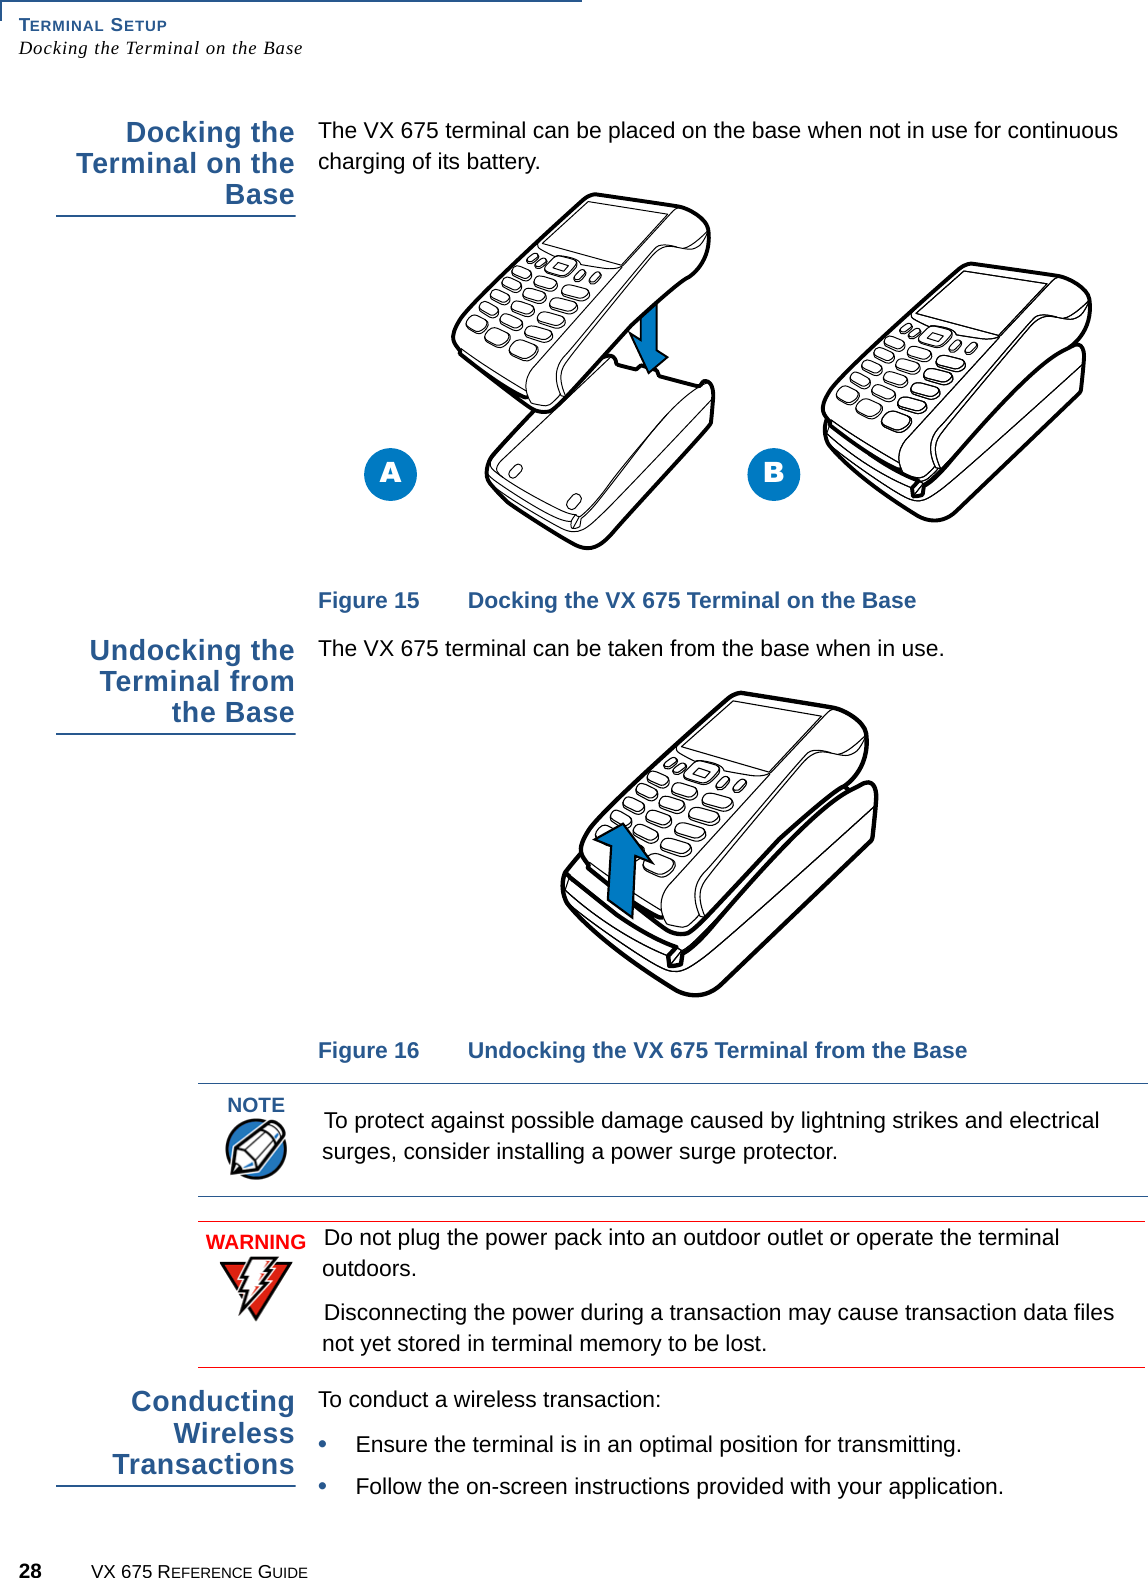
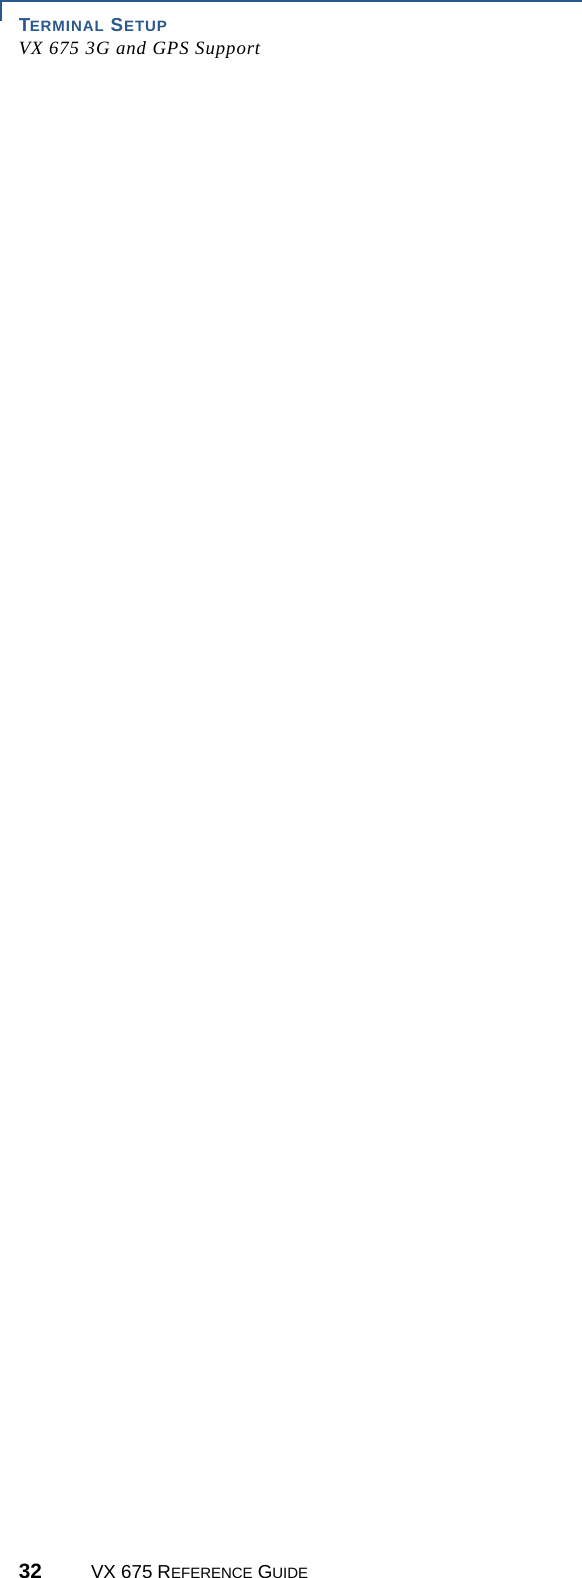
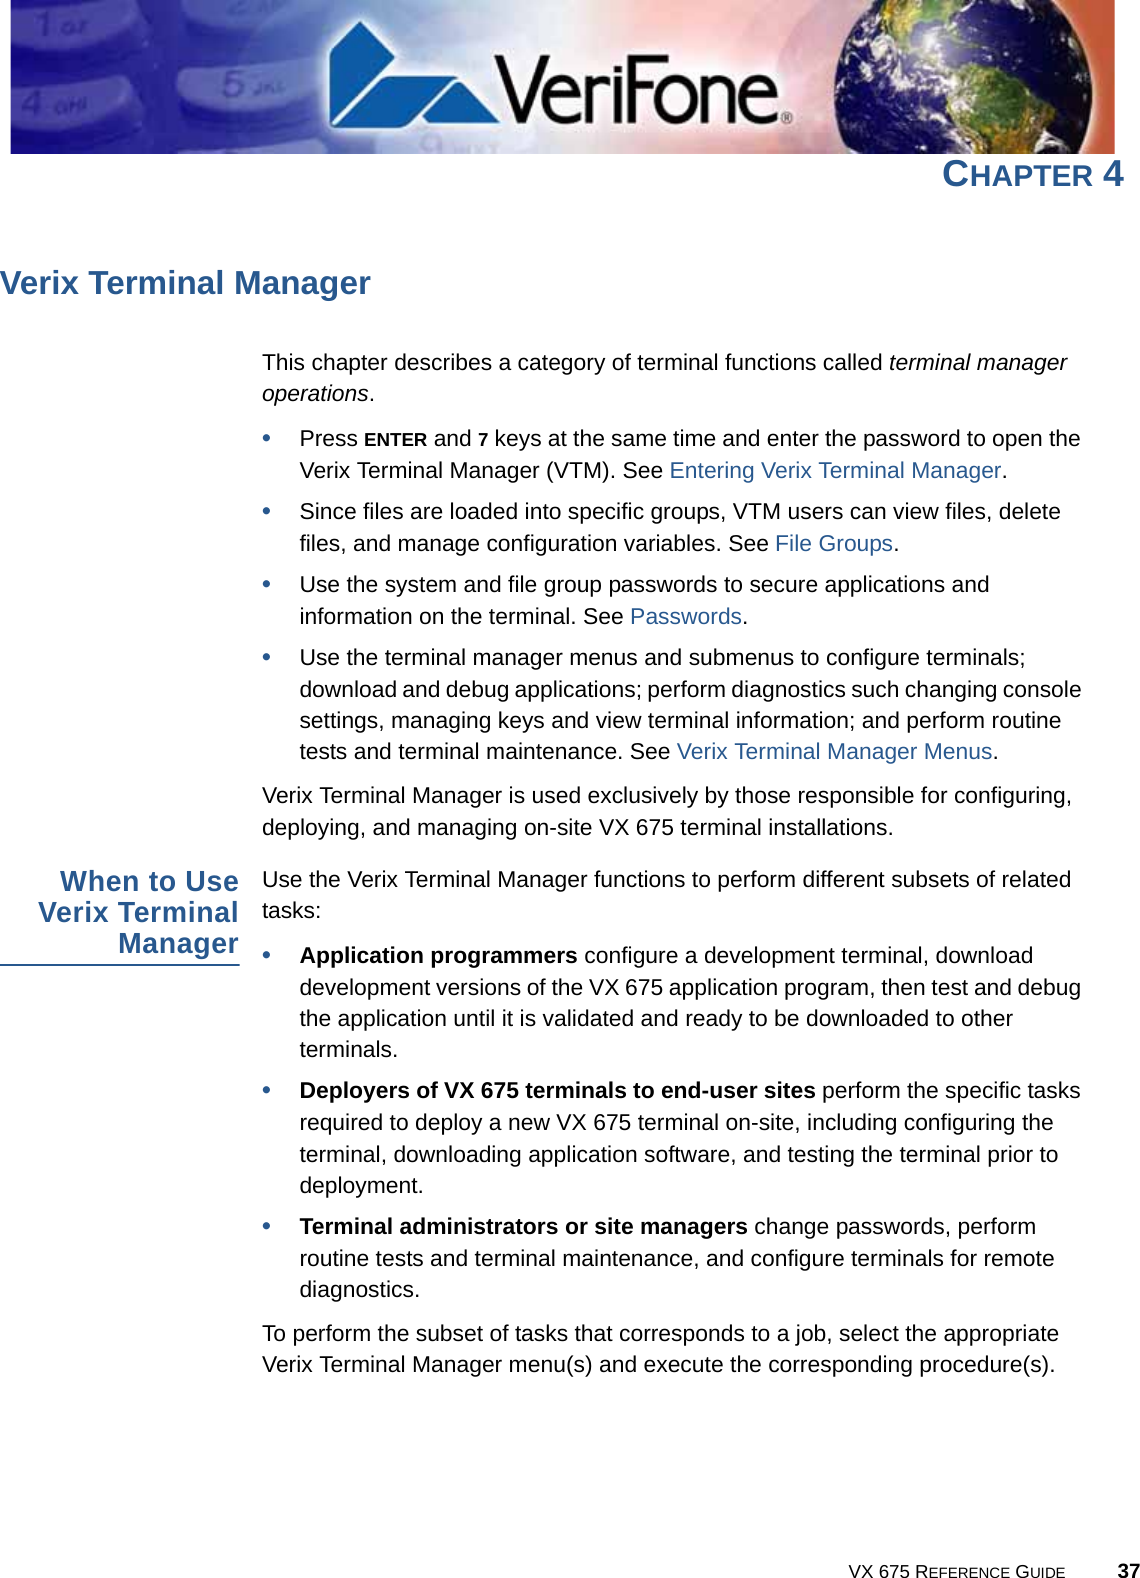
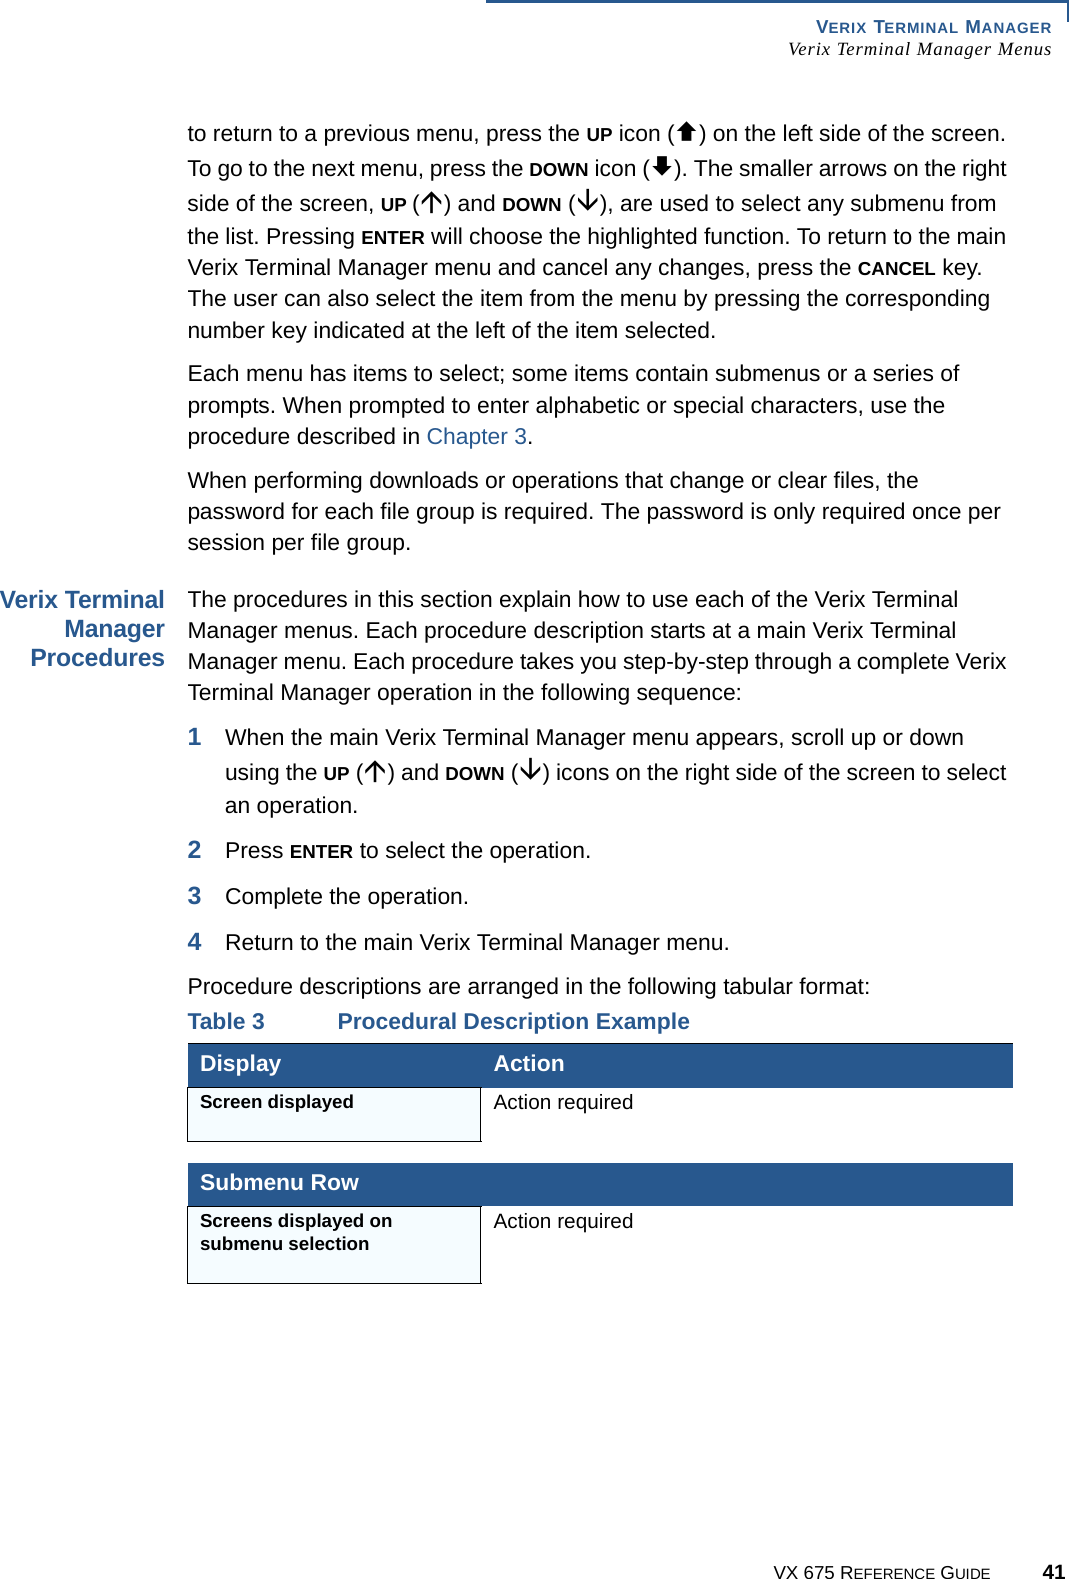
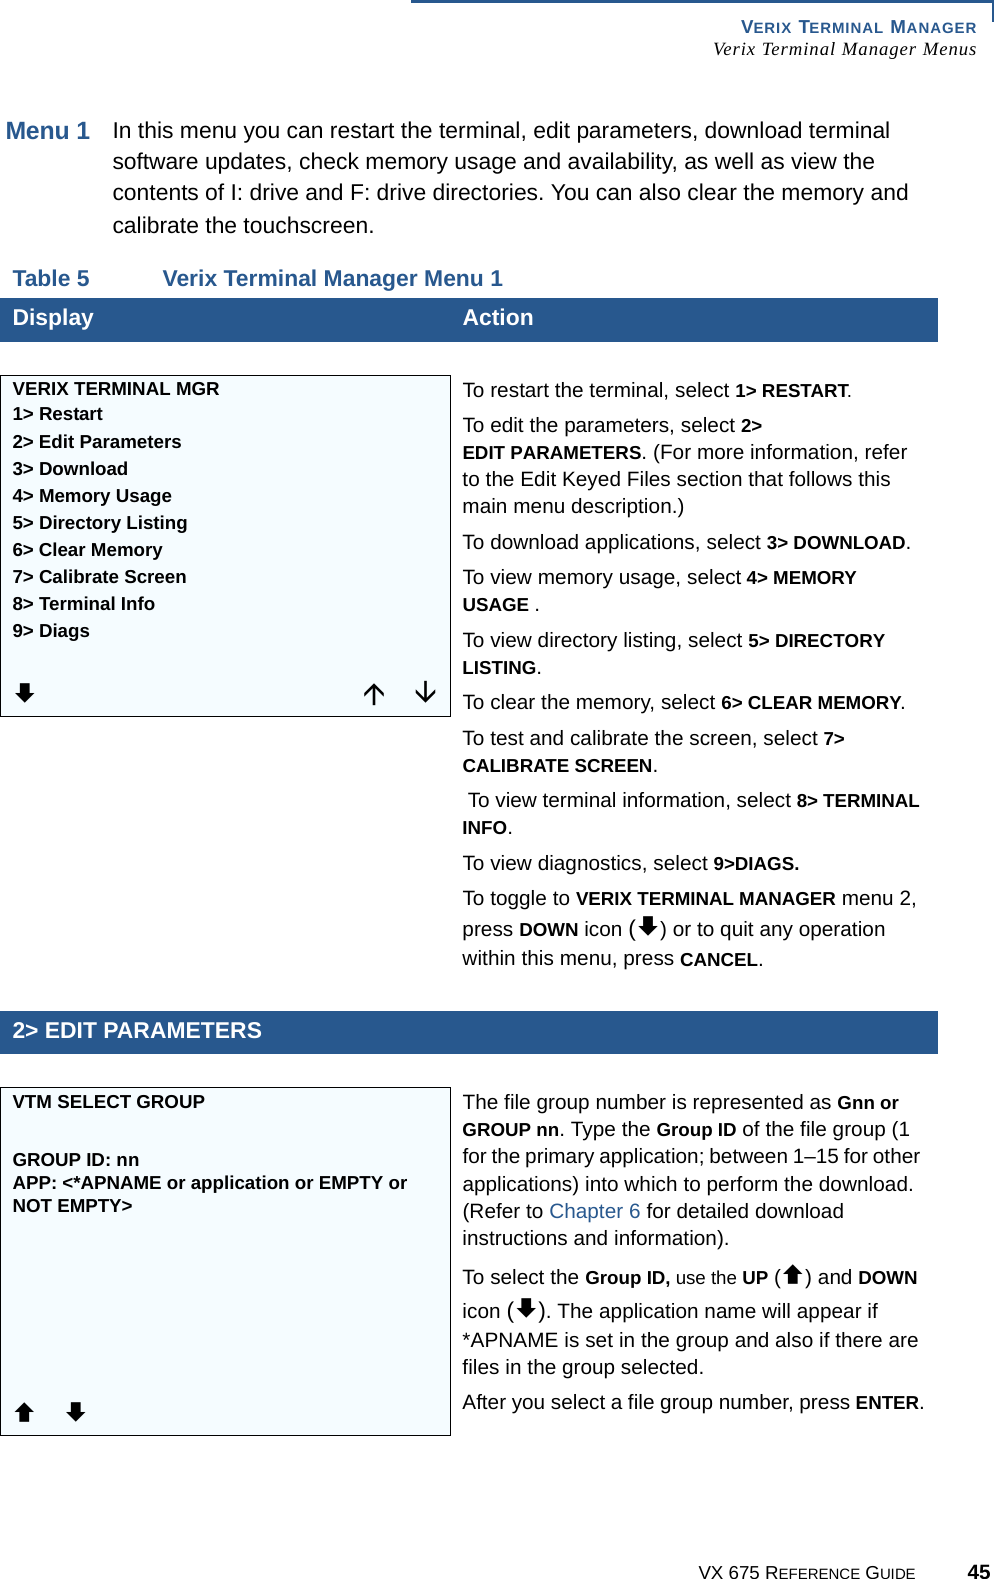
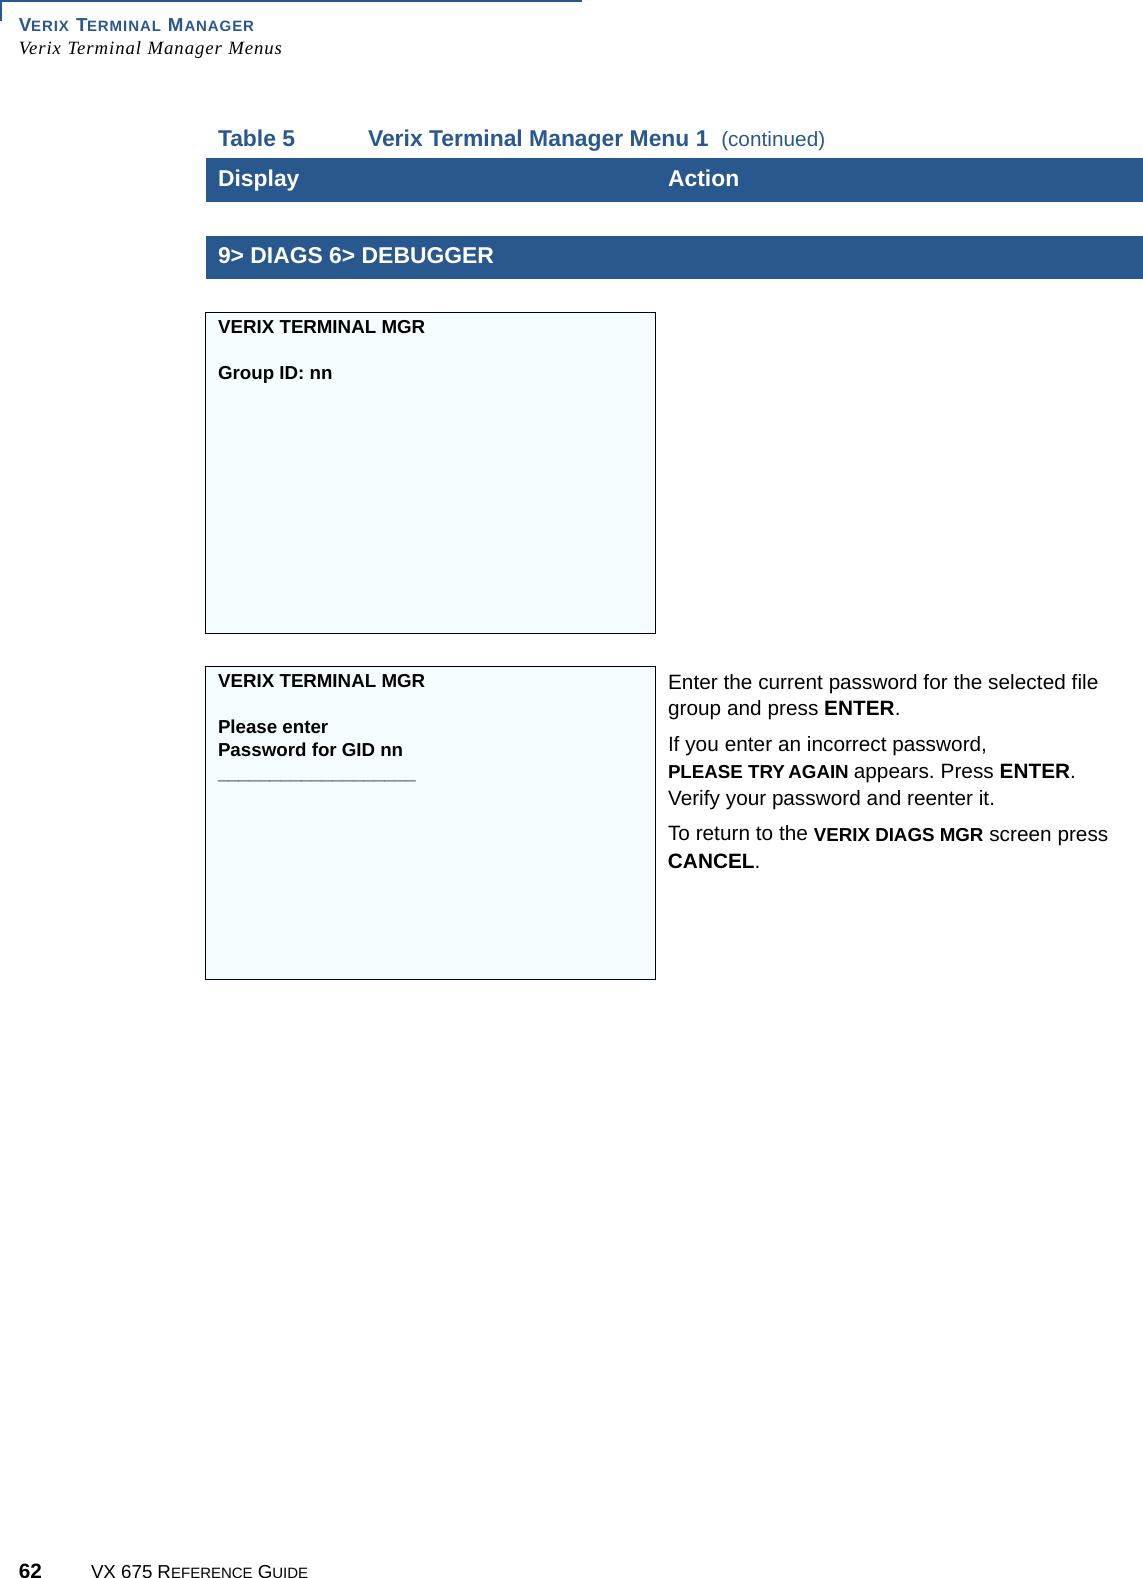
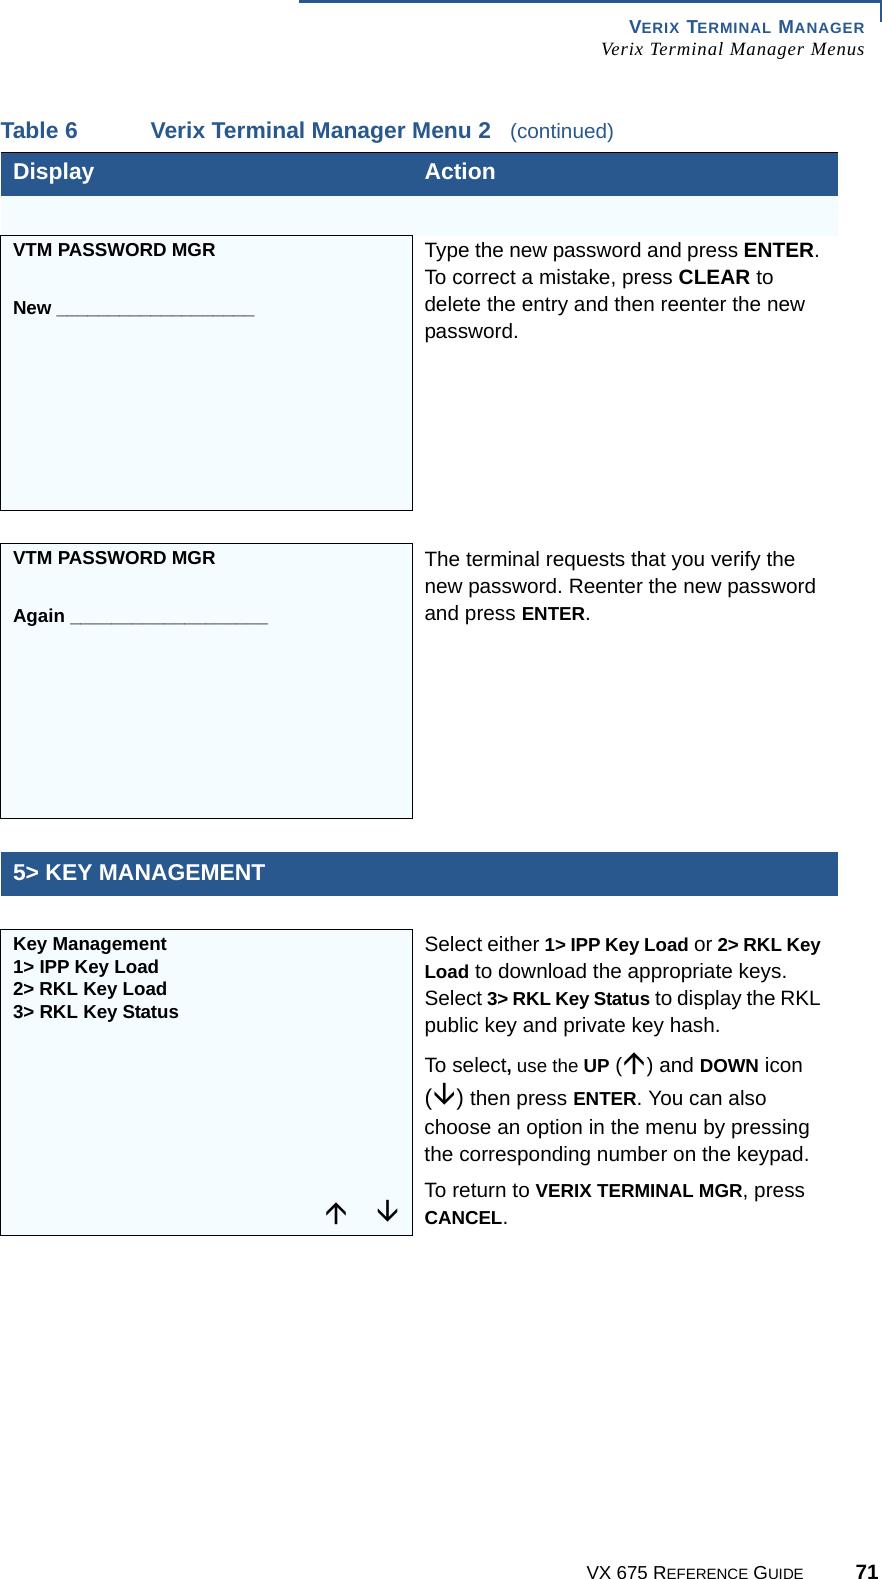
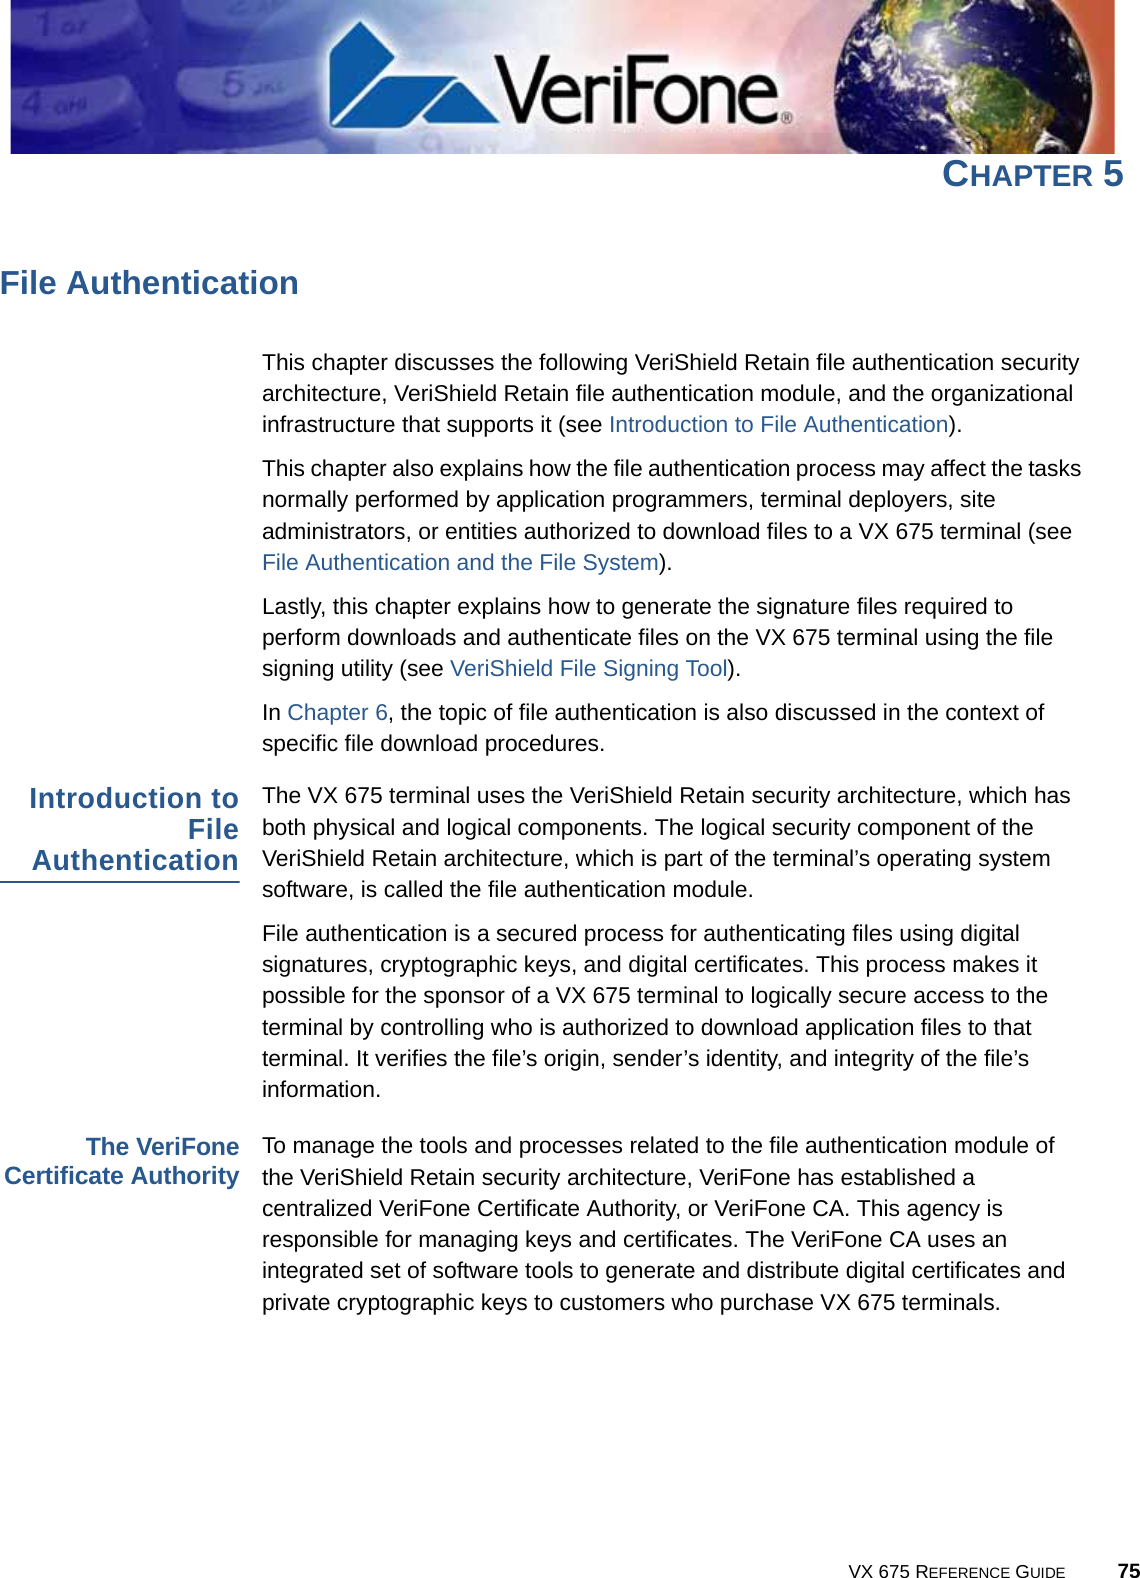
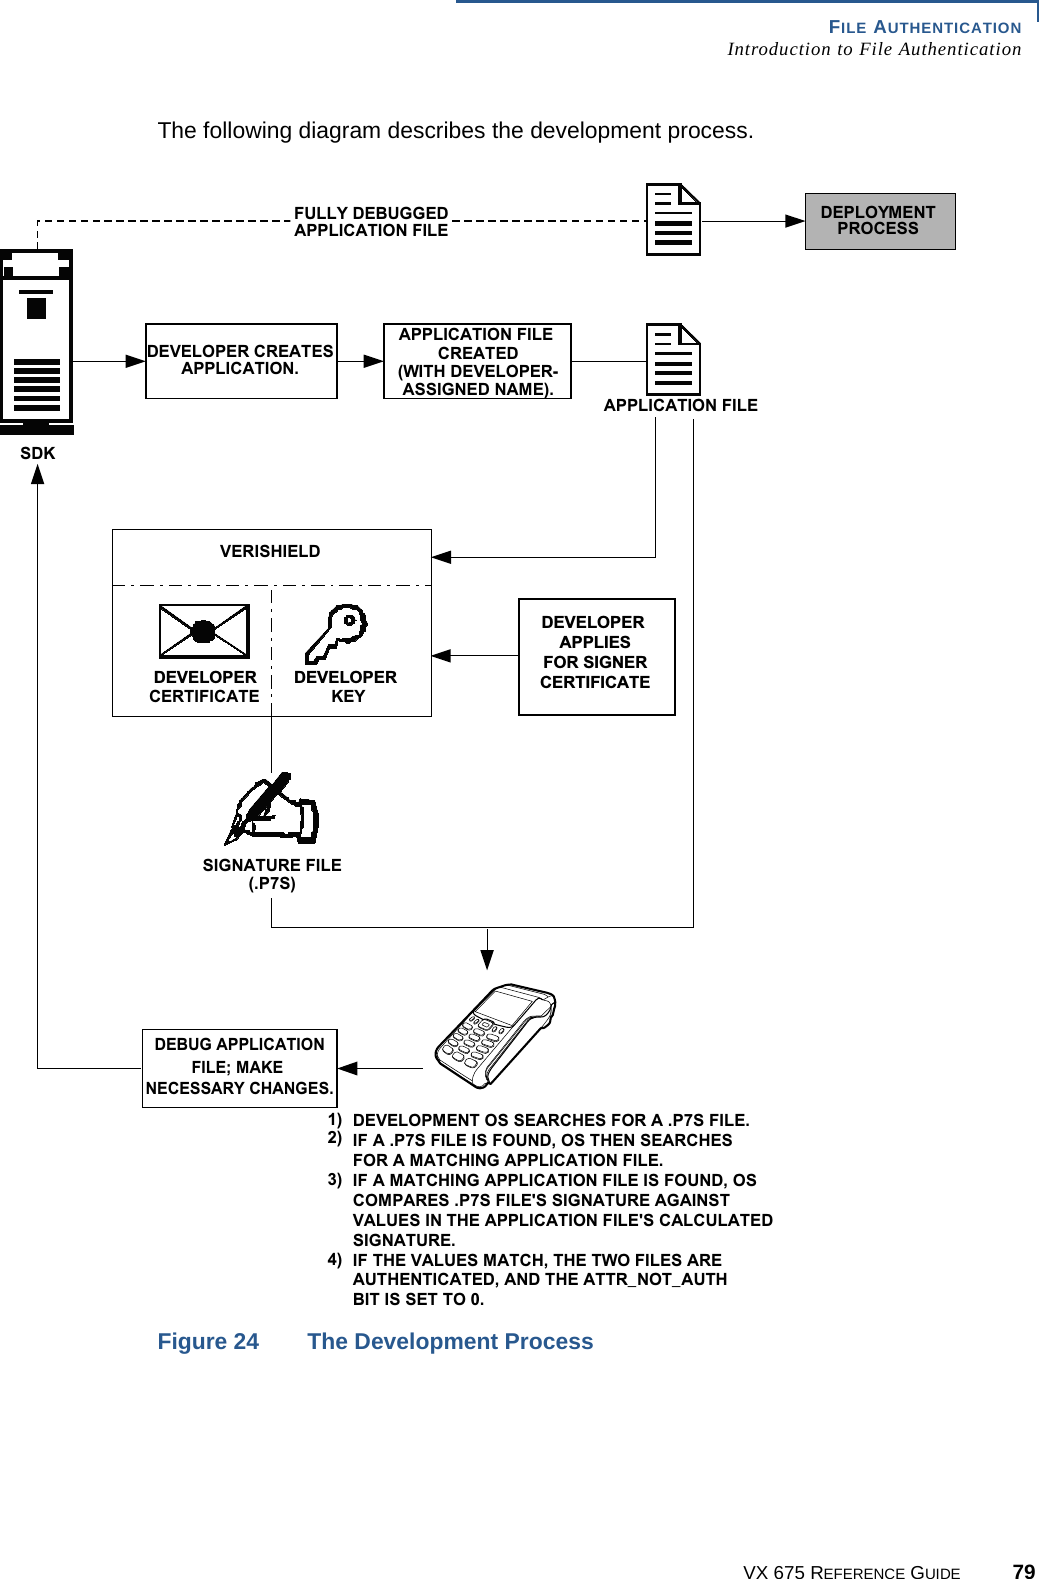
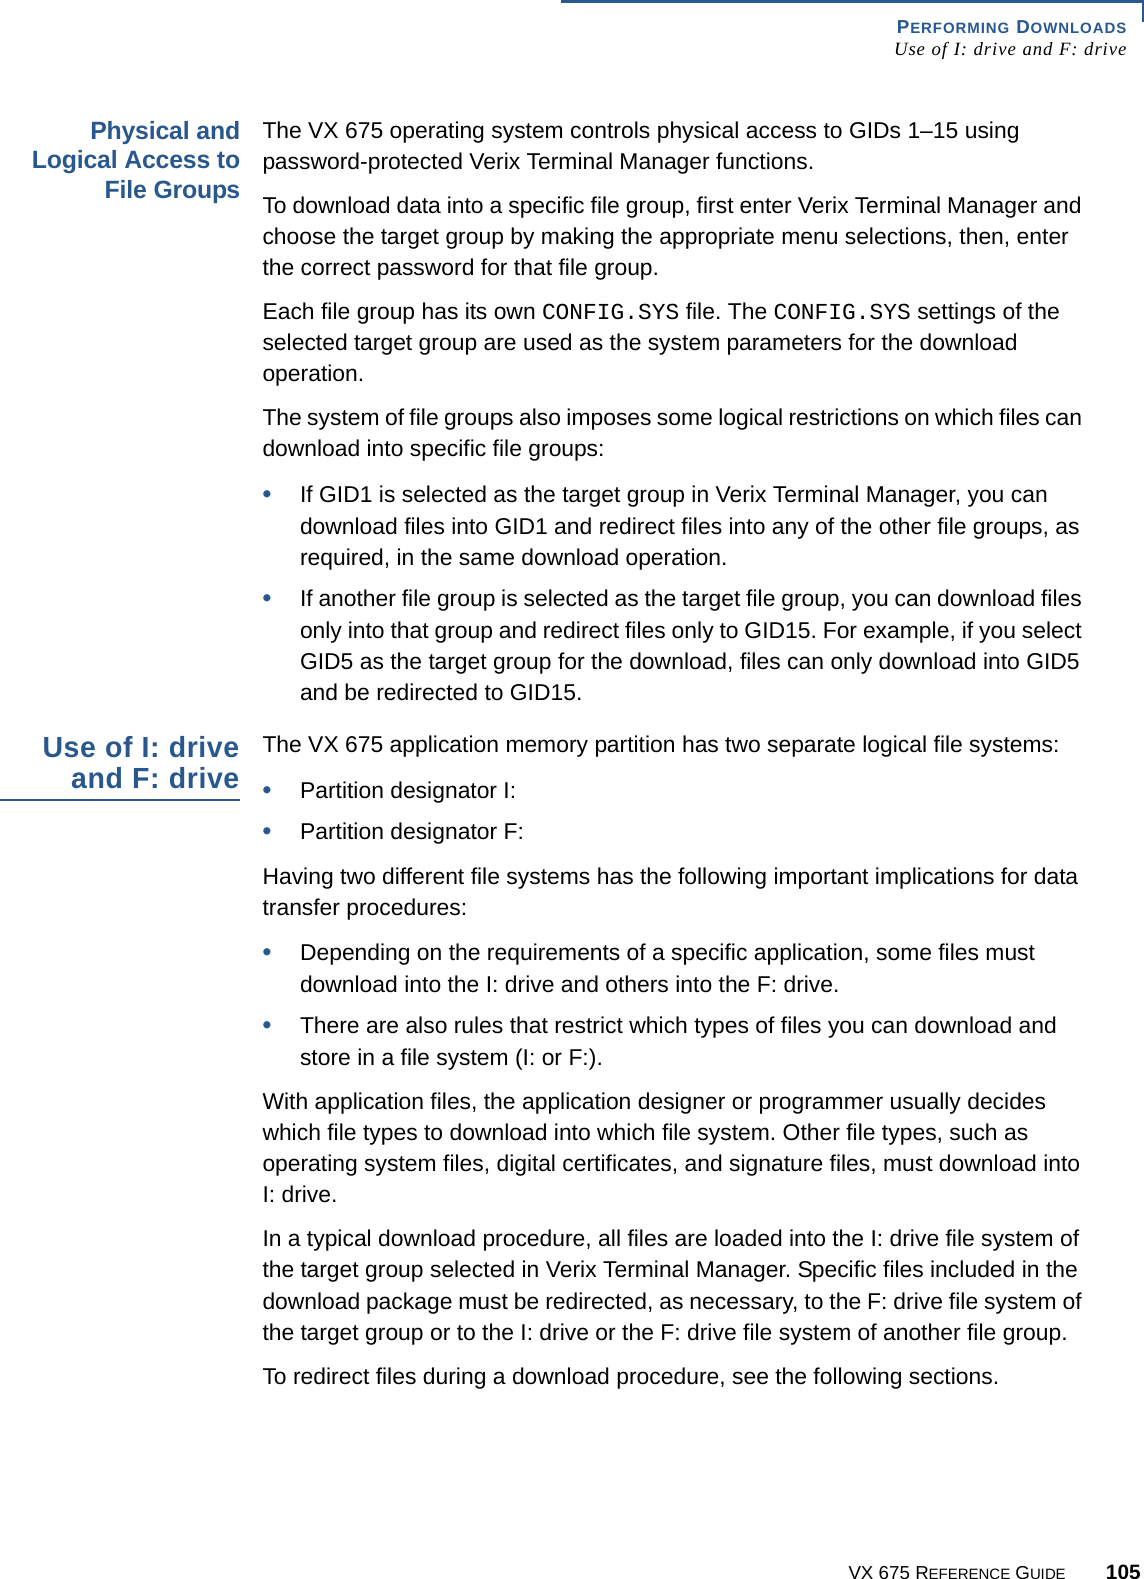
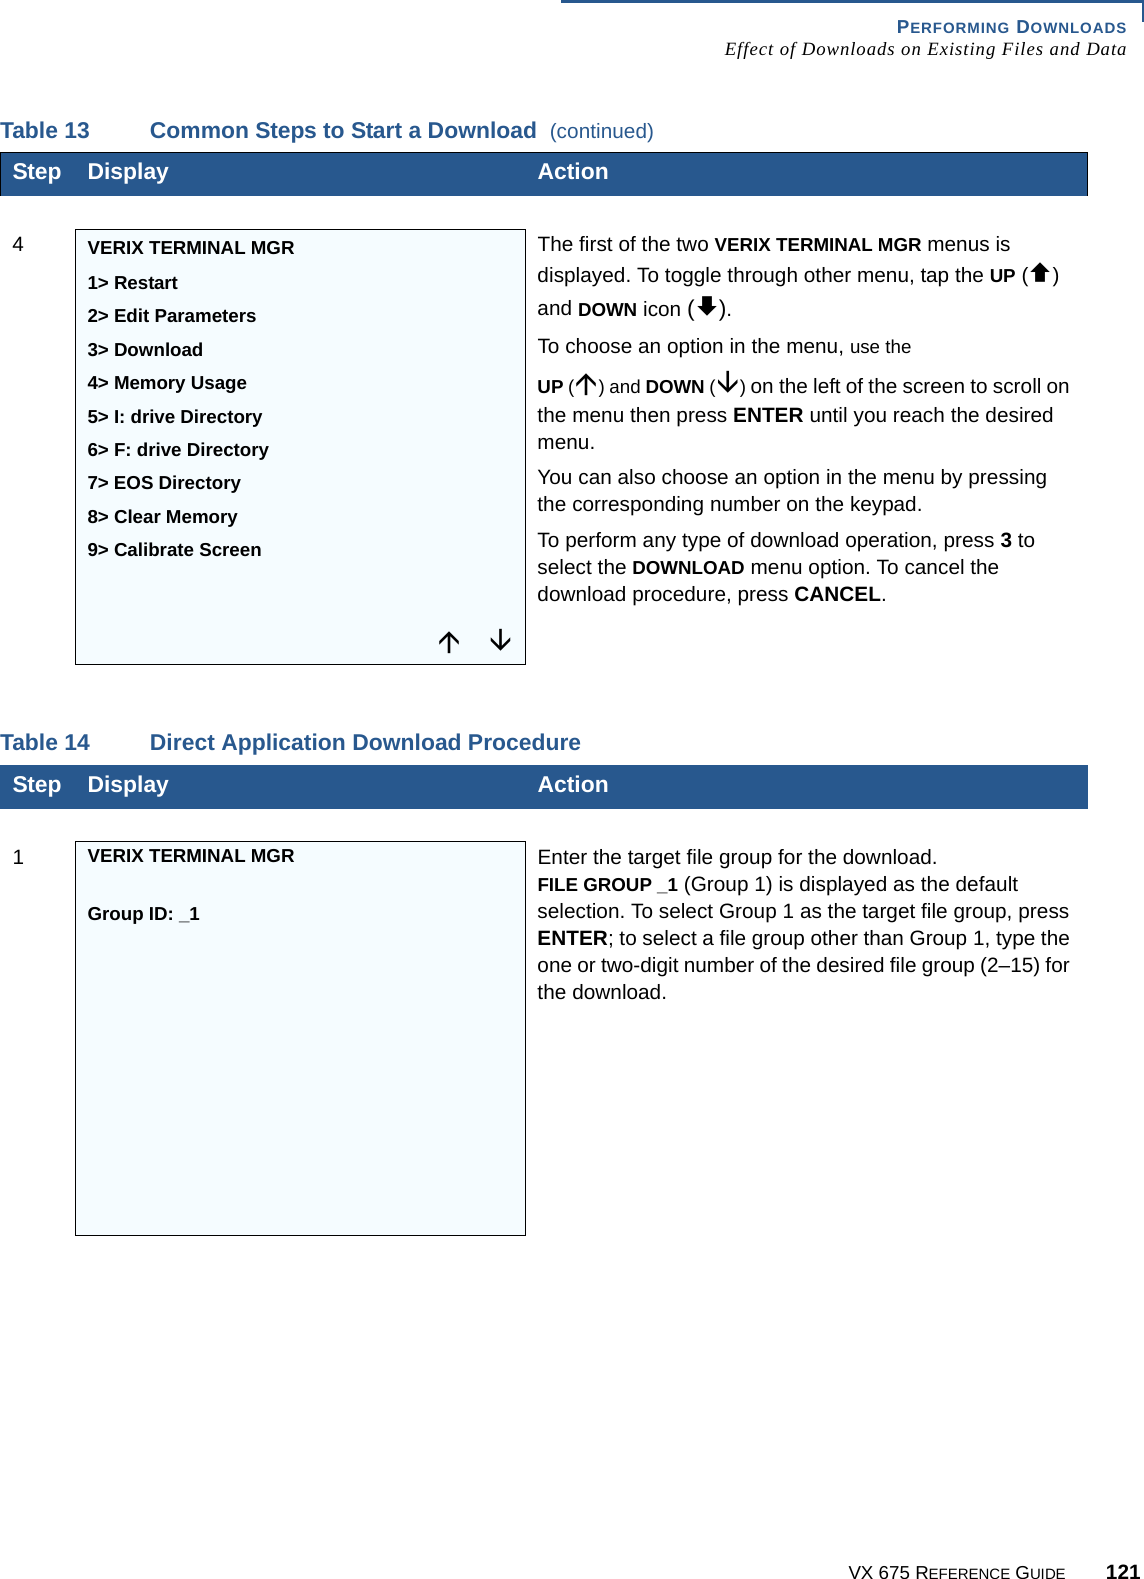
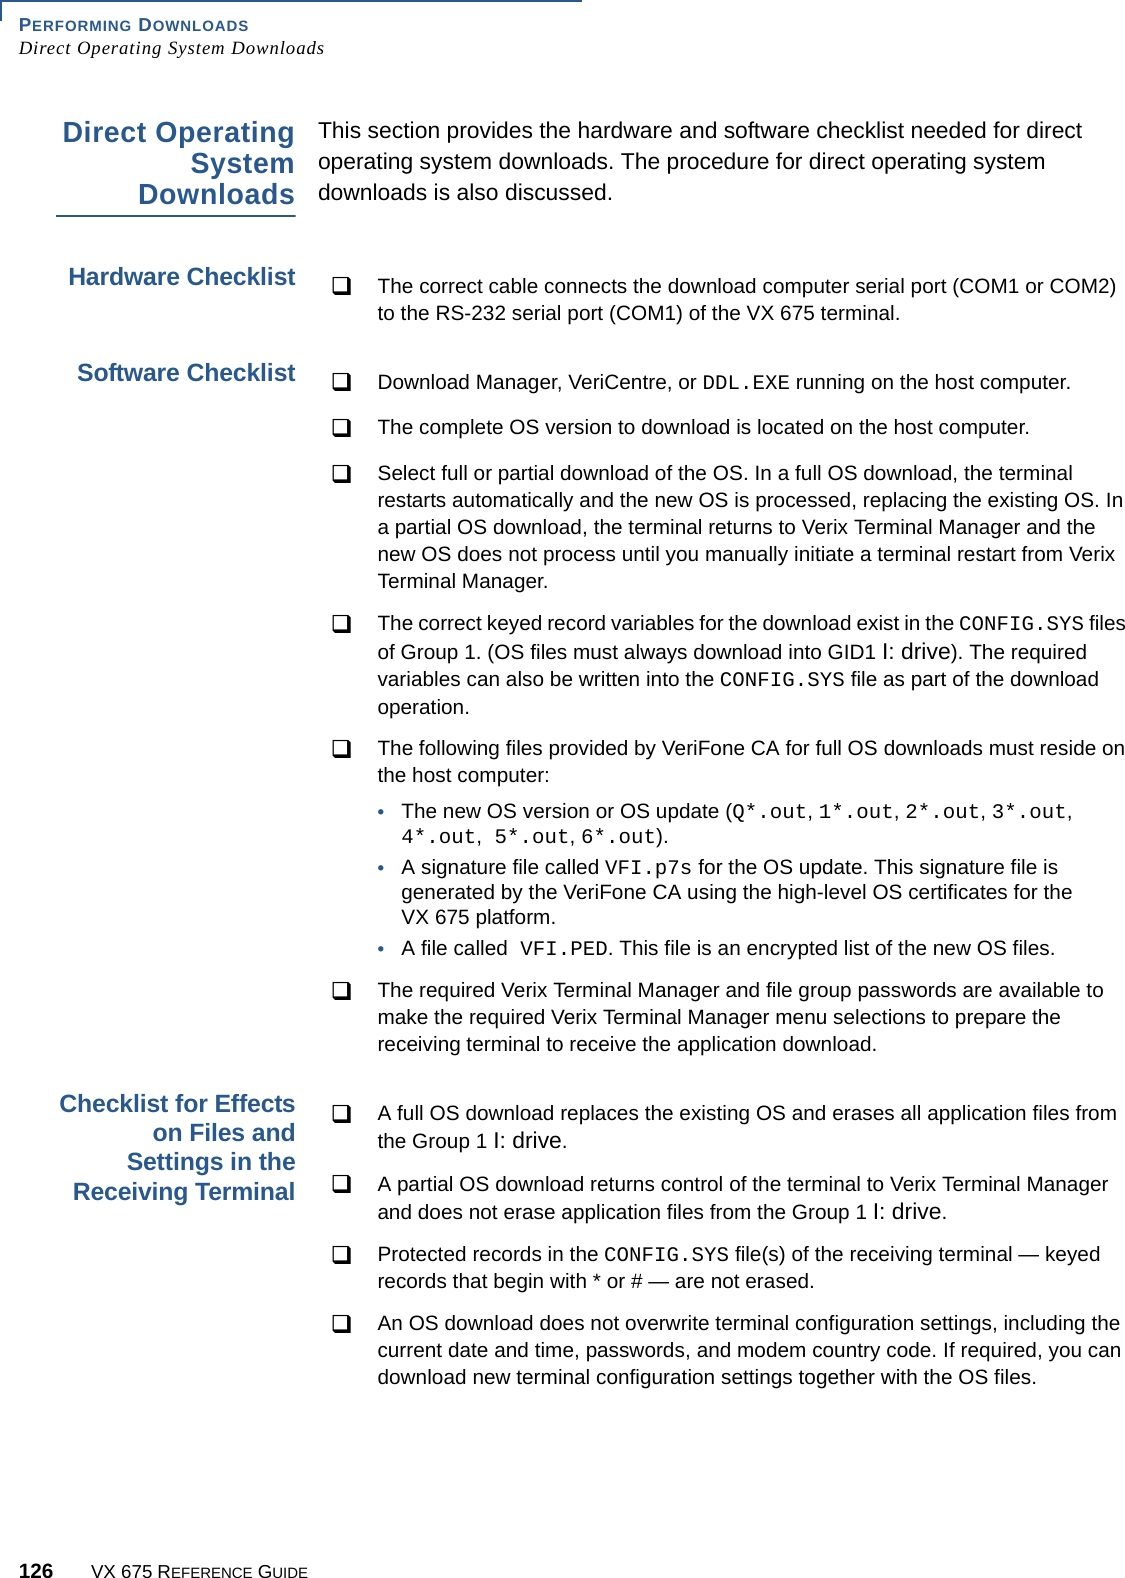
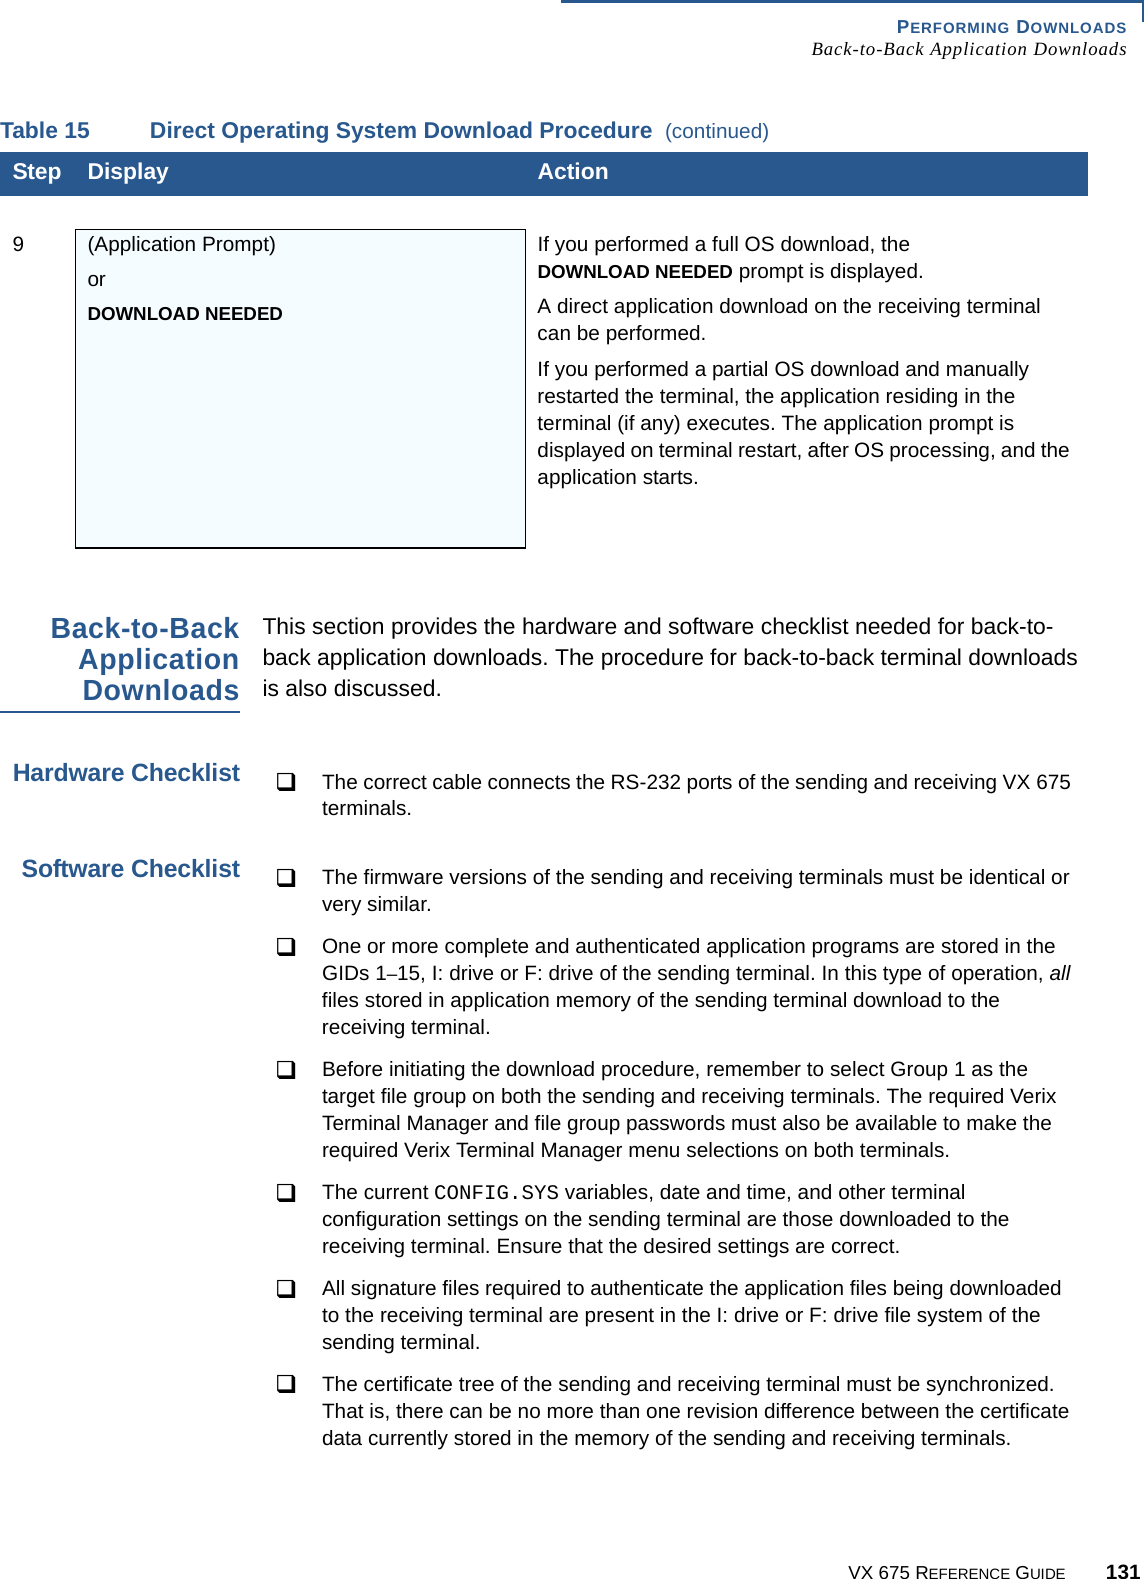
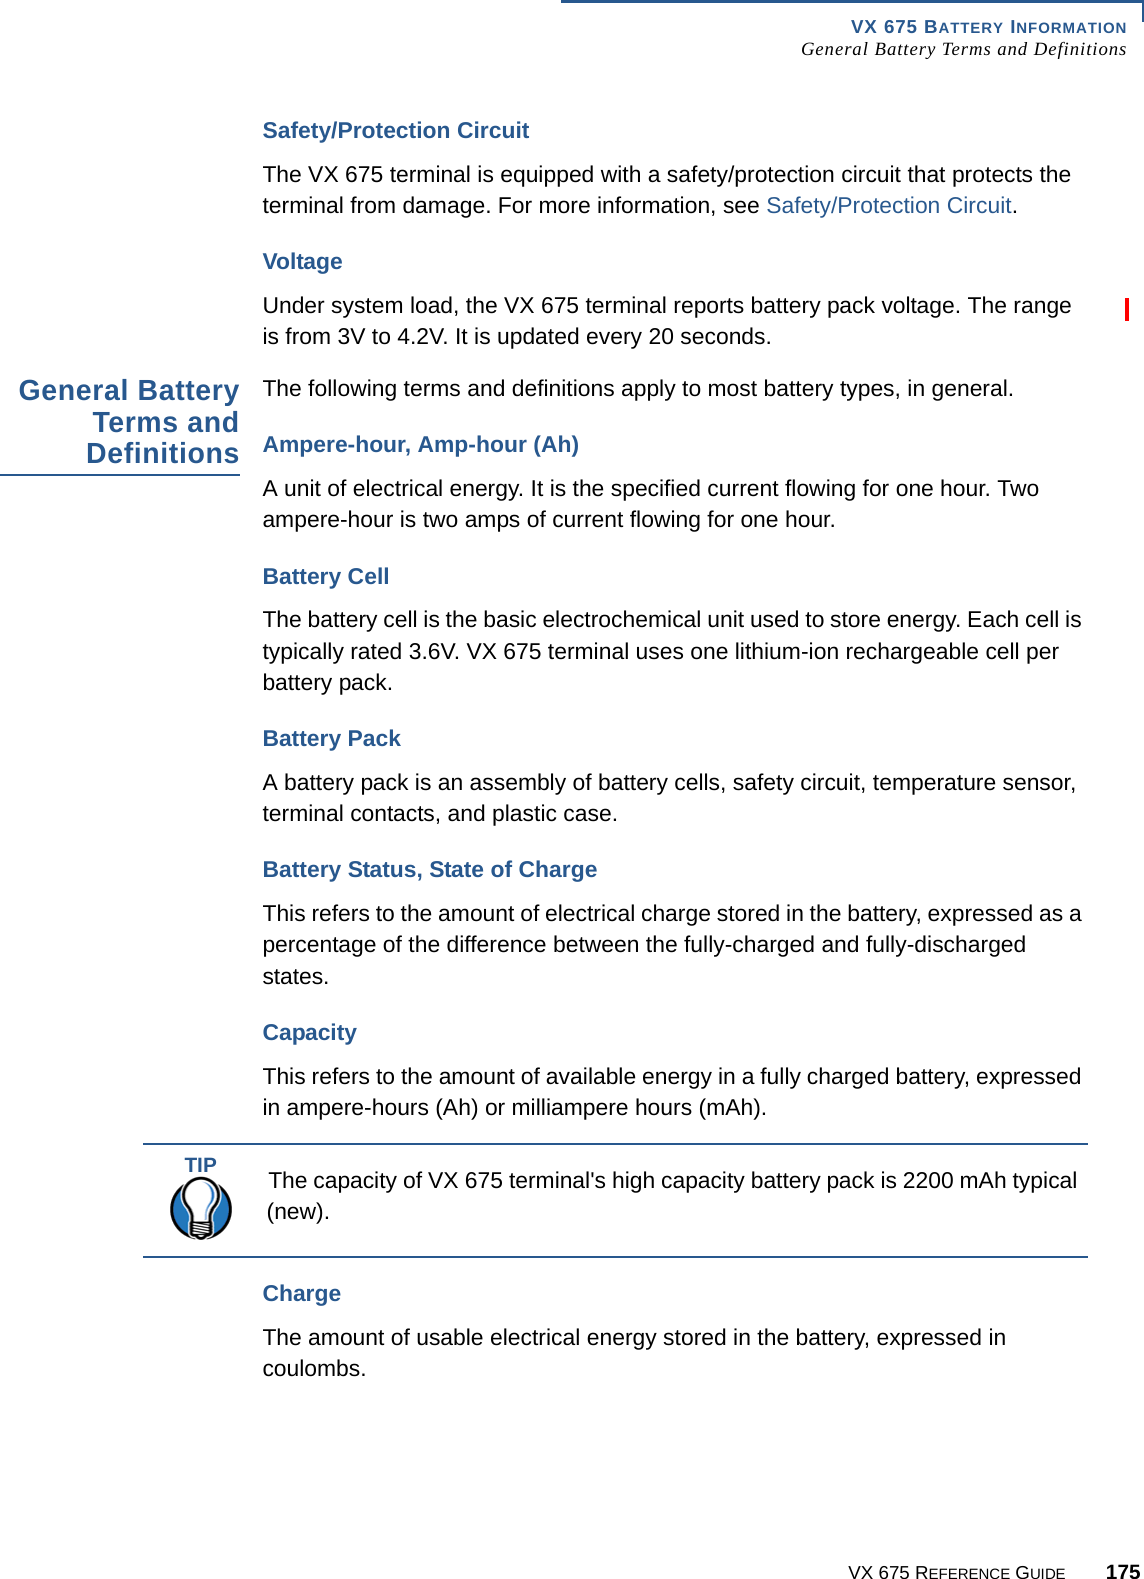
![VX 675 REFERENCE GUIDE 169APPENDIX DASCII TableThe ASCII TableAn ASCII table for the VX 675 display is presented in Table 19.Table 19 VX 680 Display ASCII TableDec Hex ASCII Dec Hex ASCII Dec Hex ASCII Dec Hex ASCII000 NUL 32 20 SP 64 40 @96 60 '101 SOH 33 21 !65 41 A97 61 a202 STX 34 22 "66 42 B98 62 b303 ETX 35 23 #67 43 C99 63 c404 EOT 36 24 $68 44 D100 64 d505 ENQ 37 25 %69 45 E101 65 e606 ACK 38 26 &70 46 F102 66 f707 BEL 39 27 '71 47 G103 67 g808 BS 40 28 (72 48 H104 68 h909 HT 41 29 )73 49 I105 69 i10 0A LF 42 2A *74 4A J106 6A j11 0B VT 43 2B +75 4B K107 6B k12 0C FF 44 2C ,76 4C L108 6C l13 0D CR 45 2D -77 4D M109 6D m14 0E SO 46 2E .78 4E N110 6E n15 0F SI 47 2F /79 4F O111 6F o16 10 DLE 48 30 080 50 P112 70 p17 11 DC1 49 31 181 51 Q113 71 q18 12 DC2 50 32 282 52 R114 72 r19 13 DC3 51 33 383 53 S115 73 s20 14 DC4 52 34 484 54 T116 74 t21 15 NAK 53 35 585 55 U117 75 u22 16 SYN 54 36 686 56 V118 76 v23 17 ETB 55 37 787 57 W119 77 w24 18 CAN 56 38 888 58 X120 78 x25 19 EM 57 39 989 59 Y121 79 y26 1A SUB 58 3A :90 5A Z122 7A z27 1B ESC 59 3B ;91 5B [123 7B {28 1C FS 60 3C <92 5C \124 7C |29 1D GS 61 3D =93 5D ]125 7D }30 1E RS 62 3E >94 5E ^126 7E ~31 1F US 63 3F ?95 5F _127 7F DEL](https://usermanual.wiki/Verifone/VX675WCDMA/User-Guide-2103601-Page-169.png)
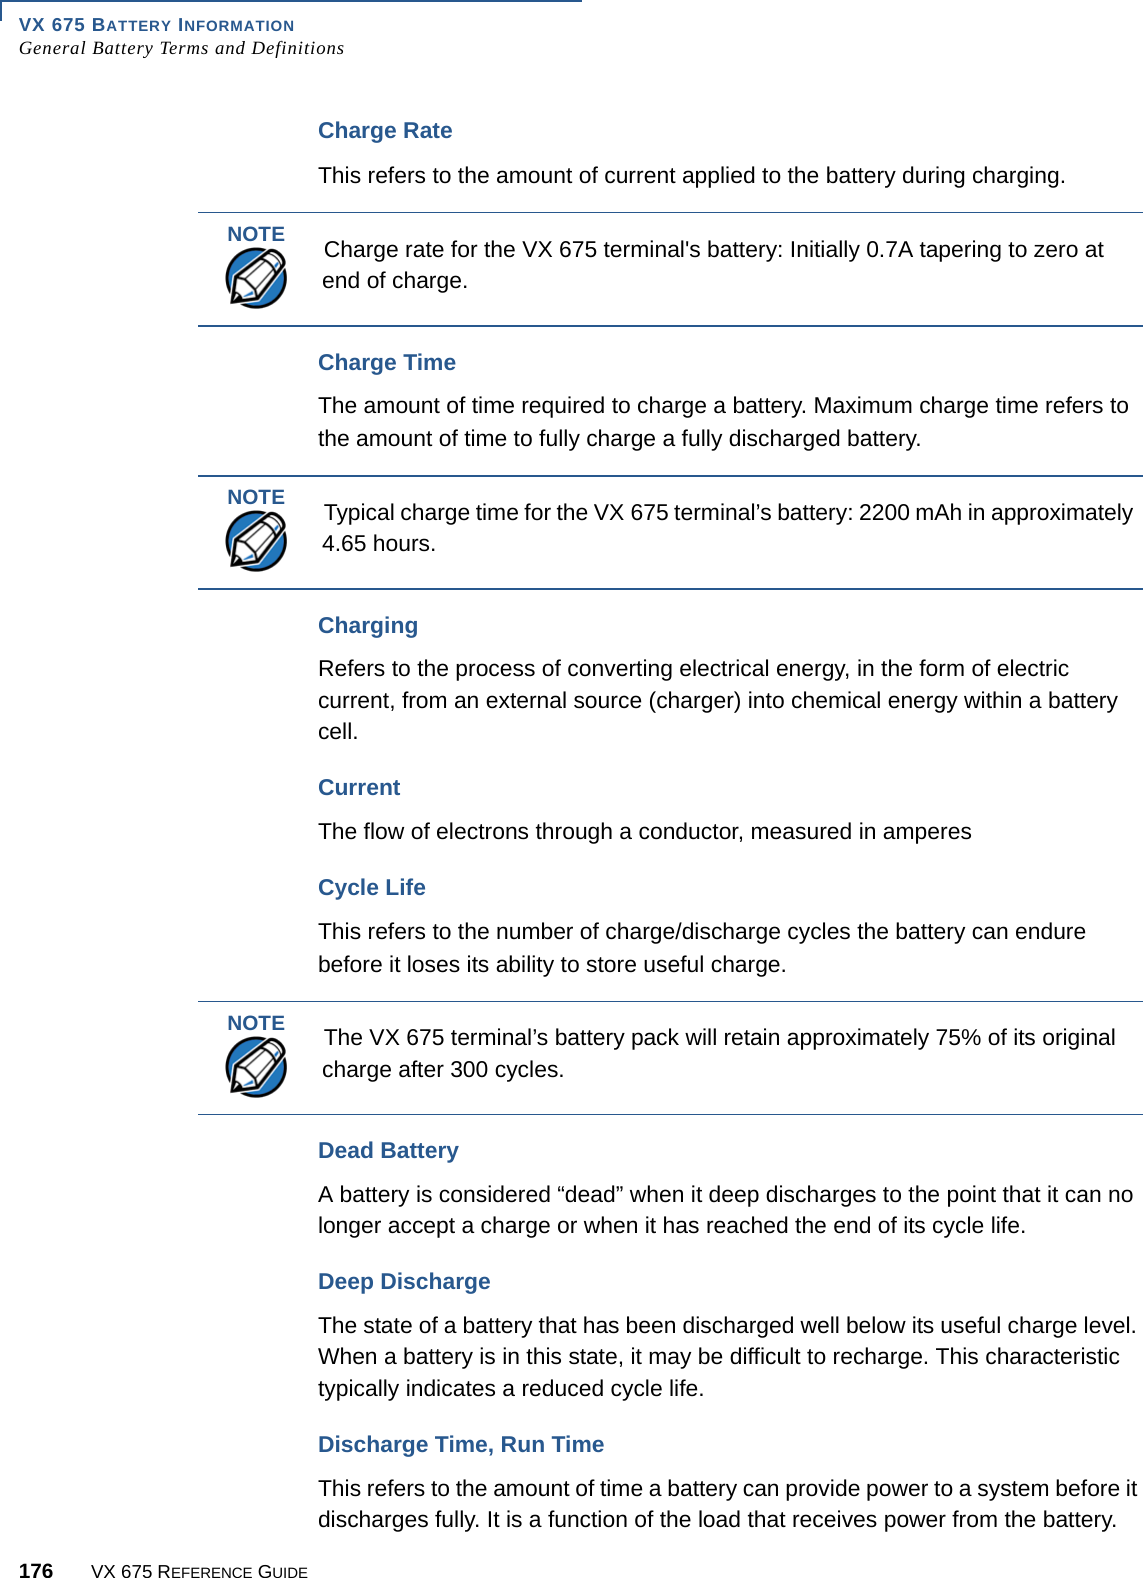


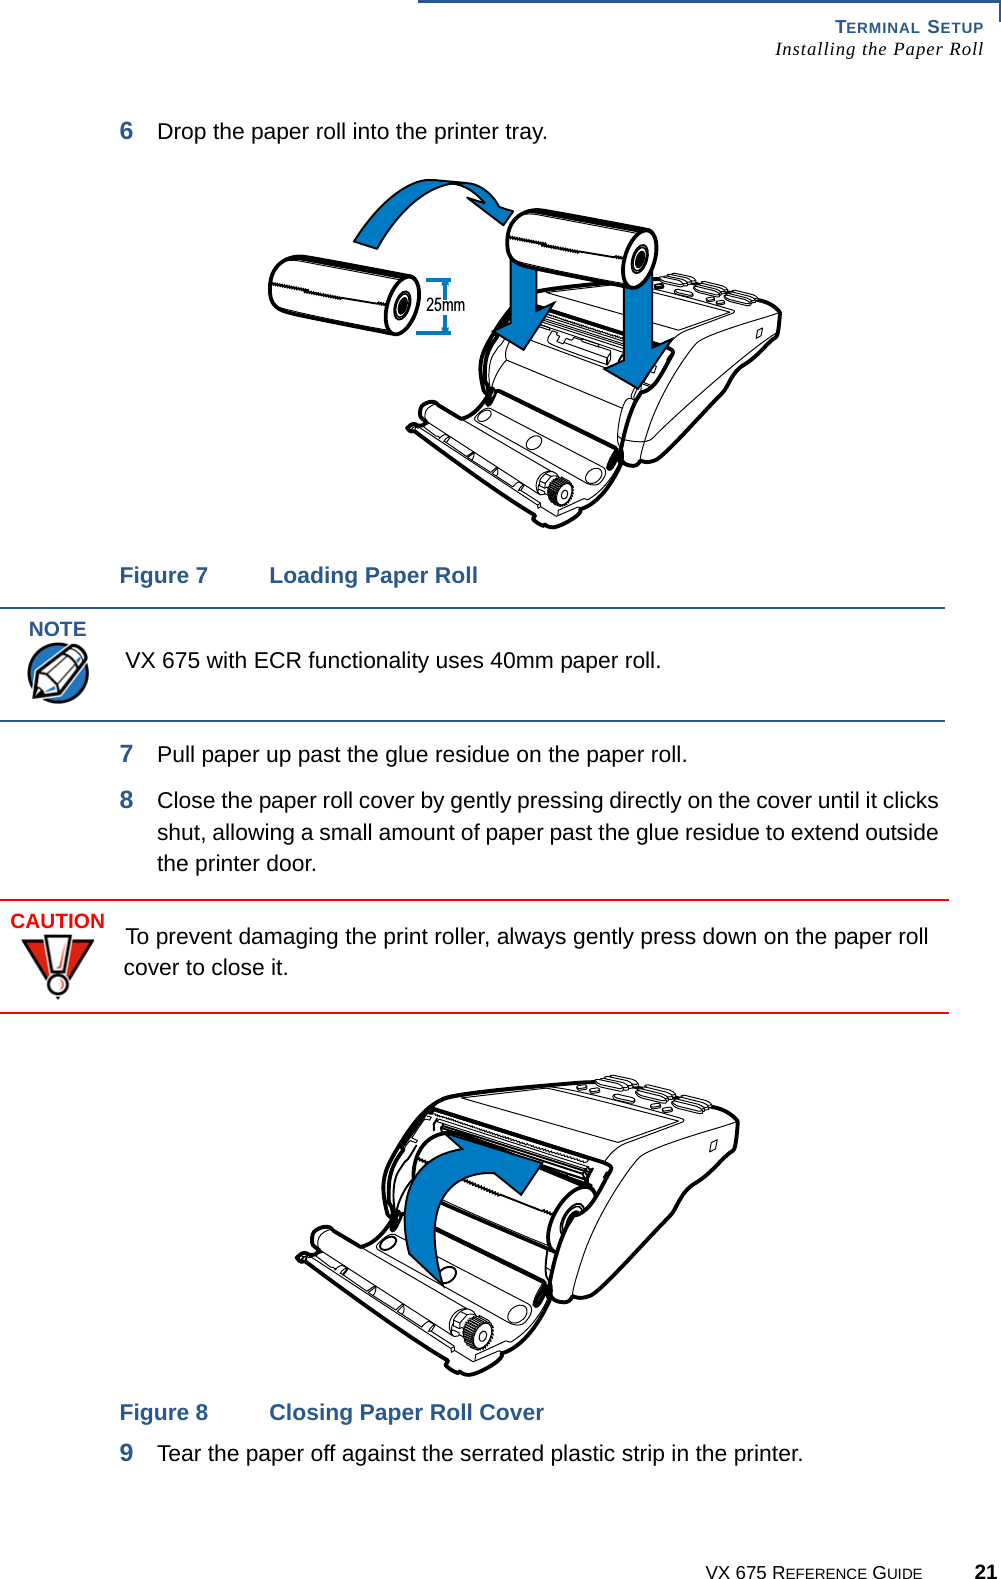
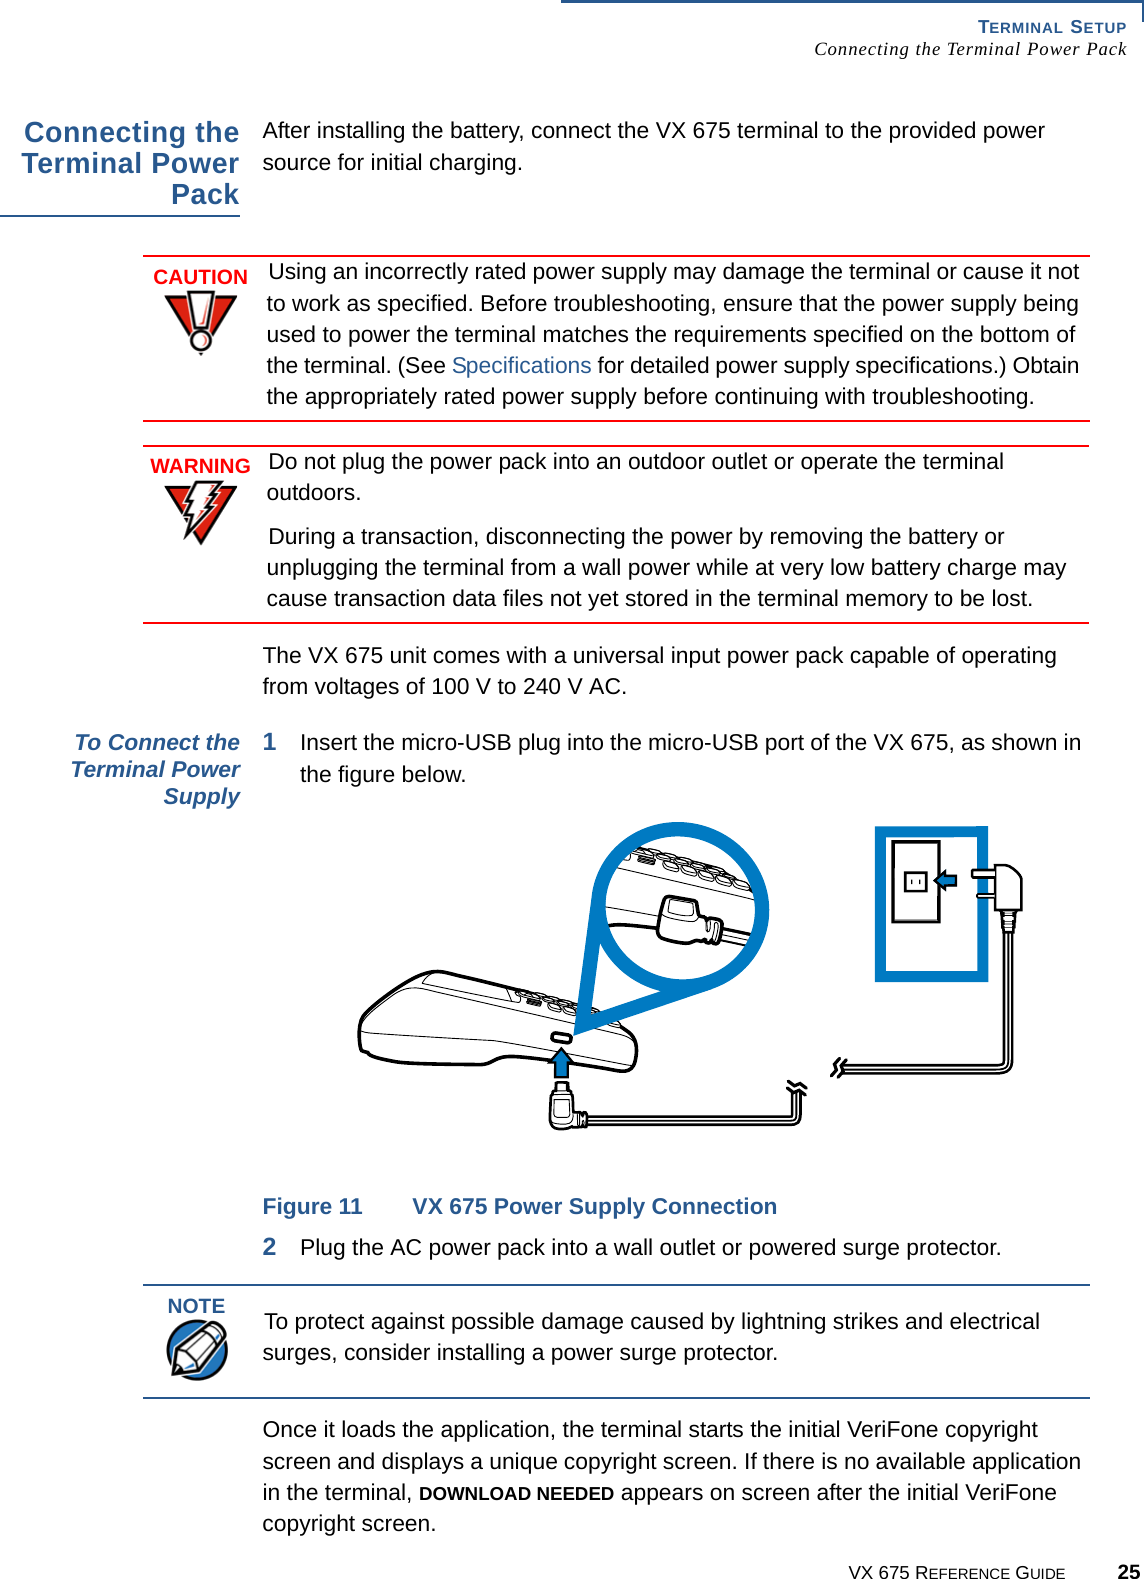
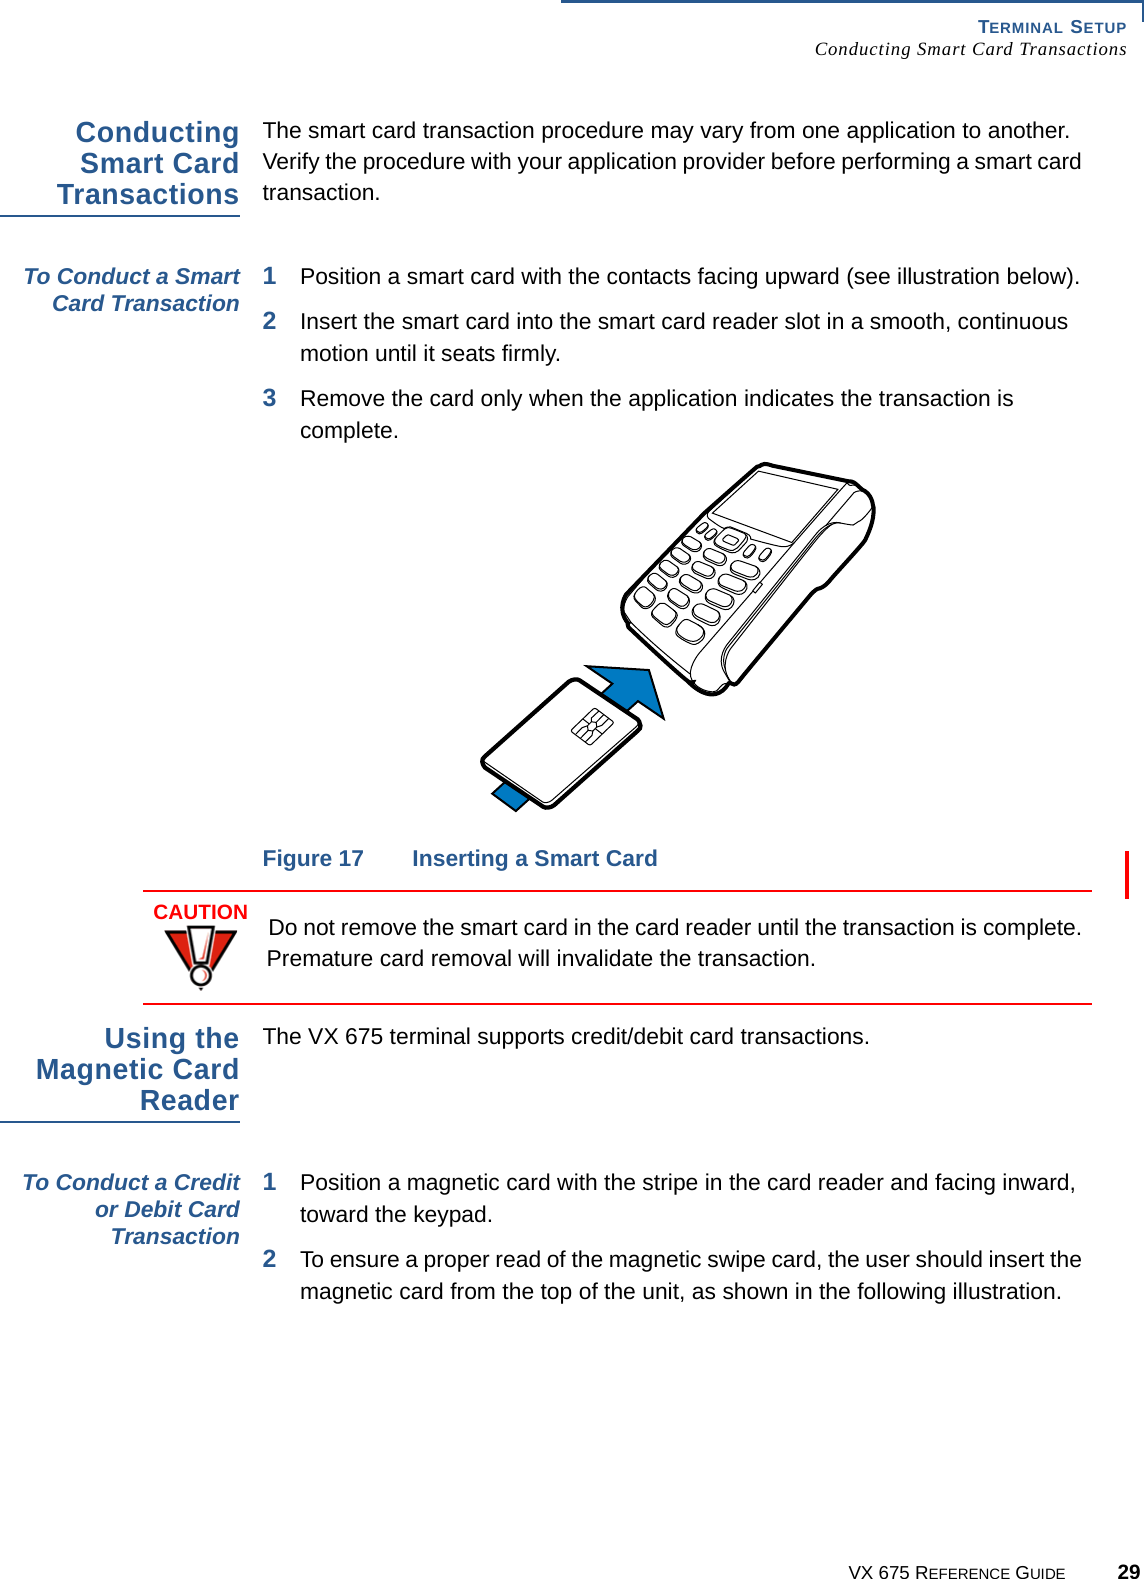
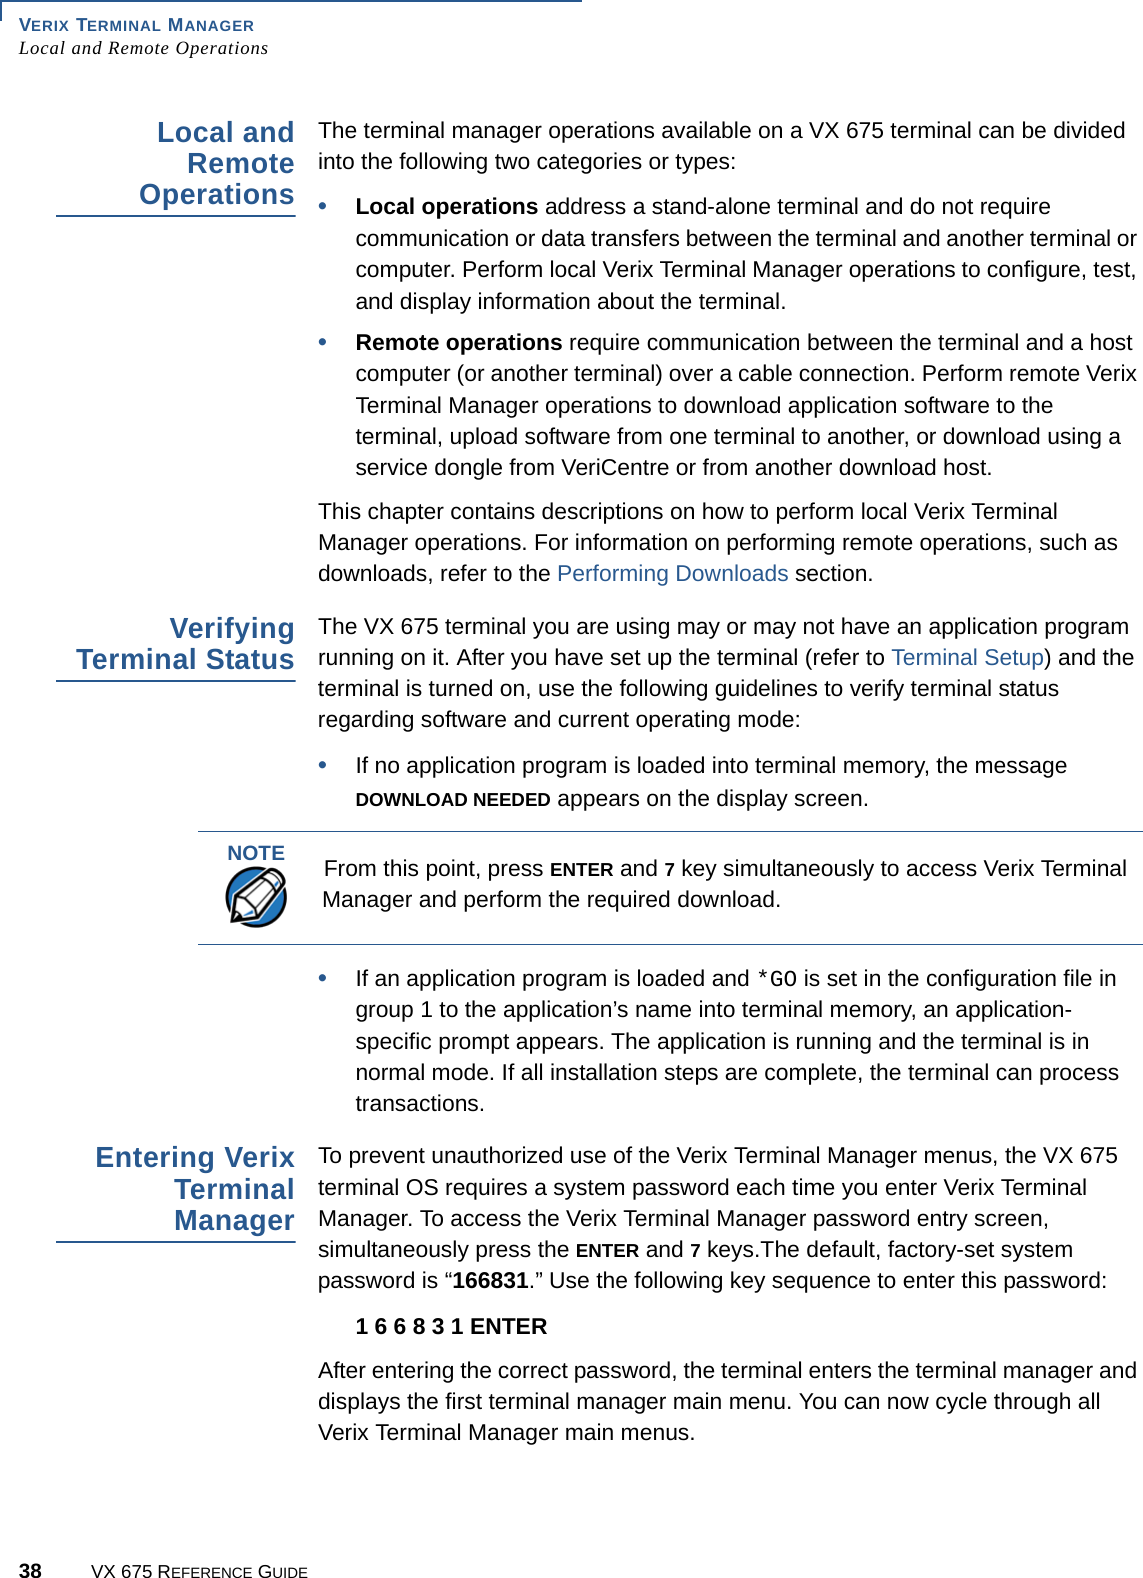
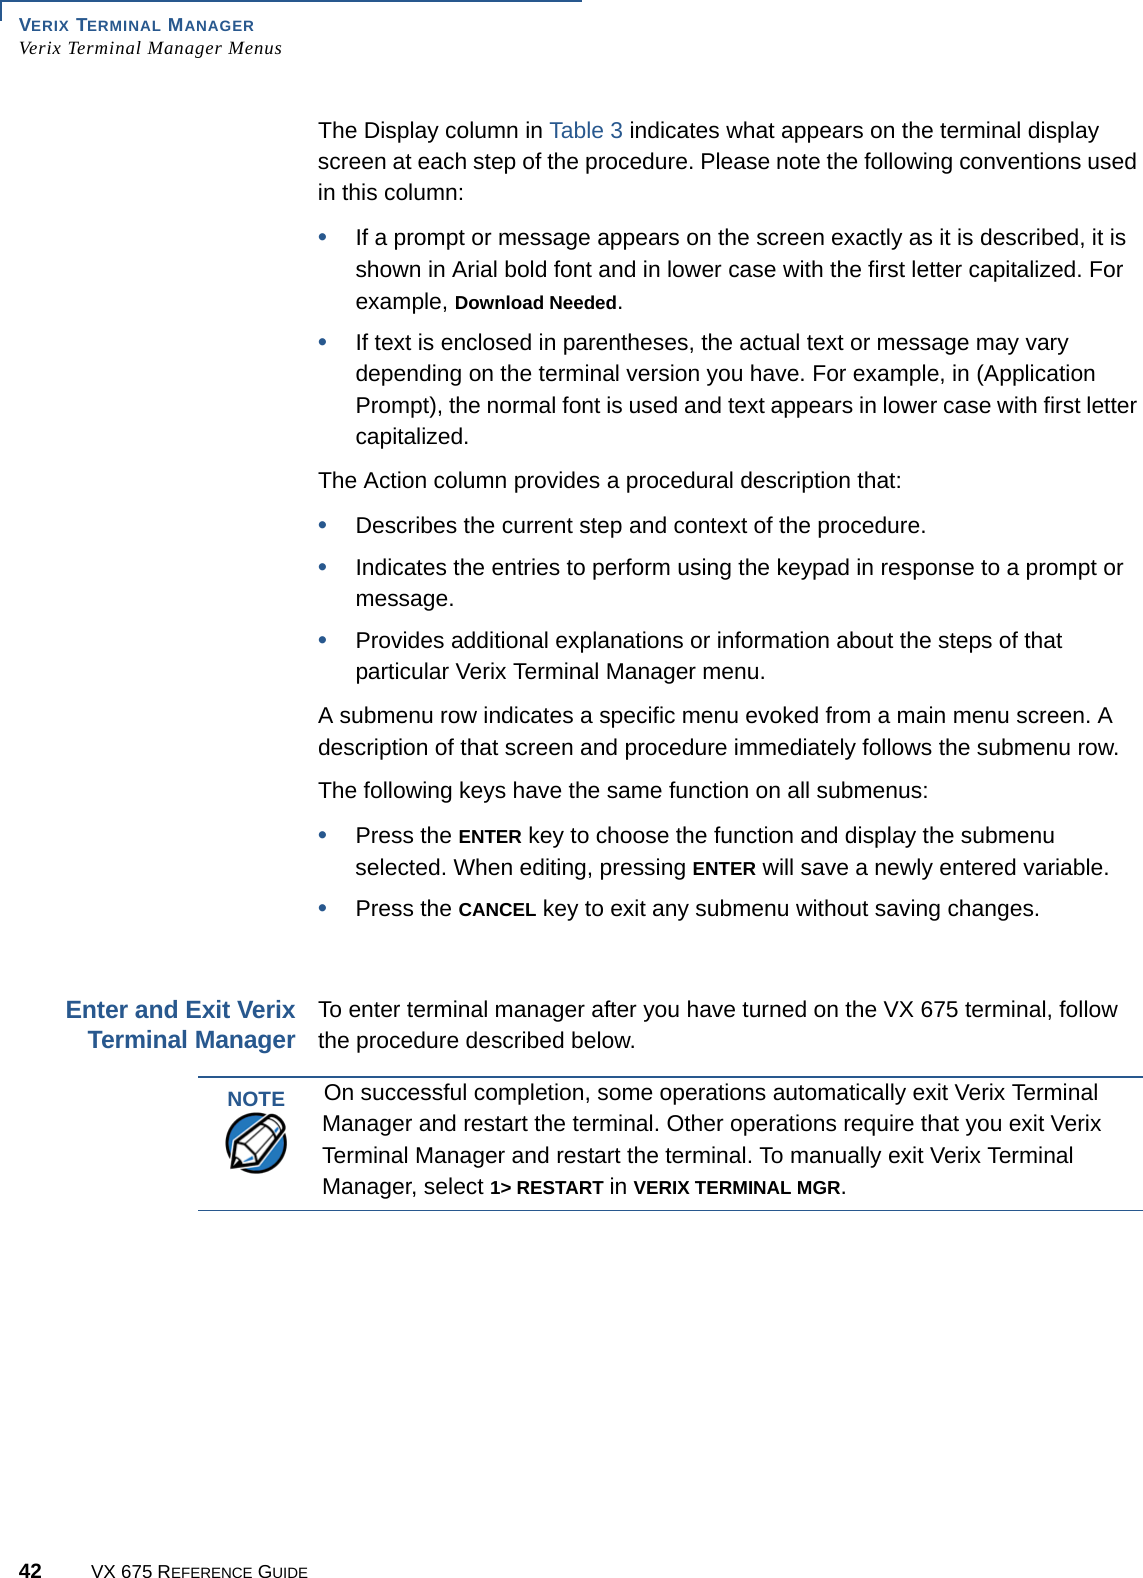
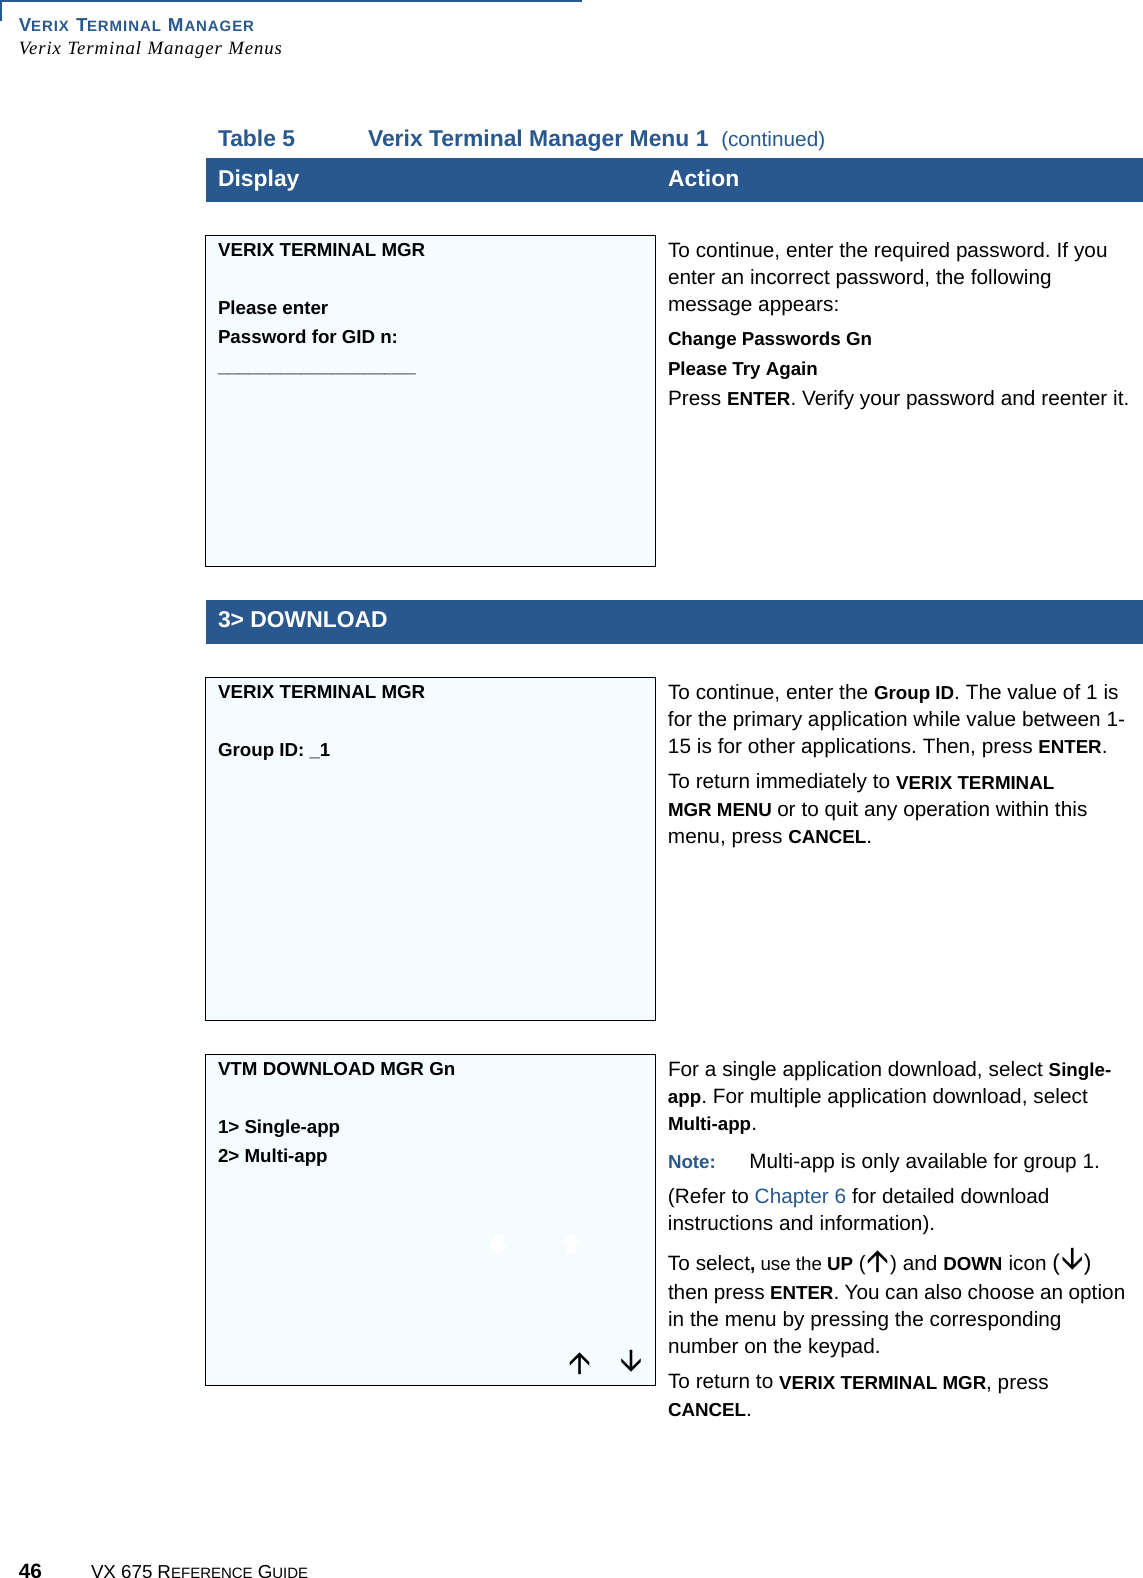
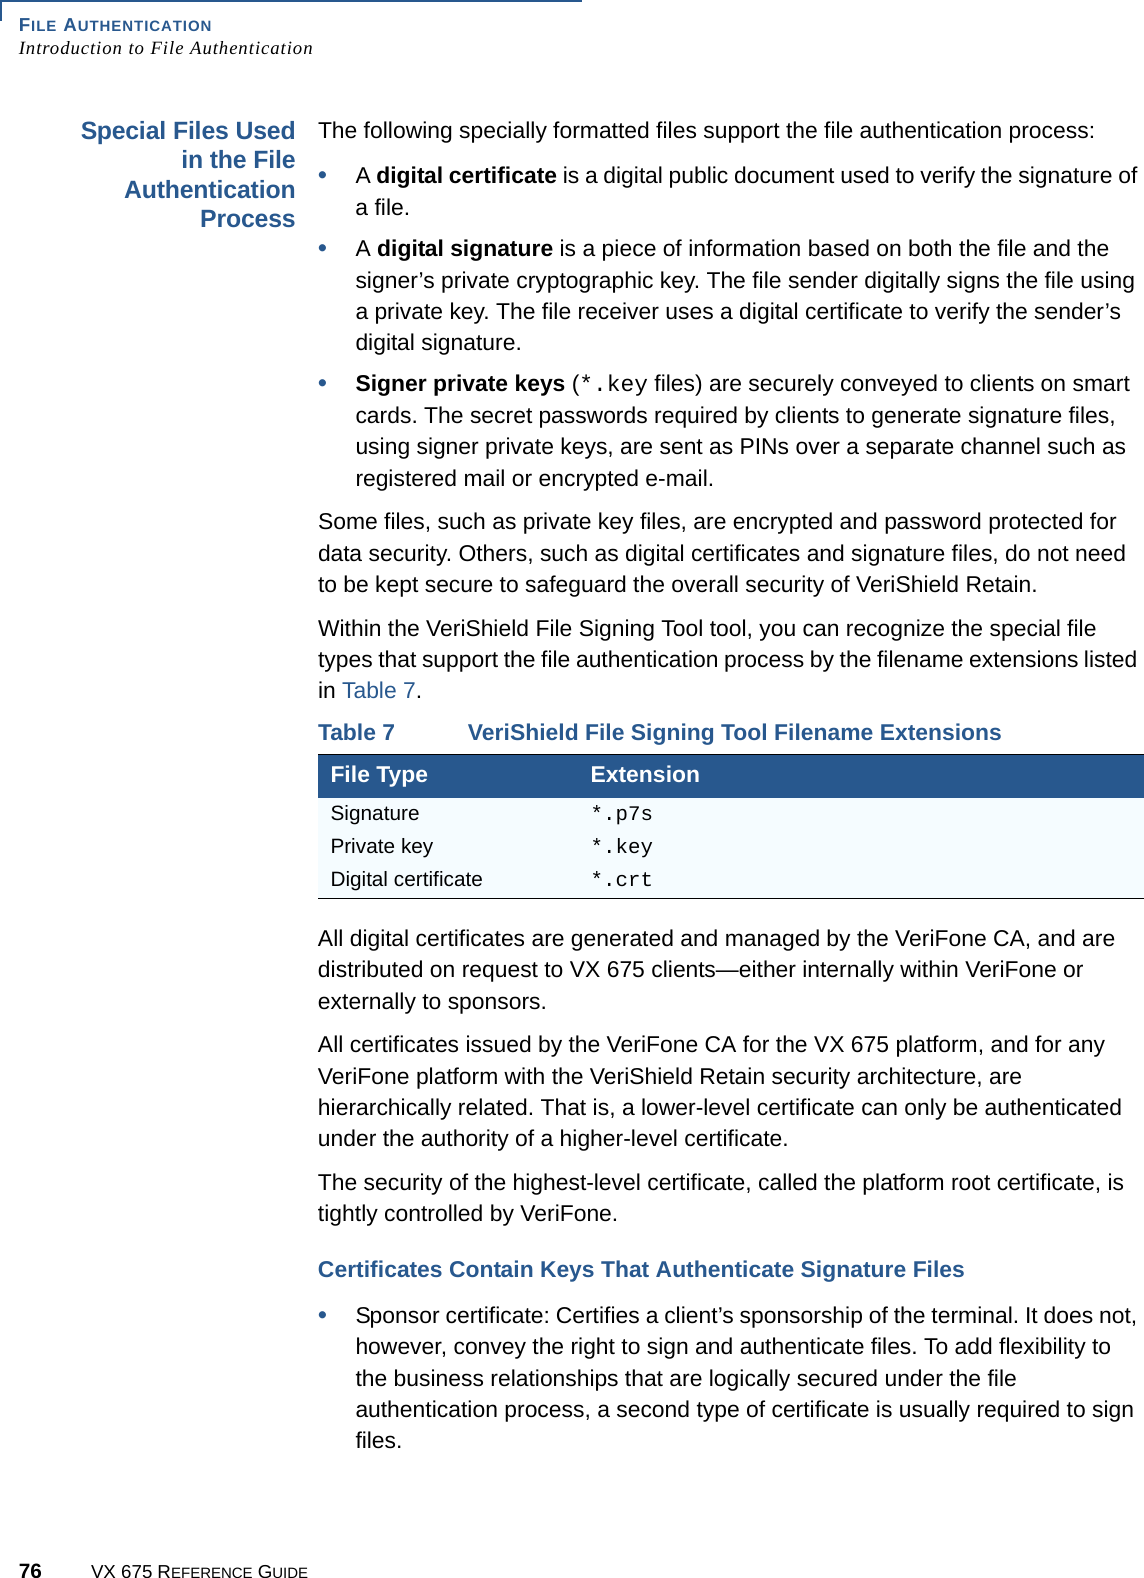
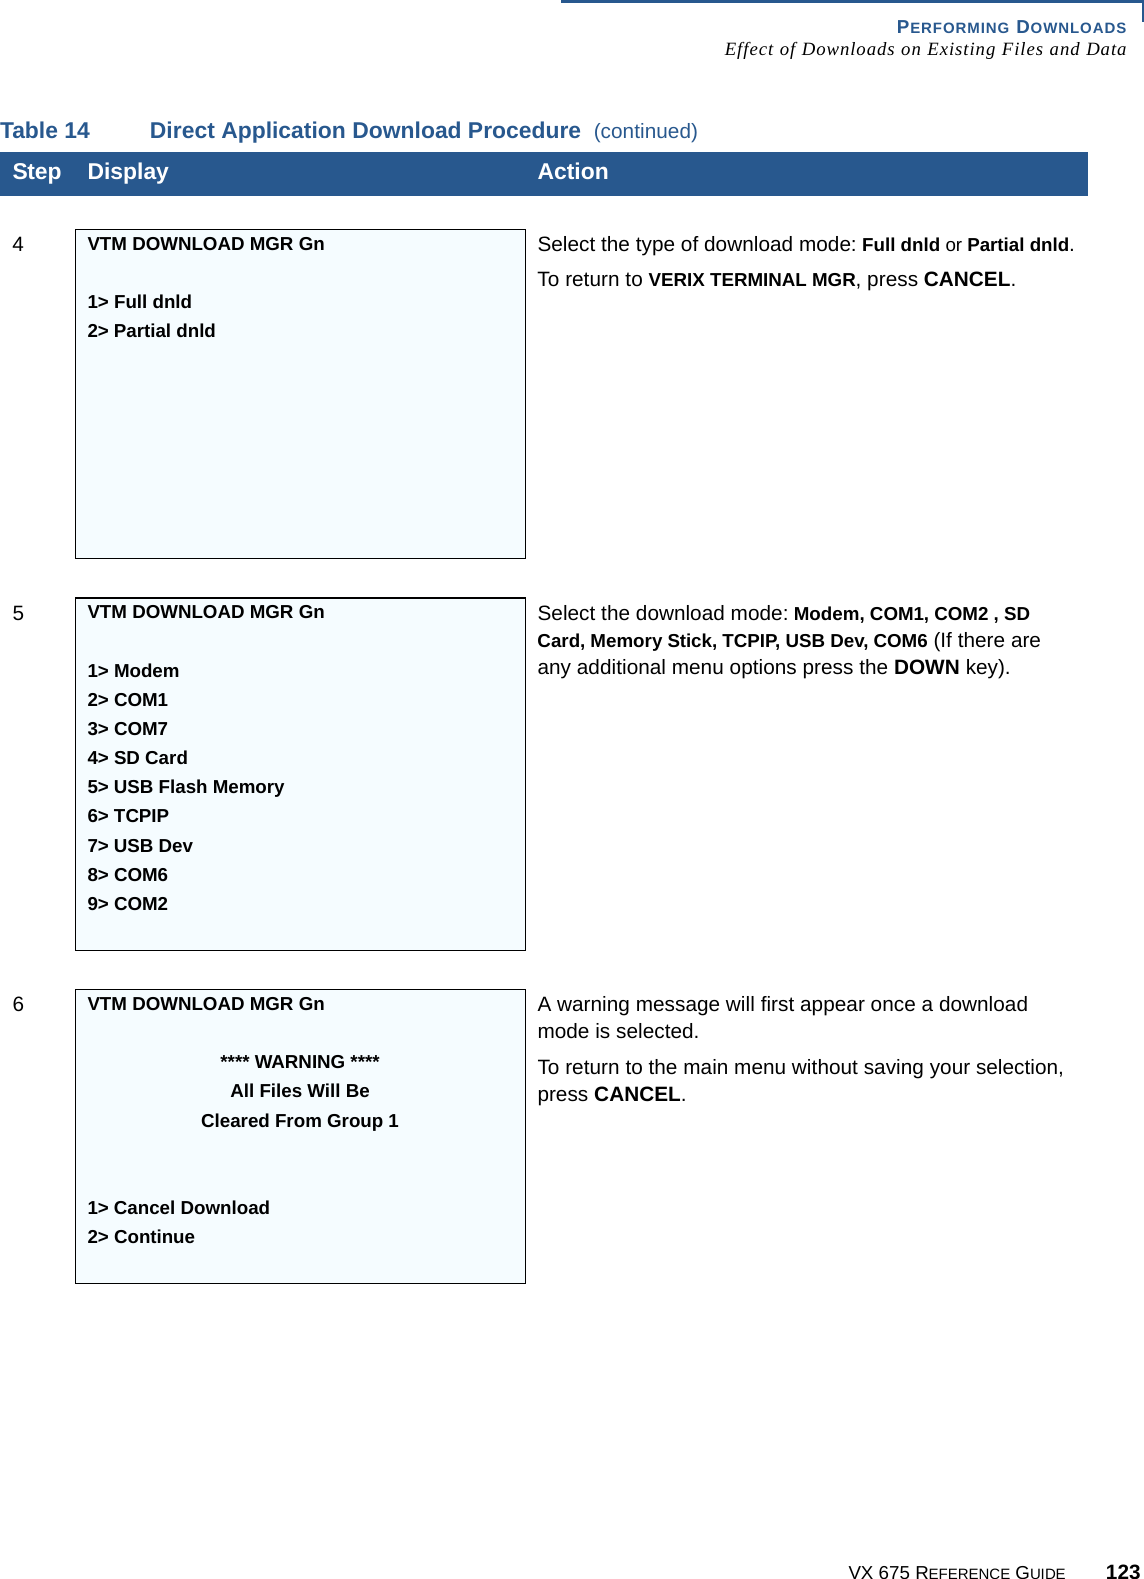
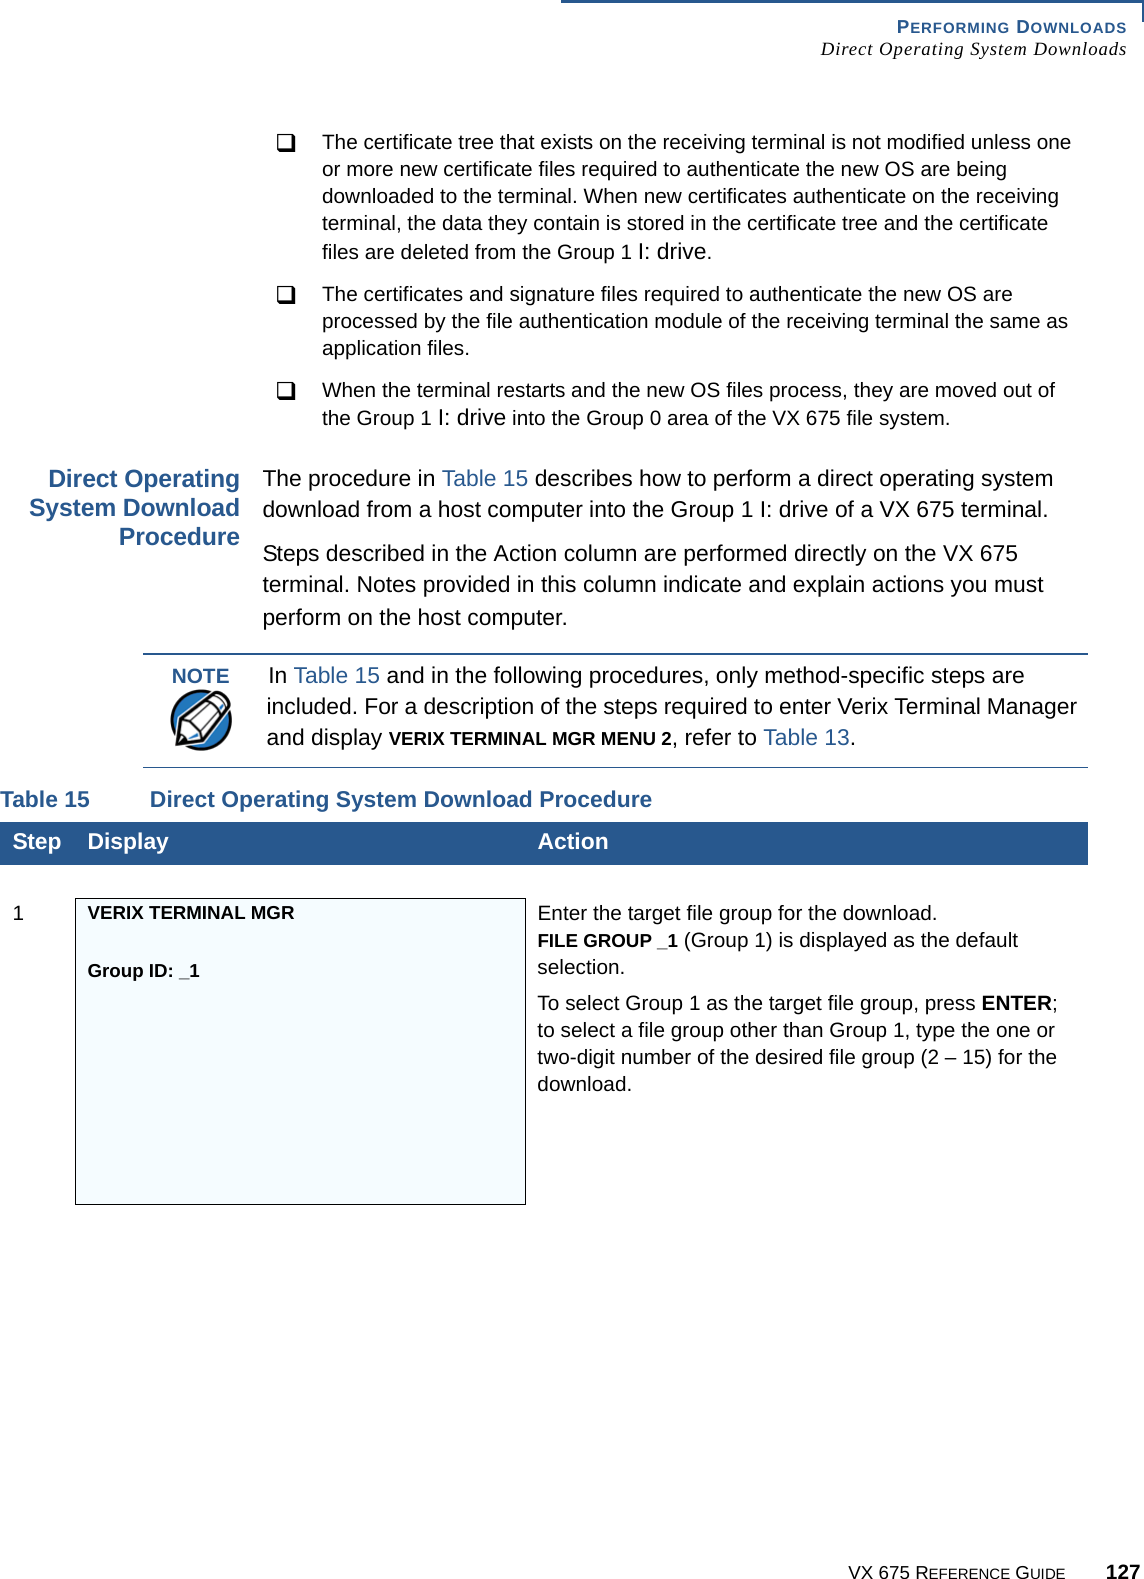
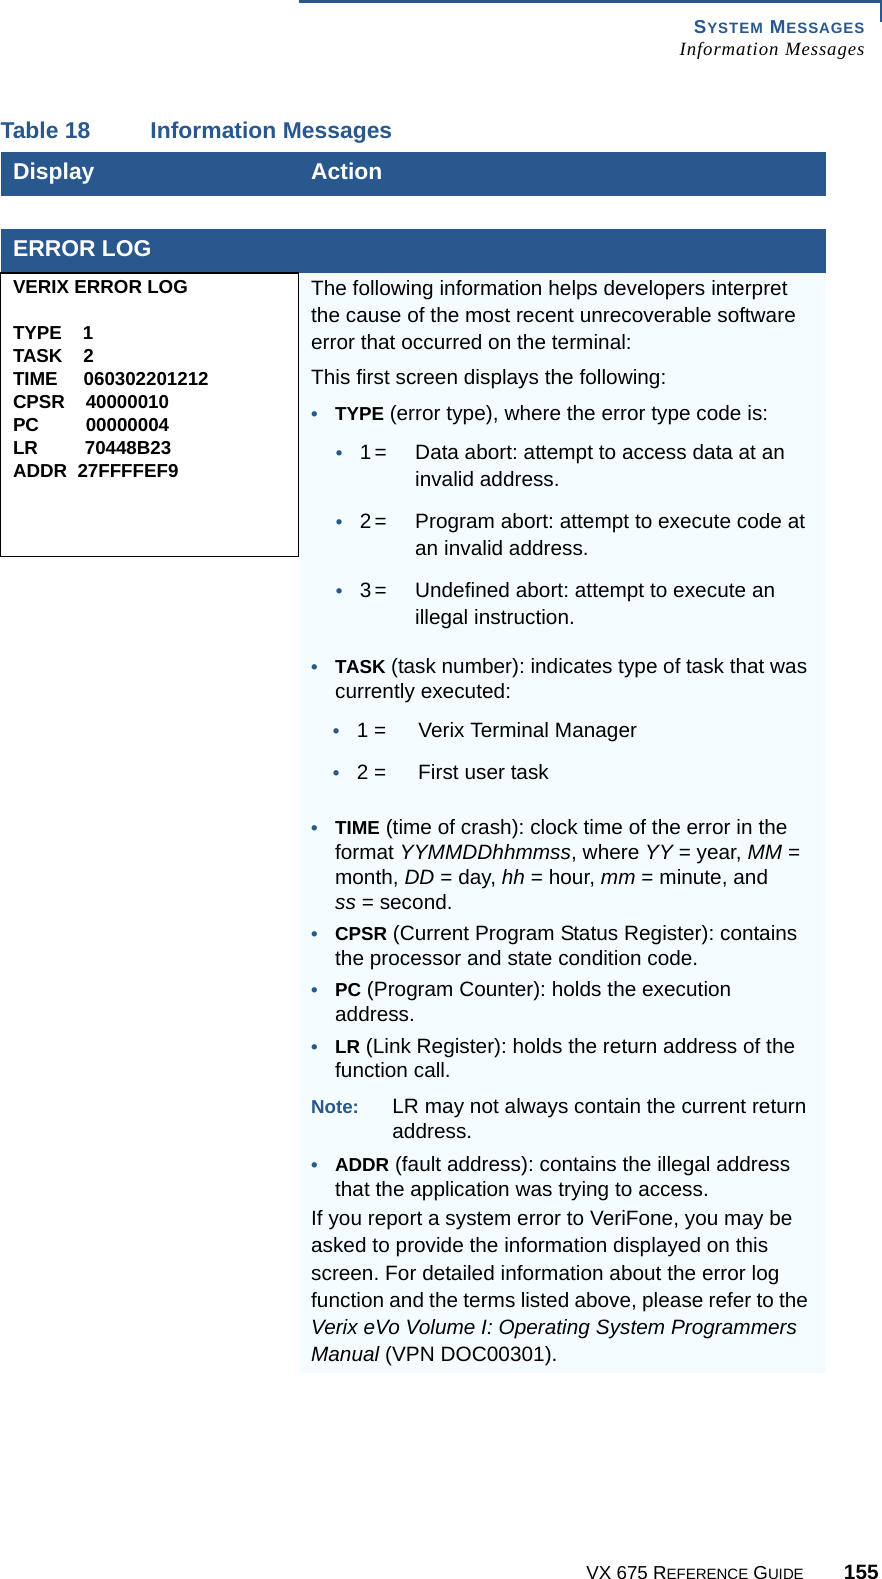
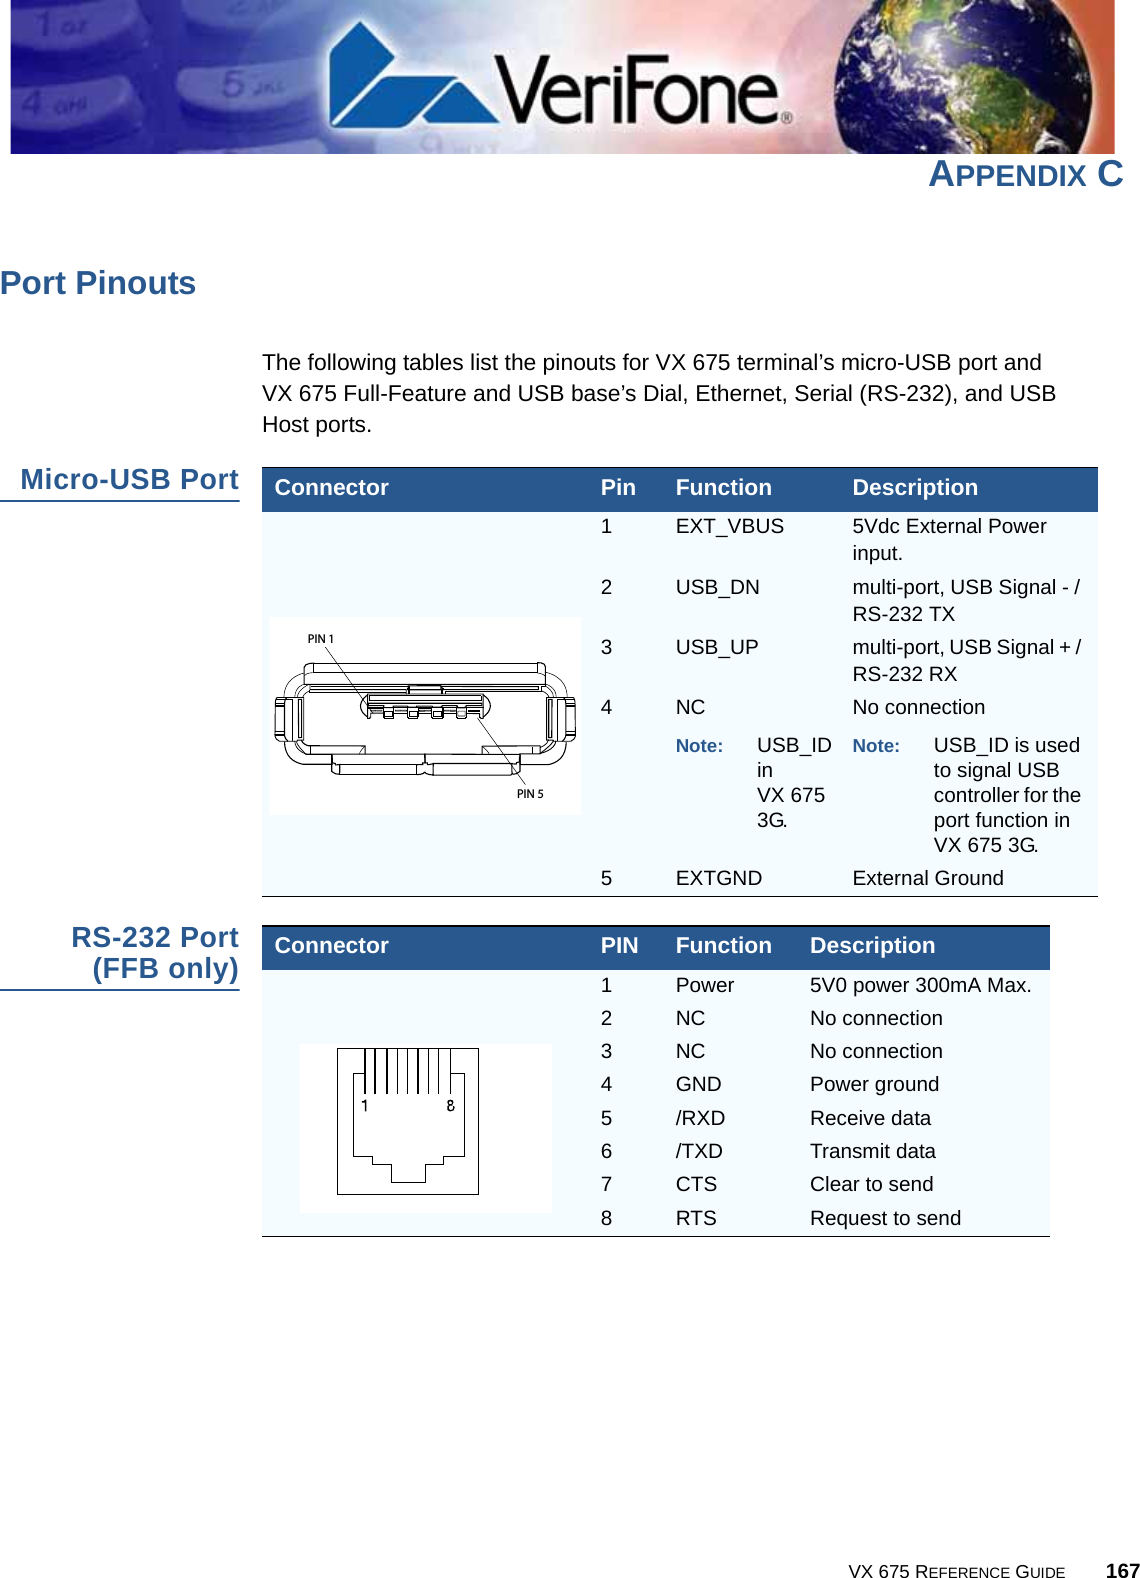
![Česky [Czech] [Jméno výrobce] tímto prohlašuje, že tento [typ zařízení] je ve shodě se základními požadavky a dalšími příslušnými ustanoveními směrnice 1999/5/ES. Dansk [Danish] Undertegnede [fabrikantens navn] erklærer herved, at følgende udstyr [udstyrets typebetegnelse] overholder de væsentlige krav og øvrige relevante krav i direktiv 1999/5/EF. Deutsch [German] Hiermit erklärt [Name des Herstellers], dass sich das Gerät [Gerätetyp] in Übereinstimmung mit den grundlegenden Anforderungen und den übrigen einschlägigen Bestimmungen der Richtlinie 1999/5/EG befindet. Eesti [Estonian] Käesolevaga kinnitab [tootja nimi = name of manufacturer] seadme [seadme tüüp = type of equipment] vastavust direktiivi 1999/5/EÜ põhinõuetele ja nimetatud direktiivist tulenevatele teistele asjakohastele sätetele. English Hereby, [name of manufacturer], declares that this [type of equipment] is in compliance with the essential requirements and other relevant provisions of Directive 1999/5/EC. Español [Spanish] Por medio de la presente [nombre del fabricante] declara que el [clase de equipo] cumple con los requisitos esenciales y cualesquiera otras disposiciones aplicables o exigibles de la Directiva 1999/5/CE. Ελληνική [Greek] ΜΕ ΤΗΝ ΠΑΡΟΥΣΑ [name of manufacturer] ΔΗΛΩΝΕΙ ΟΤΙ [type of equipment] ΣΥΜΜΟΡΦΩΝΕΤΑΙ ΠΡΟΣ ΤΙΣ ΟΥΣΙΩΔΕΙΣ ΑΠΑΙΤΗΣΕΙΣ ΚΑΙ ΤΙΣ ΛΟΙΠΕΣ ΣΧΕΤΙΚΕΣ ΔΙΑΤΑΞΕΙΣ ΤΗΣ ΟΔΗΓΙΑΣ 1999/5/ΕΚ. Français [French] Par la présente [nom du fabricant] déclare que l'appareil [type d'appareil] est conforme aux exigences essentielles et aux autres dispositions pertinentes de la directive 1999/5/CE. Italiano [Italian] Con la presente [nome del costruttore] dichiara che questo [tipo di apparecchio] è conforme ai requisiti essenziali ed alle altre disposizioni pertinenti stabilite dalla direttiva 1999/5/CE. Latviski [Latvian] Ar šo [name of manufacturer / izgatavotāja nosaukums] deklarē, ka [type of equipment / iekārtas tips] atbilst Direktīvas 1999/5/EK būtiskajām prasībām un citiem ar to saistītajiem noteikumiem. Lietuvių [Lithuanian] Šiuo [manufacturer name] deklaruoja, kad šis [equipment type] atitinka esminius reikalavimus ir kitas 1999/5/EB Direktyvos nuostatas. Nederlands [Dutch] Hierbij verklaart [naam van de fabrikant] dat het toestel [type van toestel] in overeenstemming is met de essentiële eisen en de andere relevante bepalingen van richtlijn 1999/5/EG. Malti [Maltese] Hawnhekk, [isem tal-manifattur], jiddikjara li dan [il-mudel tal-prodott] jikkonforma mal-ħtiġijiet essenzjali u ma provvedimenti oħrajn relevanti li hemm fid-Dirrettiva 1999/5/EC. Magyar [Hungarian] Alulírott, [gyártó neve] nyilatkozom, hogy a [... típus] megfelel a vonatkozó alapvetõ követelményeknek és az 1999/5/EC irányelv egyéb elõírásainak. Polski Niniejszym [nazwa producenta] oświadcza, że [nazwa wyrobu] jest zgodny z](https://usermanual.wiki/Verifone/VX675WCDMA/User-Guide-2103601-Page-193.png)
![[Polish] zasadniczymi wymogami oraz pozostałymi stosownymi postanowieniami Dyrektywy 1999/5/EC. Português [Portuguese] [Nome do fabricante] declara que este [tipo de equipamento] está conforme com os requisitos essenciais e outras disposições da Directiva 1999/5/CE. Slovensko [Slovenian] [Ime proizvajalca] izjavlja, da je ta [tip opreme] v skladu z bistvenimi zahtevami in ostalimi relevantnimi določili direktive 1999/5/ES. Slovensky [Slovak] [Meno výrobcu] týmto vyhlasuje, že [typ zariadenia] spĺňa základné požiadavky a všetky príslušné ustanovenia Smernice 1999/5/ES. Suomi [Finnish] [Valmistaja = manufacturer] vakuuttaa täten että [type of equipment = laitteen tyyppimerkintä] tyyppinen laite on direktiivin 1999/5/EY oleellisten vaatimusten ja sitä koskevien direktiivin muiden ehtojen mukainen. Svenska [Swedish] Härmed intygar [företag] att denna [utrustningstyp] står I överensstämmelse med de väsentliga egenskapskrav och övriga relevanta bestämmelser som framgår av direktiv 1999/5/EG. This device complies with the R&TTE Directive (1999/5/EC), the EMC Directive (2004/108/EC), and the Low Voltage Directive (2006/95/EC) issued by the Commission of the European Community. A minimum separation distance of 0 cm must be maintained between the user’s body and the device, including the antenna during body-worn operation to comply with the RF exposure requirements in Europe.](https://usermanual.wiki/Verifone/VX675WCDMA/User-Guide-2103601-Page-194.png)