Vertex Standard USA 11144730 UHF Mobile Transceiver User Manual
Vertex Standard USA, Inc. UHF Mobile Transceiver
UserManual.wiki
>
Vertex Standard USA
>
11144730 User Manual
User Manual
Navigation menu
Upload a User Manual
Namespaces
Wiki Guide
HTML
PDF
Info
Views
User Manual
Discussion / Help
Navigation

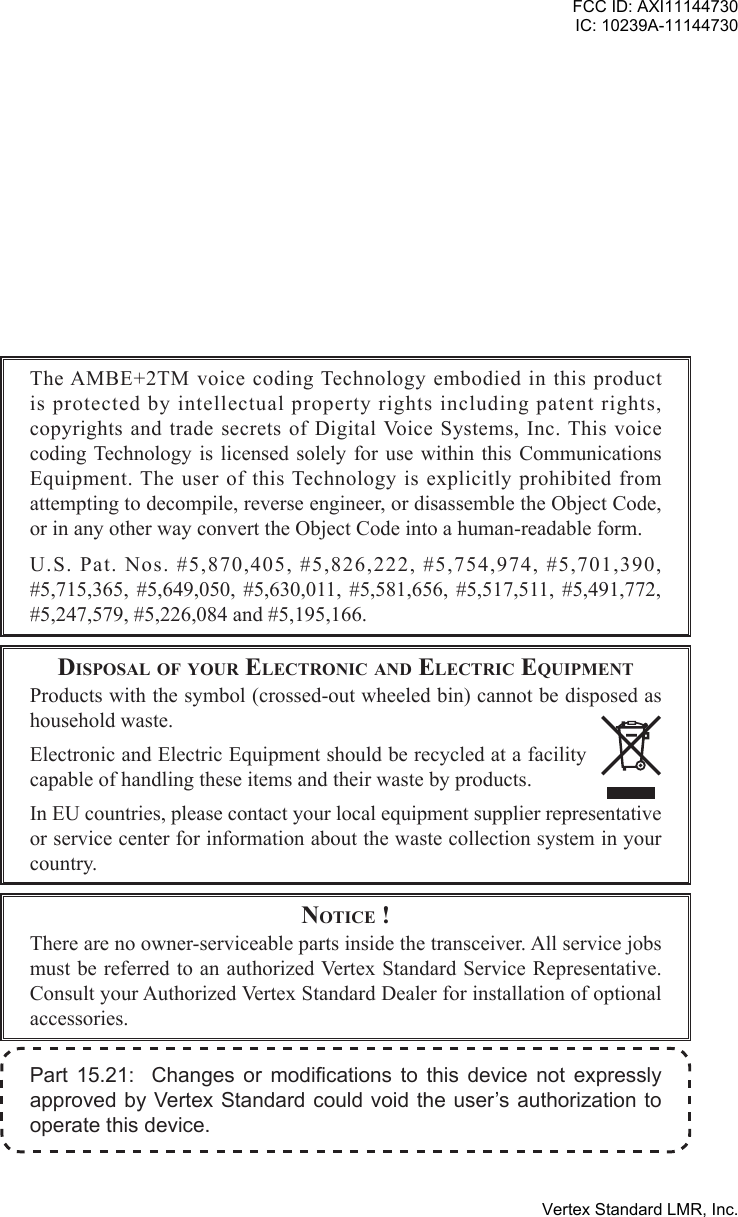
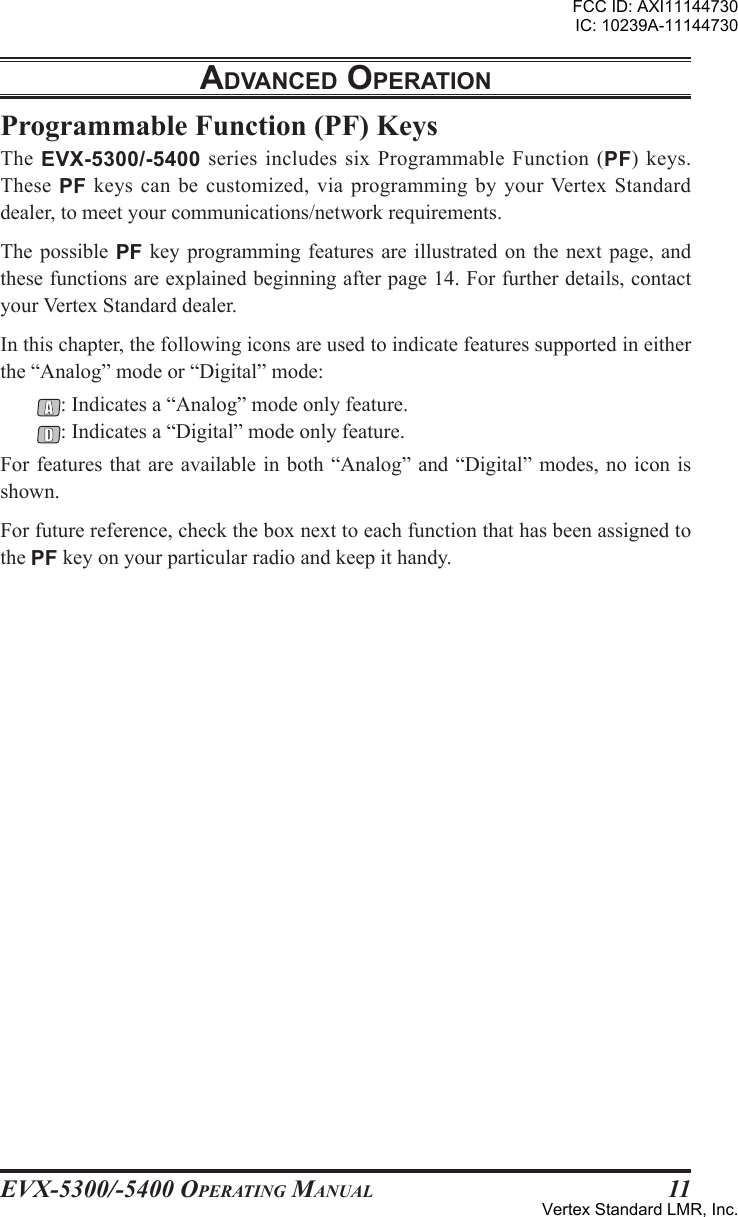
![EVX-5300/-5400 OpErating Manual4controls & connEctors (EVx-5300)Front PanelImportant! - All buttons located on the Front Panel are Programmable Function (PF) keys, congured according to your network requirements and programmed by your Vertex Standard dealer. The instructions below describe a typically-cong-ured radio. PWR () Button Press and hold in this button for 2 seconds to toggle the transceiver’s power “on” and “off”. VOL Knob Turn this control clockwise to increase the volume. Microphone Jack Connect the microphone plug to this jack. TX/BUSY Indicator Indicates transceiver’s Transmit/Receive Status. [P1] - [P4] Keys (Programmable Function Keys) These keys can be set up for special applications, such as High/Low power selection, Monitor, Talk-Around, etc., as determined by your network require-ments and programmed by your Vertex Standard dealer. []/[] Keys (Programmable Function Keys) In the factory default, pressing either key changes the current channel. FCC ID: AXI11144730IC: 10239A-11144730Vertex Standard LMR, Inc.](https://usermanual.wiki/Vertex-Standard-USA/11144730/User-Guide-2426889-Page-6.png)
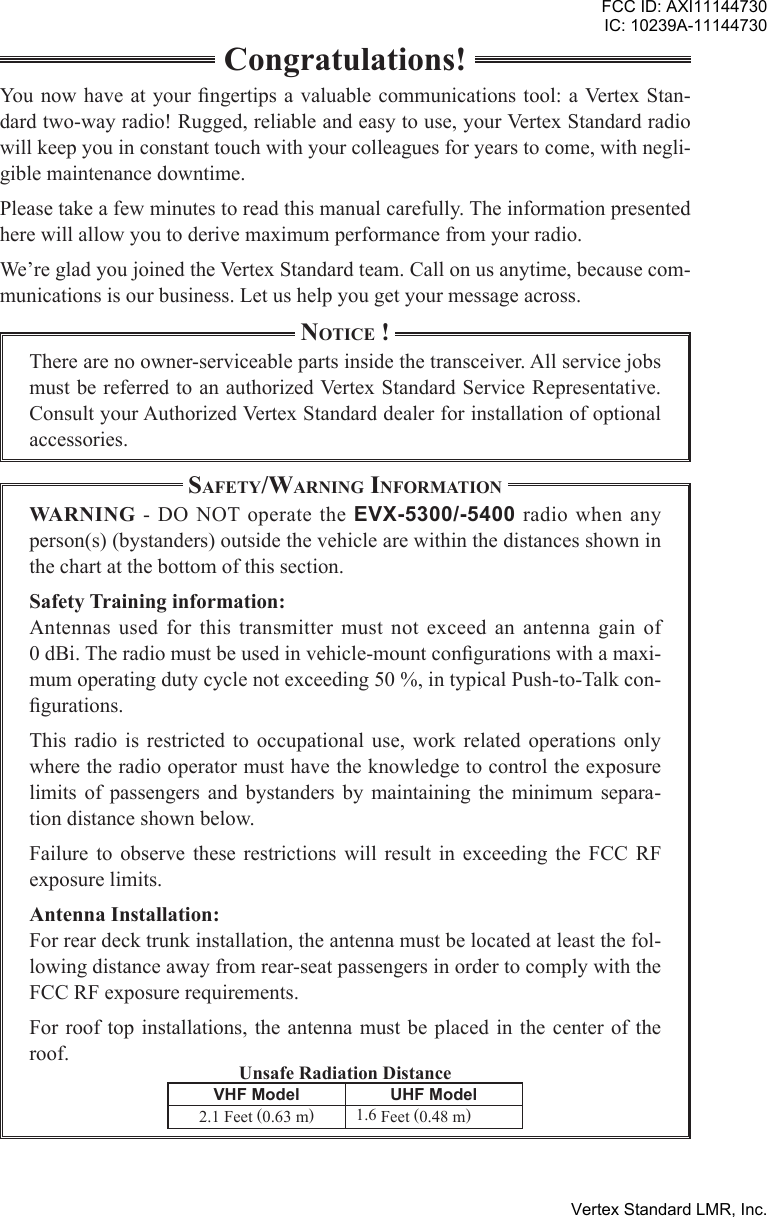
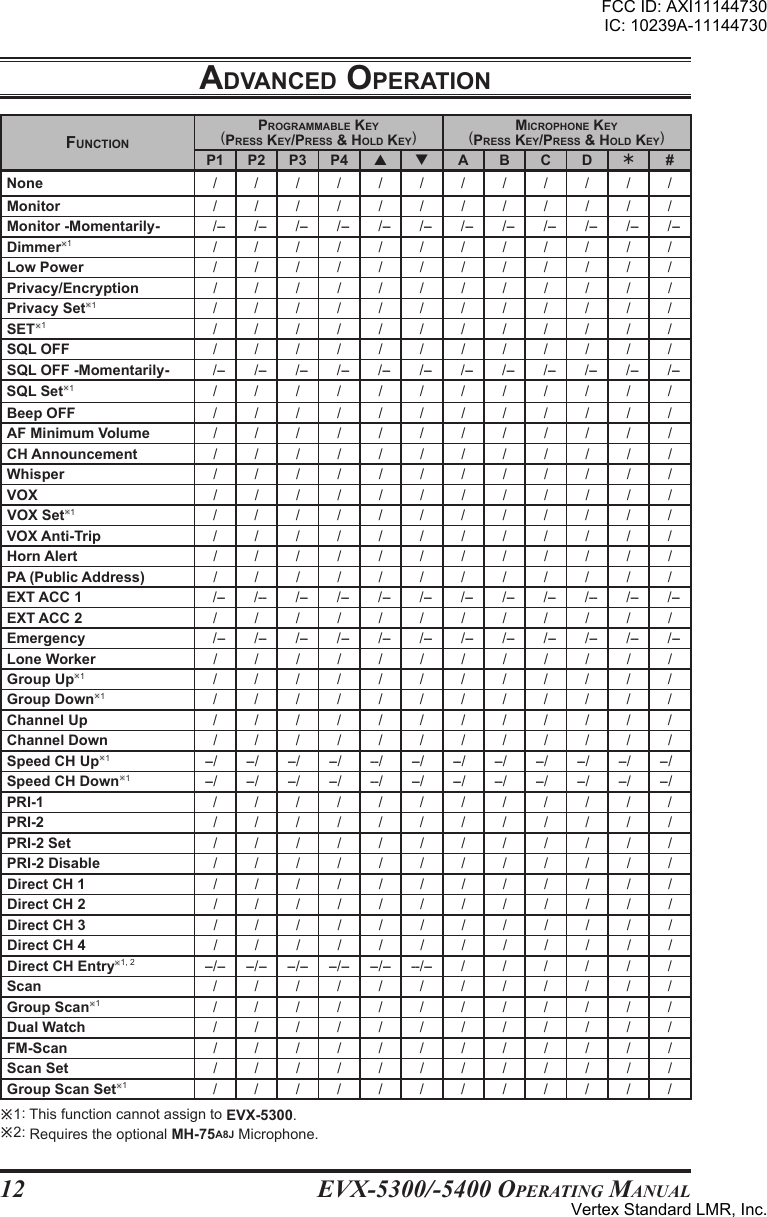
![EVX-5300/-5400 OpErating Manual6controls & connEctors (EVx-5400)Front PanelImportant! - All buttons located on the Front Panel are Programmable Function (PF) keys, congured according to your network requirements and programmed by your Vertex Standard dealer. The instructions below describe a typically-cong-ured radio. PWR () Button Press and hold in this button for 2 seconds to toggle the transceiver’s power “on” and “off”. VOL Knob Turn this control clockwise to increase the volume. Microphone Jack Connect the microphone plug to this jack. TX/BUSY Indicator Indicates transceiver’s Transmit/Receive Status. [P1] - [P4] Keys (Programmable Function Keys) These keys can be set up for special applications, such as High/Low power selection, Monitor, Talk-Around, etc., as determined by your network require-ments and programmed by your Vertex Standard dealer. []/[] Keys (Programmable Function Keys) In the factory default, pressing either key changes the current channel. FCC ID: AXI11144730IC: 10239A-11144730Vertex Standard LMR, Inc.](https://usermanual.wiki/Vertex-Standard-USA/11144730/User-Guide-2426889-Page-8.png)
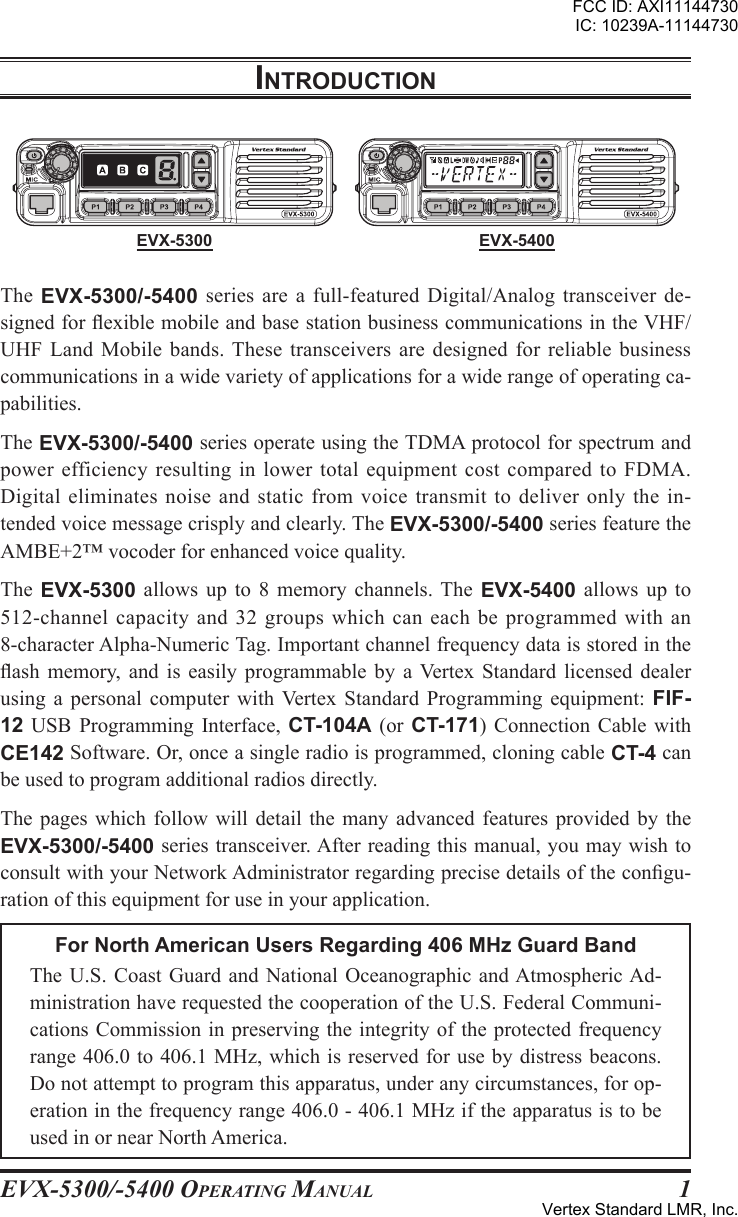
![EVX-5300/-5400 OpErating Manual9BasIc opEratIonImportant! - Before turning on the radio the rst time, conrm that the power con-nections have been made correctly and that a proper antenna is connected to the antenna jack.Switching Power ON/OFFr Press and hold in the PWR() button for 2 seconds to turn the radio on. The channel number indicator will indicate the operating channel.r Press the []/[] key to choose the desired operating channel. The display indicates a channel number (EVX-5300) or channel name (EVX-5400). The radio announces the channel number if the Channel Announcement Feature is enabled via the PC programming software.r In the EVX-5400, if you want to select an operating channel from a different group, press the Programmable Function (PF) key which is programmed to the Group Up/Down feature to select the group you want before selecting the operating channel. See page 11 for more information of the Programmable Function keys.Setting the Volumer Turn the VOL knob clockwise to increase the volume and counterclockwise to decrease it.Transmittingr To transmit, monitor the channel and make sure it is clear.r If no signal is present on the analog channel, press the PF key which is pro-grammed to the Monitor feature to listen for channel activity.r When receiving a call, transmit only after the incoming call ends. The radio cannot receive a call and transmit simultaneously.r Press the PTT switch. If the channel is clear, the TX/BUSY indicator will glow red (on the Analog Channel) or blue (on the Digital Channel). The radio is now transmitting. While holding in the PTT switch, speak across the face of the microphone in a clear and normal voice. For best transmission, hold the microphone about 1-1/2 to 2 inches (4 ~ 5 cm) away from your mouth. Re-lease the PTT switch to receive.r If the BCLO (Busy Channel Lockout) feature has been programmed on an ana-log channel, the radio will not transmit when a carrier is present. Instead, the radio will generate short beep three times. Release the PTT switch and wait for the channel to be clear of activity.r If the BTLO (Busy Tone Lockout) feature has been programmed on an analog channel or CCLO (Color Code Lockout) feature has been programmed on a digital channel, the radio can transmit only when there is no carrier being received or when the carrier being received includes the correct tone (CTCSS tone or DCS code) on an analog channel or correct code on a digital channel.FCC ID: AXI11144730IC: 10239A-11144730Vertex Standard LMR, Inc.](https://usermanual.wiki/Vertex-Standard-USA/11144730/User-Guide-2426889-Page-11.png)
![EVX-5300/-5400 OpErating Manual10Transmit Time-Out TimerIf the selected channel has been programmed for automatic time-out, you must limit the length of each transmission. While transmitting, a beep will sound 10 sec-onds before time-out. Another beep will sound just before the deadline; the red “TX” indicator will disappear and transmission will cease soon thereafter. To resume transmitting, you must release the PTT switch and wait for the “penalty timer” to expire (if you press the PTT switch before this timer expires, the timer restarts, and you will have to wait another “penalty” period).Key LockIn order to prevent accidental operating function/feature change or inadvertent transmission, various aspects of the front panel’s keys may be locked out.To activate the Locking feature, press and hold in the [P1] key while turning the radio on. To disable the Locking feature, repeat this power-on procedure.BasIc opEratIonFCC ID: AXI11144730IC: 10239A-11144730Vertex Standard LMR, Inc.](https://usermanual.wiki/Vertex-Standard-USA/11144730/User-Guide-2426889-Page-12.png)
![EVX-5300/-5400 OpErating Manual15prIVacy sEt (This function is only available in the EVX-5400) You can change a Privacy Key Code to maintain the best security using this function:r Press, (or press and hold), the assigned PF key. A tone will sound, and the current Privacy Key Number and its tag name will appear on the display.r Press the []/[] key to select the desired Privacy Key Code.r Press the [P4] key to store the new setting. The display indicates “- SET -” briey, then reverts to the normal channel indication. You may cancel the new setting by pressing the [P3] key. In this case, the display indicates “-CANCEL-” briey.Note: If the optional MH-75A8J 16-Keypad Microphone is used, you may select the Privacy Key Code and set/cancel the setting by the microphone’s [A], [B], [C], and [D] key in place of [], [], [P3], and [P4] key.EncryptIon When the Voice Scrambler feature is enabled, press, (or press and hold), the as-signed PF key to toggle the Voice Encryption “On” and “Off”. In the EVX-5300, when the Voice Encryption is activated, the Transceiver Status Indicator (“A”, “B” or “C”) will illuminate if the “Encryption” status is assigned to one of the Transceiver Status Indicators.In the EVX-5400, when the Voice Encryption is activated, the “ ” icon will be indicated on the display.sEt (This function is only available in the EVX-5400)Press, (or press and hold), the assigned PF key to activate the “User Set (Menu)” mode. See page 36 for more information of the “User Set (Menu)” mode.sql oFF Press, (or press and hold), the assigned PF key to open the SQL (Squelch) to hear background noise (unmute the audio). In the EVX-5400, when the SQL OFF function is activated, the “ ” icon will be blinked on the display.sql oFF -momEntarIly- Opens the SQL (Squelch) to hear background noise (unmute the audio) when pressing the assigned PF key. In the EVX-5400, the “ ” icon will blink on the display while opening the Squelch.adVancEd opEratIonFCC ID: AXI11144730IC: 10239A-11144730Vertex Standard LMR, Inc.](https://usermanual.wiki/Vertex-Standard-USA/11144730/User-Guide-2426889-Page-17.png)
![EVX-5300/-5400 OpErating Manual16adVancEd opEratIonsql sEt (This function is only available in the EVX-5400) You can manually adjust the squelch level using this function:r Press, (or press and hold), the assigned PF key. A tone will sound, and the cur-rent squelch level will appear on the display.r Press the []/[] key to select the desired squelch level. Available selections are “SQLLV OP (Open)”, “SQLLV TH (Threshold)”, “SQLLV NM (Nor-mal)” and “SQLLV TI (Tight)”.r Press the [P4] key to store the new setting. The display indicates “- SET -” briey, then reverts to the normal channel indication. You may cancel the new setting by pressing the [P3] key. In this case, the dis-play indicates “- CANCEL -” briey.Note: If the optional MH-75A8J 16-Keypad Microphone is used, you may select the squelch level and set/cancel the setting by the microphone’s [A], [B], [C], and [D] key in place of [], [], [P3], and [P4] key.BEEp oFFPress, (or press and hold), the assigned PF key to disable the radio beeps and the channel announcement (if activated) temporarily. Press again, (or press and hold again), the assigned PF key, to enable the radio beeps and the channel announce-ment.In the EVX-5400, when the Beep Off function is “on” and “off”, the display indi-cates briey “BEEP OFF” and “BEEP ON”.aF mInImum VolumEPress, (or press and hold), the assigned PF key to reduce the audio output to the (lower) level programmed. Again press, (or press and hold), the assigned PF key, resume normal audio output level.In the EVX-5400, when AF Minimum Volume function is “on” and “off”, the display indicates briey “AFATT ON” and “AFATT OF”. Furthermore, you may change the programmed (lower) level by the “User Set (Menu)” mode. See page 36 for more information.cH announcEmEntPress, (or press and hold), the assigned PF key to select the channel change con-rmation between “beep” (and indicates “BEEP” briey in the EVX-5400) and “announcement” (and indicates “ANNOUNCE” briey in the EVX-5400).FCC ID: AXI11144730IC: 10239A-11144730Vertex Standard LMR, Inc.](https://usermanual.wiki/Vertex-Standard-USA/11144730/User-Guide-2426889-Page-18.png)
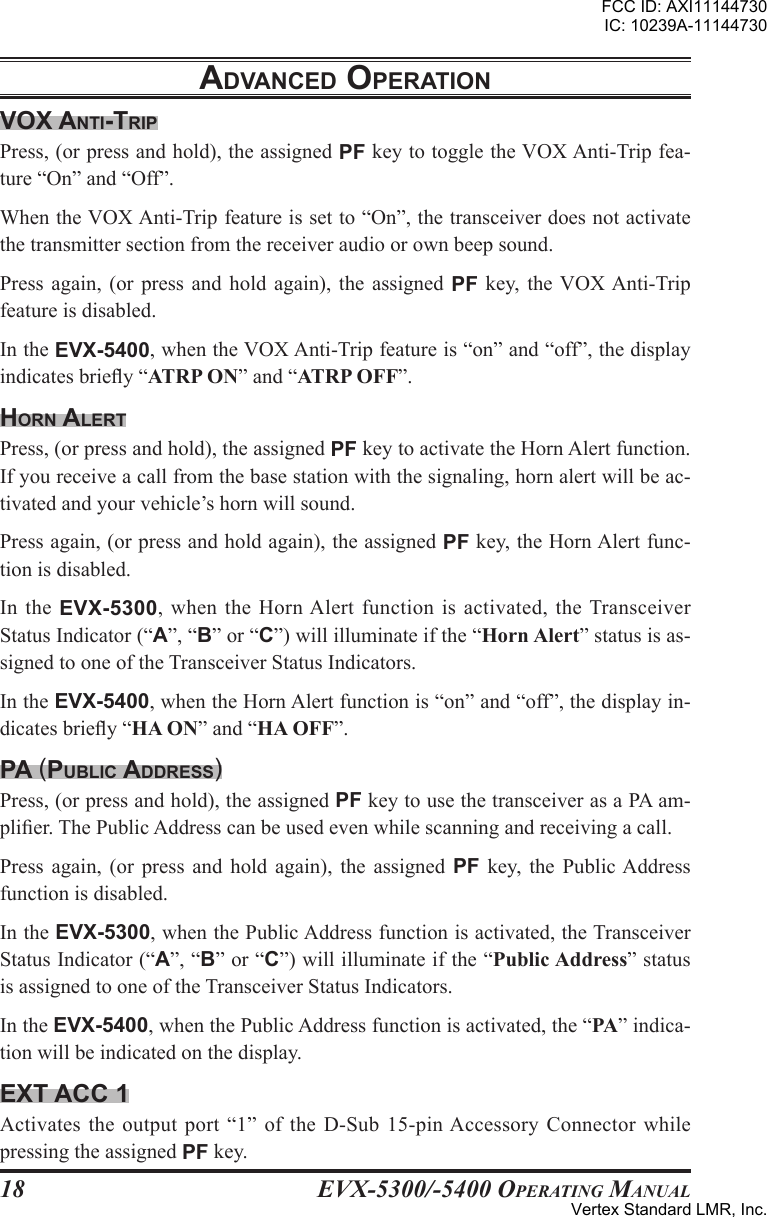
![EVX-5300/-5400 OpErating Manual17WHIspEr Press, (or press and hold), the assigned PF key to increase the microphone gain; allowing you to speak in a low voice (whisper) temporarily. Press again, (or press and hold again), the assigned PF key to resume normal microphone gain.In the EVX-5400, when the Whisper function is “on” and “off”, the display indi-cates briey “WHISP ON” and “WHISP OF”.VoxPress, (or press and hold), the assigned PF key to activate the VOX function; al-lowing hands-free, automatic activation of the transmitter, based on voice input into the microphone. You may disable the VOX function temporarily by pressing the PTT switch.Press again, (or press and hold again), the assigned PF key to resume normal op-eration.In the EVX-5400, 1) when the VOX function is activated by operation from the external equipment, a small dot (“.”) will be indicated at the bottom right of the display, and 2) when the VOX function is “on” and “off”, the display indicates briey “VOX ON” and “VOX OFF”.Vox sEt (This function is only available in the EVX-5400)You can manually adjust the VOX Gain using this function:r Press, (or press and hold), the assigned PF key. A tone will sound, and the cur-rent VOX Gain level will appear on the display.r Press the []/[] key to select the desired VOX Gain level. Available selec-tions are “VOXLV –8” to “VOXLV +8”.r Press the [P4] key to store the new setting. The display indicates “- SET -” briey, then reverts to the normal channel indication. You may cancel the new setting by pressing the [P3] key. In this case, the dis-play indicates “- CANCEL -” briey.Note: If the optional MH-75A8J 16-Keypad Microphone is used, you may select the VOX Gain level and set/cancel the setting by the microphone’s [A], [B], [C], and [D] key in place of [], [], [P3], and [P4] key.adVancEd opEratIonFCC ID: AXI11144730IC: 10239A-11144730Vertex Standard LMR, Inc.](https://usermanual.wiki/Vertex-Standard-USA/11144730/User-Guide-2426889-Page-19.png)
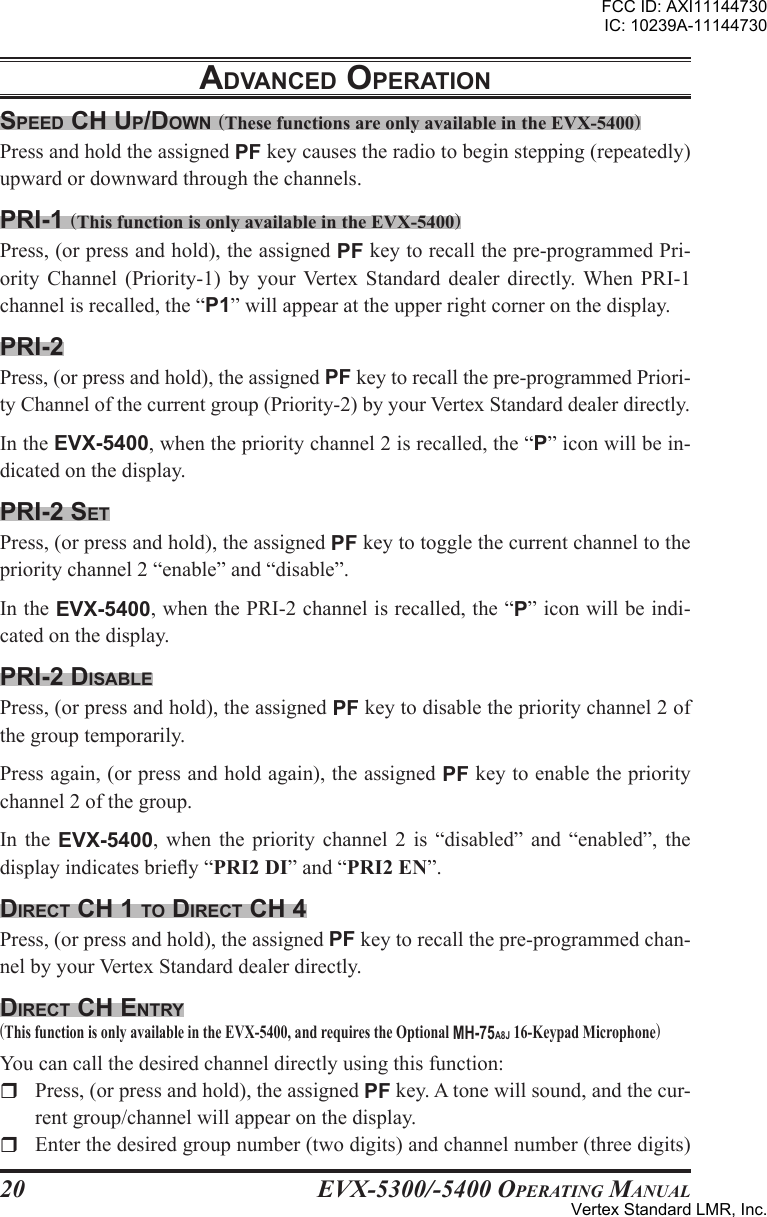
![EVX-5300/-5400 OpErating Manual19Ext acc 2Press, (or press and hold), the assigned PF key to toggle the output port “2” of the D-Sub 15-pin Accessory Connector “On” and “Off”.EmErgEncyThe EVX-5300/-5400 series include an “Emergency” feature in either analog or digital modes, which may be useful for alerting another party assistance may be re-quired, when monitoring the same frequency as the pre-dened emergency channel.Press and hold the assigned PF key for pre-programmed period to initiate an emergency call on the pre-dened channel. For further details contact your Vertex Standard dealer.To revive the radio from the Emergency mode, just press and hold again the as-signed PF key or turn off the radio.In the EVX-5300, when the Emergency feature is activated, the Transceiver Status Indicator (“A”, “B” or “C”) will illuminate if the “Emergency” status is assigned to one of the Transceiver Status Indicators.In the EVX-5400, when the Emergency feature is activated, the “- EMG -” indi-cation will be indicated on the display. lonE WorKErPress, (or press and hold), the assigned PF key to activate the Lone Worker fea-ture. The Lone Worker feature is designed to emit an alarm for 30 seconds when the Lone Worker Timer (programmed by your Vertex Standard dealer) has expired. Press again, (or press and hold again), the assigned PF key, the Lone Worker fea-ture is disabled. If the user does not reset the timer by pressing the PTT switch, the radio switches to Emergency mode.In the EVX-5400, 1) when the Lone Worker feature is activated, the “ ” icon will be indicated on the display, and 2) when the Lone Worker feature is “on” and “off”, the display indicates briey “L-WK ON” and “L-WK OFF”.group up/doWn (These functions are only available in the EVX-5400)Press, (or press and hold), the assigned PF key to select a different group of chan-nels. A group name will appear briey on the display. cH up/doWnPress, (or press and hold), the assigned PF key (generally the []/[] key) to select a different channel. In the EVX-5400, a channel name will appear briey on the display.adVancEd opEratIonFCC ID: AXI11144730IC: 10239A-11144730Vertex Standard LMR, Inc.](https://usermanual.wiki/Vertex-Standard-USA/11144730/User-Guide-2426889-Page-21.png)
![EVX-5300/-5400 OpErating Manual21from the microphone’s numeric ([0] - [9]) key.r Press the microphone’s [D] key to call the designated channel. You may cancel this function by pressing the microphone’s [C] key. In this case, the display indicates “- CANCEL -” briey.Note: You may recall and cancel the setting by the [P3] (cancel) and [P4] (recall) key. scanThe Scanning feature is used to monitor multiple channels programmed into the transceiver. While scanning, the transceiver will check each channel for the pres-ence of a signal and will stop on a channel if a signal is present. EVX-5300/-5400 series can scan both digital and analog frequency programmed channels simultane-ously.To activate scanning:r Press, (or press and hold), the assigned PF key to activate scanning.r The scanner will search the channels in the scan list, looking for a transmitting channel. The Scan function will pause each time it nds a channel on which someone is speaking.rPress, (or press and hold), the assigned PF key again to disable scanning, and receive the channel which was chosen when pressed the PF key. Note: Your Vertex Standard dealer may have programmed your radio to stay on one of the following channels if you press the PTT switch during the scan-ning pause: o “Scan Pause” channel (“Talk Back”) o “Last Busy” channel o “Priority-1” channel o “Priority-2” channel (EVX-5400 only) o “User Programmed” channel (“Select Channel”) o “Scan Start” channelgroup scan (This function is only available in the EVX-5400)The Scanning feature is used to monitor multiple channels programmed into the transceiver. While Group Scanning, the radio will check each channel of the pro-grammed group for the presence of the signal, and will stop on a channel if a sig-nal is present.Press, (or press and hold), the assigned PF key, the display indicates “GRP SCAN” briey, and activate the scanning on the selected groups.Press again, (or press and hold again), the assigned PF key to disable the group scan mode, and receive the channel which was chosen when pressed the PF key.adVancEd opEratIonFCC ID: AXI11144730IC: 10239A-11144730Vertex Standard LMR, Inc.](https://usermanual.wiki/Vertex-Standard-USA/11144730/User-Guide-2426889-Page-23.png)
![EVX-5300/-5400 OpErating Manual22dual WatcHThe Dual Watch feature is similar to the SCAN feature, except that only two chan-nels are monitored:o The current operating channel; ando The Priority-2 channel.To activate Dual Watch:r Press, (or press and hold), the assigned PF key to activate the Dual Watch fea-ture.r The scanner will search the two channels and pause each time it nds a chan-nel on which someone is speaking.To stop Dual Watch:r Press, (or press and hold), the assigned PF key to disable the Dual Watch fea-ture.r The radio receives the channel which was chosen when pressed the PF key.In the EVX-5400, when the Dual Watch feature is activated, the “DW” icon will be indicated on the display.Fm-scan (FolloW-mE scan)The FM-Scan feature checks a user-assigned priority channel regularly as you scan the other channels. Thus, if only Channels 1, 3, and 5 (of the 8 available channels) are designated for “scanning”, the user may assign Channel 2 as the “user-assigned” priority channel via FM-Scan.To activate FM-Scan, rst select the channel you want to designate as the “user-assigned priority channel” and press, (or press and hold), the assigned PF key (In the EVX-5400, the display indicates “FM SCAN” briey). Then press, (or press and hold), the Channel Up/Down key (generally the []/[] key) to recall to the “Scanning Start” channel which has been programmed by your dealer to activate the scanner. When the scanner stops on an “Active” channel, the user-assigned priority channel will automatically be checked every few seconds. If activity is found on the user-assigned priority channel, the radio will switch between it and the dealer-assigned priority channel, if any.scan sEtPress, (or press and hold), the assigned PF key to add/delete the current channel to/from your scanning list.To store a particular channel to your scanning list, press, (or press and hold), the assigned PF key. If you delete a channel from your scanning list, press, (or press and hold), the assigned PF key again.adVancEd opEratIonFCC ID: AXI11144730IC: 10239A-11144730Vertex Standard LMR, Inc.](https://usermanual.wiki/Vertex-Standard-USA/11144730/User-Guide-2426889-Page-24.png)
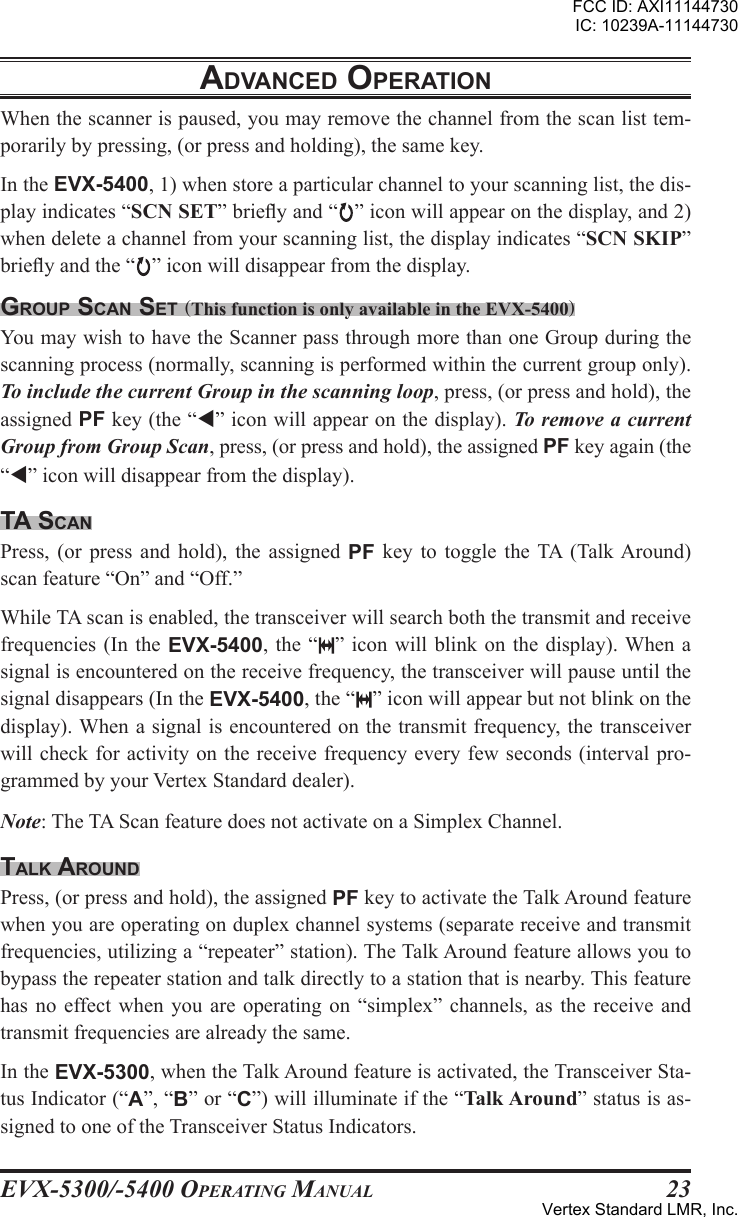
![EVX-5300/-5400 OpErating Manual24In the EVX-5400, when the Talk Around feature is activated, the “ ” icon will be indicated on the display.Note that your Vertex Standard dealer may have made provision for “Talk Around” channels by programming “repeater” and “Talk Around” frequencies on two ad-jacent channels. If so, the key may be used for one of the other Pre-Programmed Functions.Note: The Talk Around feature does not activate on a Simplex Channel.rEsEt Press, (or press and hold), the assigned PF key to reset the RFC (Ready for Com-munication) condition.call 1 to call 5Press, (or press and hold), the assigned PF key to send a pre-programmed call sig-nal of the 2-Tone, 5-Tone, MDC1200® or Digital Call.codE up/doWn (These functions are only available in the EVX-5400) Press, (or press and hold), the assigned PF key to select a 2-Tone or 5-Tone en-code code from the pre-programmed encode list.codE sEt (This function is only available in the EVX-5400) You can change the desired digit of the 5-Tone encode code using this function:r Press, (or press and hold), the assigned PF key.r Select the desired digit by the [P1]/[P2] keys, then change the number by the []/[] keys.r Press the [P4] key to store the new setting. The display indicates “- SET -” briey, then reverts to the normal channel indication. You may cancel the new setting by pressing the [P3] key. In this case, the dis-play indicates “-CANCEL-” briey.Note: If the optional MH-75A8J 16-Keypad Microphone is used, you may enter the 5-Tone encoding code directly from the microphone’s numeric ([0] - [9]) key. In this case, you may set and cancel the setting by the microphone’s [C] (for cancel) and [D] (for set) key. spEEd dIal Your Vertex Standard dealer may have pre-programmed Auto-Dial telephone num-ber memories into your radio.To dial a number:In the EVX-5300, press, (or press and hold), the assigned PF key, then press the adVancEd opEratIonFCC ID: AXI11144730IC: 10239A-11144730Vertex Standard LMR, Inc.](https://usermanual.wiki/Vertex-Standard-USA/11144730/User-Guide-2426889-Page-26.png)
![EVX-5300/-5400 OpErating Manual25PTT switch to send a pre-dened DTMF tone. The DTMF tones sent during the dialing sequence will be heard in the speaker.In the EVX-5400, Press, (or press and hold), the assigned PF key, then press the []/[] keys to select the Auto-Dial memory number which is pre-programmed by your Vertex Standard dealer. Press the PTT switch to send a pre-dened DTMF tone. The DTMF tones sent during the dialing sequence will be heard in the speaker.Note: If the optional MH-75A8J 16-Keypad Microphone is used, you may select the Auto-Dial memory number by the microphone’s numeric ([0] - [9]) key.dtmF codE sEt (This function is only available in the EVX-5400, and requires the Optional MH-75A8J 16-Keypad Microphone)r Press, (or press and hold), the assigned PF key to start entering the DTMF di-aling sequence.r Enter the DTMF digit from the microphone’s numeric ([0] - [9]) key. A DTMF cord appears in the display according to the key entry.r After entering all DTMF digits, press the PTT switch to transmit the DTMF code. call (EVX-5300) Press, (or press and hold), the assigned PF key to send a 2-tone or 5-tone sequen-tial tone.call (EVX-5400)The Call feature of the EVX-5400 is different by the operating system and operat-ing mode.When using the DTMF Paging SystemThis feature, if enabled, allows the user to send any 3-digit Page Call code, used to call other similarly-equipped stations. Press, (or press and hold), the assigned PF key, followed by the three digits representing the Page Call code of the station you wish to call. Three tones will be heard after the last key is pressed (the new code will now be transmitted).The receiver squelch of the other station will be opened, and you can begin com-munication.When using the 2-tone/5-tone Signaling SystemThis feature, if enabled, Press, (or press and hold), the assigned PF key to send a 2-tone/5-tone sequential tone.When using the MDC1200® SystemThis feature, if enabled, Press, (or press and hold), the assigned PF key to send an adVancEd opEratIonFCC ID: AXI11144730IC: 10239A-11144730Vertex Standard LMR, Inc.](https://usermanual.wiki/Vertex-Standard-USA/11144730/User-Guide-2426889-Page-27.png)
![EVX-5300/-5400 OpErating Manual26adVancEd opEratIonMDC1200® code. Available codes are “CALL ALT”, “SEL CALL”, “RADIO CH”, “STUN” and “REVIVE”.r Press, (or press and hold), the assigned PF key to enter the “Call Menu” mode.r Press the []/[] keys (or [P1]/[P2] keys) to select the desired Call mode, then press the [P4] key to accept the selection. (You may cancel the selection by pressing the [P3] key).r Press the []/[] (or [P1]/[P2] keys) to select the station to be called. Note: If the optional MH-75A8J 16-Keypad Microphone is used, you may en-ter the station’s ID number (four digits) directly from the microphone’s key ([0] - [9], [A] - [D], [#]: substitute for “E”, and [Ý]: wild card).r Press the PTT switch to send an MDC1200® call.When operating in the Digital modeThis feature, if enabled, allows the user conrm and/or edit the Contact Alias.r Press, (or press and hold), the assigned PF key to enter the “Call Menu” mode.r Press the []/[] keys (or [P1]/[P2] keys) to select the desired Contact Alias. You may nd the “New List” and “Manual” category at the last of the indication loop. Describes these two functions later.r Press the [P4] key to accept the selection. You may cancel the selection by pressing the [P3] key.I) If the TX ID Type of the selected Contact Alias is “Group Call” or “All Call” (indicates the “GC” or “AC” icon at the upper right corner of the display), you may conrm the Call ID of the Contact Alias by the following operation: Press the [P4] key to conrm the “Call ID” of the selected Contact Alias. Press the [P3] key to return the display to the “Tag Name” indication.II) If the TX ID Type of the selected Contact Alias is “Private Call” (indicates the “PC” icon at the upper right corner of the display), you may conrm and edit the Contact Alias by the following operation: Press the []/[] keys (or [P1]/[P2] keys) to select the function you wish to. Available selections are “CALL ALT”, “VIEW ID”, “EDIT TAG”, “EDIT ID”, “ALT SEL”, “DEL LIST”, “RADIO CK”, “RADIOMON”, “REVIVE” and “STUN”. Press the [P4] key to accept the selected function. Refer to follows for de-tailed operation of each function. Press the [P3] key to cancel the “Call” feature and return to the normal opera-tion, if desired.CALL ALT: You may contact with the selected Contact Alias.Press the [P4] key to transmit the call alert command to the designated radio. FCC ID: AXI11144730IC: 10239A-11144730Vertex Standard LMR, Inc.](https://usermanual.wiki/Vertex-Standard-USA/11144730/User-Guide-2426889-Page-28.png)
![EVX-5300/-5400 OpErating Manual27If the designated radio is active, the designated radio transmits the ACK com-mand and displays your ID number on the display. If not, your radio’s display indicates “NO ACK”.VIEW ID: You may conrm the Call ID of the Contact Alias.Press the [P4] key to conrm the “Call ID”. Press the [P3] key to return the display to the “Tag Name” indication.EDIT TAG: You may edit the “Tag Name” of the selected Contact Alias.Important Note: This function require the optional MH-75A8J 16-Keypad Microphone, and you can not edit the “Tag Name” of the Contact Alias which determined by the CE142 Programming Software.Press the [P4] key, then edit the “Tag Name” using the [0] - [9] key (for select the character) and [A]/[B] key (for select the digit). You may delete the current character by pressing the [Ý] key, or insert the space by pressing the [#] key. Press the [P4] key again, the display indicates “-SAVED-” briey and store the new setting. You may cancel the new setting by pressing the [P3] key.EDIT ID: You may edit the “ID number” of the selected Contact Alias. Im-portant Note: This function require the optional MH-75A8J 16-Keypad Mi-crophone, and you can not edit the “ID number” of the contact number which determined by the CE142 Programming Software.Press the [P4] key, then edit the “ID number” using the [0] - [9] key (for select the number) and [A]/[B] key (for select the digit). Press the [P4] key again, the display indicates “-SAVED-” briey and store the new setting. You may cancel the new setting by pressing the [P3] key.ALT SEL: You may change the alert tone which assigned to the selected Con-tact Alias.Press the [P4] key, then press the []/[] keys (or [P1]/[P2] keys) to select the desired alert tone. Available selections are “TONE A” to “TONE J” and “NONE”. Press the [P4] key again to store the new setting. You may cancel the new setting by pressing the [P3] key.DEL LIST: You may delete the desired Contact Alias from the contact list. Important Note: The deleted Contact Alias can not be restored, and you can not delete the Contact Alias which determined by the CE142 Programming Software.Press the [P4] key, the display indicates “DEL Y/N”(“Y” is blinking). Press the [P4] key again, the display indicates “-SAVED-” briey, then reverts to rst contact number of the contact list. You may cancel the new setting by pressing the [P3] key.adVancEd opEratIonFCC ID: AXI11144730IC: 10239A-11144730Vertex Standard LMR, Inc.](https://usermanual.wiki/Vertex-Standard-USA/11144730/User-Guide-2426889-Page-29.png)
![EVX-5300/-5400 OpErating Manual28RADIO CK: You may check the radio status of the selected Contact Alias.Press the [P4] key to transmit the radio status command to the designated radio. If the designated radio is alive, the designated radio transmits the ACK command, and then your radio’s display indicates “ACK RECV”. If not, your radio’s display indicates “NO ACK”.RADIOMON: You may monitor the situation around the designated radio by remote control.Press the [P4] key to remote-control the designated radio. If the designated radio is alive, the designated radio will automatically transmit for the pro-grammed period to transmit the situation around the radio to you. Your radio’s display indicates “ACK RECV”, and outputs the situation around the desig-nated radio from the speaker. If the designated radio is not alive, your radio’s display indicates “NO ACK” and no responses.REVIVE: You may revive the stunned radio by remote control.Press the [P4] key to transmit the revive command to the stunned radio. When the stunned radio receives the revive command, the stunned radio revives, and then transmits the ACK command automatically. Your radio’s display indi-cates “ACK RECV”. If your radio’s display indicates “NO ACK”, the revive command did not succeed.STUN: You may stun the designated radio forcibly by remote control.Press the [P4] key to transmit the stun command to the designated radio. If the designated radio is alive, the designated radio transmits the ACK command and stuns it. If not, your radio’s display indicates “NO ACK”, the stun com-mand did not succeed.The stunned radio will revive by the REVIVE function described previously.III) New List: This category allows you to create the desired Contact Alias and save it into the contact list. Important Note: This function require the optional MH-75A8J 16-Keypad Microphone.r Press the [P4] key, the display indicates “ENTER ID” briey, enter the “ID number” you wish to, using the [0] - [9] key (for select the number) and [A]/[B] key (for select the digit).r Press the [P4] key again, the display indicates “ENTERTAG” briey, enter the desired “Tag Name” using the [0] - [9] key (for select the character) and [A]/[B] key (for select the digit). You may delete the current character by pressing the [Ý] key, or insert the space by pressing the [#] key. r Press the [P4] key again, the display indicates “ALT SEL” briey, select the desired alert tone using the []/[] keys (or [P1]/[P2] keys).adVancEd opEratIonFCC ID: AXI11144730IC: 10239A-11144730Vertex Standard LMR, Inc.](https://usermanual.wiki/Vertex-Standard-USA/11144730/User-Guide-2426889-Page-30.png)
![EVX-5300/-5400 OpErating Manual29r Press the [P4] key again to store the new setting into the contact list as the Private Call. You may cancel the new setting by pressing the [P3] key.IV) Manual: This category allows you to perform the “CALL ALT”, “RADIO CK”, “RADIOMON”, “REVIVE” and “STUN” function for the desired Contact Alias manually by the following operation. Important Note: This function require the optional MH-75A8J 16-Keypad Microphone.r Press the [P4] key, the display indicates “ENTER ID” briey, enter the “ID number” you wish to operate the function, using the [0] - [9] key (for select the number) and [A]/[B] key (for select the digit).r Press the [P4] key again, then press the []/[] keys (or [P1]/[P2] keys) to select the desired function described above.r Press the [P4] key to perform the function. You may cancel the function by pressing the [P3] key.Note: If the optional MH-75A8J 16-Keypad Microphone is used, you may use the [A], [B], [C], and [D] keys in place of [P1], [P2], [P3], and [P4] keys.status sEt (This function is only available in the EVX-5400) You can change the 5-tone status code using this function: r Press, (or press and hold), the assigned PF key to change the 5-tone status code.r Select the desired digit to be changing by pressing the [P1]/[P2] keys, then change the number by pressing the []/[] keys.r Press the [P4] key to store the new number to the 5-tone status code. The dis-play indicates “- SET -” briey, then reverts to the normal channel indication. You may cancel the new setting by pressing the [P3] key. In this case, the dis-play indicates “-CANCEL-” briey.Note: If the optional MH-75A8J 16-Keypad Microphone is used, you may enter the 5-tone status code directly from the microphone’s numeric ([0] - [9]) key.status up/doWn (These functions are only available in the EVX-5400) Press, (or press and hold), the assigned PF key to select a 5-tone status code from the pre-dened status list.status cHEcK (This function is only available in the EVX-5400) Press, (or press and hold), the assigned PF key to check the 5-tone receive status code. When you press this key, the display will indicate the “Message” corre-sponding to the receive status condition per the pre-dened status list.adVancEd opEratIonFCC ID: AXI11144730IC: 10239A-11144730Vertex Standard LMR, Inc.](https://usermanual.wiki/Vertex-Standard-USA/11144730/User-Guide-2426889-Page-31.png)
![EVX-5300/-5400 OpErating Manual30adVancEd opEratIonduty Press, (or press and hold), the assigned PF key to toggle the Duty function of the 2-tone, 5-tone or MDC1200® decoder “On” and “Off”.When the Duty function is set to “On”, the user will always hear (depending on the sub-audio signaling) all trafc on the paging channel. The radio will sound the paging alert when it receives the programmed 2-tone, 5-tone or MDC1200®.When the Duty function is set to “Off”, the user will NOT hear normal radio traf-c on the paging channel. The radio will sound the paging alert and unmute only when it receives the programmed 2-tone, 5-tone or MDC1200®.In the EVX-5400, when the Duty function is “On” and “Off”, the display indicates briey “DUTY ON” and “DUTY OFF”.Id cHEcK (This function is only available in the EVX-5400) This function allows logged ID of the DTMF Signaling or 5-tone Signaling to be reviewed and relayed (5-tone Signaling only) to a specic station:r Press, (or press and hold), the assigned PF key to display the logged ID of the DTMF Signaling or 5-tone Signaling.r Press the []/[] keys to select the logged ID to be reviewed. r Press the [P2] key to toggle the display between the “ID Code display” and “Channel Tag display”. r Press the [P4] key to send the Call back, when recalling the ID of the “5-tone Signaling”, if desired. You may cancel the Call back sending by pressing the [P3] key. In this case, the display indicates “-CANCEL-” briey.arts logIn (This function is only available in the EVX-5400)This function enable the displaying the logged ID of the MDC1200® ARTS™ (ARTSII™) or Digital ARTS™ (ARTSII™).r Press, (or press and hold), the assigned PF key to display the number of the logged station of the MDC1200® ARTS™ (or ARTSII™) or Digital ARTS™ (ARTSII™) for 1.5 seconds, and then the display indicates the “ID number” of the logged station.r Press the []/[] keys to indicate the “ID number” of other stations, if needed.r Press the [P3] key to resume normal display.FCC ID: AXI11144730IC: 10239A-11144730Vertex Standard LMR, Inc.](https://usermanual.wiki/Vertex-Standard-USA/11144730/User-Guide-2426889-Page-32.png)
![EVX-5300/-5400 OpErating Manual31adVancEd opEratIontExt mEssagE (This function is only available in the EVX-5400) You may receive/send the message from/to other radio.r Press, (or press and hold), the assigned PF key to enter the “Text Message” mode.r Press the [P1]/[P2] keys (or []/[] keys) to select the function you wish to. Available functions are “IN BOX”, “WRITEø”, and “SEL MSG”.r Press the [P4] key to accept the selected function. Refer to follows for detailed operation of each function.r Press the [P3] key to cancel the “Text Message” feature and return to the normal operation, if desired.ø: The “WRITE” function appears only when the optional MH-75A8J 16-Key-pad Microphone is connected.IN BOX: You may conrm/delete the received message in this function.Conrm Press the [P1]/[P2] keys to select the received message you wish to conrm. The display will scroll the selected message automatically. The EVX-5400 can memorize up to 28 messages (rst-in rst-out basis). The message number indicates at the upper right corner of the display. You may nd the “ALL DEL” menu which is located at the last message loop. Describes this menu later. Press the [] key at once (or press the [] key twice) to conrm the “Call ID” of the selected message, if desired. Press the [P1]/[P2] keys to select other received message, or press the [P3] key to return to the top of the “IN BOX” function.Delete (Individual message) Press the [P1]/[P2] keys to select the received message you wish to delete. Press the [] key at once (or press the [] key twice) to select the “DELETE” menu, then press the [P4] key. The display indicates “DEL Y/N”(“Y” is blinking). Press the [P4] key again to delete the selected message. You may cancel the deleting the message by pressing the [P3] key. Press the [P1]/[P2] keys to select other received message you wish to delete, or press the [P3] key to return to the top of the “IN BOX” function.Delete (All messages) Press the [P1]/[P2] keys to select the “ALL DEL” menu which is located at the last message loop, then press the [P4] key. The display indicates “DEL Y/N”(“Y” is blinking). Press the [P4] key again to delete the all messages. You may cancel the FCC ID: AXI11144730IC: 10239A-11144730Vertex Standard LMR, Inc.](https://usermanual.wiki/Vertex-Standard-USA/11144730/User-Guide-2426889-Page-33.png)
![EVX-5300/-5400 OpErating Manual32deleting the all messages by pressing the [P3] key.WRITE: You may create a sending message and send/save it in this function if you use with the optional MH-75A8J 16-Keypad Microphone. The EVX-5400 can memorize up to 24 messages include pre-programmed message which determined by the CE142 Programming Software.Create the message Create the message using the [0] - [9] key (for select the character) and [A]/[B] keys (for select the digit). The EVX-5400 can create up to 32 characters. You may delete the current character by pressing the [Ý] key, or insert the space character by pressing the [#] key. Press the [D] key, then press the [A]/[B] keys to select the “SEND” or “SAVE” menu depending on your purpose, and move to each step as follow.Send the message Press the [D] key, then press the [A]/[B] keys to select the “Call ID” you wish to send a message. You may enter a new “Call ID” manually by following operation:l Press the [A]/[B] keys to select the “MANUAL” menu which is located at the last “Call ID” loop.l Press the [D] key, then enter the “Call ID” using the [0] - [9] key. Press the [D] key again to send the message. The display indicates “TEXT MSG” and “Call ID” alternately while sending the message.Save the message Press the [D] key to save the created message.SEL MSG: You may send/edit/delete the message in this function.Send the message Press the [P1]/[P2] keys to select the message you wish to send. Press the [P4] key, then press the [P1]/[P2] keys to select the “SEND” menu. Press the [P4] key again, then press the [P1]/[P2] keys to select the “Call ID” you wish to send a message. If you use with the optional MH-75A8J 16-Keypad Microphone, you may enter a new “Call ID” manually by following operation:l Press the [P1]/[P2] keys to select the “MANUAL” menu which is located at the last “Call ID” loop.l Press the [P4] key, then enter the “Call ID” using the [0] - [9] key. Press the [P4] key again to send the message. The display indicates “TEXT MSG” and “Call ID” alternately while sending the message.adVancEd opEratIonFCC ID: AXI11144730IC: 10239A-11144730Vertex Standard LMR, Inc.](https://usermanual.wiki/Vertex-Standard-USA/11144730/User-Guide-2426889-Page-34.png)
![EVX-5300/-5400 OpErating Manual33adVancEd opEratIonEdit the messageImportant Note: This menu appears only when the optional MH-75A8J 16-Keypad Microphone is connected, and you can not edit the message which determined by the CE142 Programming Software. Press the [P1]/[P2] keys to select message you wish to edit. Press the [P4] key, then press the [P1]/[P2] keys to select the “EDIT” menu. Press the [P4] key again, then edit the message using the [0] - [9] key (for select the character) and [A]/[B] key (for select the digit). Press the [P4] key, then press the [P1]/[P2] keys to select the “SAVE” menu. Press the [P4] key again to save the edited message.Delete the messageImportant Note: You can not delete the message which determined by the CE142 Programming Software. Press the [P1]/[P2] keys to select the message you wish to delete. Press the [P4] key, then press the [P1]/[P2] keys to select the “DELETE” menu. Press the [P4] key. The display indicates “DEL Y/N”(“Y” is blinking). Press the [P4] key again to delete the selected message. You may cancel the deleting the message by pressing the [P3] key.optIon sWItcH 1Activates the optional accessory while pressing the assigned PF key.optIon sWItcH 2Press, (or press and hold), the assigned PF key to toggle the optional accessory “On” and “Off”.tx saVE dIsaBlEPress, (or press and hold), the assigned PF key to disable the Transmit Saver, if you are operating in a location where high power is almost always needed.Press again, (or press and hold again), the assigned PF key, the Transmit Saver ac-tivates to reduce the transmit power when a very strong signal from an apparently nearby station is being received.In the EVX-5400, when the Transmit Saver is “On” and “Off”, the display indi-cates briey “TX SA ON” and “TX SAOFF”.FCC ID: AXI11144730IC: 10239A-11144730Vertex Standard LMR, Inc.](https://usermanual.wiki/Vertex-Standard-USA/11144730/User-Guide-2426889-Page-35.png)
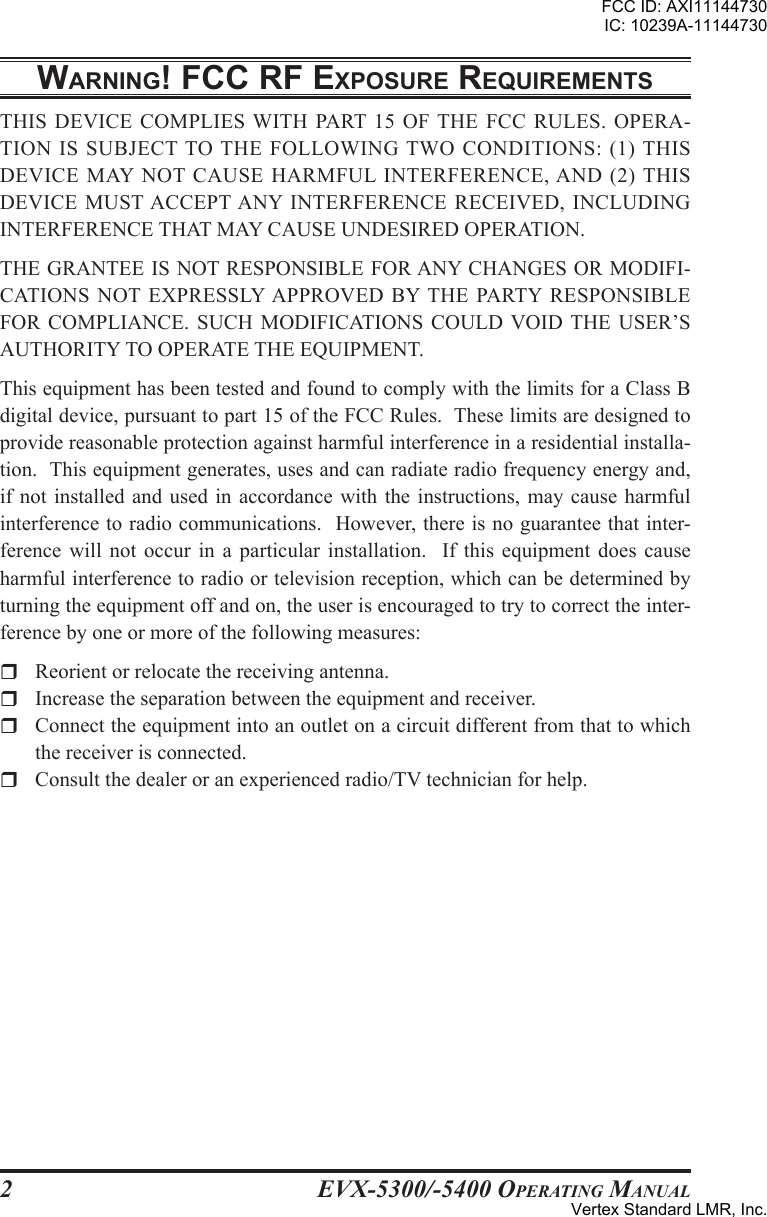
![EVX-5300/-5400 OpErating Manual36usEr sEt modEThe EVX-5400 includes a “User Set” (Menu) Mode which allows the user to de-ne or congure various settings, such as Squelch, Display contrast, etc. To acti-vate the “User Set” (Menu) Mode:r Press the PF key assigned to the “SET” function to enter the “User Set” (Menu) Mode.r Select the Set Mode item you wish to change using the [P1]/[P2] keys, then use the []/[] keys to adjust the setting of the selected item.r Repeat the previous step to adjust other Set Mode item, if desired.r Press the [P4] key to store the new setting and the display indicates “-SAVED-” briey, then exit to normal operation. You may exit to normal operation without saving the new setting by pressing the [P3] key.sEt modE ItEmdEscrIptIon aVaIlaBlE ValuEsSQL Sets the Squelch level.This Set Mode Item is appeared on the ana-log channel only. SQL OP (Open),SQL TH (Threshold),SQL NM (Normal),SQL TI (Tight)Beep Enables/Disables the Key Beeper. BEEP ON,BEEP OFFBell Enables/Disables the Bell function of the CTCSS/DCS Sub Audio System.(alert tone activated by incoming signaling)BELL ON,BELL OFFLight Enables/Disables the TX/BUSY indicator and the back light of the display and keypad.LIGHT ON,LIGHT OFFKey Enables/Disables the Key Lock function. KEY FRE (Free),KEY LCK (Lock)PTT Enables/Disables the PTT Lock function. PTT FRE (Free),PTT LCK (Lock)DIMMER Sets the LCD Brightness level. DIMM 0 (Dimmer “OFF”),DIMM 1,DIMM 2,DIMM 3Scan Engages/Disengages Scanning. SCAN ON,SCAN GRP (Group Scan),SCAN FM (Follow-Me Scan),SCAN OFFDW Engages/Disengages Dual Watch. DW OFF,DW ONAF Sets the minimum Audio Volume level. AF 000 ~ AF 255CONTRAST Sets the LCD Contrast level. CONTR 00 ~ 15TX Save Enables/Disables the TX Save function. TXSV ON,TXSV OFFFCC ID: AXI11144730IC: 10239A-11144730Vertex Standard LMR, Inc.](https://usermanual.wiki/Vertex-Standard-USA/11144730/User-Guide-2426889-Page-38.png)