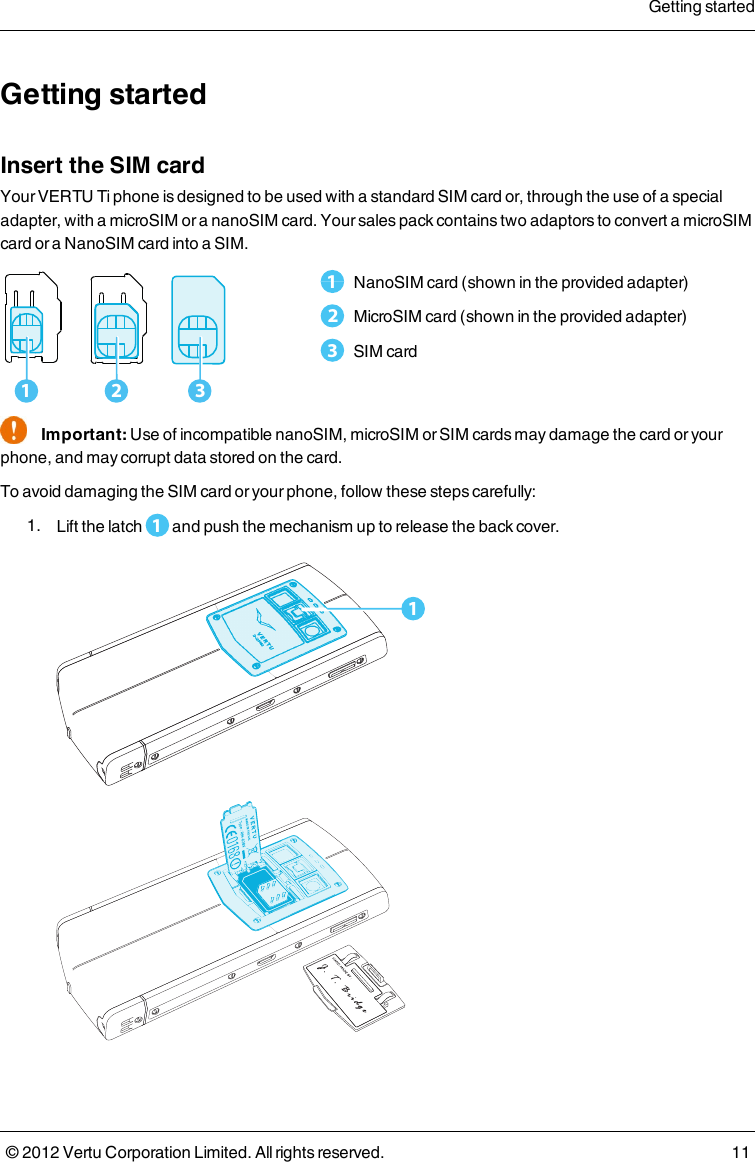
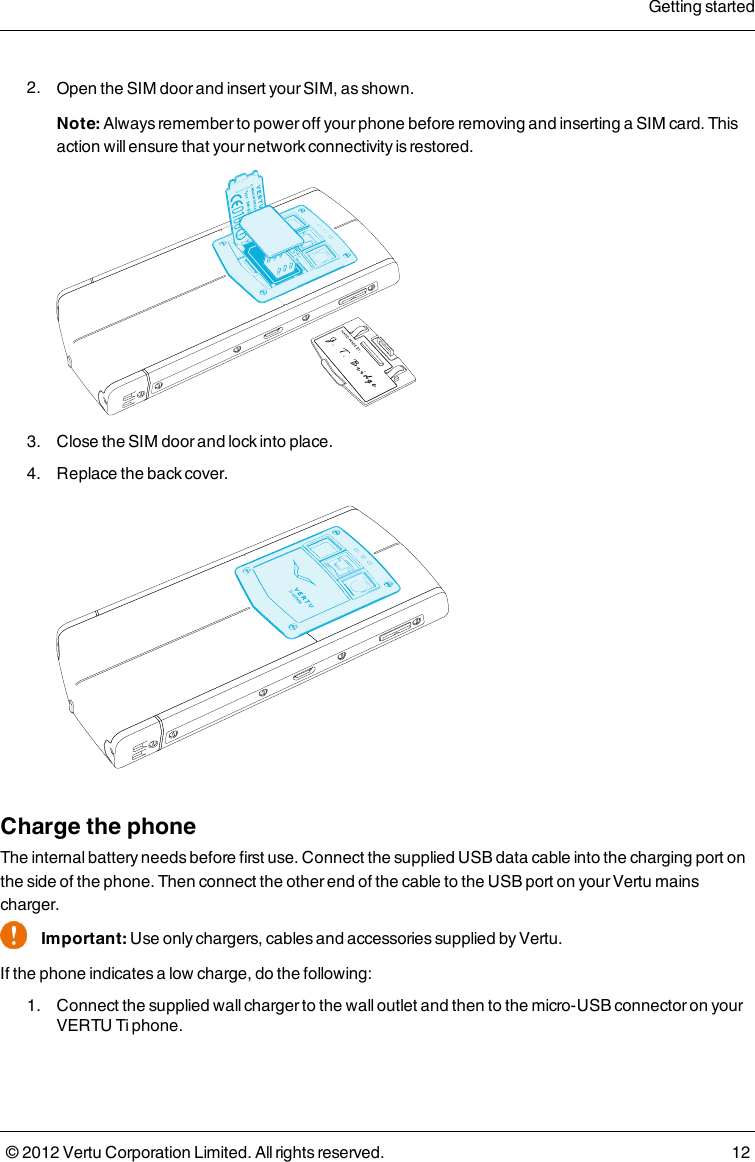
Vertu RM-828V GSM/WCDMA CELLULAR TELEPHONE WITH BT AND WLAN User Manual Vertu Ti Reference Manual
Vertu GSM/WCDMA CELLULAR TELEPHONE WITH BT AND WLAN Vertu Ti Reference Manual
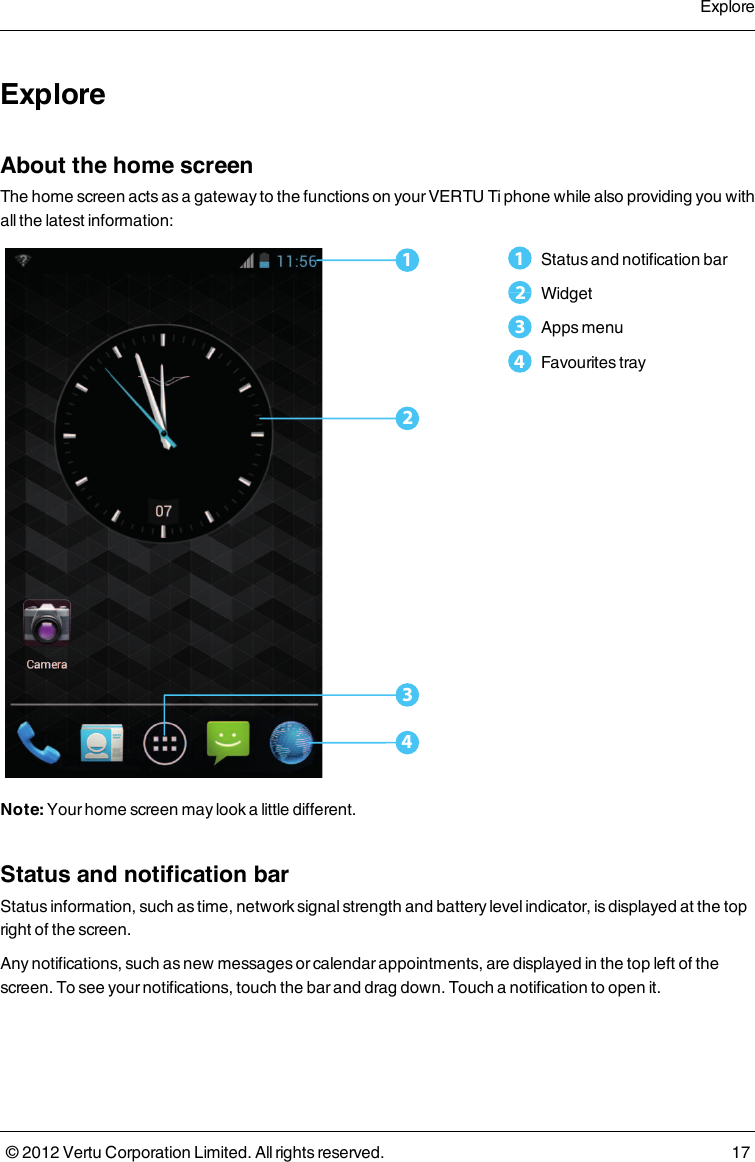
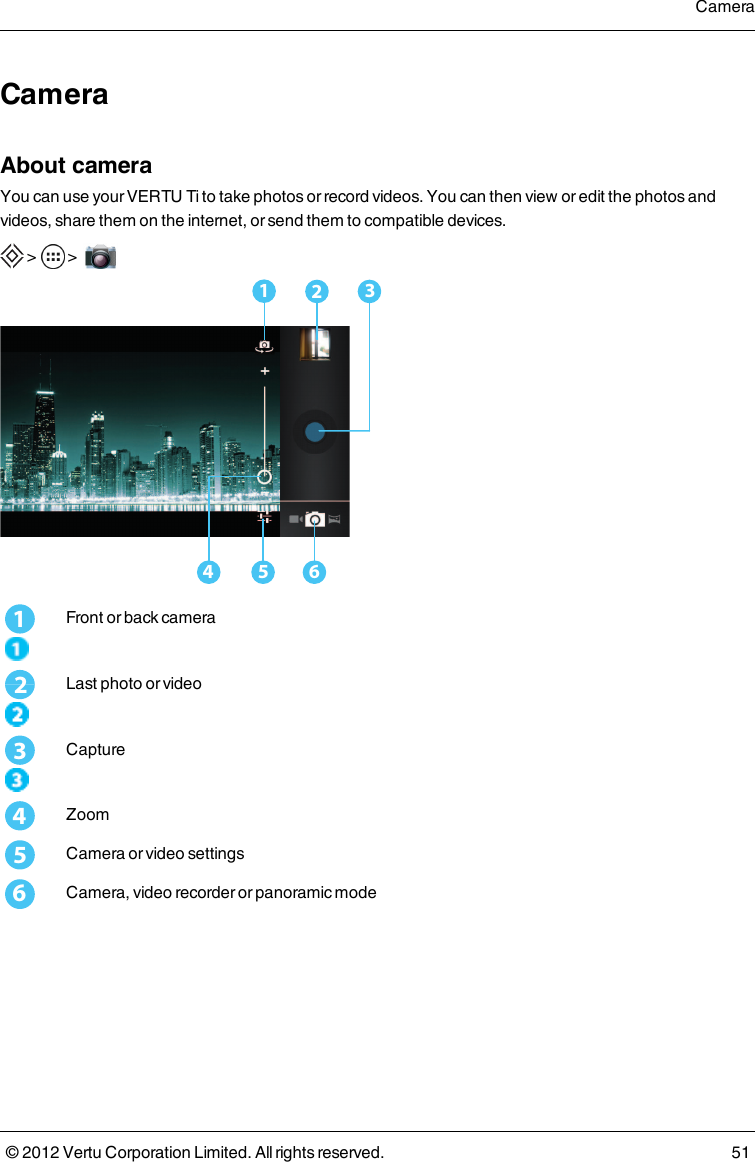
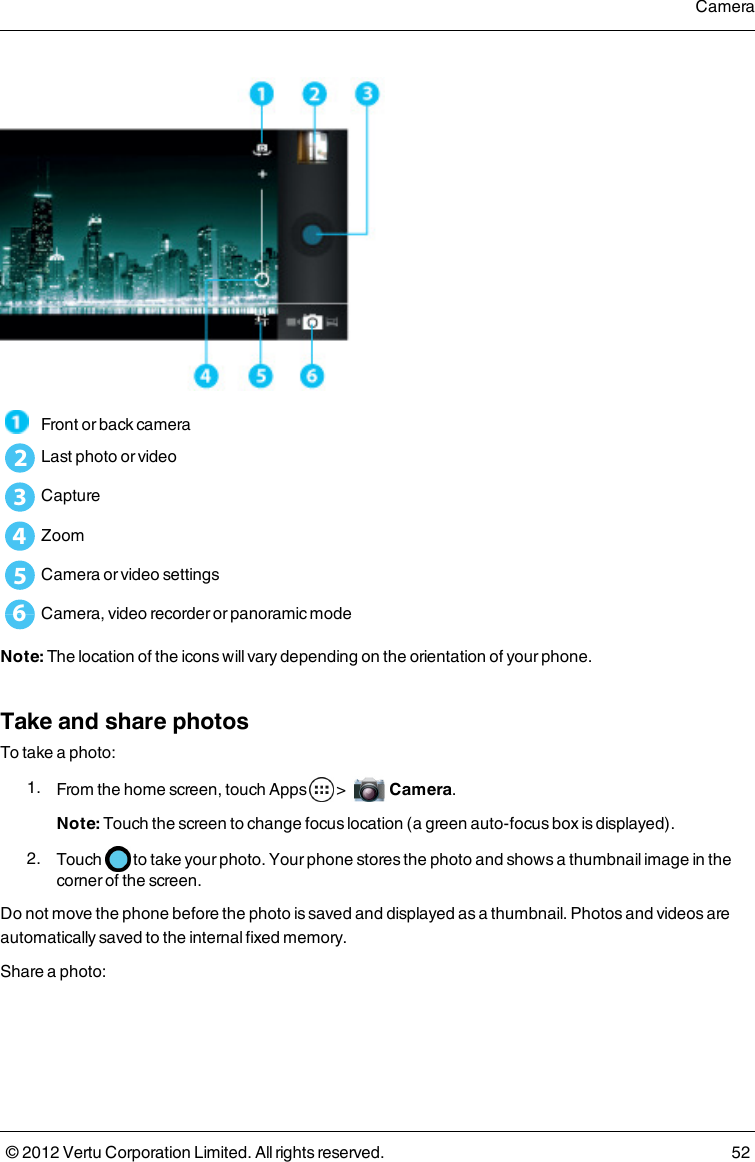
Vertu >
Contents
- 1. User Manual
- 2. Users Manual
User Manual

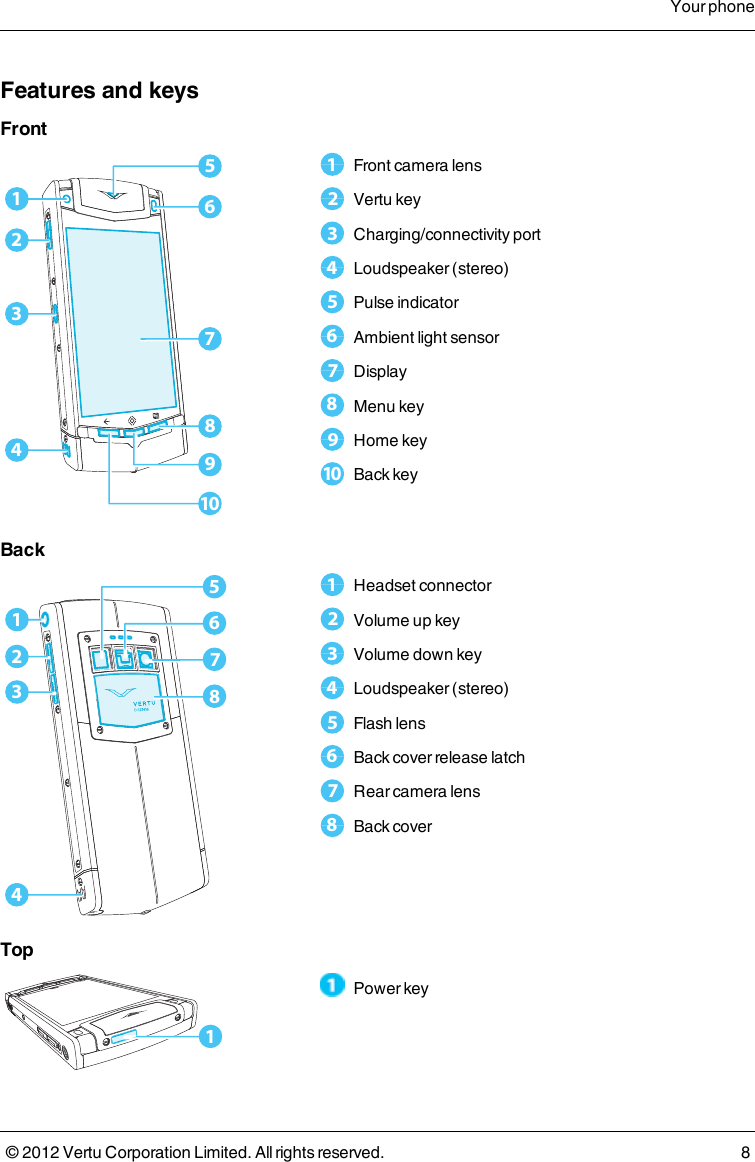
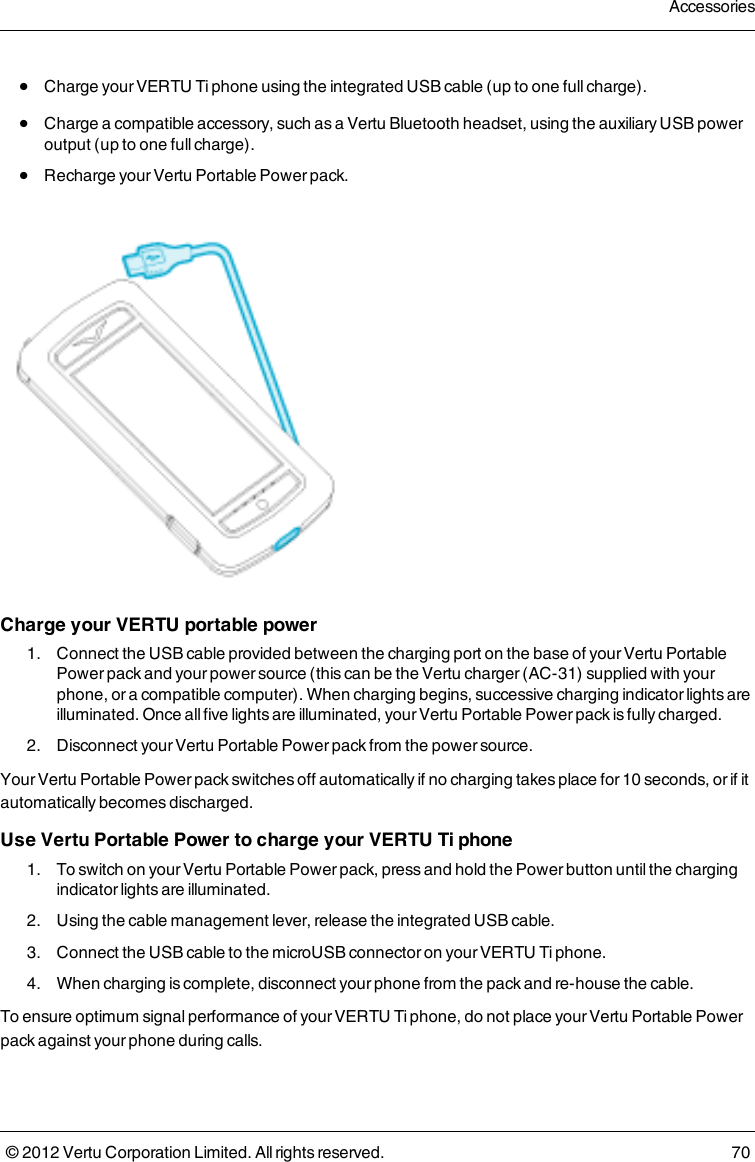
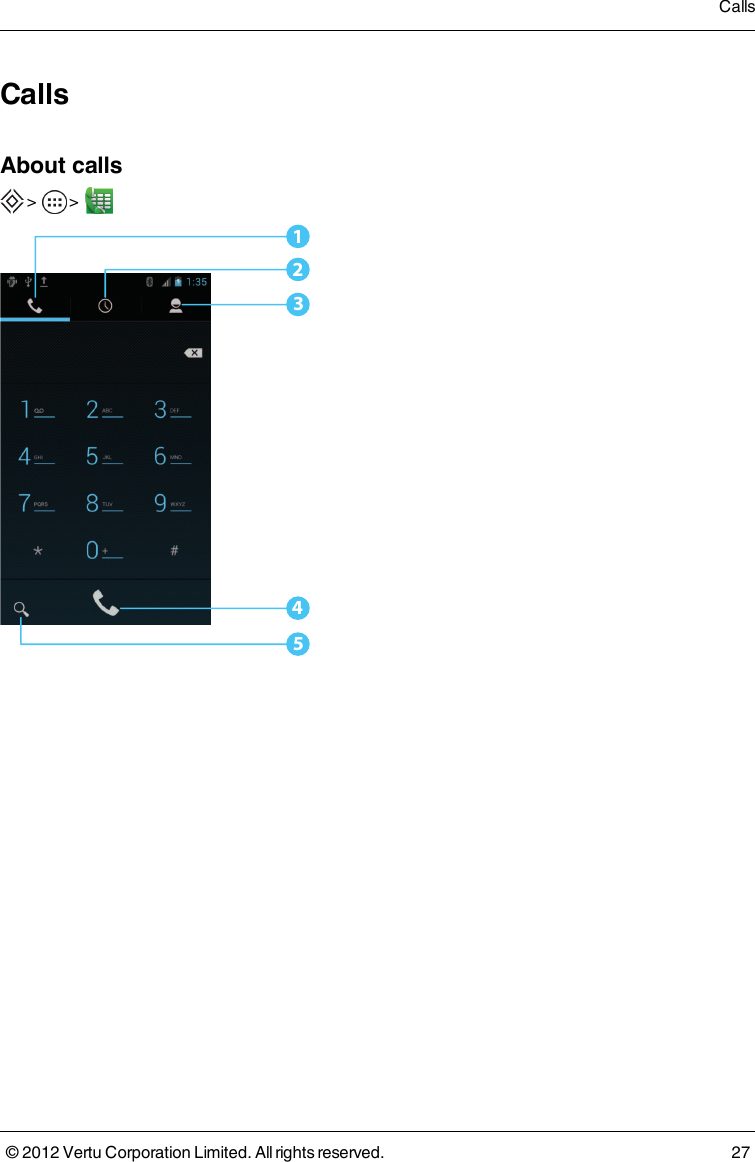
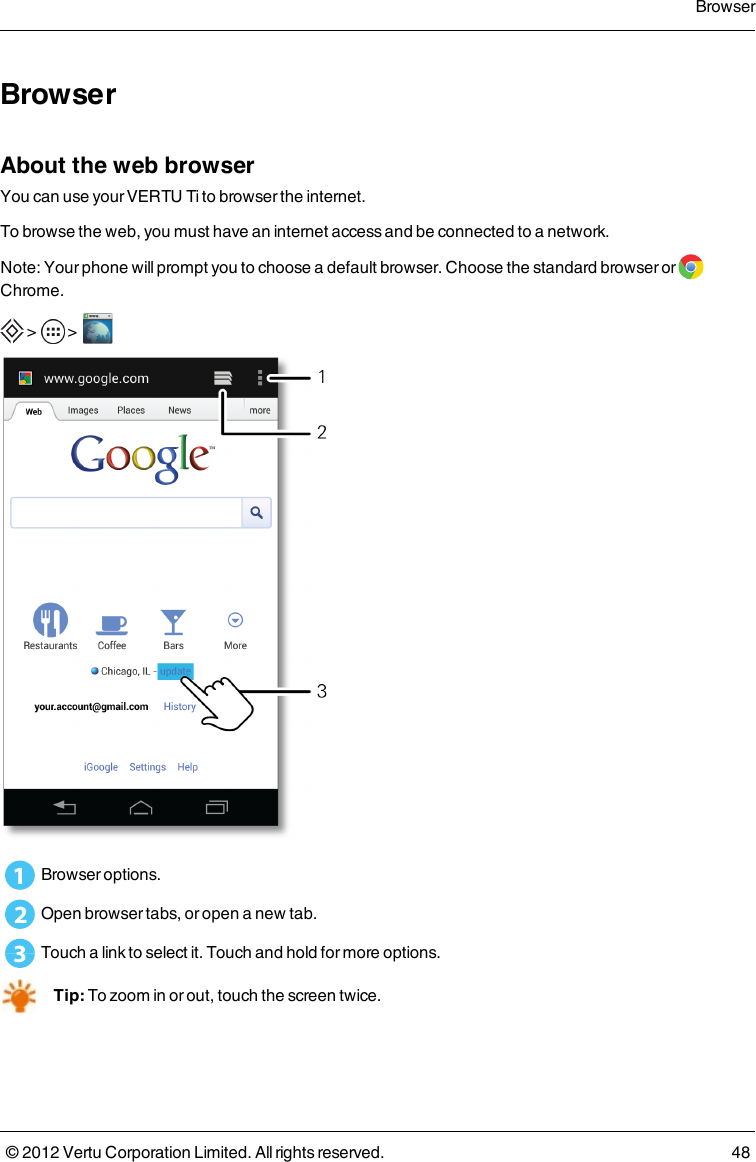
![2. When the battery is fully charged, disconnect the charger from the phone and then from the wall outlet.Note: l You can use the phone while it is charging. l If the battery is completely discharged, it may take several minutes before the charging indicator is displayed or before you can make any calls.Tip: You can also charge your VERTU Ti phone using the VERTU Portable Power pack and the vehicle charger, supplied in the sales box.Charge the battery using the VERTU Portable Power packTo charge the VERTU Portable Power pack connect the USB data cable supplied into the charging port on the base. Then connect the other end of the cable to the USB port on your Vertu mains charger.Once the VERTU Portable Power pack is charged, you can connect it to your phone to charge the phone while you are on the move.[Image]Charge the battery over USBYou can also charge your phone by connecting it to your computer using the USB cable.Note: Your phone charges quicker when connected to the wall charger.Extend battery lifeFor tips on how to extend battery life, see "Extend battery life" on page 64.Switch the phone on or offSwitch on: Press and hold the power key until the phone vibrates.Switch off: Press and hold the power key, and then touch Power off.Getting started© 2012 Vertu Corporation Limited. All rights reserved. 13](https://usermanual.wiki/Vertu/RM-828V.User-Manual/User-Guide-1838369-Page-13.png)

![Make a conference callTo start a conference call: 1. Call the first number. 2. After the call connects, touch Add call [Icon]. 3. Dial the next number, or select it from contacts or favourites. 4. When the next number answers, touch Merge calls.Note: Conference calls are a network service. For details, contact your service provider.Silence an incoming callTo silence an incoming call, press the Power key or Volume keys.Voice diallingTo voice dial a contact, touch Apps > Voice Dialler and say “Call” followed by a contact name.Calls© 2012 Vertu Corporation Limited. All rights reserved. 30](https://usermanual.wiki/Vertu/RM-828V.User-Manual/User-Guide-1838369-Page-30.png)
![Instant messagesTo send and receive instant messages, you can use Google Talk™. > > Manage messages > > To delete a message, touch and hold to select it, and then touch the trash can at the bottom.To change your messaging options, touch Apps > Messaging > Menu > Settings.Email setupYour VERTU Ti allows you to set up multiple email accounts. This gives you mobile access to the mail, calendar, contacts, and tasks on your accounts.Corporate email setupFrom the home screen, touch Apps > Settings > Accounts & sync > ADD ACCOUNT. Select Corporate for Microsoft™ Exchange server work email accounts. Enter details from your IT administrator.Tip: You need to enter your username and password. You may be prompted to enter your domain and server names. Contact your IT administrator for details.To read and reply to messages on your email accounts, touch Apps > Email. l To compose a new message, touch [Icon]. l To read a message touch it from the inbox. l To manually refresh your mailbox, touch [Icon]. l To view different folders within your mailbox, touch [Icon].Tip: When you have new email will appear in the status bar.Press Menu > and select your account to see options, such as Signature, Sync Email and Remove account.Google mail setupFrom the home screen, touch Apps Settings > Accounts & sync > ADD ACCOUNT. Select Google for your Gmail accounts. For account details, contact Gmail.Messaging and email© 2012 Vertu Corporation Limited. All rights reserved. 37](https://usermanual.wiki/Vertu/RM-828V.User-Manual/User-Guide-1838369-Page-37.png)
![To read and reply to messages on your Gmail accounts, touch Apps > Gmail.To view different labels within your mailbox, like Drafts and Sent items, touch [Icon] > Label name. To delete, move to another label, mark as unread or mark as important, touch an hold the item within the label.Personal email setupFrom the home screen, touch Apps > Settings > Accounts & sync > ADD ACCOUNT. Select Email for your personal email accounts. For account details, contact the account provider.To read and reply to messages on your email accounts, touch Apps > Email.Messaging and email© 2012 Vertu Corporation Limited. All rights reserved. 38](https://usermanual.wiki/Vertu/RM-828V.User-Manual/User-Guide-1838369-Page-38.png)
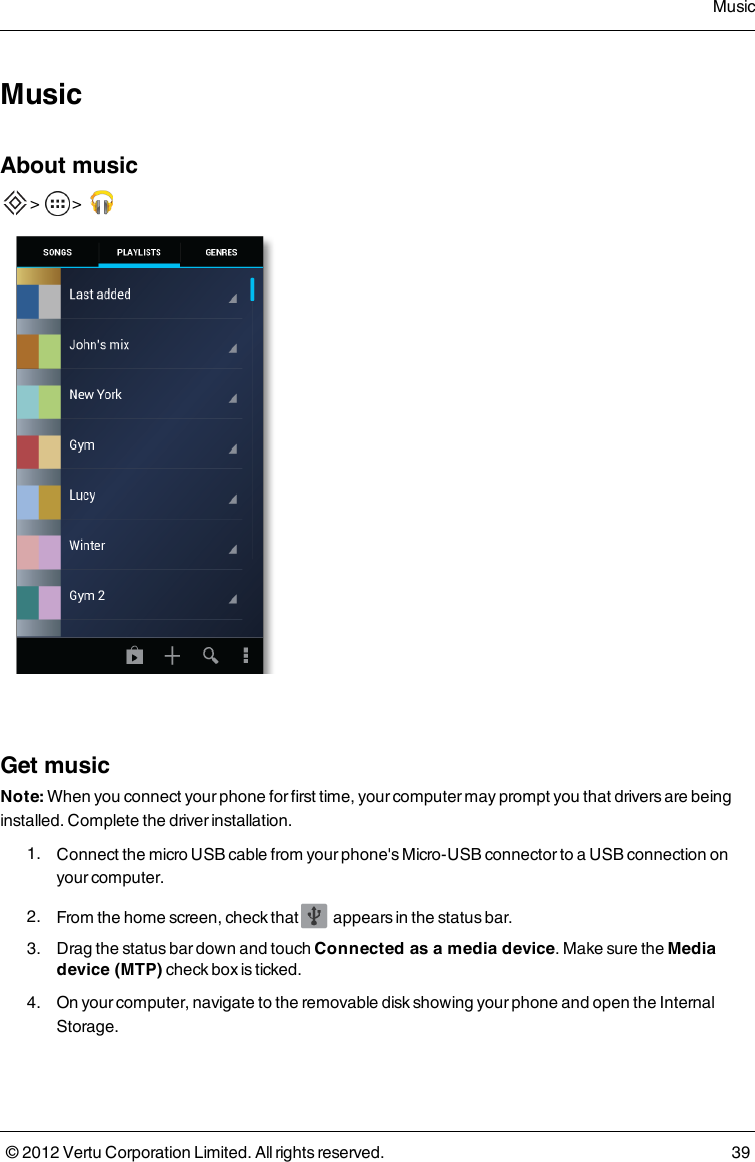
![5. Drag and drop files between your computer and "Music" folder. 6. When you have finished, disconnect the USB cable.Set up musicTo load music on your computer and then load it on your phone, you need: l Microsoft™ Windows™ computer or Apple Macintosh™ computer. l USB data cable.Your VERTU Ti phone will play the following audio file formats:Play musicTouch a song or playlist to start playing music.[Screen]Music player controls l Play/pause: touch / . l Select previous/next song: touch / . l Fast forward/rewind: touch and hold the progress bar, and then drag forwards or backwards. l Shuffle on/off: touch . l Repeat all/off: touch . l Adjust volume: press side volume keys. l Manage sound effects: press Menu > Sound effects.Music© 2012 Vertu Corporation Limited. All rights reserved. 40](https://usermanual.wiki/Vertu/RM-828V.User-Manual/User-Guide-1838369-Page-40.png)

![1. From the home screen, touch Apps > Gallery. 2. Touch the photo,touch and then choose how you want to share Bluetooth, Picasa, Messaging, Google Drive, Google+, or Gmail[icons].Tip: To share a photo immediately after capture, touch the thumbnail image and the sharing options are shown below the photo.Panoramic viewIn the viewfinder, touch > to take a wide panoramic photo. Move the phone slowly across the image you want to take. The camera auto-captures multiple shots as you move the camera and joins them together to make one large photo. Camera settingsTouch in the corner of the viewfinder to adjust your camera settings.Option Setting Camera settings Set Store location to ON to record the location of a photo or video automatically.Set Picture size to: QVGA, VGA, 1.3M pixels, 2M pixels, 3M pixels, 5M pixels or 8M pixels.SCN Scene mode Set the type of photo you want to take: Auto, Action, Night, Sunset, or Party.[icon] Exposure Select an exposure setting.[icon] White balance Set to Auto, Incandescent, Daylight, Fluorescent, or Cloudy.[icon] Flash mode Set Flash to Auto, On or Off.Record and share a videoBesides taking photos with your phone, you can also capture videos.To take a video: 1. From the home screen, touch Apps > Camera.Note: To switch from photo mode to video mode, touch .Camera© 2012 Vertu Corporation Limited. All rights reserved. 53](https://usermanual.wiki/Vertu/RM-828V.User-Manual/User-Guide-1838369-Page-53.png)
![2. To start recording touch . To stop recording touch . Your phone stores the video, and shows a thumbnail image in the corner of the screen.Note: Touching the screen to focus location is not required for video capture. The phone will auto-focus to the centre of the frame while you capture the video.Share a video: 1. From the home screen, touch Apps > Gallery. 2. Touch the video, touch and then choose how you want to share Bluetooth, Picasa, Messaging, Google+, YouTube, or Gmail[icons].Tip: To share a video immediately after capture, touch the thumbnail image and the sharing options are shown below the video.Video settingsTouch in the corner of the viewfinder to adjust video settings.Option Setting Camera settings Set Store location to ON to record the location of a photo or video automatically.1080p Video quality Set to SD 480p, HD 720p, or SD 480p.[icon] Time lapse interval Set a time lapse interval, such as five seconds.icon] Effects Add SILLY FACES or BACKGROUND.[icon] White balance Set to Auto, Incandescent, Daylight, Fluorescent, or Cloudy.[icon] Flash mode Set to On or Off.Camera© 2012 Vertu Corporation Limited. All rights reserved. 54](https://usermanual.wiki/Vertu/RM-828V.User-Manual/User-Guide-1838369-Page-54.png)
![GalleryAbout gallery > > With Gallery you can watch the videos you have recorded, or browse through the photos you have taken.To manage your media files more effectively organise them into albums or folders.View and edit photos and videos > > > photo or videoJust touch a photo or video to view it.Tip: To zoom in and out quickly, touch the screen twice.Press Menu then select an option: Delete, Slideshow, Edit, Rotate left, Rotate right, Crop, Details or Set picture as.The Edit option lets you change various photo settings, such as Highlights , Film Grain, B&W and Red Eye.Note: For videos you can only Delete or show Details.Share photos and videosShare a photo or video: 1. From the home screen, touch Apps > Gallery. 2. Touch the photo or video, touch and then choose how you want to share Bluetooth, Picasa, Messaging, Google Drive, Google+, Gmail, or YouTube[icons].You can copy photos and videos between your phone and PC. See "Copy between the phone and a PC" on page 60 for details. View an albumYou can view all your photos and videos, or arrange photos and videos by album. > > All your photos and videos are shown in Albums. Touch an album and then, press Menu > Group by and then select an option from Locations, Times, People, or Tags to show how the album is displayed.Gallery© 2012 Vertu Corporation Limited. All rights reserved. 55](https://usermanual.wiki/Vertu/RM-828V.User-Manual/User-Guide-1838369-Page-55.png)