VeryKool USA I320 MOBILE PHONE User Manual i320 FCC
VeryKool USA Inc MOBILE PHONE i320 FCC
UserManual.wiki
>
VeryKool USA
>
I320 User Manual
>
User Manual
Contents
1.
User Manual
2.
USERS MANUAL
3.
Users Manual
User Manual
Navigation menu
Upload a User Manual
Namespaces
Wiki Guide
HTML
PDF
Info
Views
User Manual
Discussion / Help
Navigation
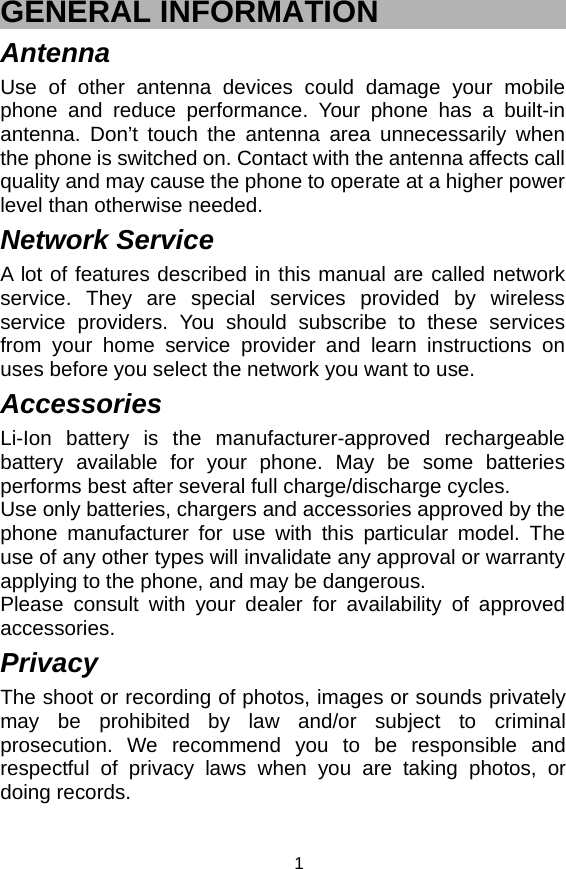
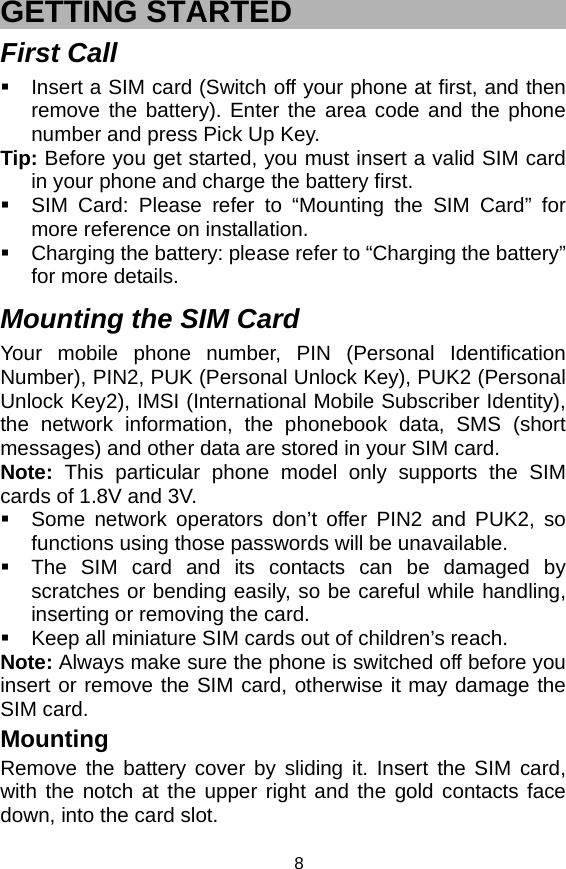
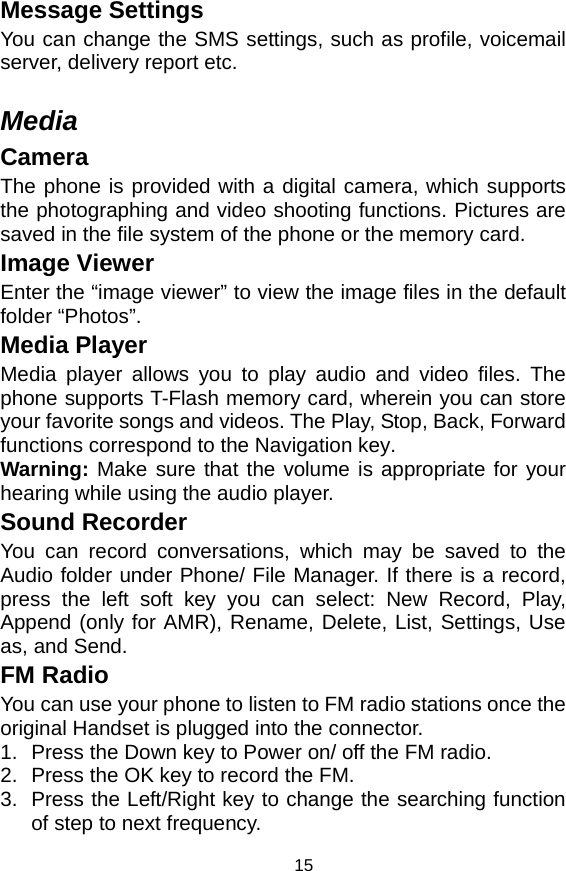
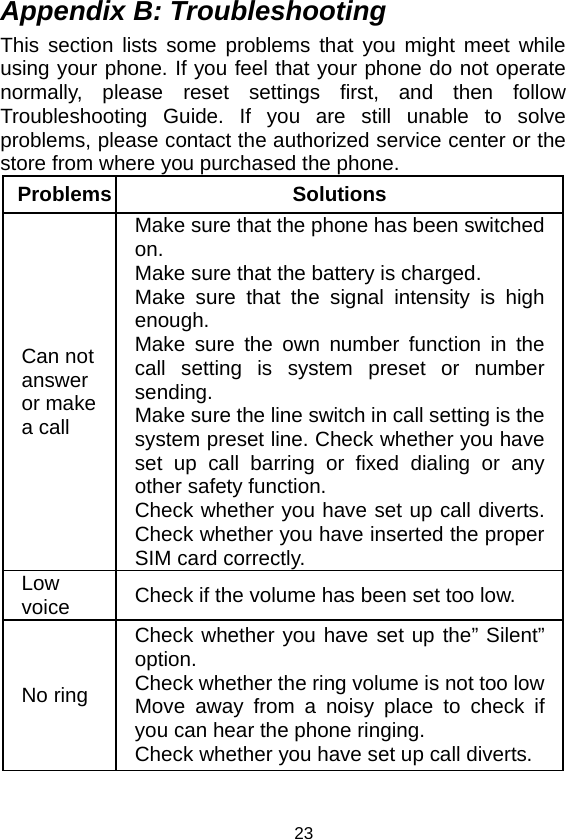
![2KNOW YOUR MOBILE PHONE Positions of Phone Keys 1. Earpiece 8. End and Power key 2. Screen 9. Keypad 3. Navigation [arrows] key 10. Charger and USB data port 4. Left Soft key 11. side keys 5. OK key 12. Camera 6. Dial key 13. Sub LCD 7. Right Soft Key 14. Audio Jack](https://usermanual.wiki/VeryKool-USA/I320.User-Manual/User-Guide-1763066-Page-7.png)