ViVOtech VIVOPAY4800 Wireless Card Reader User Manual ViVOpay 4800 User Guide
ViVOtech, Inc. Wireless Card Reader ViVOpay 4800 User Guide
ViVOtech >
User manual
Part Number: 631-0013-00 July 2011
ViVOtech, Inc. 451 El Camino Real, Santa Clara, CA 95050 Ph: (408) 248-7001
Email: info@vivotech.com URL: www.vivotech.com
ViVOpay®
4800 User Guide
Revision 1.0

Copyright© 2011, ViVOtech® Inc. All rights reserved.
ViVOtech, Inc.
451 El Camino Real
Santa Clara, CA 95050
Written and designed at ViVOtech, Inc.
This document, as well as the hardware and software it describes, is furnished under license and may only be used
in accordance with the terms of such license. The content of this paper is furnished for informational use, subject to
change without notice, and not to be construed as a commitment by ViVOtech, Inc. ViVOtech, Inc. assumes no
responsibility or liability for any errors or inaccuracies that may appear in this document.
Except as permitted by such license, no part of this publication may be reproduced or transmitted by electronic,
mechanical, recorded, or any other method, or translated into another language or language form without the
express written consent of ViVOtech, Inc. ViVOtech, ViVOpay, ViVOwallet, ViVOcard, ViVOplatform, ViVOnfc,
ViVOapps, ViVOtag, ViVOpos, mTouch, mLoyalty, mPromotion and mPrepaid are trademarks or registered trade-
marks of ViVOtech Inc. Other trademarks are the property of the respective owner.
Warranty Disclaimer: The services and hardware are provided "as is" and "as-available," and the use of these ser-
vices and hardware is at the user’s own risk. ViVOtech does not make, and hereby disclaims, any and all other
express or implied warranties, including, but not limited to warranties of merchantability, title, fitness for a particular
purpose, and any warranties arising from any course of dealing, usage, or trade practice. ViVOtech does not war-
rant that the services or hardware will be uninterrupted, error-free, or completely secure.
July 2011

ViVOpay 4800 User Guide 1
Chapter 1
Getting Started . . . . . . . . . . . . . . . . . . . . . . . . . . . . . . . . . . . . . . . . . . . . . 1
Overview . . . . . . . . . . . . . . . . . . . . . . . . . . . . . . . . . . . . . . . . . . . . . . . . . . . . . 1
Features . . . . . . . . . . . . . . . . . . . . . . . . . . . . . . . . . . . . . . . . . . . . . . . . 1
Unpacking the ViVOpay 4800 . . . . . . . . . . . . . . . . . . . . . . . . . . . . . . . . . . . . . 2
Accessories . . . . . . . . . . . . . . . . . . . . . . . . . . . . . . . . . . . . . . . . . . . . . . . . . . . 2
Chapter 2
Installing the ViVOpay 4800 . . . . . . . . . . . . . . . . . . . . . . . . . . . . . . . . . . . 3
Overview . . . . . . . . . . . . . . . . . . . . . . . . . . . . . . . . . . . . . . . . . . . . . . . . . . . . . 3
Radio Frequency Interference . . . . . . . . . . . . . . . . . . . . . . . . . . . . . . . 3
Installing the ViVOpay 4800 . . . . . . . . . . . . . . . . . . . . . . . . . . . . . . . . . . . . . . 3
Connecting the ViVOpay 4800 . . . . . . . . . . . . . . . . . . . . . . . . . . . . . . . 3
Mounting to the Countertop Stand . . . . . . . . . . . . . . . . . . . . . . . . . . . . 4
Installing the ViVOpay 4500m . . . . . . . . . . . . . . . . . . . . . . . . . . . . . . . . . . . . . 5
Testing the Installation . . . . . . . . . . . . . . . . . . . . . . . . . . . . . . . . . . . . . . . . . . 9
Testing a Transaction . . . . . . . . . . . . . . . . . . . . . . . . . . . . . . . . . . . . . . 9
Chapter 3
Troubleshooting and Maintenance . . . . . . . . . . . . . . . . . . . . . . . . . . . . 10
Troubleshooting . . . . . . . . . . . . . . . . . . . . . . . . . . . . . . . . . . . . . . . . . . . . . . 10
Upgrade ViVOpay 4800 Firmware . . . . . . . . . . . . . . . . . . . . . . . . . . . . . . . . 11
Required Items . . . . . . . . . . . . . . . . . . . . . . . . . . . . . . . . . . . . . . . . . . 11
Preparation . . . . . . . . . . . . . . . . . . . . . . . . . . . . . . . . . . . . . . . . . . . . . 11
Firmware Download Process . . . . . . . . . . . . . . . . . . . . . . . . . . . . . . . 11
Appendix A
Specifications . . . . . . . . . . . . . . . . . . . . . . . . . . . . . . . . . . . . . . . . . . . . . 13
ViVOpay 4800 Specifications . . . . . . . . . . . . . . . . . . . . . . . . . . . . . . . . . . . . 13
Regulatory Compliance . . . . . . . . . . . . . . . . . . . . . . . . . . . . . . . . . . . . . . . . . 14
FCC Part 15 Class B Equipment . . . . . . . . . . . . . . . . . . . . . . . . . . . . 14
FCC Information for User . . . . . . . . . . . . . . . . . . . . . . . . . . . . . . . . . . 14
Industry Canada Class B Equipment . . . . . . . . . . . . . . . . . . . . . . . . . 14
Industry Canada Information for User . . . . . . . . . . . . . . . . . . . . . . . . . 14
Glossary . . . . . . . . . . . . . . . . . . . . . . . . . . . . . . . . . . . . . . . . . . . . . . . . . 15
Table of Contents

ViVOpay 4800 User Guide 1
Chapter 1
Getting Started
Overview
The ViVOpay 4800 seamlessly integrates with existing POS systems and requires minimal counter
space at checkout stands. The ViVOpay 4800 is counter-top contactless reader with serial RS-232
to POS systems. The ViVOpay 4800 complies with ISO/IEC 18092 and supports the full peer-to-peer
NFC feature set.
ViVOpay 4800 supports the following contactless payment applications:
• MasterCard PayPass Magstripe v3.3
• Visa payWave MSD v2.0.2
• American Express, ExpressPay v1.0
• Discover Zip v1.0
• Mifare ePurse (Passthrough)
• ViVOcard 1, 2, and 3
This document assumes that users are familiar with their host POS systems and all related functions.
Features
The following features are supported:
• ISO14443 type A/B and Mifare based contactless payment transactions
• ISO 18092 support for peer-to-peer NFC devices and smartphones
• Support for SoftSAM
• Buzzer
• Industry standard LED indicators
• Real time clock
• Environmental compliance
• Field-upgradeable firmware
• Full serial programing interface over serial port
ViVOpay 4800 User Guide 2
Getting Started
Unpacking the ViVOpay 4800
The ViVOpay 4800 requires a data cable and a power supply if you are not powering the reader
through the data cable. Verify that you have all the required components for the installation.
You may also need the following:
• Contactless test card (ViVOcard Contactless Test Card P/N 241-0015-03)
Accessories
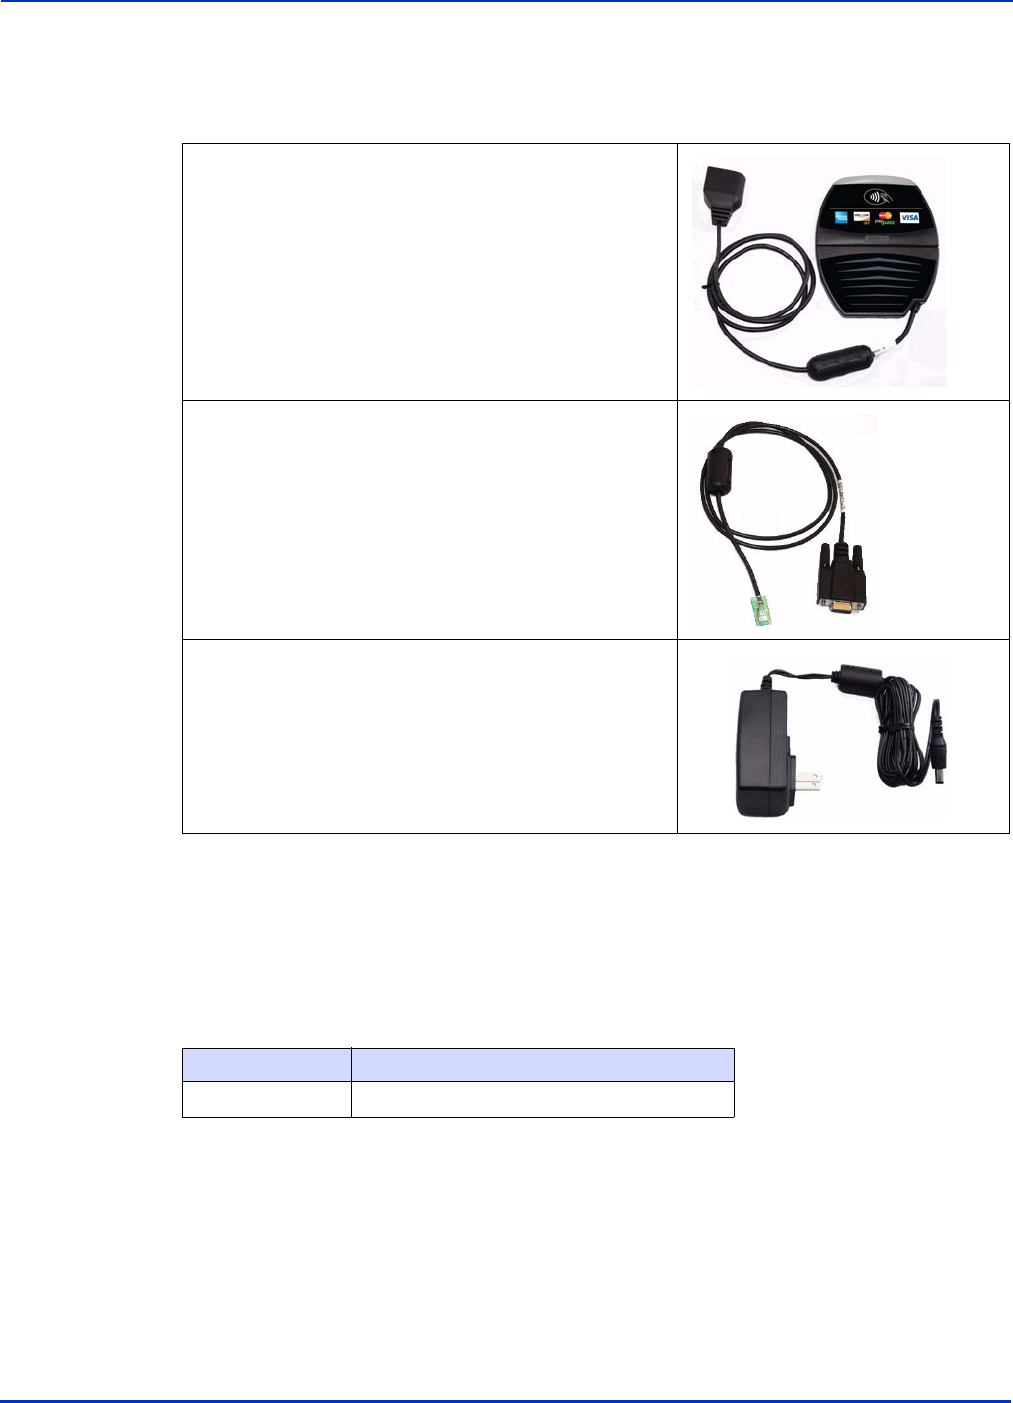
The following accessories are available for the ViVOpay 4800.
ViVOpay 4800 (P/N 540-XXXX-01)
Data cable
RS-232 Serial (P/N 220-2463-XX)
Power supply
• US/North America (P/N 140-2035-00)
• Europe (P/N 140-2035-01)
• UK (P/N 140-2035-02)
• Australia (P/N 140-2035-03)
Part Number Description
590-1156-00 Countertop Stand
ViVOpay 4800 User Guide 3
Chapter 2
Installing the ViVOpay 4800
Overview
Radio Frequency Interference
To perform contactless transactions, the ViVOpay 4800 uses a radio frequency antenna. The range
(reading distance) and performance of the reader can be affected by other radio frequency emitters
and proximity to metal.
For best performance, adhere to the following guidelines:
• Do not position the ViVOpay 4800 closer than 1 foot (30 cm) to ViVOpay 4800s or other
(non-NFC) RF-emitting devices. Some environments may require greater distances.
• Do not position the ViVOpay 4800 near radio transmitters.
• Avoid placing the ViVOpay 4800 on or near large metal objects.
Installing the ViVOpay 4800
This section describes how to install the ViVOpay 4800. The basic steps are:
• Connect to power and POS
• Mount if required
• Test the installation
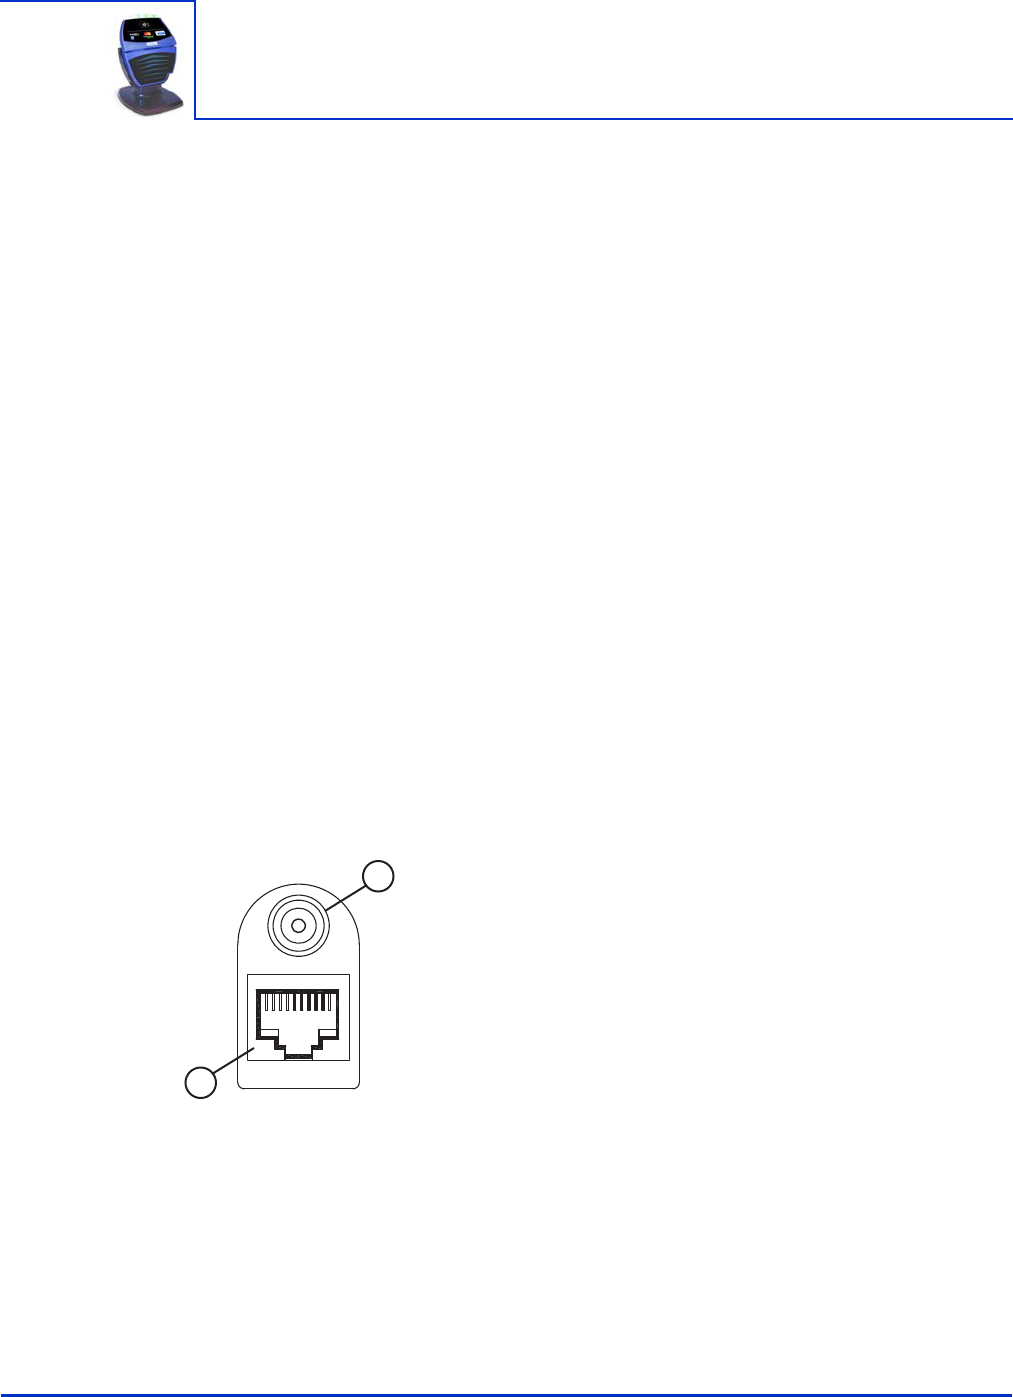
Connecting the ViVOpay 4800
Connection to the ViVOpay 4800 is through the molded connector on the terminal side of the
reader’s AVX data cable.
Pin 1 10
1
2
1
: DC power connector
2
: Data port 10P8C modular connector
ViVOpay 4800 User Guide 4
Installing the ViVOpay 4800
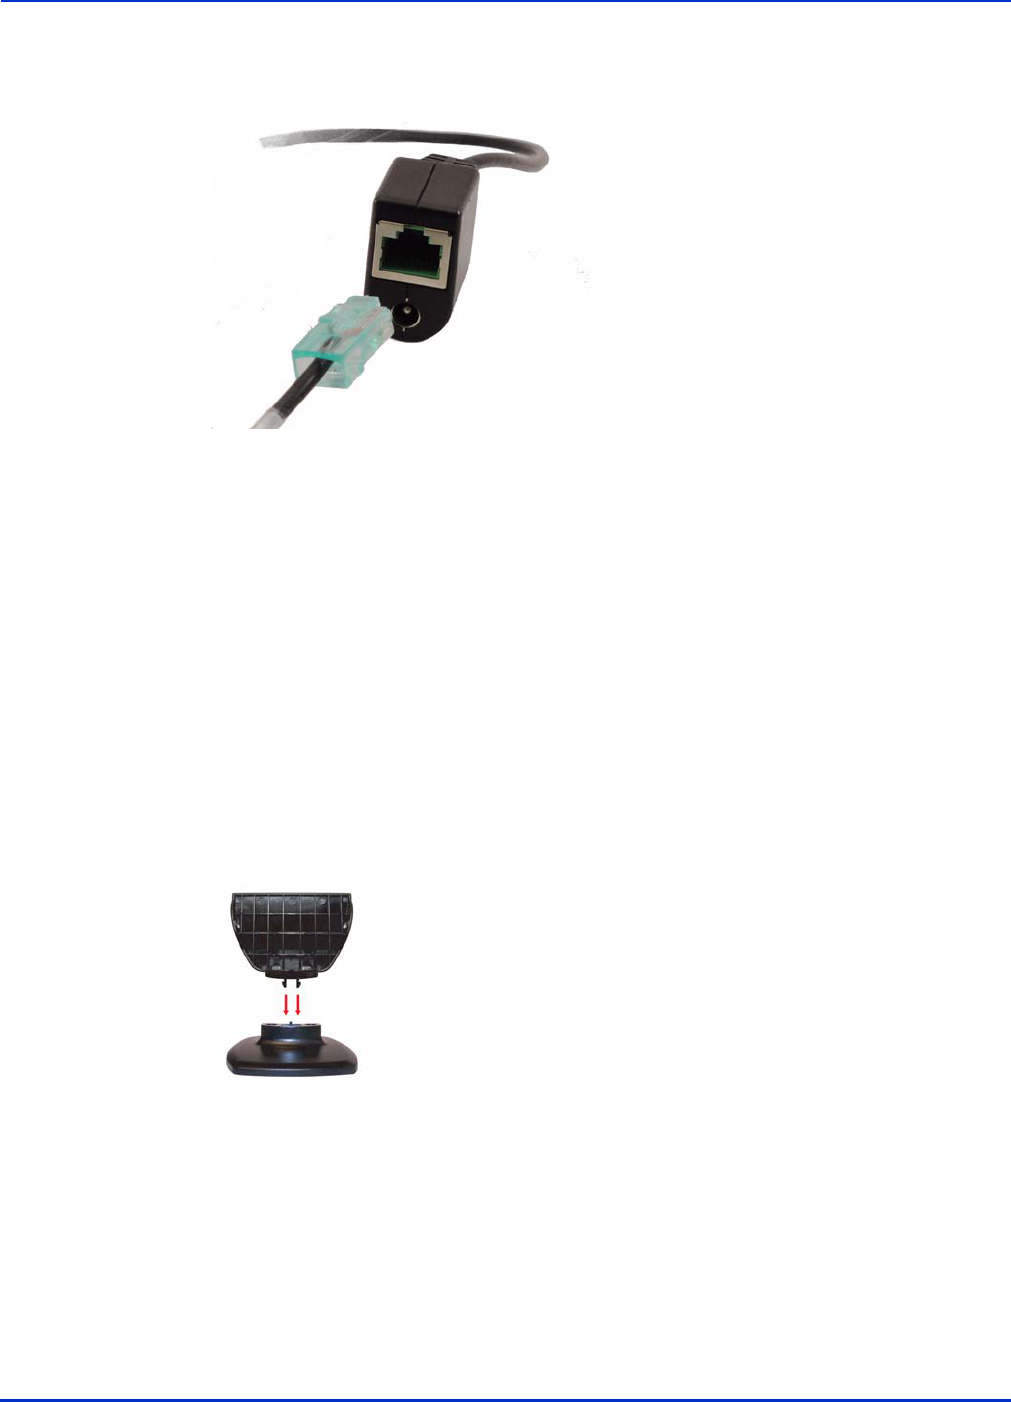
To connect the ViVOpay 4800
1. Connect the data cable to the data port on the AVX connector.
Note: The MSR of the ViVOpay 4800m communicates at 19200 baud only. For other
readers, use the Set Baud Rate command to change the default 115200 baud rate, if
needed. See the ViVOpay Advanced Reader Interface Devevlopers Guide for more
information.
2. Insert the power cable into the power connector.
3. Connect the power supply to power.
The ViVOpay 4800 LEDs flash and the reader is ready to operate. If the reader fails to
power up, see “Troubleshooting” on page 10.
Mounting to the Countertop Stand
The ViVOpay 4800 can be mounted in the Countertop Stand for easier use.
To mount the ViVOpay 4800 in the Countertop Stand
1. Assemble the ViVOpay 4800 countertop stand by inserting the saddle into the base. Make
sure to align the curved part of the saddle with the curved part of the base.
2. For a permanent installation, you can fasten the stand base to the countertop with the
provided screws. For a non-permanent installation, additional mounting solutions can be
suggested. Please contact your local support representative for further information.
3. Slide the bottom of the ViVOpay 4800 down into the saddle. Press the sides firmly until the
tabs snap into place.
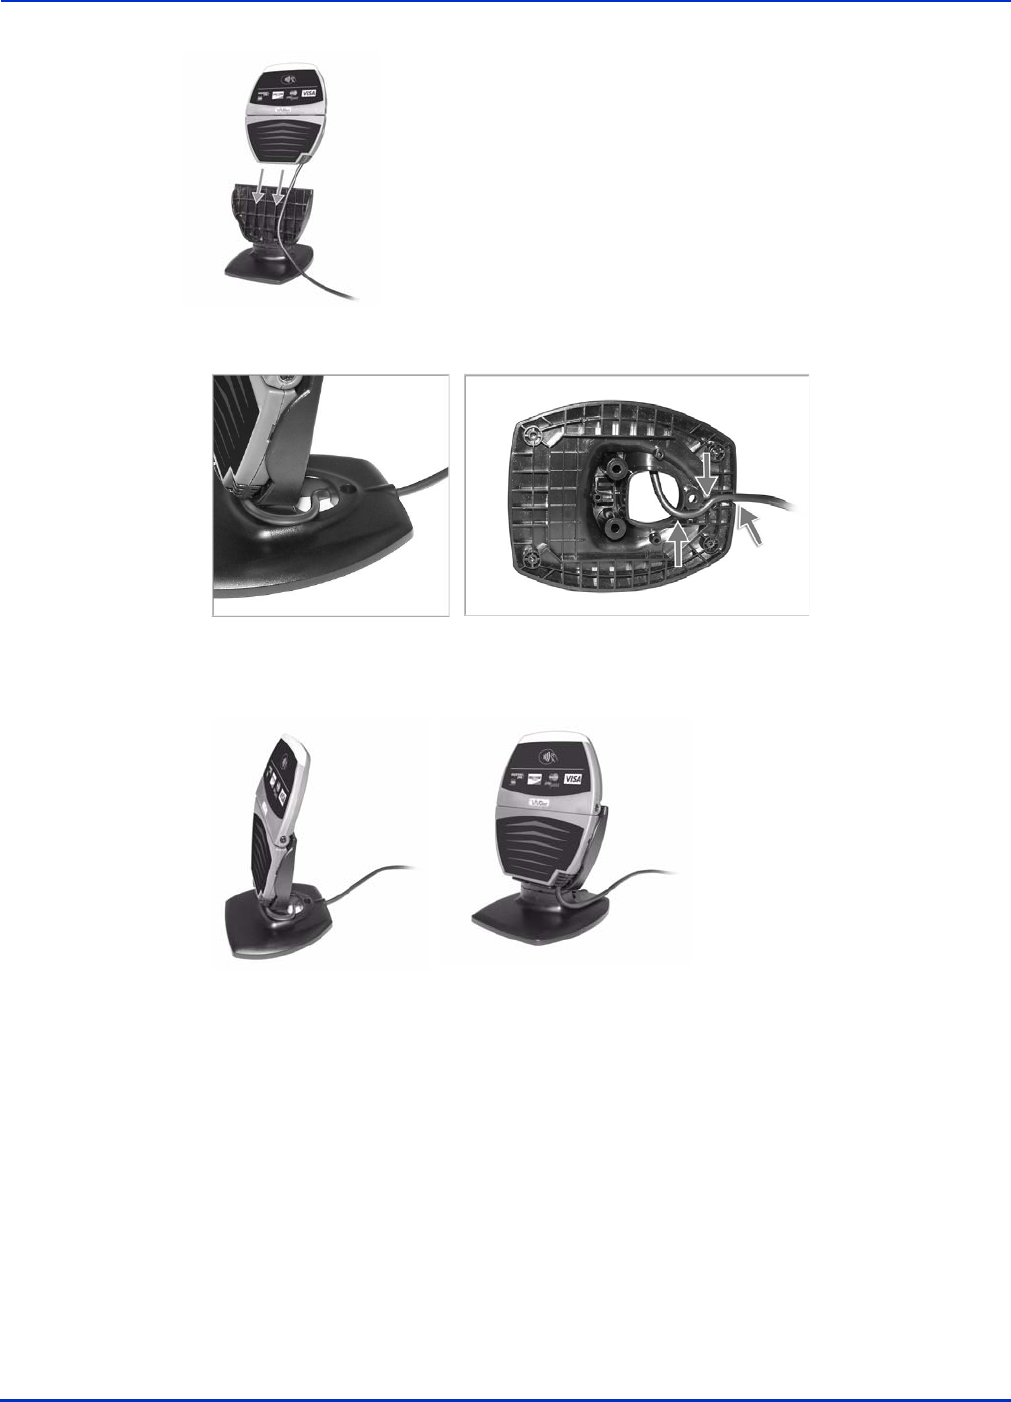
ViVOpay 4800 User Guide 5
Installing the ViVOpay 4800
4. The preferred cable routing of the cable is through the hole at the back of the base and in
the channel in the underside of the base.
Note: The cable should always be positioned to the back of the ViVOpay 4800 - do not
route the cable towards the front of the ViVOpay 4800.
5. Attach the ViVOpay 4800 serial cable to the serial port of the POS (consult your POS
manual for additional information). In certain installations, you might have to use the
supplied DONGLE to make this connection.
6. Connect the ViVOpay power cable to the power module.
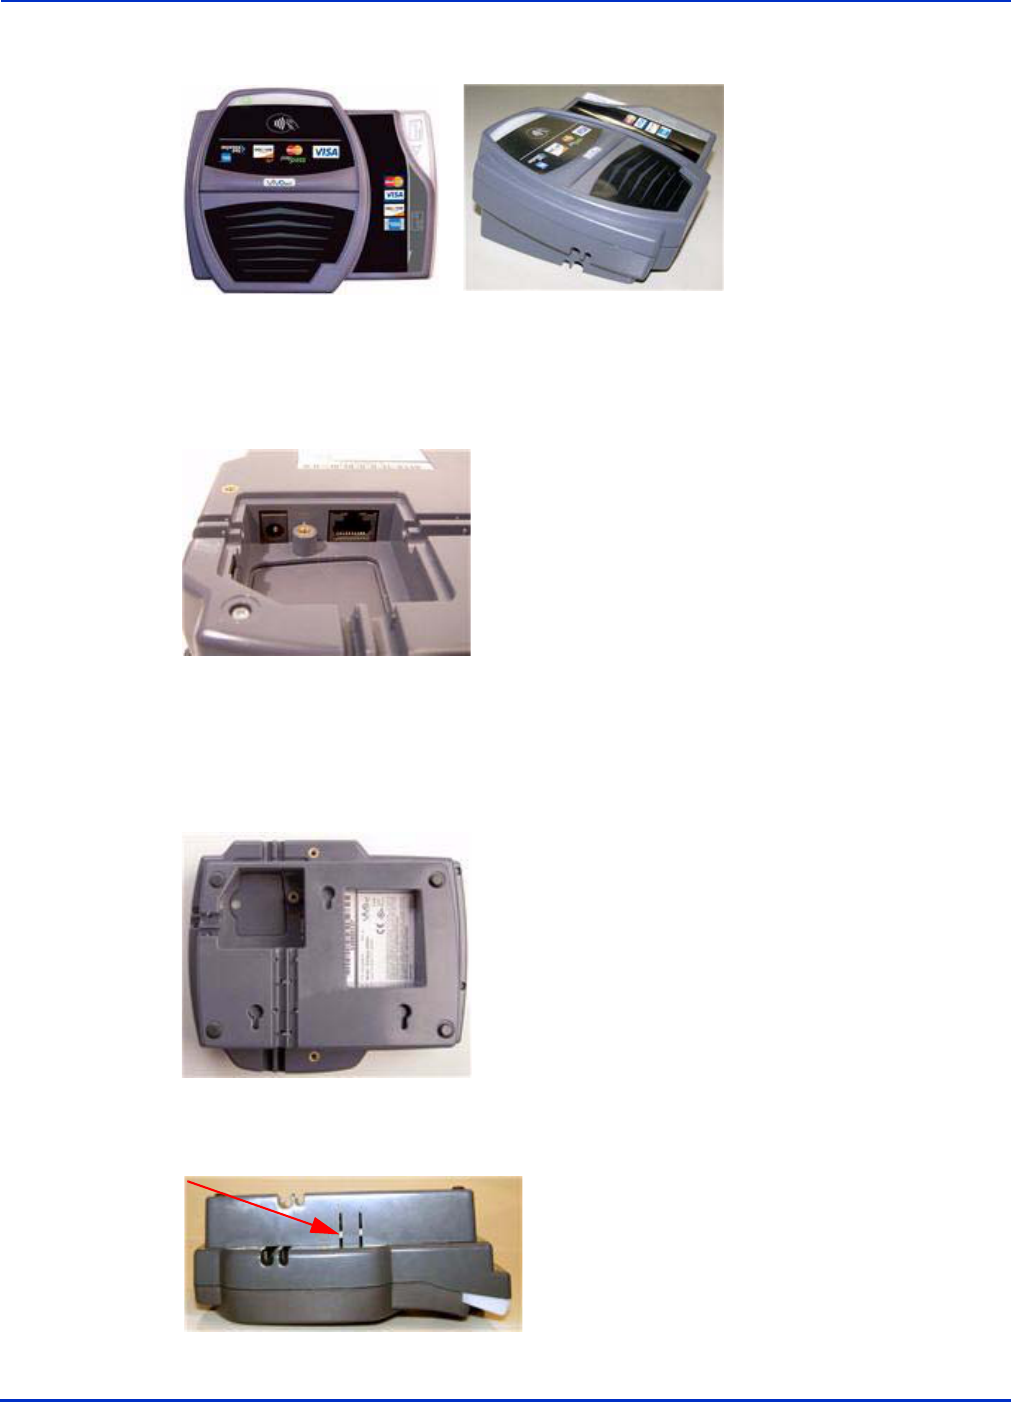
Installing the ViVOpay 4500m
This section describes how to install the ViVOpay 4500m. The basic steps are:
• Connect to power and POS
• Mount if required
• Test the installation
ViVOpay 4800 User Guide 6
Installing the ViVOpay 4800
The following pictures shows the ViVOpay 4500m installed in a counter top stand. Note
that the stand causes the unit to sit at a slight angle to the counter top surface.
Cable Installation
1. Turn the ViVOpay 4500m unit over to get access to the cable routing channels, power
jack, and RJ45 10-pin connector.
Note:
Do not use 8-pin connectors as they can damage the jack. Use only ViVOtech-approved
cables with 10-pin connectors.
2. Select the channel to be used for routing the cable. You can choose to use either of the
2 channels on the bottom of the stand or any of the 3 channels at the bottom of the
4500m unit underneath the stand. This decision should be based on the installation
requirements.
3. If you want to use any of the channels on the bottom of the 4500m unit, you need to
remove the stand by depressing the spring clip on the wide side of the stand and lifting
the stand off of the 4500m unit.
ViVOpay 4800 User Guide 7
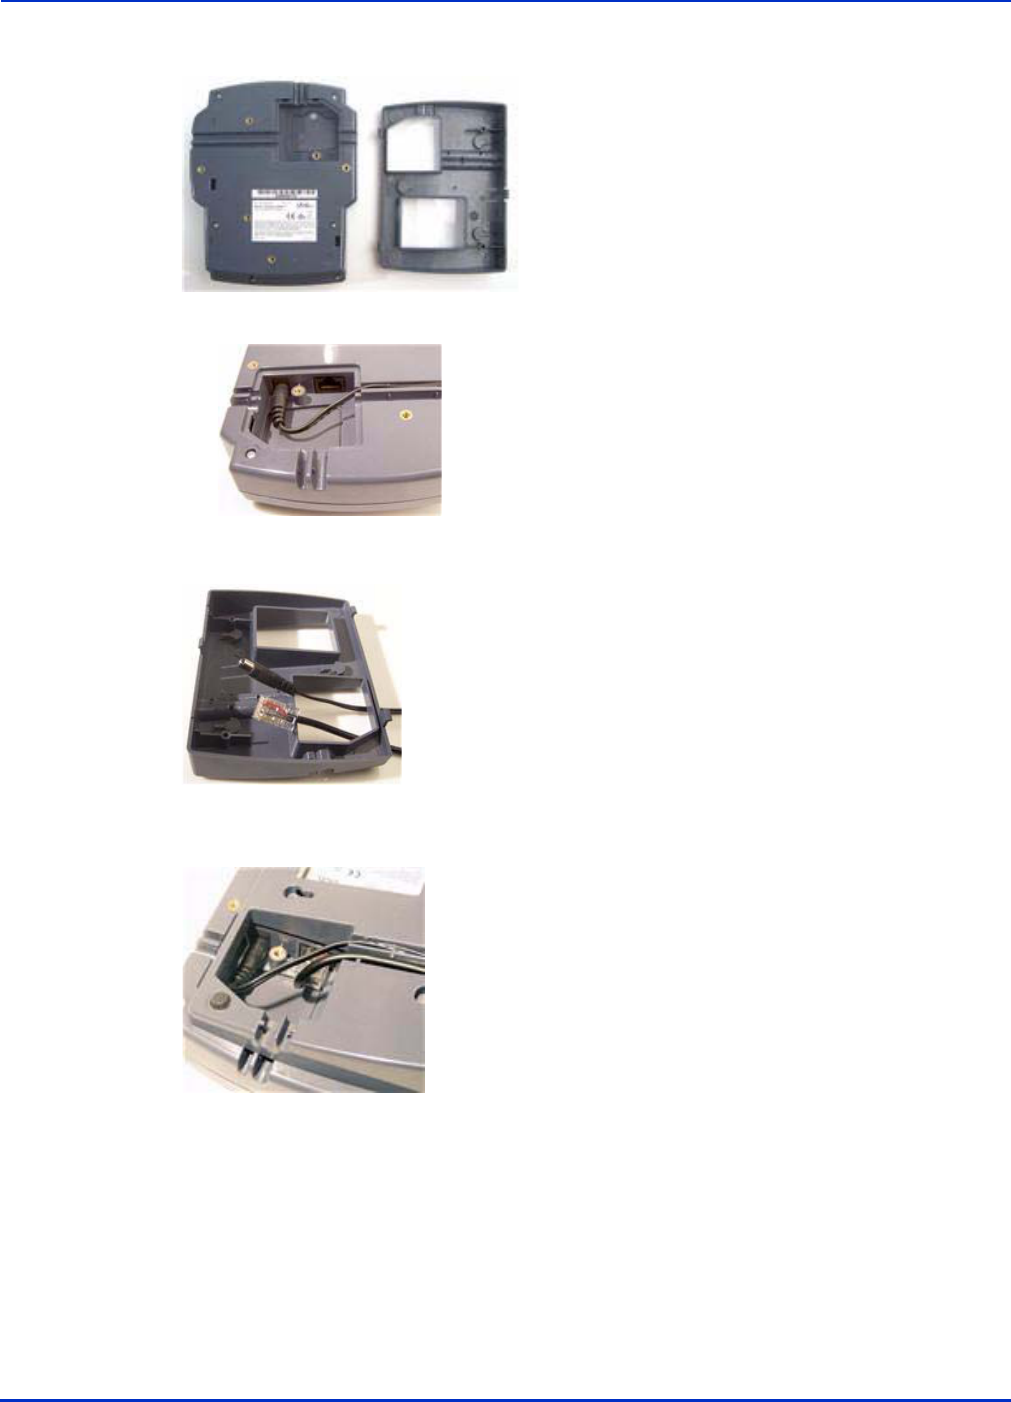
Installing the ViVOpay 4800
4. Lay the stand to the side of the 4500m unit.
5. You attach the power to the power receptacle on the bottom of the 4500m unit.
6. If you are planning on using either of the 2 channels on the bottom of the stand, make
sure to route the RJ45 10-pin cable (and optionally, the power cable) through the stand.
7. Attach the power cable and the RJ45 10-pin connector into the base of the 4500m unit.
Make sure that the cables are routed into the channels.
ViVOpay 4800 User Guide 8
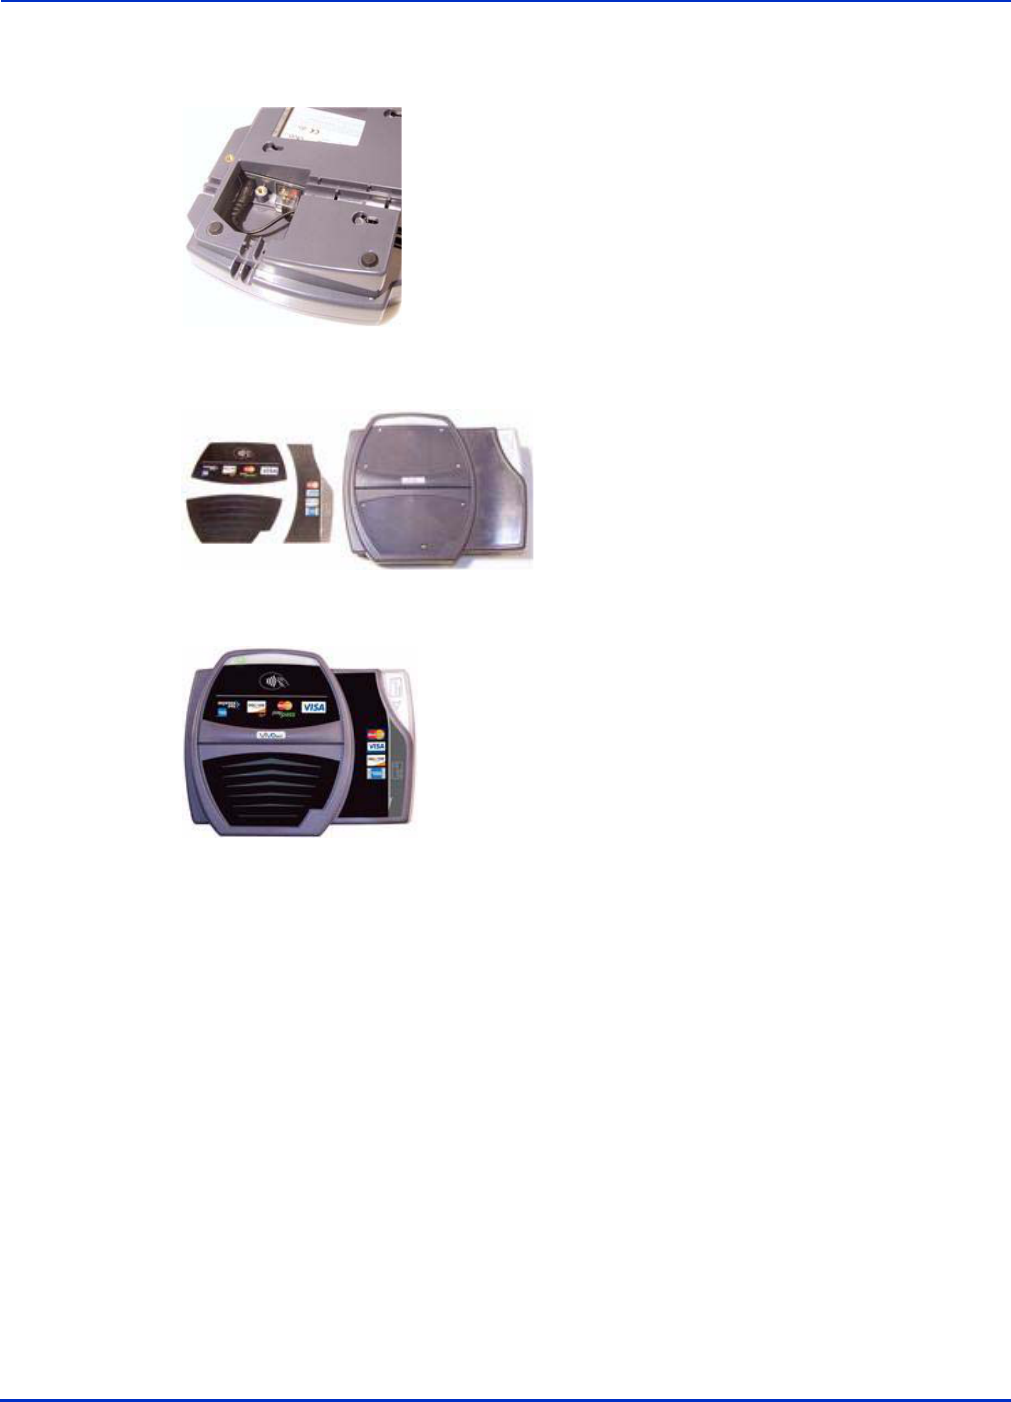
Installing the ViVOpay 4800
8. Reattach the stand if it was removed for routing the cables. Note that the stand helps to
hold the cables in the channels.
9. Turn the 4500m unit over so that the top of the unit is up. Lay out the decals for correct
orientation.
10.Remove the adhesive backing from each decal and carefully attach the decals as
illustrated.
11.Attach the other end of the RJ45 10-pin cable to the POS/ECR and plug the power
module into an electrical outlet.
ViVOpay 4800 User Guide 9
Installing the ViVOpay 4800
Testing the Installation
After you have completed the installation check that the ViVOpay 4800 and the POS are
communicating correctly by performing a sample transaction.
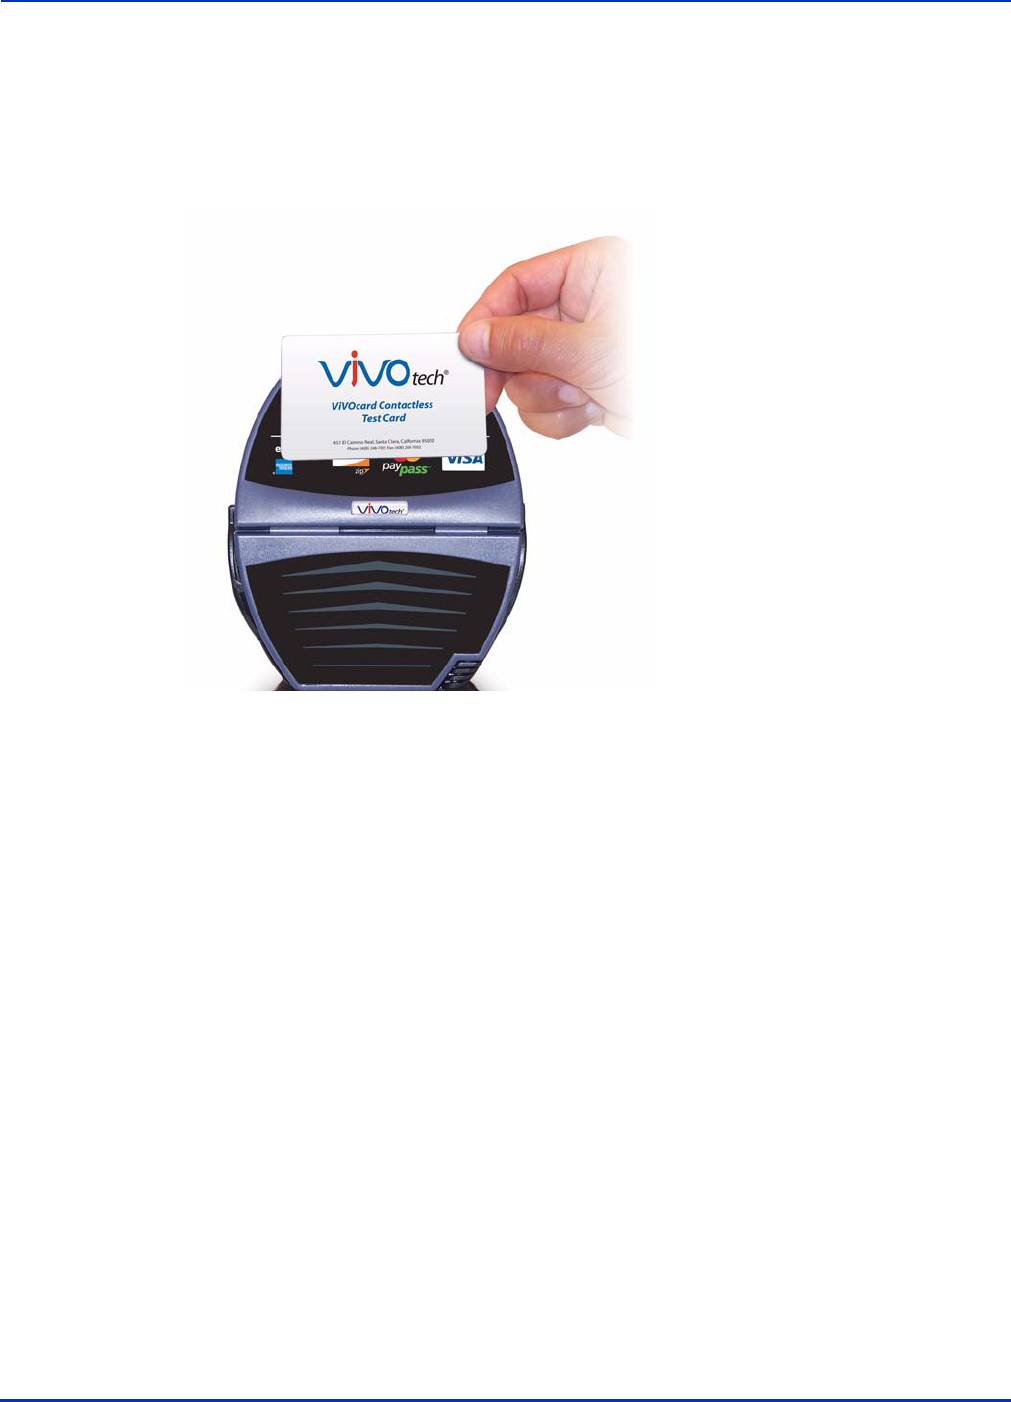
To test that the reader is reading cards, present the contactless card/fob/phone flat against the upper
half of the reader so that maximum surface area is parallel to the screen.
When a card/fob/phone has been successfully read, the ViVOpay 4800 beeps and illuminates all four
green LEDs.
Testing a Transaction
The exact wording that appears on the terminal depends on the POS application.
To test a transaction
1. Ring up a transaction on the POS.
2. Present a card/fob/phone in close proximity to the reader.
3. A single beep and LED flash indicates that the card has been validated.
4. A receipt is printed by the POS with the purchase amount.
5. Initiate a charge reversal on the POS and tap the card again, if needed.

ViVOpay 4800 User Guide 10
Chapter 3
Troubleshooting and Maintenance
Troubleshooting
The ViVOpay 4800 readers are reliable and easy to troubleshoot. The components that may require
troubleshooting include the power supply, the reader, and the data cable.
Symptom Possible Cause Remedy
General Issues
Reader does not appear to be
powered on—no LEDs lit.
• Reader not powered on.
• Incorrect power supply used.
• Check cable connections.
• Verify that power is on and correct voltage and
current are present.
• Replace the power supply.
• Verify that power cable plug is fully inserted.
• Replace the reader.
Reading Cards/Fobs/Phones
LEDs do not light and beeper is
not audible when
card/fob/phone is presented.
• Card/fob/phone not properly
presented.
• Metal or RF interference.
• Firmware issue (contact your local
support representative).
• Reader not powered on or incorrect
voltage.
• Incorrect power supply used.
• Unsupported card/fob/phone used.
• Present card/fob/phone closer to the reader
and ensure it’s parallel to the reader’s display.
• Verify that the card/fob/phone is valid/current.
• Test with “ViVOcard Contactless Test Card”
part number 241-0015-03.
• Try a different card/fob/phone.
• Verify that the unit is not near any large metal
objects.
• Verify that correct firmware is loaded (local
support representative only).
• Verify that power is on and correct voltage and
current are present.
• Verify that power cable plug is fully inserted.
• Replace the reader.
Some cards/fobs/phones read,
but not all.
• Wrong firmware (contact your local
support representative).
• Possible bad card/fob/phone.
• Unsupported card used.
• Verify that correct firmware is loaded on
reader (local support representative only).
• Check to see if card/fob/phone is damaged.
• Try a different card/fob/phone.
Communication to POS/ECR
No data is received, or data is
garbled.
• Faulty or incorrect cable connections.
• Unsupported card used.
• Contactless application is not
installed on terminal (for serial
connections only).
• The POS application is not using the
correct communications parameters.
• Check that the cable connection is secure and
in the correct port on the POS/ECR.
• Check that the POS/ECR has the correct
software application to accept data from the
contactless reader (may need assistance from
the POS vendor).
• Try a different card/fob/phone.
• Contact the payment processor for an
application upgrade.
• Check that the cable is correctly attached to
the back of the ViVOpay 4800. Loosen and
gently reseat the connector if neccessary. Do
not overtighten the retaining screw.
• Check the POS application.

ViVOpay 4800 User Guide 11
Troubleshooting and Maintenance
Upgrade ViVOpay 4800 Firmware
Required Items
Gather the following items before downloading new firmware to the ViVOpay 4800.
• PC with available serial com port
• ViVOpay 4800 with universal cable (220-2280-00) attached
• 220-1233-00 Download Dongle (9-pin serial to RJ45)
• CAT 5 cable
• Phillips LPC2000 Flash Utility software
• Firmware file for the desired firmware (e.g. GR 1.2.3)
• Power supply for the ViVOpay reader 120V AC input, 9V DC output
Preparation
To prepare for the download
1. Install the LPC2000 flash utility program on the PC.
2. Copy the ViVOpay 4800 firmware on the PC.
Firmware Download Process
The download process is through the RS 232 serial interface. To place the ViVOpay 4800 into
download mode, the ISP signal must be shorted to ground. The Download Dongle does this for you
so all you have to do is connect a standard Ethernet cable between the dongle and the ViVOpay
4800 data cable.
To download new firmware
1. Connect the download dongle to the PC serial port.
2. Connect the Ethernet cable to the dongle.
3. Connect the Ethernet cable to the RJ-45 socket at the end of the universal cable (220-
2280-00).
4. Connect power to the ViVOpay reader. There should be no beep, and no LED activity.
5. Launch the Phillips LPC2000 utility.
If the Philips utility fails to identify any reader attached, please follow the troubleshooting
steps given in the previous section.
6. Set the Device to LPC 2138. [this is not an option with V2.2.0!!!]
7. Set Baud Rate from the Use Baud Rate drop-down list.
8. Select the COM the reader is connected to from the Connect to Port drop-down list.
You can verify the COM port to which the reader is connected by navigating to the
Windows Device Manager (Start>Settings>Control Panel>System>Hardware->Device
Manager->Ports) to verify the actual port number.
9. Click Read Device ID, the Part ID: and Boot Loader ID: fields should be filled in if the
reader is responding to the utility
Note: If the reader does NOT respond to the utility, reset the reader by unplugging and
replugging the power connector and try again.

ViVOpay 4800 User Guide 12
Troubleshooting and Maintenance
10. Click Erase. This erases the old firmware on the reader and returns a message to
indicating success.
11. Click Blank Check (with Entire Device selected); this confirms that the erase function
worked properly.
12. Click the "..." button in the Flash Programming box to browse for the firmware file you
want to load on the ViVOpay reader.
13. Click Upload to Flash to load the firmware on the reader (the % completion bar runs
across the screen as the firmware is loaded).
ViVOpay 4800 User Guide 13
Appendix A
Specifications
ViVOpay 4800 Specifications
RF Interface
Frequency 13.56 MHz
Standard ISO 14443 Type A/B
ISO 18092
Physical
Length 125 mm (5.0 in) unfolded
62.5 mm (2.5 in) folded
Width 105.0 mm (4.2 in) maximum
Depth 10.0 mm (0.7 in)
Weight 0.4 Kg (0.9 lbs)
Environmental
Operating Temp. 0 to 40° C (32 to 104° F)
Storage Temp. -20 to 70° C (-4 to 158° F)
Operating Humidity 20 to 90% non-condensing
Operating Environment Indoor only
Power
Voltage 9-12 Vdc regulated, +/- 10%
Consumption 450 mA maximum

ViVOpay 4800 User Guide 14
Specifications
Regulatory Compliance
FCC Part 15 Class B Equipment
This equipment has been tested and found to comply with the limits for a Class B digital device,
pursuant to Part 15 of the FCC Rules. These limits are designed to provide reasonable protection
against harmful interference in a residential installation. This equipment generates, uses and can
radiate radio frequency energy and, if not installed and used in accordance with the instructions, may
cause harmful interference to radio communications. However, there is no guarantee that
interference will not occur in a particular installation. If this equipment does cause harmful
interference to radio or television reception, which can be determined by turning the equipment off
and on, the user is encouraged to try to correct the interference by one or more of the following
measures:
• Reorient or relocate the receiving antenna.
• Increase the separation between the equipment and receiver.
• Connect the equipment into an outlet on a circuit different from that to which the receiver is
connected.
• Consult the dealer or an experienced radio/TV technician for help.
FCC Information for User
The users manual or instruction manual for an intentional or unintentional radiator shall caution the
user that changes or modifications not expressly approved by the party responsible for compliance
could void the user's authority to operate the equipment. In cases where the manual is provided only
in a form other than paper, such as on a computer disk or over the Internet, the information required
by this section may be included in the manual in that alternative form, provided the user can
reasonably be expected to have the capability to access information in that form.
Industry Canada Class B Equipment
This Class B digital apparatus complies with Canadian ICES-003.
Cet appareil numérique de la classe B est conforme à la norme NMB-003 du Canada.
Industry Canada Information for User
Operation is subject to the following two conditions: (1) This device may not cause harmful
interference, and (2) this device must accept any interference, including interference that may cause
undesired operation of the device.

ViVOpay 4800 User Guide 15
Glossary
Discover Zip Discover's contactless payment product that utilizes contactless technology.
Electronic Cash Register (ECR)
The combination of a traditional cash register and a POS terminal, often PC-based.
ExpressPay from American Express
American Express contactless payment product that utilizes contactless technology.
Firmware Software that is embedded in a hardware device that allows reading and executing the
software, but does not allow modification, e.g., writing or deleting data by an end user.
Example: Firmware is a computer program in a read-only memory (ROM) integrated circuit
chip. A hardware configuration is usually used to represent the software.
Example: Firmware is a program embedded in an erasable programmable read-only memory
(EPROM) chip, which program may be modified by special external hardware, but not by an
application program.
Fob A key chain device or other non-standard credit card sized form factor that has an embedded
radio frequency (RF) chip.
MasterCard PayPass
MasterCard's contactless payment product that utilizes contactless technology.
NFC Near Field Communications.
NFC Phone Near Field Communications (NFC) phone. A technology that enables communication between a
secure element in a mobile device and a contactless reader to make credit/debit payments.
Also see UICC.
PCI 2.0 The Payment Card Industry Security Standards Council (PCI SSC) mission is to enhance
payment account data security. PCI 2.0 is a set of standards created by PCI SSC to increase
the security of card data.
Point of Sale (POS)
Refers to terminals used in retail stores with a magnetic stripe reader, keyboard, display and
autodialer modem or IP connection, connected to the telephone/internet network and used for
on-line credit/debit authorization. Can also be connected to a host computer, which handles all
transaction processing including item price look-up, data collection, and credit/debit
authorization.
Proximity Payments
Payment method utilizing contactless technology such as RF, Infrared (IrDA) or Near Field
Communications (NFC).
Radio Frequency (RF)
Any frequency that corresponds to radio signals, including those used by cellular telephones
and wireless networks.
RF Reader The Point of Sale device that receives the RF transmission from a card, fob or NFC phone.
Visa payWave Visa's contactless payment product that utilizes contactless technology.