Visonic TOWER20AMPG2 POWERG WIRELESS PIR MOTION MIRROR DETECTOR WITH ANTI-MASKING User Manual D 304046 TOWER 20 PG2 Installation Instructions
Visonic Ltd. POWERG WIRELESS PIR MOTION MIRROR DETECTOR WITH ANTI-MASKING D 304046 TOWER 20 PG2 Installation Instructions
Visonic >
User Manual
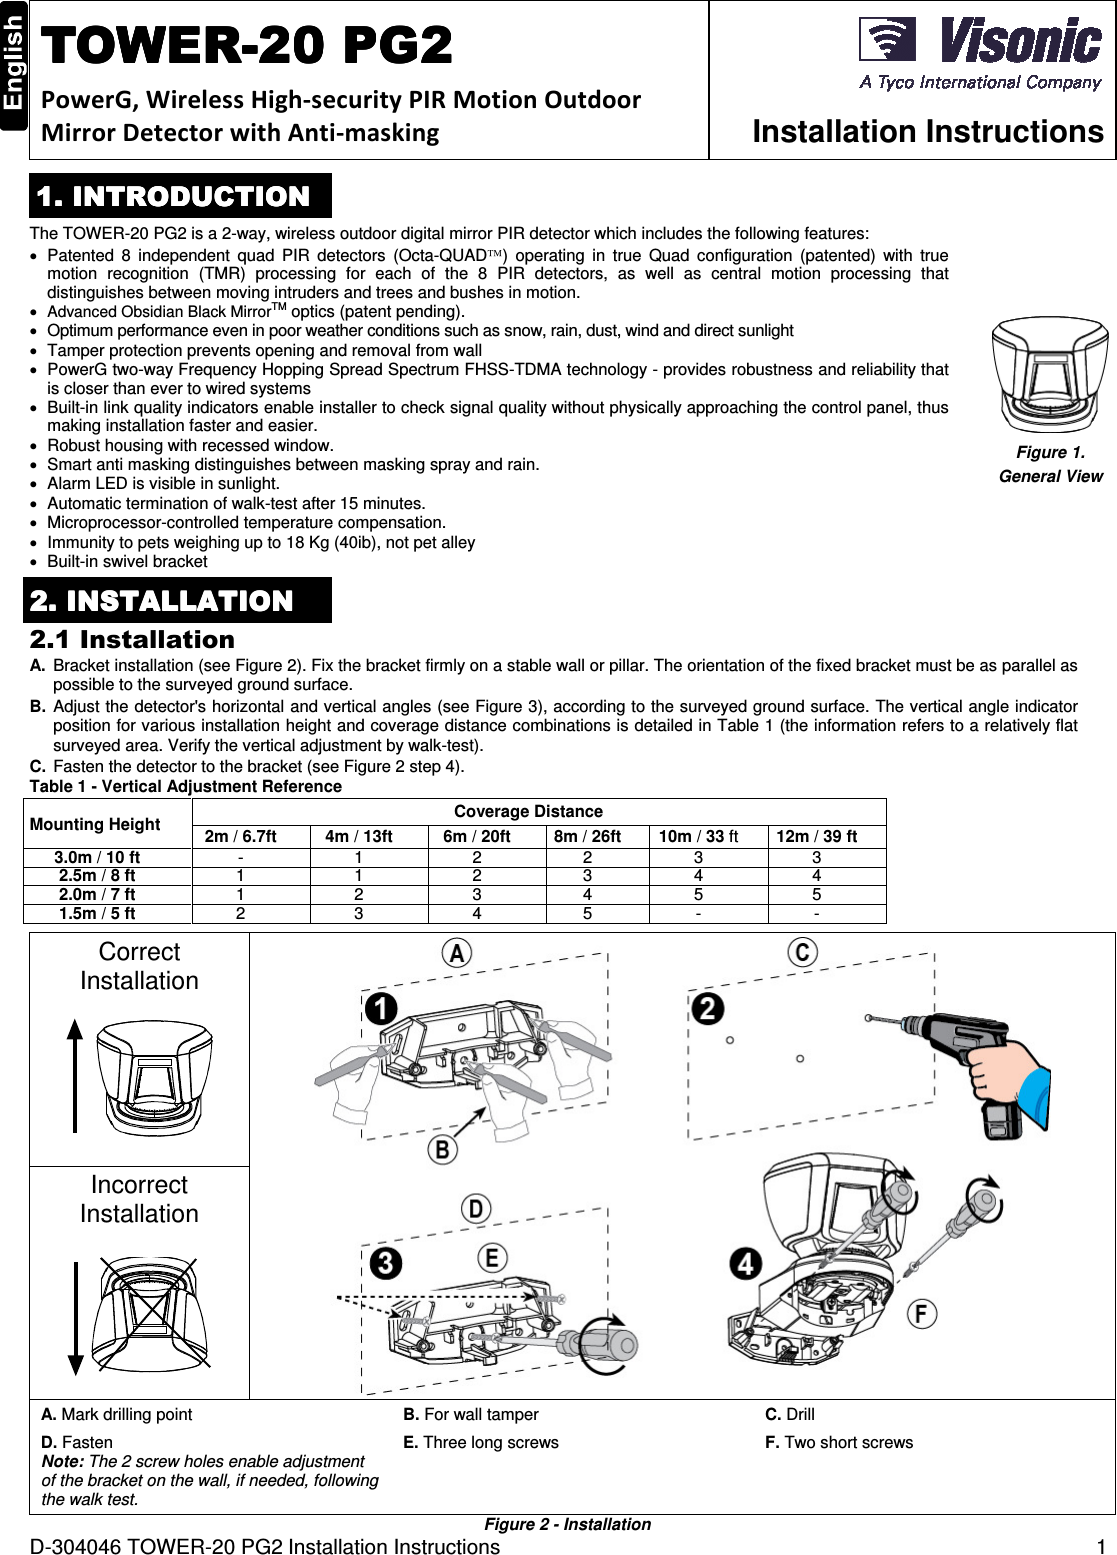
![D-304046 TOWER-20 PG2 Installation Instructions 3 2.2 Battery Insertion It is recommended to perform the first batteries insertion on a flat surface (see Figure 4). After battery insertion, the LED will flash for 60 seconds and then the detector will enter a 15 minutes' local diagnostic mode. A. Tamper switch B. Press firmly to release the bracket C. 3 screws Figure 4 – Battery Insertion 2.3. Enrollment Refer to the PowerMaster control panel's Installer Guide and follow the procedure under the "02:ZONES/DEVICES" option of the Installer Menu. A general description of the procedure is provided in the following flow chart. Step 1 Step 2 Step 3 Step 4 Enter the Installer menu and select “02:ZONES/DEVICES” Select "ADD NEW DEVICE" See Note 1 Enroll the device (see Figure 5) or enter the device ID Select a detector number for the new flood detector Step 5 Step 6 Step 7 Configure Location, Zone Type & Chime parameters Enter PARTITIONS. See Note 2 Assign partitions to the detector by pressing the , and/or buttons on the panel means scroll and select Notes: [1] If the detector is already enrolled you can configure the detector parameters and assign partitions via the “Modify Devices” option – see Step 2. [2] PARTITIONS will appear only if PARTITIONING was previously enabled in a panel that supports the Partitioning feature (for further details, see "Partitioning" in the PowerMaster Installer Guide). Z14.SET CHIME Z14.ZONE TYPE MODIFY DEVICES Z14.LOCATION Z14.PARTITIONS Z14:P1 P2 P3 ID No. 130-XXXX Z14:Motion Sens ENTR ID:XXX-XXXX ENROLL NOW or ADD NEW DEVICES 02:ZONES/DEVICES](https://usermanual.wiki/Visonic/TOWER20AMPG2/User-Guide-1945603-Page-3.png)