Visteon BLUE15M Bluetooth Handsfree Device User Manual 14 ACURA MDX 31TZ56000
Visteon Corporation Bluetooth Handsfree Device 14 ACURA MDX 31TZ56000
UserManual.wiki
>
Visteon
>
BLUE15M User Manual
User Manual
Navigation menu
Upload a User Manual
Namespaces
Wiki Guide
HTML
PDF
Info
Views
User Manual
Discussion / Help
Navigation


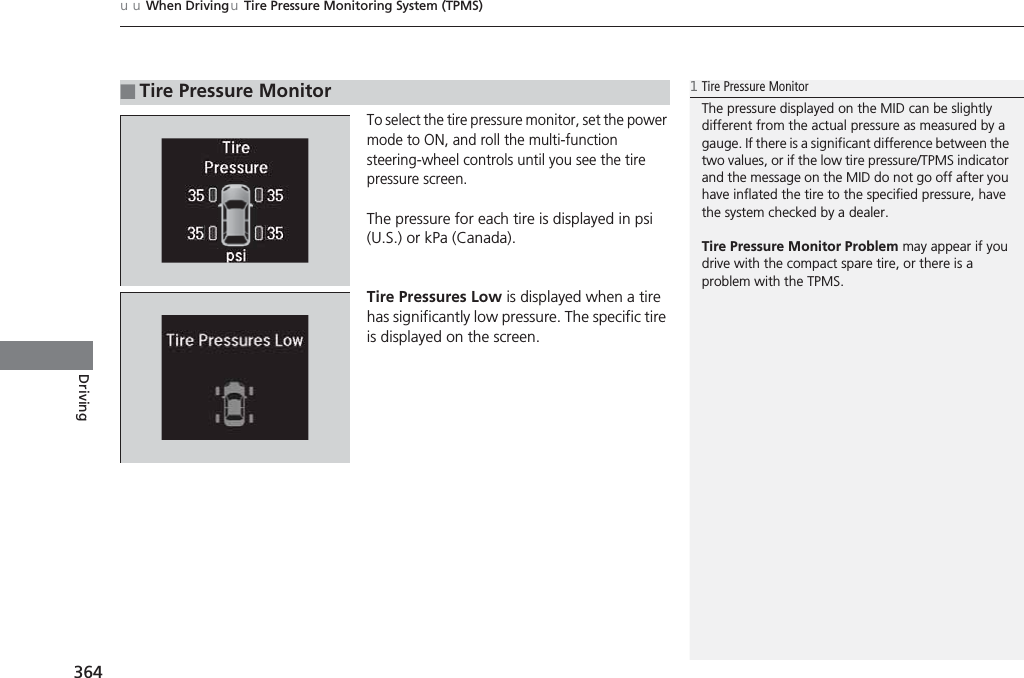
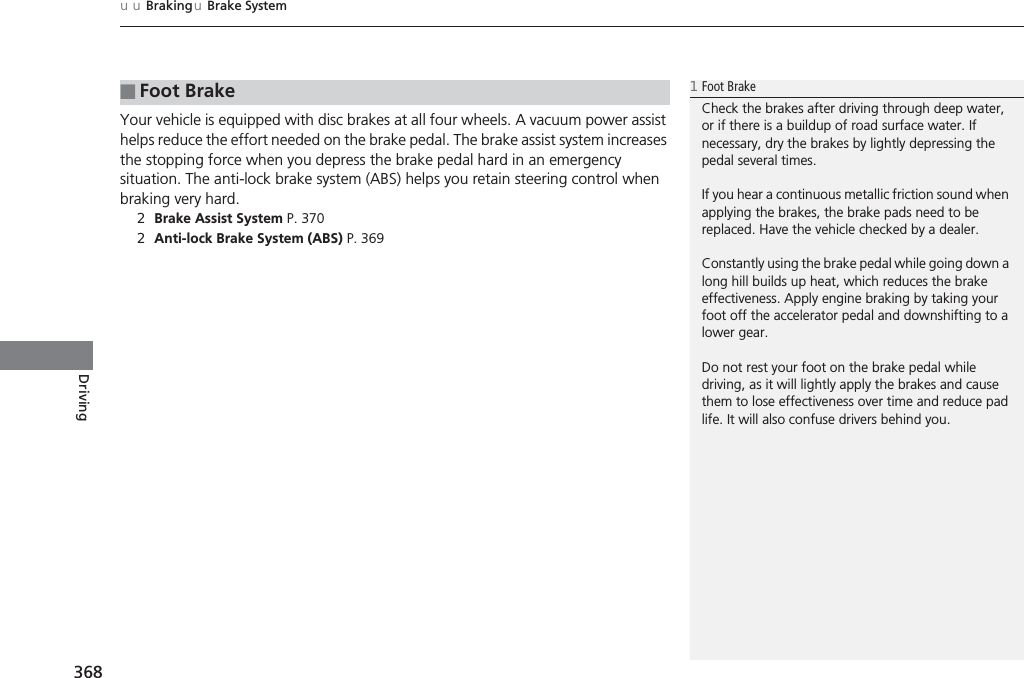
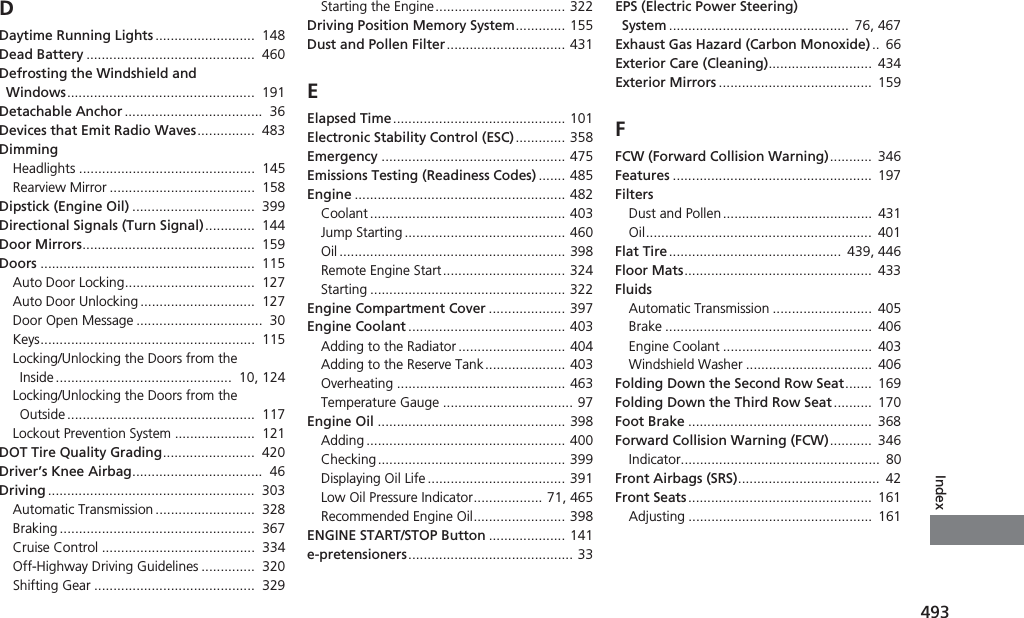
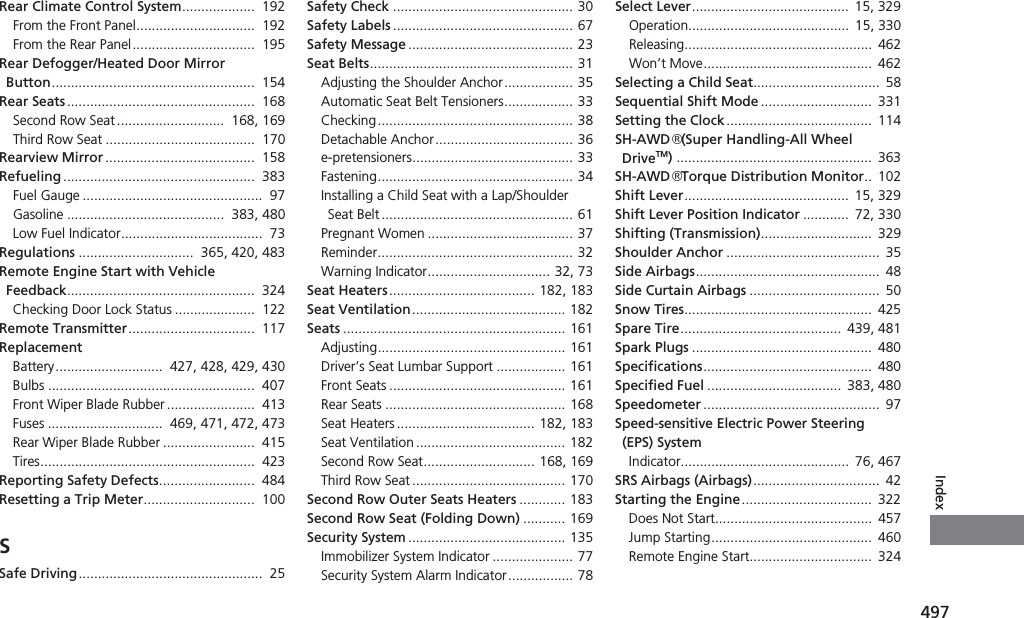
![uuBrakinguCollision Mitigation Braking SystemTM (CMBSTM)*376DrivingThe CMBSTM may activate even when you are aware of a vehicle ahead of you, or when there is no vehicle ahead. Some examples of this are:■When PassingYour vehicle approaches another vehicle ahead of you and you change lanes to pass.■At an intersectionYour vehicle approaches or passes another vehicle that is making a left or right turn.■Through a low bridge at high speedYou drive under a low or narrow bridge at high speed.■Speed bumps, road work sites, train tracks, roadside objects, etc.You drive over speed bumps, steel road plates, etc., or your vehicle approaches train tracks or roadside objects [such as a traffic sign and guard rail] on a curve.■With Little Chance of a Collision1Collision Mitigation Braking SystemTM (CMBSTM)*Avoid the following conditions that may cause the radar aim to be temporarily out of range and prevent the CMBSTM from working properly.•A heavy load in the rear or modifications to the suspension tilts your vehicle.•The tire pressures are not correct, the tire sizes are incorrect, the tire types are different, and/or the tires are not in good condition.For the CMBSTM to work properly:•Always keep the radar sensor cover clean.•Never use chemical solvents or polishing powder for cleaning the sensor cover. Clean it with water or a mild detergent.Do not put a sticker on the emblem or replace the emblem.Take your vehicle to a dealer if you need the radar sensor to be repaired, or removed, or the radar sensor cover is strongly impacted.* Not available on all models](https://usermanual.wiki/Visteon/BLUE15M/User-Guide-2722740-Page-128.png)


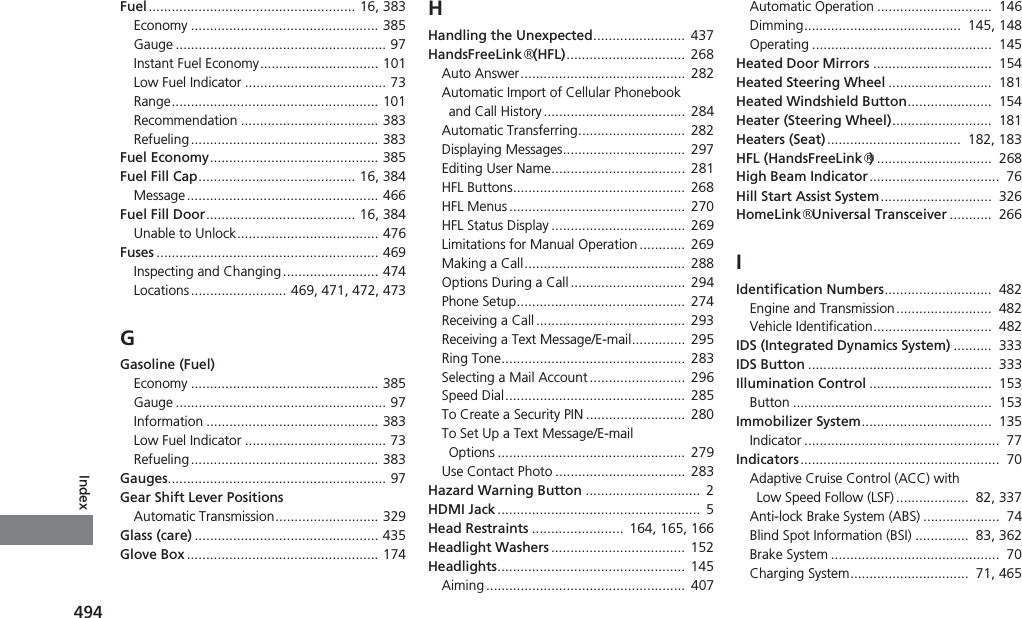
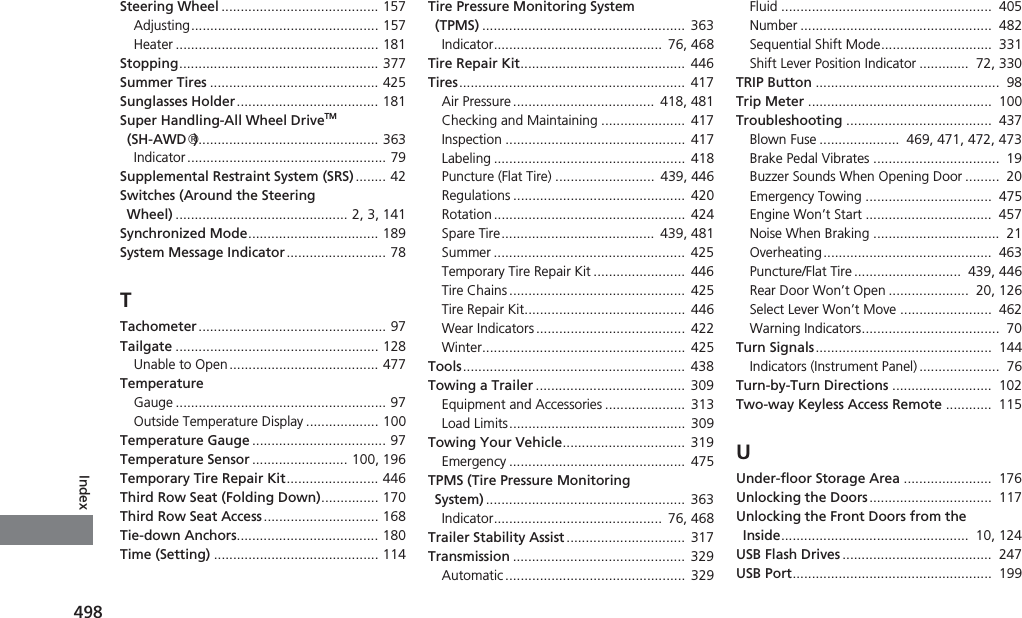
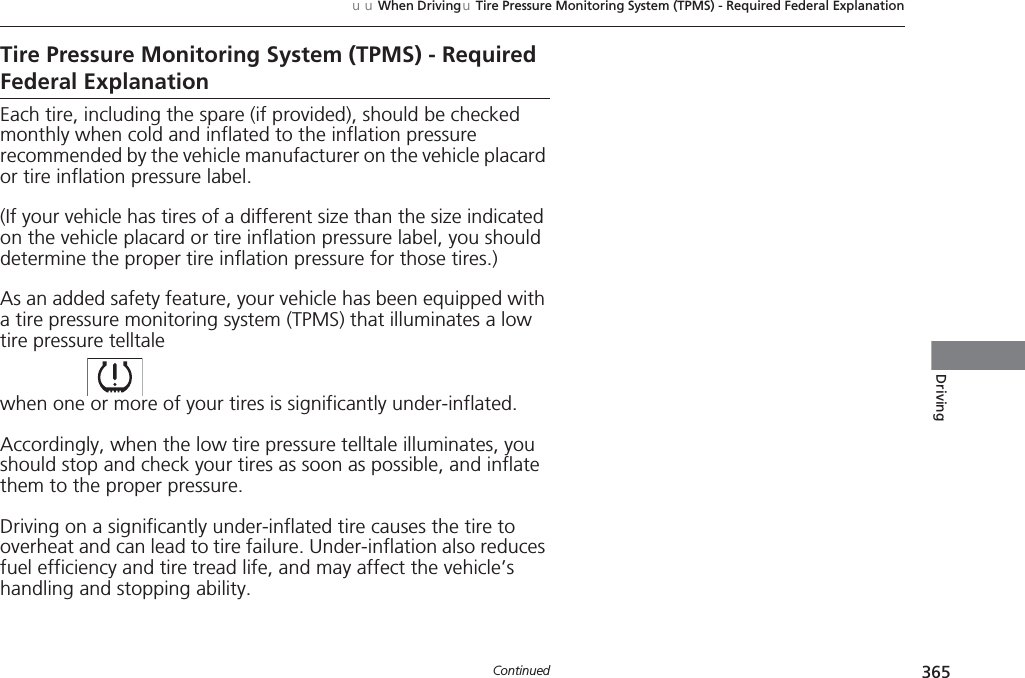
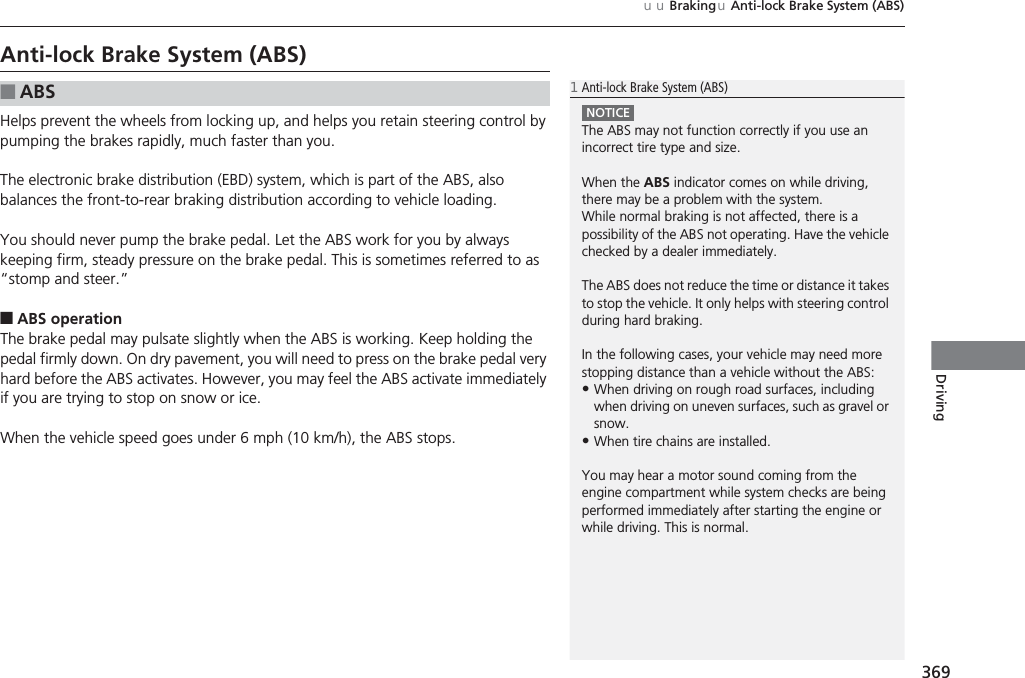
![481uuSpecificationsuInformation■Automatic Transmission Fluid■Rear Differential Fluid*■Transfer Assembly Fluid*Specified Acura ATF DW-1(automatic transmission fluid)Capacity Change 3.3 US qt (3.1 ℓ)Specified Acura All Wheel Drive Fluid (DPSF)Capacity Change 2.7 US qt (2.5 ℓ)Specified Acura HGO-Type1 to be applied.Capacity Change 0.45 US qt (0.43 ℓ)■Engine Oil■Engine CoolantRecommended ·Genuine Acura Motor Oil 0W-20·API Premium-grade 0W-20 detergent oilCapacityChange 5.4 US qt (5.1 ℓ)Change including filter5.7 US qt (5.4 ℓ)Specified Acura Long Life Antifreeze/Coolant Type 2Ratio 50/50 with distilled waterCapacity1.93 US gal (7.3 ℓ)(change including the remaining 0.19 US gal (0.72 ℓ) in the reserve tank)■Tire*1: BASE models*2: Except BASE modelsRegularSize 245/60R18 105H*1245/55R19 103H*2Pressure psi (kPa [kgf/cm2]) 35 (240 [2.4])Compact Spare*Size T165/80D17 104MPressure psi (kPa [kgf/cm2]) 60 (420 [4.2])Wheel Size Regular 18 x 8J*119 x 8J*2Compact Spare*17 x 4T* Not available on all models](https://usermanual.wiki/Visteon/BLUE15M/User-Guide-2722740-Page-233.png)