Vocollect TT-100-1-1 Vocollect T1 Talkman Terminal User Manual CERTIFICATE OF COMPLIANCE
Vocollect Inc Vocollect T1 Talkman Terminal CERTIFICATE OF COMPLIANCE
User Manual

Rhein Tech Laboratories, Inc.
Client:
Vocollect, Inc.
360 Herndon Parkway
Model #:
TT-100-1-1
Suite 1400
Standards:
FCC 15.247 & RSS-210
Herndon, VA 20170
http://www.rheintech.com
ID’s:
MQO-TT-100-1-1/2570A-TT10011
Report #: 2010100
Page 47 of 63
Appendix J: Manual
Please refer to the following pages.
Chapter
1
Talkman® Devices
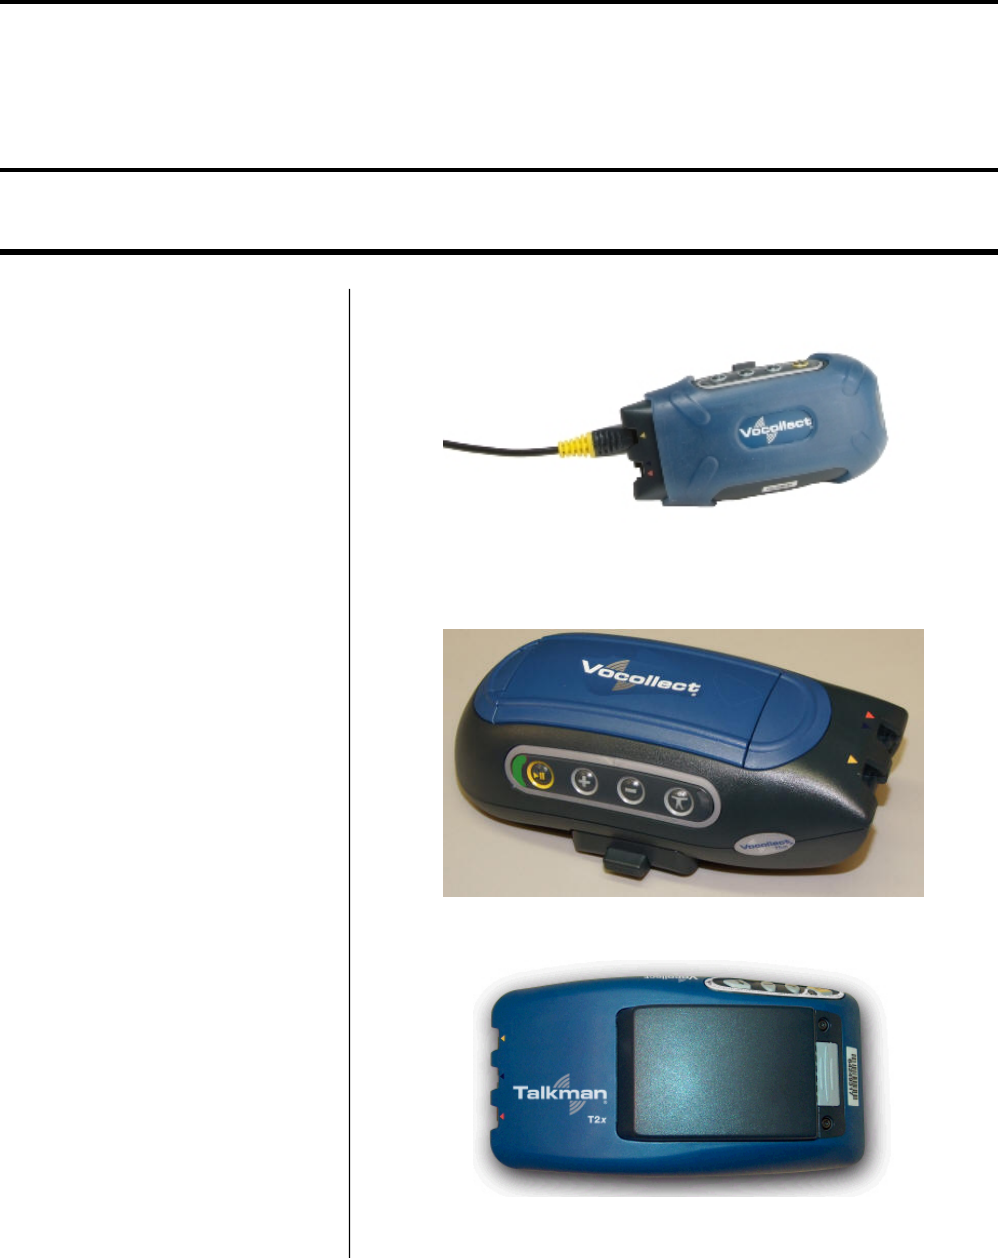
Figure 1:Talkman T5
Topics:
•T5 Series Specifications:Talkman
T5 and Talkman T5m
•T2 Series Specifications:Talkman
T2x and Talkman T2
•T1 Specifications: Talkman T1
•Loading an Operator's Templates
onto a Device
•Charging a T5 Battery in a Device
•Charging a T2 Series Device
•Charging a T1 Battery in a Device
•Turning a Talkman Wearable
Computer On
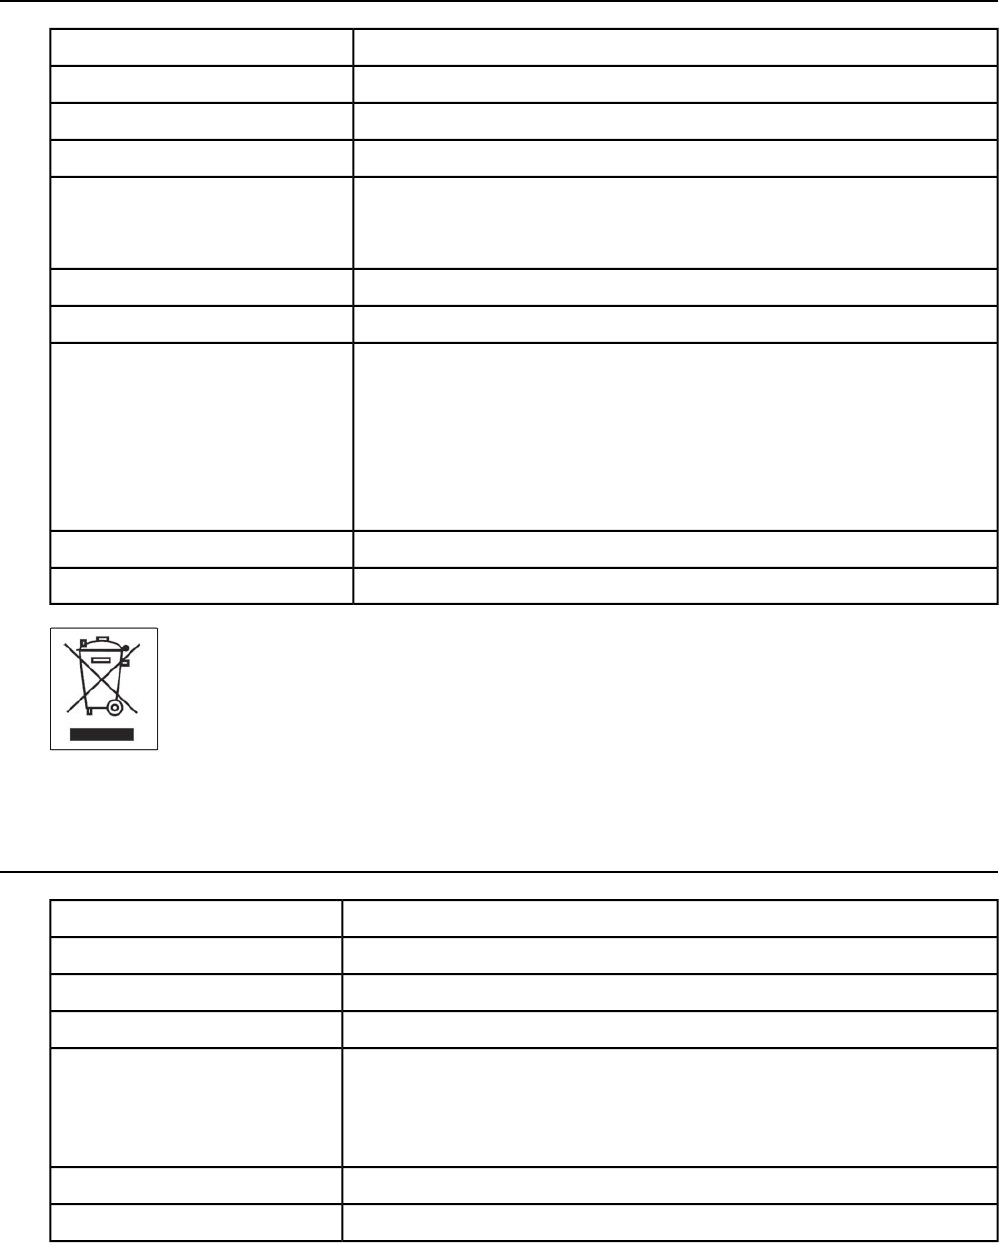
Figure 2:Talkman T5m
•Turning a Talkman Wearable
Computer Off
•Adjusting the Voice's Pitch
•Adjusting the Voice's Volume
Using Voice
•Adjusting the Voice's Speed
•Changing the Speaker's Gender
•Repeating the Current Prompt
•Repeat the Previous Prompt,
Your Last Response, and the
Current Prompt
•Erase Your Current Response
and Repeat the Current Prompt
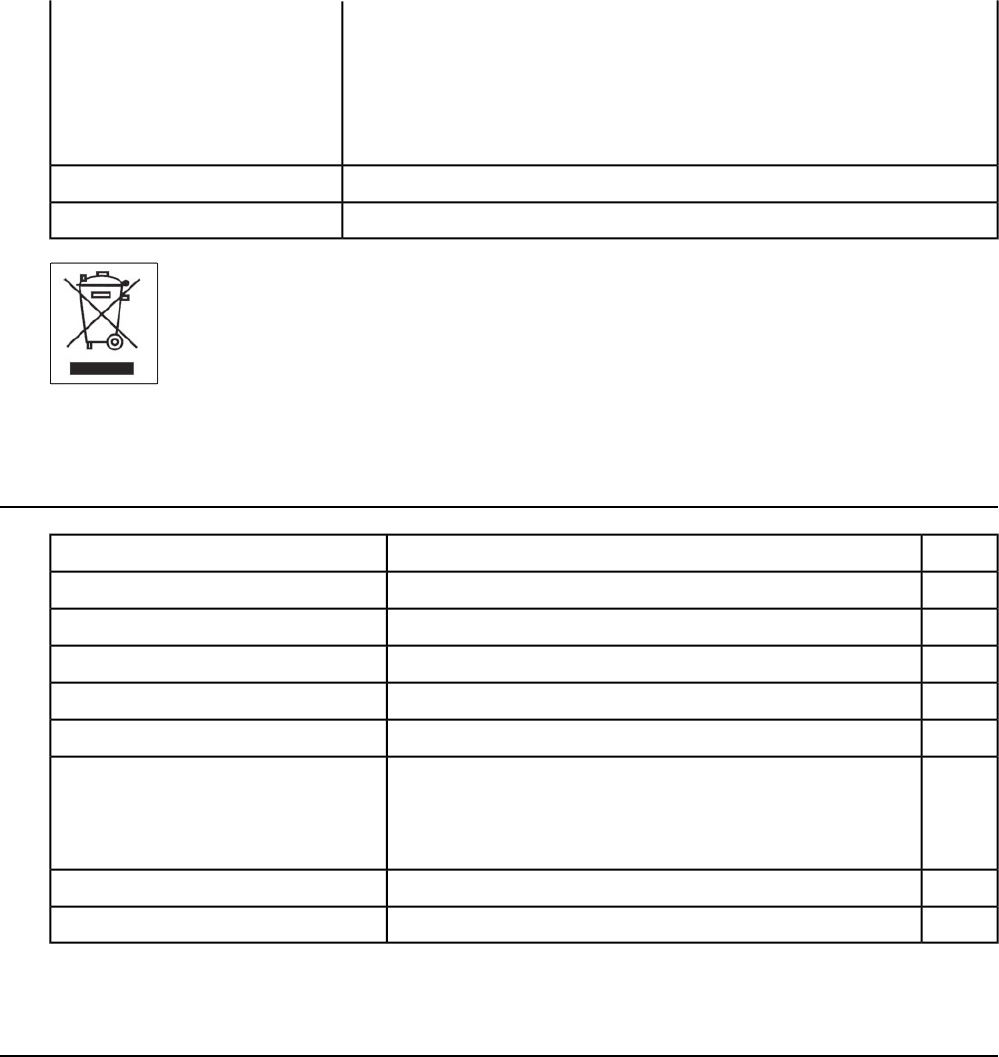
Figure 3:Talkman T2x
•Pairing a T5 Wearable Computer
and a Bluetooth Device
•Part Number Index: Vocollect
Wearable Computers

Figure 4:Talkman T1
Talkman devices are voice-directed wearable computers. The Talkman T1 has
been specifically designed for light-duty, light-industrial environments. Operators
listen to instructions to perform tasks such as warehouse order picking and
factory floor inspection, and then speak simple phrases to enter data. Talkman
T1 device is a lighter, lower-cost alternative to the T2- and T5-series wearable
computers. It is intended for work in areas where you don't require an extremely
rugged device.
Talkman T5-series and T2-series devices attach to a customized belt or shoulder
harness equipped with a specially designed clip. Talkman T1 devices are inserted
into a customized holster with belt clip. This leaves the operator's hands free to
inspect items, pick product, or repair defects. A headset with an attached
microphone allows the operator to hear the device's instructions or questions.
The operator talks to the device to request information, and enters data by
responding to the device's prompts.
A Talkman T5e Mobile Computer, External Antenna is a T5 device with a
battery adapter mounted to a warehouse vehicle, such as a forklift. After the
device is mounted, the battery adapter is placed in the battery area of the T5
device and connected to the vehicle’s power source.
• Talkman wearable computers are assembled under strict Vocollect
manufacturing guidelines. Tampering with a device in any manner will void
published operating specifications and may void the product warranty.
• Never remove the battery from a Talkman unless it has been properly
powered off.
• Vocollect designed the Talkman to be worn on the right side of the body
with the wearable computer’s buttons on the top (T5-series and T2-series)
or facing front (T1) and its connectors toward the operator’s back (T5-series
and T2-series) or pointed up (T1).
• The Talkman T1 must be holstered with the holster opening facing up.
Holstering with the opening facing down or to the side places the unit at risk
for dropping.
•When the Talkman is not in use, it should be placed properly into a charger.
•A “Proper Use and Care” document has been provided with your order which
contains important handling instructions for the T1’s headset, the SL-4. If
you do not have this document, users should contact their Vocollect Regional
16 | OpenTopic | Talkman® Devices

Sales Manager Representative or Vocollect Reseller for additional copies
of this important document.
• Use an isopropyl alcohol (isopropanol) swab or soft cloth dampened with
isopropyl alcohol to clean metal connection points. If dirt or residue cannot
be removed with the alcohol swab or cloth, use a soft, non-abrasive rubber
eraser to clean metal connection points. You also can use a three-row
toothbrush style, general cleaning brush with natural hog hair bristles to
gently brush away dirt on the contacts. A final alcohol wipe after this should
ensure a clean contact.
Important:
• These instructions are for the T2- and T5-series devices only.
•Use only isopropyl alcohol. Do not use any other cleaning solvent.
• If using an eraser, it must be in good condition (soft, pliable, and
not worn down to the mounting). A good test is to rub the eraser
against your skin. If it feels abrasive, do not use it, because it will
damage the connectors.
OpenTopic | Talkman® Devices | 17
T5 Series Specifications:Talkman T5 and Talkman T5m
12.1 ounces (343 g) (with battery)Weight
5.5" (13.97 cm)Length
2.63" (6.68 cm)Width
1.7" (4.3 cm)Depth
I/O Ports • Headset port (yellow)
• Maintenance port with audio out and RS-232 serial support
-29° to 122° F (-33° to 50° C)Operating Temperature
-30° to 140° F (-34° to 60° C)Storage Temperature
Meets the MIL STD -810F specification for shock and vibration.
Drop Tested
In addition, the device has been tested to the following specifications:
•25 drops from 5 feet, 10 additional drops from 6 feet onto polished concrete
• 10 drops at varying angles from 5 feet at -20° F (-29° C) onto polished
concrete
100% condensingHumidity
IP67Enclosure Rating
T2 Series Specifications:Talkman T2x and Talkman T2
16 ounces (with standard battery)Weight
6.5" (16.5 cm)Length
3.38" (8.5 cm)Width
1.5" (4 cm)Depth
I/O Ports • Headset port (yellow)
• Maintenance port with audio out and RS-232 serial support (red)
• Bar code port with RS-232 decoded bar code support (blue)
-29° to 122° F (-34° to 50° C)Operating Temperature
-30° to 140° F (-34° to 60° C)Storage Temperature
18 | OpenTopic | Talkman® Devices
Meets the MIL STD -810F specification for shock and vibration.
Drop Tested
In addition, the device has been tested to the following specifications:
• 25 drops from 5 feet, 10 additional drops from 6 feet onto polished concrete
•10 drops at varying angles from 5 feet at -20° F (-29° C) onto polished concrete
100% condensingHumidity
IP67Enclosure Rating
T1 Specifications:Talkman T1
5.3 ounces (150 g) (with battery)Weight
100 mmLength
51.5 mmWidth
24 mmDepth
-1° to 50° C (30° to 122° F)Operating Temperature
-40° to 70° C (-40° to 158° F)Storage Temperature
The device is not designed to be repeatedly dropped. The device
has been tested to the following specifications:
Drop Tested
• 18 drops from 4 feet
5 to 95% non-condensingHumidity
IP54Enclosure Rating
Loading an Operator's Templates onto a Device
You need a device with a charged battery, headset, and any other equipment (belt, bar code reader) you are going to
use. You must be within radio range. Make sure the device is on or sleeping. The LED indicator should be either solid
green or blinking green (T5-series and T2-series) or solid green (T1).
1. Press the Operator button.
The device says "Current operator is operator name. Select menu item."
2. Press the + button or — button until the device says, "Change operator."
3. Press the Operator button.
4. The device says, "Please wait" and retrieves a list of operators and teams. Wait for the device to say, "Select team".
• If the device says "Current operator is (operator name). Change operator", skip to step 8.
OpenTopic | Talkman® Devices | 19

5. Press the + button or — button to scroll through the list of operator teams until you hear the name of a team to which
you belong.
6. Press the operator button.
The device says, "Please wait" and retrieves a list of all operators who belong to the team that was selected. The
device then says, "Current operator is (operator name). Select new operator."
7. Press the + button or — button to scroll through the list of available operator names until you hear your name.
•If you do not hear your name, press the yellow play/pause button to cancel this operation and start over from step
2.
• When selecting a team in step 6, choose the "All Operators" team.When selecting a team in step 6, choose the
"All Operators" team.
• Consult with your supervisor if you are not listed in the "All Operators" team.
8. Press the operator button.
The device says, "Loading operator" and loads your templates. Once it has loaded your templates, the device says,
"Current operator is (your operator name). Good night." The device then goes to sleep. The next time you turn the
device on, it will be ready to use.
Charging a T5 Battery in a Device
1. Remove the wearable computer from the belt clip.
2. Disconnect any other peripherals.
3. Insert the wearable computer into an open slot on the charger, pressing down and then back until the wearable
computer clicks into place.
4. After the wearable computer has been placed into the charger, make sure that the LED indicator on the wearable
computer turns on and begins to blink green.
a) If the LED does not turn on after 30 seconds, remove the wearable computer from the charger slot and then place
it into the slot again.
b) If the LED indicator still does not turn on, try another charger slot.
Caution: Do not attempt to place the device into the charger unless you have first disconnected the headset and
any other peripheral devices. Do not remove the battery from the device when placing a device into a charger.
Charging a T2 Series Device
1. Make sure the charger is powered. The charger's orange power light (LED indicator) is lit when the charger is
powered.
2. Sign off of the device if necessary.
3. Press and hold the yellow play/pause button until the LED indicator turns solid red and then turns off.
4. Remove the device from the belt clip.
5. Disconnect any other peripherals. If the device is in a cover, remove the cover.
6. Insert the device into one of the device charger slots with the button controls of the device to the top and facing
toward the left.
20 | OpenTopic | Talkman® Devices
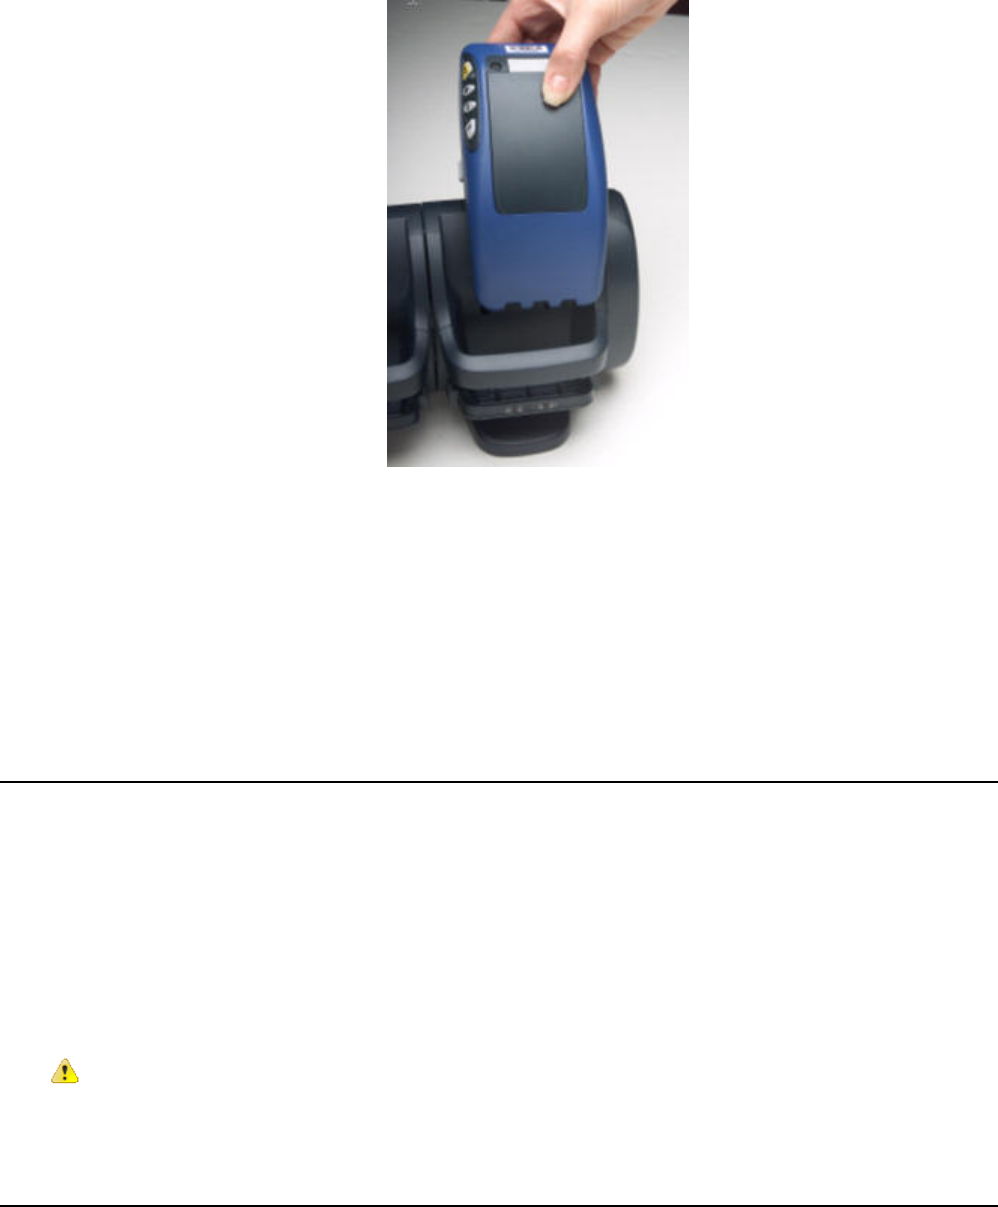
Figure 5: Inserting a T2 Series Device Into a Charger
7. After the wearable computer has been placed into the charger, make sure that the LED indicator on the wearable
computer turns on and begins to blink green.
a) If the LED does not turn on after 30 seconds, remove the wearable computer from the charger slot and then place
it into the slot again.
b) If the LED indicator still does not turn on, try another charger slot.
Charging a T1 Battery in a Device
1. Remove the wearable computer from the holster.
2. Disconnect the headset from the wearable computer.
3. Insert the wearable computer into an open slot on the charger.
4. After the wearable computer has been placed into the charger, make sure that the LED indicator on the wearable
computer turns on and is green.
a) If the LED does not turn on after 30 seconds, remove the wearable computer from the charger slot and then place
it into the slot again.
b) If the LED indicator still does not turn on, try another charger slot.
Caution: Do not attempt to place the device into the charger unless you have first disconnected the headset.
Turning a Talkman Wearable Computer On
Before you turn on a wearable computer, make sure a headset and charged battery are properly connected to it.
1. Press the Play/Pause button on the wearable computer.
The LED indicator first turns solid red while the processor reboots. It then flashes red and green, turns solid, blinks
red, then turns solid green (T5-series and T2-series) or The LED indicator turns solid green (T1).
OpenTopic | Talkman® Devices | 21

2. The wearable computer says, "Current operator is operator name. Please keep quiet for a few seconds." The device
then starts a noise sample.
3. After a brief pause, it says, "Please wait." After another pause, the device begins asking questions or providing
instructions.
Turning a Talkman Wearable Computer Off
Press and hold the Play/Pause button on the device until the LED indicator turns red.
After a few seconds, it says, "Powering off." The device turns off, and the LED indicator light goes out.
Caution:
• Do not remove the battery until the LED indicator is off. If you remove the battery when the device is on
or sleeping, any data collected could be lost.
• You should not turn off the device if the LED indicator is blinking red (T5-series and T2-series), unless it
has been blinking red for several minutes. If a wearable computer is turned off when its LED indicator is
blinking red, it may not be ready to use when it is turned back on.
Powering Off a Wearable Computer
You can use a button control or forced reset to force a Talkman wearable computer to power off. In some circumstances, the
device powers off automatically. You can then reboot the device.
Powering Off by Using the Play/Pause Button
This is the commonly used method of powering off. Press and hold the Play/Pause button for several seconds. The
wearable computer's LED indicator turns red, and the device stores any data that has not been transmitted. The device
says, "Powering off" when the process is complete, and the LED indicator turns off.
Powering Off Due to Inactivity
If the wearable computer's software detects no device activity for a specified length of time, it powers off automatically.
Powering Off Due to Low Battery Levels
If the wearable computer's software detects that the current battery level is critically low, it powers off automatically.
Booting a Wearable Computer After Powering Off
If a wearable computer was properly powered off, it does the following operations after a battery is placed into the
device and the Play/Pause button is pressed:
• Performs a background noise sample
• Continues operation at the place in the task where you left off
• Transfers any templates to the host that had not been sent prior to powering off
• Transfers any output data records to the host that had not been sent prior to powering off
•Transfers any lookup tables to the wearable computer that had not been received from the host prior to powering off
Forced Reset
This type of reset is invoked by removing the battery from the wearable computer without properly powering it off first.
Caution: Perform a forced reset only as a last resort. If you reboot a wearable computer in this manner:
• the contents of its memory, including any data collected, will be lost
22 | OpenTopic | Talkman® Devices

• the wearable computer starts over at the beginning of the task
•if you are in the process of retraining vocabulary, the wearable computer will send all vocabulary word templates
to the host computer when the device is turned back on. Do not do anything until the templates have been sent
to the host.
When the battery is replaced and the wearable computer is turned back on, it boots and attempts to load the current task
and operator. Once the task and operator have successfully loaded, the device behaves identically to a one that has just
had a new task or operator loaded.
Adjusting the Voice's Pitch
Make sure the device is on or sleeping. The LED indicator should be either solid green or blinking green (T5-series and
T2-series) or solid green (T1).
Note: You can only adjust the pitch for certain languages and certain Voices.
1. Press the Operator button.
The device says "Current operator is operator name. Select menu item."
2. Press the + or — button until the device says "Change pitch."
3. Press the Operator button.
If you use the + button to scroll through the options, Change Pitch is the fifth menu item in the list.
4. Press the + button to make the voice higher or the — button to make the voice lower.
The device says "higher" each time you press the + button and "lower" each time you press the — button. If the pitch
of the voice is at the highest possible setting, it says "This is highest." If the pitch of the voice is at the lowest possible
setting, it says "This is lowest."
Note: You can exit this menu without changing the settings by pressing the Play/Pause button before you press
the Operator button.
5. When the pitch reaches the level you want, press the Operator button to save the new pitch setting.
Adjusting the Voice's Volume Using Voice
Make sure the device is on or sleeping. The LED indicator should be either solid green or blinking green (T5-series and
T2-series) or solid green (T1).
1. Say "Talkman volume".
2. Say "louder" to increase the volume or "softer" to decrease the volume.
If the device says "This is softest" or "This is loudest", you cannot make the volume any louder or softer.
3. When the voice is as loud or as soft as you want it, say "Talkman continue" to return to work.
Adjusting the Voice's Volume Using the Device Buttons
Make sure the device is on or sleeping. The LED indicator should be either solid green or blinking green (T5-series and
T2-series) or solid green (T1).
Press the + button to make the voice louder or the — button to make the voice softer.
OpenTopic | Talkman® Devices | 23

The device says "louder" when the + button is pressed and "softer" when the — button is pressed. If the volume of
the voice is at the loudest possible setting, it says, "This is loudest." If the volume of the voice is at the softest possible
setting, it says, "This is softest."
Adjusting the Voice's Speed
Make sure the device is on or sleeping. The LED indicator should be either solid green or blinking green (T5-series and
T2-series) or solid green (T1).
1. Press the Operator button.
The device says "Current operator is operator name. Select menu item."
2. Press the + or — button until the device says "Change speed."
3. Press the Operator button.
If you use the + button to scroll through the options, Change Speed is the fourth menu item in the list.
4. Press the + button to make the voice faster or the — button to make the voice slower.
The device says "faster" each time you press the + button and "slower" each time you press the — button. If the
speed of the voice is at the fastest possible setting, the device says "This is fastest." If the speed of the voice is at the
slowest possible setting, it says "This is slowest."
Note: You can exit this menu without changing the settings by pressing the Play/Pause button before you press
the Operator button.
5. When the voice is speaking as quickly or as slowly as you want, press the Operator button to save the new speed
setting.
Changing the Speaker's Gender
Make sure the device is on or sleeping. The LED indicator should be either solid green or blinking green (T5-series and
T2-series) or solid green (T1).
1. Press the Operator button.
The device says "Current operator is operator name. Select menu item."
2. Press the + or — button until it says, "Change speaker."
3. Press the Operator button.
If you use the + button to scroll through the options, Change Speaker is the sixth menu item in the list.
4. Press the + or — button to hear the next speaker.
The device says, "This is female" when it toggles to the female voice, or "This is male" to indicate the male voice.
Note: You can exit this menu without changing the settings by pressing the Play/Pause button before you press
the Operator button.
5. When you hear the speaker you want to use, press the Operator button to select that speaker.
Repeating the Current Prompt
• Say "Talkman continue."
24 | OpenTopic | Talkman® Devices

The device repeats the current prompt.
Repeat the Previous Prompt,Your Last Response, and the Current Prompt
Note: As of VoiceClient 3.4, this feature is disabled by default.
1. Say "Talkman repeat."
The device repeats the previous prompt, repeats what you said in response to that prompt, and then repeats the current
prompt.
2. Respond to the current prompt.
Erase Your Current Response and Repeat the Current Prompt
Say "Talkman backup" or "Say again."
The device erases any response given to the current prompt and then repeats the prompt again.
Note:
• If you say "Talkman back up" more than once, the wearable computer continues to back up to previous
prompts until it reaches a point where it cannot back up anymore (such as a point where data has already
been transmitted to the host computer).
•If you say "Say again" more than once, the device continues to repeat the last thing it said (that is, the current
prompt) again and again. It will not back up any further than the previous prompt.
Pairing a T5 Wearable Computer and a Bluetooth® Device
Note: Currently, you can associate one printer and/or one bar code reader to the same Talkman T5. You cannot
associate multiple printers or bar code readers to a single wearable computer.
Pairing a T5 With the Metrologic MS9535:T5 Is the Initiator
1. In VoiceConsole, follow the instructions for creating a pairing and setting the bar code reader as the acceptor. See
VoiceConsole's Help for details.
2. Scan the Code 128 bar code (3000CA7000000). See the documentation that came with the Metrologic 9535 for
details.
3. Place the T5 and bar code reader close together. The T5 associates with the bar code reader. A low-tone/high-tone
beep from the bar code reader indicates a successful association.
Note: If a bar code reader goes out of communication range with the T5, it may un-pair from the T5 device. You
will hear a high-tone/low-tone beep. Move the bar code reader closer to the T5 to reassociate the bar code reader
with the T5. You will hear a low-tone/high-tone beep when they pair.
OpenTopic | Talkman® Devices | 25

Pairing a T5 With the Metrologic MS9535:T5 Is the Acceptor
The Talkman T5 must be configured in VoiceConsole to listen for incoming connections before proceeding with these
instructions. See the VoiceConsole online help for details.
Note: Do not attempt to pair the Metrologic scanner until the T5 is powered off.
Important: Only one scanner should be configured to communicate with a T5's Bluetooth address at any one time.
If you change the bar code reader to which the wearable computer has been paired, you must clear the Bluetooth
service in the old bar code reader. Scan the Provide Bluetooth Service bar code (3000CA7000000). See the
documentation that came with the Metrologic scanner for details.
1. With the Metrologic scanner, scan the Provide Bluetooth Service bar code (3000CA7000000). See the documentation
that came with the Metrologic scanner for details.
2. Power off the T5 completely and then power it back on.
3. Place the T5 into sleep mode or wait for it to enter sleep mode.
The green LED on the wearable computer blinks green.
4. Wait for 30 seconds.
5. Scan the Get Bluetooth Address bar code (3000CA7FFFFFF) from the Metrologic user's guide.
6. Scan the bar code on the T5. This bar code contains the T5's Bluetooth address.
You will hear a quick, three-beep confirmation from the bar code reader, followed by a low-tone/high-tone beep
indicating success.
Pairing a T5 Series Device with Zebra QL™ Series Printers
• In VoiceConsole, follow the instructions for creating a pairing and setting the bar code reader as the acceptor. See
VoiceConsole's Help for details.
• Create the pairing in VoiceConsole.
Part Number Index:Vocollect Wearable Computers
Part Numbers for ordering Vocollect Talkman Wearable Computers
Vocollect Part NumberVocollect Model NumberWearable Computer
TT-700-100-M
TT-700-100-M
Talkman T5m
TT-700
TT-700-100
Talkman T5
TT-700-100_R WF
TT-700-100_RG WF
TT-601
TT-601-XXXXX
Talkman T2x
TT-601_R WF
TT-601_RG WF
TT-100TT-100-1-1Talkman T1
26 | OpenTopic | Talkman® Devices
Patent and Intellectual property
Vocollect products are protected by one or more of the following:
• U. S. Patents: 6,910,911; 7,052,799
•U. S. Design Patent Numbers: D549,216; D525,237; D549,217; D529,438; D530,667; D551,615; D549,694; D552,595;
D554,642.
• Other U. S. and worldwide patents pending
OpenTopic | Talkman® Devices | 27
Chapter
3
Batteries
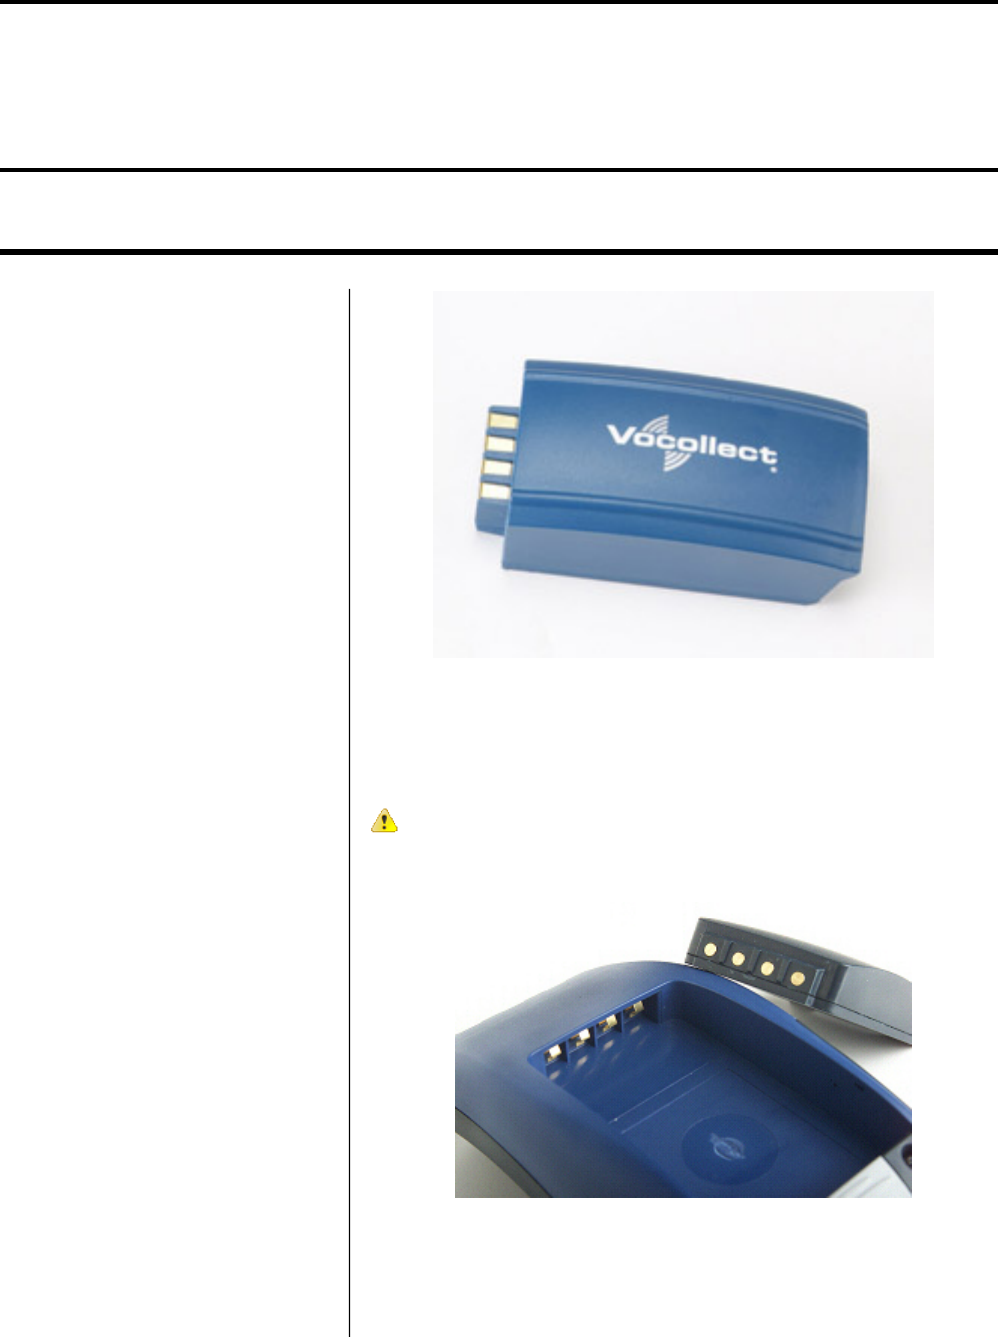
Figure 23:Talkman T5 Battery
Topics:
•T5 High-Performance Batteries
Specifications
•T2 Series High Capacity Battery
Specifications
•T1 Batteries Specifications
•Charging a T5 Battery
•Charging a T1 Battery in a T1
10-Bay Combination Charger
•Charging a T1 Battery with a T1
Single Charger Cable
•Removing a T2 or T5 Series
Device From a Charger
•Removing a T1 Device From a T1
5-Bay Charger
•Disconnecting a T1 Device from
a T1 Single Charger Cable The T5 battery is available in a high-performance model. Unlike the T2 series
batteries, which have contact points that are flush with the case, the T5 battery
features a pin-out design.
•Inserting a Battery into a Talkman
T5-Series or T2-Series Device Caution: T2 series and T5 series batteries are not interchangeable. If you
try to insert the wrong battery into a device, you may damage the device
and the battery.
•Inserting a Battery into a Talkman
T1 Device
•Removing a Battery from a
Talkman T5-Series or T2-Series
Device
Figure 24:Talkman T2 Series Battery
•Removing a Battery from a
Talkman T1 Device
•Charging SRX Wireless Headset
Batteries
•Inserting a Battery into the SRX
Wireless Headset
•Removing a Battery from an SRX
Wireless Headset
•Battery Warm-Up Time
•Part Number Index: Batteries
The T2 series battery is available in standard and high-capacity models. The
standard battery sits flush with the top of the device when installed. The
high-capacity battery has a longer run time than the standard capacity battery.

Figure 25: SRX Wireless Headset High-Performance Battery
A fully depleted SRX Wireless Headset battery will be fully recharged in less
than 4 hours.
A fully charged SRX Wireless Headset battery has 3.7 volts. When the charge
depletes to 3.3 volts, the user will hear a spoken warning, "Headset battery is
getting low. Change headset battery now." and the warning will also be displayed
in debug.
Battery Safety
Improper use of the battery may cause heat, fire, explosion, damage, or reduced
battery capacity. Read and follow the handling instructions for the battery before
and during use.
The following are general cautions and guidelines only, and as such may not
include every possible usage scenario. The manufacturer will not be liable for
actions taken or accidents caused by any use not documented below.
Danger:
•Do not disassemble, open, drop (mechanical abuse), crush, bend, deform,
puncture, or shred a battery.
• Do not modify or remanufacture, attempt to insert foreign objects into
a battery, immerse or expose to water or other liquids, or expose to fire,
excessive heat including soldering irons, or put in a microwave oven.
• Only use a battery in the device for which it is specified.
•Do not short-circuit the battery or allow metallic or conduction objects
to contact both battery devices simultaneously.
• Do not short-circuit a battery or allow metallic or conduction objects
to contact both battery devices simultaneously.
• Replace a battery only with another battery that has been qualified for
the product you are using. Use of an unqualified battery may present a
risk of fire, explosion, leakage, or other hazard.
• Dispose used batteries promptly according to the local, state and/or
federal regulations. Requirements and options vary greatly in different
countries and in different parts of the United States. Many locations
have facilities or companies set up for receipt of old batteries.
• Improper battery use may result in a fire, explosion or other hazard.
• Vocollect batteries should not be used by children.
• Vocollect shall not held responsible for any damages caused by
equipment malfunction when used with non-Vocollect batteries.
50 | OpenTopic | Batteries

Important:
•In the event of a battery leak, do not allow the liquid to come in contact
with skin or eyes. If contact is made, wash the affected area with large
amounts of water and seek medical advice.
• Seek medical advice immediately if a battery is swallowed.
•If at any time you witness a battery starting to balloon, swell up, smoke,
or show signs of getting hot, discontinue charging process immediately
and disconnect the battery. Observe it from a safe place, preferably
outside of any building or vehicle for approximately 15 minutes.
Caution:
• When a battery is expected not to be used for a long period of time,
take it out the equipment or device and store at room temperature with
normal humidity.
•Do not leave a battery connected to the charger for long periods of time.
It may cause degradation of battery performance, such as a shortening
of battery life. It should be removed from the charger and stored as
recommended above.
• Power off your equipment when not in use.
Handling Used Batteries
•When shipping batteries, place tape or insulating material securely over the
battery contacts to avoid accidental contact in transit. Vocollect’s batteries
can be shipped under Special Provision 188 of 49 CFR 172.102 or IATA
exception A45.
• Do not expose a battery to rain or water.
• Never disassemble a battery.
• Do not leave a battery under strong sunshine.
• Store batteries in a rugged receptacle and cover with a lid.
OpenTopic | Batteries | 51

T5 High-Performance Batteries Specifications
Electrical Specifications
• Cells: The high capacity battery pack uses two lithium ion cells.
• Nominal voltage = 3.7V
• Capacity = 4400mAhr or greater
•Protection circuit characteristics: The pack contains a protection circuit that prevents over and under voltage conditions
on the cells and protects the pack from damage as a result of a short circuit between the positive and negative terminals
of the battery.
• The battery pack contains custom electronics that provide performance, temperature, and pack identification to the
device. This information is made available to voice management software.
• Battery Charging: The battery pack must be charged only in a Vocollect designated charger.
Mechanical and Environmental Specifications
• Drop-test specifications
• The high capacity battery meets the MIL STD 810F specification for shock and transient drop criteria.
• The drop-test failure criteria consists of the following:
• A split or separation of the ultrasonic weld joint greater than one linear inch
• Inability to meet open circuit voltage, serial number input, thermistor output and charge tests
• Minor cosmetic damage to the battery, such as scratches and dents, is acceptable.
• Environmental specifications: The battery pack halves are sonically welded together to protect the internals from
water and dust. The battery functions properly in the following conditions:
Temperature: -40°C to 55°C (-40°F to 131°F)
Humidity: 95% non-condensing
Rain/dust: IP67
• The pin out from left to right:
• Battery (+)
• Clock
• Data
• Battery (—)
Battery Notifications
Battery warnings for a Talkman battery occur at the following levels:
• First warning = 3,550 mV
• Critical warning = 3,350 mV
52 | OpenTopic | Batteries

T2 Series High Capacity Battery Specifications
Electrical Specifications
• Cells: The high capacity battery pack uses four lithium ion cells.
• Nominal voltage = 7.2V
• Capacity = 3000mAhr or greater
•Protection circuit characteristics: The pack contains a protection circuit that prevents over and under voltage conditions
on the cells and protects the pack from damage as a result of a short circuit between the positive and negative terminals
of the battery.
• Thermistor: The battery pack contains a negative temperature coefficient thermistor. The charger uses the voltage
drop across the thermistor to determine that the battery pack is within the proper charging temperature limits.
• Battery ID: The battery pack contains a Dallas Semiconductor DS2401 serial ID chip. In future enhancements to
both the device and the device software, this chip will be used to provide data about features such as battery life,
capacity monitoring and asset tracking.
• Battery Charging: The battery pack must only be charged in a Vocollect designated charger.
Mechanical and Environmental Specifications
• Drop-test specifications
• The high capacity battery meets the MIL STD 810F specification for shock and transient drop criteria.
• The drop-test failure criteria consists of the following:
• A split or separation of the ultrasonic weld joint greater than one linear inch
• Inability to meet open circuit voltage, serial number input, thermistor output and charge tests
• Minor cosmetic damage to the battery, such as scratches and dents, is acceptable.
• Environmental specifications: The battery pack halves are sonically welded together to protect the internals from
water and dust.
• The battery functions properly in the following conditions:
Temperature: -4°F to 122°F
Humidity: 95% non-condensing
Rain/dust: IP67
• The pin out from left to right (when looking at the contacts with the battery's label facing down) is as follows:
• Battery +
• Thermistor
• ID Data
• Battery -
OpenTopic | Batteries | 53

T1 Batteries Specifications
Electrical Specifications
• Cells: The battery pack uses one lithium ion cells.
• Nominal voltage = 3.7V
• Capacity = 2000mAhr
•Protection circuit characteristics: The pack contains a protection circuit that prevents over and under voltage conditions
on the cells and protects the pack from damage as a result of a short circuit between the positive and negative terminals
of the battery.
• The battery pack contains custom electronics that provide performance, temperature, and pack identification to the
device. This information is made available to voice management software.
• Battery Charging: The battery pack must be charged only in a Vocollect designated charger.
Mechanical and Environmental Specifications
• Drop-test specifications
• The drop-test failure criteria consists of the following:
• A split or separation of the ultrasonic weld joint greater than one linear inch
• Inability to meet open circuit voltage, serial number input, thermistor output and charge tests
• Minor cosmetic damage to the battery, such as scratches and dents, is acceptable.
• Environmental specifications: The battery pack halves are sonically welded together to protect the internals from
water and dust. The battery functions properly in the following conditions:
Temperature: -40°C to 55°C (-40°F to 131°F)
Humidity: 95% non-condensing
Rain/dust: IP54
• The pin out from left to right:
• Battery (+)
• Temp
• Battery (—)
Battery Notifications
Battery warnings for a Talkman battery occur at the following levels:
• First warning = 3,550 mV
• Critical warning = 3,350 mV
54 | OpenTopic | Batteries
Charging a T5 Battery
1. Remove the battery from the Talkman wearable computer.
2. Hold the battery with its contacts to the bottom and the Vocollect label facing you.
Figure 26: Inserting a Battery Into the Charger
3. Place the battery into an open battery slot on the top level of the charger.
When the battery is placed into the charger properly, the left LED indicator for the slot into which the battery was
placed turns red.
Note: The upper set of LED indicators apply to the charger's battery slots and the lower indicators apply to the
wearable computers' slots.
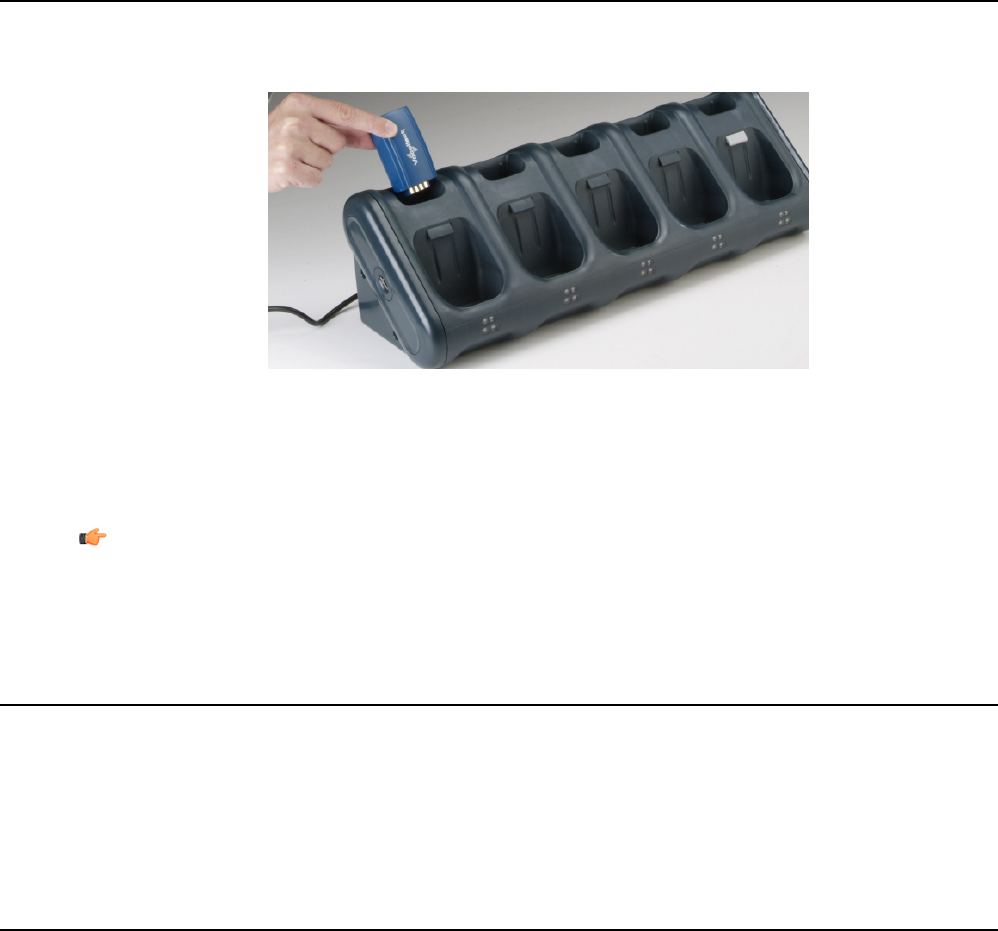
Charging a T1 Battery in a T1 10-Bay Combination Charger
1. Remove the battery from the Talkman wearable computer.
2. Hold the battery with its contacts to the top and facing away from you.
3. Place the battery into an open battery slot on the front of the charger.
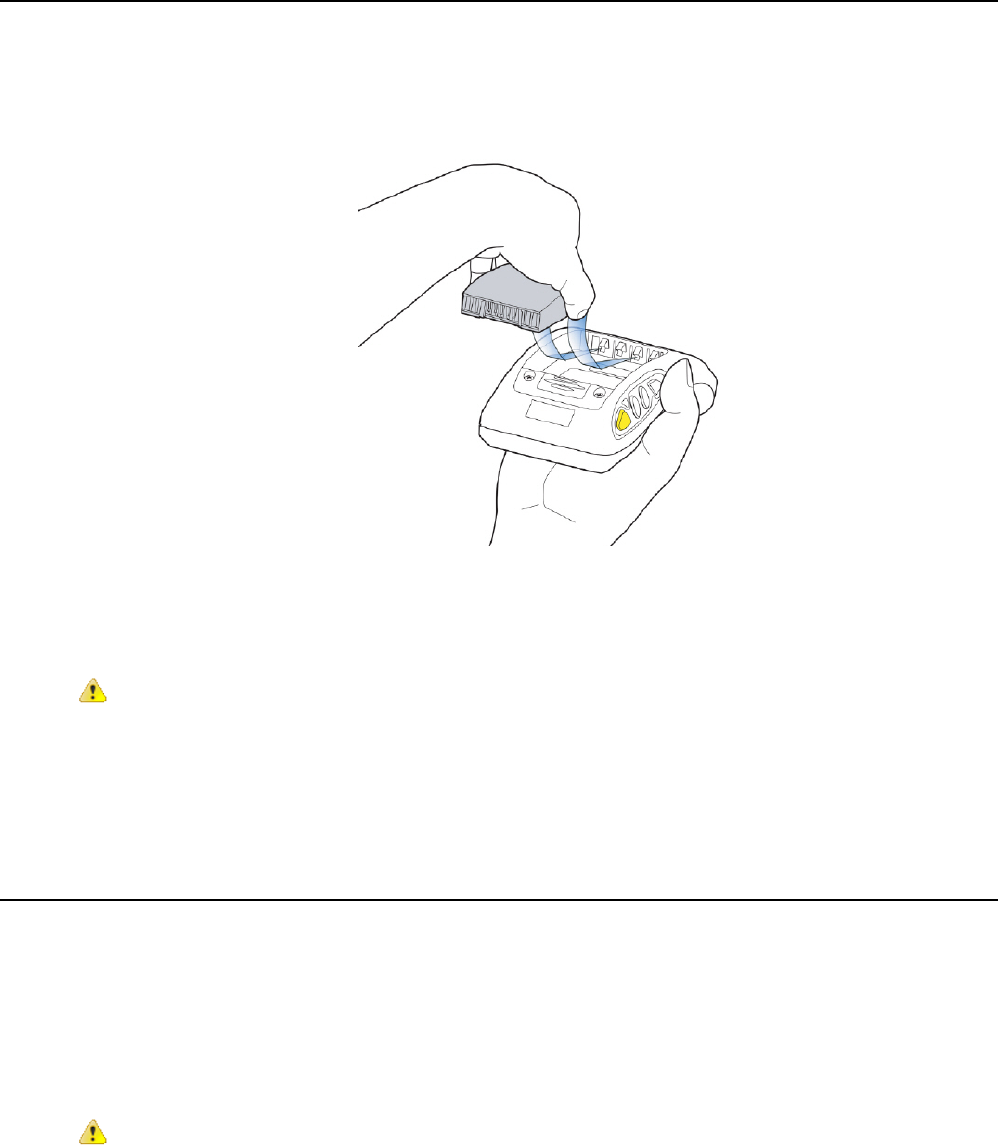
Charging a T1 Battery with a T1 Single Charger Cable
1. Grasp and squeeze the sides of the I/O connector on the cable.
2. Attach the I/O connector onto the T1's connectors and release the I/O connector. Ensure the flush side of the I/O
connector faces front with the device’s front.
3. Insert the other end of the charging cable into the barrel jack on the plug cable.
4. Plug the charger into an electrical outlet.
OpenTopic | Batteries | 55

Removing a T2 or T5 Series Device From a Charger
Note: The device is ready to use when the LED indicator on the device is blinking green. If the LED is blinking
red, the device is not ready to be used.
Important: If a device continuously displays a solid red light, contact your system administrator.
1. Make sure that the device is ready to use.
2. Pull up on the device to remove it from the device charger.
Figure 27: Removing a Device from a Charger
Removing a T1 Device From a T1 5-Bay Charger
Note: The device is ready to use when the LED indicator on the device is green. If the LED is amber, the device
is not ready to be used.
Important: If a device displays a solid red light, contact your system administrator.
1. Make sure that the device is ready to use.
2. Pull up on the device to remove it from the device charger.
Disconnecting a T1 Device from a T1 Single Charger Cable
Note: The device is ready to use when the LED indicator on the device is green. If the LED is amber, the device
is not ready to be used.
Important: If a device's LED continuously displays red, contact your system administrator.
1. Unplug the charger from the electrical outlet.
2. Gently remove it from the T1 device by squeezing the sides of the I/O connector on the cable. Do not pull the cable
wire.
56 | OpenTopic | Batteries
Inserting a Battery into a Talkman T5-Series or T2-Series Device
Make sure the battery to be inserted is fully charged.
1. Hold the Talkman so that the red and yellow ports are facing away from you.
2. Hold the battery with the pins facing away from you and so that the Vocollect logo is on top.
3. Place the battery in at an angle, pins end first.
Figure 28: Properly Inserting a Battery
4. Push the back of the battery into place.
You will hear a click when the battery is in place.
Caution: Do not force the battery into the compartment. You may damage the battery or the device. If the
battery does not snap easily into place, reposition the battery in the compartment and try again.
Make sure the battery is firmly in place and can't be removed without pressing the battery release button.
Inserting a Battery into a Talkman T1 Device
Make sure the battery to be inserted is fully charged.
1. Hold the Talkman with the battery compartment facing you.
2. Hold the battery with the contacts facing to the bottom and away from you.
3. Place the battery in at an angle, non-contact end first.
4. Push the bottom of the battery into place.
You will hear a click when the battery is in place.
Caution: Do not force the battery into the compartment. You may damage the battery or the device. If the
battery does not snap easily into place, reposition the battery in the compartment and try again.
Make sure the battery is firmly in place and can't be removed without pressing the battery release button.
OpenTopic | Batteries | 57
Removing a Battery from a Talkman T5-Series or T2-Series Device
Make sure the Talkman wearable computer is off.
Caution: Do not remove the battery until the LED indicator is off. If you remove the battery when the device is
on or sleeping, any data collected could be lost.
1. Hold the wearable computer in one hand with the battery compartment facing toward you.
2. Press the battery release button all the way down until the top of the battery pops up from the battery compartment.
Figure 29: Removing the Battery From a Device
3. Lift the battery out of the compartment.
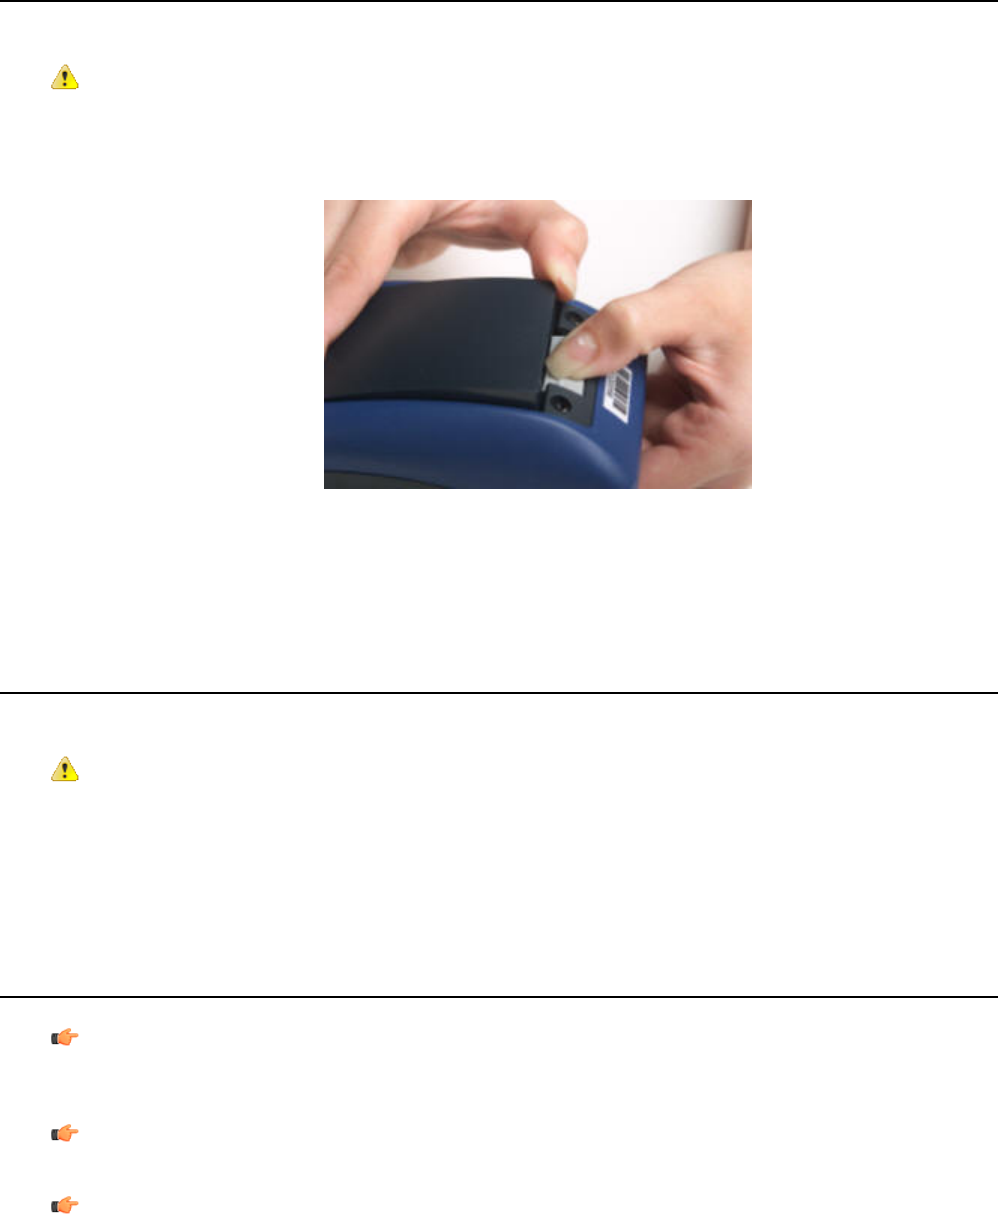
Removing a Battery from a Talkman T1 Device
Make sure the Talkman wearable computer is off.
Caution: Do not remove the battery until the LED indicator is off. If you remove the battery when the device is
on or sleeping, any data collected could be lost.
1. Hold the wearable computer in one hand with the battery compartment facing toward you.
2. Push the battery release button up and pull the battery out.
Charging SRX Wireless Headset Batteries
Important: Once an SRX battery is placed in the charger, it must remain in the charger for a minimum of five
seconds. This allows the charger sufficient time to analyze the state of the battery. Removing the battery during
this five second interval may cause the LED indicator on the charger to display an incorrect battery status.
Important: Do not force the battery into the compartment. Doing so may result in damage to the battery or the
headset. If the battery does not snap easily into place, reposition the battery in the compartment and try again.
Note:
•A battery is fully charged and can be removed from the charger when the left and right LED indicators for that
slot on the charger are green.
58 | OpenTopic | Batteries
• If you insert a fully charged battery into a charger, the charger will analyze the battery's status and then "top
off" the battery's charge. During this process, the left LED indicator for that slot on the charger is red. It may
take several minutes for this process to complete, at which time both LED indicators for that slot turn green.
1. Make sure the battery charger is powered. The green LED indicator on the end of the battery charger should be lit.
2. Power off the headset by pressing and holding the Plus and Minus buttons on the earpiece for three seconds and then
remove the battery.
3. Hold the battery with its contacts to the bottom and the Vocollect logo facing toward you, and insert it into an empty
slot on the battery charger.
4. Press down on the battery until it snaps into place.
5. Make sure the battery is firmly in place and cannot be removed without pressing the battery release button.
Inserting a Battery into the SRX Wireless Headset
Important: Do not force the battery into the compartment. Doing so may result in damage to the battery or the
headset. If the battery does not snap easily into place, reposition the battery in the compartment and try again.
1. Make sure the battery is charged. A battery is fully charged and can be removed from the charger when the left and
right LED indicators for that slot on the charger are green.
2. Hold the headset with the battery compartment facing toward you.
3. Place the end of the battery with the contacts into the compartment first so that the contacts on the bottom of the
battery line up with the contacts in the compartment.
4. Press down on the battery until it snaps into place.
5. Make sure the battery is firmly in place and cannot be removed without pressing the battery release button.
Removing a Battery from an SRX Wireless Headset
Important: Do not remove the battery until the LED indicator on the headset is off.
1. Power off the headset by pressing and holding the Plus and Minus buttons on the earpiece for three seconds.
2. Hold the headset with the battery compartment facing toward you.
3. Pull the battery release button, located on the left side of the battery compartment, away from the battery until the
end of the battery pops up from the compartment.
4. Lift the battery out of the compartment.
Battery Warm-Up Time
If a battery has been used in a cold environment, it will not begin charging until it warms up sufficiently.
It will take approximately this amount of time to warm
up...
If the battery was being used at...
6 minutes-4°C (24.8°F)
10 minutes-10°C (14.0°F)
OpenTopic | Batteries | 59

It will take approximately this amount of time to warm
up...
If the battery was being used at...
22 minutes-20°C (-4°F)
30 minutes-30°C (-22°F)
Part Number Index: Batteries
Part Numbers for ordering Vocollect Talkman Accessories
Vocollect Part NumberBattery
BT-700 (For use with T5 Series)
T5 High-Performance Battery
BT-601 (For use with T2 Series)
T2 Series Standard Battery
BT-602 (For use with T2 Series)
T2 Series High-Capacity Battery
BT-101 (For use with T1 devices)T1 Standard Battery
BT-800 (For use with SRX Headsets)SRX Headset High-Performance Battery
Patent and Intellectual property
Vocollect products are protected by one or more of the following:
• U. S. Patents: 6,910,911; 7,052,799
•U. S. Design Patent Numbers: D549,216; D525,237; D549,217; D529,438; D530,667; D551,615; D549,694; D552,595;
D554,642.
• Other U. S. and worldwide patents pending
60 | OpenTopic | Batteries

Appendix
A
Compliance
Topics:
•Vocollect Regulatory Compliance
•Declaration of Conformity: RoHS
•Vocollect SRX Wireless Headset
Declaration of Conformity
•Vocollect T5 and T5m Wearable
Computers Declaration of
Conformity
•Vocollect T2x Wearable
Computer Declaration of
Conformity
•Vocollect T1 Wearable
Computers Declaration of
Conformity

Vocollect® Regulatory Compliance
Statement of Agency Compliance
Vocollect devices, and wireless headsets are designed to be compliant with the rules and regulations in the locations
into which they are sold and are labeled as required. Vocollect devices are type approved and do not require the user to
obtain license or authorization before using them. Changes or modifications not expressly approved by Vocollect, Inc.
could void the user's authority to operate the equipment.
Federal Communications Commission Compliance
FCC Class B Compliance Statement
Part 15 (b) of the Federal Communications Commission (FCC) Rules
This device complies with part 15 of the FCC Rules. Operation is subject to the following two conditions: (1) This
device may not cause harmful interference, and (2) this device must accept any interference received, including interference
that may cause undesired operation.
Note: This equipment has been tested and found to comply with the limits for a Class B digital device, pursuant to Part
15 of the FCC Rules. These limits are designed to provide reasonable protection against harmful interference in a
residential installation. This equipment generates, uses and can radiate radio frequency energy and, if not installed and
used in accordance with the instructions, may cause harmful interference to radio communications. However, there is
no guarantee that interference will not occur in a particular installation. If this equipment does cause harmful interference
to radio or television reception, which can be determined by turning the equipment off and on, the user is encouraged
to try to correct the interference by one or more of the following measures:
• Reorient or relocate the receiving antenna.
• Increase the separation between the equipment and receiver.
• Connect the equipment into an outlet on a circuit different from that to which the receiver is connected.
• Consult the dealer or an experienced radio/TV technician for help.
Radio
The Talkman® devices are nominally Class B digital devices, pursuant to Part 15 of the FCC Rules.
Caution: Exposure to Radio Frequency Radiation.
•The following devices each contain an internal low-power radio: Talkman® devices and SRX Wireless Headset.
• The radiated output power of Vocollect® devices and headsets is far below the FCC radio frequency exposure
limits.
• Nevertheless, Vocollect® devices shall be used in such a manner that the potential for human contact with the
radio antenna during normal operation is minimized. The device should not be used if the case is open or if the
internal antenna is exposed. When not in use, the Vocollect® devices should be powered off. In addition, the
device should be worn in accordance with the instructions for this device.
Vocollect products contain one of the following radio devices. See device label.
Maximum SAR
Value
Vocollect Talkman
Canadian ID #
Vocollect Talkman
FCC ID#
Card Manufacturer and
P/N
Vocollect Device
0.390W/kg2570A-TT60-50300MQOTT600-50300
Vocollect Wi-FiT2x
600-2400-032Model: TT-600
0.531W/kg2570A-TT601300MQOTT601-30000Summit SDC-CF10G
T2x
138 | OpenTopic | Compliance
Maximum SAR
Value
Vocollect Talkman
Canadian ID #
Vocollect Talkman
FCC ID#
Card Manufacturer and
P/N
Vocollect Device
Model:TT-601_R WF
(RoHS Compliant)
0.471W/kgMQOTT700-10000MQOTT700-10000USI WM-BB-AG-01
T5
Model:TT-700-100
0.689W/Kg2570A-TT700200MQOTT700-20000
Summit SDC-MCF10GT5
Murata LBMA46LBA3Model:TT-700-100_R
(RoHS Compliant)
0.056W/Kg2570A-SRX10000MQOSRX-10000CSR BlueCore
3-Multimedia BC358239A
SRX
0.382W/Kg2570A-TT-700-1-1MQO-TT-700-1-1Summit SDC-MCF10GT1
Canadian Compliance
This Class B digital apparatus complies with Canadian ICES-003. Operation is subject to the following two conditions:
1. This device may not cause harmful interference.
2. This device must accept any interference received, including interference that may cause undesired operation.
Cet appareil numérique de la classe B est conforme à la norme NMB-003 du Canada.
CE Marking & European Compliance
Products intended for sale within the European Union are marked with the CE Mark, which indicates compliance to
applicable Directives and European Normes (EN) as follows. Amendments to these Directives or ENs are included.
Devices - T5, T2x, SRX
Important Notice: This device is a 2.4 to 2.48 GHz RF device
intended for office and light industrial use in all EU and EFTA
member states with restrictions in France and Italy.
Italy Restrictions: If used outside of own premises, general authorization is required.
France Restrictions: Outdoor use is limited to 10mW e.i.r.p. within the band 2454-2483.5
Device - T1
Regulatory Approvals for Bluetooth® Radio Devices
Vocollect devices that contain an integrated Bluetooth® module are designed to comply with the most current applicable
standards on safe levels of RF energy, developed by the Institute of Electrical and Electronics Engineers (IEEE) and the
American National Standards Institute Communications Commission (FCC).
The Bluetooth word mark and logos are owned by the Bluetooth SIG, Inc. and any use of such marks by Vocollect is
under license. Other trademarks and trade names are those of their respective owners.
OpenTopic | Compliance | 139
2570A-TT10011
MQO-TT-100-1-1

Made in the U.S.A.
Vocollect Inc.
Pittsburgh, PA
Declaration of Conformity: RoHS
Directive 2002/95/EC of the European Parliament and Council of 27 January 2003
Restriction of Hazardous Substances (RoHS)
Products Manufactured by Vocollect®
All Vocollect manufactured products shipped by Vocollect as of 1 July 2006 to destinations where the DIRECTIVE
2002/95/EC OF THE EUROPEAN PARLIAMENT AND OF THE COUNCIL of 27 January 2003 (RoHS) applies are
compliant with this directive on the restriction of the use of certain hazardous substances in electrical and electronic
equipment.
The parts do not exceed the maximum concentrations by weight in homogenous materials for:
• 0.1% lead (Pb)
• 0.1% Hexavalent chromium (Cr6+)
• 0.1% polybrominated biphenyl (PBB)
• 0.1% polybrominated diphenyl ether (PBDE)
• 0.01% cadmium (Cd)
or qualify for an exemption to the above limits as defined in the Annex of the RoHS Directive.
Third Party products sold by Vocollect
Vocollect has obtained verification from all suppliers of all third party products that versions of those products shipped
by Vocollect as of 1 July 2006 to destinations where the DIRECTIVE 2002/95/EC OF THE EUROPEAN PARLIAMENT
AND OF THE COUNCIL of 27 January 2003 (RoHS) applies are compliant with this directive on the restriction of the
use of certain hazardous substances in electrical and electronic equipment.
The parts do not exceed the maximum concentrations by weight in homogenous materials for:
• 0.1% lead (Pb)
• 0.1% Hexavalent chromium (Cr6+)
• 0.1% polybrominated biphenyl (PBB)
• 0.1% polybrominated diphenyl ether (PBDE)
140 | OpenTopic | Compliance

• 0.01% cadmium (Cd)
or qualify for an exemption to the above limits as defined in the Annex of the RoHS Directive.
Vocollect® SRX Wireless Headset Declaration of Conformity
We the undersigned declare that the equipment has been designed to comply with the relevant sections of the R&TTE
Directive 1999/5/EC, Low Voltage Directive 2006/95/EEC & EMC Directive 89/336/EEC.
Vocollect, Inc.Manufacturer's Name:
703 Rodi Rd.
Pittsburgh, PA 15235
Manufacturer's Address:
USACountry
Certify and declare under our sole responsibility that the following equipment:
Vocollect® SRX Headset and battery chargers. Products are used in voice
directed wireless Bluetooth applications operating in the 2.4Ghz frequency
band.
Product description / Intended use:
Approved for use in all EU and EFTA member states.
EU / EFTA Member states intended for use:
Note: New members may be omitted or subject to change. For an
up to date official list please contact the EU government offices.
US, CanadaOther Country approvals:
Members with Restrictive use:
Vocollect, Inc. and Intelligent Technologies, Inc.Manufacturer:
VocollectBrand:
SRX Headset and Battery ChargersType:
HD-800-1, CM 800-1, CM 801-1Model(s):
Is tested and conforms with the essential requirements for the protection of health and safety of the user and any person
and Electromagnetic Compatibility, as included in the following standards.
For the SRX Headset:
Standards to which the
Conformity is declared:
EN 300 328 – Electromagnetic Compatibility and Radio Spectrum Matters
EN 301 489 -1, -17 ERM EMC General & Immunity
EN 60950:2001 - Safety
For the battery chargers:
OpenTopic | Compliance | 141
EN 60950:2001 - Safety
Emissions: EN 55022, EN61000-3-2, EN 61000-3-3
Immunity: EN 55024, EN 61000-4-2, EN 61000-4-3, EN 61000-4-4, EN 61000-4-5, EN
61000-4-6, EN 61000-4-8, EN 61000-4-11
Technical construction file is kept at the following address:
Contact:
Rakesh Thapar, Vice
President, Engineering
Vocollect, Inc
703 Rodi Road
Pittsburgh, Pa 15235 U.S.A.
Phone: 412-829-8145
Fax: 412-829-0972
Document-1000280 revision A
Copyright ©1998-2008 Vocollect, Inc. All Rights Reserved
Vocollect®T5 and T5m Wearable Computers Declaration of Conformity
We the undersigned declare that the equipment has been designed to comply with the relevant sections of the R&TTE
Directive 1999/5/EC, Low Voltage Directive 2006/95/EEC & EMC Directive 89/336/EEC.
Vocollect, Inc.Manufacturer's Name:
703 Rodi Rd.
Manufacturer's Address:
Pittsburgh, PA 15235
USACountry
Certify and declare under our sole responsibility that the following equipment:
Vocollect®T5 devices and battery chargers. Products are used in voice directed
wireless data acquisition devices operating in the 2.4Ghz frequency band.
Product description / Intended use:
Approved for use in all EU and EFTA member states.
EU / EFTA Member states intended
for use: Note: New members may be omitted or subject to change. For an up to
date official list please contact the EU government offices.
US, CanadaOther Country approvals:
France, Italy - See User DocumentationMembers with Restrictive use:
Vocollect, Inc. and Intelligent Technologies, Inc.Manufacturer:
VocollectBrand:
T5 Terminals and Battery ChargersType:
TT-700-100_R WF, TT-700-100_RG WF, CM 700-1, CM 700-2Model(s):
142 | OpenTopic | Compliance
For the Terminals:
Standards to which the Conformity is
declared:
EN 300 328 EMC Radio Spectrum Matters
EN 301 489 -1, -17 ERM EMC General & Immunity
EN 60950:2001 - Safety
For the battery chargers:
EN 60950:2001 - Safety
Emissions: EN 55022, EN 61000-3-2, EN 61000-3-3
Immunity: EN 55024, EN 61000-4-2, EN 61000-4-3, EN 61000-4- 4, EN
61000-4-5, EN
61000-4-6, EN 61000-4-8, EN 61000-4-11
Technical construction file is kept at the following address:
Contact:
Rakesh Thapar, Vice
President, Engineering
Vocollect, Inc
703 Rodi Road
Pittsburgh, Pa 15235 U.S.A.
Phone: 412-829-8145
Fax: 412-829-0972
Document - 1000474
Copyright ©1998-2008 Vocollect, Inc. All Rights Reserved
Vocollect®T2x Wearable Computer Declaration of Conformity
We the undersigned declare that the equipment has been designed to comply with the relevant sections of the R&TTE
Directive 1999/5/EC, Low Voltage Directive 2006/95/EEC & EMC Directive 89/336/EEC.
Vocollect, Inc.Manufacturer's Name:
703 Rodi Rd.
Pittsburgh, PA 15235
Manufacturer's Address:
USACountry
Certify and declare under our sole responsibility that the following equipment:
Vocollect®T2 Series devices, device charger and battery chargers. Products are
used in voice directed data acquisition devices operating in the 2.4Ghz ISM
frequency band.
Product description / Intended use:
Approved for use in all EU and EFTA member states.
EU / EFTA Member states intended
for use: Note: New members may be omitted or subject to change. For an up to
date official list please contact the EU government offices.
US, CanadaOther Country approvals:
OpenTopic | Compliance | 143
France, Italy - See User DocumentationMembers with Restrictive use:
Vocollect, Inc. & Global Components CorporationManufacturer:
VocollectBrand:
T2 device and Battery ChargerType:
TT-601_R WF, TT-601_RG WF, CM 601, CM 602, and CM 603Model(s):
For the devices:
Standards to which the Conformity is
declared:
EN 300 328 EMC Radio Spectrum Matters
EN 301 489 -1, -17 ERM EMC General & Immunity
EN 60950:2001 - Safety
For the battery chargers:
EN 60950:2001 - Safety
Emissions: EN 55022, EN 61000-3-2, EN 61000-3-3
Immunity: EN 55024, EN 61000-4-2, EN 61000-4-3, EN 61000-4- 4, EN
61000-4-5, EN
61000-4-6, EN 61000-4-8, EN 61000-4-11
Technical construction file is kept at the following address:
Contact:
Rakesh Thapar, Vice
President, Engineering
Vocollect, Inc.
703 Rodi Road
Pittsburgh, Pa 15235 U.S.A.
Phone: 412-829-8145
Fax: 412-829-0972
Document - 1000474
Copyright ©1998-2008 Vocollect, Inc. All Rights Reserved
Vocollect®T1 Wearable Computers Declaration of Conformity
We the undersigned declare that the equipment has been designed to comply with the relevant sections of the R&TTE
Directive 1999/5/EC, Low Voltage Directive 2006/95/EEC & EMC Directive 89/336/EEC.
Vocollect, Inc.Manufacturer's Name:
703 Rodi Rd.
Manufacturer's Address:
Pittsburgh, PA 15235
USACountry
Certify and declare under our sole responsibility that the following equipment:
Vocollect®T1 terminals, terminal and battery chargers Products are used in
voice directed data acquisition. The terminals operate in the 2.4Ghz ISM
frequency band.
Product description / Intended use:
144 | OpenTopic | Compliance
Approved for use in all EU and EFTA member states.
EU / EFTA Member states intended
for use: Note: New members may be omitted or subject to change. For an up to
date official list please contact the EU government offices.
US, CanadaOther Country approvals:
France, Italy - See User DocumentationMembers with Restrictive use:
Vocollect, Inc.Manufacturer:
VocollectBrand:
T1 Terminals and Battery ChargerType:
TT-100-1-1, CM-100-1, CM-103-1Model(s):
For the Terminals:
Standards to which the Conformity is
declared:
EN 300 328 EMC Radio Spectrum Matters
EN 301 489 -1, -17 ERM EMC General & Immunity
EN 60950-1:2006 - Safety
For the battery chargers:
EN 60950-1:2006 - Safety
Emissions: EN 55022, EN61000-3-2, EN 61000-3-3
Immunity: EN 55024, EN 61000-4-2, EN 61000-4-3,
EN 61000-4-4, EN 61000-4-5, EN 61000-4-6,
EN 61000-4-8, EN 61000-4-11
Technical construction file is kept at the following address:
Contact:
Rakesh Thapar
Vice President, Engineering
Vocollect, Inc
703 Rodi Road
Pittsburgh, Pa 15235 U.S.A.
Phone: 412-829-8145
Fax: 412-829-0972
Document-1002028 revision A
Copyright ©1998-2008 Vocollect, Inc. All Rights Reserved
OpenTopic | Compliance | 145