WGI Innovations FLX500 E-Game Call User Manual
WGI Innovations, Ltd. E-Game Call
User manual

User’s Manual Model # FLX500
HD GAME CALL
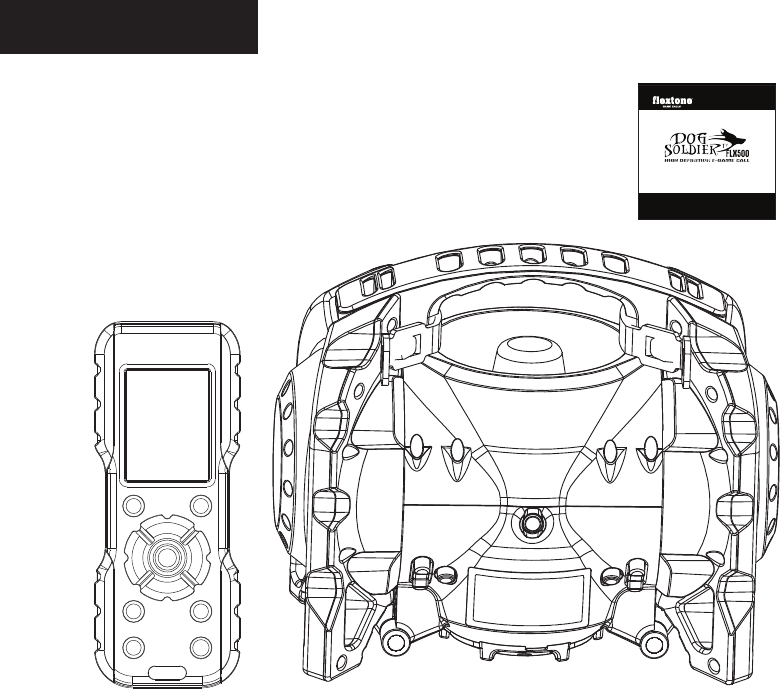
INCLUDED PARTS
1) Dog soldier FLX500 electronic game
call unit with remote – (2 pieces)
2) Product Information Guide – (1)
3) Shoulder Strap - (1)
PAGE 1
User’s Manual Model # FLX500
HD GAME CALL
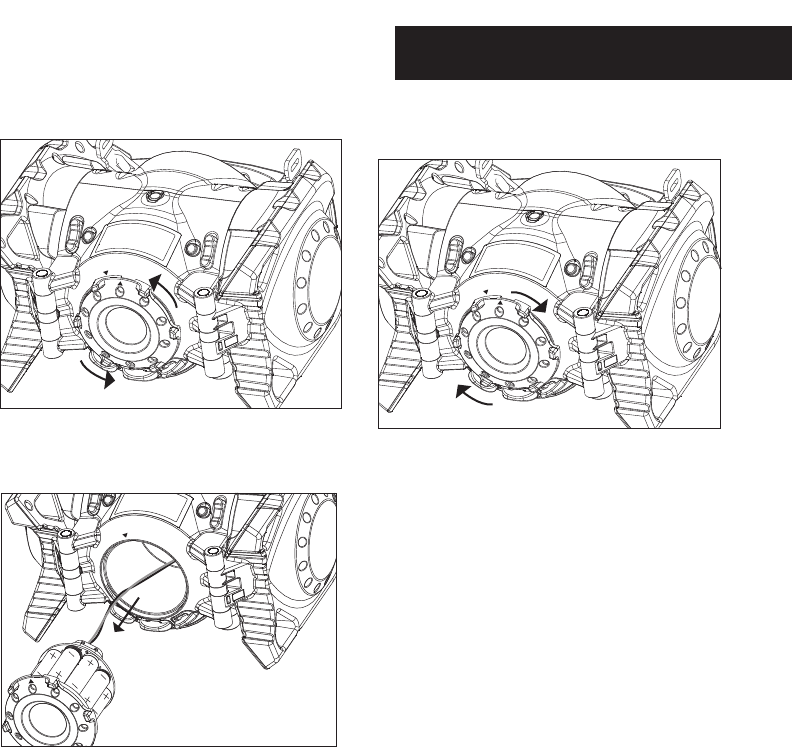
INSTALLING BATTERIES IN UNIT
PAGE 2
3
To close put battery chamber back inside
cavity while aligning the arrows and rotate to
the right till you can’t turn it any further.
1
Turn the call on it’s side and rotate battery
door to the left. You will hear and feel a click.
2Next, pull out the battery chamber, conrm
that the positive (+) and negative (-) terminals
are oriented correctly and insert ten (10) AA
batteries.
PAGE 3
3
To close, slide the cover up.
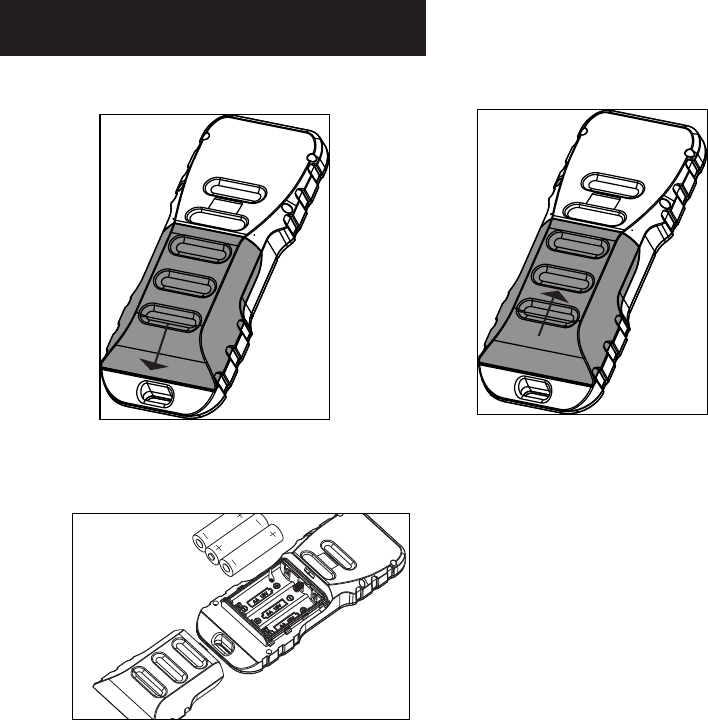
INSTALLING BATTERIES IN REMOTE
2Next, conrm that the positive (+) and negative
(-) terminals are oriented correctly and insert
the batteries.
1To install three (3) AA batteries for the
remote, slide the cover down to open.
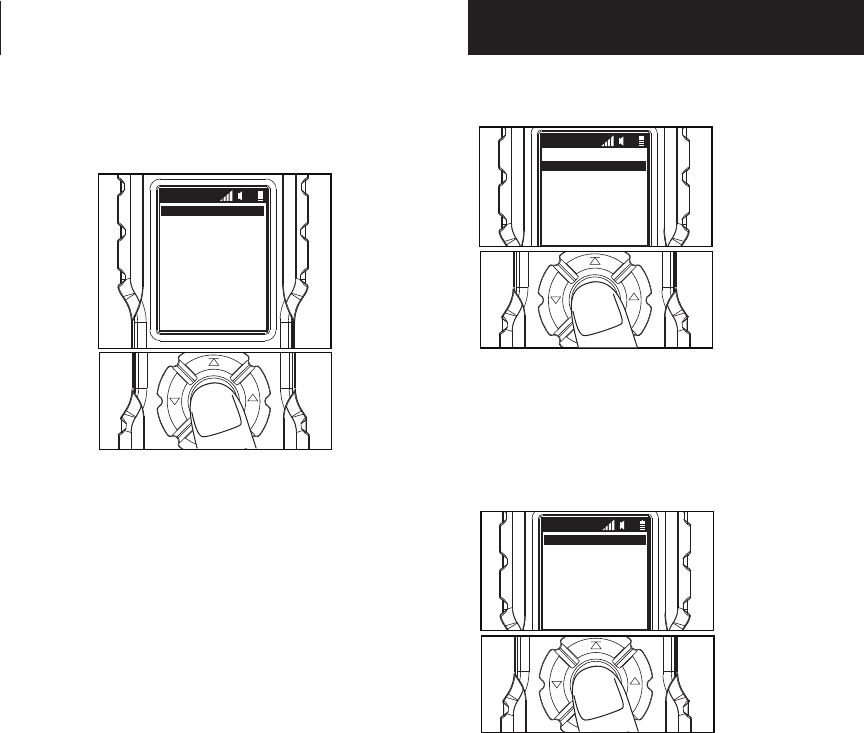
TURNING SPEAKER UNIT ON
Press and hold the power button until LCD is
illuminated and then release. Unit is now on.
Note: The LCD will enter sleep mode in
approximately 1 minute of inactivity. The
Speaker unit will auto turn off after 30 minutes
of inactivity.
PAGE 4
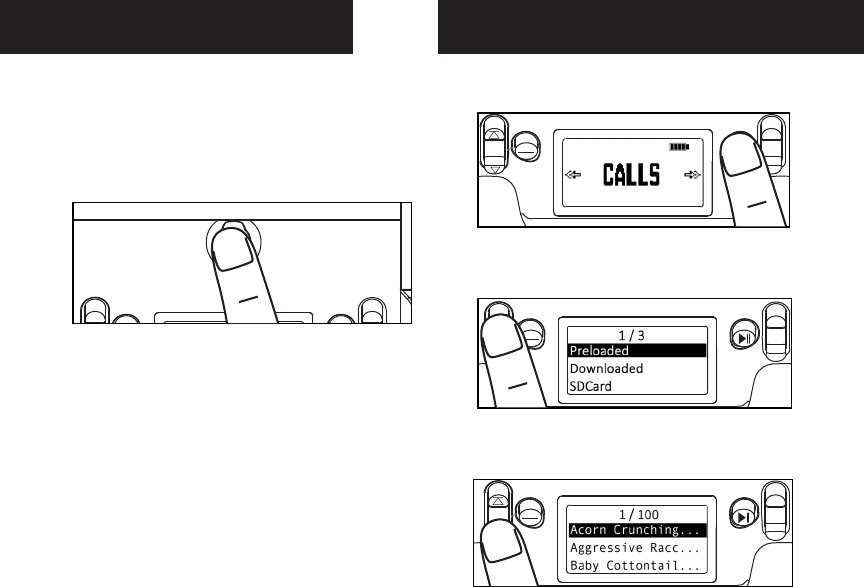
CHOOSING PRELOADED INDIVIDUAL
CALLS ON SPEAKER UNIT
1First, press the play/enter button while CALLS
is on display.
2Next, press either the up or down button to
choose Preloaded. Press the play/enter button
when the desired option is highlighted.
3Scroll through calls by pressing the up or down
button. Press the play/enter button when the
desired option is highlighted.
MENU
BACK
VOL
+
-
MENU
BACK
VOL
+
-
MENU
BACK
VOL
+
-
This will activate the audible call. To maximize the
effectiveness of the Electronic Game Call, point
the call in the directions you want the sound to
go. Note: Call will loop repeatedly until call is
deactivated.
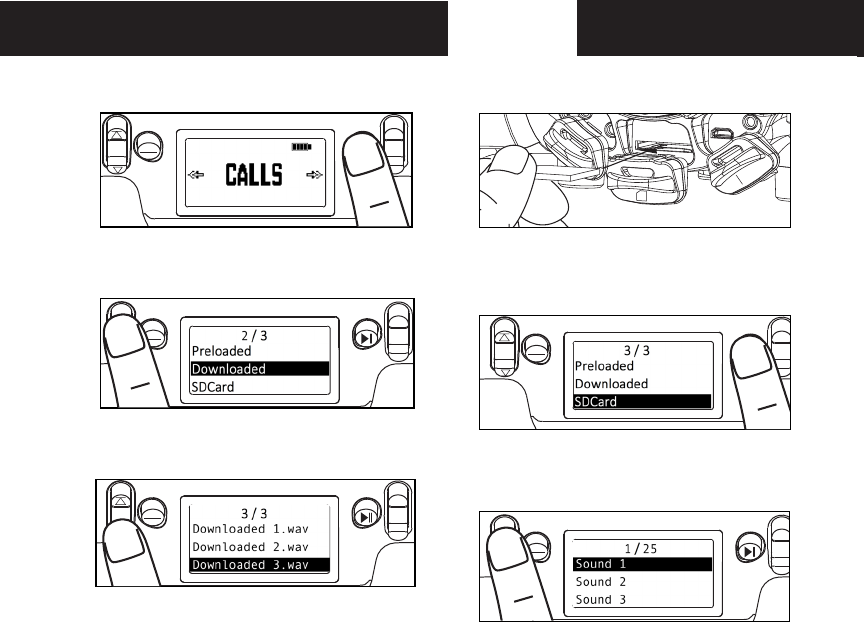
CHOOSING SD CARD
2Next, press the play/enter button while SD
CARD is on display. NOTE: This option will only
show up if an SD card was inserted.
3Scroll through calls by pressing the up or down
button. Press the play/enter button when the
desired option is highlighted.
MENU
BACK
MENU
BACK
This will activate the audible call. To maximize the
effectiveness of the Electronic Game Call, point
the call in the directions you want the sound to
go. Note: Call will loop repeatedly until call is
deactivated.
VOL
+
-
VOL
+
-
1First, insert SD card.
SD
USB LINE-OUT
LINE-IN
CHOOSING DOWNLOADED INDIVIDUAL
CALLS ON SPEAKER UNIT
1First, press the play/enter button while CALLS
is on display.
2Next, press either the up or down button to
choose Downloaded. Press the play/enter
button when the desired option is highlighted.
3Scroll through calls by pressing the up or down
button. Press the play/enter button when the
desired option is highlighted.
MENU
BACK
VOL
+
-
MENU
BACK
VOL
+
-
MENU
BACK
VOL
+
-
This will activate the audible call. To maximize the
effectiveness of the Electronic Game Call, point
the call in the directions you want the sound to
go. Note: Call will loop repeatedly until call is
deactivated.
PAGE 5
To adjust volume, press the volume + or -- buttons.
VOLUME CONTROL
MENU
BACK
VOL
+
-
PAGE 6
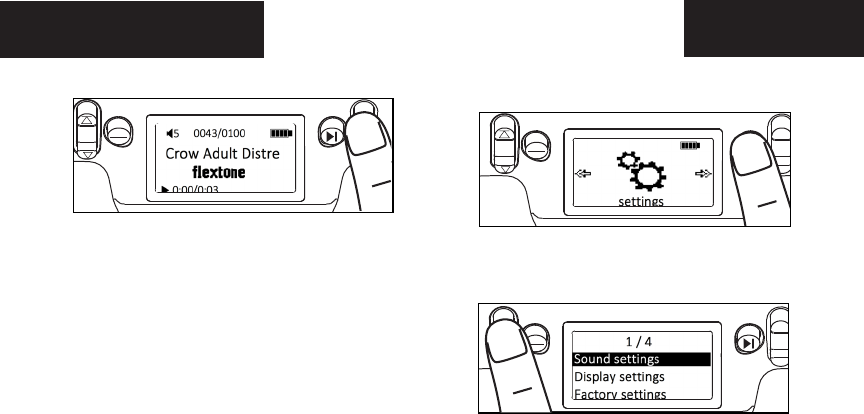
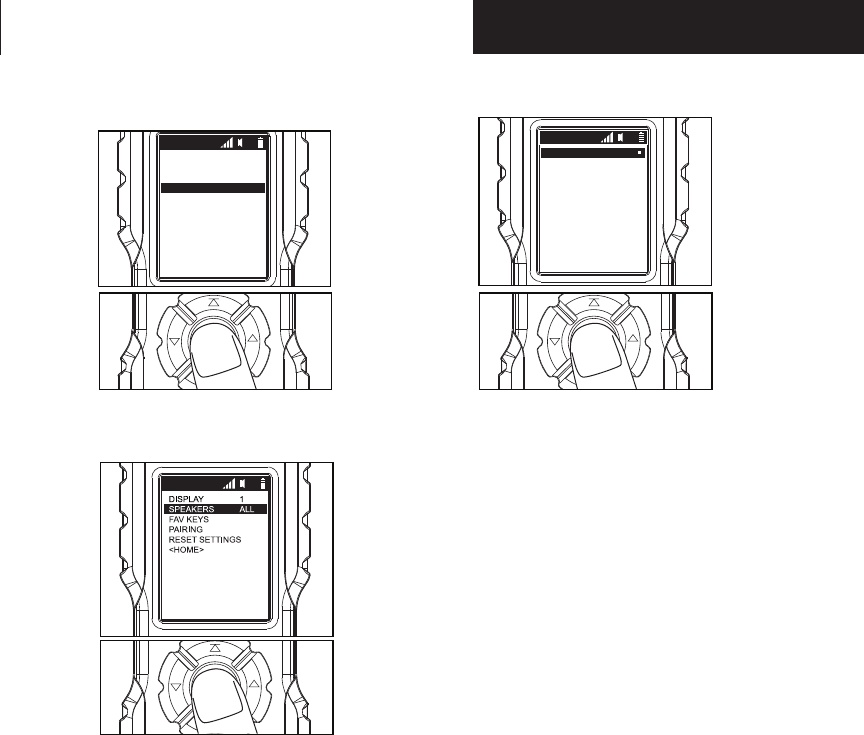
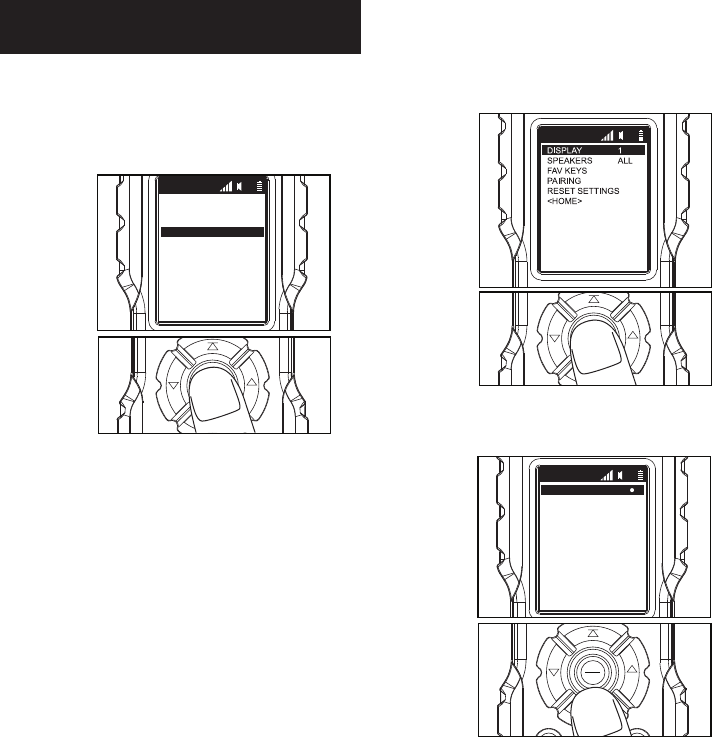
SETTINGS
1First, press the play/enter button while
SETTING is on display.
MENU
BACK
VOL
+
-
2Scroll through the options by pressing the up
or down button. Press the play/enter button
when the desired option is highlighted.
Sound Settings: You can switch to All, Side
Speakers or Center Speakers
Display Settings: Backlight timer can be adjusted
to 10 sec, 20 sec, 30 sec or Always On.
Factory Settings: Restore to factory settings.
About: Information about the unit.
MENU
BACK
VOL
+
-

DOWNLOAD CALLS FROM
PC ONTO SPEAKER UNIT
1First, connect a USB cable from the PC to the
Speaker Unit.
USB LINE-OUT
2The computer will auto detect it as a mass
storage drive.
3Then, copy your calls into this drive.
4Unplug and disconnect the USB cable once you
copied the calls into the drive.
LINE-IN
The Flextone Electronic-game calls also support
Line-in from external audio player. You must rst
connect the audio cable from external audio player
into the Line-in port. After that, go to the settings
menu, you will be able to see Line-in setting which
you can turn it on or off.
USB LINE-OUT
LINE-IN
NOTE: Line-in function is only available on the
Speaker Unit.
NOTE: MP3 and .WAV le types can be played.
PAGE 7
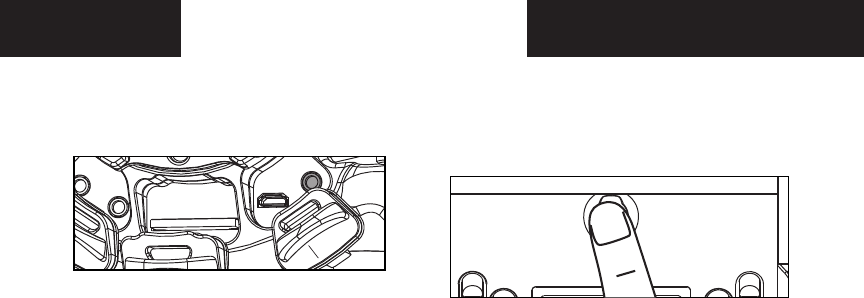
The Flextone Electronic-game calls also support
audio out to external speaker. You must rst
connect the audio cable from external speaker
into the Line-Out port.
LINE-OUT
USB LINE-OUT
NOTE: Line-out function is only available on the
Speaker Unit.
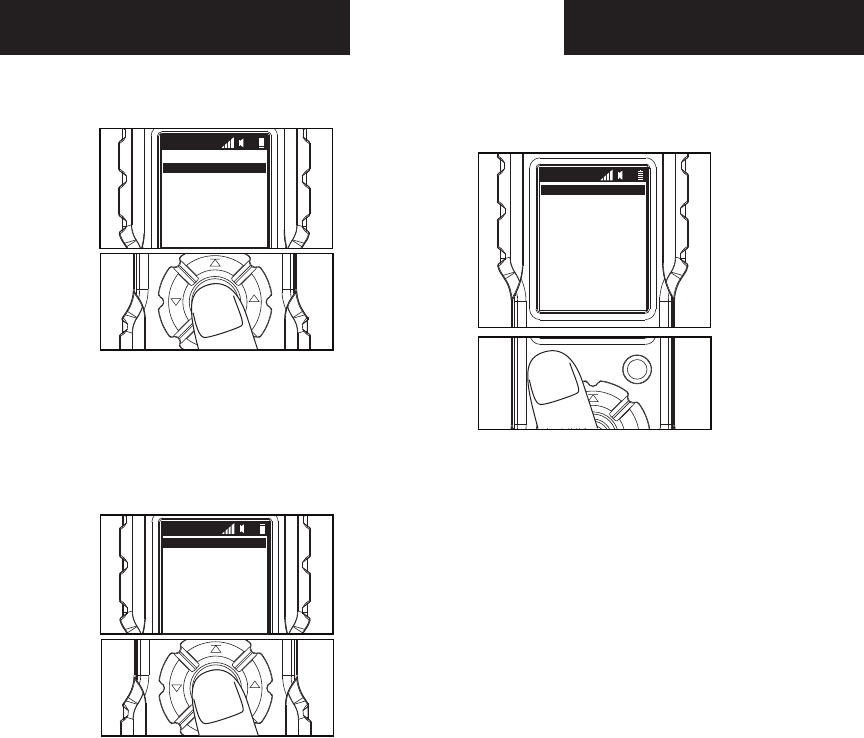
TURN SPEAKER UNIT OFF
Press and hold the power button until LCD is
illuminated and then release. Unit is now off.
Note: The LCD will enter sleep mode in
approximately 1 minute of inactivity. The unit will
turn off in 30 minutes of inactivity.
PAGE 8
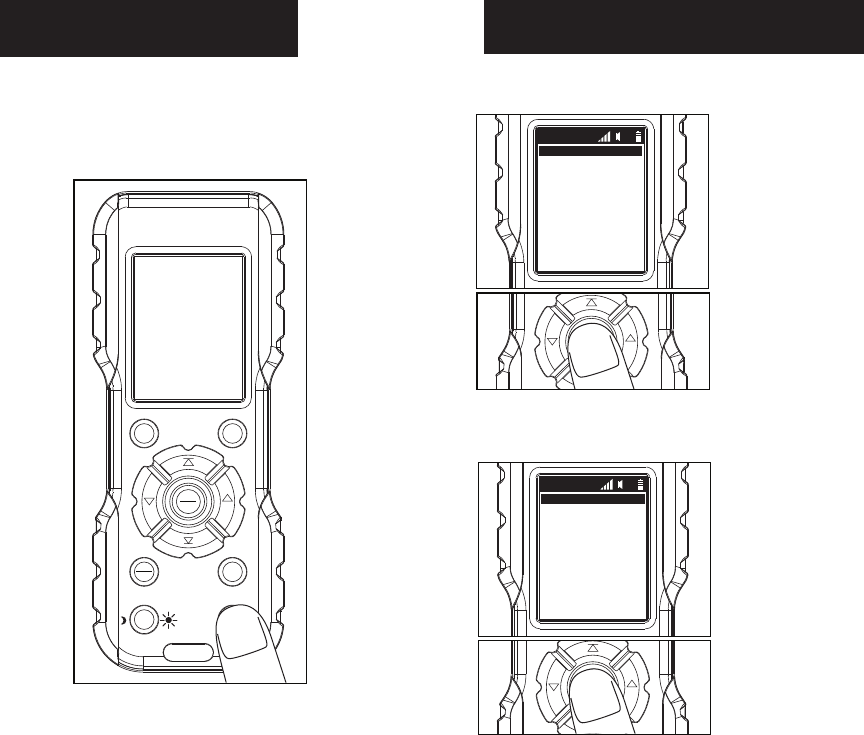
TURNING REMOTE ON
Press and hold the power button until LCD is
illuminated and then release. Unit is now on.
Note: The remote LCD will go into sleep mode in
approximately 1 minute of inactivity. It will power
off in 30 minutes of inactivity.
FAV1 FAV2
MUTE
MENU
BACK
DISPLAY
PLAY
SELECT VOL
VOL
CHOOSING PRELOADED CALLS
1First, press the play/select button while
Preloaded is highlighted.
2Next, select desired call category by pressing
the play/select button. Category name will
show in the top left corner.
PLAY
SELECT VOL
VOL
PLAY
SELECT VOL
VOL
FLX500
PRELOADED
DOWNLOADED
SD CARD
SETTINGS
11
PRELOADED
Bear
Bird
Bobcat
Cougar
Coyote
Crows
Elk
Fox
Hog
Mouse
11
Owl
Prairie Dog
Rabbi t
l
PAGE 9
3Scroll through the call list by using the up or
down arrow buttons to the desired call, press
the play/select button for the call to begin playing.
This will activate the audible call. Note: Call will
loop repeatedly until call is deactivated.
4Press the play/select button to stop the call
from continuing.
PLAY
SELECT VOL
VOL
BEAR
BEAR 4 MONTH DIS
BEAR ADULT DISTR
<BACK>
<HOME>
11
CHOOSING DOWNLOADED CALLS
1From the main menu, press the down arrow
to highlight DOWNLOADED. Then press the
PLAY/SELECT button.
The Remote control will start to sync the calls with
the speaker unit at this time. it may take a few
minutes to complete this operation.
PLAY
SELECT VOL
VOL
2Scroll through the call list by using the up or
down arrow buttons to the desired call, press
the play/select button for the call to begin playing.
This will activate the audible call. Note: Call will
loop repeatedly until call is deactivated.
PLAY
SELECT VOL
VOL
FLX500
PRELOADED
SD CARD
SETTINGS
11
DOWNLOADED
BEAR
BEAR 4 MONTH DIS
BEAR ADULT DISTR
<BACK>
<HOME>
11
PAGE 10
CHOOSING SD CARD CALLS
1From the main menu, press the down arrow
to highlight SD CARD. Then press the PLAY/
SELECT button.
The Remote control will start to sync the calls with
the speaker unit at this time. it may take a few
minutes to complete this operation.
PLAY
SELECT VOL
VOL
FLX500
PRELOADED
SD CARD
SETTINGS
11
DOWNLOADED
2Scroll through the call list by using the up or
down arrow buttons to the desired call, press
the play/select button for the call to begin playing.
This will activate the audible call. Note: Call will
loop repeatedly until call is deactivated.
PLAY
SELECT VOL
VOL
BEAR
BEAR 4 MONTH DIS
BEAR ADULT DISTR
<BACK>
<HOME>
11
SETTING FAV BUTTONS
1While playing any sound from any location
(preloaded, downloaded or sd card) press the
FAV1 or FAV2 buttons for 3 seconds to set that
sound for the selected FAV button.
PRELOADED
Bear
Bird
Bobcat
Cougar
Coyote
Crows
Elk
Fox
Hog
Mouse
11
Owl
Prairie Dog
Rabbi t
FAV1 FAV2
The selected call will blink when set.
2Once selected, you can press either FAV
button to play saved sound no matter what
sound is playing at the time.
3
Press FAV button to activate sounds and
press a second time to mute the sound (the
mute button also mutes the sound).
PAGE 11
SETTINGS: SPEAKER CONTROLS
1First, use the down button until Settings is
highlighted. Then, press the play/select button
to enter settings options.
2Next, use the down button until Speakers is
highlighted. Then, press the play/select button
to enter speaker options.
PLAY
SELECT VOL
VOL
PLAY
SELECT VOL
VOL
3Use the up or down buttons to select desired
option, then press play/select button.
PLAY
SELECT VOL
VOL
FLX500
PRELOADED
DOWNLOADED
SD CARD
SETTINGS
11
SETTINGS 11
SPEAKERS
ALL
SIDE ONLY
CENTER ONLY
<BACK>
<HOME>
11
PAGE 12
SETTINGS: DISPLAY OPTIONS
1First, use the down button until Settings is
highlighted. Then, press the play/select button
to enter settings options.
2Next, press the play/select button while
display is highlighted.
PLAY
SELECT VOL
VOL
PLAY
SELECT VOL
VOL
3Scroll to desired display option by using the
up and down buttons. Press the play/select
button to change display.
PLAY
SELECT VOL
VOL
FLX500
PRELOADED
DOWNLOADED
SD CARD
SETTINGS
11
SETTINGS 11
Display
Option 1
Option 2
Option 3
<BACK>
<HOME>
11
You can change the display settings to make the
remote easier to read based on lighting conditions.
PAGE 13
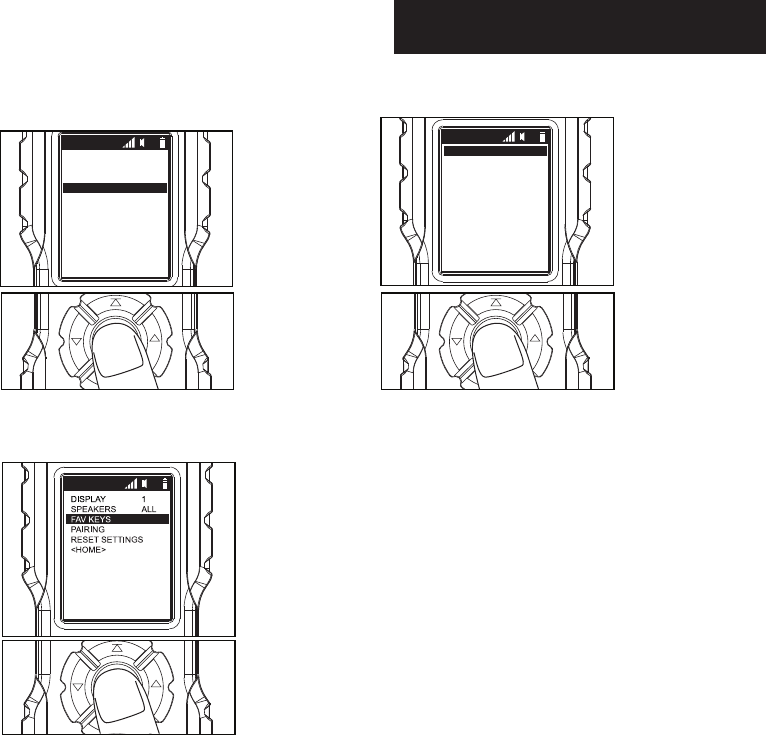
SETTINGS: FAV KEYS OPTIONS
1First, use the down button until Settings is
highlighted. Then, press the play/select button
to enter settings options.
2Next, use the down button until Fav keys is
highlighted. Then, press the play/select button
to enter Fav keys options.
PLAY
SELECT VOL
VOL
PLAY
SELECT VOL
VOL
3Use the up or down buttons to select desired
option, then press play/select button.
PLAY
SELECT VOL
VOL
FLX500
PRELOADED
DOWNLOADED
SD CARD
SETTINGS
11
SETTINGS 11
FAV KEYS
FAV1:
FAV2:
CLEAR FAV1
CLEAR FAV2
<BACK>
<HOME>
11
NOTE: FAV buttons cannot be set from this
screen. See setting FAV buttons.
PAGE 14
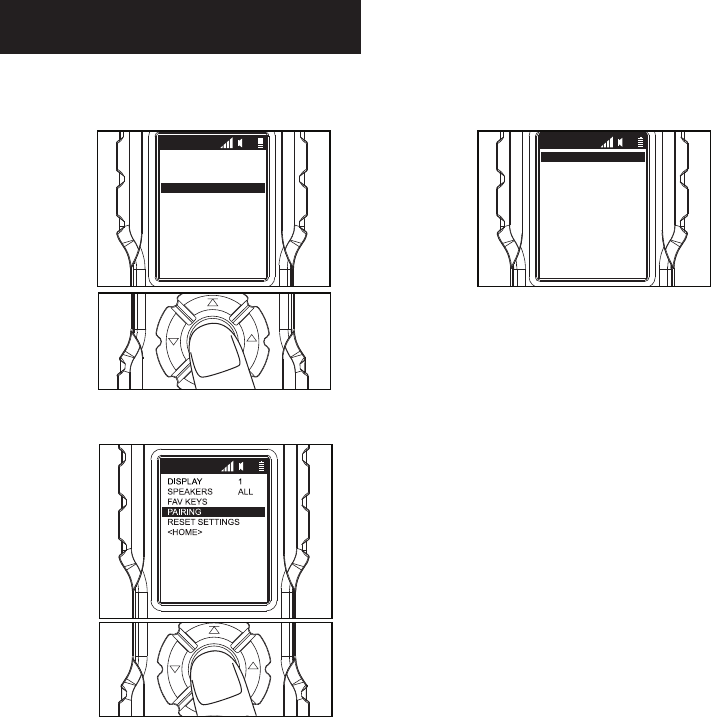
1First, use the down button until Settings is
highlighted. Then, press the play/select button
to enter settings options.
2Next, press the play/select button while
Pairing is highlighted.
PLAY
SELECT VOL
VOL
PLAY
SELECT VOL
VOL
SETTINGS: PAIRING OPTIONS
FLX500
PRELOADED
DOWNLOADED
SD CARD
SETTINGS
11
SETTINGS 11
PAIRING
Pairing...
successful
<BACK>
11
3
It will tell you “Successful” if the pairing was
completed. NOTE: If the screen says Please
Wait, it maybe having trouble connecting.
PAGE 15
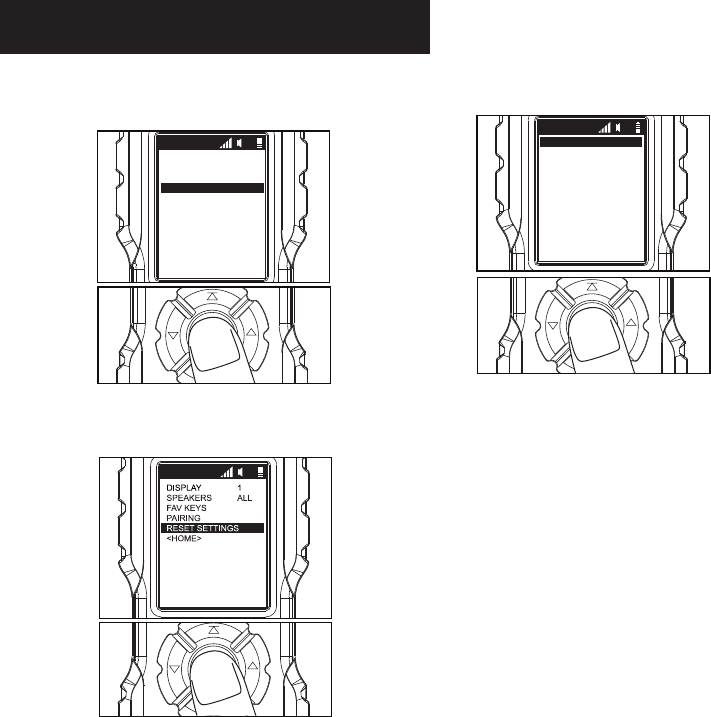
SETTINGS: RESET SETTINGS OPTION
1First, use the down button until Settings is
highlighted. Then, press the play/select button
to enter settings options.
2Next, press the play/select button while Reset
Settings is highlighted. Then, press the play/
select button to enter reset options.
PLAY
SELECT VOL
VOL
PLAY
SELECT VOL
VOL
FLX500
PRELOADED
DOWNLOADED
SD CARD
SETTINGS
11
SETTINGS 11
3Press play/select button while Factory
Settings is highlighted.
PLAY
SELECT VOL
VOL
RESET
FACTORY SETTINGS
11
PAGE 16

To adjust volume, press the volume up or down
buttons.
VOLUME CONTROL
PLAY
SELECT VOL
VOL
PAGE 17
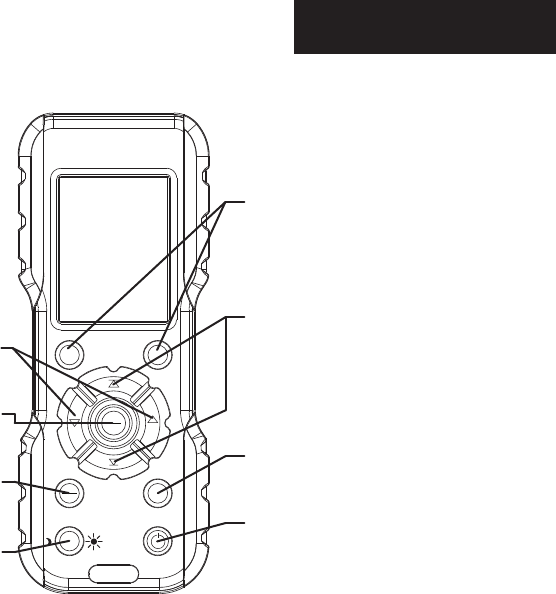
REMOTE BUTTONS
FAV1 FAV2
MUTE
MENU
BACK
DISPLAY
PLAY
SELECT VOL
VOL
FAV 1 & FAV 2:
Press to play saved favorite sound 1
and 2.
Press and hold down for 2-3 seconds to
save to Fav button.
UP & DOWN ARROWS:
Press to move up and down through
menu options.
VOLUME UP & DOWN:
Press to change the volume higher or
lower.
PLAY/SELECT:
Press to select options and/or to play
desired calls. MUTE:
Press to mute the sound.
MENU/BACK:
Press to go back to previous page or to
reach main menu.
DISPLAY:
Press to change the display of the
screen (3 options). Continue pressing
till you reach desired display.
POWER:
Press and hold to power On and Off the
remote.
PAGE 18

DISCLAIMERS
WGI Innovations, LTD. is not responsible for damage,
expense or injury caused by the unauthorized use of,
alterations to, improper connection of and abuse or
neglect of the WGI Innovations™ products.
WARRANTY
For the warranty to be in eect, you MUST complete-
ly ll out and mail the warranty card along with your
proof of purchase to WGI Innovations within (14)
days after the date of purchase. As an alternative to
mail, you may also visit our website and register your
product at www.wildgameinnovations.com (you are
still required to mail WGI Innovations your proof of
purchase before the warranty is placed in eect.) Fol-
low the onscreen directions to complete the process.
WGI Innovations, LTD will replace all workmanship
defects free of charge for ONE (1) YEAR after the date
of purchase as long as your warranty is in eect.
This warranty DOES NOT COVER damage, expense
or injury caused by unauthorized repairs, alterations,
improper connection, shipping, abuse, theft, acci-
dent, neglect, animal damage or collateral loss.
When returning product(s) for service you MUST ob-
tain a Return Merchandise Authorization (RMA) num-
ber from WGI Innovations, LTD. Please include name,
UPS address (No P.O. Box), telephone number, RMA
number and a complete description of the problem
on all enclosed correspondence. When possible,
pack product carefully in original carton. Customers
are responsible for any shipping cost to WGI Innova-
tions. WGI Innovations will pay the shipping cost of
replacement product to the customer. We are not
responsible for damage incurred in returning items
for repair.
For product service send to:
WGI Innovations
602 Fountain Parkway
Grand Prairie, TX 75050
(800) 847-8269
Thank you for your purchase!
CUSTOMER SERVICE
WGI Innovations, LTD. stands behind every product
we manufacture for a one year product workmanship
warranty and a strong commitment to customer ser-
vice. If you are in need of customer service for miss-
ing parts or need assistance with the operation or
assembly of your product, we encourage you to call
one of our customer service representatives and let
us assist you with your WGI Innovations product.
DISCLAIMER
WGI Innovations, LTD. reserves the right to make
changes to product features, functionality and
physical design at its sole discretion. As a result, such
changes may not be reected in this version of the
manual.
WARRANTY
PAGE 19

PAGE 20
FCC STATEMENT
Product Name: Electronic Game Call
Trade Name: Flextone
Model# FLX500
This device complies with Part 15 of the FCC Rules. Operation is subject to the following two
criteria: (1) This device may not cause harmful interference, and (2) This device must accept any
interference received, including interference that may cause undesired operation.
Warning: Changes or modications to this unit not expressly approved by the party responsible
for compliance could void the user’s authority to operate the equipment.
NOTE: This equipment has been tested and found to comply with the limits for a Class B digital
device, pursuant to Part 15 of the FCC Rules. These limits are designed to provide reasonable
protection against harmful interference in a residential installation. This equipment generates,
uses and can radiate radio frequency energy and, if not installed and used in accordance with the
instructions, may cause harmful interference to radio communications.
However, there is no guarantee that interference will not occur in a particular installation. If this
equipment does cause harmful interference to radio or television reception, which can be deter-
mined by turning the equipment o and on, the user is encouraged to try to correct the interfer-
ence by one or more of the following measures:
-Reorient or relocate the receiving antenna.
-Increase the separation between the equipment and receiver.
-Connect the equipment into an outlet on a circuit dierent from that to which the receiver is
connected.
-Consult the dealer or an experienced radio/TV technician for help.
This device complies with Industry Canada licence-exempt RSS standard(s). Operation is subject
to the following two conditions: (1) this device may not cause interference, and (2) this device
must accept any interference, including interference that may cause undesired operation of the
device.
WARRANTY

602 Fountain Parkway
Grand Prairie, TX 75050
800.847.8269
“Flextone” is a registered trademark of Wild Game Innovations, LLC.
“Sport Responsible” is TM trademarks of WGI Innovations, LTD.
“Dog Soldier TV” is a registered trademark of Steve Criner, all rights reserved.