WGI Innovations YN1REMOTE YN1 REMOTE User Manual
WGI Innovations, Ltd. YN1 REMOTE Users Manual
Users Manual
PAGE 2
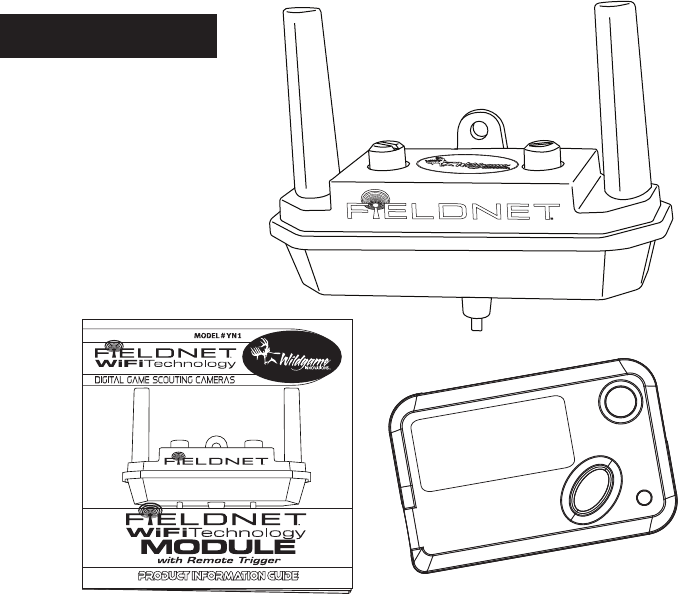
INCLUDED PARTS
1) YN1 Module – (1)
2) Remote Control Unit – (1)
3) Product Information Guide – (1)
Note: Can only be used with
Fieldnet™ WiFi Technology
capable cameras.
PAGE 3
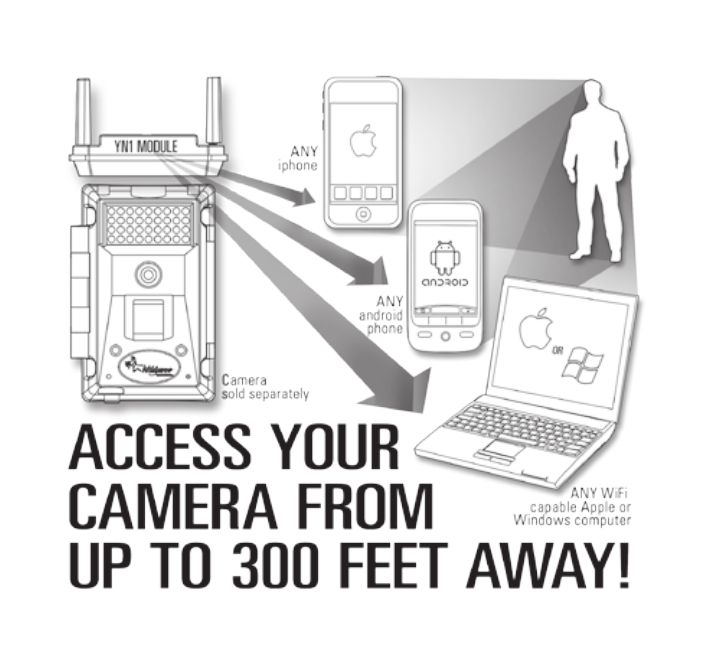
HOW DOES
FIELDNET
™ WORK?
PAGE 4
DETERMINE CAMERA MODEL
YOU ARE INSTALLING ONTO INSTALLING BATTERY
IF YOU ARE INSTALLING THE YN1 WIFI MODULE
ONTO THE X10 OR X10E CAMERA, OR ANY
VARIATION THEREIN, PLEASE CONTINUE TO NEXT
PAGE
YOU MUST DETERMINE THE
MODEL YOU ARE INSTALLING THE
YN1 UNIT ON, AS INSTALLATION
INSTRUCTIONS ARE DIFFERENT FOR
DIFFERENT MODELS.
IF YOU ARE INSTALLING THE YN1 WIFI MODULE
ONTO THE D10 OR IR10 CAMERA, , OR ANY
VARIATIONS THEREIN, PLEASE SKIP TO PAGE 6.
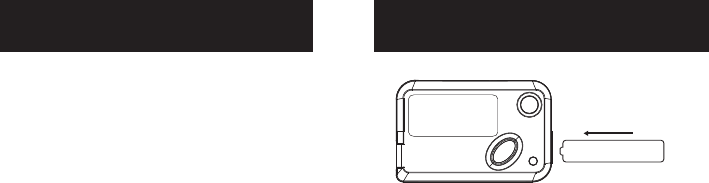
REMOVE CAP AND INSERT BATTERY WITH THE
POSITIVE END FIRST. REPLACE CAP.
THE REMOTE IS REQUIRED FOR YN1 OPERATION.
MAKE SURE YOUR CAMERA IS POWERED OFF
BEFORE INSTALLING YN1 UNIT.
27A
Battery
+ -
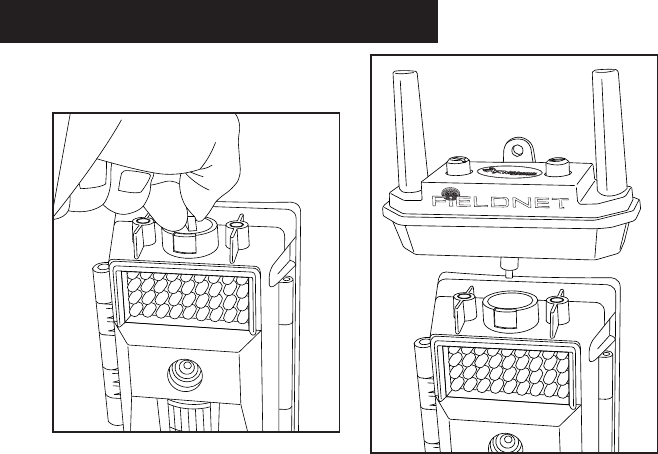
1Unscrew and remove USB port protective cap
from top of camera. (Illustration A)
2With the YN1 Wi Module facing forward
(mounting tab to back), as illustrated below,
securely place onto the top of the camera so that
the USB prong ts snugly into the USB insert.
(Illustration B) Note: Do not force the USB plug
into port.
3Securely mount the YN1 module to camera by
tightening the stabilizer screws on either side of
the YN1 module. (Illustration C)
PAGE 5
INSTALLATION ONTO X10 CAMERA
(Illustration A)
(Illustration B)
Note: If you unstall the YN1 module, you must
replace the USB port protective cap, or damage
to the camera will occur. This damage will not
be covered by warranty.
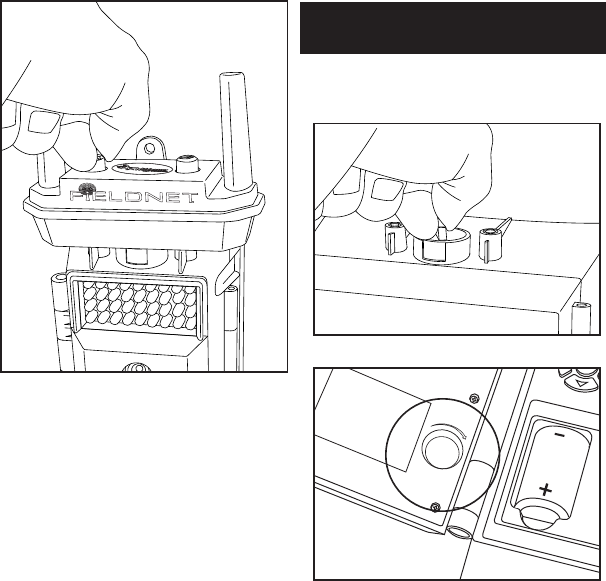
1Unscrew and remove cap from top of camera and
store the cap on the inside of the camera in the
provided space. (Illustrations D&E)
PAGE 6
INSTALLATION ONTO D10 &
IR10 CAMERAs
Lock
Cap Storage
Lock
Cap Storage
(Illustration D)
(Illustration E)
(Illustration C)
PAGE 7
INSTALLATION ONTO D10 &
IR10 CAMERAs
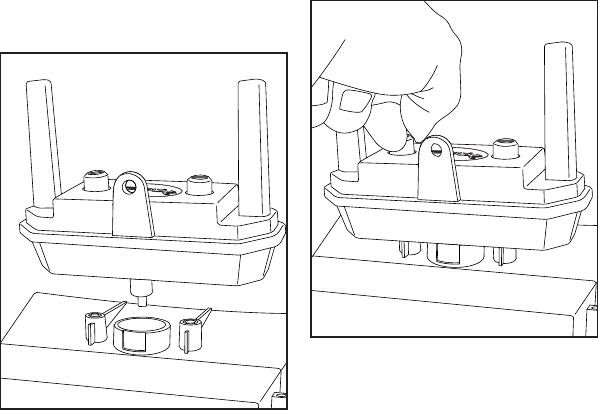
2With the YN1 Wi Module facing backwards, as
illustrated below, place it onto the top of the
camera so that the USB prong ts into the USB
insert. (Illustration F) Note: Do not force the USB
plug into port.
3Screw the stabilizer screws on either side of the
YN1 module into the camera. (Illustration G)
Note: If you unstall the YN1 module, you must
replace the USB port protective cap, or damage
to the camera will occur. This damage will not
be covered by warranty.
Note: To insure that the YN1 module is installed
correctly, power on the camera. Then power on
the YN1 module with remote. Make sure the LED
on the YN1 module is on.
(Illustration G)
(Illustration F)
PAGE 8
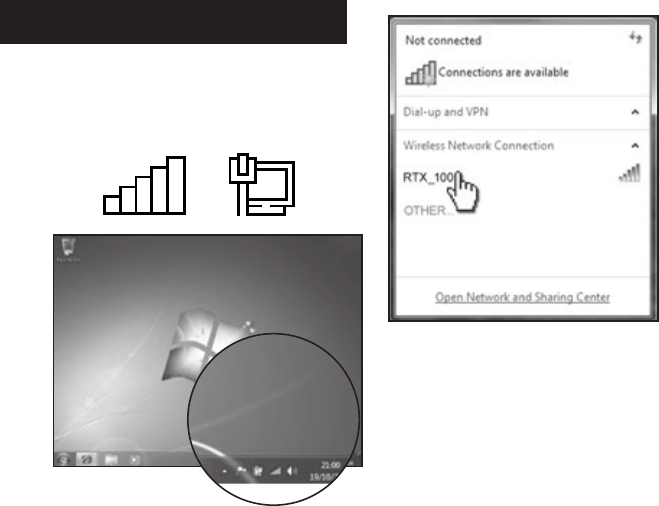
WINDOWS WIFI CONNECT
1
Click on the Connect to a Network icon in the
notication area on the bottom right-hand
corner of the screen. (Illustration H) Illustration is of
Windows 7 default screen.
2 In the window that appears, you can now see
the YN1 equipped camera. Here it is named
“RTX_100.” Click on the name to connect to the
YN1 module. (Illustration I)
(Illustration H)
(Illustration I)
PAGE 9
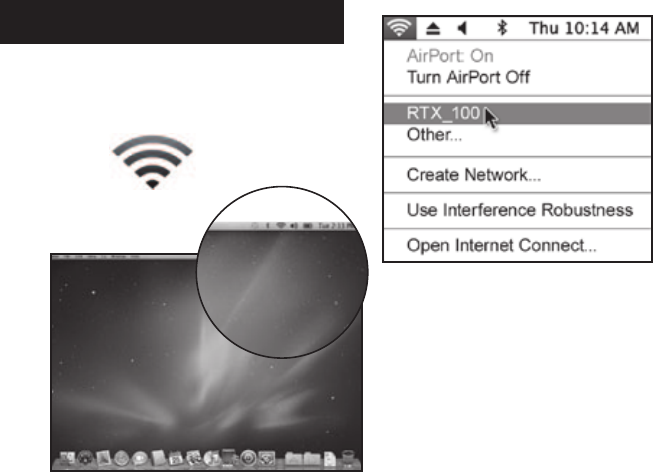
MAC OSX WIFI CONNECT
1
Click on the “AirPort” icon on the top right-hand
corner of the screen. (Illustration J) Illustration is
of Windows 7 default screen.
2
In the window that appears, you can now see
the YN1 equipped camera. Here it is named
“RTX_100.” Click on the name to connect to the
YN1 module. (Illustration K)
(Illustration K)
(Illustration J)

PAGE 10
Go to www.wildgameinnovations.com to download
the interface and information on how to use your
computer with your YN1 equipped camera.
If using an iPhone or android phone with YN1,
you must go to either iTunes or The Android
Market to download the Fieldnet app. If you
have trouble locating the app, please visit www.
wildgameinnovations.com and go to the download
section for more information.
Note: Can only be used with Fieldnet™ WiFi
Technology capable cameras.
Note: If you unstall the YN1 module, you must
replace the USB port protective cap, or damage
to the camera will occur. This damage will not
be covered by warranty.
Note: Do not force the USB plug into the port
when installing.
Note: To insure that the YN1 module is
installed correctly, power on camera and make
sure the LED on the YN1 module is on.
NEXT STEPS
IMPORTANT NOTES

PAGE 11
DISCLAIMERS
WGI Innovations, LTD is not responsible for damage,
expense or injury caused by the unauthorized use
of, alterations to, improper connection of and abuse
or neglect of the Wildgame Innovations™ YN1 WiFi
Module.
WARRANTY
You must register your product warranty on line at
www.wildgameinnovations.com. Follow the onscreen
directions to complete the process.
WGI Innovations, LTD will repair all material or
workmanship defects free of charge for ONE (1)
YEAR after the date of purchase and thereafter the
cost will vary per incident.
This warranty DOES NOT COVER damage, expense
or injury caused by unauthorized repairs, alterations,
improper connection, shipping, abuse, theft,
accident, neglect or collateral loss.
When returning product for service you MUST obtain
a Return Merchandise Authorization (RMA) number
from WGI Innovations, LTD. Please include name,
UPS address (no P.O. Box), telephone number, RMA
number and a complete description of the problem
on all enclosed correspondence.
When possible pack product carefully in original
carton. We are not responsible for damage incurred
in returning items for repair.
CUSTOMER SERVICE
WGI Innovations, LTD stands behind every
product we manufacture for a one year product
workmanship warranty and a strong commitment
to customer service. If you are in need of customer
service for missing parts or need assistance with
the operation or assembly of your product, we
encourage you to call one of our customer service
representatives and let us assist you with your
Wildgame Innovations™ YN1 WiFi Module.
WGI Innovations, LTD reserves the right to
make changes to features, functionality and
physical design at its sole discretion. As a
result, such changes may not be reected in
this version of the manual.
DISCLAIMER
FCC STATEMENT
1. This device complies with Part 15 of the FCC Rules. Operation is subject to the following two
conditions:
(1) This device may not cause harmful interference.
(2) This device must accept any interference received, including interference that may cause
undesired operation.
2. Changes or modifications not expressly approved by the party responsible for compliance could
void the user's authority to operate the equipment.
NOTE: This equipment has been tested and found to comply with the limits for a Class B digital
device, pursuant to Part 15 of the FCC Rules. These limits are designed to provide reasonable
protection against harmful interference in a residential installation.
This equipment generates uses and can radiate radio frequency energy and, if not installed and
used in accordance with the instructions, may cause harmful interference to radio communications.
However, there is no guarantee that interference will not occur in a particular installation. If this
equipment does cause harmful interference to radio or television reception, which can be
determined by turning the equipment off and on, the user is encouraged to try to correct the
interference by one or more of the following measures:
Reorient or relocate the receiving antenna.
Increase the separation between the equipment and receiver.
Connect the equipment into an outlet on a circuit different from that to which the receiver is
connected.
Consult the dealer or an experienced radio/TV technician for help.
RF warning statement:
The device has been evaluated to meet general RF exposure requirement. The device can be used
in portable exposure condition without restriction.
PAGE 13

WGI Innovations, LTD
602 Fountain Parkway, Grand Prairie, Texas 75050
Telephone: (800) 847-8269 Fax: (972) 352-6633
www.wildgameinnovations.com
“Wildgame Innovations” and the “Button Logo are TM trademarks of Wildgame Innovations, LLC.
“FIELDNET” is a TM trademark of WGI Innovations, LTD.
“Sport Responsible” is a TM trademark of WGI Innovations, LTD.