WINIA Electronics 7NF0011 VCR/DVD Player User Manual L83 84 53 54D1N QS VE1 5
Dongbu Daewoo Electronics Corporation VCR/DVD Player L83 84 53 54D1N QS VE1 5
UserManual.wiki
>
WINIA Electronics
>
7NF0011 User Manual
User Manual
Navigation menu
Upload a User Manual
Namespaces
Wiki Guide
HTML
PDF
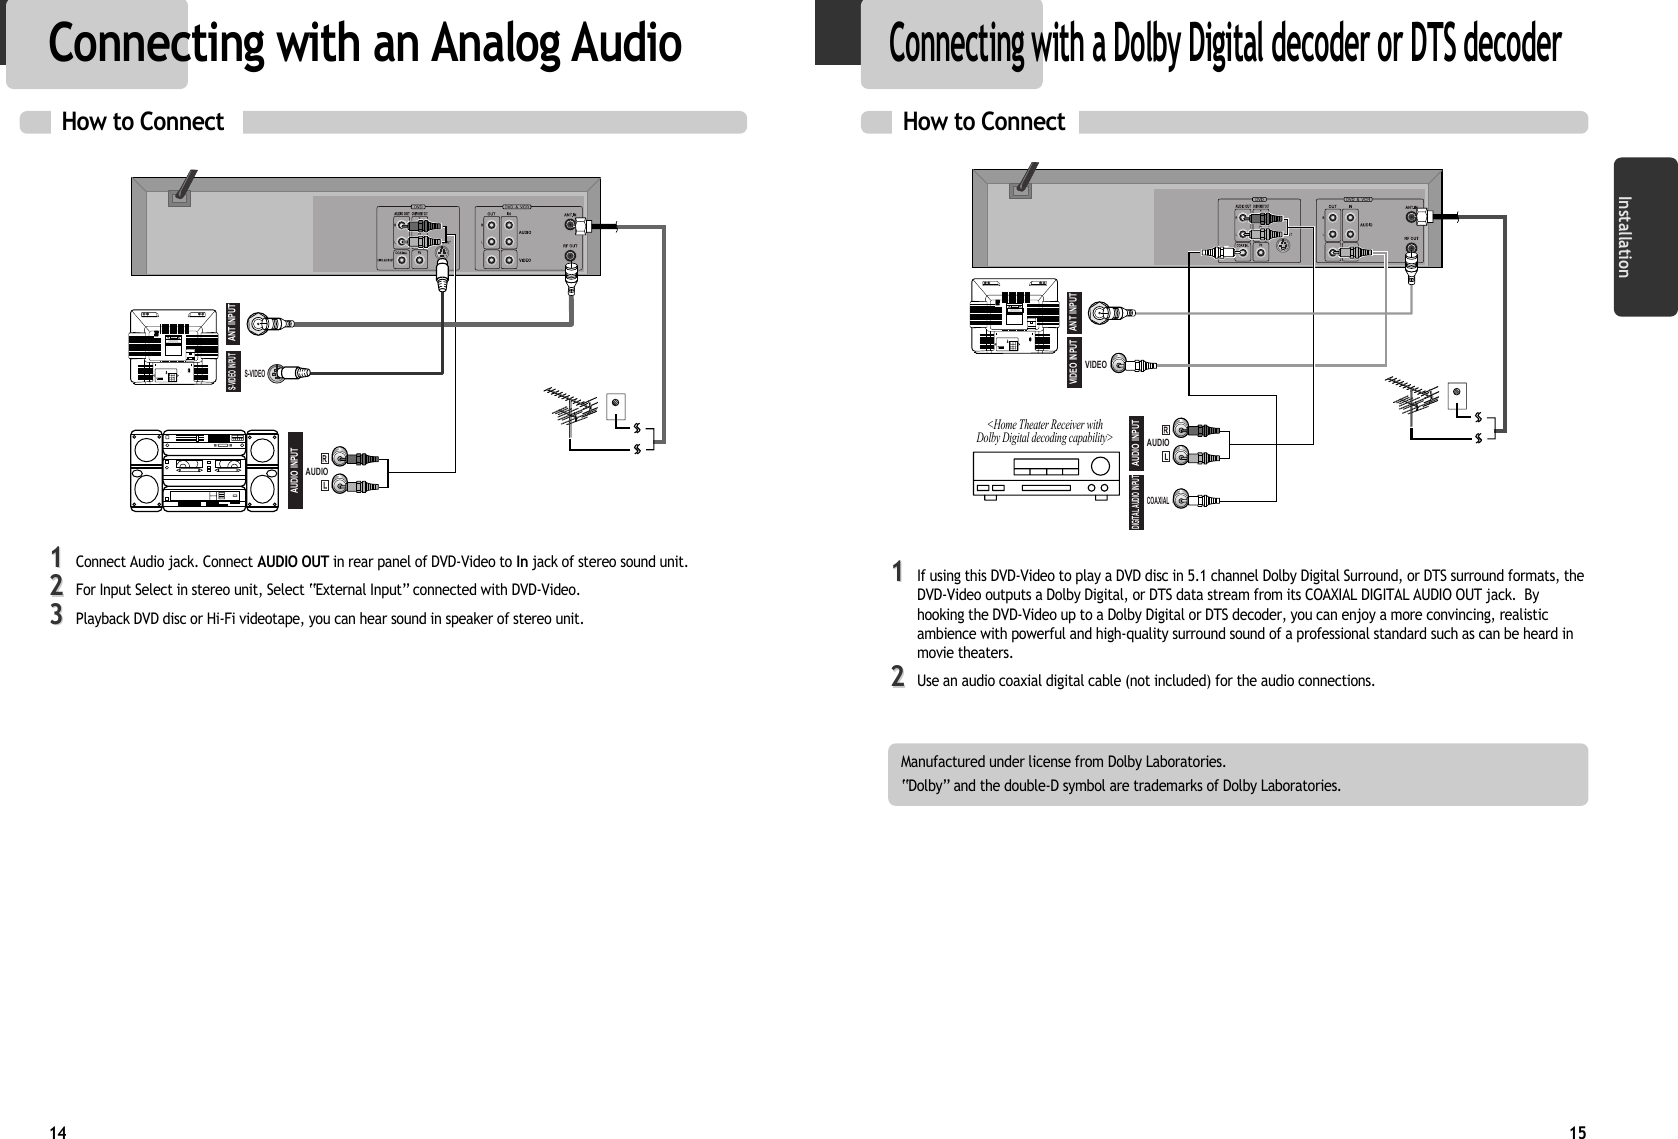
Info
Views
User Manual
Discussion / Help
Navigation
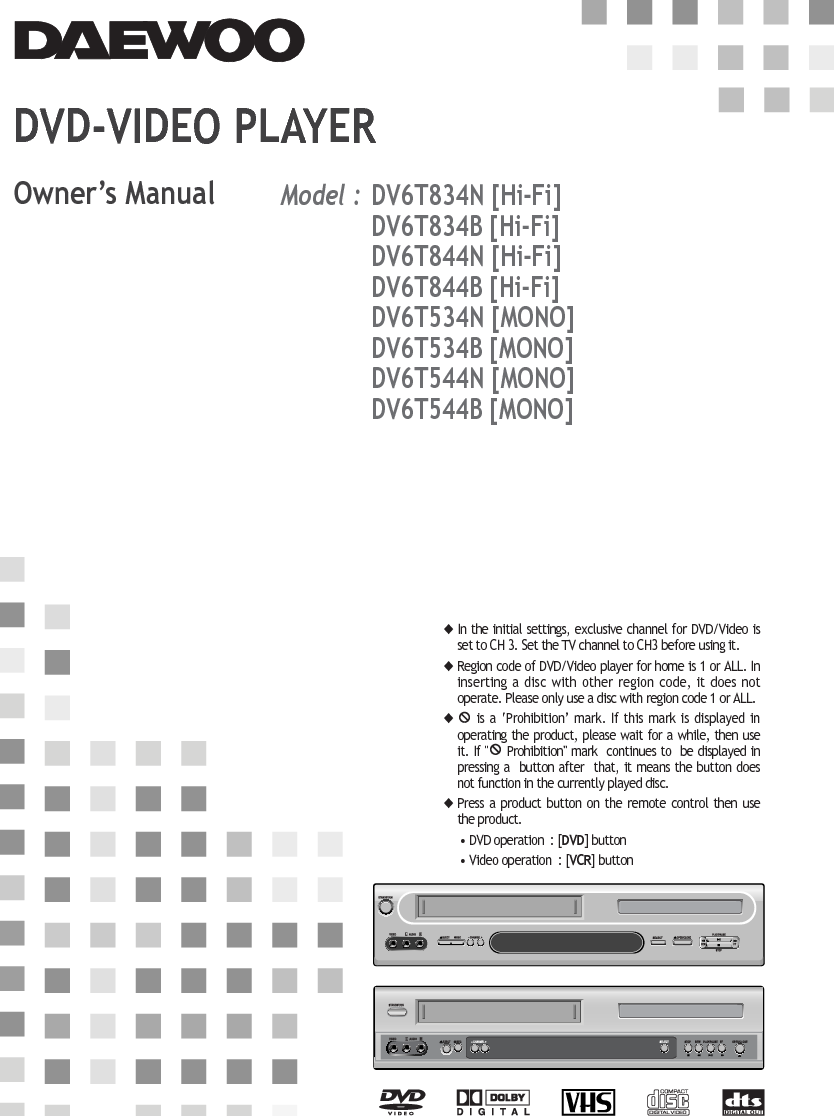
![DVD-VIDEO PLAYEROwnerÕs ManualModel : DV6T834N [Hi-Fi]DV6T834B [Hi-Fi]DV6T844N [Hi-Fi]DV6T844B [Hi-Fi]DV6T534N [MONO]DV6T534B [MONO]DV6T544N [MONO]DV6T544B [MONO]◆In the initial settings, exclusive channel for DVD/Video isset to CH 3. Set the TV channel to CH3 before using it. ◆Region code of DVD/Video player for home is 1 or ALL. Ininserting a disc with other region code, it does notoperate. Please only use a disc with region code 1 or ALL. ◆is a ÔProhibitionÕ mark. If this mark is displayed inoperating the product, please wait for a while, then useit. If " Prohibition" mark continues to be displayed inpressing a button after that, it means the button doesnot function in the currently played disc.◆Press a product button on the remote control then usethe product. ¥ DVD operation : [DVD] button ¥ Video operation : [VCR] button](https://usermanual.wiki/WINIA-Electronics/7NF0011/User-Guide-313586-Page-1.png)
![4Product Information5Advantages of This Product Are ..... ¥ DVD, VCD, CD, CD-R(MP3), CD-RW, VHSplayback function ¥ Watching DVD for recording broadcast ¥ Integrated remote control (VCR, DVD) ¥ VISS function ¥ Multiplex sound playback/record ¥ High Sound Quality of 6 head Hi-Fi (Hi-FiModel only)¥ One Touch timer Recording (OTR) ¥ MP3 file playback function (CD-R disc havingrecords of MP3 files) ¥ GUI (Graphical User Interface) OSD (On ScreenDisplay) By using the [DISPLAY] button on the remotecontrol, information on the DVD/VCD/CD player anddisc, can be displayed on the TV screen. ¥ Screensaver function (DVD)¥ 3D sound (3D sound effect using 2 speakers) ¥ High bit / high sampling with 27MHz / 10bitvideo encoder This unit has 27MHz / 10bit capability, that enablesthe faithful reproduction of fine images. ¥ High bit / high sampling with 96KHz / 24bitaudio D/A converter With this 96KHz / 24bit linear Pulse Code Modulatedsignals, which constitute the highest specificationsin the DVD standards, you can enjoy faithfullyreproduced sound in all of its various modes. Tosupport 96KHz sampling / 24bit sound, the shapingnoise of this multi-level digital sigma type of D/Aconverter is kept flat up to 44KHz, thus preventingthe important audio signals from being affected. ¥ Coaxial digital output (PCM, Dolby Digital, dts) You can enjoy high-level digital audio by connectingwith amp embedded with Dolby Digital / dtsdecoder. ¥ Built-in Dolby Digital decoder (DVD)¥ Analog audio 2-channels output for DOWNMIX(x1) ¥ Composite video out (x1)¥ Slow Forward / Reverse (DVD) playback ¥ Fast Forward / Reverse playback ¥ Search of title, chapter, and time in DVD disc,and search of track and time in VCD and CD ¥ Various TV aspect (DVD)4:3 for Pan and Scan, 4:3 for Letter Box, and 16:9for Wide ¥ Repeat playback (title and chapter for DVD,track and disc for VCD/CD) ¥ Repeat a defined period from A to B (DVD)¥ Selective Play (DVD/VCD/CD)You can select and play the desired title / chapterof DVD and track of Video CD/CD in STOP mode. ¥ Various languages OSD (On Screen Display)function (DVD)You can select and display OSD among variouslanguages. (English, French, Spanish) ¥ Parental Lock function (DVD) This function can prevent playback of software thatmay be unsuitable for children. ¥ Multi Audio function (DVD) The audio soundtrack can be heard in up to 8languages. In the case of SVCD or CVD, it dependson the disc. (The number of audio languagesdepends on the software.) ¥ Multi Subtitle function (DVD)The subtitle can be seen in up to 32 languages. Inthe case of SVCD or CVD, it depends on the disc.(The number of subtitle languages depends on thesoftware.) ¥ Multi Angle function (DVD)This function allows you to choose the viewing angleof scenes which were shot from a number ofdifferent angles. (The number of angles depends onthe software.) ¥ Screen zoom function (DVD/VCD)Read Carefully before UsingCautions in use of DVD-Video player are described below. Please read carefully before using a DVD-Video player. Installation place and handling¥ When you place this player near other devices,they may affect poorly together. ¥ When you place DVD-Video player and TV in theupper and lower sides, it may cause flickering ofpictures or failure (tape is not ejected). ¥ When you place this player near strong magneticmaterials, it may affect image or voice poorly ordamage recording. ¥ Do not spill volatile liquids like insect spray overthe player. Do not leave rubber or plastic productsin contact with the player for a long time. Theywill cause deterioration or paint peel-off. Not in use¥ When the unit is not in use, be sure to remove thedisc or tape and turn off the power. ¥ If you do not use the unit for a long period,remove batteries in remote control to preventleakage. ¥ In case you donÕt use the unit for a long time, theunit may not function properly in the future. Turnon and use the player occasionally. Moving¥ Repack the unit as it was originally packed at thefactory. Alternatively, pack this product withtowel not to be damaged. ¥ Eject any videotape. Cleaning¥ Dust off dirt in cabinet or control panel partsmoothly with a soft cloth. ¥ For heavy dirt, soak the cloth in a weak detergentsolution, wring it well and wipe. Use a dry clothto wipe it out. ¥ Follow instructions in using chemical cleaners. ¥ Do not use any type of solvent such as gasoline orbenzene, as they may cause deterioration or paintpeel-off.Checking¥ Video is a high precision device. To obtain a clearscreen, we recommend regular inspection andmaintenance every 1,000 hours of use by technicalengineers. ¥ For checking, contact your dealer or your nearestservice center. Checking and Replacement of Antenna¥ Antenna is subject to change in its direction ordamage by wind and rain. For clean screen,contact and consult your nearest service centerabout checking and replacement. In recording important screen¥ Be sure to record the screen and check whetherrecording is performed properly. We beg you tounderstand compensation of recording if recordingis not performed by badness of used tape or video. Copyright¥ Do not use your recordings without permission of acopyrighter except personal usage. Tape and Disc Handling¥ Do not use any tape and disc below. Damage ofvideo head or cut/coiling of tape may causefailure. - Tape with mold - Tape or disc stained with juice or attachments - Tape having breakage connection - Disassembled tape - Disc with severe scratch ¥ Moisture condensation may occur in tape. Moisturecondensation damages the tape. Please use thetape after the moisture condensation isdisappeared. ¥ After use, store tape vertically in a case to preventloose. ¥ Do not store the following places. - High temperature and humidity - Subject generation of mold - Subject to direct sunlight - Much dirt or dust - Near strong magnetic materials such as speaker ◆Instructions in using remote control¥ Operate remote control within 7m from the unit. ¥ Do not press 2(two) buttons at the same time. ¥ Do not light up sending part of remote control. ¥ Do not keep in the place with much dust andhumidity.](https://usermanual.wiki/WINIA-Electronics/7NF0011/User-Guide-313586-Page-5.png)
![9Product Information8Operation Display WindowTime, Counter and CurrentOperationTray is openedTray is closedDisc is loadedThere is no disc in trayDisc has some errorMenu screen is displayedSetup menu is displayedPower is ONPower is OFF3D Sound IndicatorDVD Disc Operation VCR Operation REC and TIMER REC displayRecording , TIMER Recording , To be Timer-recorded, To be Timer-recorded state ERROR(No Tape or Tape without tab) AMdts Disc IndicatorTrackChapter This is displayed in DVD disc. Identification of Controls Identification of Controls Rear Panel!(@^ *&$# %!Power Cord It is a jack for supplying power to the unit.Connect to outlet in a wall. @Digital Output (COAXIAL) Jack To enjoy sound quality of theater level in home,connect this jack with amp or unit embedded withdigital audio decoder. #AUDIO Out Jack $COMPONENT Out JackTo obtain better screen quality, connect the unitto TV or monitor with COMPONENT(480i) input. %S-Video Output Jack ^A/V Output Jack &A/V Input Jack *Connection to Antenna Cable (Connection to TV ✔DV6T834N, DV6T834B, DV6T844N, DV6T844B [Hi-Fi]!(@^ *&$# %✔DV6T534N, DV6T544N, DV6T534B, DV6T544B [MONO]Accessories Remote Control 2 Batteries RF cableConnecting cable toAudio/Video jack OwnerÕs Manual/Warranty ¥ To purchase accessories or not supplied parts additionally, contact your nearest dealer or service center. But,ownerÕs manual and warranty are not sold additionally.](https://usermanual.wiki/WINIA-Electronics/7NF0011/User-Guide-313586-Page-7.png)
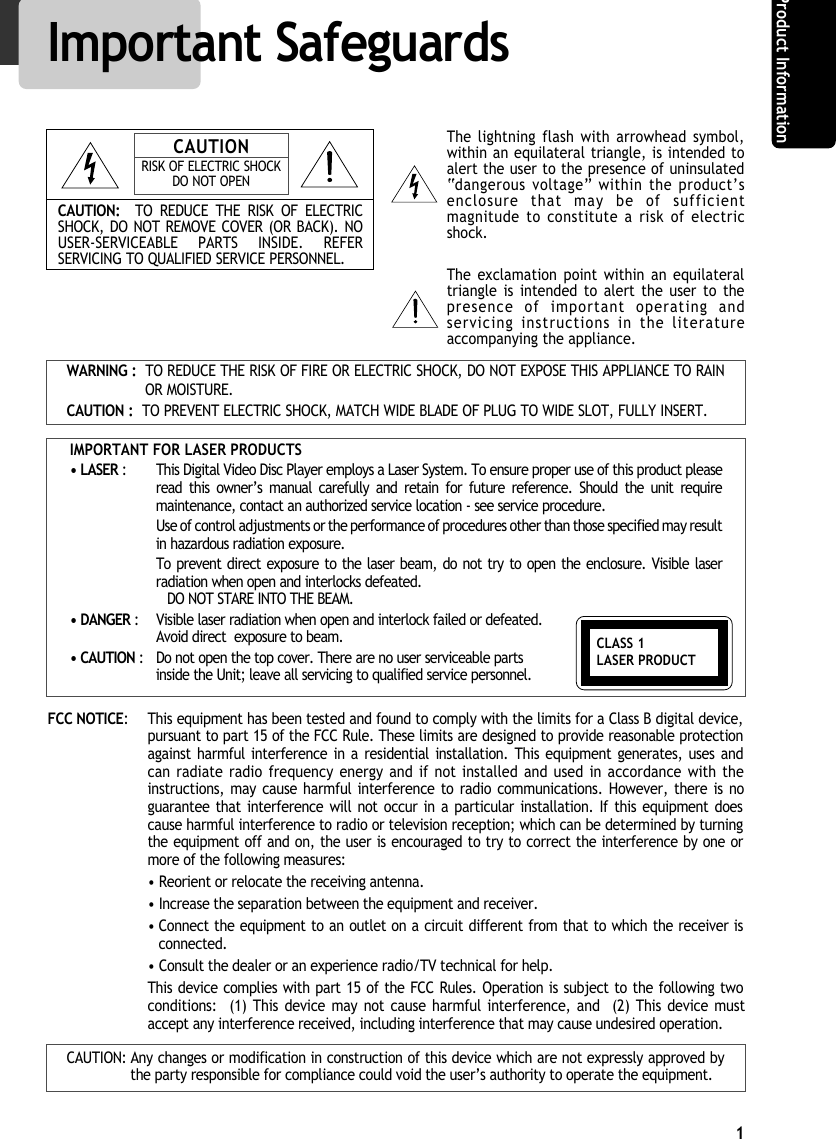
![11Product Information Installation10Remote Control6@#!$%^&*()123457890“‘+=QqWwEeR![DVD] MENU button@POWER button #[DVD] TITLE /PBC button $[DVD] OPEN/CLOSE button, [VCR] EJECT button%[DVD, VCR] MOVE/SELECT in OSD, [VCR] ChannelUp/Down button ^SETUP button &[DVD] REPEAT Playback button *[DVD] REPEAT a defined period from A to B button ([DVD] PREVIOUS button (move into a previouschapter or track) )REVERSE SEARCH button 1[VCR] TIMER RECORDING button, [DVD] PROGRAMbutton2[DVD, VCR] CLOCK/COUNTER button 3[DVD, VCR] TV/VCR button4[VCR] Record button 5[DVD, VCR] NUMBER button , [VCR] TRACKING Ð/+button 6VCR SELECT button 7DVD SELECT button 8[DVD, VCR] OSD DISPLAY button9OUTPUT Selection button0ENTER button“CLEAR/3D button ‘[DVD] AUDIO LANGUAGE Select, [VCR] AUDIO Selectbutton +[DVD] SUBTITLE Select button =[DVD] NEXT button (Move into a next chapter ortrack) , [VCR] Frame Advance button in pausemode QPLAY/PAUSE button qFORWARD SEARCH button WSTOP button w[DVD] Chapter/Title/Time SEARCH button E[DVD] ZOOM button e[DVD] ANGLE, [VCD] DIGEST, [VCR] Record SPEEDbutton R[VCR] 100 buttonPress the power [√] button of the remote controlfor about 8 seconds. No buttons of front panel andremote control can be operated now and Lockindicator (Ò Ó) will be displayed on windowdisplay. To release child lock, press the power [√]button of the remote control for about 8 seconds.Child Lock!!!Various methods in connecting with TV AUDIOVIDEOS-VIDEOANT INPUTS-VIDEO INPUTA/V INPUTCOMPONENT INPUTCAUTIONCAUTION: TO REDUCE THE RISK OF ELECTRIC SHOCK.DO NOT REMOVE COVER (OR BACK).NO USER SERVICEABLE PARTS INSIDE.REFER SERVICING TO QUALIFIED SERVICE PRESONNEL.RISK OF ELECTRIC SHOCKDO NOT OPEN2018 16 14 12 10 8 6 4 32119 17 15 13 11 9 7 5 3 1MethodMethod 11Remove circular cable (RF cable) (surplus cable) plugged in ÒANT.INÓ Jack in rear panel of TV. Connect thecable to ÒANT.INÓ jack in rear panel of DVD-Video. Connect TV to DVD-Video. Connect ÒRF OUTÓ jack in DVD-Video with ÒANT.INÓ jack in TV with RF cable. MethodMethod 2 2 : Connecting to a TV that has a audio/video in jacksConnect VIDEO OUT jack in DVD-Video to VIDEO IN jack in TV, and AUDIO OUT jack in DVD-Video to AUDIO INjack in TV with connecting cable of Audio/Video jack. Select VCR mode by pressing TV/INPUT button in TV, youcan view more clear screen and sound than connection with RF cable only. MethodMethod 3 3 : Connecting to a TV that has a component video in jacksUse a component video cable (commercially available) in place of the yellow video cable to enjoy higher qualitypictures. The component video connection only supplies video (picture) in the DVD mode of the DVD-Video.Therefore, in order to use the VCR features or view TV channels at the DVD-Video, you still need to eitherconnect the RF coaxial cable between the ANT-OUT jack of the DVD-Video and the TVÕs Antenna In jack, orconnect the video cable.MethodMethod 4 4 : Connecting to a TV that has a S-Video in jacksUse a S-Video cable (not supplied) to enjoy higher quality pictures.■In the initial SET, exclusive channel for video is set to CH 3. To change this setting, set again in ÒCHANNELSETÓ screen in VCR operation. ■In connecting RF cable to TV, set TV channel to CH3. Connecting with TV¥VHF: 2 ~13 channels of TV , UHF: 14~69 channels of TV, CATV: Broadcasting is transmitted with cable frombroadcasting station by contract with the station and consumers. It does not need any antenna. ¥ In/Out jack in Audio/Video terminal: - In: A jack used to receive signal required in this unit from other units. -Out: A jack used to send signal of this unit to other units. ¥ Connect with Audio/Video terminal, you can enjoy more clear video and audio. (Use OUTPUT button in this remotecontrol to select video mode.) ¥ If screen is broken in connecting COMPONENT Out to Pr, Pb, Y of TV COMPONENT In jack , connect to Cr, Cb, Y. <Outside Antenna or Wall Antenna Outlet><Rear Panel of DVD-VIDEO><Rear Panel of TV>Method 1Method 2Method 3Method 4](https://usermanual.wiki/WINIA-Electronics/7NF0011/User-Guide-313586-Page-8.png)
![13Installation12Connecting with Cable BoxHow to connect INPUT 1 INOUT ANT ININPUT 2OUTOUTINIf your cable system only requiresyou to use a converter box forsome channels(i.e., pay-TV channels), follow thesesteps: Find the primary incoming RFcable. Plug this cable into a splitter(available at your local electronicsstore.) Connect one RF cablebetween one OUT terminal on the■You should install a distributor additionally. How to watch general broadcasting with recording CATV11Set Channel Select switch of Converter Box to CH 3 or 4 as same as video exclusive channel. Press [SET]button in [VCR] operation to set video exclusive channel in ÒCHANNEL SETÓ screen. 22Press channel button of Converter Box to select channel to be recorded. In this case, if you want to watchCATV to be recorded, press [TV/INPUT] button of TV to select ÒOut (VCR)Ó. 33Press [REC] button in DVD-Video. 44To watch general broadcasting, press channel button in TV to select the desired channel.splitter and the IN terminal on the converter box. Connect another RF cable between the other OUT terminal on the splitter and the A-IN terminal on an A/Bswitch (available at your local electronics store.) Connect a third RF cable between the OUT terminal on theconverter box and the B-IN terminal on the A/B switch. Connect a RF cable between the OUT terminal on the A/B switch and the ANT. IN on your DVD-VIDEO.When the A/B switch is in the B position, use the converter box to change channels ; when the A/B switch is inthe A position, use the DVD-VIDEO to change channels.¥ For some types of TV, you should press [TV/INPUT] button in TV remote control and convert from Out 1( VCR 1) orOut 2(VCR 2) mode to Broadcasting Channel mode to change TV channel. ¥ Change channel selection of CATV receiver in recording, contents of recording is changed. <Rear Panel of DVD-VIDEO><Converter Box> <Rear Panel of TV>RF Cable AUDIO/VIDEO CableRF CableRF Cable<A/B Switch><Splitter (Not supported)><Cable Antenna>RF CableConnecting with Other Video EquipmentHow to Connect AUDIOVIDEOANT INPUTA/V OUTPUTCAUTIONCAUTION: TO REDUCE THE RISK OF ELECTRIC SHOCK.DO NOT REMOVE COVER (OR BACK).NO USER SERVICEABLE PARTS INSIDE.REFER SERVICING TO QUALIFIED SERVICE PRESONNEL.RISK OF ELECTRIC SHOCKDO NOT OPEN201816 14 12 10 8 6 4 3211917 15 13 11 9 7 5 3 1How to Copy(Edit) Tape with Other Video Equipment11Connect Audio/Video Out jack in other video equipment to Audio/Video In jack in rear panel (or frontpanel) of DVD-Video with connecting cable. 22Connect ÒANT. INÓ jack in TV to ÒRF.OUTÓ jack in DVD-Video with RF cable. 33To record contents of other video equipment with DVD-Video, insert recording tape attached recording tabin DVD-Video. 11Turn on DVD-Video. 22Press [OUTPUT] button of remote control and adjust DVD-Video to display ÒExternal Input 1Ó or ÒExternalInput 2Ó in TV screen. 33Press [PLAY] button in other video equipment. 44Press [REC] button in DVD-Video if you want to record contents of other video equipment. 55Press [Pause] button in DVD-Video when unnecessary or undesired scene is displayed in recording. (Caution) Recording is released automatically after 5 minutes since pressing [PAUSE] button. Press [REC]button if you want to record again. Playback VCR,Camcorder,SatelliteReceiver .........RF CableAUDIO/VIDEO Cable■You can connect a wide variety of audio/video equipment to your DVD-Video, including : an additional VCR,Laser Disc Player, DVD Player, Camcorder, Satellite Receiver, Video Game. Since all of these devices useessentially the same connections, they will be described together.](https://usermanual.wiki/WINIA-Electronics/7NF0011/User-Guide-313586-Page-9.png)
![Press [DVD] button. If DVD mode is correctly selected, DVD on the operation display window is lighted.Then, remote control button works as DVD function. Press the [DVD] button, thenthe mode of DVD-Video Player becomes to the DVD OPERATION mode.Basic Operation17Clock SetPress [SETUP] button.Press [ENTER] button to select CLOCK SET.Select Time and Date Set with [ENTER] buttonin CLOCK SET screen.Set the current date and time with [ ,, , ] button or [NUMBER] button.For DATE SET, follow the order of Month / Day /Year ; for TIME SET, follow the order of Hour /Minute in CLOCK SET screen. If CLOCK SET is completed, press[SETUP] button.112233To Select VCRPress [VCR] button.If VCR mode is correctly selected, VCR on the operation display window islighted. Then, remote control button works as VCR function. Press the [VCR]button, then it becomes to the VCR OPERATION mode.To Select Watch Modes or External InputPress [OUTPUT] button.Whenever you press [OUTPUT] button, VCR PLAYBACK, BROADCASTING RECEPTION and EXTERNAL INPUT isselected in order. To Select DVDSETUPCLOCK SETTIMER RECORDINGSCHANNEL SETFUNCTIONSLANGUAGE SELECTMove: Select:End: SETUPENTERCLOCK SETTime and Date SetAuto DST : ONTIME AND DATE SETTIME AND DATE SETMove: Select:End: SETUPENTERMove: Input:End: SETUPMove: Input:End: SETUPTime - - : - -(hh:mm)Date - - / - - / 20 - -Time 11 : 01 AMDate 05 / 24 / 2003 (Sat)(mm/dd/yy)16■Set TV to CH 4( or 3).■Press [VCR] button on remote control to change into VCR mode and follow theprocedures below.Output Select](https://usermanual.wiki/WINIA-Electronics/7NF0011/User-Guide-313586-Page-11.png)
![19Basic Operation18DVD Playback Press [√√] button to power on.Press [DVD] button of remote control to change into DVD mode.Press [OPEN/CLOSE] button to open the disc tray. Place a disc firmly on the disc tray, making its label look upward. Insert the disc and press [OPEN/CLOSE] button to close the tray.The disc tray is closed and after checking the discÕs condition, Playback or Stopfunction starts to operate. 112233To playback it, press [PLAY/PAUSE] button. ¥ In the case of DVD,DVD menus and titles are displayed on TV screen. ¥ In the case of S-VCD and VCD2.0the menus are displayed on TV screen and it is converted into PBC(Playback Back Control) mode. ¥ In the case of CD, VCD1.1 and MP3, the disc plays in order of its track numbers. 44To stop it, press [ ] button.For pause, press [PLAY/PAUSE] button in playback mode. If you press this button once more, it starts playback again.55Press [OPEN/CLOSE] button to remove the disc.66Various Playback Methods■If you want fast (or reverse) playback, press [√√√√] or [œœœœ ] button in Playback mode.You can watch fast playing (reverse ) screen.* This reverse playback can be unavailable for certain DVD. Unavailable for MP3. ■If you want slow (or reverse) playback, press [√√√√] or [œœœœ ] button in Pause mode.You can watch the desired screen in the slow forward (reverse) playback. * For the case of Video CD, this reverse slow playback function is unavailable. The markwill appear.■If you want still picture, press [PAUSE] button in Playback mode. You can watch thedesired screen in Pause status.VCR Playback Press [√√] button to power on.Press [VCR] button of remote control to change into VCR mode.Insert the desired tape.If you want to playback it, press [PLAY/PAUSE] button.When the operational status is flickering or poor, adjust it with [TRACKING +/Ð]button. 112233To stop it, press [ ] button. For pause, press [PLAY/PAUSE] button in playback mode. If you press this button once more, it starts playback again. 44Press [EJECT] button in the front part or [OPEN/CLOSE] buttonon remote control to remove the tape. 55Various Playback Methods■If you want fast forward (or reverse) playback, press [√√√√] or [œœœœ ] button inPlayback mode. You can watch fast playing (rewinding) screen.■If you want Still picture, press [PLAY/PAUSE] in Playback mode. You can watchthe desired screen in pause status.■If you want slow-motion playback, press [√√√√] button in Pause mode. You canwatch the desired screen in the slow forward playback. * NOTE: VCR doesnÕt have Slow Reverse Playback function.■If you want to watch a series of screens one by one, (FRAME ADVANCE) press[NEXT ] button in Pause mode. Each time you press this button, the pictureadvances one frame.If the product, whichhas a auto-detector,detects acontaminatedhead(s), it shows theconditions to noticethe contamination onscreen.* In case of the noticeon screen, pleaserub the heads with ahead-cleanerfollowed by ÒHow touse a head-cleanerÓ.To Adjust DisplayThis product includes automatic Tracking function and enables users to enjoy clearpicture without an additional operation. Provided that the following problems can besolved by the manual adjustment, which improves display quality. (During automaticdisplay adjustment, ÒAdjusting DisplayÓ are displayed on TV screen.)- If the screen is poor in Playback mode, - If noises occur in the upper or lower part of screen in slow playback mode, - If paused picture vibrates up and down.Use [TRACKING +/Ð] buttons of remote control to adjust the display suitable forwatching.If you press nobutton in 5 minutesafter you are openedthe tray, the playercloses the trayautomatically toprevent from damage.](https://usermanual.wiki/WINIA-Electronics/7NF0011/User-Guide-313586-Page-12.png)
![21VCR Operation20To Delete Channels Manually ■After memorizing automatically channels, when the same broadcasting is memorized in more than twochannels, or you want to delete badly displayed channels, follow the procedures below.■You must set the viewing mode for your VCR, choosing either CABLE (cable system connection) or ANTENNA(antenna connection). 11Press [SETUP] button and selectÒCHANNEL SETÓ. Select ÒAdd/RemoveChannelsÓ. 22Select the desired channel and delete it.ADD/REMOVE CHANNELSChannel 02is now REMOVED.To Memorize Channels Manually ■When the desired broadcasting finished or you want to add unmemorized channels owing to poor signals tothe memory, follow the procedures below.Press [SETUP] button and selectÒCHANNEL SETÓ.Select ÒAdd/Remove ChannelsÓ. 11Select the desired channel and memorize it. Press [NUMBER] button of remote control toselect the desired channel to memorize. When [>] button is pressed, ÒREMOVEDÓ underchannel number converts into ÒADDEDÓ.22Check the memorized channel.To check the memorized channel, press [CH+/Ð] button on remote control. 33ADD/REMOVE CHANNELSChannel 02is now ADDED.Memorizing TV ChannelsMemorizing TV ChannelsPress [SETUP] button.Press [ ] button to move into CHANNELSET, and then select CHANNEL SET with[ENTER] button. Select ÒAUTO CHANNEL SEARCHÓ. Press [ENTER] button in CHANNEL SET windowto select AUTO CHANNEL SEARCH. Select ÒDetect AutomaticallyÓ. Press [ENTER] button in AUTO CHANNEL SEARCHwindow to detect the channel automatically.Channel number changes successively from 01to 125, while only broadcasting channels arememorized automatically. When memoryprocess is completed, the lowest numberÕs oneof memorized channels is displayed.Please, check the memorized channels.To check the memorized channels, press [CH+/Ð] button on remote control. 112233To Memorize Automatically ChannelsSETUPCLOCK SETTIMER RECORDINGSCHANNEL SETFUNCTIONSLANGUAGE SELECTAUTO CHANNEL SEARCHWhat type of signal are you using?Cable TVAntennaDetect AutomaticallyAUTO CHANNEL SEARCHNow scanning channel 11CHANNEL SETAuto Channel SearchAdd/Remove ChannelsSignal Type: CABLECable Box SetupChannel Change: CH3CHANNEL SETAuto Channel SearchAdd/Remove ChannelsSignal Type: CABLECable Box SetupChannel Change: CH3Selecting cable or antenna viewingTo set the viewing mode:Press [ENTER] to toggle the setting between CABLE andANTENNA in CHANNEL SET screen. When the desired viewing mode is displayed, press[SETUP] twice to exit.CHANNEL SETAuto Channel SearchAdd/Remove ChannelsSignal Type: CABLECable Box SetupChannel Change: CH3To Set Cable BoxTo Set Output Channel Press [SETUP] button and select ÒCHANNELSETÓ . Select ÒChannel ChangeÓ. By pressing [ENTER] button, set the exclusive channelfor video on the desired one of CH3 or CH4.Press [SETUP] button and selectÒCHANNEL SETÓ.Select ÒCable Box SetupÓ. 11Select ÒCable Box ChannelÓ. Press the channel number which matches to theoutput of the Cable Box to connect betweenCable Box and this unit.22CABLE BOX SETUPOn what channel do youwant to receive fromthe cable box?- -CHANNEL SETAuto Channel SearchAdd/Remove ChannelsSignal Type: CABLECable Box SetupChannel Change: CH3CHANNEL SETAuto Channel SearchAdd/Remove ChannelsSignal Type: CABLECable Box SetupChannel Change: CH3Press [NUMBER] button of remote control to select the desired channel to delete. When [<] button is pressed, ÒADDEDÓ under the channel number converts intoÒREMOVEDÓ. 33To check the deleted channel, press [CH+/Ð] button on remote control.](https://usermanual.wiki/WINIA-Electronics/7NF0011/User-Guide-313586-Page-13.png)
![22To Enjoy Another TV Channel or DVD during recording11If you want to watch another TV channel during recording with video, press[TV/VCR] button.It is available of changing into and watching another TV channel by pressing TV[CHANNEL] buttons.22If you want to playback DVD during recording with video, insert a DVD disc.Place the desired DVD disc on DVD tray, press [DVD] button to convert OUTPUT intoDVD mode and press [PLAY] button. Then, you can watch DVD.RecordingPress [√] button to power on.¥ Press [VCR] button of remote control to change into VCR mode. ¥ Power on TV and select Ch 3, or press [INPUT] button of TV set to selectExternal Input mode. Insert a recordable tape.Insert a tape with recording tab. With [CHANNEL], [NUMBER] and [OUTPUT] buttons, select thedesired broadcasting channel or external input unit to record. 112233To Record With VCRSelect the desired speed (SP or SLP) with [SPEED] button. 44Press [REC] button.Then, it starts recording. 55If you want to pause recording, press [PAUSE] button.After pressing [PAUSE] button, if the pause status continues for five minutes,the recording is released automatically.66To exit recording, press [STOP] button. 7723VCR OperationThis product incorporates copyright protection technology that is protected by method claims of certain U.Spatents and other intellectual property rights owned by Macrovision Corporation and other rights owners. Use of this copyright protection technology must be authorized by Macrovision Corporation, and is intendedfor home and other limited viewing uses only unless otherwise authorized by Macrovision Corporation.Reverse engineering or disassembly is prohibited.To Record From DVD To Videotape during DVD playbackOne Touch timer Recording (OTR)■When your urgent business happens suddenly in watching TV or you want to record the current TV programfor the desired time, follow the procedures below. Recording11First, follow the steps 1 to 4 in ÒRecording With VCRÓ. 22Press [REC] button as much as you want. See the ÒRecording Times TableÓ below.Once ......... continuous recording until you press STOP button Twice ........ recording for 30 mins from current time 3 (times) ..... recording for 1 hour 9 .............. recording for 4 hours 10 ............ returning to the status of Once Press33To stop Recording mode, press [STOP] button more than 5 seconds. 11Press [DVD] button of remote control to change into DVD mode.Insert the desired DVD disc. When it is a DVD disc with copy protect function, you canÕt copy it. Insert a recordable tape. 22Play the DVD disc and press [REC] button.DVD plays and VCR starts recording. 33To exit copy, press [ ] button.Also it stops automatically when DVD playback is finished or recorded tape isreached to the end.](https://usermanual.wiki/WINIA-Electronics/7NF0011/User-Guide-313586-Page-14.png)
![25VCR Operation24Set proper ÒRECORDING SPEEDÓ. Select one of SP/SLP with [ ] or [ ] button. For more information on recording speed, seeÒUsing video cassetteÓ in the page 24. 66Press [SETUP] button to complete thesetting. ÒProgram # has been saved. For programrecording, insert a cassette....Ó message isdisplayed. TIMER RECORDINGS indicator, is displayed inthe operation display window. On the reserved time, TIMER RECORDINGS startsto operate.77To Confirm or Cancel TIMER RECORDINGSSelect ÒReview/Cancel ProgramsÓ. 11Confirm reservation-recording details in turnwith [ ] button and then, press [CLEAR] buttonon the position of the details to delete. 22PROGRAM1 (ONE TIME)Channel 104 CableStart Date 06 / 04 Start Time 10 : 10 AMEnd Time 11 : 10 AMTape Speed SPPROGRAM1 (ONE TIME)Channel 104 CableStart Date 06 / 04 Start Time 10 : 10 AMEnd Time 11 : 10 AMTape Speed SPPROGRAM 1 (ONE TIME)Channel 104 CableStart Date 06 / 04 Start Time 10 : 10 AMEnd Time 11 : 10 AMTape Speed SPPROGRAM 1 has been saved.For program recording,insert a cassette.To leave your cable boxon and tuned to presetchannel.TIMER RECORDINGSMake a New ProgramReview/Cancel ProgramsMove: Input:Video: End: SETUPOUTPUTMove: Input:Video: End: SETUPOUTPUTMove: Select:End: SETUPENTERCancel: Move:End: SETUPCLEARIf a recordabletape is notinserted in Stop modeunder Power ON,ÒWaiting for TIMERRECORDINGS. Insert arecordable tapeÓmessage is displayedin the center ofscreen, for allchanges or outputconversions incurredduring TIMERRECORDINGS SET. Timer RecordingsTimer Program SettingPress [PROGRAM] button in VCR mode.You can set the Timer Program. Before timer program setting, clock should be set correctly and video mode should beselected.Timer RecordingsTIMER RECORDINGSPress [SETUP] button and selectÒTIMER RECORDINGSÓ.Move into ÒTIMER RECORDINGSÓ with [ ]and then, select the desired one with [ENTER]button.Select ÒMake a New ProgramÓ. Press [ENTER] button to select ÒMake a newProgramÓ. 1122Select ÒTimer Recording methodÓ. Move into desired recording type with [ ]and then, select the desired one with [ENTER]button. For Timer Recording method details, seeÒVarious TIMER RECÓ in the page 24. 33Select Òa broadcasting to recordÓ.Select the desired broadcasting channelwith [NUMBER] buttons. **If Converter Box and video are connected toVideo/Audio terminal, set ÒEXTERNAL INPUTÓon TIMER REC CH by using ÒOUTPUTÓ button. 44Set Òthe date and time to recordÓ. Select the date, start time and end time torecord with [NUMBER] buttons.55■Power on TV.■Make sure that current time is set correctly. ■Insert a recordable tape with recording tab. ■Prior to the setting, press [VCR] button to change to VCR mode. When moves into ÒCableÓ, select one of ÒCableÓ/ÓAntennaÓ with [ ] or[ ] button. SETUPCLOCK SETTIMER RECORDINGSCHANNEL SETFUNCTIONSLANGUAGE SELECTTIMER RECORDINGSMake a New ProgramReview/Cancel ProgramsPROGRAM1 (ONE TIME)How often do you wantto record program?One TimeDaily (Sun-Sat)Weekdays (Mon-Fri)Weekly (Once a Week)Channel 0 4 CableStart Date - - / - - Start Time - - : - - AMEnd Time - - : - - AMTape Speed SPPROGRAM1 (ONE TIME)Channel 104 CableStart Date - - / - - Start Time - - : - - AMEnd Time - - : - - AMTape Speed SPMove: Select:End: SETUPENTERMove: Select:End: SETUPENTERMove: Select:End: SETUPENTERMove: Input:Video: End: SETUPOUTPUTMove: Input:Video: End: SETUPOUTPUT](https://usermanual.wiki/WINIA-Electronics/7NF0011/User-Guide-313586-Page-15.png)
![27VCR Operation26Watching and Recording Cable TVTo Watch and Record Promptly Cable TVPower on converter and then, set a channel to watch or to record.Power on DVD-video and then, set the channel of DVD-video to theconverter-connected channel (one of CH03/04/EXTERNAL INPUT).Power on TV and then, set the video-connected channel (one ofCH03/04/VCR). Simultaneous Recording and Watching At this time, CH selected by the converter is displayed on TV screen.Simultaneously, press [REC] button of DVD-Video to record the CH selected bythe converter, and press [REC] button more than two times to set on One Touchtimer Recording (OTR).1122TIMER RECORDINGS of Cable TV Reserve VCR. According to TIMER REC procedures, select TIMER RECORDINGS SET window andcomplete the settings. At this time, the video channel should be input in CH3(or CH4, EXTERNAL INPUT) of the converter-connected channel. Enter date andtime of the cable program for TIMER RECORDINGS.Adjust Converter. Set converter to the cable TV channel to record. e.g.) To record CH48, Display CH48 with CONVERTER CHANNEL SELECT button. If there is TIMER REC function of converter, it is available of reservation. Complete Reservation. If you power on converter, video powers on automatically and starts recordingat the reserved time. **Home watching cable TV is unavailable of simultaneous recording function(while recording NBC program, watching CNN program). (Owing to mechanicalfeatures of converter, it is unavailable of simultaneous reception of twochannels.)112233Using video cassettesBefore you play or record on a video cassette tape, be certain to read this information on the proper care anduse of video cassettes.Only use video cassettes that bear the VHS mark: .There are four types of video cassettes: T-60, T-90, T-120, and T-160. The amount you can record on a tape isdependent upon the tape speed at which you record. The table below lists the recording time(hours:minutes) foreach tape type according to recording speed.Tape Type SP Mode (Standard Play) SLP Mode (Extended Play) T-60 1:00 3:00T-90 1:30 4:30T-120 2:00 6:00T-160 2:40 8:00Protecting video cassettes from accidental erasureCassettes have a safety tab to prevent erasure. Break off the safety tab with a screw driver. Ifyou wish to record on a cassette without a safety tab, cover the hole with cellophane tape. Inserting video cassettesFirmly insert the cassette into the cassette compartment with the label up. An inverted cassette cannot beinserted. Removing video cassettesPress [EJECT] on the front panel and the VCR will eject the tape. Pull the cassette out gently.¥ Audio-visual material may include works of copyright which must not be recorded without authorization of thecopyright owner.¥If you insert a video cassette without a safety tab into the unit : After setting the timer recording program, Ò Ówill blink on the display panel in the power off mode and the unit will automatically eject the cassette. In thepower on mode, the unit will playback automatically.¥If you insert a video cassette with a safety tab into the unit : After setting the timer recording program,the unitwill be stand-by mode in power off mode.¥ Do not attempt to pull out the video cassette once the unit begins to load the video cassette. ¥ Do not insert fingers or any foreign object beyond the door flaps of the cassette compartment; this could lead toinjury or equipment damage.¥ Do not attempt to insert a video cassette if the unit in unplugged. Various TIMER RECORDINGSOne Time: It is available of TIMER RECORDINGS at the desired specified time. Daily : Once you set TIMER RECORDINGS of the desired program telecasted at the same time dayafter day, it is available of daily recordings. It is available of TIMER RECORDINGS fromSunday to Saturday. Weekday : It is similar to Daily TIMER RECORDINGS, but this TIMER RECORDINGS is available fromMonday to Friday. Weekly : Once you select one day of the week, it is available of TIMER RECORDINGS in the sameday weekly. Timer Recordings](https://usermanual.wiki/WINIA-Electronics/7NF0011/User-Guide-313586-Page-16.png)
![29VCR Operation28Press [SETUP] button and selectÒFUNCTIONSÓ.Select ÒIndex SearchÓ.11■When you record a programs, the VCR places an index mark at the start of the recording. To search for anindex mark: FUNCTIONSAuto Play: ONAuto TV/VCR: ONIndex SearchGo-To SearchIf you want to search through a certain numberof index marks, press two number buttons toenter the number of marks you want to search.Press CLEAR on the remote to correct an entry.orPress REW to search backward or FF to searchforward. The VCR will locate your index markand begin playback. If you did not enter aspecific index number, the VCR will locate thenext index mark and begin playback. PressSTOP to stop index searching. 22INDEX SEARCHPress REW or FFto begin searchingorEnter a specificindex number- -End: SETUP¥ If tworecordingsoverlap, the indexmark for the secondprogram will beerased. Therefore,when you use theindex feature to findthe second program,the VCR will skipover it. ¥ If you recordmultiple programs inone recordingsession, the VCR willonly find the indexmark that wasplaced on the videocassette tape whenthe recordingsession began.Searching a cassette tape for programs (indexing)Press [SETUP] button and selectÒFUNCTIONSÓ.Select ÒGo-To SearchÓ.11■You can mark a segment of the video cassette with the tape counter that will help you easily locate thesegment later. FUNCTIONSAuto Play: ONAuto TV/VCR: ONIndex SearchGo-To SearchThe tape counter is displayed on the screen.Input the tape counter you want to go and pressREW or FF, the VCR will search for the timecounter you want.22GO-TO SEARCHCurrent tape counter is2 : 17 : 18Press REW or FFto go to - : - - : 00Some indexmarks that maybe missed by the VCR :¥ A mark too close toyour location on thetape.¥ The mark at thebeginning of arecorded segment offive minutes or less.¥ The first index markon the tape whenyou start at thebeginning of thetape.Searching with the tape counter (go- to search)Using advanced featuresUsing advanced featuresPlay the tape automatically■This feature allows the VCR to automatically start playing when you insert a tape with the safety tabremoved.Press [SETUP] button and selectÒFUNCTIONSÓ.Move into ÒFUNCTIONSÓ with [ ] andthen, select the desired one with [ENTER]button.Press [ENTER] to switch between ONand OFF.- Select ON if you want a tape with its safetytab removed to start playing automaticallywhen the tape is inserted.- Select OFF if you do not want a tape withits safety tab removed to start playingautomatically. 1122SETUPCLOCK SETTIMER RECORDINGSCHANNEL SETFUNCTIONSLANGUAGE SELECTFUNCTIONSAuto Play: ONAuto TV/VCR: ONIndex SearchGo-To SearchMove: Select:End: SETUPENTERMove: Select:End: SETUPENTERSwitch the VCR to TV or VCR mode automatically■This feature controls whether the TV/VCR switch changes automatically to the VCR mode when the VCR is turned on.Press [SETUP] button and select ÒFUNCTIONSÓ.Move into ÒFUNCTIONSÓ with [ ] and then, select the desired one with[ENTER] button.Press [ENTER] to switch between ONand OFF.- Select ON if you want the VCR to switch tothe VCR mode when the VCR is turned onor a cassette is inserted. This only applies ifyou connect the ANT.IN and RF OUT jacksof your VCR and TV and watch your VCR onchannel 3 of your TV.- Select OFF if you want the VCR to remainin the TV mode. This is useful if you watchyour VCR on the TVÕs video input and youdonÕt want your antenna/cable signalinterrupted by the VCR. 2211FUNCTIONSAuto Play: ONAuto TV/VCR: ONIndex SearchGo-To SearchMove: Select:End: SETUPENTER11Use PLAY, REW,or FF to reach the point on the tape that you would like to mark as0:00:00.22Press [DISPLAY] button to display the tape counter on the screen.33Press [CLEAR] button to reset the tape counter to 0:00:00.44You can continue to play the tape or perform other functions with the VCR.Marking a tape for zero search](https://usermanual.wiki/WINIA-Electronics/7NF0011/User-Guide-313586-Page-17.png)
![31VCR OperationHi-Fi Stereo Playback (Hi-Fi Model only)Playing a tape in Hi-Fi high-quality¥ ÒHi-FiÓ signal lights up in the top of a screen.¥ Pressing [AUDIO] button changes menus one by one.If there are some noises made in recording, please ÒLinearÓ to reduce them.Forced MonoRecording Stereo or Secondary Audio Programs (SAP)¥ In some cases, while receiving a stereo or SAP (Secondary Audio Programs), receiving condition may be poor,which may cause the stereo or SAP broadcasting to be interfered frequently or its volume to beuncontrollable. Just pressing [AUDIO] in stereo or SAP forces to fix the condition into mono sound.¥ To return it, you have two choices, pressing [AUDIO] button again or picking up the channel again.Hi-Fi LINEAR MIXSTEREO MONO SAP¥ Programs are broadcast in mono or stereo audio, or with a SAP.¥ Pressing [AUDIO] button changes STEREO, MONO, SAP one by one.¥ While recording in stereo signal, it is recorded in Hi-Fi.¥ SAP is available only in its service areas from stations.¥ The following guidelines will help you decide on the best method for recording programs. Choose:- Stereo reception for normal recording and to record broadcast stereo television.- Mono reception if the stereo signal is weak and sound is too Ònoisy.Ó- SAP reception to record a second audio program. An example of a SAP is a program that is broadcast in English, buthas a Spanish SAP.¥You can only record stereo and SAPs if the program is a broadcast in stereo or with a SAP. Consult a television guidefor program broadcast information.30Changing the on-screen menu languagePress [SETUP] button and selectÒLANGUAGE SELECTÓ.11Select the language among English,Spanish or French by pressing [ENTER]button.22■You may select the language in which you would like the VCRÕs menu to be displayed: English, Spanish, orFrench.LANGUAGE SELECTSelect a language.EnglishSpanishFrenchMove: Select:End: SETUPENTERSETUPCLOCK SETTIMER RECORDINGSCHANNEL SETFUNCTIONSLANGUAGE SELECTMove: Select:End: SETUPENTERDisplay (O.S.D)11Press [DISPLAY] button to display the tape counter, clock and status mode on theTV screen.22And, by one more pressing [DISPLAY] button before disappearing the OSD from thescreen, only the tape counter will remain on the screen.Press [SETUP] button and select ÒCLOCK SETÓ.Move into ÒAuto DSTÓ with [ ] .11Press [ENTER] to switch between ONand OFF.- Select ON if you want the VCRÕs clock toautomatically adjust for daylight-savingtime. - Select OFF if you do not want the VCRÕsclock to adjust for daylight-saving time. 22SPRING Forward ; Fall Backward In the Spring, daylight-saving time begins on the first Sunday in April. Because the clockautomatically changes from 2:00 AM to 3:00 AM (forward one hour), remember to include theextra hour for timer recording falling within this time frame. In the Autumn, daylight-saving time ends on the last Sunday in October. The VCR clock automatically changes from 2:00 AM to 1:00 AM (back one hour). Therefore, it canaffect your recording length.Daylight-Saving TimeCLOCK SETTime and Date SetAuto DST : ONMove: Select:End: SETUPENTERUsing advanced features](https://usermanual.wiki/WINIA-Electronics/7NF0011/User-Guide-313586-Page-18.png)
![33DVD Operation■You may repeat a defined period from A to B.At the point where you want to startthe repeat playback, press [A-B]button.The right figure appears and repeat playback startposition (A) is set.11Rep. A-At the point where you want to endthe repeat playback, press [A-B]button again.The repeat playback end position (B) is set and adefined period from A to B is playback repeatedly.22To exit from repeat playback mode,press [A-B] button. It enters into Normal Playback mode.33Rep. A-BRep. OffPlaying a desired scene32While STOP or Playback, press[PROGRAM] button.While the right figure is appearing, please inputdesired Title and Chapter number with NUMBERbuttons. Press [ENTER] to go into next programnumber.* In case of VCD and CD, please input TRACK Number.11After completing setting, press [PLAY] button.Then, titles and chapters (track) are played in the above-programmed order.To exit from Program Play mode, press the [SETUP] button in Program menuscreen.22Playing a desired sceneTo skip scenes in a discTo move to next chapter (or track), press [NEXT √√√√❚] button.The current chapter (or track) moves to the next chapter (or track).Press [❚œœœœ PREV] button. The current scene moves to the previous chapter (or track) or first scene of currentchapter (or track).Press the [TITLE/PBC] or [MENU]button.A list of the titles on the disc is displayed.For the case of VCD disc, menu screen will appearonly when the disc has PBC function and PBC ONis activated.11Press the [ENTER] button or [PLAY]button after pressing the [ ]button to select thedesired title.The selected title nowstarts playing.22■Some movie discs may contain multiple titles. If the disc has a movie title menu recorded on it, the [TITLE]button can be used to select the movie title. Details of operation may differ depending on the disc used.* Selecting a title may not be available on certain DVD discs.Program Menu Select : ENTERTitle Chapter Title Chapter1 - - - - 6 - - - -2 - - - - 7 - - - -3 - - - - 8 - - - -4 - - - - 9 - - - -5 - - - - 10 - - - -Previous NextPlay Exit : SETUPRepeating a defined period¥ Rep. Chapter : Current chapter will be repeatedly playback.¥ Rep. Title : Current title will be repeatedly playback.¥ Rep. One : Current track will be repeatedly playback.¥ Rep. Disc : Current disc will be repeatedly playback.¥ Rep. Random : Tracks in the disc will be playback in random order.¥ Rep. Dir : Current directory in MP3 disc will be repeatedly playback.¥ Rep. Off : Repeat playback will be cancelled.Each time you press [REPEAT] button in playback mode, repeatplayback starts as below.¥ DVD : Rep. Chapter --> Rep. Title --> Rep. Off¥ VCD : Rep. One --> Rep. Disc --> Rep. Off¥ CD : Rep. One --> Rep. Disc --> Rep. Random --> Rep. Off¥ MP3 : Rep. One --> Rep. Dir --> Rep. Disc --> Rep. Random --> Rep. OffA MP3 disc maynot be repeated fromA to B.DVD, VCD, VCD2.0, CD, MP3DVDDVD, VCD, CDDirectly moving to a desired title (DVD)Playing a programmed orderDVD, VCD, CD, MP3DVD, VCD, CDRepeating a defined period from A to B](https://usermanual.wiki/WINIA-Electronics/7NF0011/User-Guide-313586-Page-19.png)
![35DVD Operation34Confirming the current PLAY mode on screenConfirming the current DVD disc modeWhile in playing, press [DISPLAY]button.It shows the disc type, current title, currentchapter and time elapsed.11Press [DISPLAY] button again.It shows the DVD disc logo, subtitle selected,audio selected, dolby digital logo, repeat playback22While in playing, press [DISPLAY] button.It shows the disc logo, current track, subtitle selected,audio selected, repeat playback mode, time elapsed andequalizer bar.* In case of CD, display screen appears automatically in playbackmode. But subtitle and equalizer bar indicator will not appear.To exit from Display mode, press [DISPLAY] buttonagain.1If you want to search with a time,press [SEARCH] button one time. In case of PBC OFF, the screen like the right figureappears. Please enter the new time to besearched using the [NUMBER] button.11In completing entering, please press [ENTER].PLAY starts from the selected position.* In case of MP3, press [SEARCH] button one time. When it shows track , please enter thetrack number.---33Time - - : - -If you want to search with a tracktime, press [SEARCH] button twice. In case of PBC OFF, the screen like the right figureappears. It shows current trackÕs time and thewhole discÕs hours. Please enter the new tracktime to be searched using the [NUMBER] button.* If it is PBC OFF, only the trackÕs time appears.22Track Time - - : - -LR OFFVCD00:451/2TPlaying a desired sceneDisplay screen appears automaticallyin Playback mode.It shows the MP3 File information in disc, thedirectory, MP3 File name and directory list.With [ ] buttons, you can move thecursor to directory or number of MP3 MusicFile. To go to desired directory or to playbackMP3 File, press [ENTER] key.* The information of MP3 File means the disc type,current track, Bit rate, repeat playback mode, timeelapsed and equalizer bar.11At the desired directory position,press [ENTER] button.It shows the track list.2200:45/30:351/517 128KTOFFDIR_1DIR_3DIR_4DIR_5DIR_200:45/30:351/517 128KTOFF...TRACK_3TRACK_4TRACK_1\ - - - - - - - - - - - - - - 1.MP3\ - - - - -TRACK_2mode and current angle.To exit from Display mode, press [DISPLAY] button again.Searching DVD with a title number, a chapter number or a timeIf you want to search with a titlenumber, press [SEARCH] button onetime.It shows total title numbers, chapter numbers andtimes. Please enter the new title number to besearched using the [NUMBER] buttons.11If you want to search with a time,press [SEARCH] button three times.Please enter the new time to be searched usingthe [NUMBER] buttons.33Title - - -If you want to search with a chapternumber, press [SEARCH] buttontwice.Please enter the new chapter number to besearched using the [NUMBER] buttons.2202:00:181/2T1/8CChapter - - -Time - - : - - : - -02:00:181/2T1/8C02:00:181/2T1/8CPBCLR OFFVCD00:451/2TPBCIn completing entering, please press [ENTER] button.PLAY starts from the selected position.* If it is PBC ON, pressing the time number converts PBC to OFF mode automatically.LR OFFVCD00:451/2T02:00:181/2T1/8CPBCDVDVCD, CDSearching VCD and CD with a track number or timeDVDVCD, CDMP3Confirming the current VCD, CD disc modeConfirming the current MP3 disc mode](https://usermanual.wiki/WINIA-Electronics/7NF0011/User-Guide-313586-Page-20.png)
![37DVD Operation36ZOOM, Multi Angle and Digest playUsing a zoom function■The user can enlarge the current screen about 1.3 or 2 times.Keep pressing [ZOOM] button till thepreferred zoom appears.Every time the user presses [ZOOM] button, a zoommagnification changes 1.3 times (X1.3) ➝2 times (X2) ➝OFF ➝1.3 times (X1.3) ➝... one by one.A base point to be enlarged is centre and the point can bechanged with the operation of [ ] button.■If a disc includes multi angle information, the user can watch a screen in multi angles. The function is limitedto a DVD disc supporting multi angle information.Keep pressing [ANGLE] button till thepreferred angle appears.Every time the user presses [ANGLE] button, an angledegrees changes in a consecutive order.For the case ofVCD, only 2 timesZoom is available.1.32Selecting an audio languageAUDIO language, SUBTITLE language and 3D AUDIO■The user may select an audio language and subtitle language if a disc includes Multi-language.Keep pressing [AUDIO] button till the userÕspreferred language appears.If DVD disc includes audio information, every time theuser presses [AUDIO] button, English (ENG), French (FRE),Spanish (SPA) and others appear one by one.Keep pressing [SUBTITLE] button till theuserÕs preferred language appears.If a DVD disc includes subtitle information, every timethe user presses [SUBTITLE] button, English (ENG),French (FRE), Spanish (SPA) and others appear one byone.A certain discmay not support audioselect or subtitleselect.Please press [3D] button.If the right figure appears, move the cursor with[ ] buttons.The user may select a ÒSound fieldsÓ among Standard,Theater, Amphitheater, Live, Concert, Church, Wide, Hallor Stadium.Also, select a ÒGraphics equalizerÓ among Standard,Classic, Rock, Jazz, Pop or User.* When setting graphics equalizer, sound fields changes toÒStandardÓ automatically.■Sound Fields and Graphics Equalizer can be set.+8dB- 8dBSound fields StandardGraphics equalizer StandardDIENG 1/3 OFFENG/3 1/1DIENG 1/3 OFFENG/3 1/1DIENG 1/3 OFFENG/3 1/2Only activateswith VCD 1.0 or VCD2.0 discs.Press the [DIGEST] button in playback orstop mode.All the contents of VCD are divided to 9 parts and thefirst scene of each parts are shown on the screen. Press the [ENTER] button after moving to the desiredscene with [ ] button.The selected scene now starts playing.DVDDVDDVD, VCD, CDSelecting 3D AudioSelecting a subtitle languageDVD, VCDDVDDVD, VCD2.0Different AngleDigest play](https://usermanual.wiki/WINIA-Electronics/7NF0011/User-Guide-313586-Page-21.png)
![39DVD Operation Setup38LANGUAGE SetupWhile STOP or RESUME STOP, press[SETUP] button.11Selecting a OSD language.Please select a language to be displayed on DVDscreen. 22Selecting Audio language.Set it as the preferred audio language. In case the audio language is set andrecorded in the DISC, it is automatically played in the set language in everyplaying. For example, English is set and recorded as audio language in the DISC,it is played in English. 33Selecting Subtitle language.Please set it as the preferred language. In case the subtitle language is set andrecorded in the DISC, it is automatically played in the set language in everyplaying. For example, English is set and recorded as subtitle language in theDISC, it is played in English.44Selecting DISC MENU language.Please set it as the preferred DISC MENU language. In case the DISC MENUlanguage is set and recorded in the DISC, it is automatically played in the setlanguage in every playing. For example, English is set and recorded as a DISCMENU language in the DISC, it is played in English.55■A user can set OSD language, Audio, Subtitle and Disc Menu.In case a discdoes not includesetting languagesinformation, theselected languagedoes not appear.ÒOSDÓ meansÒOn Screen DisplayÓ.Video Audio OthersOSD Language EnglishAudio EnglishSubtitle EnglishDisc Menu EnglishLanguageTo display menus in a disc■If a disc includes menus, the user may use them.Press [TITLE/PBC] or [MENU] button. ¥ It shows menus in the disc. Also they are different according to discs.(ÒReturnÓ will appear on the OSD with VCD2.0.)¥ If it is a VCD2.0, select PBC ON mode by pressing [TITLE/PBC] button.* CD and VCD1.1 do not support the function.11Move a cursor to a relative item with arrow buttons of [ ]button and select one with [ENTER] button or [PLAY] button.22Displaying menus in a discPlaying a disc containing MP3 files■Play and PausePress the [PLAY/PAUSE] button to switch between play and pause.■Search for a trackThe [SEARCH] button works on MP3 discs as well as CD audio.■To stop playbackPress the [STOP ] button.■To skip to the next or previous file¥ Press the [NEXT √√√√❚] button of the remote control briefly while playing, to skipahead to the beginning of the next file. Each time you press the buttonconsecutively, the beginning of the next file is located and played back.¥ Press the [❚œœœœPREV] button of the remote control briefly while playing, to skipback to the beginning of the previous file. Each time you press the buttonconsecutively, the beginning of the previous file is located and played back.The ability of this unit to read MP3 discs is dependent on the followings:¥ The Bit Rate must be within 64-256 kbps.¥ The maximum number of directories should not exceed 32.¥ The maximum depth level of directories should not exceed 4.¥ File names should be named using 8 or fewer letters and/or numbers, and must incorporatethe ÒMP3Ó file extension. EXAMPLE: ********. MP3 where each *is a letter or number.¥ Use only letters and/ or numbers in file names. If you use special characters, the file and/ orfolder names may not be displayed correctly on the on-screen display.¥ The CD-R or CD-RW discs should be written using the Ôdisc at onceÕ method.¥ The disc which is made with ISO 9660 format can be playback.About MP3 discsThis unit will play MP3 files recorded on CD-R and CD-RW discs.11Turn on your television and select the channel assigned to this DVD player.22Press the DVD open [OPEN/CLOSE] button, the disc tray opens.33Put a disc containing MP3 files on the disc tray with the label side up. 44Press the DVD open [OPEN/CLOSE] button, the disc tray closes.55The unit will take a short while to load the disc and display the directory structure.66Press the [ ] navigation buttons of the remote control to select thefolder, then press the [ENTER] button to confirm.77Press the [ ] navigation buttons of the remote control to select the fileyou want to listen to, then press the [ENTER] button and this selected file islocated and played back.88After starting playback, the track list is on-screen. You can move the highlight ontothe folder name above the track list and change folder with the [PREV] button.Press the [SEARCH] button twice in stop mode to get back to folder tree view.MP3 DVD, VCD2.0](https://usermanual.wiki/WINIA-Electronics/7NF0011/User-Guide-313586-Page-22.png)
![41SetupOthers SetupSelect character display window.Select "On" to make OSD(On Screen Display)language displayed in screen.22Select screensaver.If bright scenes continue to be displayed in screen, TV can be damaged. Set thescreensaver to "On", the screensaver functions automatically and DVD logo movescontinuously if the resume stop, stop, open status is maintained for about 5 minutes.33Select defaults.If you select defaults, every function set returns to FACTORY Defaults exceptPARENTAL.44Entering a password.Input password display appears.Enter a userÕs password by pressing 4 [Digit]buttons.55Select Parental.Press [ENTER] button to set theselected item .It consists of 8 levels of parental control, violence,sexual scene, strong sexual scene and others toprotect children from watching those scenes.66While STOP or RESUME STOP, press[SETUP] button.11ÒParental LockÓactivates only ifyou set a passwordand the unit goesinto Lock status.When the disc has noparental functioneven if the disc foradult only, ParentalLock doesnÕt activate.OSD OnScreensaver OnDefaults ResetParental OffChange Password◆◆◆◆Language VideoVideo Audio OthersOSD OnScreensaver OnDefaults ResetInput Password ◆◆◆◆Change Password◆◆◆◆LanguageVideo Audio OthersOSD OnScreensaver OnDefaults ResetParental OFFChange Password◆◆◆◆LanguageAudio OthersChanging a password.For the change of a userÕs password, please moveto ÒChange PasswordÓ and enter new password.77The initialpassword is3308. In case youforget newly-inputpassword, you can use3308 as a password. Video Audio OthersOSD OnScreensaver OnDefaults ResetParental8 AdultChange Password ◆◆◆◆Language40AUDIO SetupSelect a digital output.You can set following 2 values of digital output;¥Bitstream: The same signal as audio signalrecorded in disc goes to digital audiooutput terminal.¥LPCM: Decoded audio signal goes to digitaloutput terminal.22■A user may select audio menu according to a userÕs speaker set.While STOP or Resume STOP, press[SETUP] button.11OthersDigital Output BitstreamDynamic OffLanguage Video AudioVIDEO SetupWhile STOP or RESUME STOP, press[SETUP] button.Select TV Aspect.If a user selects Ò4:3 PSÓ, the user can watch2211■A user can set up a connected TV condition and screen. Select Video Out.A user may select a Video Out between Component and S-Video.33Select a Dynamic RangeYou can set following 2 values of Dynamic Range;¥Off : You can hear the same sound as recorded in disc.¥Full : You can hear loud sound softer and soft sound louder.33Audio OthersTV Aspect 4:3 LBVideo Out S-VideoLanguage Videoonly a center of the original scene of Ò16:9Ó.If a user selects Ò4:3 LBÓ, the user can watch the original scene of Ò16:9Ó, butthe top and bottom of the screen look black color.If a disc size is originally recorded in 4:3, a user cannot watch it in a widescreen though a user sets a size as Ò16:9 WideÓ.✔Off1 Kids2 G3 PG4 PG-135 PG-R](https://usermanual.wiki/WINIA-Electronics/7NF0011/User-Guide-313586-Page-23.png)
![44 45The othersHow to use a head cleaner¥ In case of a old or contaminated videotape, screen may not be clean from the contamination of VCR heads.Please remove contaminants using a head-cleaner like below order.1 Insert a head-cleaner into VCR.2 Press [PLAY] for 5 seconds, and then press [FF] for about 10 seconds.3 Eject a head-cleaner from VCR.¥ If the screen is not clean yet, please repeat the above 2 or 3 times more.¥ A head-cleaner is not for sale. Please ask it for the nearest agent.¥ In case a user ask the removal of contaminants of us, the user should pay extra charges.PLAY (5 secs)FF (10 secs)Basic information about VCR and VideotapeWhat is dew condensation symptom?¥ If a VCR is moved from a cool place to a warm and damp place or a place facing a direct cool wind from air-conditioner...and others, temperature varies sharply, which makes dew on head drums of VCR.If dew condensation occurs, 1 First, turn it on for one or two hours before using it.2 Do not use it because it may develop troubles of a VCR or videotape.Terms related with VCRAFT Automatic fine tuning, a circuit that automatically adjusts TV reception to optimum condition.CABLE Cable television.Index Search A feature of this VCR that automatically records an index each time recording begins. It helps youlocate a particular segment of the tape quickly and easily.SLP Super Long Play, an intermediate tape recording speed that combines most of the picture/audioquality obtainable at the standard recording speed with some of the tape economy of ExtendedPlay.OSD On-screen display of information pertinent to the features of the VCR.OTR One-touch recording, a feature that allows you to record the program youÕre watching by pressingthe REC key. Each press of the key increases the recording time by 30 minutes, up to four hours.RF Radio frequency, the composite audio/video signal supplied to a TV receiver (or other videocomponent) by an antenna or cable system.Safety tab The plastic tab at the back of a video tape cassette which, when removed, prevents accidentalerasure of a recording.SP Standard play, the recording speed to use when the best picture quality is of prime importance(and when total recording time is not).Before doubting about troubles (DVD)¥ The player does not play.¥ No sound comes through.¥ A disc is playing but screen does notappear or poor screen appears.¥ Sound is irregular¥ Remote control does not work.¥ Dolby Digital sound does not work¥ [AUDIO] or [SUBTITLE] button doesnot work.¥ [ANGLE] button does not work while aDVD is playing.¥ ÒMENUÓ does not appear while a DVDis playing.¥ Screen shakes or appears only in blackand white. (or Subtitle shakes)¥ The file name of MP3 (CD-R) appearswith strange letters.¥ Any MP3 (CD-R) file isnÕt displayed.ChecksSymptom➤If a DVD is from overseas, it may not be played. Please check a DVDÕs regioncode whether it has the relative region code 1 or All.➤Please check whether a DVD is inserted in a right direction.➤If it is a CD-ROM for PC or DVD-ROM, it does not work.➤Play mode may be ÒSLOWÓ or ÒPAUSEÓ(In abnormal speed play, nosound comes through)➤Did you connect the parts in right way?➤Please check the operative condition of TV or amplifier.➤From SETUP, please check ÒAUDIOÓ items.➤Did you turn on your TV sets?➤Did you connect the parts in right way?➤The play may be in ÒPAUSEÓ.➤A disc may have some contaminants or be damaged.➤A disc may be bad one.➤Please check the connection with Dolby Digital amplifier.➤Please check the plugs are connected with one another tightly.➤Some contaminants may be remained in connection terminal.➤Please check the degree of remote control, distance or any interruption.➤Battery may be weak or exhausted.➤When you operate DVD, use it by pressing [DVD] button.➤Unplug the power plug and plug it again.➤Dolby Digital sound can be worked in the Dolby Digital amplifier only.➤Please check ÒDolby Digital Ó mark on your DVD.➤In case of playing it through digital output, while pressing [STOP],please check whether ÒDIGITAL OUTPUTÓ is ÒBITSTREAMÓ by pressing[SETUP].➤Please check the connection is correct.➤If a DVD does not include language information, it does not supportthe function.➤ÒANGLEÓ is supported only in a DVD contains multi angle scenes. Also auser can confirm the support with the ÒANGLEÓ mark on screen.➤Please check the degree of remote control, distance or anyinterruption.➤Please check a battery in remote control whether it is exhausted ornot.➤A DVD may not contain menu information.➤A disc may have some contaminants or be damaged.➤If you playback a DVD disc of PAL system whose region code is ÒALLÓ,the playback screen may shake.➤The file name of MP3 recognize only the Alphabet (A~Z, a~z), numbers(0~9) and a special symbol on keyboard (~, !, @, #, $ ....) and 10letters can be displayed in maximum.➤The letters except above case will be displayed like Ò----Ó.➤If the surface of disk is injured, the file display and playback can beimpossible.](https://usermanual.wiki/WINIA-Electronics/7NF0011/User-Guide-313586-Page-25.png)
![46 47The othersBefore doubting about troubles (VCR)¥ Recording a TV program is impossible.¥ Once pressing [REC], a videotape isejected automatically.¥ Timer recording of Cable TV does notwork.¥ In spite of pressing [CHANNEL], achannel can not be set.¥ While duplicating, screen is not cleanand distorted.¥ remote control does not work.¥ Buttons on remote control do notwork.¥ VISS index search does not work.¥ Cable broadcasting can not beselected.ChecksSymptom➤Please check whether a channel is fixed on video. If not, you have toturn it into ÒTVÓ by pressing [OUTPUT] button.➤Please check whether the timer recording info is right.➤Are RF cables inputted antenna connection terminal correctly?➤Does a CH number selected in display section appear?➤Please check a tab on a tape whether it is broken or not. (If it wasbroken, please scotch-tape it)➤Check whether the screen is displayed in VCR Only Channel. Press[OUTPUT] button in this remote controller to adjust in "GeneralBroadcast" condition.➤Is the rounded line (RF cable) connected in "ANT.IN" terminal?➤Please check whether the clock is right.➤Does the display on your video show Ò Ó (Ready to timer recording)?Please make it out.➤Please check whether the timer recording info is right.➤Please check a tab on a tape whether it is broke or not. (If it wasbroken, please scotch-tape it)➤Was a cable data output code connected correctly?➤Were a converter manufacturer setup and output channel right?➤Did you enter a password? (Please cancel it.)➤Did you turn off your player? (Please turn it on.)➤You may not memorize channels.➤Please check your channel setting or press a number button.➤Some tapes or discs distributed in the market for lending is set toprevent copy in manufacturing. These tapes cannot be duplicated ina good condition.➤Battery may be weak or exhausted.➤A receiver of remote control may be different with a sender.➤In case a videotape is positioned in the beginning, ÒVISS REWÓ andÒREWÓ do not work.➤In case a videotape is positioned in the end, ÒFFÓ, ÒVISS FFÓ, ÒPLAYÓand ÒRECÓ do not work.➤Please check whether another button is pressed.➤Are you playing a tape that is not recorded in this recorder? (Try torecord it with the recorder.)➤You may start recording it in ÒREC-PAUSEÓ. Please start recording itfrom stop condition.➤Please select ÒCABLEÓ not ÒNETWORKÓ from the ÒCHANNEL SETTINGÓ.Before doubting about troubles (VCR)¥ ÒPower OnÓ does not work.¥ It does not work even in ÒPower OnÓ.¥ A videotape is not inputted in.¥ On inputting a videotape, the tape isre-ejected.¥ A videotape is not ejected.¥ A channel on video and a play screendoes not appear.¥ Noise (screen noise) appears onscreen.¥ Noise appears on screen afterrecording.¥ While in playing, noise appears.¥ Sound and screen are irregular.¥ Sound comes out but screen does notappear.¥ Screen is irregular and stripes appears.¥ "Screen Error" message is displayed ina screen.¥ While recording and playing, the topof screen extremely waves.¥ A screen is not clear.¥ A screen at pause is trembling or slowscreen is not clear.ChecksSymptom➤Please check whether a power plug is inserted in an electric outlet.➤Please check whether a videotape is inserted in.➤Try to insert a plug again.➤Please check whether a power plug is inserted in an electric outlet.➤Please check whether a videotape is in.➤Please check whether a videotape is inserted in a right direction (aside of transparent window should be on the upside)➤Have you inputted a videotape again just after the tape was ejected?Please try it again after fully ejecting it.➤When a videotape forces to be ejected, the tape may not be inputted.In the case, please pull out an outlet, and then push the tapesmoothly.➤ThatÕs why a safe mode to protect a videotape is operatedautomatically. Please pull out the tape and input it again.➤In case the product is used for a long time, a videotape may not be ejectedfor a film inside may be stretched. In the case, please pull out a power plugfor about 10mins and then press [EJECT] button.➤Please check your antennaÕs connection.➤TV channel should be fixed on video channel (3 or 4).➤Please check your antennaÕs signal whether it may be weak. In case ofits weakness, please use a frequency amplifier connected with thedevice.➤Press [TV/VCR] and then let ÒVCRÓ is displayed on the display panel.➤While in no use of VCR, was it turned on?➤While in recording a program, do you watch another channel?➤Select TV by pressing [TV/VCR] button on remote control.➤While in playing a videotape, there may happen some noise or blot inthe part of the beginning of a videotape or resuming ÒPAUSEÓ, whichare not breakdown.➤Please press [TRACKING] for better screen. Videotape may be poor.Try to change it to another one.➤Please use a head-cleaner to clean VCR heads. VCR heads may becontaminated.➤Since VCR Play signals are not stable like a TV signals, screen may beunstable or curved while in playing. To fix the problem, pleasehorizontal adjustment.➤In case videotape is the one recorded by other products or old one,stripe may appear on the screen.➤Try to adjust the screen by [TRACKING+/Ð] button.➤Try to use a head-cleaner.➤Try to use a head-cleaner.➤Try to adjust the screen by [TRACKING+/Ð] button.](https://usermanual.wiki/WINIA-Electronics/7NF0011/User-Guide-313586-Page-26.png)