WINSONIC ELECTRIC 9308 Alarm Clock Radio User Manual 9308 Manual
Winsonic Electric Limited Alarm Clock Radio 9308 Manual
User manual
Alarm Clock Radio
MODEL 9308
SAFETY INSTRUCTIONS
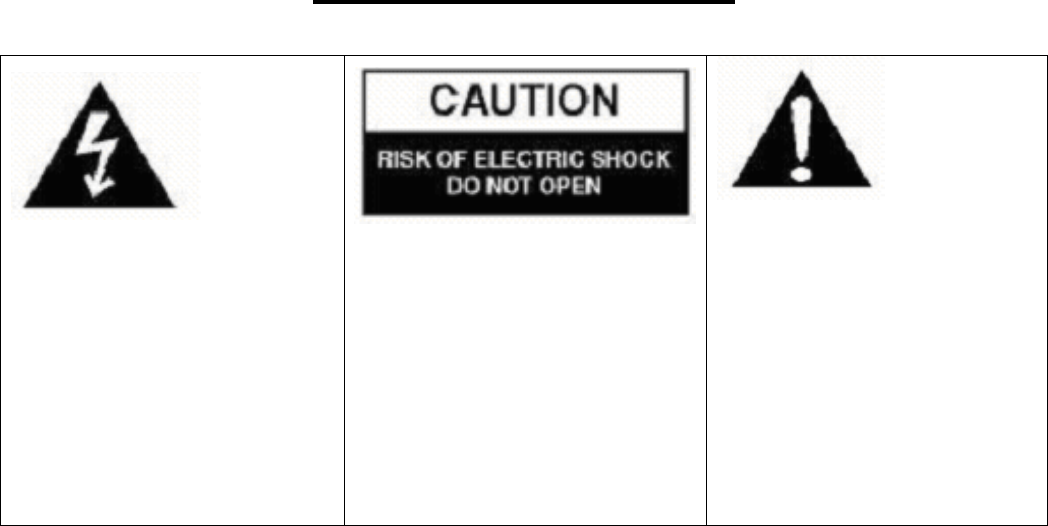
The exclamation point within an
equilateral triangle is intended to alert
the user of the presence of important
operating and maintenance
(servicing) instructions in the
literature accompanying the
appliance.
The Lightning flash with arrowhead
symbol, with an equilateral triangle is
intended to alert the user of the
presence of uninsulated dangerous
voltage within the product’s enclosure
that may be of sufficient magnitude to
constitute a risk of electric shock to
persons.
CAUTION: TO REDUCE THE RISK
OF ELECTRIC SHOCK, DO NOT
REMOVE COVER (OR BACK). NO
USER SERVICEABLE PARTS
INSIDE. REFER SERVICING TO
QUALIFIED SERVICE PERSONNEL.
CAUTION : TO PREVENT ELECTRIC SHOCK,
MATCH WIDE BLADE OF PLUG
TO WIDE SLOT, FULLY INSERT.
WARNING : TO REDUCE THE RISK OF FIRE
OR ELECTRIC SHOCK, DO NOT
EXPOSE THE APPLIANCE TO RAIN
OR MOISTURE.
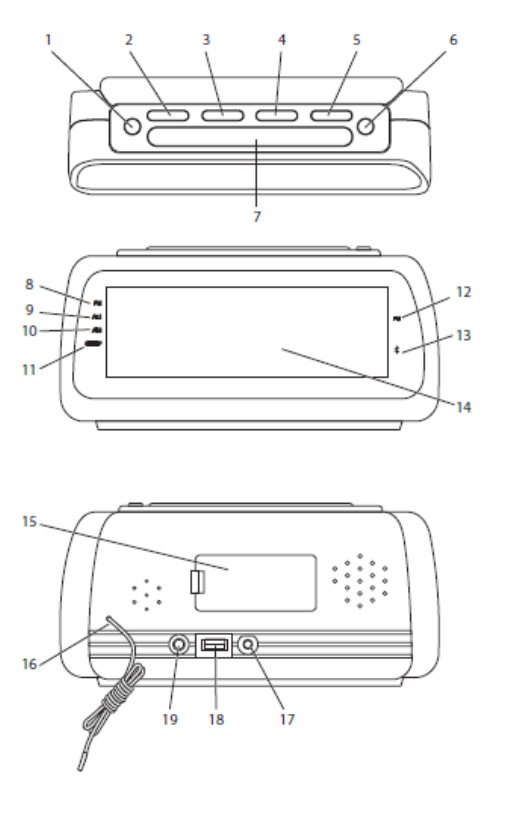
Location of control
1. Preset/Time Set & MEM ►│button
2. Vol- / AL1 Set button
3. Vol+/ AL2 Set button
4. │◄ ◄ / H button
5. ►►│/ M button
6. Standby / function
7. Snooze/Sleep/dimmer
8. PM LED indicator
9. AL1 LED indicator
10. AL2 LED indicator
11. SLEEP LED indicator
12. FM LED indicator
13. Bluetooth indicator
14. LED Display
15. Back up Batteries compartment
16. Antenna
17. DC Jack
18. USB socket(charger) button
19. AUX Jack

CLOCK SETTING
1. In STANDBY OFF mode, press and hold the Time Set Button, the LED will blink on
the display
2. Press │◄ ◄ / H Button to set the desired Hour.
3. Press ►►│/ M button to set the desired Minute.
4. After the desired time has set, press the Time Set button to confirm.
ALARM 1 SETTING :
a. Keep the unit in standby off mode.
b. Press and hold the button, indicator and LED will blink on the
display,
c. Press │◄ ◄ / H Button to set the desired alarm hour.
d. Press ►►│/ M button to set the desired alarm minute.
e. Press button again, then press FUNC button to choose the alarm
sound(buzzer/FM/AM),
f. Then press button to confirm, the indicator will light up
ALARM 2 SETTING
Same as Alarm 1 setting. But, press the button instead of button.
SNOOZE FUNCTION
If you want to snooze a few more minutes, pressing the SNOOZE button will deactivate the alarm sound
for 9 minutes.
SHUT OFF ALARM
1. When alarm goes off, press the STANDBY button to turn off alarm. The alarm will
reset for next day.
2. To turn off the alarm completely (not reset for net day). Press the or
button repeatedly until / indicator was turn off.
DimmerFunction
In normal status (not in alarm status), press the SNOOZE/DIMMER Button repeatedly to set
the brightness level of the LED segments as desired

RADIO OPERATION
1. Press STANDBY button to turn on the unit.
2. Press the FUNC button repeatedly until AM or FM frequency will appear on the display.
3. To searching the previous/next available radio station, press and hold the │◄ ◄ / H or
►►│/ M button until the displayed frequency starts running then release the button.
(When a radio station is found, the frequency on display will stop running and start
playback automatically). To stop during searching, press the │◄ ◄ / H or ►►│/ M
button again. (If reception is no good, press the │◄ ◄ / H or ►►│/ M button repeatedly
to fine tune).
4. Adjust the volume to the desired level by pressing VOL+ or VOL- button
5. When finished listening, press the STANDBY button to turn the unit to power off
(standby) mode.
RADIO STATIONS PRESETTING & RECALL MEMORY
1. Receive the desired radio station as the previously procedure.
2. Press & hold the button, “P XX” will blink on the display. Press the │◄
◄ / H or ►►│/ M button repeatedly to select the program number (P01-P20) you
want stored to. Then press the button again to store it.
3. Repeat the same procedures until all the desired radio stations were stored into
the program list.
4. After settings, press the button to select 1 to 20 stored radio station as
desired.
NOTE: As stored frequencies can only be stored for long time with the power supplying.
The station you stored will be lost and cannot be recalled in case that you cut off the
power.
CONNECT THE BLUETOOTH
1. Press STANDBY button to turn on the unit.
2. Press the FUNC button repeatedly until “bL” will appear on the display, and the LED
indicator will blink.
3. Turn on the Bluetooth feature on your mobile compatible device. Search for R-1427. Pair
and connect to R-1427. If pairing is successful, the LED indicator will light up
4. you can now start playing your music
5. Press the │◄ ◄ / H or ►►│/ M button to choose the previous or next song
6. When finished listening, press the STANDBY button to turn the unit to power off
(standby) mode.
USB CHARGER SOCKET
Allows you to charge your Smartphone or MP3 player battery.

AUX INPUT JACK
1. In radio mode, connect the AUX connect wire from the out jack of your Personal Player
such as portable MP3 player to the AUX input jack.
2. Play start from your Personal Player and adjust the volume.
FCC Statement
This equipment has been tested and found to comply with the limits for a Class B digital device, pursuant
to Part 15 of the FCC Rules. These limits are designed to provide reasonable protection against harmful
interference in a residential installation. This equipment generates uses and can radiate radio frequency
energy and, if not installed and used in accordance with the instructions, may cause harmful interference
to radio communications. However, there is no guarantee that interference will not occur in a particular
installation. If this equipment does cause harmful interference to radio or television reception, which can
be determined by turning the equipment off and on, the user is encouraged to try to correct the
interference by one or more of the following measures:
-- Reorient or relocate the receiving antenna.
-- Increase the separation between the equipment and receiver.
-- Connect the equipment into an outlet on a circuit different from that to which the receiver is connected.
-- Consult the dealer or an experienced radio/TV technician for help.
Changes or modifications not expressly approved by the party responsible for compliance could void the
user's authority to operate the equipment.
This device complies with part 15 of the FCC Rules. Operation is subject to the following two conditions:
(1) This device may not cause harmful interference, and (2) this device must accept any interference
received, including interference that may cause undesired operation.
The antenna(s) used for this transmitter must be installed to provide a separation distance of at least 20
cm from all persons and must not be co-located or operating in conjunction with any other antenna or
transmitter.