WOOSIM SYSTEMS WSP-R241 Mobile Printer User Manual
Woosim System Inc. Mobile Printer
UserManual.wiki
>
WOOSIM SYSTEMS
>
WSP R241 User Manual
User Manual
Navigation menu
Upload a User Manual
Namespaces
Wiki Guide
HTML
PDF
Info
Views
User Manual
Discussion / Help
Navigation
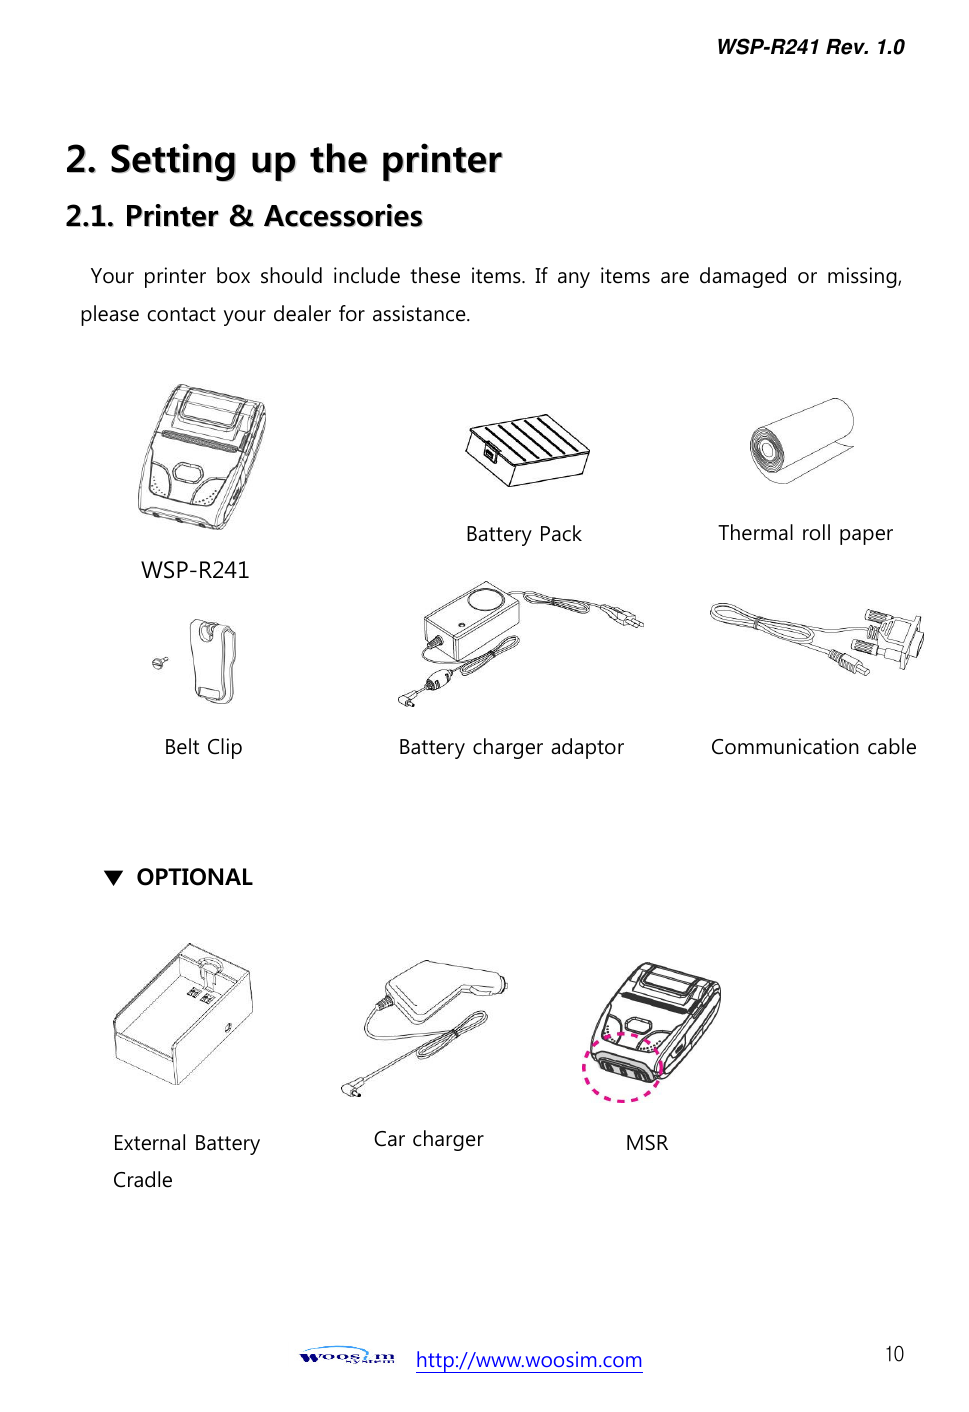
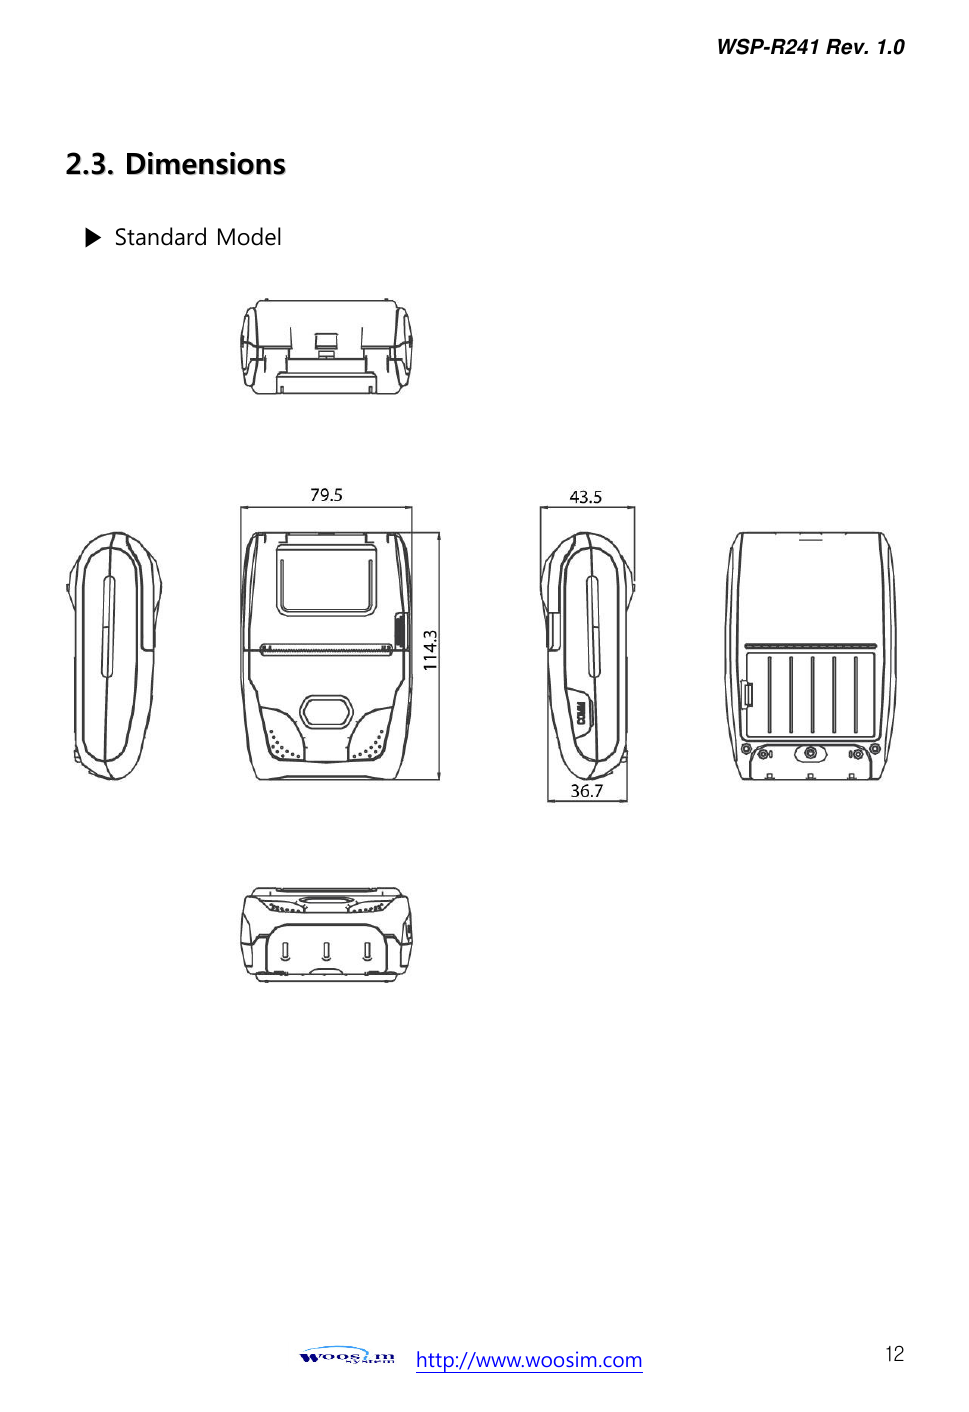
![WSP-R241 Rev. 1.0 http://www.woosim.com 3 Introduction The WSP-R241 is suitable designed for use with a growing variety of mobile devices. Bluetooth/Serial interfaces make the WSP-R241 the perfect comrade for applications such as point of transaction warehousing, distribution, point of sales, hospitality, gaming and healthcare. The general features of WSP-R241 printer are as follows: Pocket size (79.5 X 114.3 X 43.5mm) Light weight (201g) for true mobility. Very silent printing thru direct thermal printing method. High speed(100mm/sec, MAX) High resolution(203dpi : 8dots/mm) USB, Bluetooth Ver 3.0 + EDR Intuitive LED’s indicate Power(on/off),Error, Bluetooth status, Battery status Support Magnetic Stripe Reader [option]. Support text and graphic printing. Easier paper loading by CLAMSHELL design. One touch paper cover Printer door open & Paper-out sensor Easier maintenance with self-diagnostics. In field programming – Update Firmware, Download Fonts and Logos Microsoft Windows XP/VISTA/7-32bit/7-64bit/CE/Linux/Android compatible. Free fall: 1.5M drop resistance Flow control : Software (XON/XOFF) ※ Hardware flow control not supported in printer.](https://usermanual.wiki/WOOSIM-SYSTEMS/WSP-R241/User-Guide-2515822-Page-3.png)
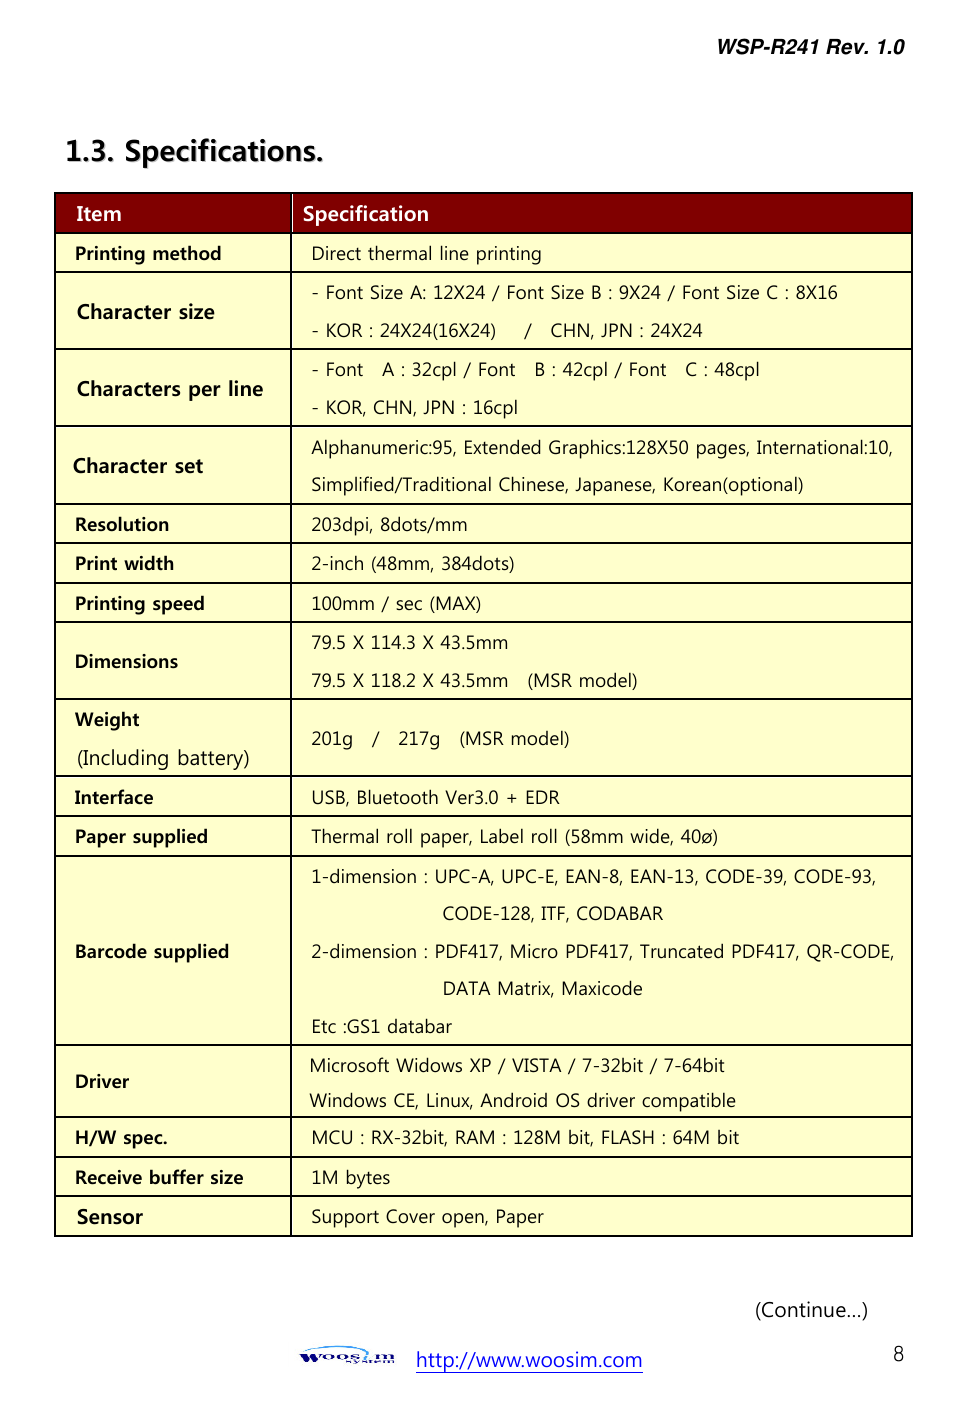
![WSP-R241 Rev. 1.0 http://www.woosim.com 9 Item Specification MSR [option] Triple tracks (1&2&3 Tracks Reading) *Supports 3DES & AES encryption Battery Rechargeable 7.4V DC , 1100mAh (Li-ion) Battery duration 1 hour continuous printing Battery Charger Input (100~240V AC 50/60Hz) Output(8.4VDC/0.8A), 4hours full charge time Environment Conditions Temperature -10°C ~ 50°C (operating) -10°C ~ 70°C (storage) Humidity 30% - 80% (operating) 10% - 90% (storage) Limited Warranty of Life Head 100Km < Table 1 >](https://usermanual.wiki/WOOSIM-SYSTEMS/WSP-R241/User-Guide-2515822-Page-9.png)
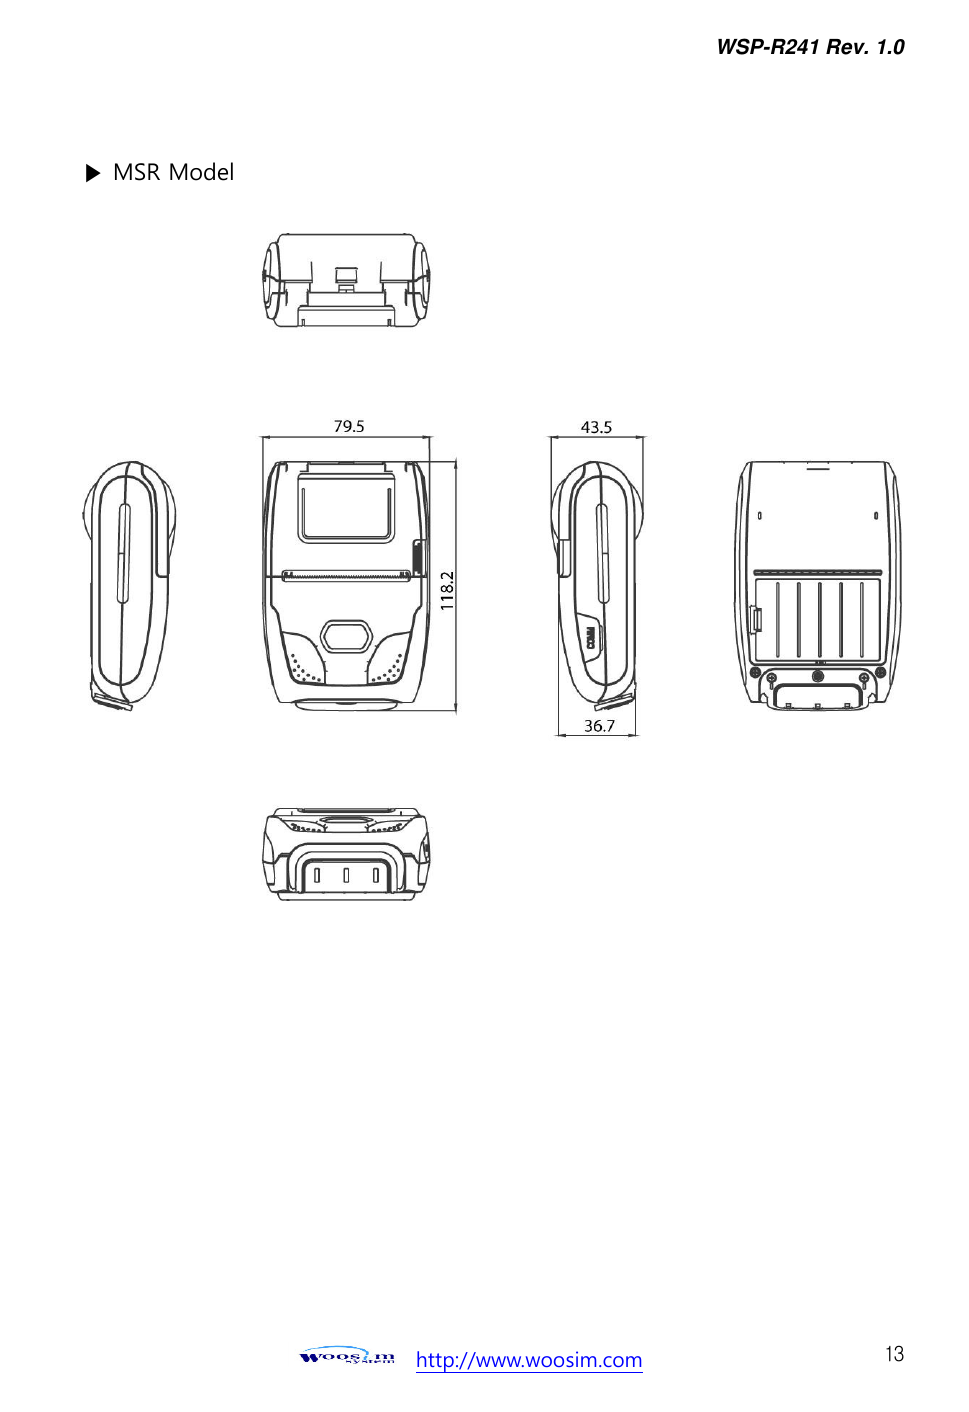
![WSP-R241 Rev. 1.0 http://www.woosim.com 11 22..22.. PPrriinntteerr FFeeaattuurreess ▶ Part Name [MSR Model]](https://usermanual.wiki/WOOSIM-SYSTEMS/WSP-R241/User-Guide-2515822-Page-11.png)
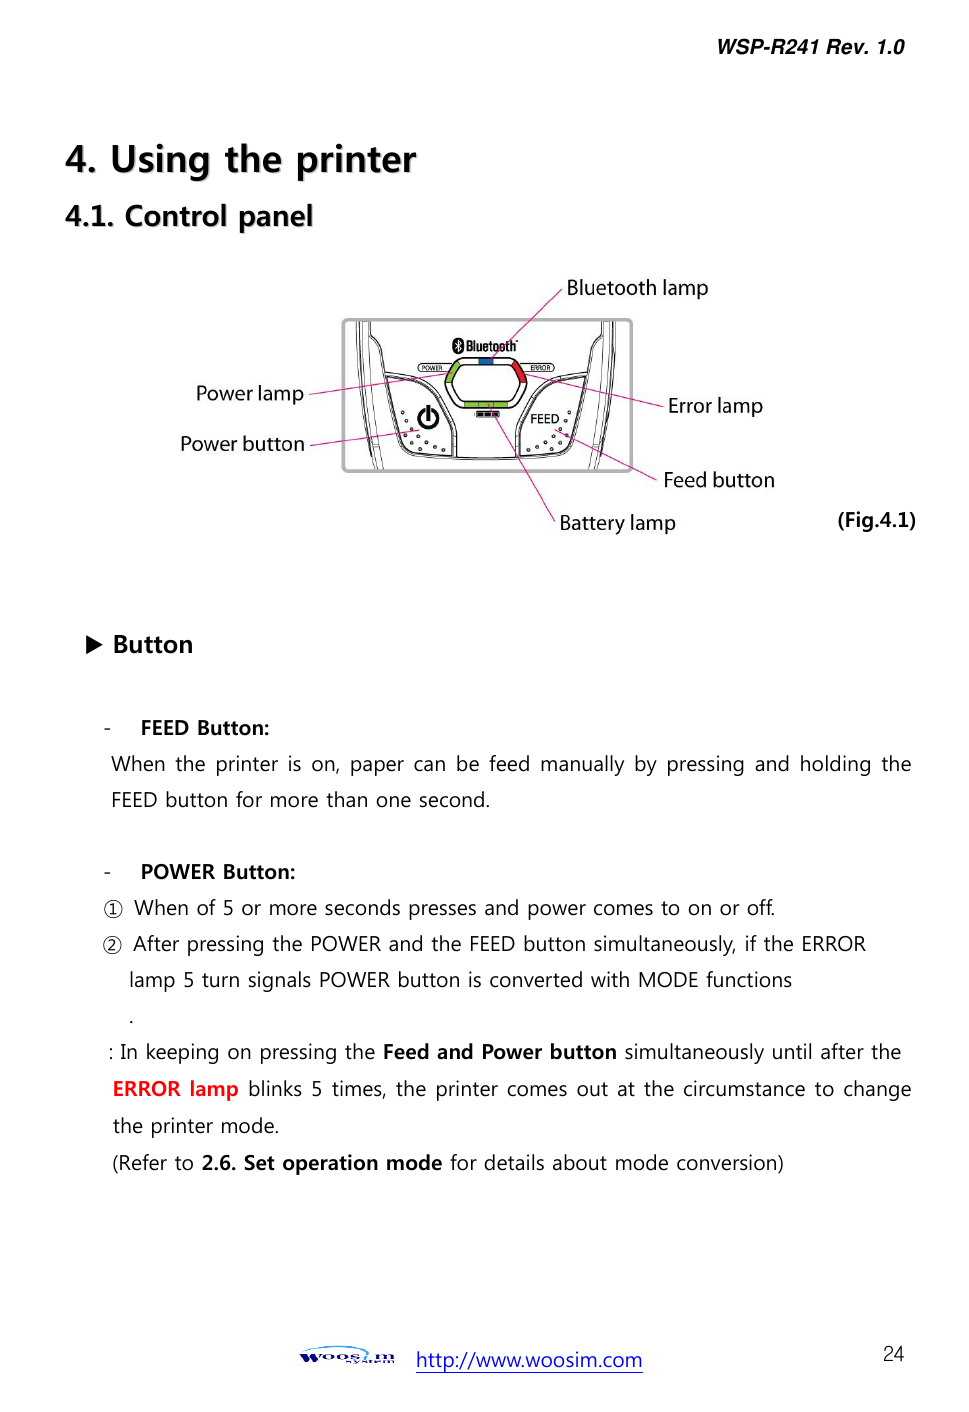
![WSP-R241 Rev. 1.0 http://www.woosim.com 18 POWER button : use for changing OPTION status. (Error Lamp) FEED button : use for changing MODE status. (Power Lamp) [Example] The defaults of the printer are : USB / 9600 bps / 8 data bit / No parity / 1 stop bit / Density low / Mark use / Sensor low / Power down 5 minute If a user wants to modify the defaults with Bluetooth / 57600 bps / 7 data bit / Odd parity / 2 stop bit / Density high / Mark no use / Sensor medium1 / Power down no use Press FEED & POWER Button during the Error Lamp flickers 5 times. You will see the Power Lamp and the Error Lamp flickers once. Press the POWER Button twice and the Error Lamp flickers 3 times. And then, interface mode has set to Bluetooth mode. When you press POWER button once again, Power Lamp flickers twice and the Error Lamp flickers once. Press POWER Button 3 times, Error Lamp flickers 4 times. And then, baudrate has set to 57,600 bps. When you press POWER Button once again, Power Lamp flickers 3 times and the Error Lamp flickers twice. Press POWER Button once, Error Lamp flickers once. And then Data Bit has set to 7 data bit. When you press FEED Button once again, Power Lamp flickers 4 times and the Error Lamp flickers once. Press POWER Button once, Error Lamp flickers twice. And then the Parity bit has set to Odd parity bit.](https://usermanual.wiki/WOOSIM-SYSTEMS/WSP-R241/User-Guide-2515822-Page-18.png)