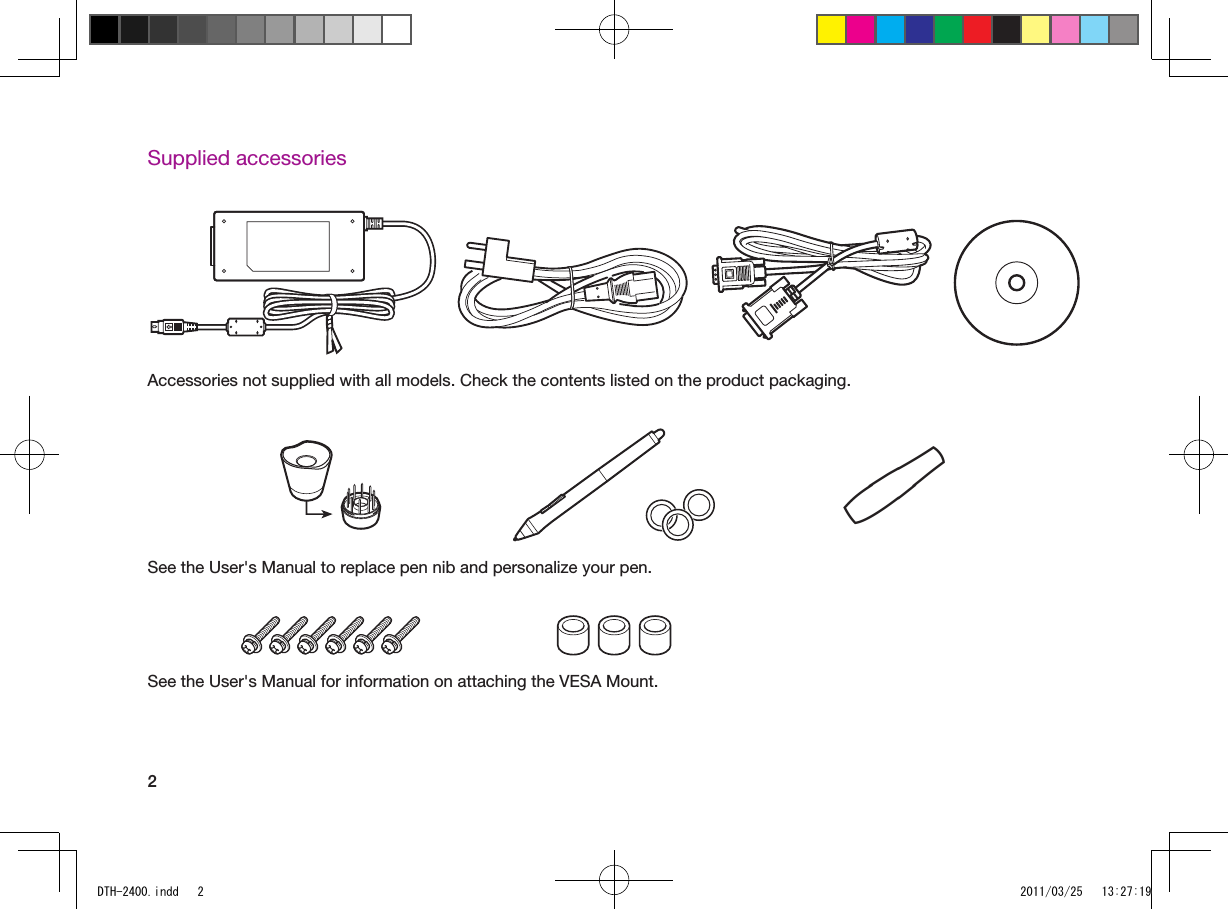
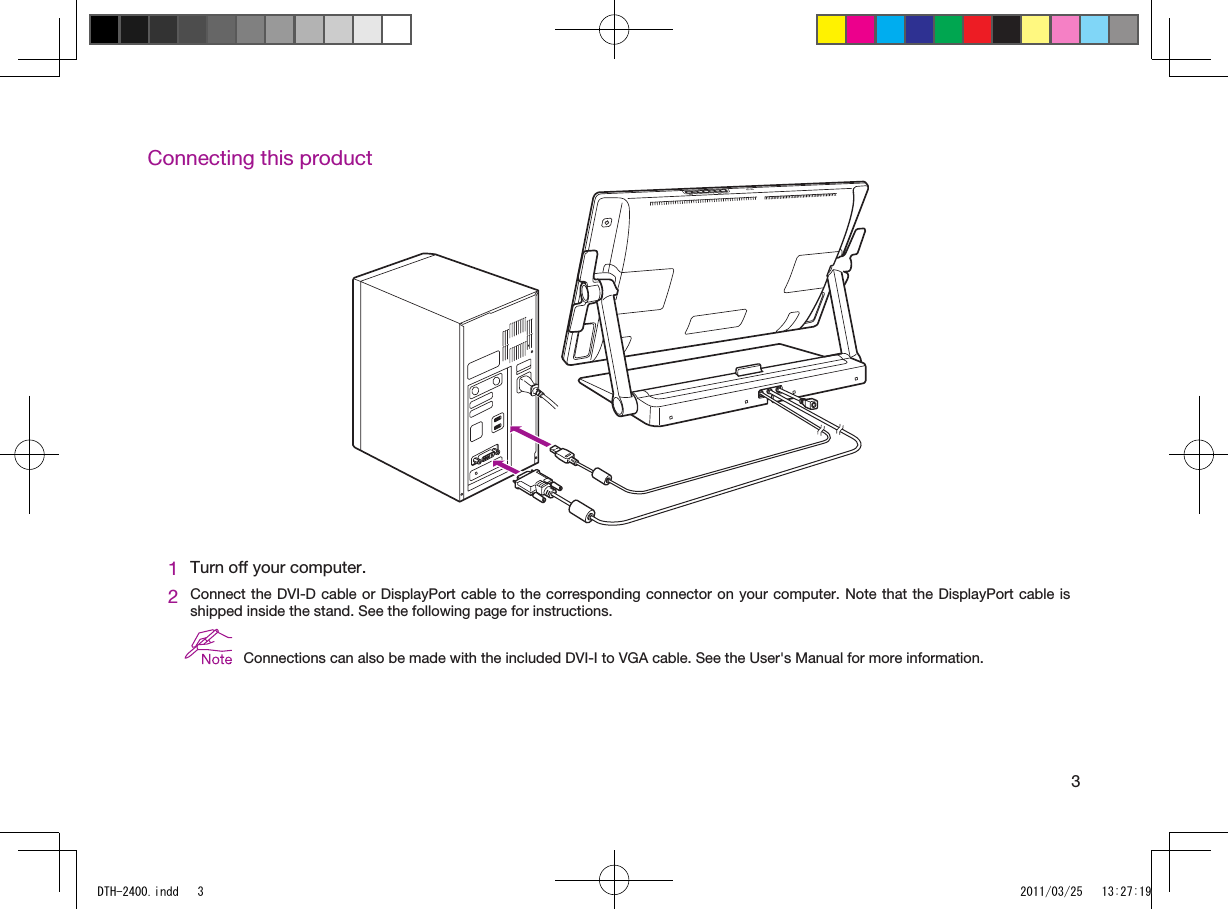
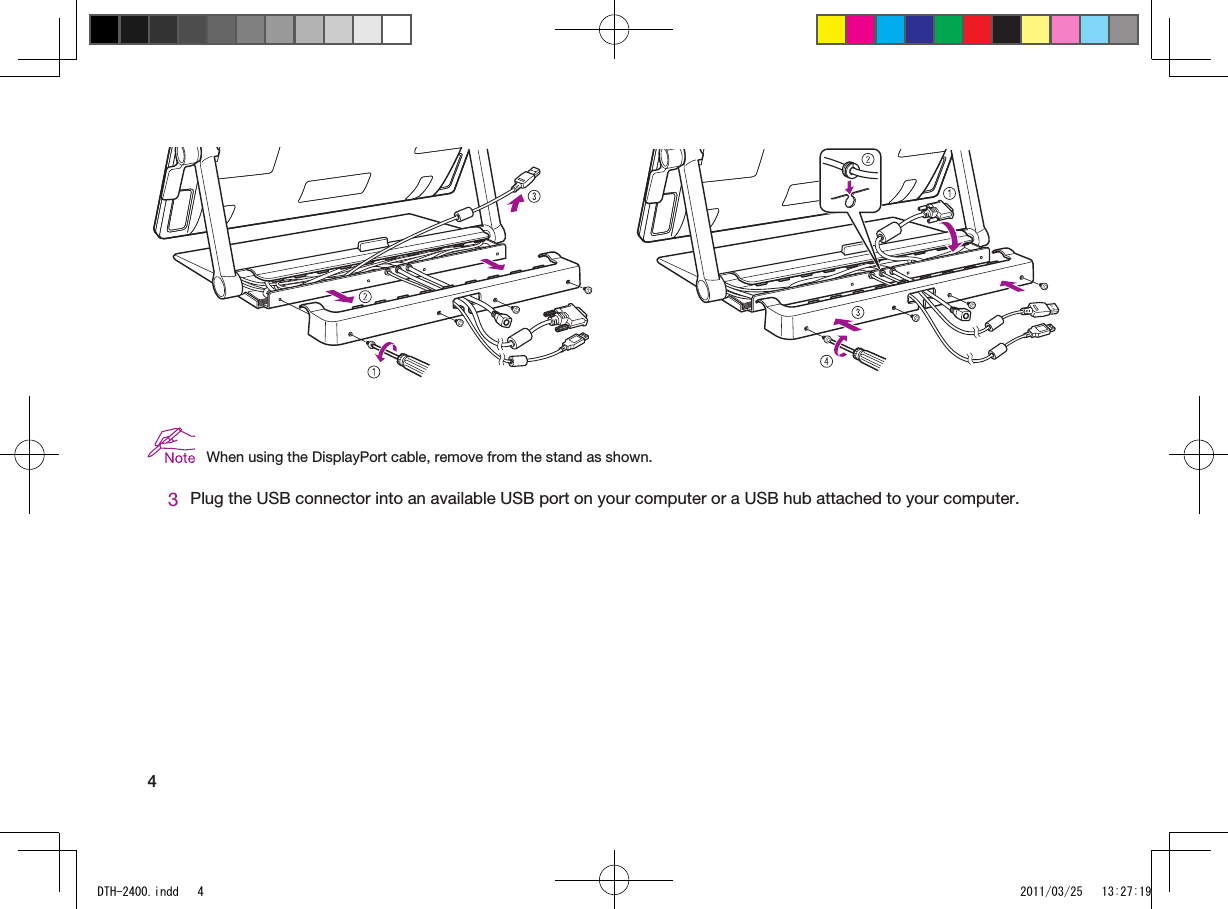
Wacom Co DTH2400 LCD Tablet User Manual DTH 2400 indd
Wacom Co Ltd LCD Tablet DTH 2400 indd
UserManual.wiki
>
Wacom Co
>
DTH2400 User Manual
>
User Manual Part 1
Contents
1.
User Manual Part 1
2.
User Manual Part 2
3.
User Manual - regulatory
User Manual Part 1
Navigation menu
Upload a User Manual
Namespaces
Wiki Guide
HTML
PDF
Info
Views
User Manual
Discussion / Help
Navigation


![65Turn on this product. The power LED will change from orange to blue.6Turn on your computer.If a DVI-I to VGA cable is connected, configure the color resolution and size settings while looking at the display.Then, open the menu screen, and select [Screen Setting] > [Auto Adjust].For information on how to open the menu screen, see the User's Manual.DTH-2400.indd 6 2011/03/25 13:27:20](https://usermanual.wiki/Wacom-Co/DTH2400.User-Manual-Part-1/User-Guide-1687331-Page-8.png)
![8Calibrating this productFor optimum performance, you must calibrate this product to align the screen cursor with the position of the pen on the display screen. This is required to compensate for the viewing angle, and to adjust for parallax. Set this product in its working position, then follow the procedure below.1Open the pen tablet's control panel.See page 18.2Click the [Position Adjustment] tab.3Click [Calibrate...].DTH-2400.indd 8 2011/03/25 13:27:20](https://usermanual.wiki/Wacom-Co/DTH2400.User-Manual-Part-1/User-Guide-1687331-Page-10.png)
![94In the order of (1) > (2) > (3) > (4) from the top-left, click the center of the cross marks on the screen with the pen.The position adjustment is completed when the cross marks disappear.When using Windows, click [OK] (or [Save]) and close the control panel after saving the adjustment contents.••DTH-2400.indd 9 2011/03/25 13:27:21](https://usermanual.wiki/Wacom-Co/DTH2400.User-Manual-Part-1/User-Guide-1687331-Page-11.png)

![20Customizing this productOpen the Wacom Tablet control panel:Windows – Click [Start]>> [ (All) Programs]>>[XXXX]>>[XXXX Properties].Mac – Open [System Preferences] >> select [XXXX].See the User's Manual to learn how to customize the ExpressKeys and Radial Menu to enhance your productivity.Registering your this productSupport optionsCheck the Technical Notes or the Troubleshooting section in the User's Manual.Visit our web site at www.wacom.com/product supportCall the Wacom Customer Care Center. Available in English from 7:30 am to 5:00 pmMonday - Thursday, and 8:30 am to 5:00 pm Friday (Pacific Time) at 360-896-9833.DTH-2400.indd 20 2011/03/25 13:27:23](https://usermanual.wiki/Wacom-Co/DTH2400.User-Manual-Part-1/User-Guide-1687331-Page-23.png)

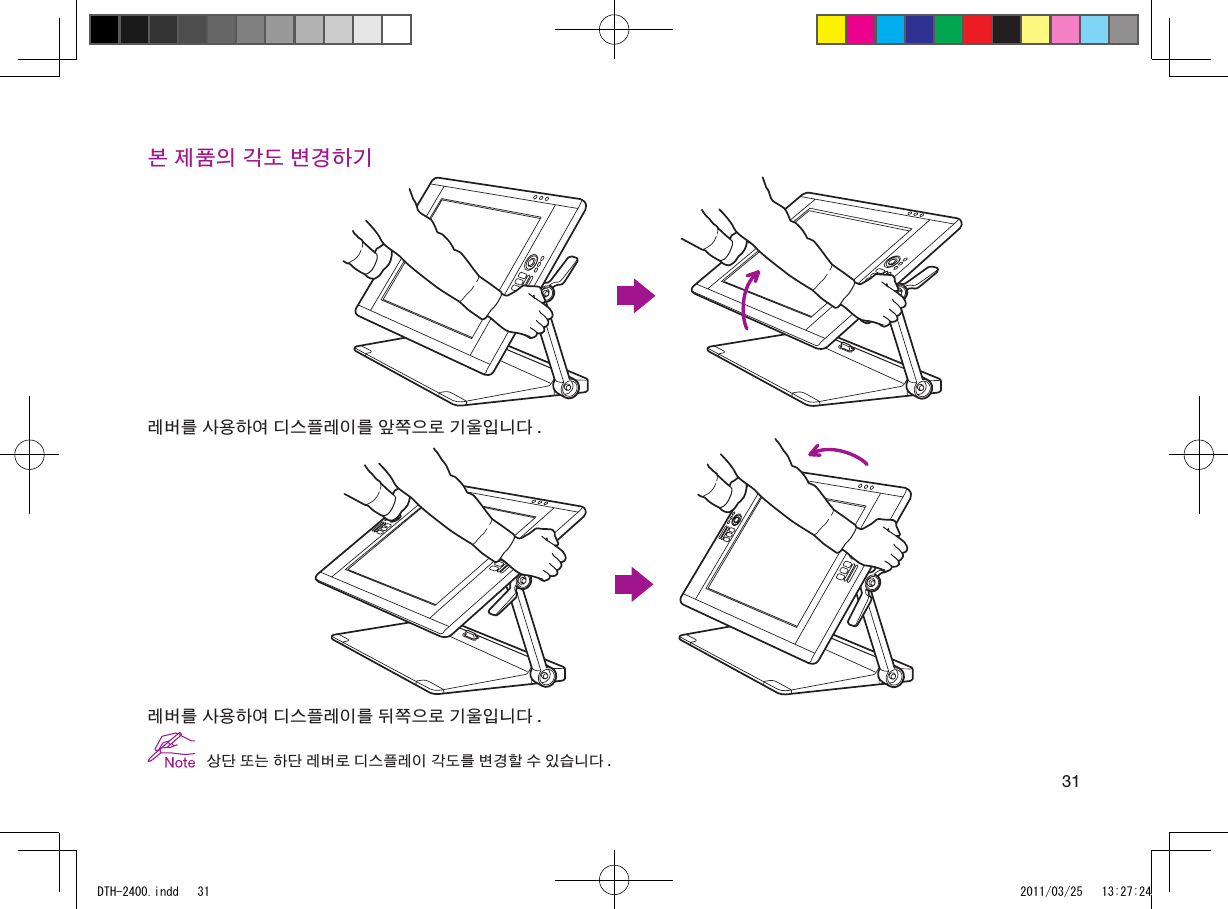
![275본 제품을 켭니다 . 전원 LED 가 주황색에서 파란색으로 바뀝니다 .6컴퓨터를 켭니다 .DVI-I 대 VGA 케이블을 연결한 경우 디스플레이를 보면서 색 해상도와 크기 설정을 구성합니다 .그런 다음 메뉴 화면을 열고 [Screen Setting( 화면 설정 )] > [Auto Adjust( 자동 조정 )] 를 선택합니다 .메뉴 화면을 여는 방법은 사용설명서를 참조하십시오 .DTH-2400.indd 27 2011/03/25 13:27:23](https://usermanual.wiki/Wacom-Co/DTH2400.User-Manual-Part-1/User-Guide-1687331-Page-30.png)
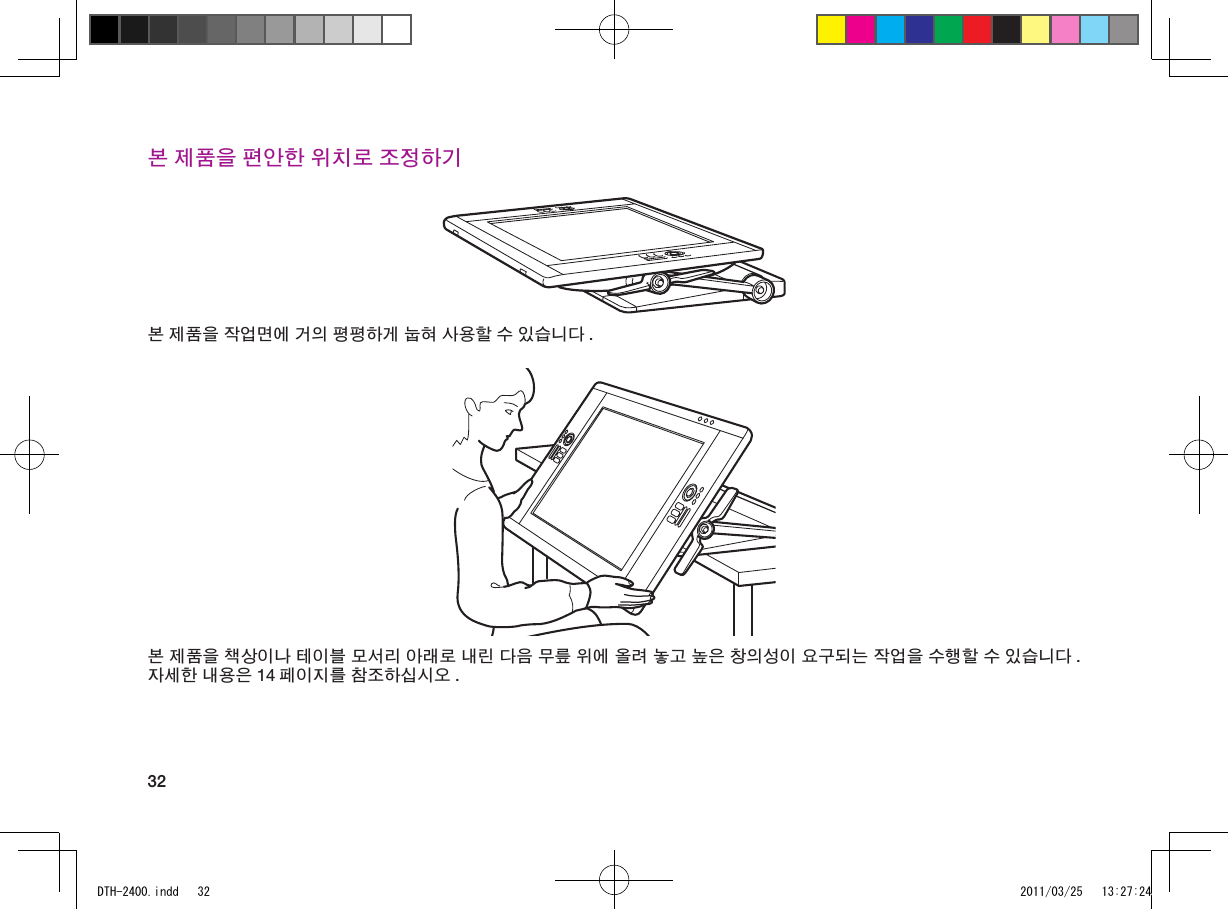
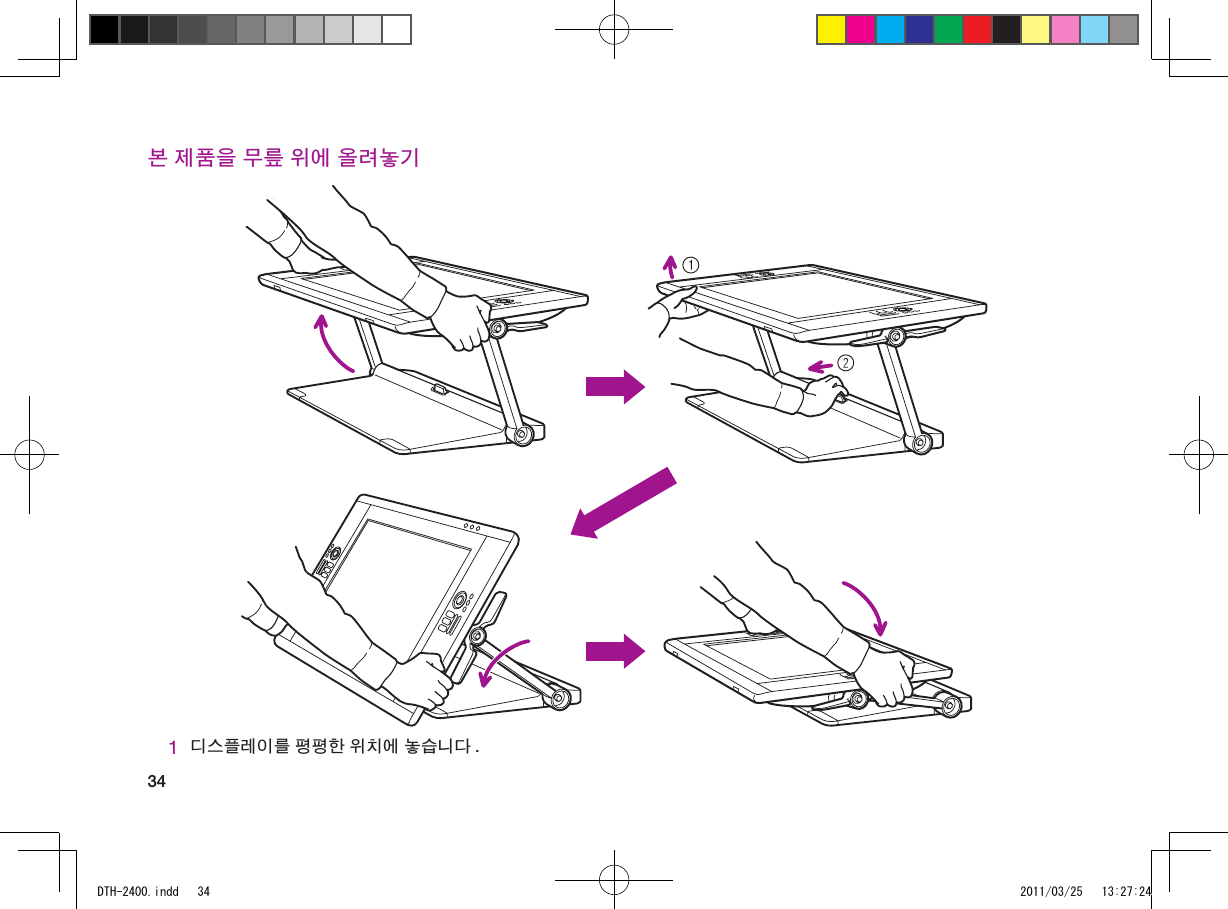
![29본 제품 보정하기최적의 성능을 위해서는 본 제품을 보정하여 화면 커서를 디스플레이 화면의 펜 위치에 맞추어야 합니다 . 이 작업은 보기 각도를 보정하고 시차를 조정하는 데 필요합니다 . 본 제품을 작업 위치에 놓고 아래의 절차를 따르십시오 .1펜 타블렛의 제어판을 엽니다 .18 페이지를 참조하십시오 .2[Position Adjustment( 위치 조정 )] 탭을 클릭합니다 .3[Calibrate...( 보정 ...)] 를 클릭합니다 .DTH-2400.indd 29 2011/03/25 13:27:23](https://usermanual.wiki/Wacom-Co/DTH2400.User-Manual-Part-1/User-Guide-1687331-Page-32.png)
 을 클릭하고 제어판을 닫습니다 .••DTH-2400.indd 30 2011/03/25 13:27:23](https://usermanual.wiki/Wacom-Co/DTH2400.User-Manual-Part-1/User-Guide-1687331-Page-33.png)
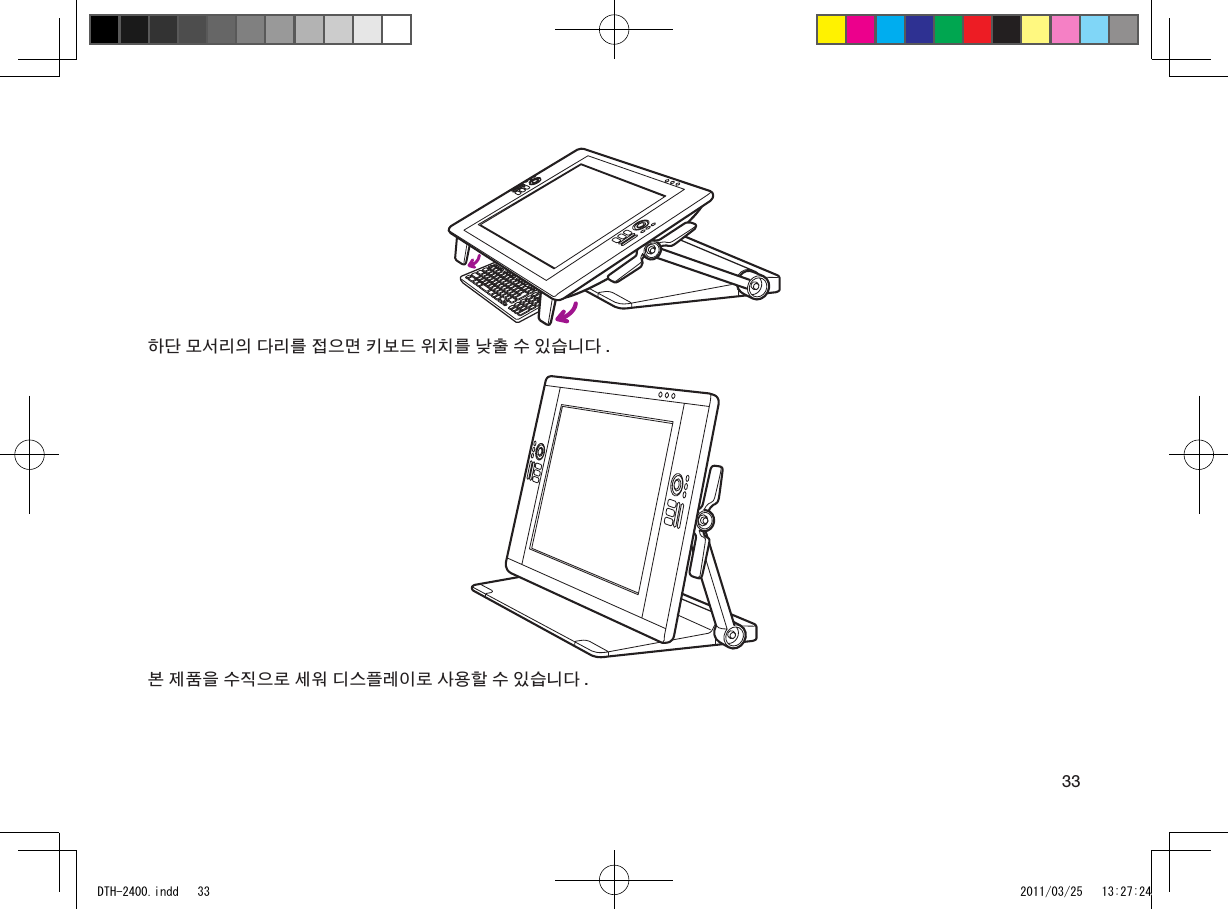


![41본 제품 사용자 정의하기와콤 타블렛 제어판을 엽니다 .Windows – [ 시작 ]>> [ ( 모든 ) 프로그램 ]>>[XXXX]>>[XXXX 등록정보 ]를 클릭합니다 .Mac – [ 시스템 환경설정 ] >> [XXXX] 를 선택합니다 .생산성 향상을 위해 익스프레스 키와 레디얼 메뉴를 사용자 정의하는 방법은 사용설명서를 참조하십시오 .본 제품 등록하기지원 옵션사용설명서의 기술 노트 또는 문제 해결 부분을 확인하십시오 .자사 웹 사이트 (www.wacom.com/product support) 를 방문하십시오 .와콤 고객 지원 센터로 문의하십시오 . 월요일 - 목요일의 경우 오전 7:30 부터 오후 5:00 까지 , 금요일의 경우 오전 8:30 부터 오후 5:00( 태평양 시간 기준 )까지 360-896-9833 으로 영어 지원 서비스를 받을 수 있습니다 .DTH-2400.indd 41 2011/03/25 13:27:24](https://usermanual.wiki/Wacom-Co/DTH2400.User-Manual-Part-1/User-Guide-1687331-Page-45.png)