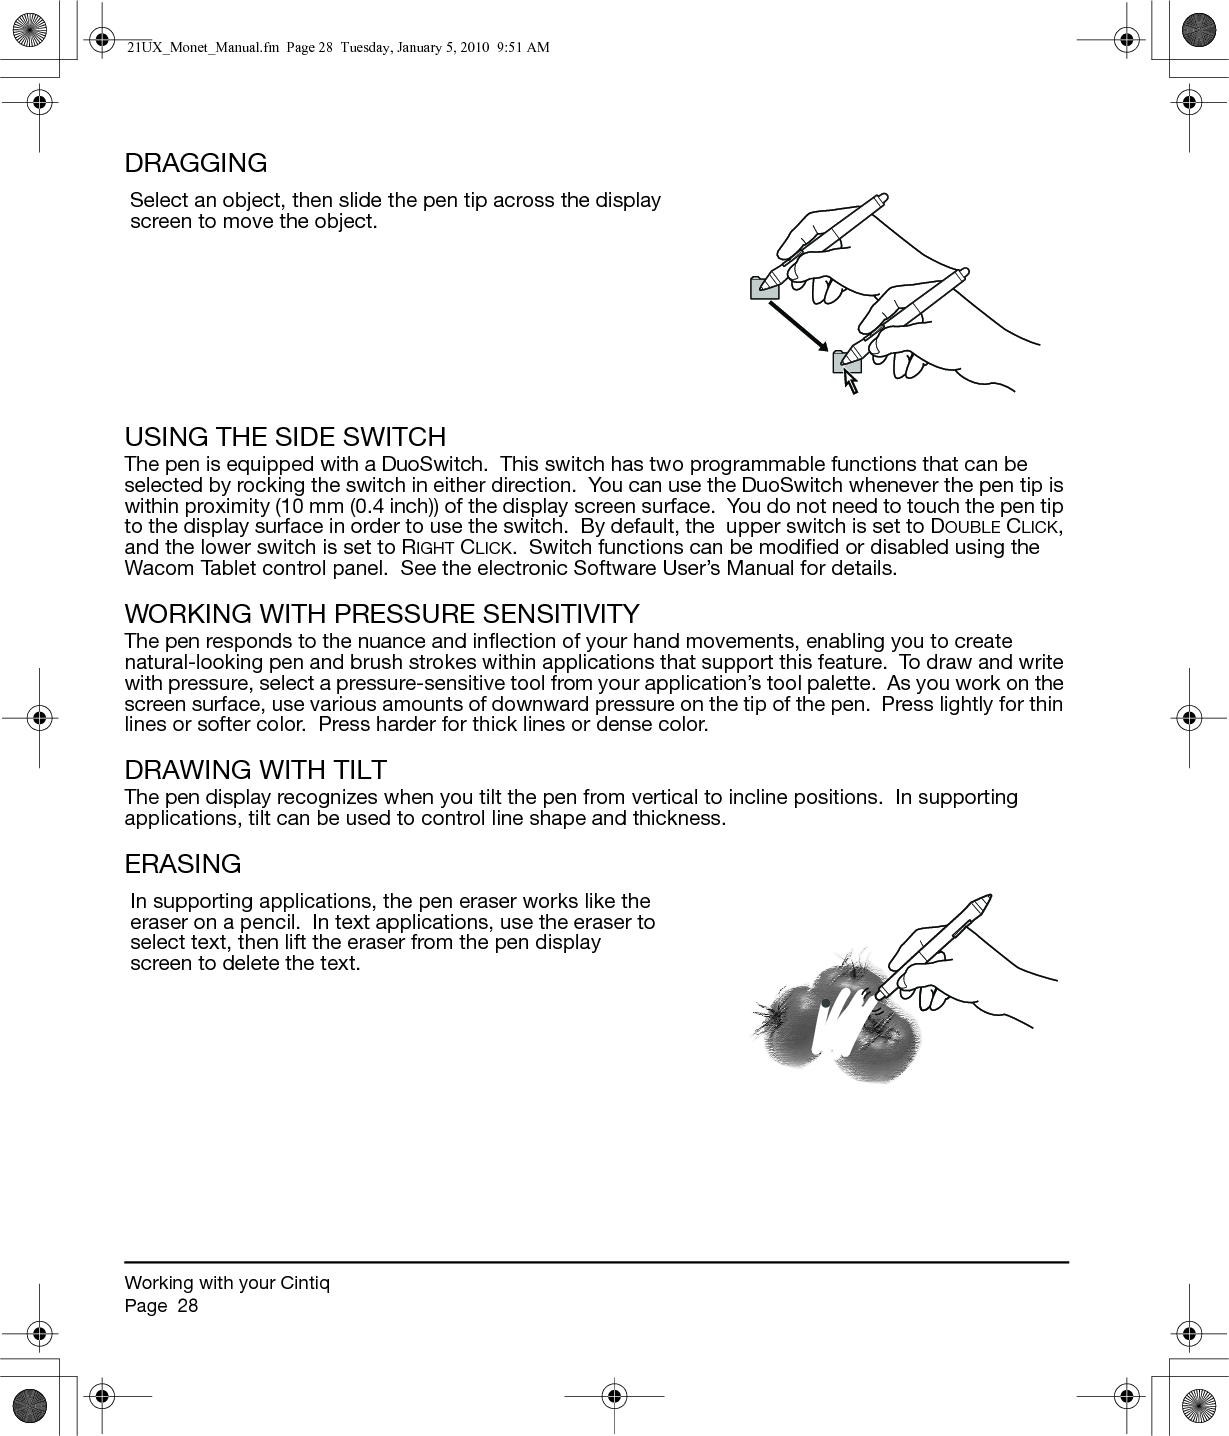
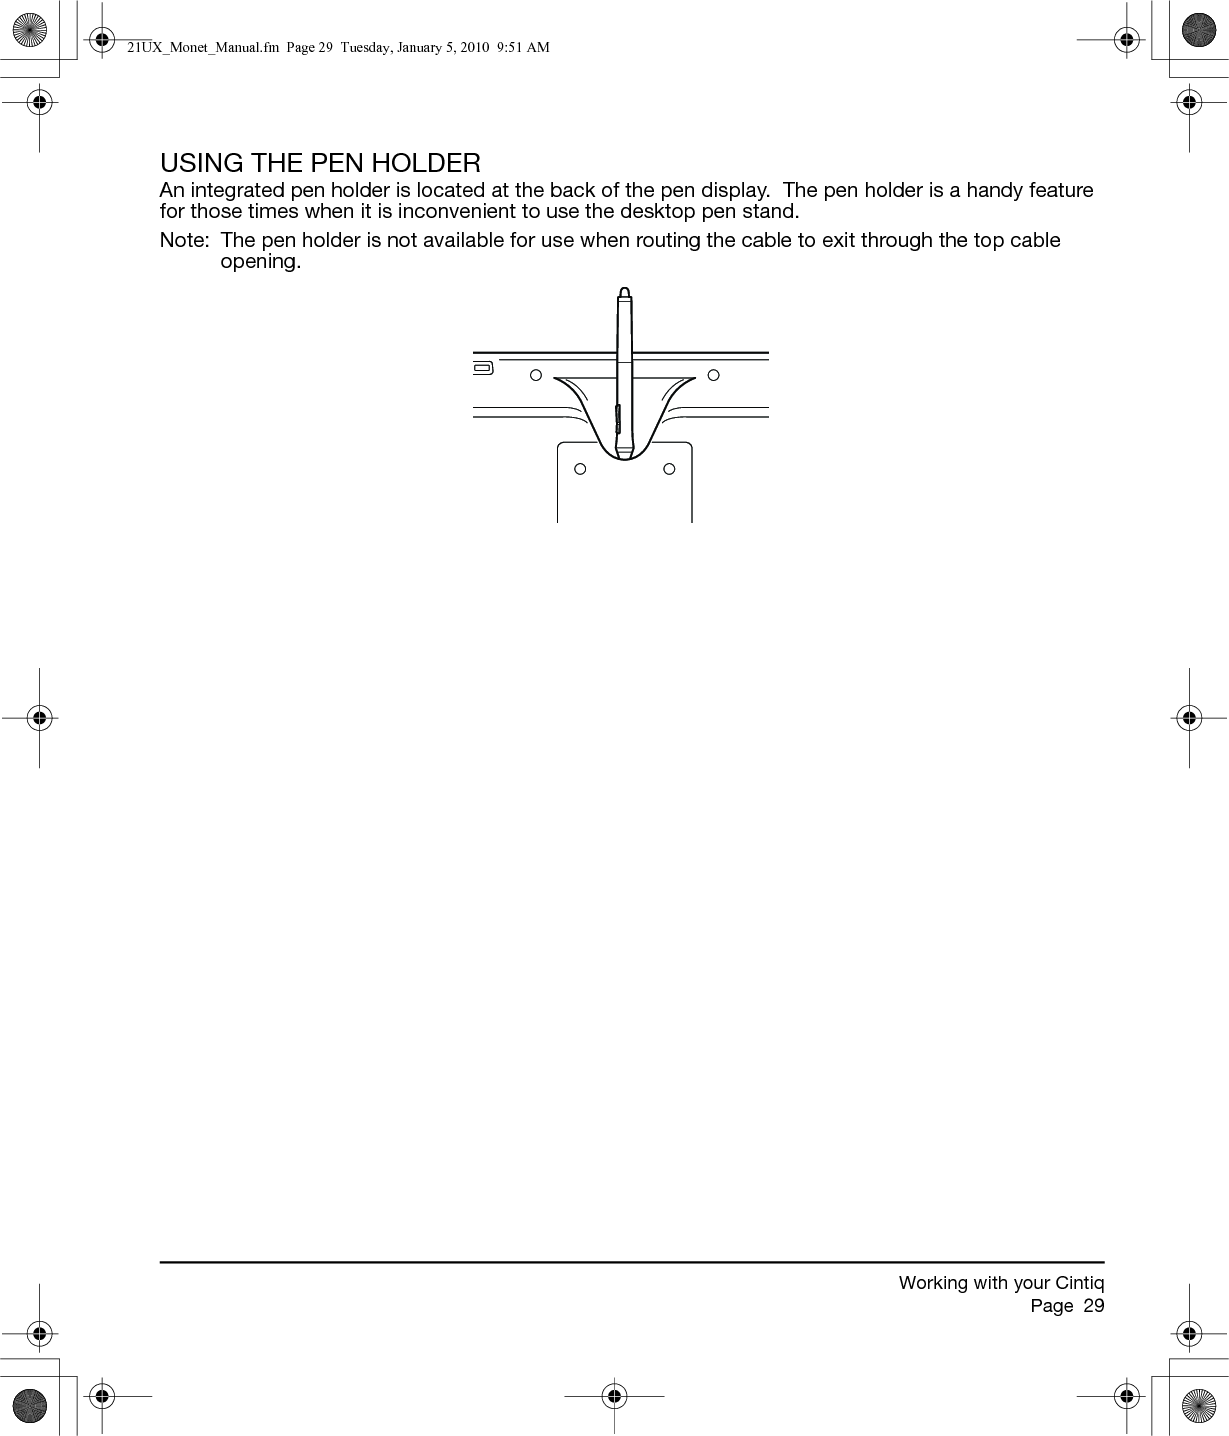
Wacom Co DTK2100 LCD TABLET User Manual
Wacom Co Ltd LCD TABLET Users Manual
UserManual.wiki
>
Wacom Co
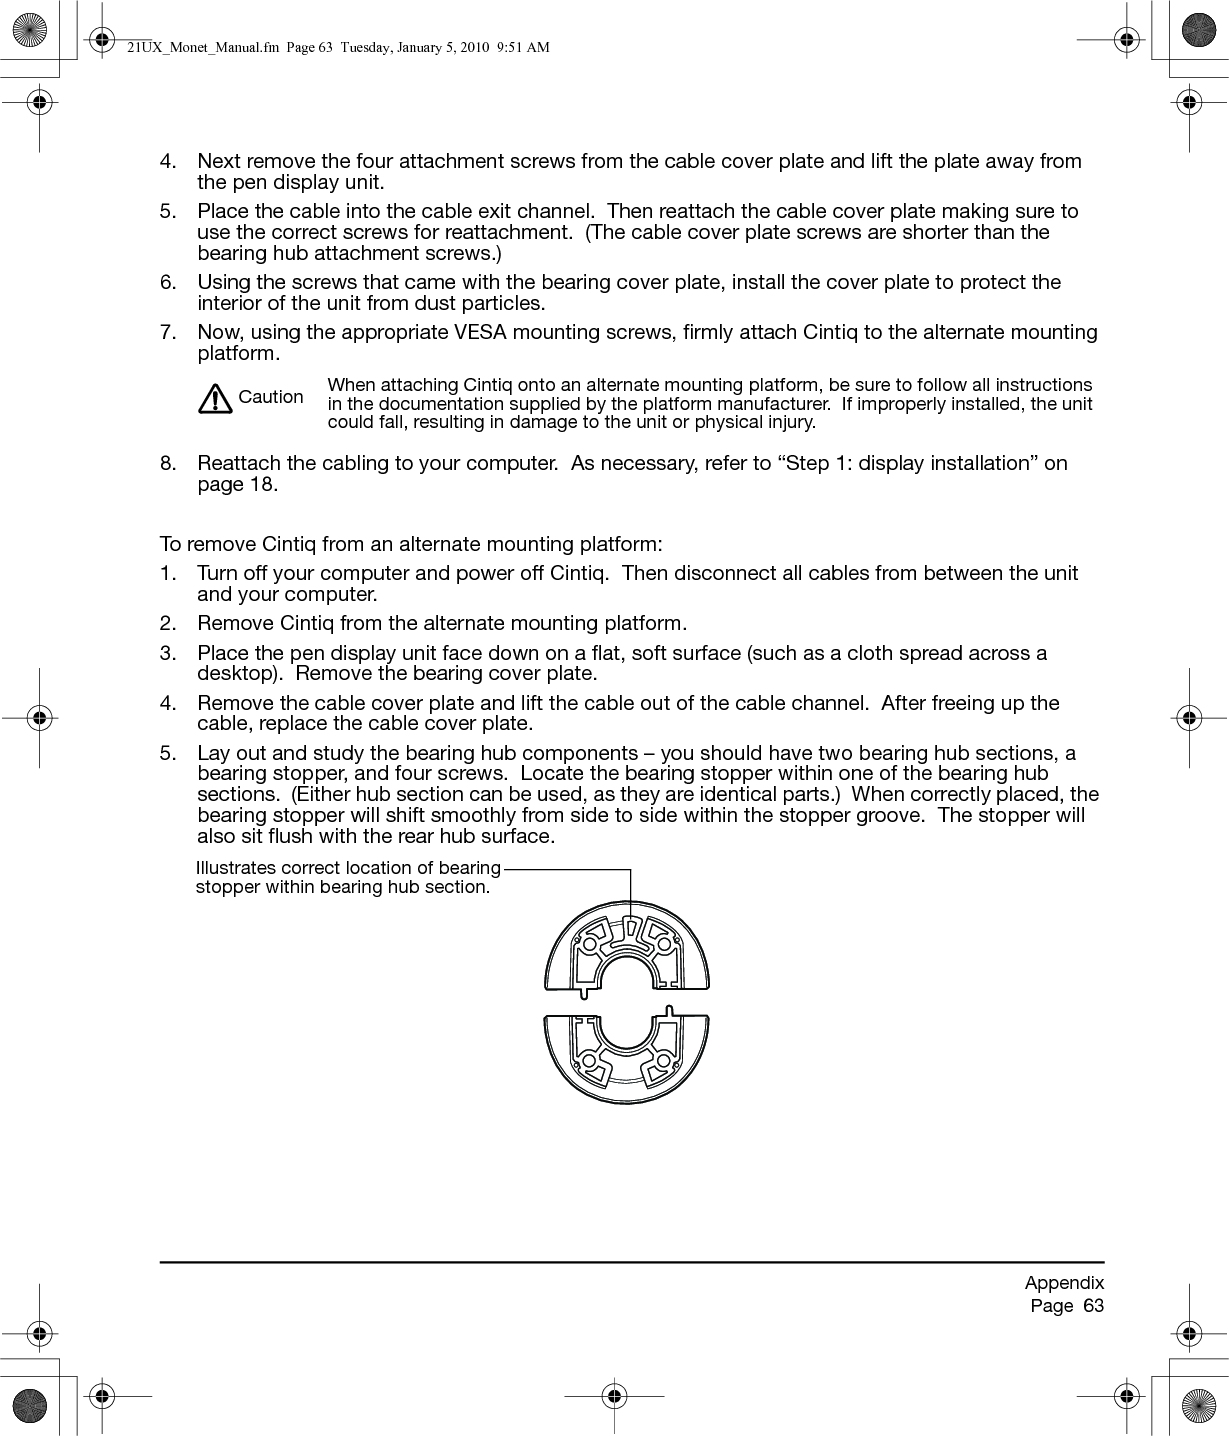
>
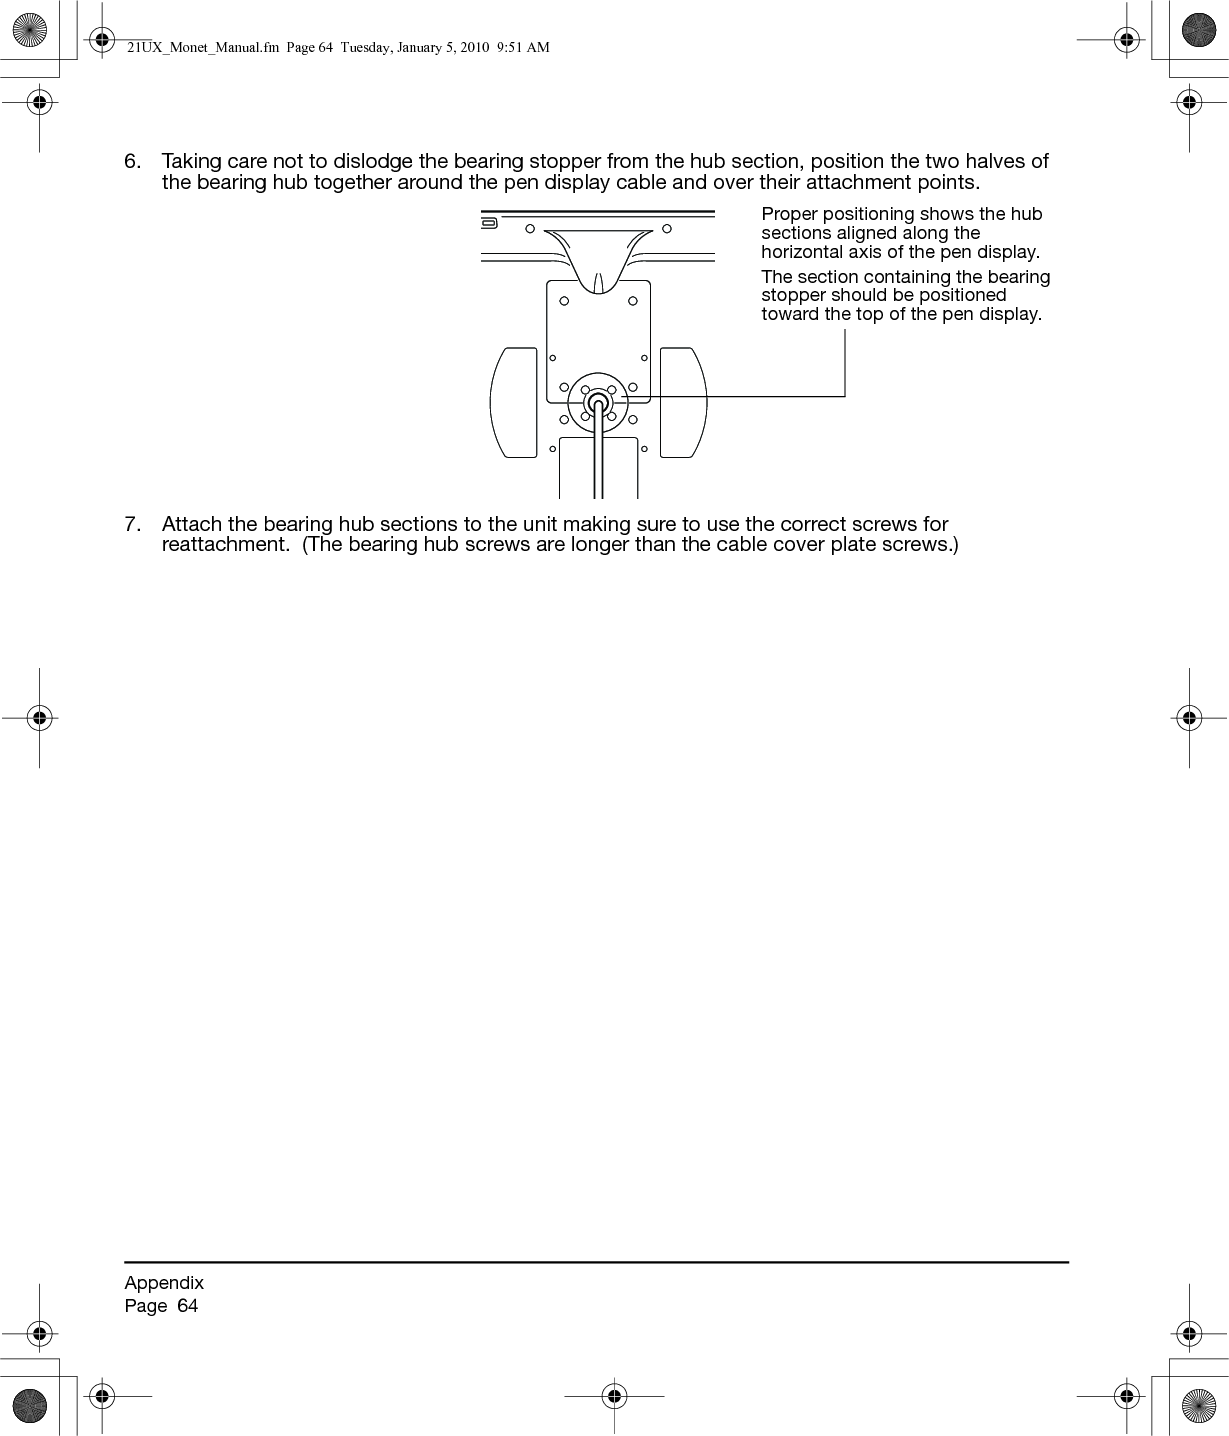
DTK2100 User Manual
Users Manual
Navigation menu
Upload a User Manual
Namespaces
Wiki Guide
HTML
PDF
Info
Views
User Manual
Discussion / Help
Navigation


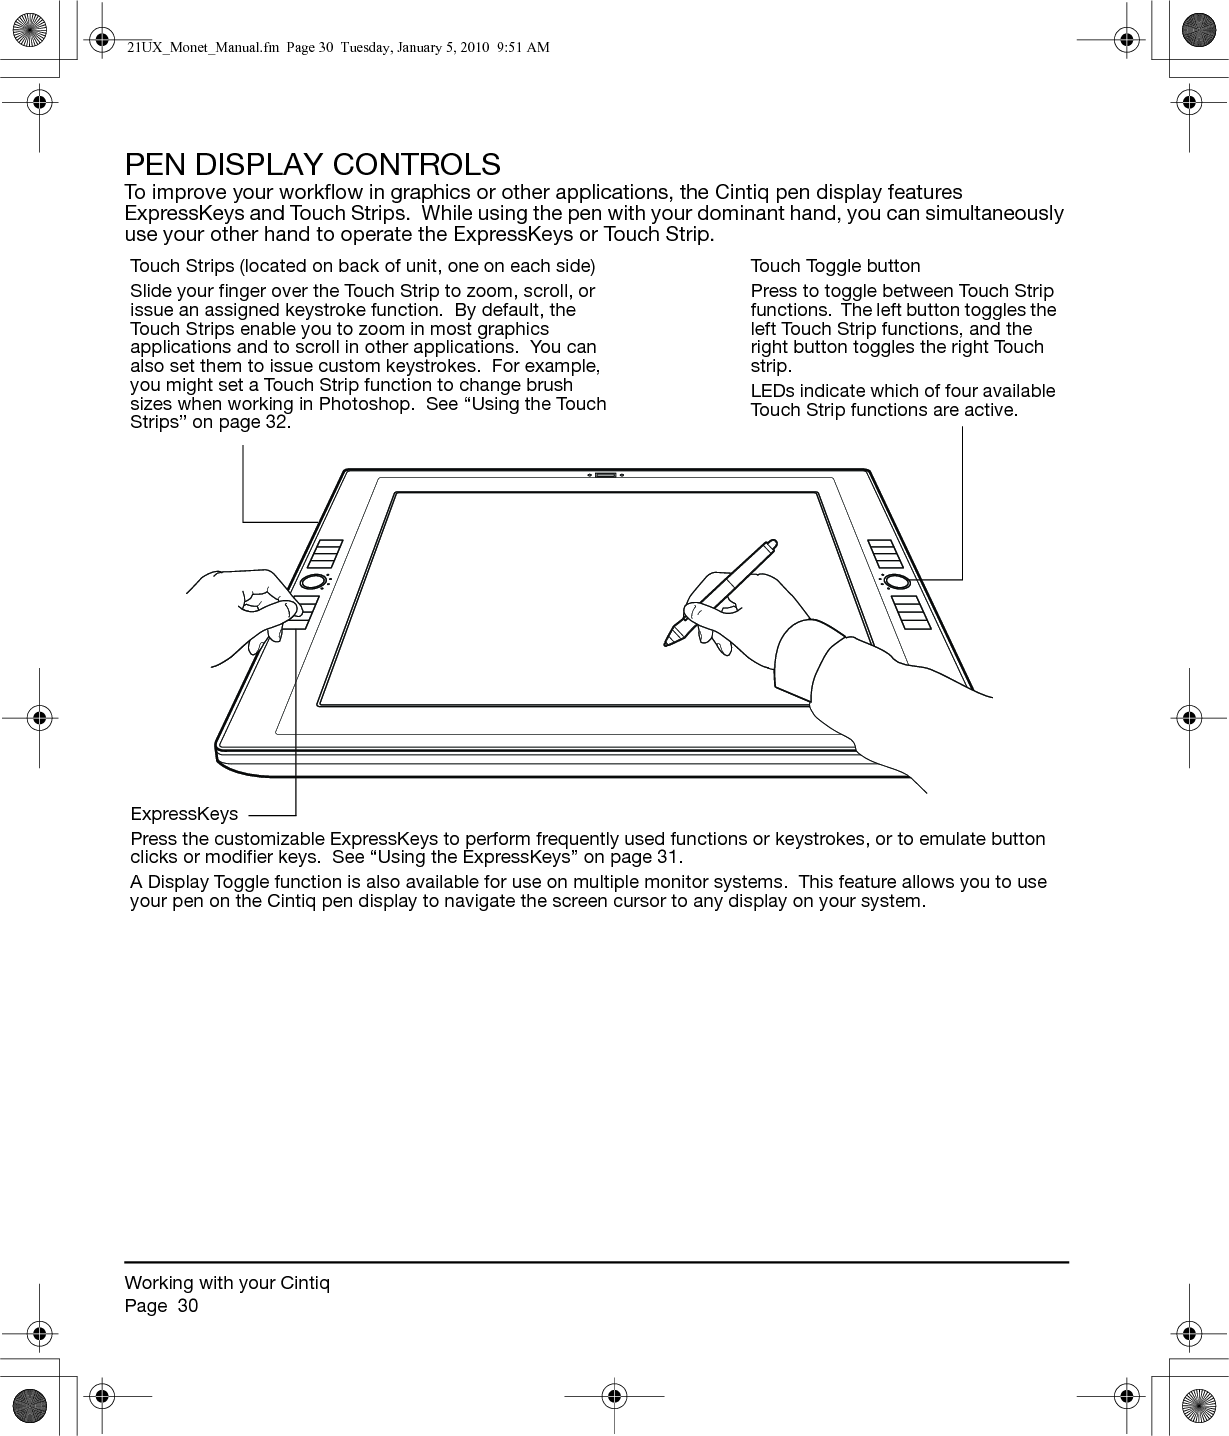
![Working with your CintiqPage 32Here are a few ideas for using the ExpressKeys:• Set a pair of keys to commonly used keystrokes, such as [ and ] to decrease and increase your brush size in Photoshop.• Set a key to a commonly used keyboard shortcut in order to open files or start an application.• If you prefer not to (or cannot) use the side switches on your Grip Pen, then set a key to right- or double-click.• Choose from any of the other available functions.Important: Some applications can override and control the ExpressKey functions. For details, see the section on using applications integrated for tablet control in the Software User’s Manual.USING THE TOUCH STRIPSSlide your finger over the Touch Strip to quickly zoom in or out, scroll up or down, or perform other functions with your secondary hand while using your primary hand to work with the Grip Pen. You can also set each Touch Strip to issue custom keystrokes. For example, you might set a Touch Strip action to cycle through layers when working in Photoshop. The Touch Strips can be operated in three different ways:• Standard operation: Slide your finger up or down to zoom, scroll, or issue an assigned keystroke function.• Continuous operation: Press and hold your finger at either end of the Touch Strip to continuously scroll. This is useful for scrolling through long documents or web pages.• Single step operation: Press and release your finger at either end of the Touch Strip to zoom, scroll, or issue the assigned keystroke function one step at a time.Press and hold here for continuous operation, or press and release for single step operation.Press the Touch Toggle button (located on front of unit) to toggle between four customizable Touch Strip functions. The left button toggles the left Touch Strip functions, and the right button toggles the right Touch strip.As you toggle between settings, a corresponding status LED illuminates. Any disabled settings are skipped in the toggle sequence.Tip: Press an ExpressKey set to the HELP function do display a diagram of the Cintiq ExpressKeys and Touch Strips, showing the current function settings for each control.21UX_Monet_Manual.fm Page 32 Tuesday, January 5, 2010 9:51 AM](https://usermanual.wiki/Wacom-Co/DTK2100/User-Guide-1239876-Page-34.png)
![Working with your CintiqPage 33The Touch Strip default setting states are as listed below. See the electronic Software User’s Manual for details on other available settings. The defaults are the same for the left and right side Touch Strips.•AUTO SCROLL/ZOOM. Sets the Touch Strip to zoom in most graphics applications and scroll in most other applications. Page scrolling is not supported. Some applications may interpret zoom events as scroll events, or may completely ignore zooming. Likewise, scroll events may be interpreted as zoom events, or ignored completely.•KEYSTROKE... CYCLE LAYERS. Enables you to cycle up or down through a stack of layers when working in Adobe Photoshop. Move your finger up along the Touch Strip to cycle up through layers.•KEYSTROKE... BRUSH SIZE. Sets the Touch Strip to increase or decrease the brush size of your drawing tool when working in Adobe Photoshop.•KEYSTROKE... CANVAS ROTATION. Enables you to rotate or flip an entire image when working in Adobe Photoshop CS4 or later.Important: Some applications can override and control the Touch Strip functions. For details, see the section on using applications integrated for tablet control in the Software User’s Manual.Tip: Photoshop users who frequently change brush sizes may want to assign the [ and ] keys to a Touch Strip. Sliding your finger up or down the Touch Strip will then change the brush size without the need to reach for the keyboard or access the Photoshop Brushes palette.See the electronic Software User’s Manual for detailed information on customizing the way your pen display Touch Strips work.21UX_Monet_Manual.fm Page 33 Tuesday, January 5, 2010 9:51 AM](https://usermanual.wiki/Wacom-Co/DTK2100/User-Guide-1239876-Page-35.png)

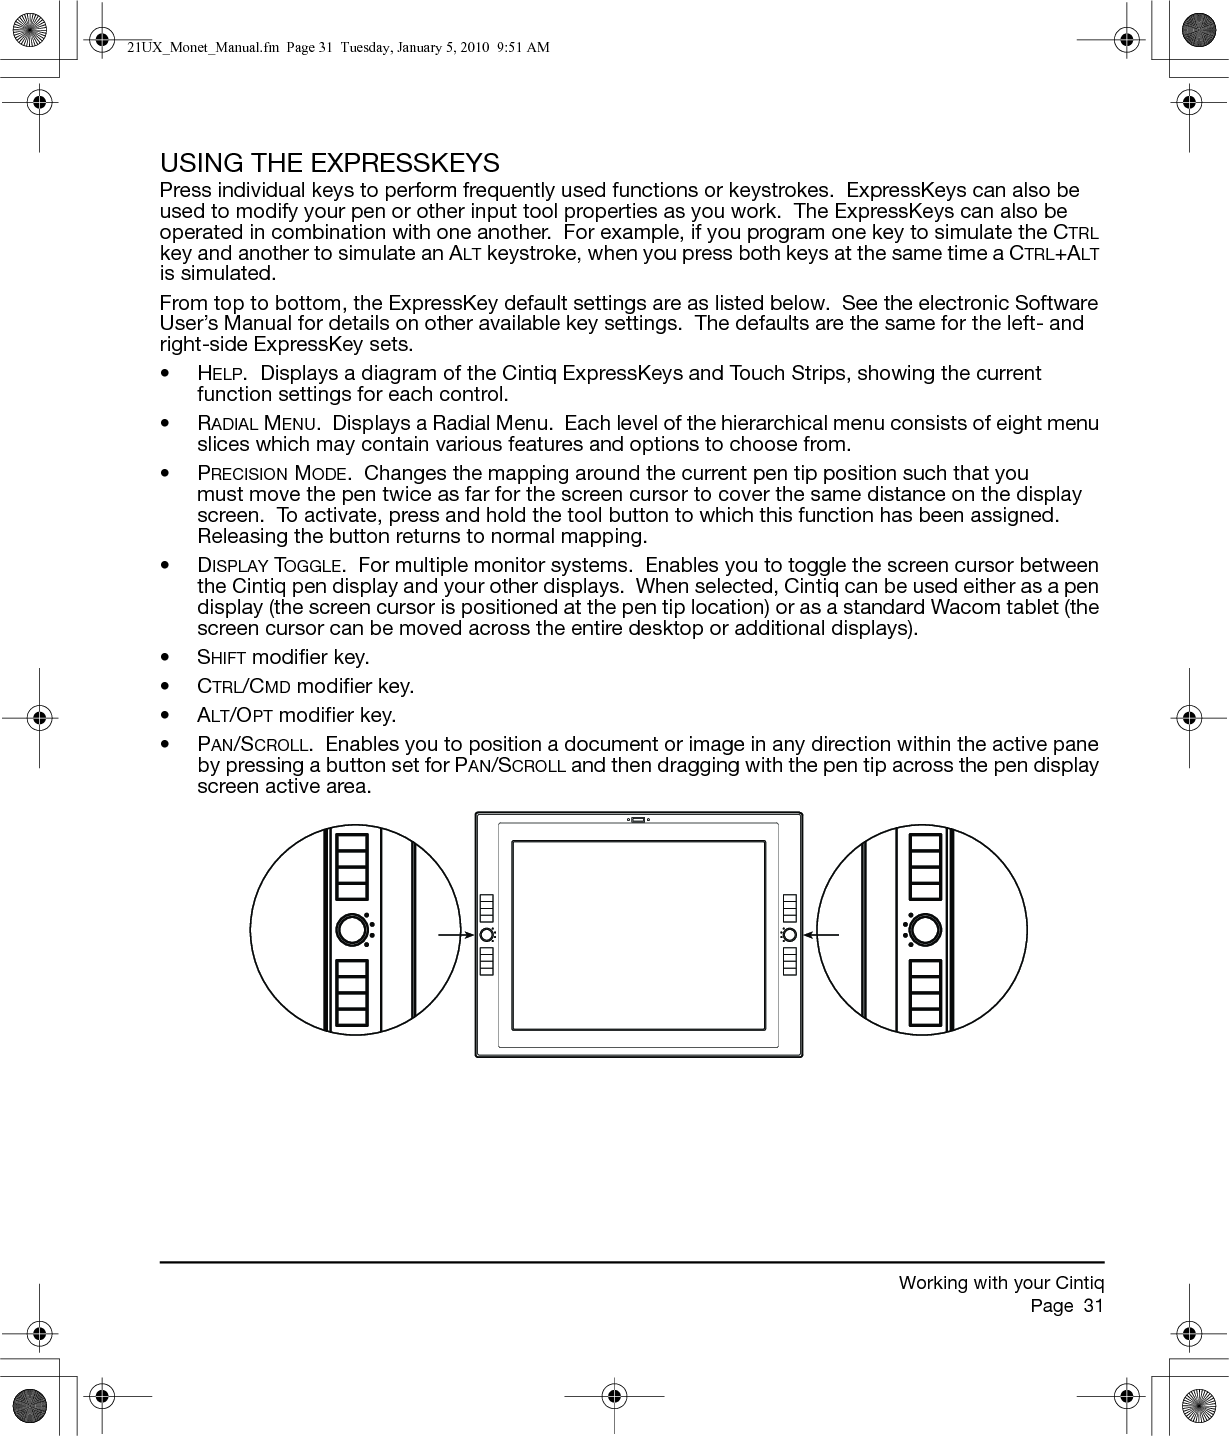
![TroubleshootingPage 44TESTING CONTROLS AND INPUT TOOLSIf the Grip Pen, or the Cintiq ExpressKeys or Touch Strips do not work as you expect, it is a good idea to first check the assigned functions or reset them to their default conditions. A quick way to return a pen to its default settings is to remove it from the TOOL list by clicking on the control panel list’s [ – ] button. After the pen has been removed, place it back onto the display screen surface. The pen will be added back to the TOOL list with its default settings.• Open the Wacom Tablet control panel and click on the ABOUT button. In the dialog box that appears, click on the DIAGNOSE... button. The DIAGNOSTICS dialog box displays to show dynamic information about the Cintiq pen display and pen. This information is used when testing Cintiq and your input tool.• If more than one Cintiq unit is connected to your system, in the TABLET INFO column select the unit for which you are testing.• Use the information presented in the DIAGNOSTICS dialog box when testing your pen display and pen.Note: When testing your tool buttons, if a button is set to RADIAL MENU or OPEN/RUN..., that function will occur when the button is pressed. In this case you may want to change the button function before testing.TESTING THE EXPRESSKEYS1. With the DIAGNOSTICS dialog box open, observe the TABLET INFO column as you test each ExpressKey. If more than one Cintiq unit is connected to your system, be sure you have selected the unit you are testing from the TABLET INFO column.2. Test the keys by clicking them one at a time. Each time you press a key, its number will be displayed next to either the LEFT KEYS or RIGHT KEYS category, depending on which keys group you are testing.3. When you are done, click the CLOSE button to exit the dialog box.Important: Remember that some applications can override and control the ExpressKey functions. Consider closing any open applications except the Wacom Tablet control panel when testing the ExpressKeys.21UX_Monet_Manual.fm Page 44 Tuesday, January 5, 2010 9:51 AM](https://usermanual.wiki/Wacom-Co/DTK2100/User-Guide-1239876-Page-46.png)