Wacom Co HSTNN Touch Pen User Manual Manual operation
Wacom Co Ltd Touch Pen Manual operation
Wacom Co >
Contents
- 1. Manual operation
- 2. Manual regulatory
- 3. Manual
Manual operation
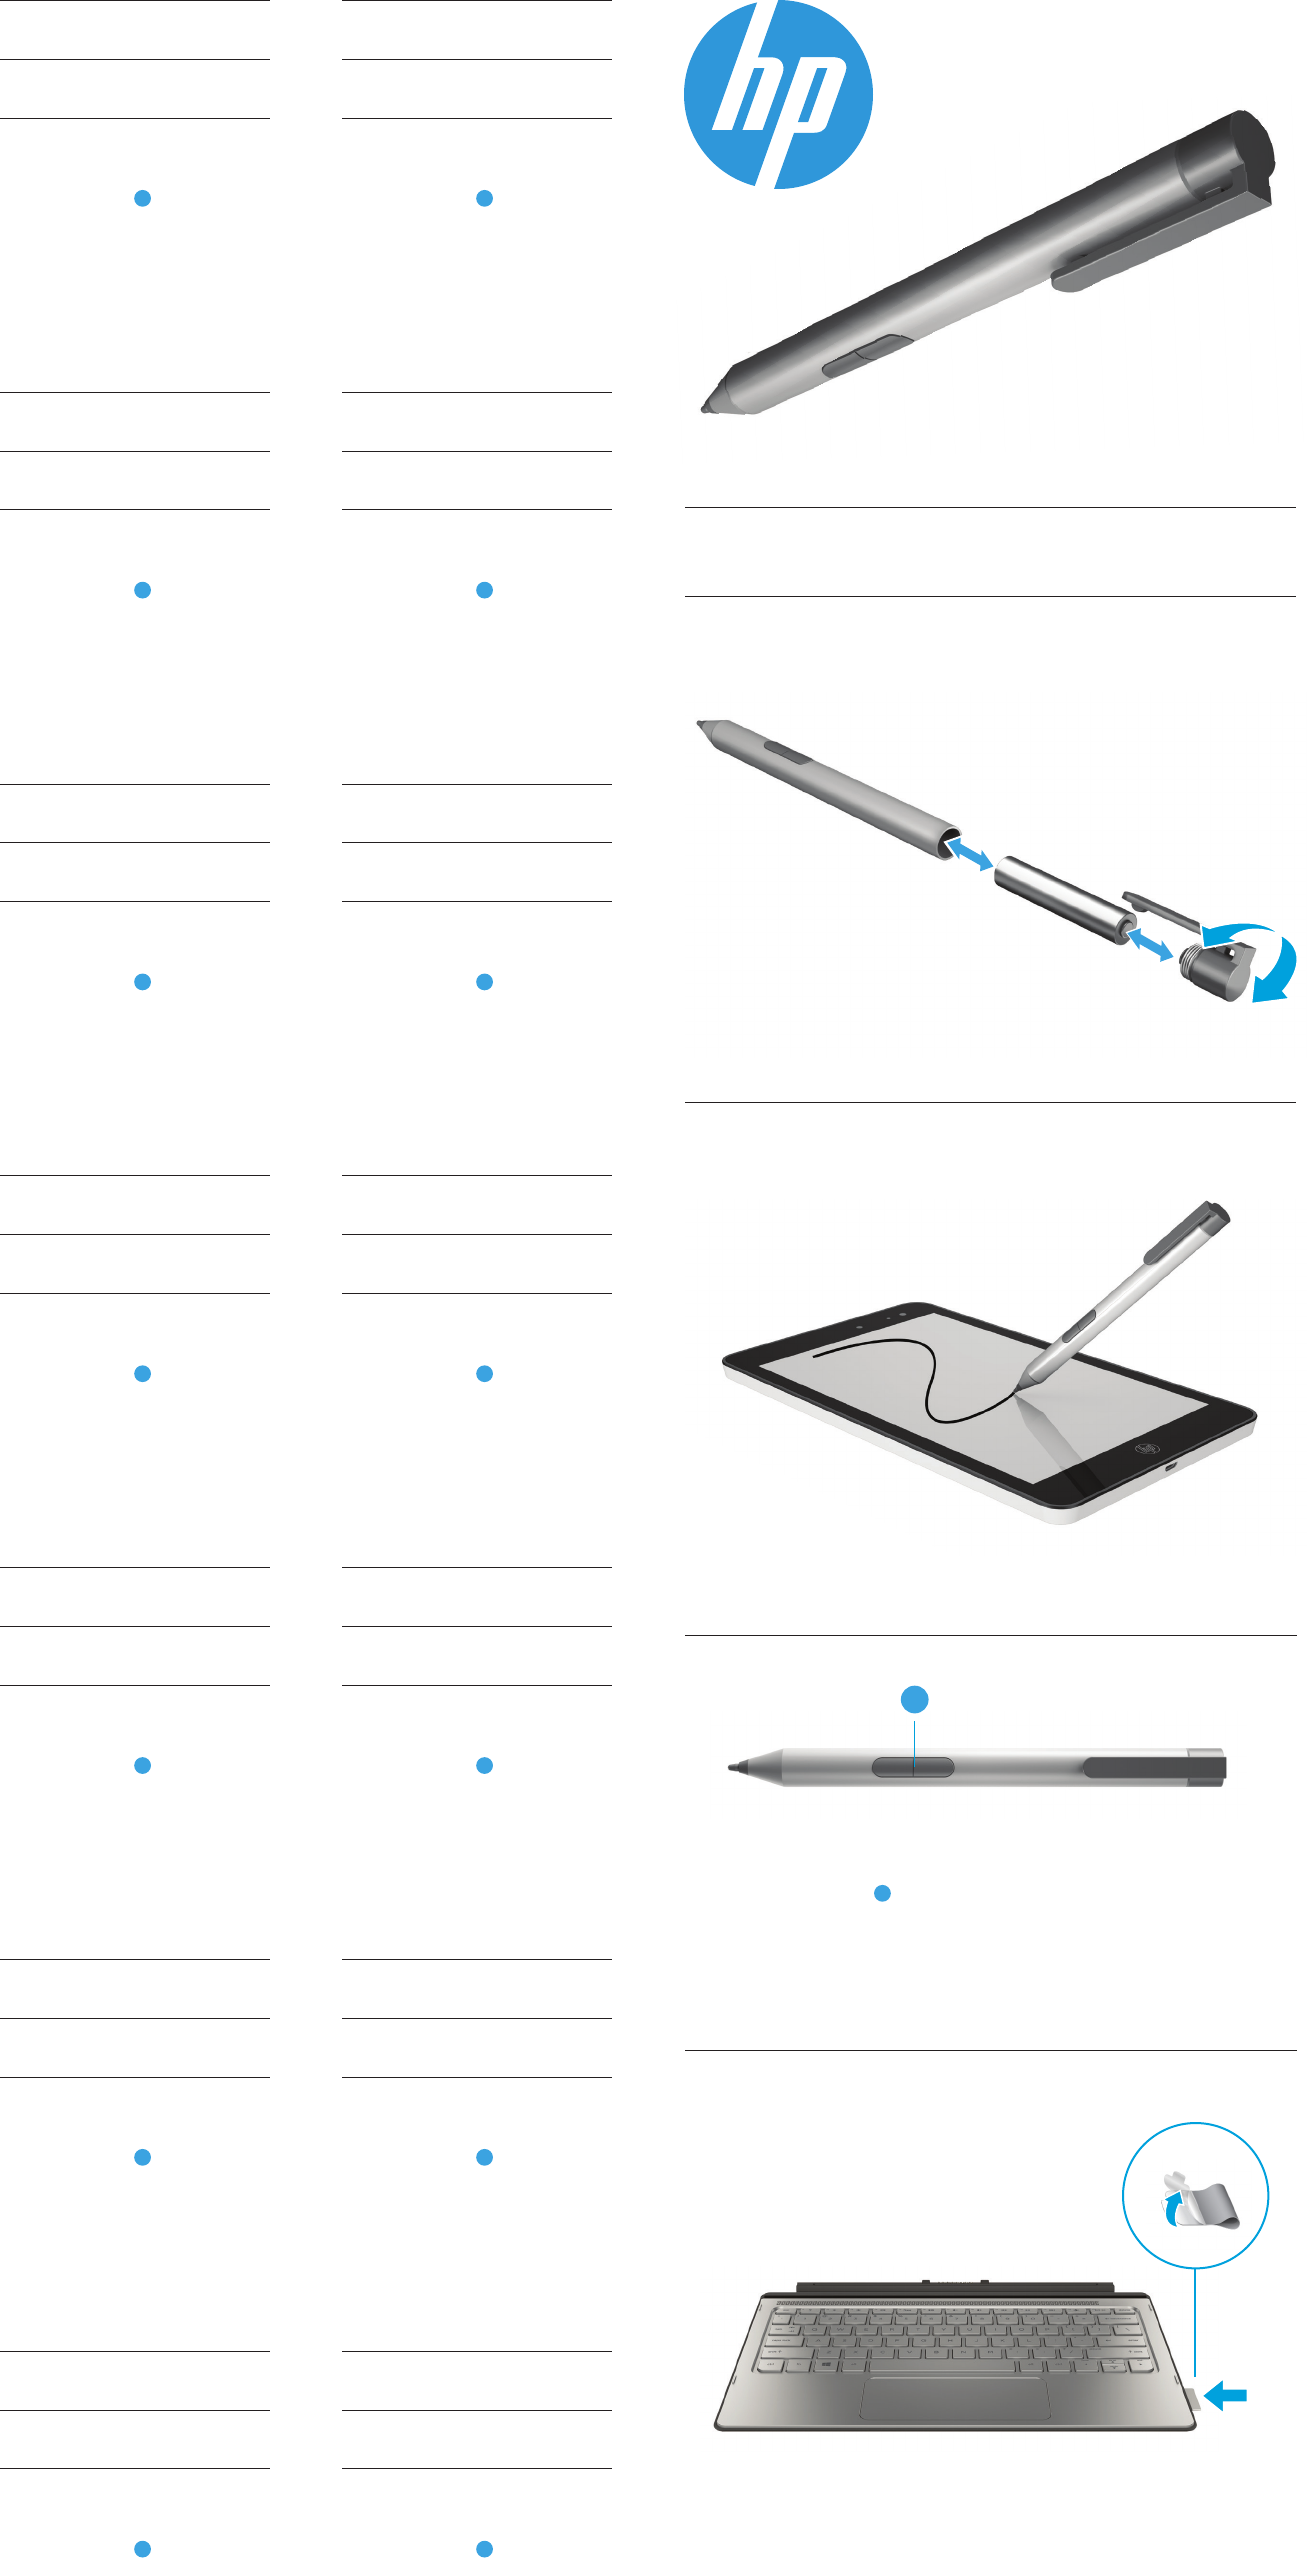
1 Turn on your device.
2 Install the battery.
3 Turn on the pen by tapping the
tip to any surface.
The function of the A button varies,
depending on the software.
For regulatory and safety notices, refer
to the Product Notices included with
your product.
*Select products only. Keyboard sold
separately.
AR
ID
BG
CS
DA
DE
ES
EL
FR
HR
IT
LV
LT
HU
EN
1 Turn on your device.
2 Install the battery.
2
3
1
3 Turn on the pen by tapping the tip to any surface.
A
The function of the A button varies, depending on
the software.
For regulatory and safety notices, refer to the Product Notices
included with your product.
2
*
1
*Select products only. Keyboard sold separately.
1 Turn on your device.
2 Install the battery.
3 Turn on the pen by tapping the
tip to any surface.
The function of the A button varies,
depending on the software.
For regulatory and safety notices, refer
to the Product Notices included with
your product.
*Select products only. Keyboard sold
separately.
Specication
Temperature, operating
0°C to 40°C (32°F to 104°F)
Relative humidity (noncondensing), operating
10% to 90%
Regulatory information
For regulatory identication purposes, your product is RMN to come. If required, regulatory markings
for your country or region are located on the side of the product, on the packaging, or elsewhere in
this document.
WARNING: To reduce the risk of re or burns, do not disassemble, crush, or puncture; do not short
external contacts; do not dispose of in re or water.
The information contained herein is subject to change without notice. The only warranties for HP
products and services are set forth in the express warranty statements accompanying such products
and services. Nothing herein should be construed as constituting an additional warranty. HP shall not be
liable for technical or editorial errors or omissions contained herein.
© Copyright 2015 HP Development Company, L.P.
First Edition: August 2015
835735-B21
SR
SE
TH
TR
UK
JA
KO
CN
TW
HE
NL
NO
PL
PT
BR
RO
RU
SK
SL
FI