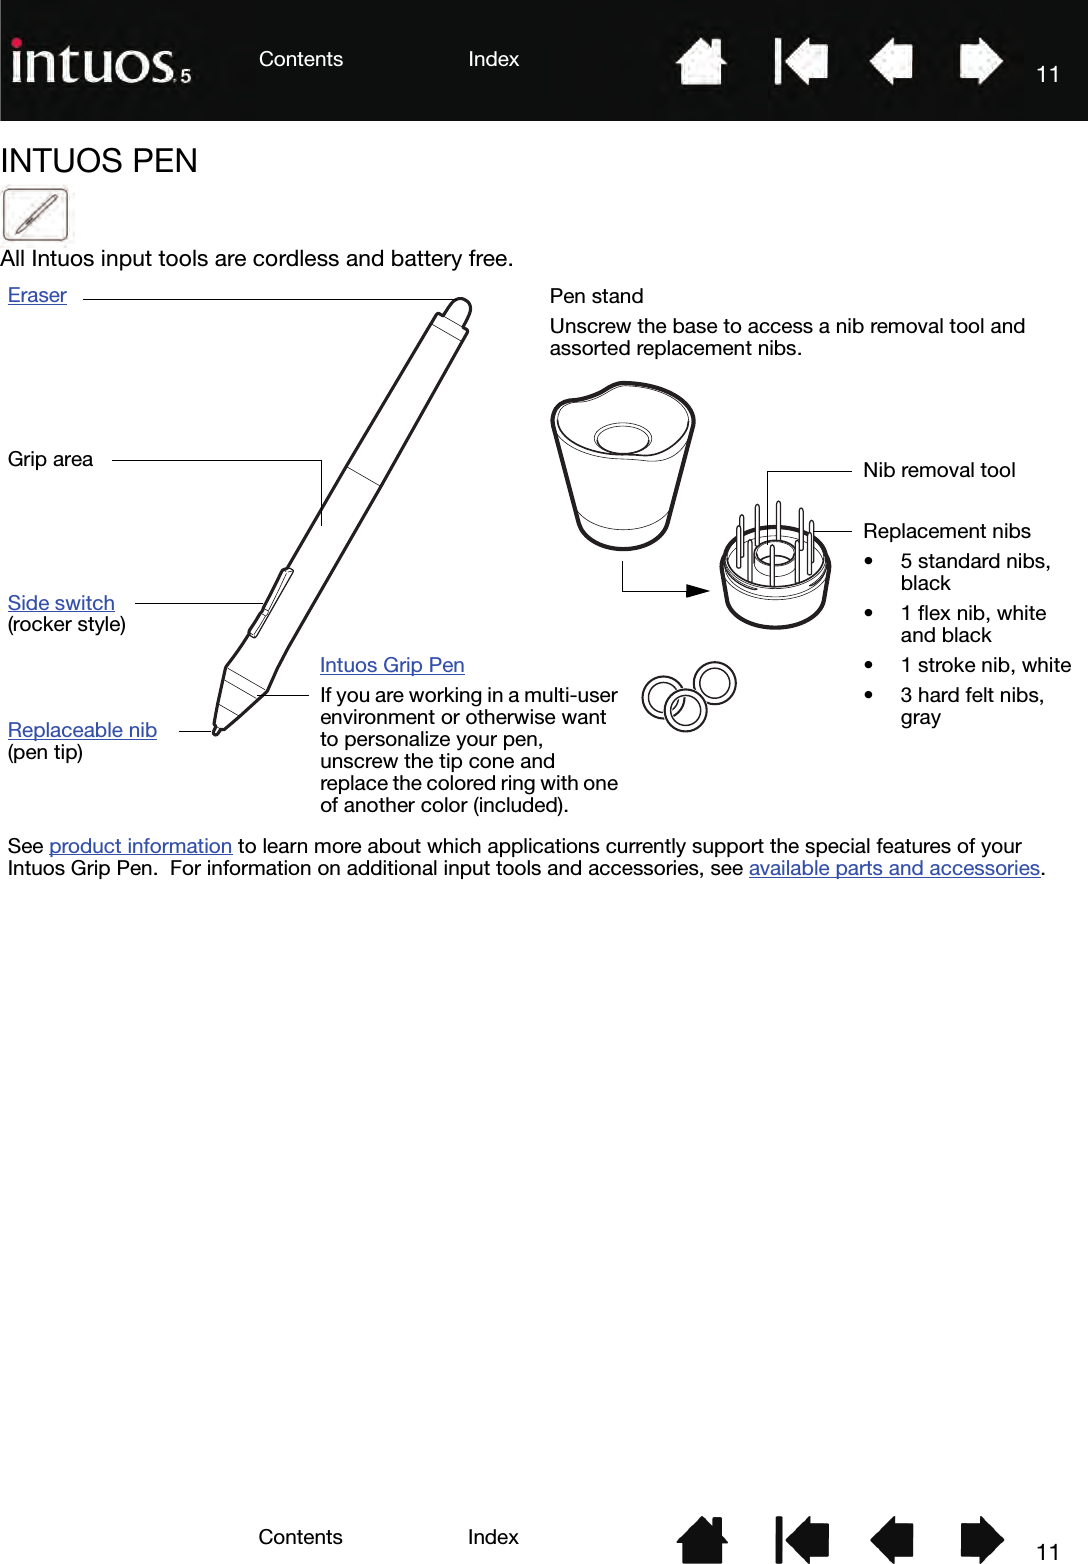
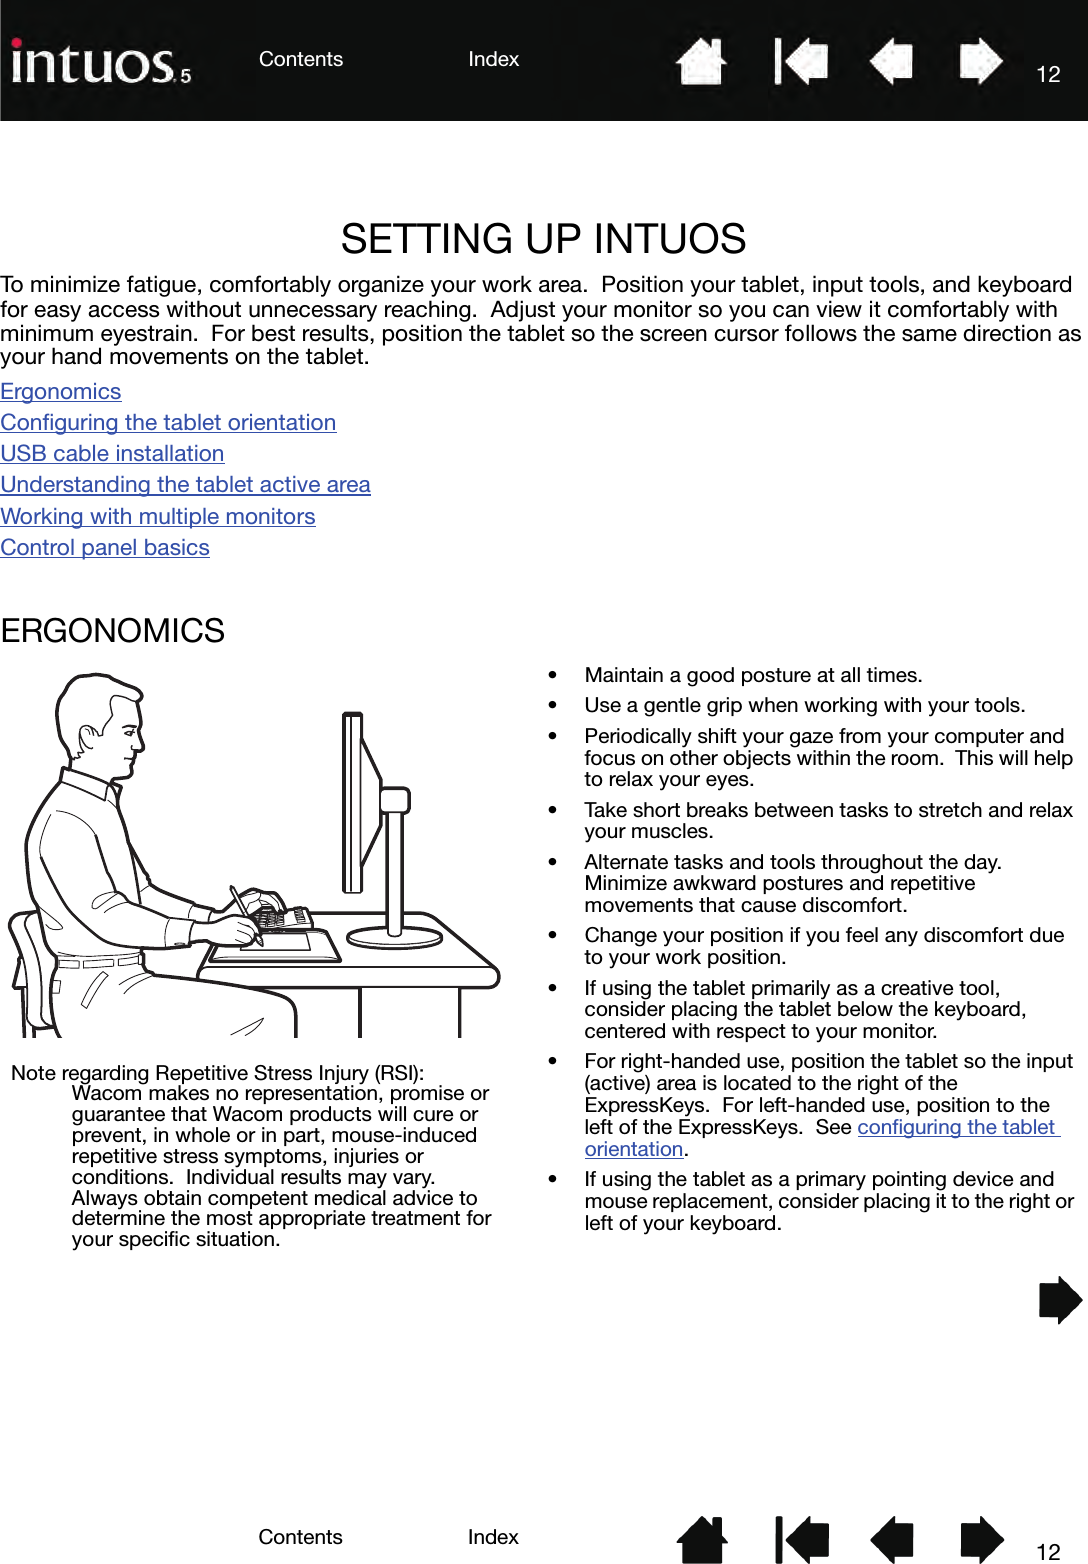
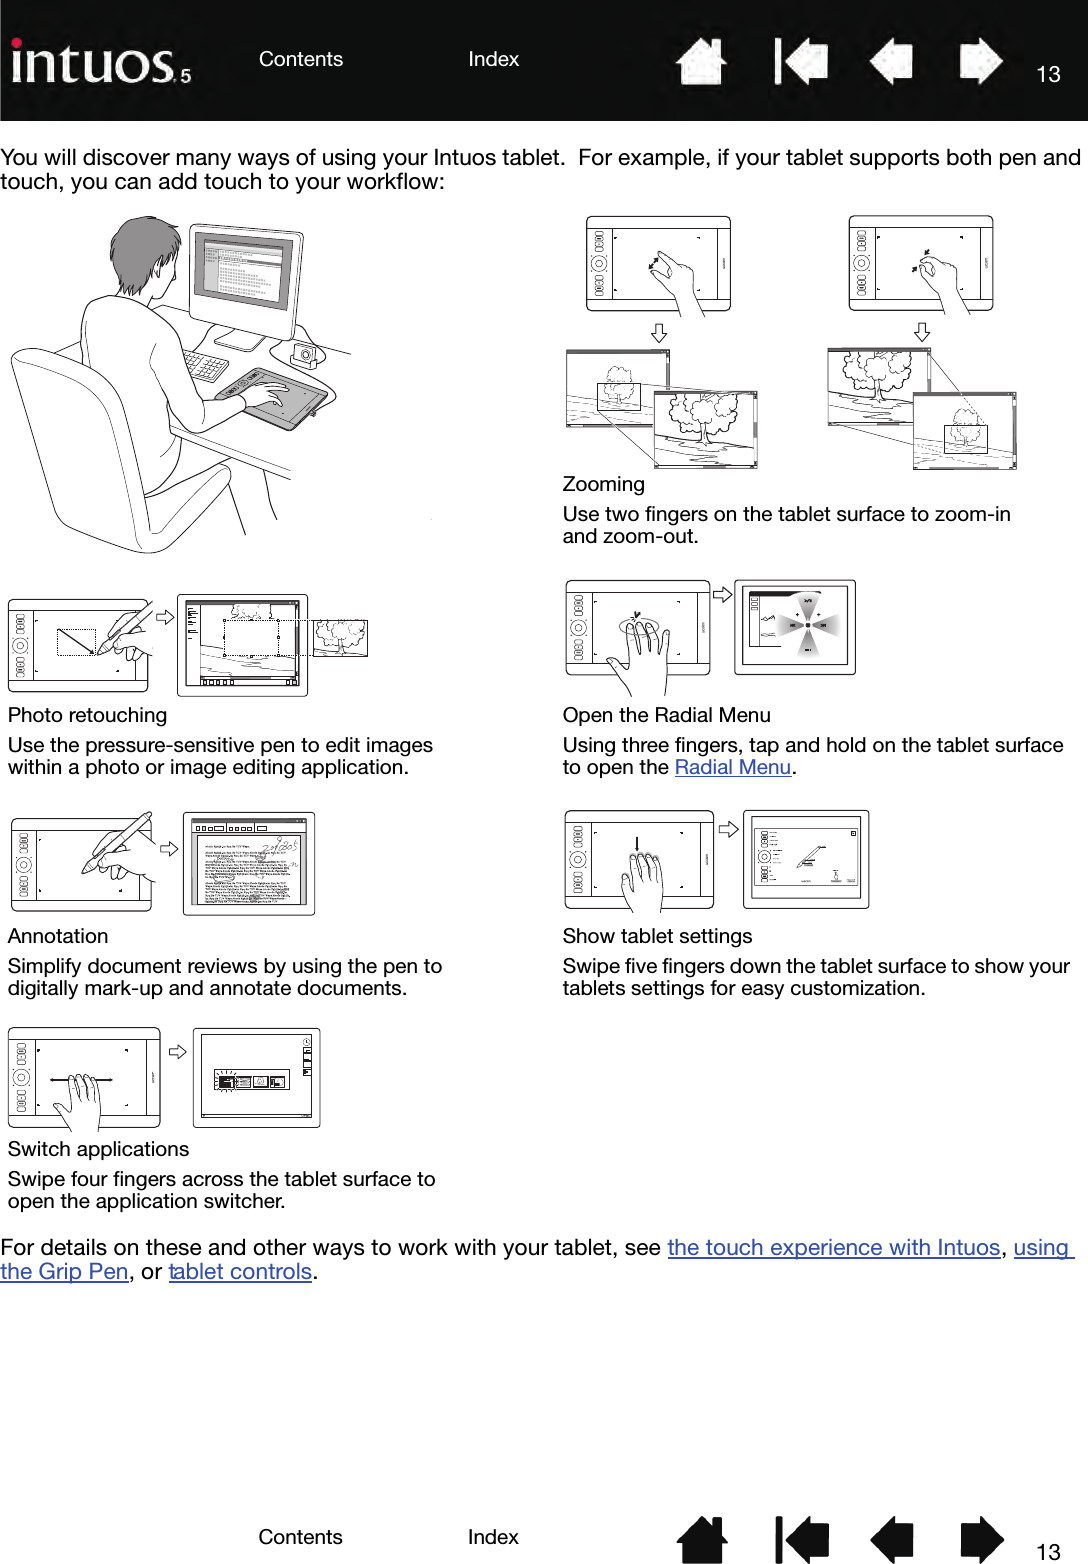
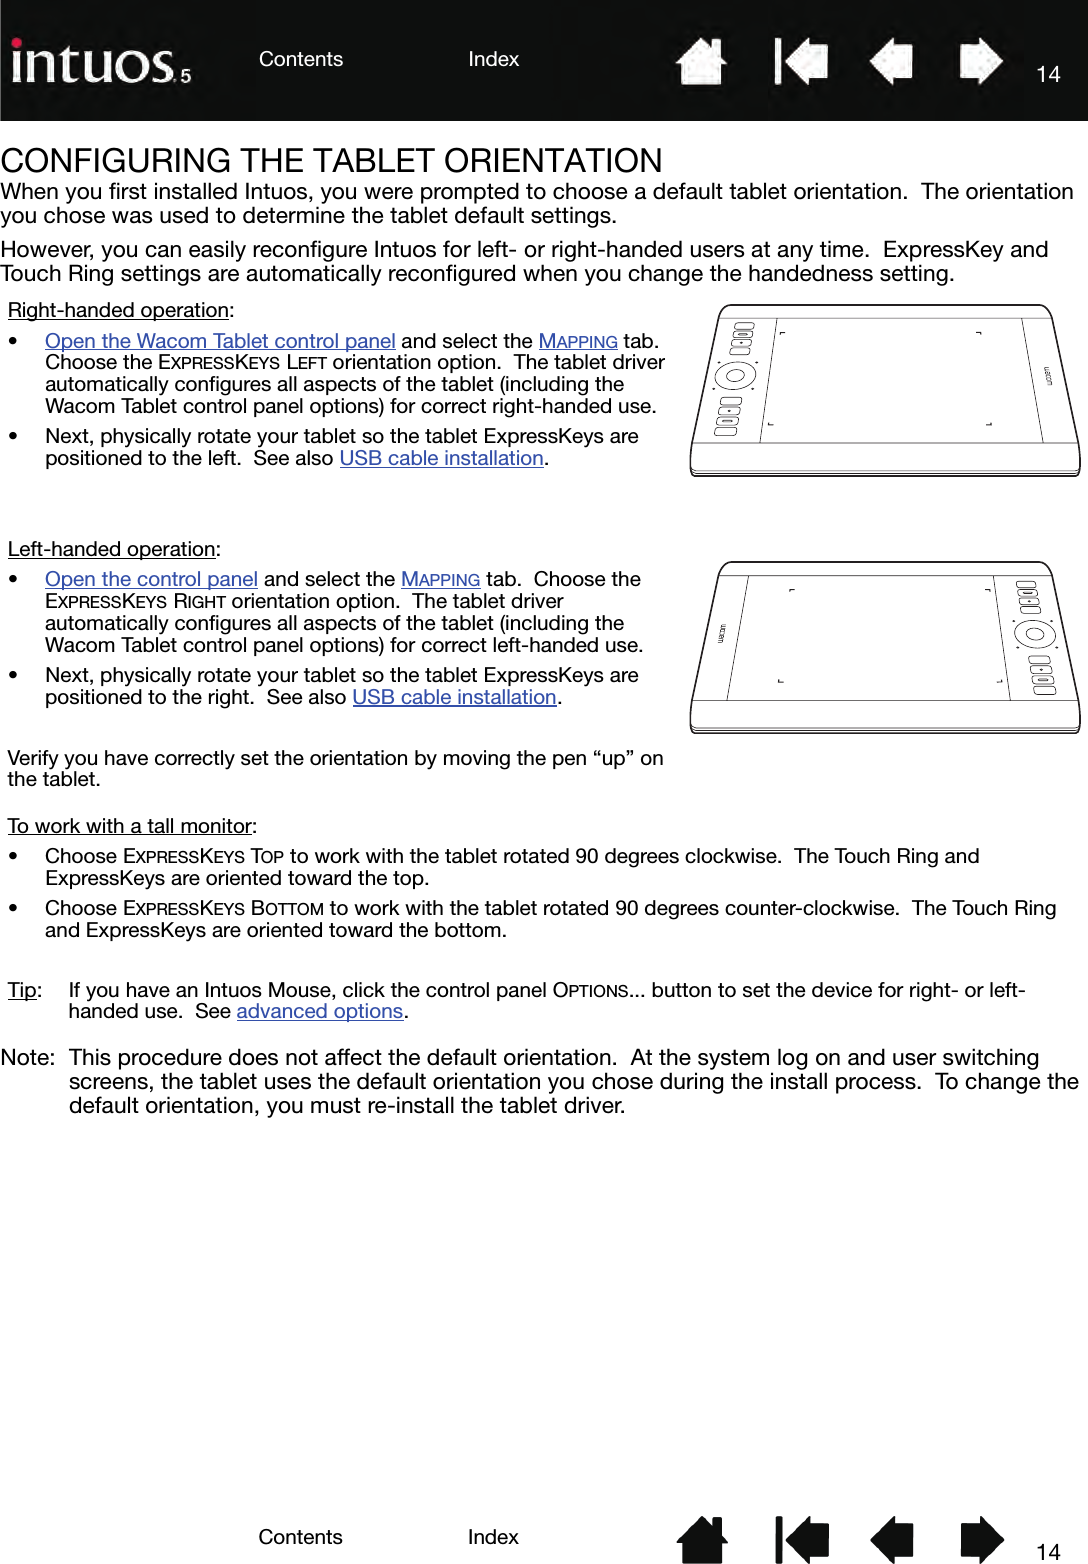
Wacom Co PTH450 Pen Tablet, Pen & Touch Tablet User Manual Cobra Intuos Manual FrameMakerV7x
Wacom Co Ltd Pen Tablet, Pen & Touch Tablet Cobra Intuos Manual FrameMakerV7x
Wacom Co >
Contents
- 1. User manual 1 of 4
- 2. User manual 2 of 4
- 3. User manual 3 of 4
- 4. User manual 4 of 4
User manual 1 of 4


![70IndexContents70IndexContentsCREATING AN APPLICATION-SPECIFIC SETTINGFirst choose the TABLET and TOOL for which you want to create an application-specific setting.After adding an application, its icon appears in the APPLICATION list whenever the respective tool is selected in the TOOL list. Select the application and then customize the control panel tab settings for your tool and selected application.Once you have created application-specific settings, applications that have not been customized in this manner will use the tool settings for ALL OTHER.Tip: First customize settings for one application. When you feel comfortable with the process, you can create more application-specific settings.Choose a method to select an application:•In the CURRENTLY OPEN APPLICATIONS box, select an application for which to create custom settings. •BROWSE to select the executable file of any application installed on your computer.The name of your selected application is displayed.Click OK to complete the process.Note: If two programs have the same executable file name, they will share the same customized settings.Click on the APPLICATION list [ + ] button.](https://usermanual.wiki/Wacom-Co/PTH450.User-manual-1-of-4/User-Guide-1599304-Page-70.png)
![71IndexContents71IndexContentsCHANGING APPLICATION-SPECIFIC SETTINGSTo change tool settings for a specific application, select the tool and the application. Then customize the tab settings.REMOVING APPLICATION-SPECIFIC SETTINGSTo remove an application-specific setting:1. In the TOOL list, select the tool from which you want to remove the application-specific setting. Then, in the APPLICATION list select the application you want to remove from the list.2. Click on the APPLICATION list [ – ] button. In the dialog box that appears, click DELETE to confirm your selection. The selected application is removed from the list, along with any custom tool settings.Tip: To quickly remove all application-specific settings from a single tool, remove it from the TOOL list. Then place the tool back on the tablet. The tool will be added back to the TOOL list using the default settings. This method cannot be used to remove custom FUNCTIONS settings.](https://usermanual.wiki/Wacom-Co/PTH450.User-manual-1-of-4/User-Guide-1599304-Page-71.png)
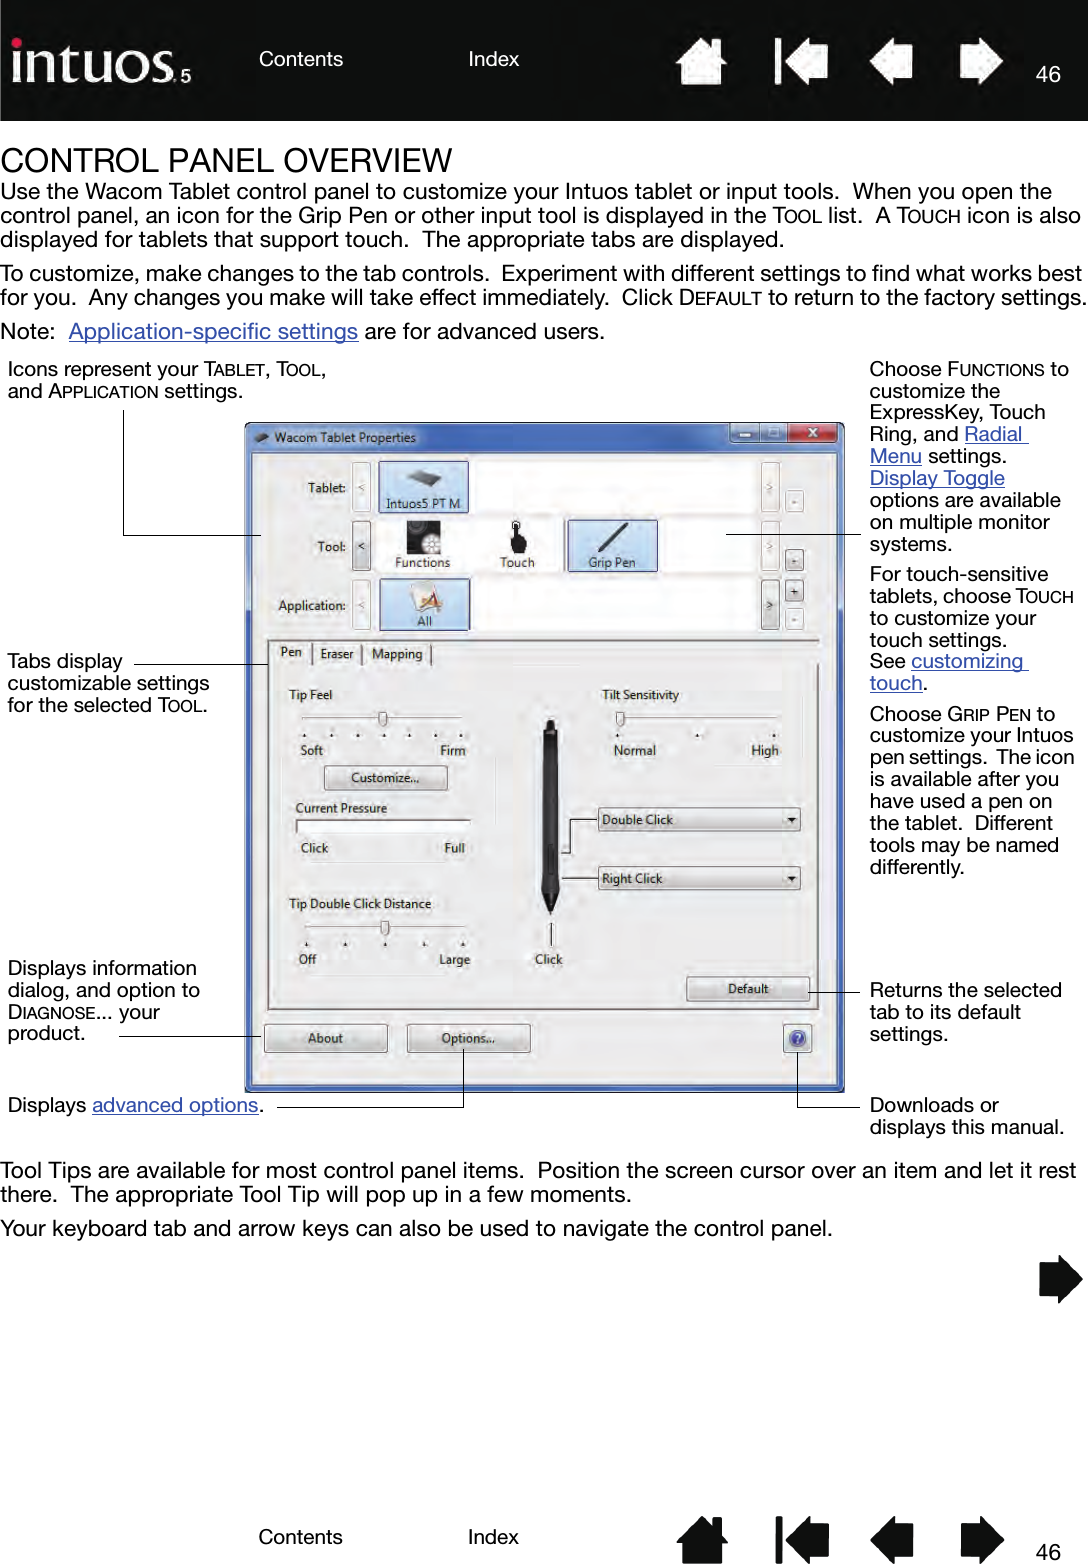
![72IndexContents72IndexContentsWORKING WITH MULTIPLE TOOLSThe Wacom Tablet control panel is designed to help you customize and keep track of the settings for your tablet and Intuos tools. The tool you use to open the control panel is automatically selected, and the appropriate tabs for that tool are displayed.To add a different tool to the TOOL list, simply use the tool on your Intuos tablet.• When you select a tool that has been added to the TOOL list, the appropriate tab settings for that tool are displayed. Any changes you make to the tab settings will then apply to the tool. Your changes take effect immediately.If a similar tool was previously added, the new tool will inherit the settings of the previously added tool. These settings can then be customized for the newly added tool.• Identical tools will use the same settings.To remove a selected tool from the TOOL list, click on the TOOL list [ – ] button. In the dialog box that appears, click DELETE to confirm your selection. The selected tool is removed from the list, along with any custom settings you may have created for it. (A removed tool can be added back to the TOOL list by placing it back onto the tablet.)Select a tool to change its settings.Removes the selected tool. The button is inactive when there is only one item in the list.The FUNCTIONS and TOUCH icons cannot be deleted.The TOOL list displays an icon for the tablet FUNCTIONS and different tools that have been used on the tablet.The TOUCH icon is available for touch-sensitive tablets. See customizing touch.If application-specific settings have not been added, the ALL icon is displayed and the tool settings apply to all applications. Tab settings apply only to the selected tool and application.](https://usermanual.wiki/Wacom-Co/PTH450.User-manual-1-of-4/User-Guide-1599304-Page-72.png)