Wacom Co PTZ DIGITIZER User Manual Intuos3 Manual
Wacom Co Ltd DIGITIZER Intuos3 Manual
UserManual.wiki
>
Wacom Co
>
PTZ User Manual
>
USERS MANUAL 1
Contents
1.
USERS MANUAL 1
2.
USERS MANUAL 2
3.
USERS MANUAL
USERS MANUAL 1
Navigation menu
Upload a User Manual
Namespaces
Wiki Guide
HTML
PDF
Info
Views
User Manual
Discussion / Help
Navigation
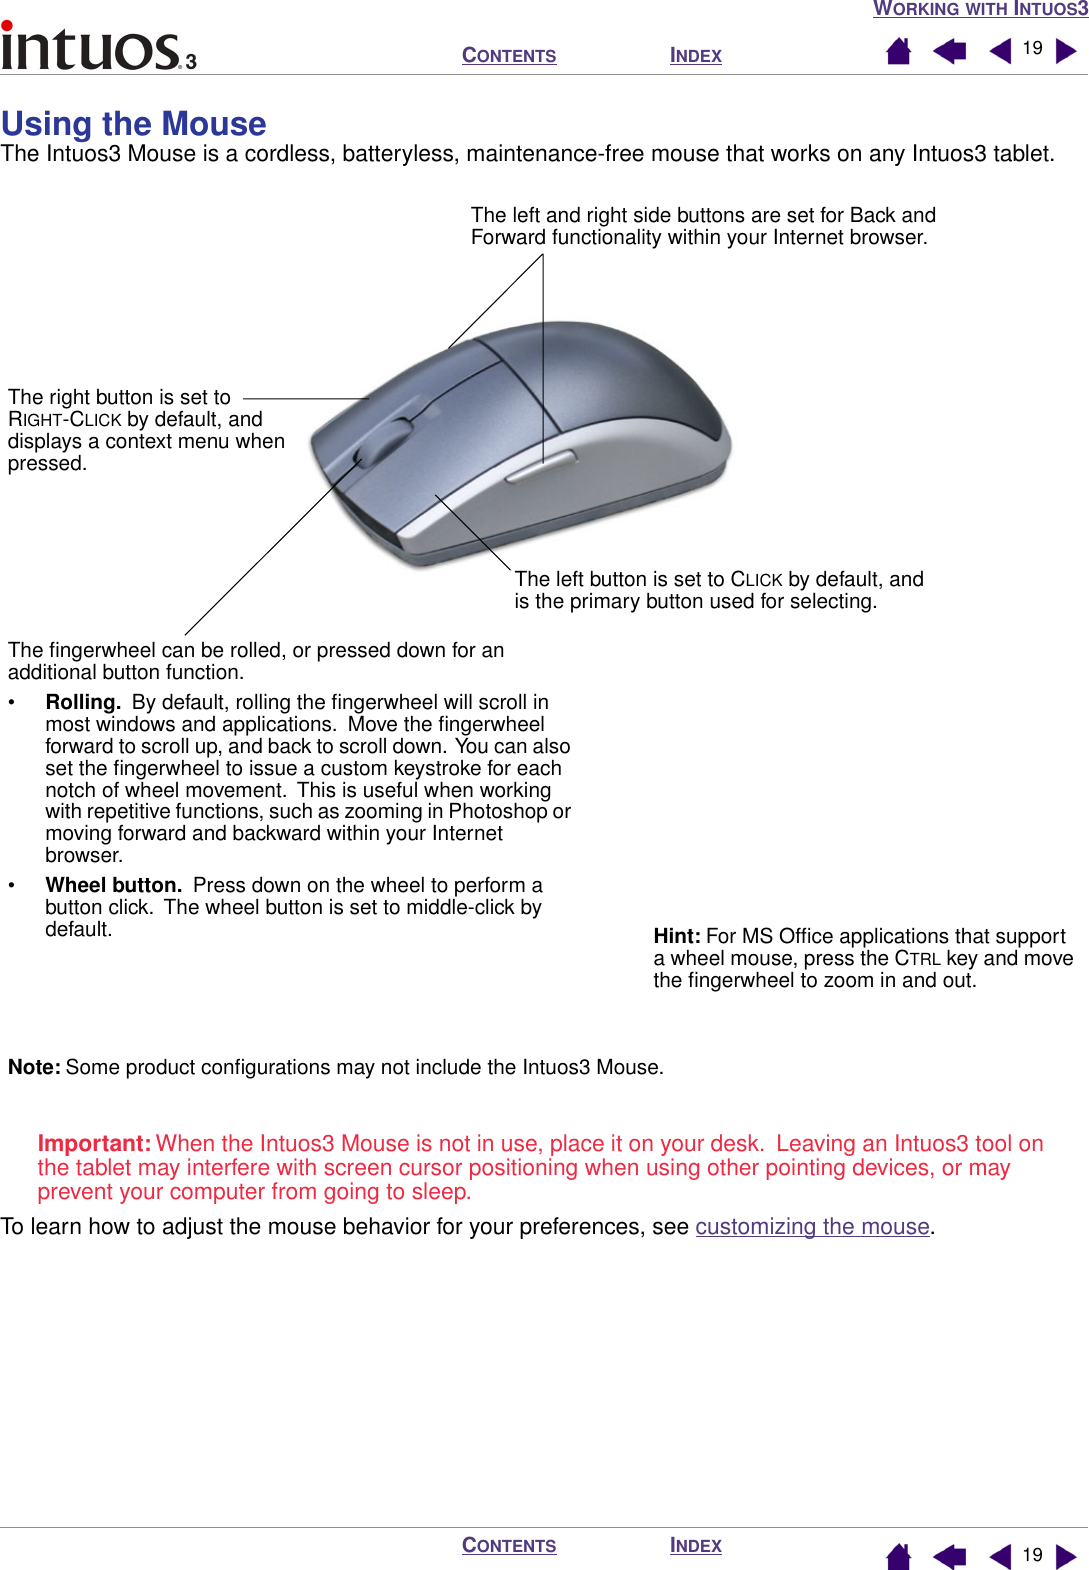
![WORKING WITH INTUOS3INDEXCONTENTSINDEXCONTENTS 2222Using the Tablet KeysPress the Tablet Keys with your secondary hand to toggle between tools or change tool properties while you are using your primary hand to work with your pen on the Intuos3 tablet. The default settings were chosen to optimize your workflow in Photoshop and other graphics applications, using the following modifier keys:Button 1: CTRL modifier key for Windows. COMMAND (Apple key) for Macintosh.Button 2: SHIFT modifier key.Button 3: ALT modifier key for Windows. OPTION modifier key for Macintosh.Button 4: SPACE key (spacebar). The Tablet Keys are fully customizable, enabling you to make the best possible use of them. You may want to consider the following ways of working with the Tablet Keys:•Set a pair of keys to commonly used keystrokes, such as [ and ] to decrease and increase your brush size in Photoshop.• Set a key to a commonly used keyboard shortcut in order to open files or start an application.• If you prefer not to (or cannot) use the side switches on your Intuos3 Pen, then set a Tablet Key to right- or double-click.• Choose from any of the other available functions.See customizing Tablet Keys for more details on the available Tablet Key settings.If you require different key functions in different applications, you can easily set up application-specific settings for the tablet controls. See creating an application-specific setting for more information.6x8/A5 tablet shown.23142341The Tablet Keys are chordable. For example, pressing keys 3 and 1 together simulates ALT+CTRL in Windows, or OPTION+COMMAND on Macintosh systems.Tips: • In Photoshop, pressing the spacebar (key 4 on your Intuos3 tablet) switches the currently selected tool to the hand tool and lets you pan (move) the image within the application window.• In Photoshop and many other graphics applications, the ALT, CTRL, and SHIFT modifier keys modify a tool or switch to a complementary tool while the modifier key is pressed.](https://usermanual.wiki/Wacom-Co/PTZ.USERS-MANUAL-1/User-Guide-458061-Page-22.png)
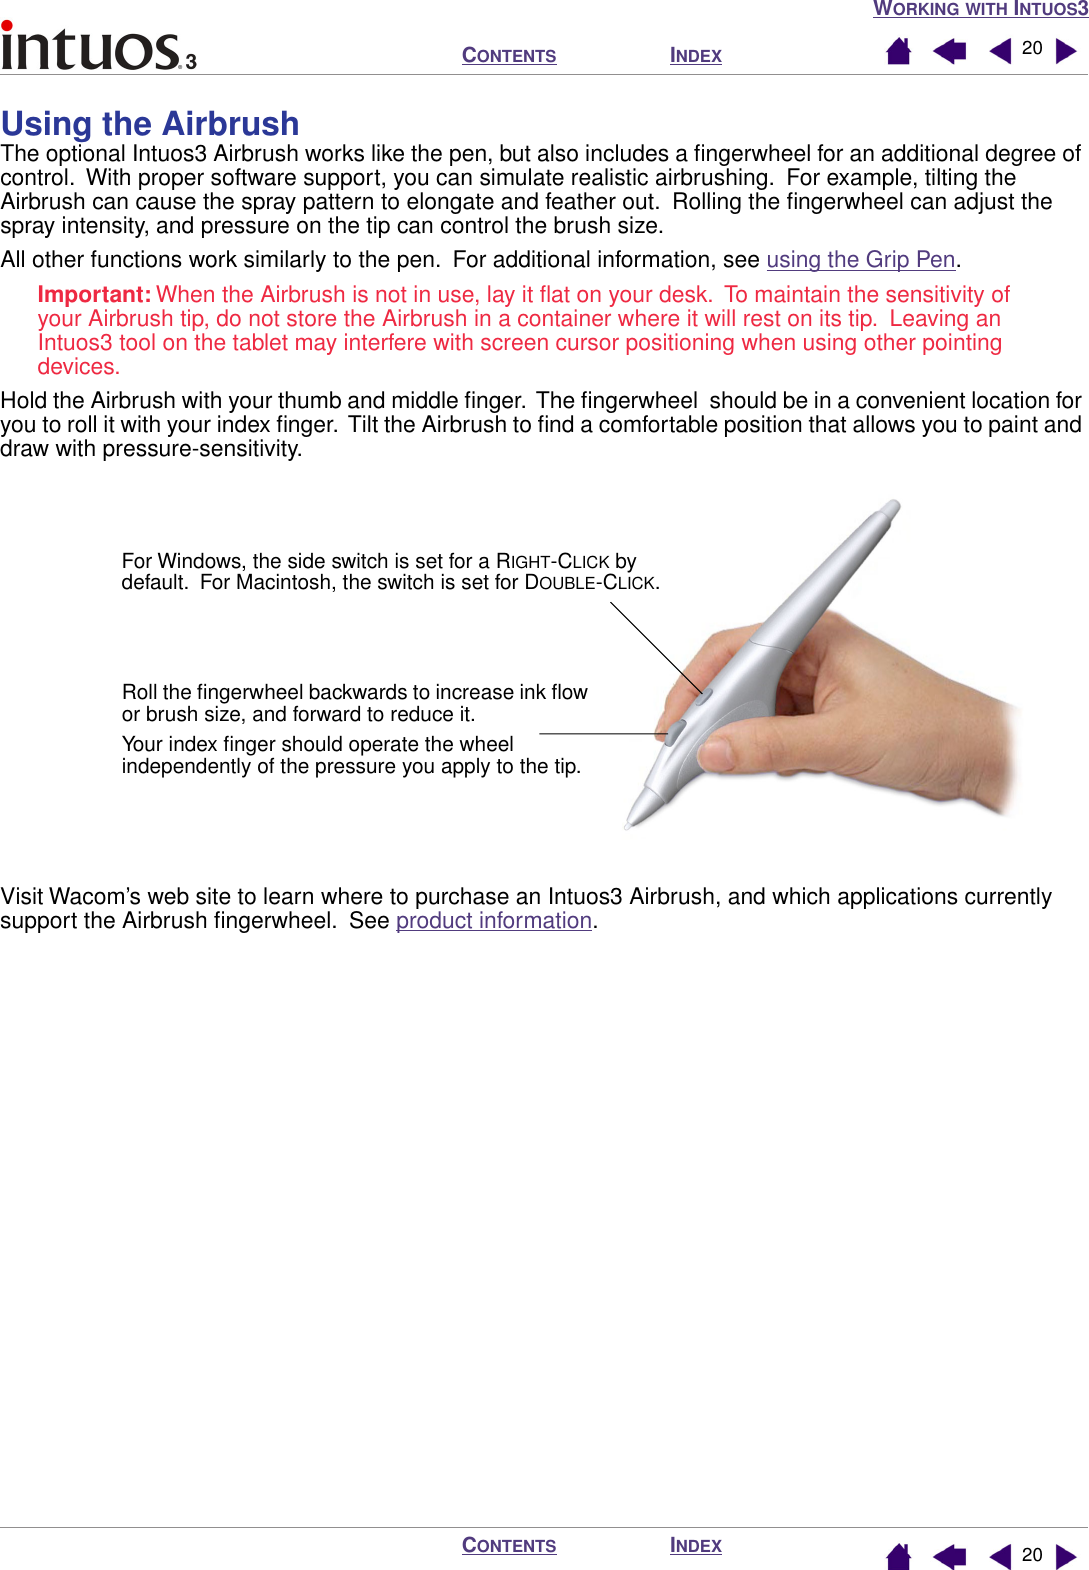
![WORKING WITH INTUOS3INDEXCONTENTSINDEXCONTENTS 2323Using the Touch StripsSlide your finger over the Touch Strip to quickly zoom in or out, scroll up or down, or perform other functions with your secondary hand while using your dominant hand to work with your pen or mouse. You can also set each Touch Strip to issue custom keystrokes. For example, you might set a Touch Strip action to cycle through layers when working in Photoshop. You can use the Touch Strips in three different ways:•Standard operation: Slide your finger up or down to zoom, scroll, or issue the assigned keystroke function.•Continuous operation: Press and hold your finger at either end of the Touch Strip to continuously scroll. This is useful for scrolling through long documents or web pages.•Single step operation: Press and release your finger at either end of the Touch Strip to zoom, scroll, or issue the assigned keystroke function one step at a time. By default, the Touch Strips enable you to zoom in most graphics applications and to scroll in other applications. Each Touch Strip can be independently customized to meet your needs.Many applications support two methods of zooming. In Photoshop, Painter, and some other applications, you can specify the center point for zooming by pointing with your Intuos tool while operating the Touch Strip (make sure you are pointing inside the document window with an Intuos tool). Otherwise, the image will zoom centering on the document window.Tip: Photoshop users who frequently change brush sizes may want to assign the [ and ] keys to a Touch Strip. Sliding your finger up or down the Touch Strip will then change the brush size without the need to reach for the keyboard or access the Photoshop BRUSHES palette.See customizing tablet Touch Strips and advanced Touch Strip settings if you would like to customize the way your tablet Touch Strip(s) work.6x8/A5 tablet shown.To use the tip of your Intuos3 Pen to operate the Touch Strip, rest the pen tip against the edge of the Touch Strip adjacent to the tablet’s active area. Then press hard enough to issue a click and move the pen tip up or down along the Touch Strip edge. (Only the inside edge of the Touch Strip responds to pen input.)Press and hold here for continuous operation, or press and release for single step operation.](https://usermanual.wiki/Wacom-Co/PTZ.USERS-MANUAL-1/User-Guide-458061-Page-23.png)