Wanlida Group WIFI9002 Wi-Fi Module User Manual Product Specification
Wanlida Group Co., Ltd. Wi-Fi Module Product Specification
Contents
- 1. User Manual
- 2. User manual
User Manual
WIFI-9002
MALATA
User’s Manual
Part Name:802.11b/g/n Wireless Model
Part No.:WIFI-9002
Version:V1.0

Revision History
Release
Date
Revision
Initials
1.0
2009-11-14
Initial release
JY
Notice for the USA FCC Part 15:
This equipment has been tested and found to comply with the limits for a Class B digital device, pursuant
to Part 15 of the FCC Rules.
These limits are designed to provide reasonable protection against harmful interference in a residential
installation.
This equipment generates, uses and can radiate radio frequency energy. However, there is no guarantee
that interference will not occur in a particular installation. If this equipment does cause harmful
interference to radio or reception, which can be determined by turning the equipment off and on, the user
is encouraged to try to correct the interference by one or more of the following measures:
• Reorient or relocate the receiving antenna.
• Increase the separation between the equipment and receiver.
• Connect the equipment into an outlet on a circuit different from that to which the receiver is
connected.
• Consult the dealer or an experienced technician for help.
This device complies with part 15 of the FCC Rules. Operation is subject to the following two conditions:
1) This device may not cause harmful interference, and
2) This device must accept any interference received, including interference that my cause undesired
operation.
MODIFICATION: Any changes or modifications not expressly approved by the grantee of this device
could void the user’s authority to operate the device.
CAUTION:
1) To comply with the limits of the Class B digital device, pursuant to Part 15 of the FCC Rules, this
device is comply with Class B limits. All peripherals must be shielded and grounded. Operation with
non-certified peripherals or non-shielded cables may results in interference to radio or reception.
2) This Transmitter must not be co-located or operating in conjunction with any other antenna or
transmitter.
3) For product available in the USA market, only channel 1~11 can be operated. Selection of other
channels is not possible.
IMPORTANT NOTE:
1) This module is intended for OEM integrator. The OEM integrator is still responsible for the FCC
compliance requirement of the end product, which integrates this module.
2) 20cm minimum distance has to be able to maintained between the antenna and the users for the
host this module is integrated into. Under such configuration, the FCC radiation exposure limites set
forth for an population/uncontrolled environment can be satisfied.
3) Any changes or modifications not expressly approved by the manufacturer could void the user’s
authority to operate this equipment.
USERS MANUAL OF THE END PRODUCT:
In the users manual of the end product, the end user has to be informed to keep at least 20cm separation
with the antenna while this end product is installed and operated. The end user has to be informed that
the FCC radio-frequency exposure guidelines for an uncontrolled environment can be satisfied. The end
user has to also be informed that any changes or modifications not expressly approved by the
manufacturer could void that user’s authority to operate this equipment. If the size of the end product is
smaller than 8*10cm, then additional FCC part 15.19 statement is required to be available in the user’s
manual:
This device complies with Part 15 of FCC rules. Operation is subject to the following two conditions:
(1) this device may not cause harmful interference and
(2) this device must accept any interference received, including interference that may cause undersired
operation.
LABEL OF THE END PRODUCT:
The final end product must be labeled in a visible area with the following “ Contains FCC ID:
SMFWIFI9002 ”. If the size of the end product is larger than 8*10cm, then the following FCC part 15.19
statement has to also be available on the label: This device complies with Part 15 of FCC rules.
Operation is subject to the following two conditions:
(1) this device may not cause harmful interference and
(2) this device must accept any interference received, including interference that may cause undersired
operation.
If the above two sentences can’t show on product body due to product size or label size, it could be put
into the end product user manual.
Table of Contents
1. INSTALL THE DRIVER---------------------------------------------------------------------------- 4
2.CONNECT----------------------------------------------------------------------------------------------- 6
3.MAKE CONNECTION------------------------------------------------------------------------------- 7
4.UNINSTALL THE DRIVER------------------------------------------------------------------------ 12
1. Install the driver
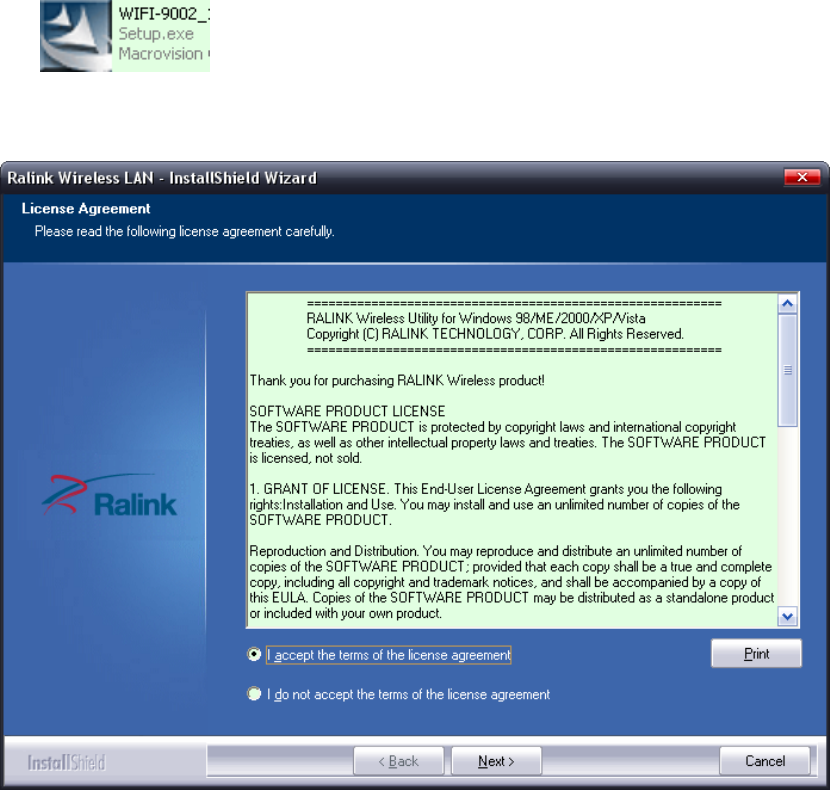
Step1 Insert the installation CD into your CD-ROM driver, Double click the
icon to start setup.
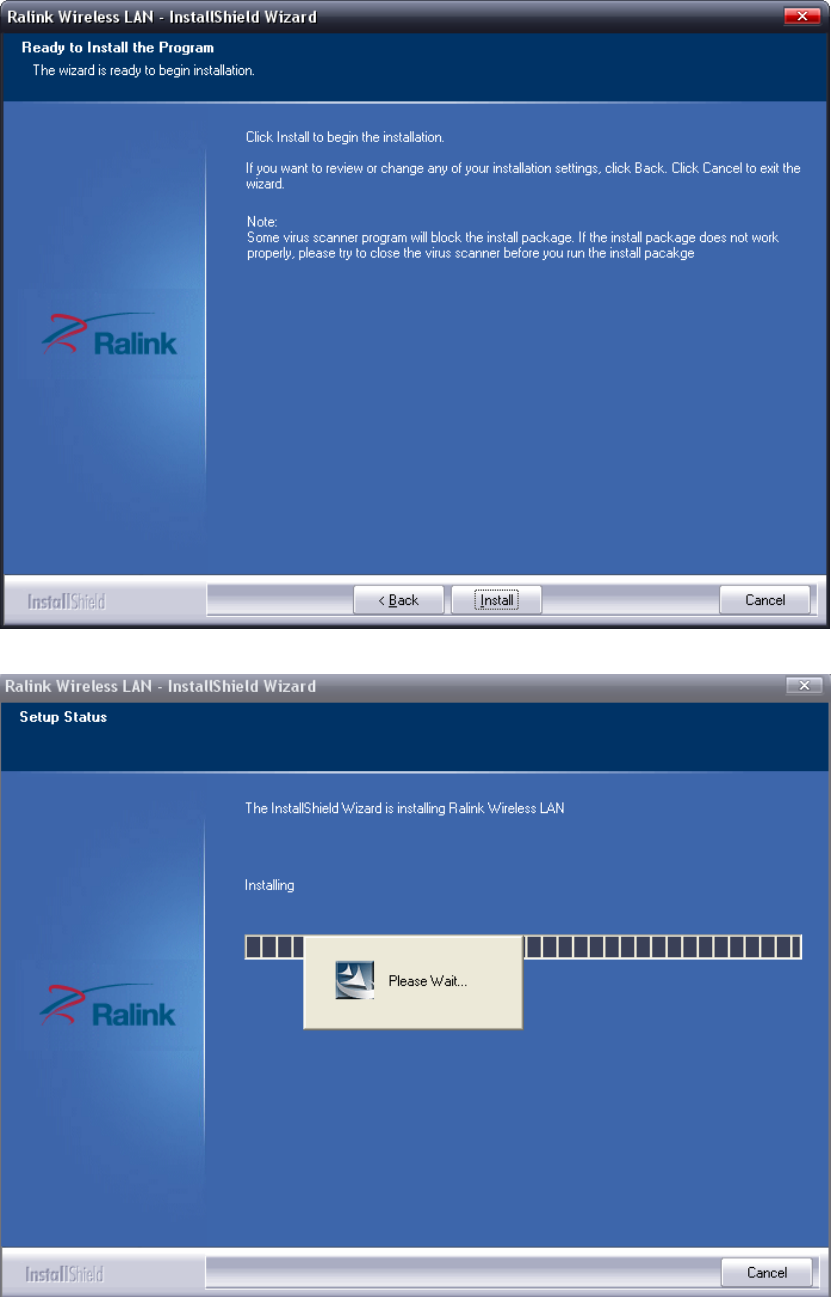
Step2 Choose I accept the terms of the license agreement and click next to go on.
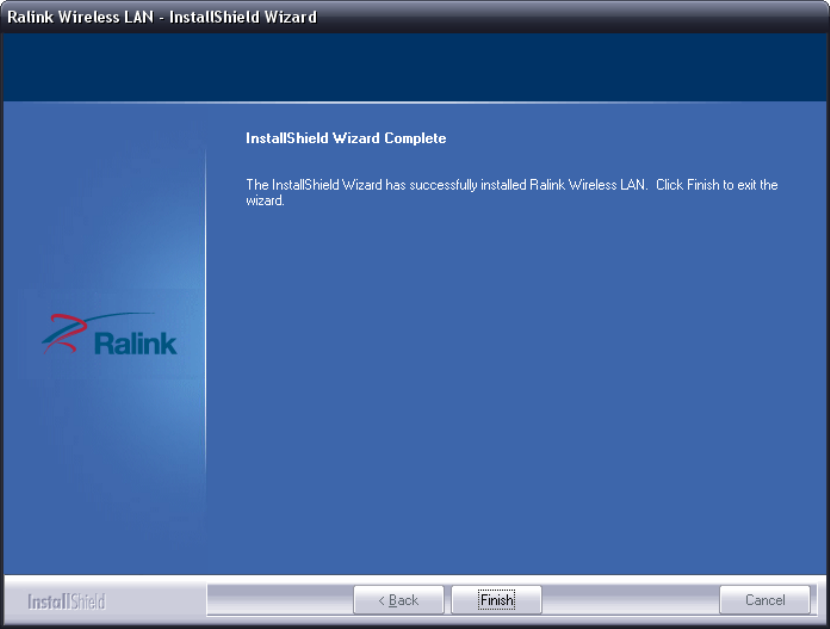
Step3 Click Install to begin the setup.
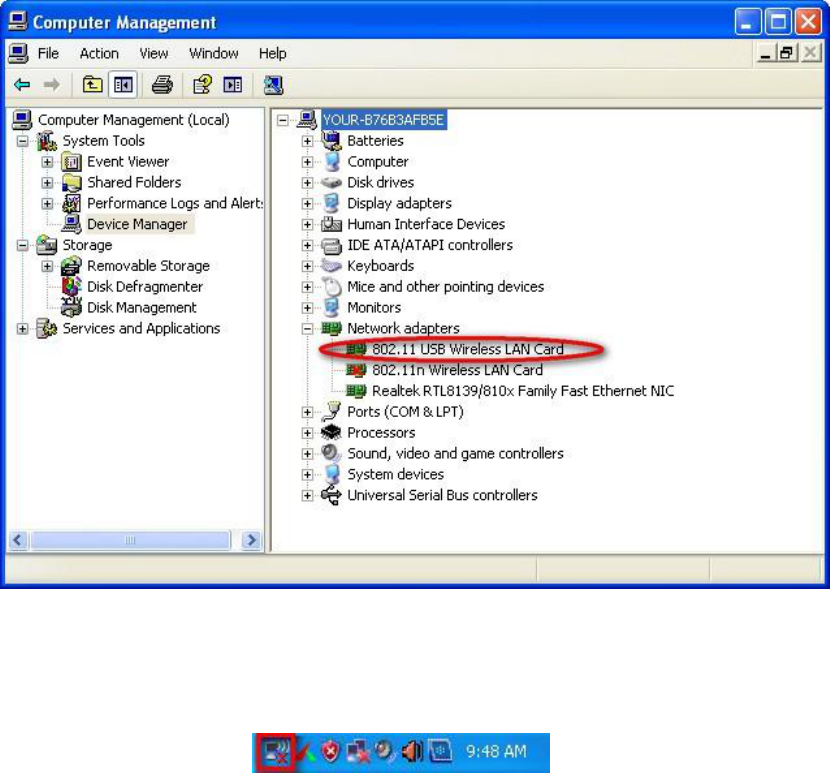
Step4 Click Finish to complete the setup.
2. connect
Plug in your usb wireless LAN adapter, it will be recognized and auto installed. Just
confirmed it like below:
3.Make connection
Double click the icon
You will see:
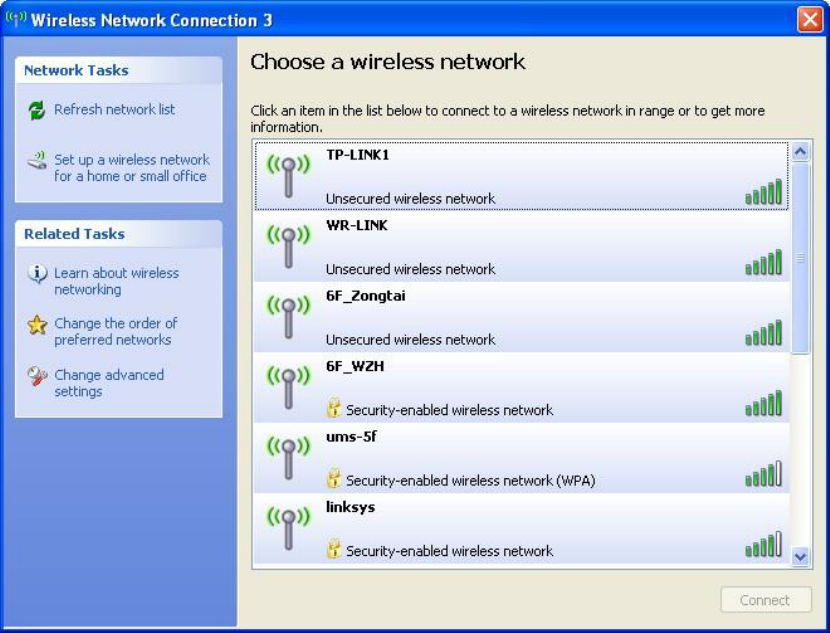
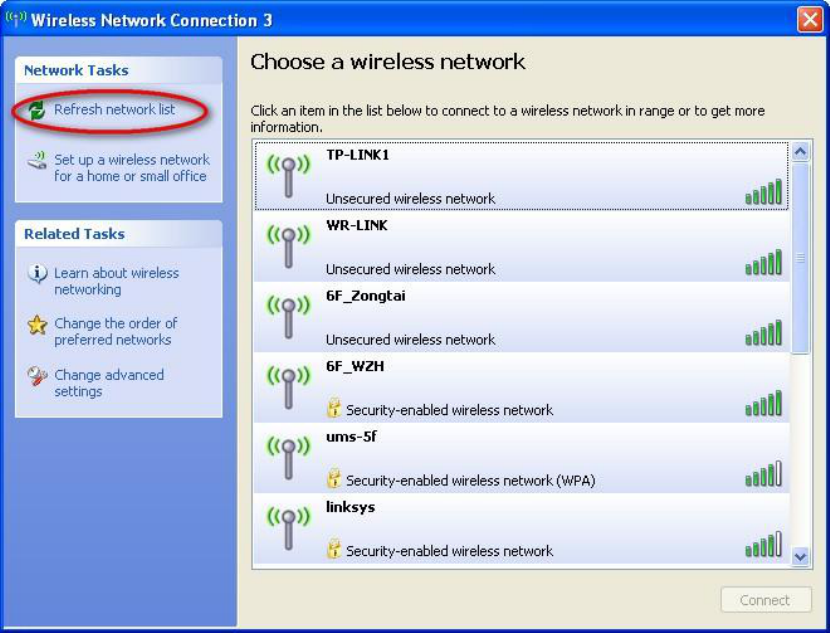
You can click the button Refresh network list to find which AP is in range, they
will show on the window.
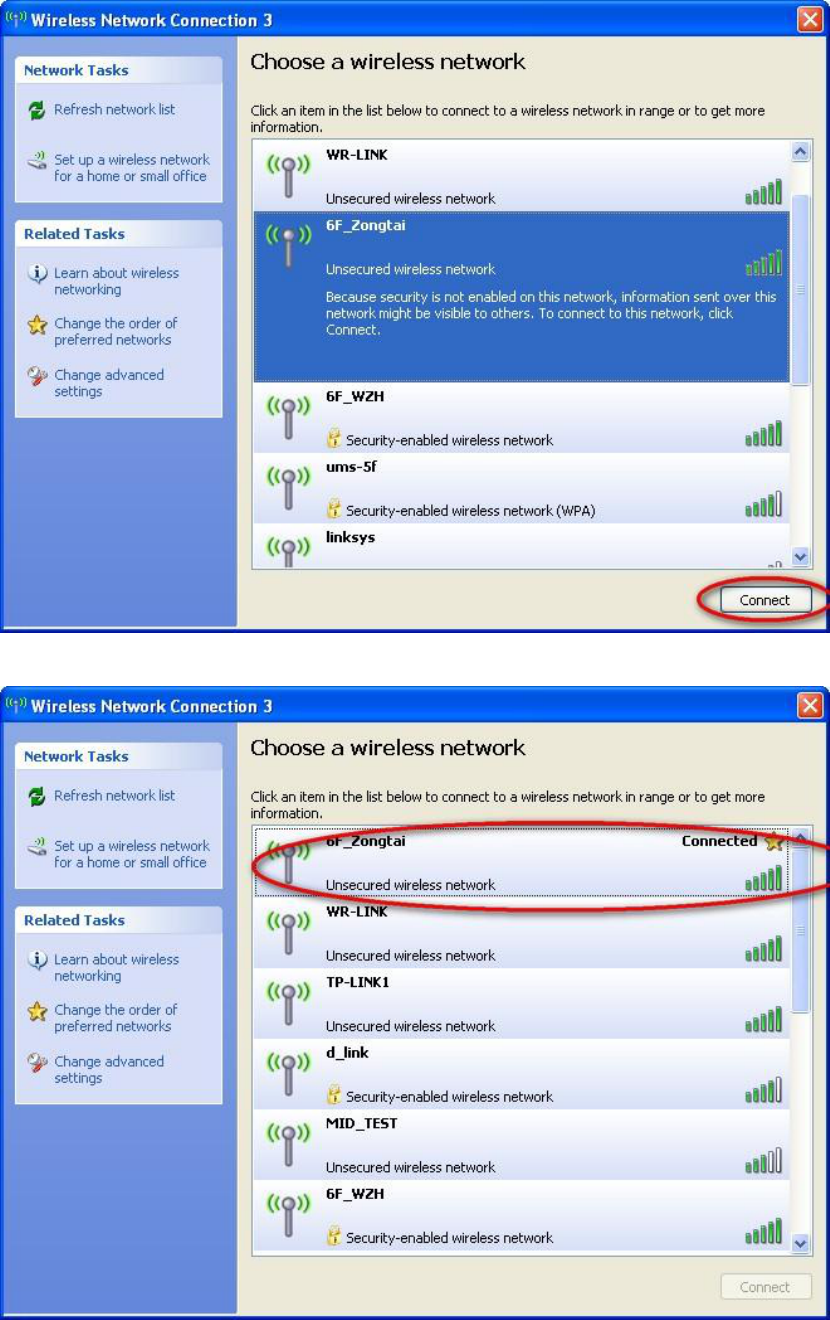
Choice one you want to connect, and click the button connect to finish the
connection. An infrastructure connection is completed.

Double click the icon
You will see the Wireless Network Connection Status
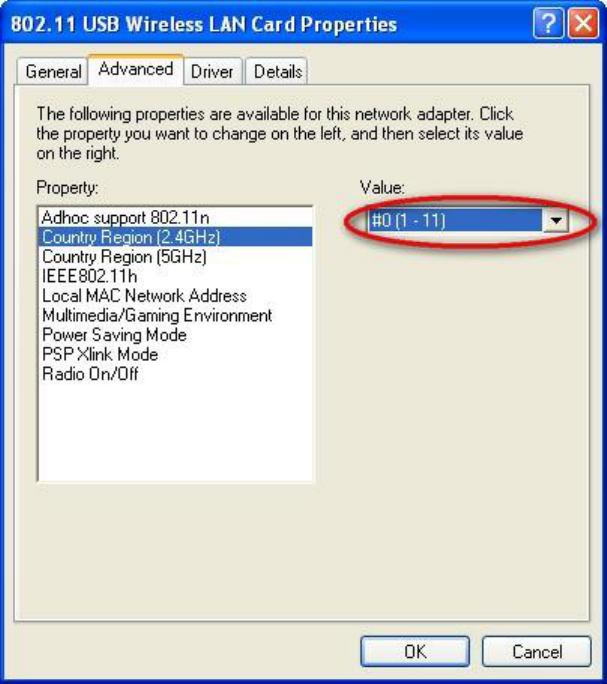
Note: please choose correct channel setting up to your law. For example, ch13 is
permitted in your country, and you set your router at ch13, while you choose ch1ch11
(default setting), you will never find the AP. So you should have to choose ch1ch13 in
Advanced page as below.
4.Uninstall the driver
In the case you need to uninstall the driver, please refer to the follow steps.
Step1 Go to Start –Control Panel-Add or Remove Programs
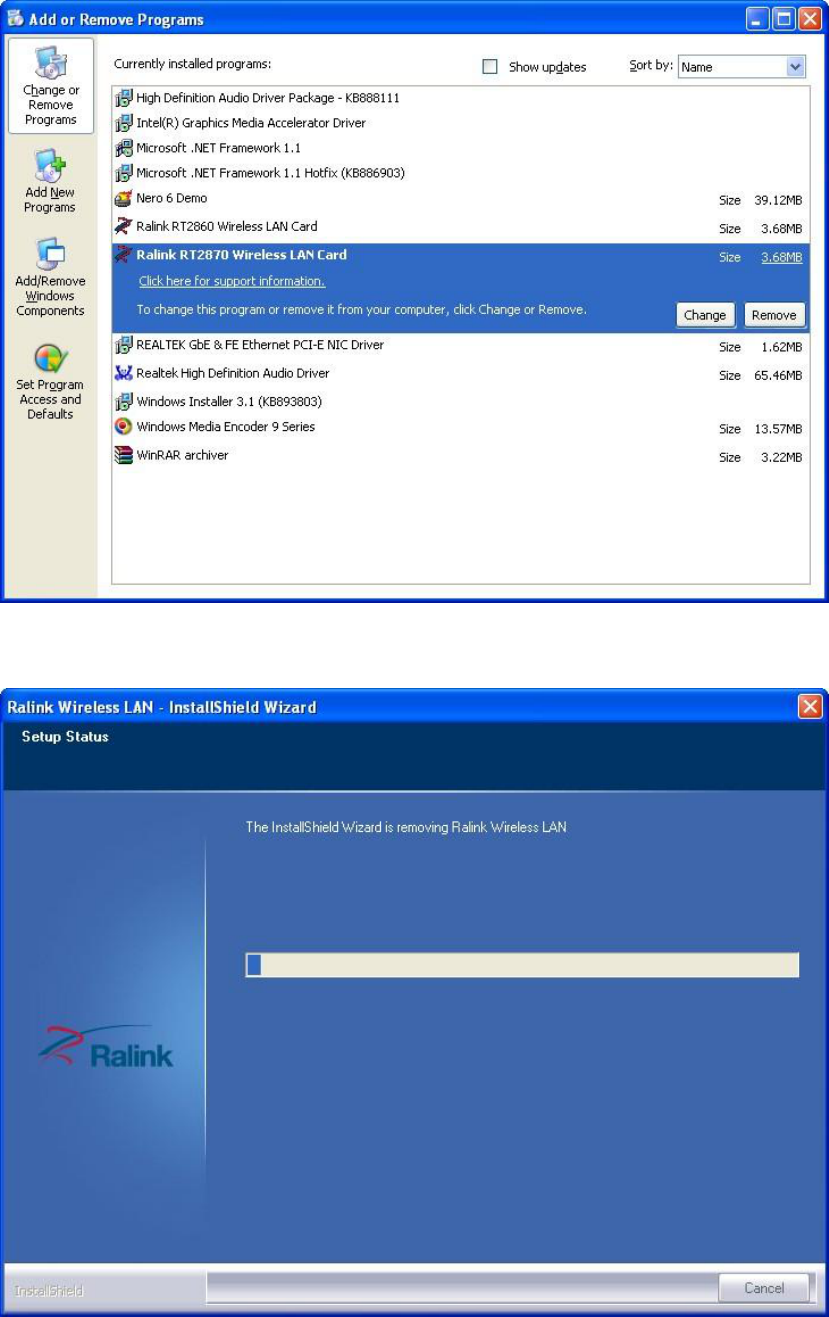
Step2 Select Ralink RT2870 Wireless LANCard, and click the button Remove
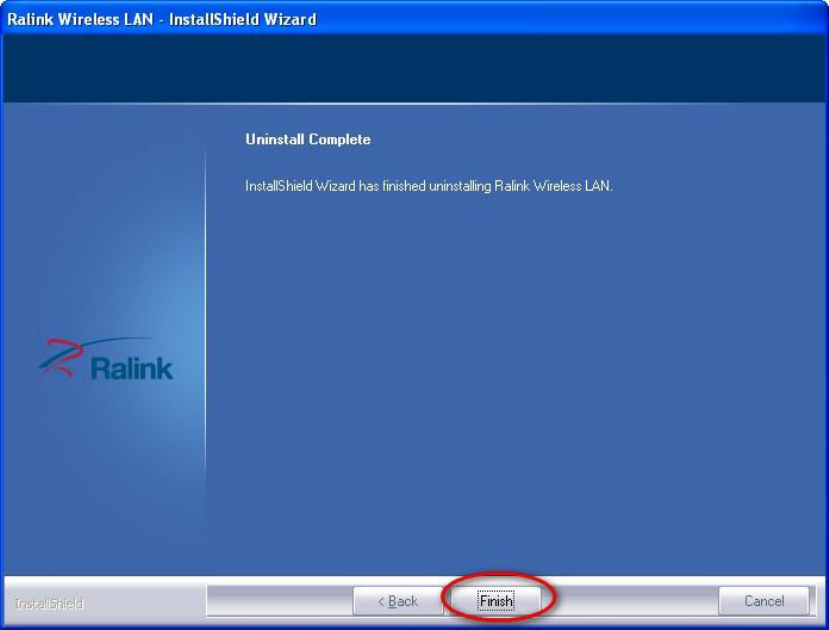
Step3 Click the button Finish to complete the uninstallation.