WaveLynx Technologies WLTC-ET10-1357 A 125 kHz, 13.56 MHz, BLE mullion reader with multiple controller communication schemes. User Manual
WaveLynx Technologies Corporation A 125 kHz, 13.56 MHz, BLE mullion reader with multiple controller communication schemes. Users Manual
Users Manual
www.wavelynxtech.com | 100 Technology Drive, Suite 150B, Broomfield CO, 80021 | 720-572-4963
Wall Mounted Reader Installation
This installation guide applies to the following types of readers:
• ET10 – Mullion Reader
Included:
• (2) #6 Screws
• Reader, Backplate, and Wall Plate
• (1) #4-40, (1) pin-in-torx
The Following tools will be needed to install
a wall mount reader:
• Phillips Screwdriver
• 6-32 Tap (if installing on metal)
• 1” (25mm), 1/8” drill bits
• T8 Security Torx Bit (optional for increased tamper
detection)
Common Cable Connections
Red
Power In
Black
Ground
Shield
Shield Ground
Brown*
Tamper Out
Green
Wiegand Data 0 /
RS 485A
White
Wiegand Data 1 /
RS 485B
Yellow*
Beeper Control
Blue*
Green LED Control
Orange*
Red LED Control
Max Length to Panel
Length
AWG
200’ (60 m)
22
300’
20
500’
18
Current @ 12 V and 25 C
Avg. mA
Max. mA
100
160
3
Wire the Cable to the Control Panel
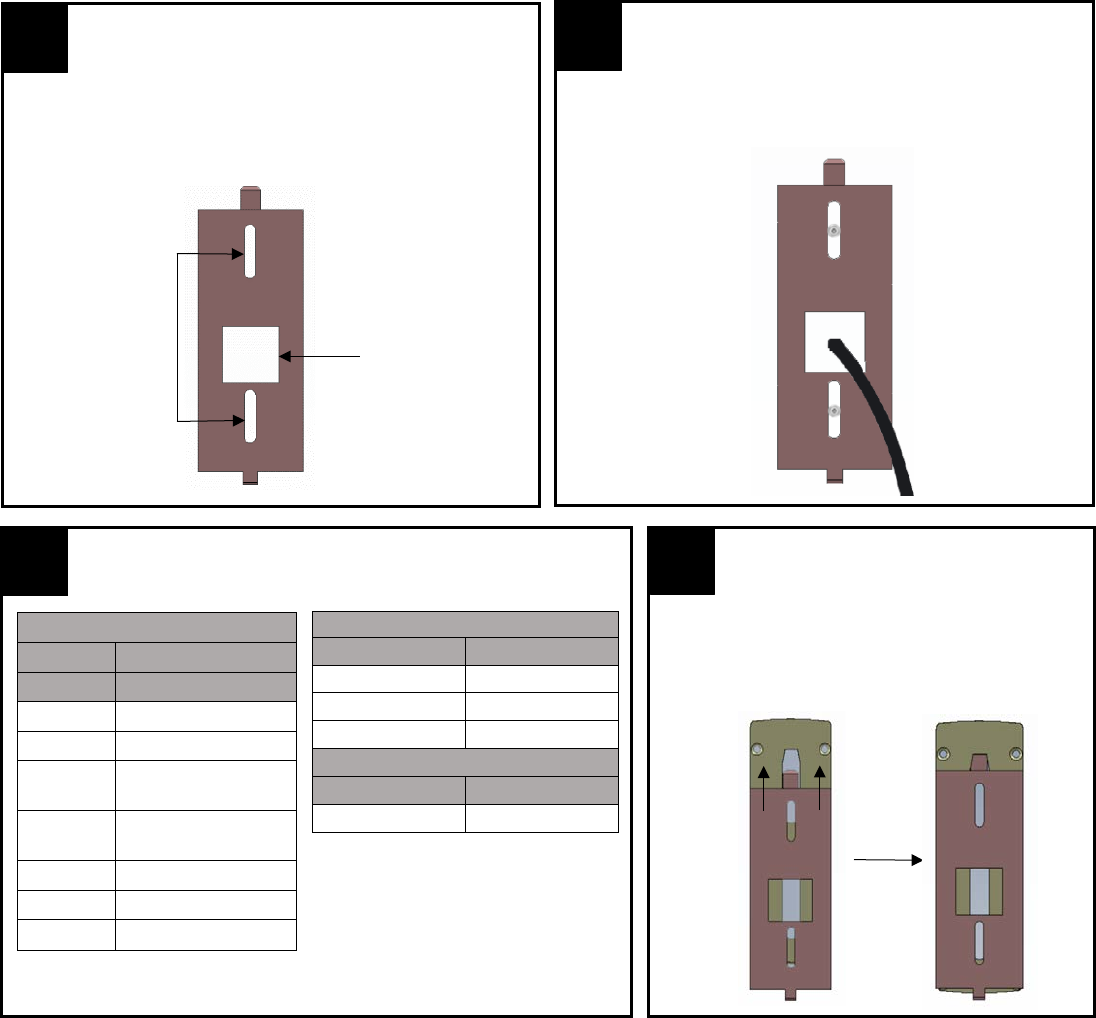
Attach the Reader to the
Wall plate
Align the reader so that the tabs of the base plate
slide into the slots on the wall plate and slide the
reader into position.
*these wires are only used in
Wiegand readers.
4
1
2
Mounting Holes for Wall Plate
Drill two mounting holes at a minimum of 1.7” apart.
Drill a ½” hole in the center for the pigtail wire to pass
through. Use the wall plate as a guide for drilling.
Install Metal Wall Plate
Once the holes are prepared, screw the wall plate in
using the provided #6 screws.
½” Hole for
Pigtail
Mounting hole
distance is
adjustable, use
the provided
#6 screws

www.wavelynxtech.com | 100 Technology Drive, Suite 150B, Broomfield CO, 80021 | 720-572-4963
Install the Reader Screw
Install the #4-40 screw or pin-in-torx at the bottom of the
reader.
Screw or pin-in-torx
5
Test the Reader
Power the reader, the red light-bar will light, followed by a
beep. Present a valid credential to the reader and the light-
bar will turn green.
6
Installation tips:
When connecting the reader to a Wiegand panel, simply connect the Green wire to Data 0, and the White wire to Data 1, to
enable Wiegand communication. When connecting the reader to an OSDP panel, connect the Green wire to RS485A, and the
White wire to RS485B. Verify that the panel is successfully communicating with the reader prior to reading a badge or pressing a
key.
The number of beeps during the power-up reset sequence indicates what mode the reader is in:
• 4 beeps (with green LED flash) indicate that the reader is in Wiegand communication mode (with OSDP auto-detect)
• 2 beeps (with green LED flash) indicate that the reader is in OSDP-only communication mode
By default (out-of- the-box) the reader will transmit credential and keypad data in Wiegand communication mode. Upon each
power up, and before the reader reads a credential or a key is pressed, the reader will be listening for an incoming OSDP
message. If a message is received during this period, the reader will automatically switch to OSDP-only communication mode. To
return to OSDP auto-detect mode, tilt the reader 45 degrees to simulate tamper and cycle power in this state. The power up
sequence should indicate OSDP auto-detect with 4 beeps.
Upon a power reset, the Ethos® Readers provide a reset sequence using the LED indicator and the beeper, to provide
information about the reader type and its communication mode. The first sequence (sequence A) describes the credential
technologies built in the reader:
• A single red LED flash indicates Bluetooth credential support
• A single green LED flash indicates 13.56 MHz credential support
• A single amber LED flash indicates 125 kHz credential support
Sequence A is followed by sequence B. Sequence B indicated the reader communication protocol:
• Two beeps (with green LED Flash) indicate that the reader is in OSDP-only communication mode
• Four beeps (with green LED Flash) indicate that the reader is in Wiegand communication mode (with OSDP auto-detect)
Patents - US9558377, & US9747738B1
This device complies with Part 15 of the FCC Rules. Operation is subject to the following two conditions: (1) this device may not cause harmful interference, and
(2) this device must accept any interference received, including interference that may cause undesired operation.
Changes or modifications not expressly approved by WaveLynx could void the user's authority to operate the equipment.
This equipment has been tested and found to comply with the limits for a Class B digital device, pursuant to part 15 of the FCC Rules. These limits are designed to
provide reasonable protection against harmful interference in a residential installation. This equipment generates, uses and can radiate radio frequency energy
and, if not installed and used in accordance with the instructions, may cause harmful interference to radio communications. However, there is no guarantee that
interference will not occur in a particular installation. If this equipment does cause harmful interference to radio or television reception, which can be
determined by turning the equipment off and on, the user is encouraged to try to correct the interference by one or more of the following measures:
• Reorient or relocate the receiving antenna.
• Increase the separation between the equipment and receiver.
• Connect the equipment into an outlet on a circuit different from that to which the receiver is connected.
• Consult the dealer or an experienced radio/TV technician for help.
This device complies with Industry Canada licence-exempt RSS standard(s). Operation is subject to the following two conditions: (1) this device may
not cause interference, and (2) this device must accept any interference, including interference that may cause undesired operation of the device. Le présent
appareil est conforme aux CNR d'Industrie Canada applicables aux appareils radio exempts de licence. L'exploitation est autorisée aux deux conditions suivantes:
(1) l'appareil ne doit pas produire de brouillage, et (2) l'appareil doit accepter tout brouillage radioélectrique subi, même si le brouillage est susceptible d'en
compromettre le fonctionnement.