Wavesystec DP-1300 MP3 Player User Manual mp3 English
Wavesystec Co., Ltd. MP3 Player mp3 English
User Manual
CONTENTS Getting Started
①Do not use the player for any other purpose than as listed within the contents of this manual.
Avoid severe impact/vibration.
②Avoid using or storing in places with high humidity, drastic temperature changes, severe
movements, or high magnetic intensity. Also, ensure that liquids do not enter the player.
Failure to meet these warnings may result in product damage or malfunction.
③Unauthorized disassembly or modification will void warranty.
④Daewoo Electronics does not hold responsibility over data loss or disintegration that occurs
during data transfer, due to mechanical malfunctions, due to software malfunctions, or any
other cause (external impact, power outages, etc). Please backup any important data stored
within the player.
⑤Use soft cloth or rag to clean. Avoid using chemical solutions.
⑥Match the battery terminals (+/-) when inserting into the player. Remove the batteries if the
player is not in use for extended periods of time to prevent damages caused by battery leak.
⑦Check the direction when connecting the USB cable to either the player or a PC.
⑧Do not leave the USB cable connected to the PC or apply pressure onto it while connected
to a PC.
⑨Always keep the player's USB port clean.
Safety Precautions
Getting Started
Computer Connection
Software Installation
11
Connecting the Player to a PC
12
USB Driver Installation
13
Removable Disk Feature
14
Formatting Removable Disk
15
Disconnecting the USB Cable
16 Customer Support
Troubleshooting 35
Specifications 36
Basic Features
Play
17
Voice Recording
21
Direct Encoding
22
FM Radio
23
Recording FM Radio
27
Additional Features
Menu Configuration 28
Playback Support 28
Recording Support 30
Navigation 31
File Delete 31
Lyrics Support Program 32
Firmware Upgrade 34
Safety Precautions
2
Features
3
Accessories
5
Overview
6
Main Button Functions
7
LCD Screen
8
Replacing the Battery
9
System Requirements
10
DIGITAL AUDIO PLAYER
3
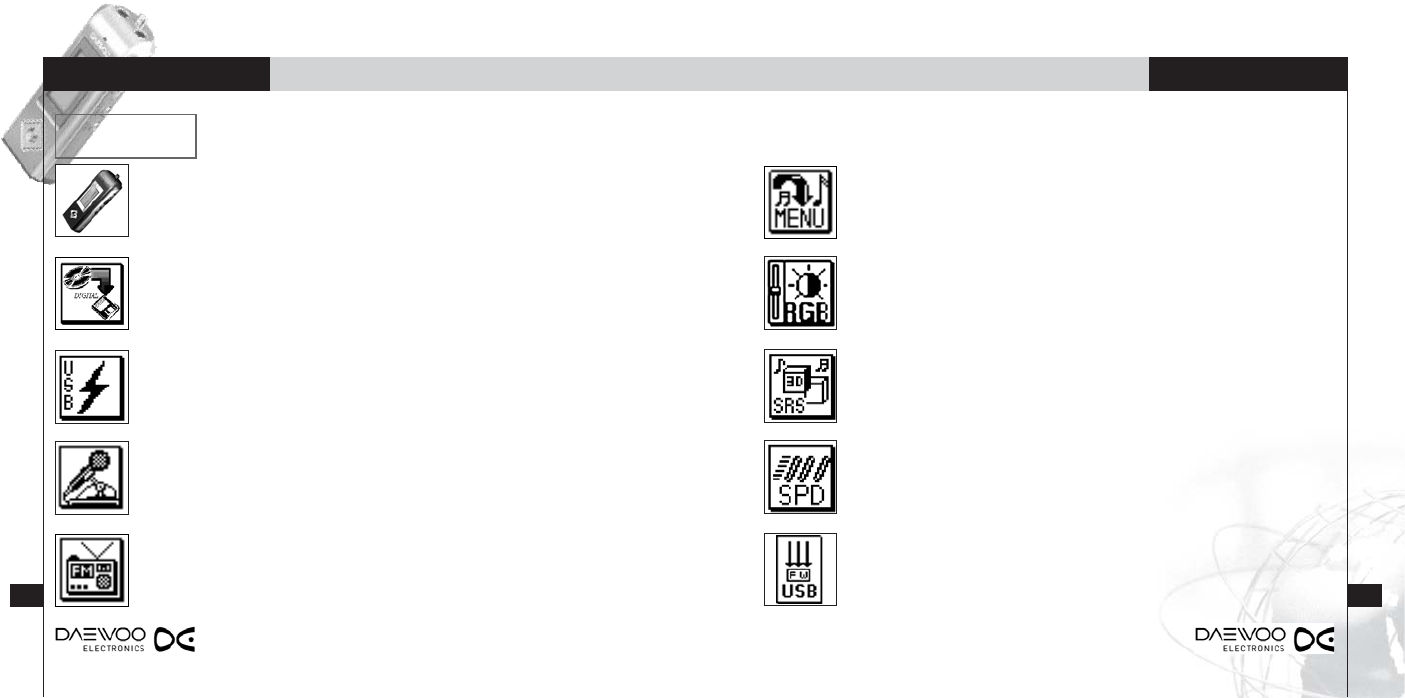
1. Compact Design
Thanks to its ultra slim and minimalist design, this player is highly
mobile.
2. Direct Encoding
Simply connect the player directly to regular CD or cassette players to
digitally record and store music files without using a computer.
3. USB Mass Storage
This player connects to PCs as a removable disk for simpler data
transfers that do not require a separate manager program.
4. Voice Recorder
Directional MIC, Recording Quality Adjustment, Monitor Feature, and
much more...
5. FM Radio Feature
A high performance FM radio built right inside!
Listen to FM radio anytime, anywhere, and even record in digital
quality!
6. User-Friendly Graphic Interface
The player's LCD is comprised of graphic icons, a simplified menu
structure, and an easy approach method for greater user-friendliness.
7. Seven Backlight Colors
Seven shades of the rainbow as your backlight!
Select from seven different color settings to match your individual style or
mood.
8. Ultimate SRS WOW Sound
The next level of sound - SRS WOW. Feel the deep, rich, and unique
sounds by SRS WOW.
9. Play Speed Control
With single touch play and lyric scroll adjustment feature, the player is
highly useful for language studies and other learning purposes.
(Firmware Version 2.0)
10. Firmware Upgrade
Always have the latest software version with Daewoo Electronics'
Firmware Upgrade Service.
Getting Started
4
Getting Started
Features

HOLD
PLAY/STOP
REC/MODE
NECKSTRAP HOOK
65
Getting Started Getting Started
Note: Accessories included with the product may change without prior notice for functional or
quality enhancement purposes.
DIGITAL AUDIO PLAYER
REW/LEFT
UP/VOL+
NAVI/MENU
RIGHT/FF
DOWN/VOL-
EARPHONE MIC
LCD
LINE IN
BAT. COVER
USB COVER
Battery
(1.5V AAA 1EA)
Main Unit
Accessories Overview
Neckstrap USB Cable
Stereo EarphoneUser Manual
Direct Cable
Master CD
87
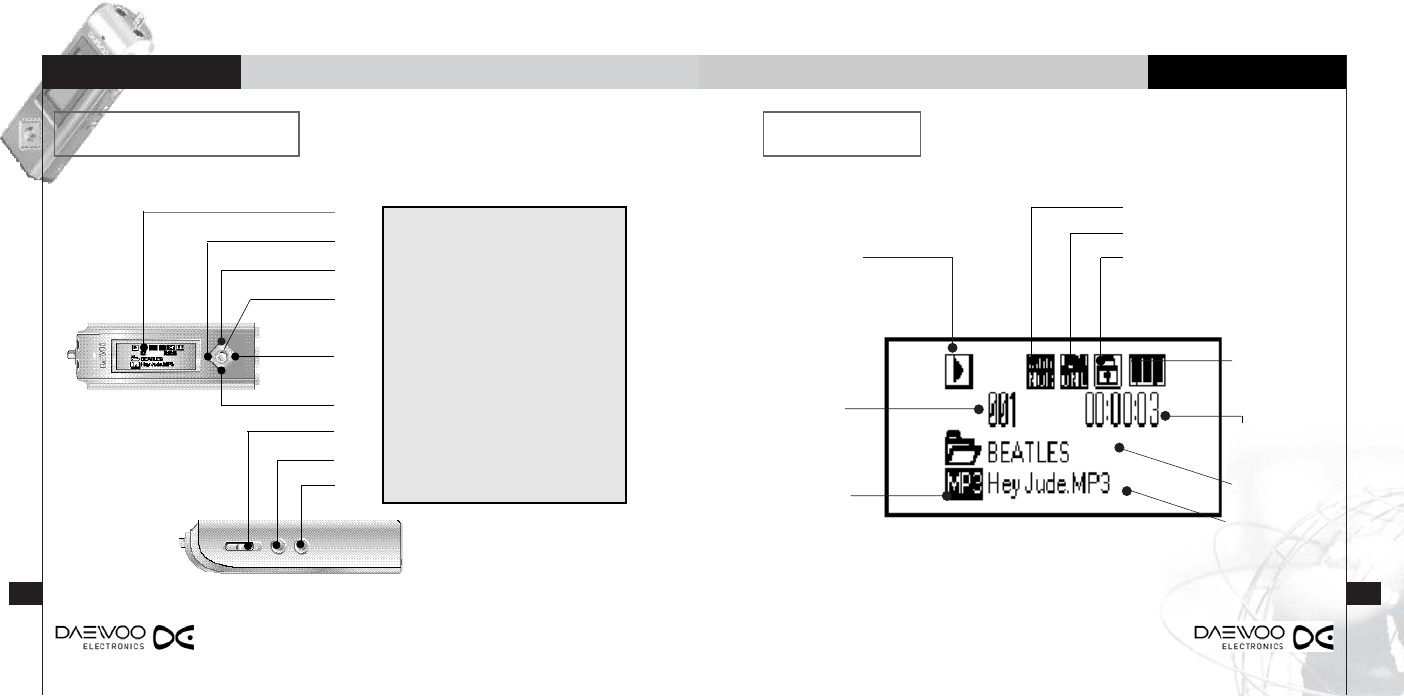
Getting Started
LCD Screen
DIGITAL AUDIO PLAYER
Equalizer
Playback Mode
Hold Status Indicator
Play Icon
Track
Number
File Format
Track Title
Current Folder
Track Time
Power
Indicator
Main Button Functions
①Player Status
②MP3 Mode: Previous Track
FM Mode: Previous Channel
③Volume Up
④File Navigation/Menu Selection
⑤MP3 Mode: Next Track
FM Mode: Next Channel
⑥Volume Down
⑦Hold Switch
⑧Play/Stop
Power ON/OFF
⑨Record/Mode Selection
①
②
③
④
⑤
⑥
⑦
⑧
⑨
Getting Started
DIGITAL AUDIO PLAYER
10
Getting Started
•Pentium 133MHz
•64MB of Memory
•CD-ROM Drive
•USB Interface
•20MB of Available Disk Space
(Additional space is needed to store music files)
•Supported Operating Systems: Windows 98SE/ME/2000/XP
Minimum System Requirements:
Actual internal disk space available for use is less than as indicated due to partial
use by firmware for systems operation.
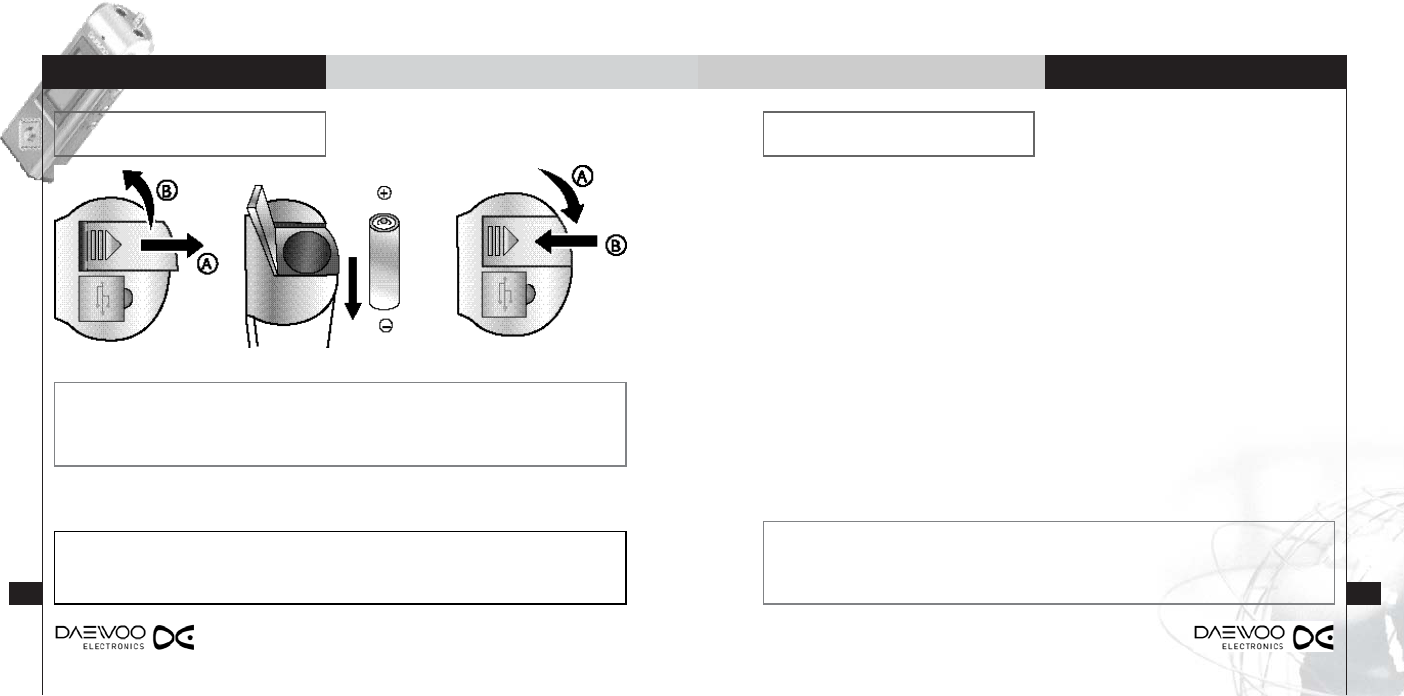
Replacing the Battery System Requirements
1. Push in the direction of the arrow to open the batter cover. (A->B)
2. Match up the battery's terminals (+, -) and insert.
3. Push to replace the batter cover. (A->B)
건전지 교체하기
9
Getting Started
Note : Please ensure that the player is powered off before replacing the battery.
Replacing the battery while the power is on may damage the player.
DIGITAL AUDIO PLAYER
Computer Connection
1211
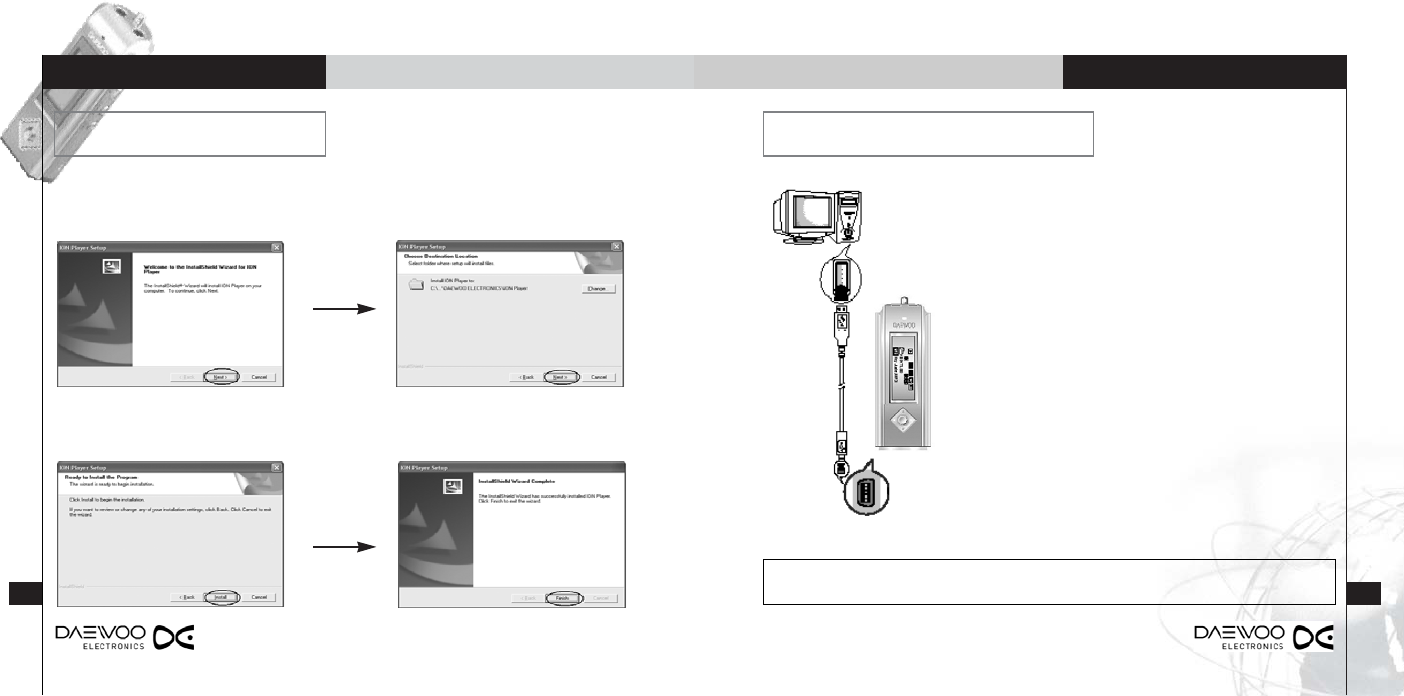
1. Insert Master CD and select "Next"
from the prompting window.
2. Designate an installation
folder and select "Next."
Use the USB cable (enclosed) to connect the player to a
PC as show in the diagram before transferring data
between them.
Connect the USB cable to the computer's USB port.
Connect the opposite end of the USB cable to the player's
USB port located at the bottom of the player.
Software Installation Connecting the Player to a PC
3. Select "Next" to continue the
installation.
4. Select "Finish" to complete the
installation process.
Computer Connection
Caution
Disconnecting the USB cable while installing the device driver may cause computer malfunction.
DIGITAL AUDIO PLAYER
Computer Connection
1413
Computer Connection
Because the PC recognizes the player as a removable disk once the software and driver
have been fully installed, the player can double as an external storage device.
• Turn the player on and connect it to the PC. The player will be detected as a removable
disk. By default, the player is comprised of VOICE, RADIO, and LINE folders.
• Open Windows Explorer.
• Select files to transfer and copy to Removable Disk.
Caution
•Disconnecting the USB cable during file transfer may cause computer malfunction.
•The word "BUSY" appears on screen whenever the player is in communication with
the PC. Please disconnect only when the word "BUSY" has disappeared.
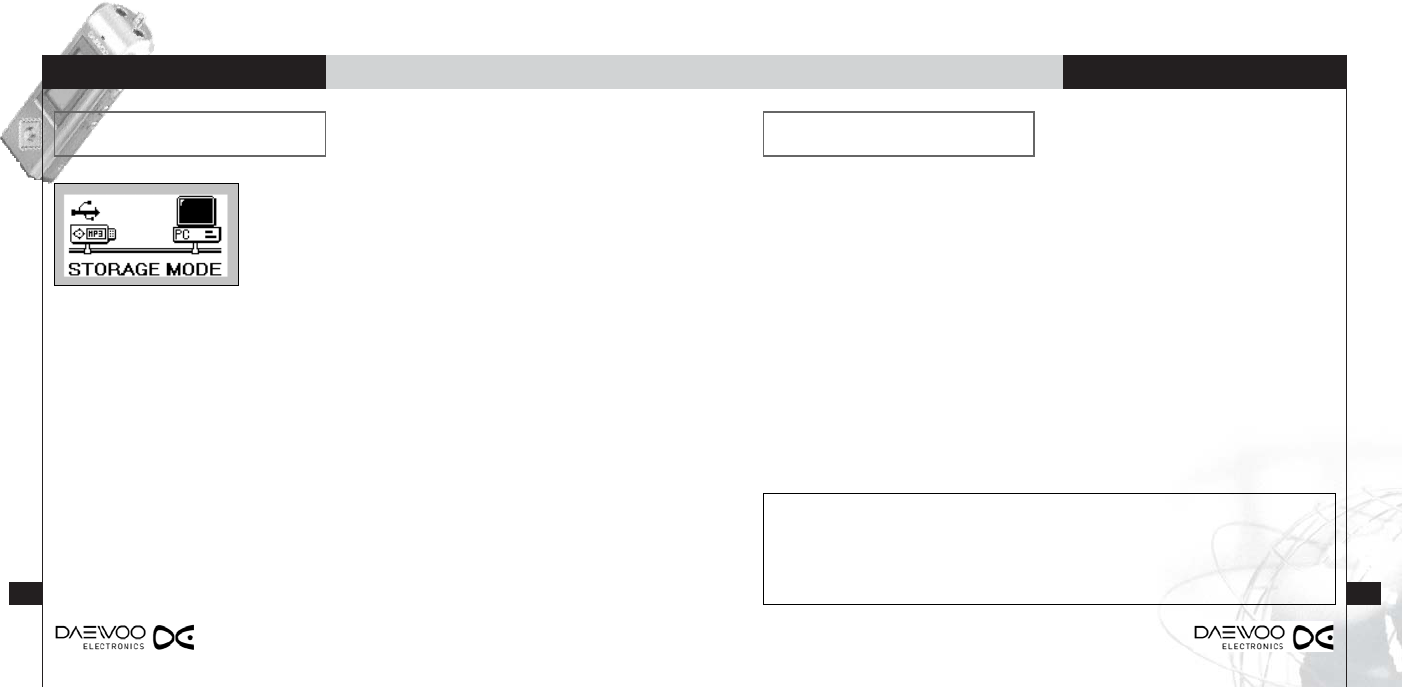
• Connect the player to the computer's USB port. It is
not necessary for the player to be powered on for
this purpose. An icon will appear on the LCD
screen as shown on the picture to the left.
• The USB driver will automatically install after the message "Searching for driver file for
the following device" appears.
The driver may install without any on-screen indications for certain PC configurations.
Please verify the USB installation through Device Manager.
Windows 98SE:
Control Panel →System →Hardware →Device Manager →Universal Serial Bus
Controllers/SEMINIX SDAS-V3 Series
Windows 2000/ME/XP:
Control Panel →System →Hardware →Device Manager →Universal Serial Bus
Controllers →USB Mass Storage Device
Verifying USB Driver Installation through Device Manager
USB Driver Installation Removable Disk Feature
DIGITAL AUDIO PLAYER
Computer Connection
1615
Computer Connection
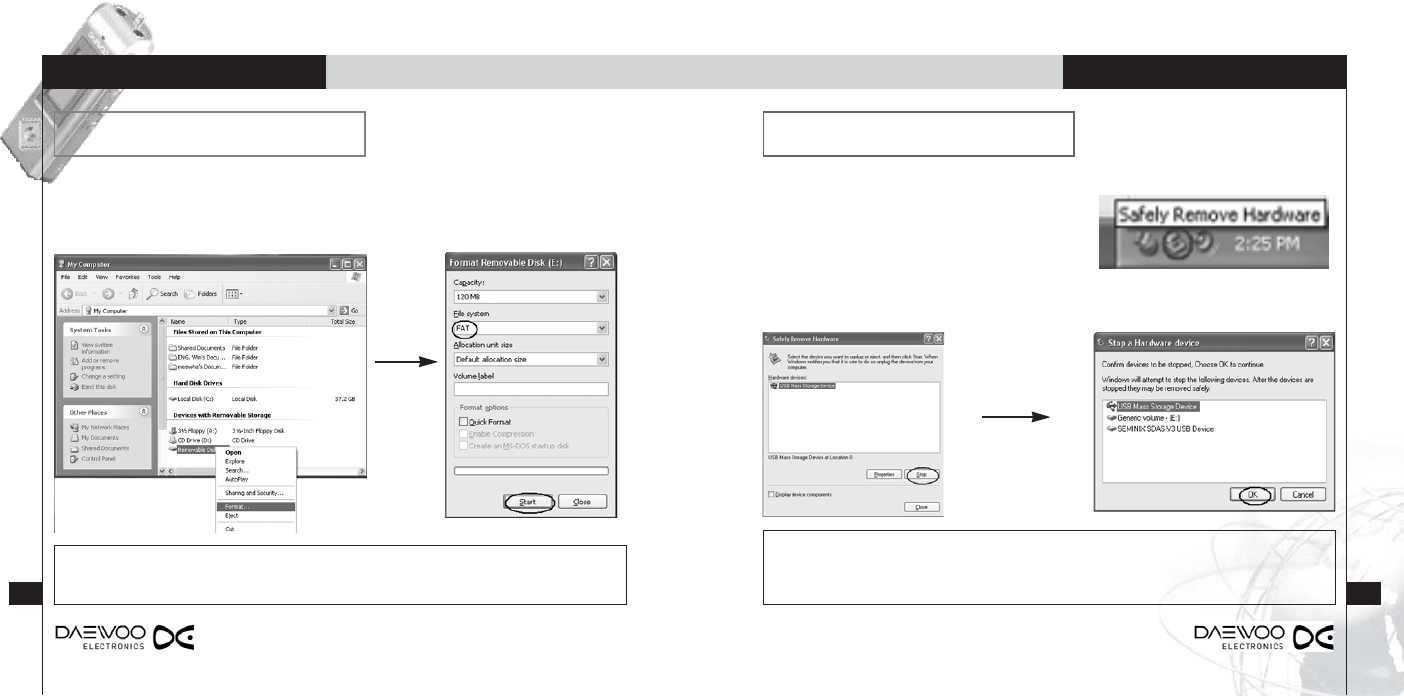
1. Right-click on "Removable Disk" and select
"Format."
1. Double click on the green arrow icon from
your taskbar.
Once file transfer is complete, remove the removable disk as follows:
2. Select USB Mass Storage Device and click on "Stop."
2. Click "Start"
Formatting will reset menu configuration.
Formatted files cannot be recovered.
Caution
1. The player will not function while the cable attached.
2. The USB cable must be unplugged and plugged in again to reconnect.
Formatting Removable Disk Disconnecting the USB Cable
Select FAT
under File
System.
DIGITAL AUDIO PLAYER
Basic Features
1817
Basic Features
1. Insert a battery and connect the earphones.
2. Disable the Hold feature by pushing the switch
in the opposite direction of the arrow.
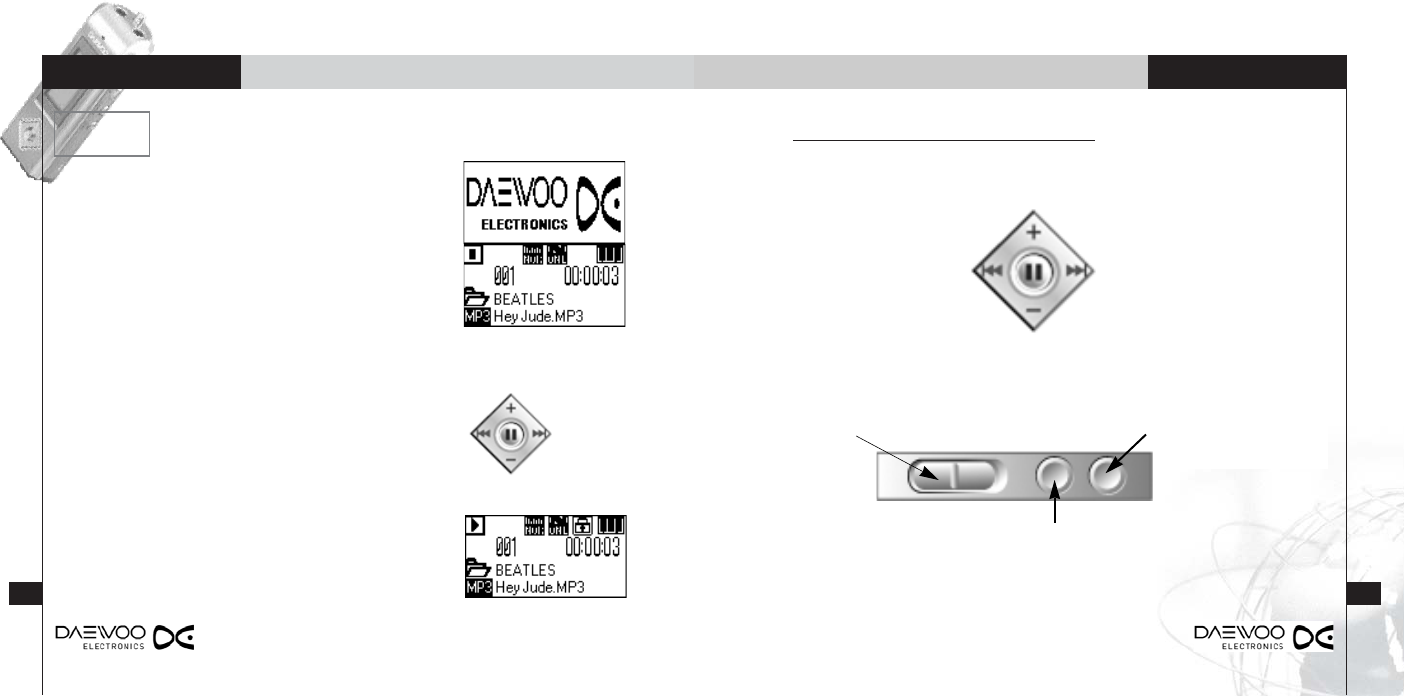
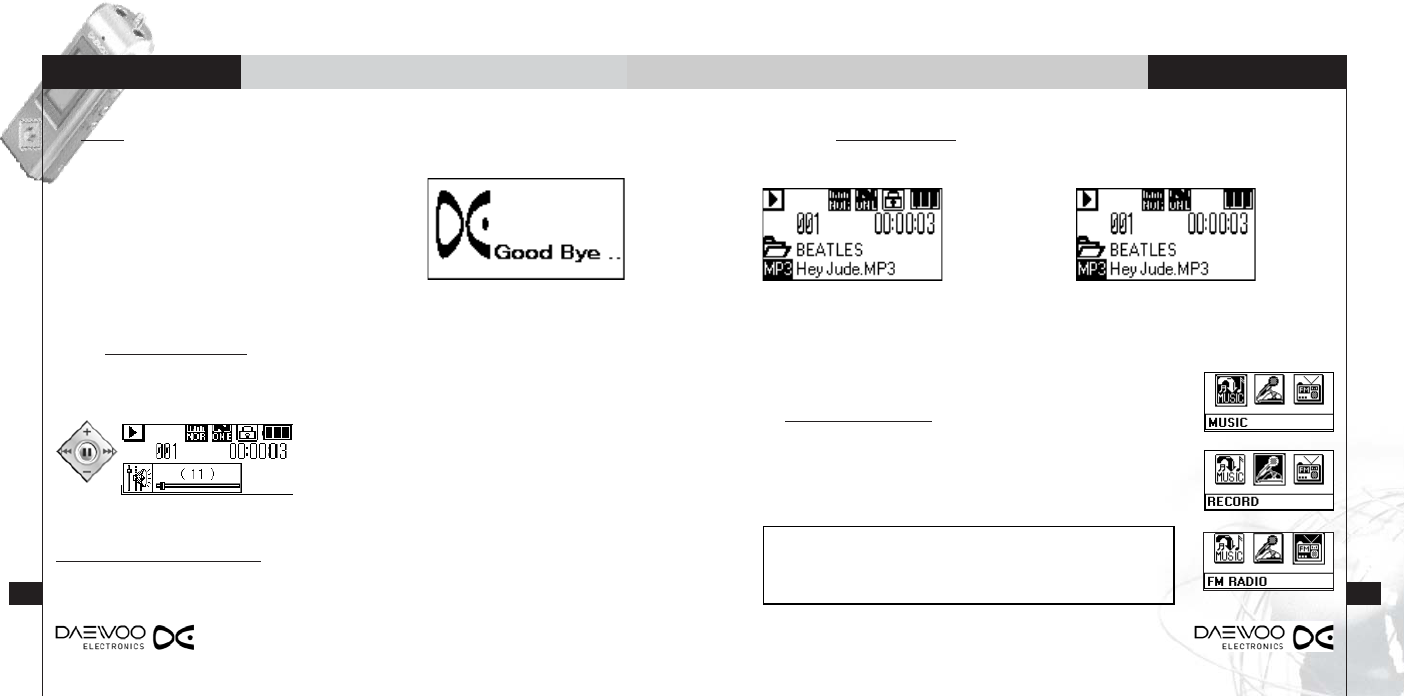
3. Press and hold the "PLAY/STOP" button to
power the player on. The intro screen as
shown on the right will appear on the LCD
screen.
4. Select a track using the Jog key.
5. Press "PLAY/STOP" to play the selected track.
Selecting a folder and pressing "PLAY/STOP"
plays all tracks within the folder, starting with
the first track.
Play
HOLD mode
Brief: Play/Stop
Hold: Power On/Off
Brief: Previous Track
Hold: Rewind
Brief: Next Track
Hold: Fast Forward
Play Menu Select
Button Functions during Playback
Brief: Loop Repeat
Hold: Feature Configuration
Previous Track Next Track
Volume +
Volume -
DIGITAL AUDIO PLAYER
Basic Features
2019
Basic Features
Enabling the Hold feature locks all button operation until disabled.
Enable: Push the Hold switch in the direction of the
arrow.
-All button operation is disabled, as indicated by an on
screen icon as shown above.
Hold Feature
Changing Modes
Disable: Push the Hold Switch in the opposite
direction of the arrow.
-The Hold icon disappears and all button operation is
restored.
1. Press and hold "REC/MODE."
2. Select a mode using the Jog key (left/right).
3. Press "NAVI/MODE" to confirm.
Note : The Mode Change menu will automatically close
after 5 seconds of inactivity. Press "Volume +" to
manually close the menu.
Stop
Volume Control
Configuring Play Menu
1. Pressing "PLAY/STOP" will stop the track from
playing.
2. The power will turn off once a preset amount of
time (refer to Menu Configurations) elapses
without any button action being taken.
3. The power can be turned off manually by
pressing and holding the "PLAY/STOP" button.
Note:
1. Volume can be set between 0 and 30.
2. Press briefly to adjust the volume at one level
increments. Press and hold to for continuous
volume increase or decrease.
1. Briefly press "NAVI/MENU" to access Play Menu.
Volume -
1.Use "Volume +" and "Volume -" to adjust volume.
Volume +
Music Mode
Record Mode
RADIO Mode
DIGITAL AUDIO PLAYER
Basic Features
21
Basic Features
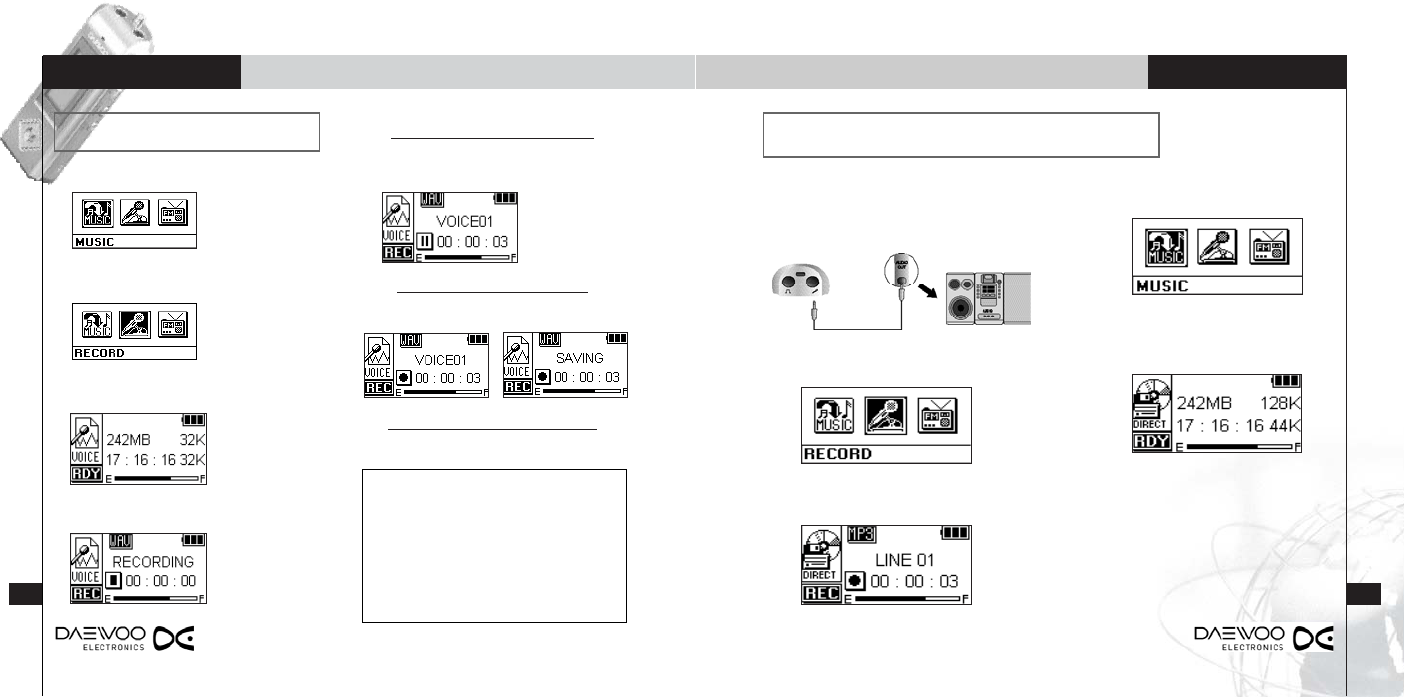
1. Connect the external device's "Line
Out" terminal to the player's "Line In"
terminal as shown below:
2. Press and hold "REC/MODE."
3. Use the Jog key (left/right) to select
Record Mode.
Direct Encoding from an External Device
5. Press "REC/MODE" again to start
direct encoding.
4. Press "NAVI/MENU" to confirm
your selection.
Voice Recording Pause Voice Recording
Stop Voice Recording
Listening to the Recording
1. Press and hold "REC/MODE." 1. Press "REC/MODE" while recording.
2. Select Record Mode by moving the
Jog key (left/right).
1. Press "PLAY/STOP" while recording.
1. Press "PLAY/STOP."
3. Press "NAVI/MENU" to confirm your
selection.
4. Press "REC/MODE" again to start
recording.
Note:
1. Voice recordings are stored as "VOICE.MP3"
or 'VOICE.WAV"" in the Voice folder, which is
located under the Root folder.
2. Recording will not take place if there is no
sufficient amount of disk space available.
3. Connecting the Direct Cable to the player's
LINE_IN outlet enables the Direct Encoding
feature. Please disconnect the Direct Cable
before attempting to voice record. 22
DIGITAL AUDIO PLAYER
Basic Features
2423
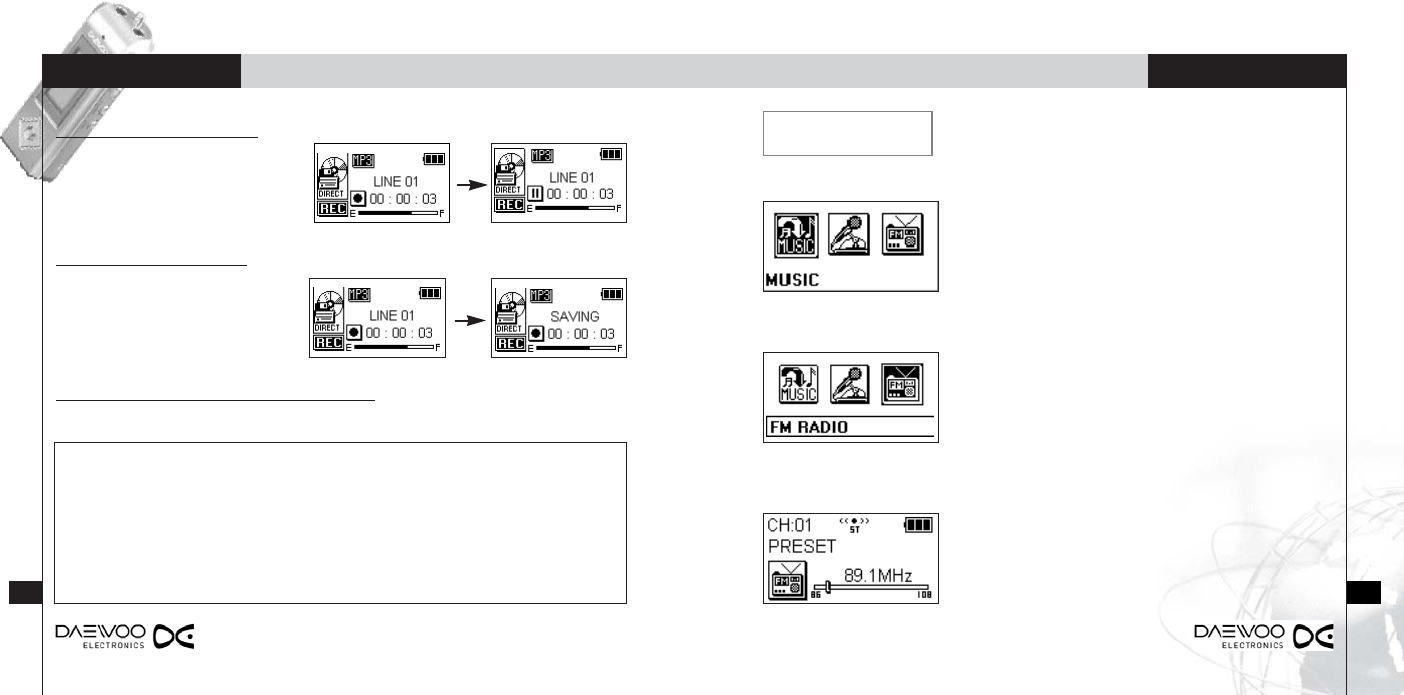
FM Radio
2. Use the Jog key (left/right) to select FM Radio Mode.
3. Press "NAVI/MENU" to confirm.
1. Press and hold "REC/MODE."
1. Press "REC/MODE" while
direct encoding.
1. Press "PLAY/STOP" while
direct encoding.
1. Press "PLAY/STOP."
Note:
1. Direct encoded files are stored as "LINExx.MP3" or "LINExx.WAV" in the LINE
folder.
2. Direct encoding will not function if there is no sufficient amount of disk space
available.
3. Direct encoding is only available with Direct Cable connected to the player.
Pause Direct Encoding
Stop Direct Encoding
Listening to the Direct Encoded File
Basic Features
DIGITAL AUDIO PLAYER
Basic FeaturesBasic Features
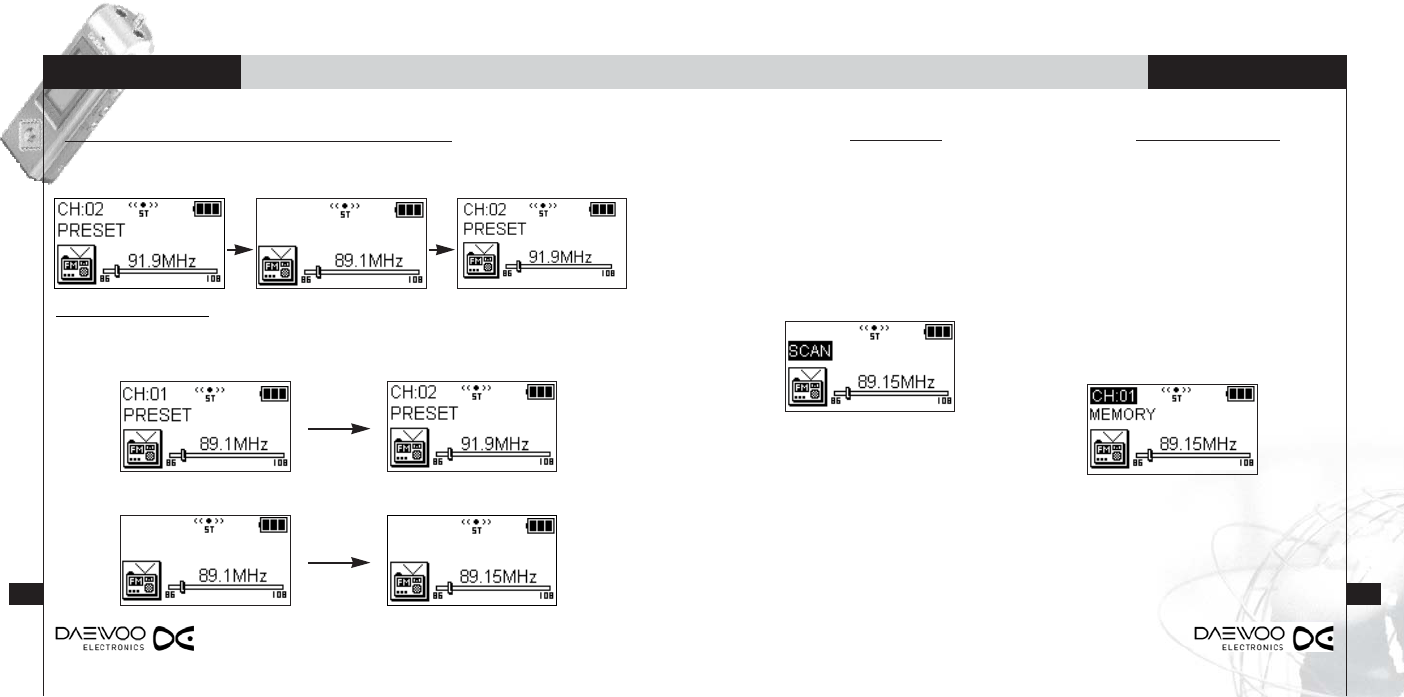
Auto Seek Channel Storing
This feature automatically detects the
next or previously available channel.
Save your favorite channels for quick
access in the future.
1. Press "PLAY/STOP" to access
Frequency Mode.
2. Use the Jog key (left/right) to select
a channel to store.
3. Press "NAVI/MENU."
4. Use the Jog key to find another
channel to store..
5. Press "NAVI/MENU" to terminate
channel storing.
6. Up to 20 channels can be saved.
1. After setting to Frequency mode by
pressing the PLAY/STOP button, Push
and hold the
Jog key
to the left or
right.
2. Auto Seek will automatically stop at
the next available channel.
[Manual Setting]
Radio Modes (PRESET, FREQUENCY)
[PRESET MODE]
[FREQUENCY MODE]
1. Use the Jog key (left/right) to scan radio frequency.
Frequency Scan
25 26
1. Toggle between Preset and Frequency Modes by pressing "PLAY/STOP."

DIGITAL AUDIO PLAYER
Additional Features
2827
Basic Features
Menu Configuration Playback Support
Press and hold "NAVI/MENU" to access
Menu Selection Mode.
1. Play Menu →Additional Features
2. Equalizer: Normal, Classic, Live, Pop, and
Rock
3. Repeat: Normal, Repeat All, Repeat One,
Shuffle, and Intro
Channel Storing Recording FM Radio
Save your favorite channels for quick
access in the future.
Use this feature to automatically seek
channels and store their frequencies in
memory.
1. Press "REC/MODE" to start
recording.
1. Press "PLAY/STOP" to access
Preset Mode.
2. Press and hold the Jog key
(left/right).The player will automatically
seek for signals and store the
frequencies.
2. Press "REC/MODE" again to pause
recording. Press once more to
resume.
3. Pressing "PLAY/STOP" stops the
recording process and reverts the
player back to Radio Mode.
4. Recorded files are stored as
"RADIOxx.MP3" or "RADIOxx.WAV"
in the RADIO folder.
3. Certain channels may not be
detected and stored in areas with
weak signal strength.
[Automatic Setting]
1. Press and hold "NAVI/MENU" to
access the following menu:
2. Menu Selection: Move the Jog key
(left/right) to scroll through the options.
3. Menu Confirm: Press "NAVI/MENU" to
confirm your selection.
4. Previous Menu: Push the Jog key up.

DIGITAL AUDIO PLAYER
Additional Features
3029
Additional Features
Press and hold "NAVI/MENU" to access Menu Selection Mode.
3. Sensitivity Level: Radio or Line In Sensitivity
Setting
2. File Format Setting: MP3 or Wave
1. File Type Setting: MP3 or Wave
5.
DISPLAY: TIME FORMAT
REMAINED or ELAPSED
-FOCUS SETTING 6. RESUME: RESUME ON or OFF
-SRS SETTING 7. PLAY SPEED SETTING: Speed is
adjustable in 9 levels ranging from
0.5X to 2X.
-TRUBASS SETTING
4. SRS : SOUND EFFECT SETTING Recording Support
DIGITAL AUDIO PLAYER
Additional Features
3231
Additional Features
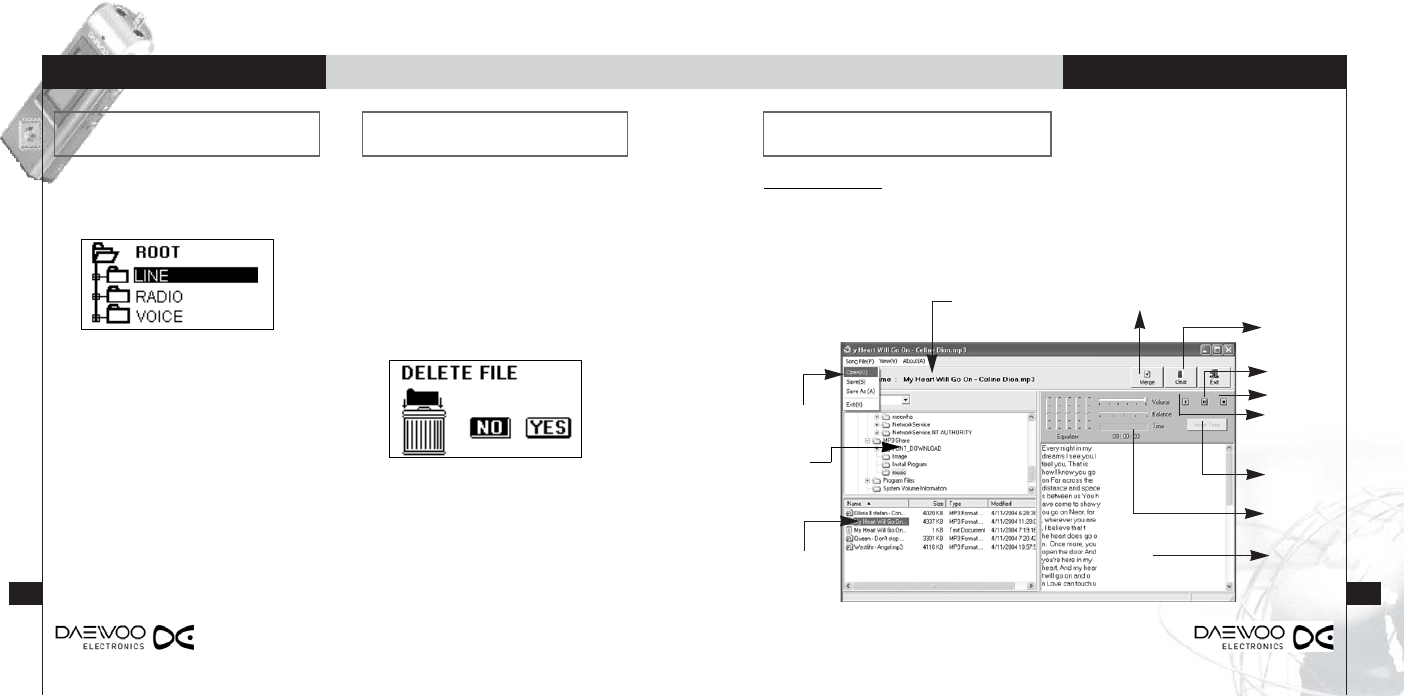
Lyrics Support Program
•Run the MP3_lyrics program from the INSTALLATION folder and access the following
screen:
Program CD
Navigation
Selected File
Open and Save
Lyrics Files
Folder
Selection
Contents of
the selected
Folder
Mp3 File and Lyrics File Merge Clear All
Entries on
Screen
Mp3 Play
Stop
Pause
Current Track
Time
Add time to
the lyrics
Lyric Entry
Window
File Delete
1. Navigation Mode Access: Press and
hold "NAVI/MENU" to access
Navigation Mode.
2. File Selection: Push the Jog key
(up/down) to select a file.
3. Press "NAVI/MENU" again, and the
following message will prompt:
4. Push the Jog key (left/right) to select
"Yes," and then press "NAVI/MENU" to
confirm.
2. Push the Jog key (left/right) to select
a folder. Move the Jog key up or
down to select desired file(s) from that
folder. Briefly push the Jog key to the
right to play the file.
3. Push "NAVI/MENU" to the left to
access the previous folder. The
Navigation feature will terminate if
there is no previous folder.
1. Briefly press "NAVI/MENU" to access
the ROOT folder as shown below:
DIGITAL AUDIO PLAYER
Additional Features
3433
Additional Features
1. Connect the player and PC via USB cable.
2. Copy the PC's firmware.bin file to the player.
3. Remove the USB cable.
4. Reboot to start the upgrade process.
5. The player will automatically power off once the upgrade has completed. Please wait
for the player to power off.
※The latest version of firmware upgrade file (DWDPVxx.BIN) is available at Daewoo
Electronics' website.
(http://www.datkor.com/digital-firmware.htm)
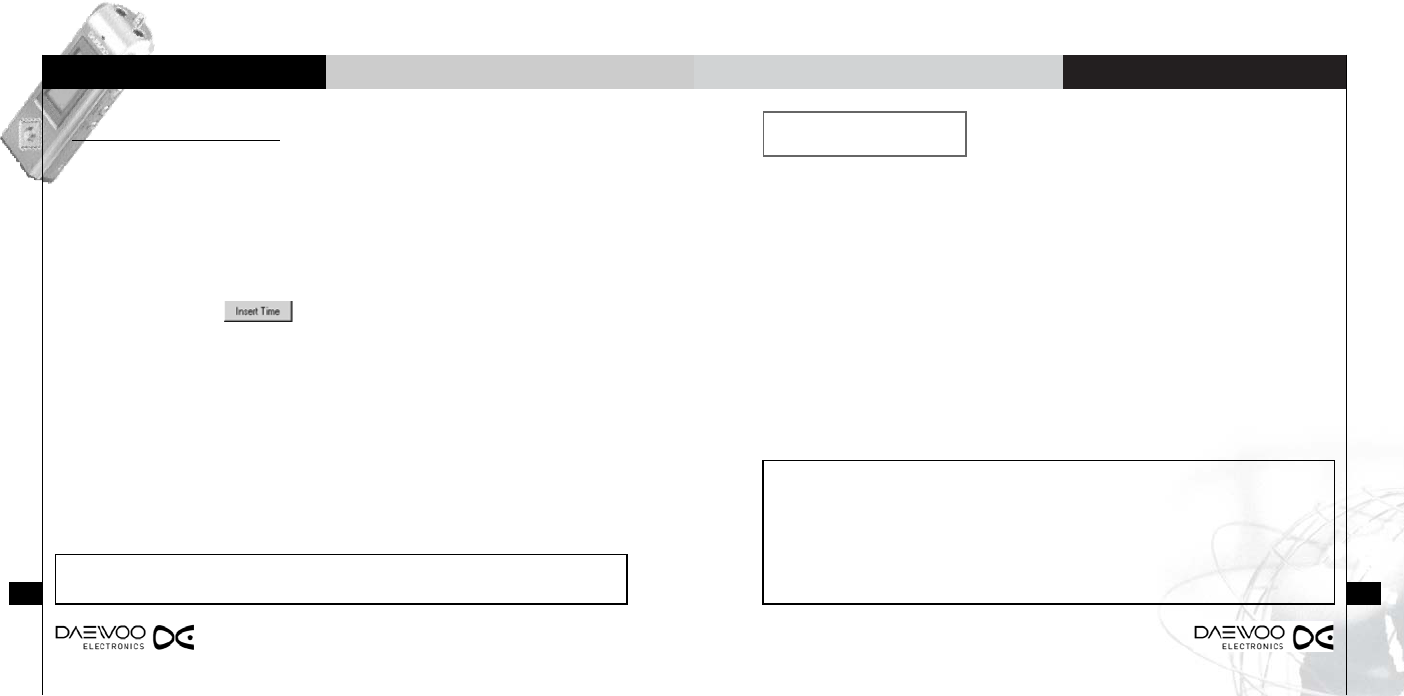
Using Lyrics program
Lyrics File Composition Sequence
•Open an existing Lyrics file or manually enter lyrics into the Lyrics Entry window.
•Once the lyrics are ready, select the MP3 file to merge by clicking on the file name.
•Press "Play" to listen to the selected MP3 file.
•As you listen to the file, press to inscribe track times to the Lyrics file.
•Once track time inscription is completed, press the "Merge" button to combine the MP3
and Lyrics files into a single file.
•DownloadthemergedMP3filetotheplayer,andthelyricsoftheselectedfile
willappearalongwithitsaudiotrack.
Note : Maximum 32 characters (32 byte) can be entered per line.
Warning : •Attempting to upgrade without sufficient battery power will cause critical
error in the player. Please attempt upgrades only when the battery has
sufficient power.
•Upgrading the firmware will format the player. Please backup important
data before starting firmware upgrade.
Firmware Upgrade
DIGITAL AUDIO PLAYER
Customer Support
3635
Customer Support
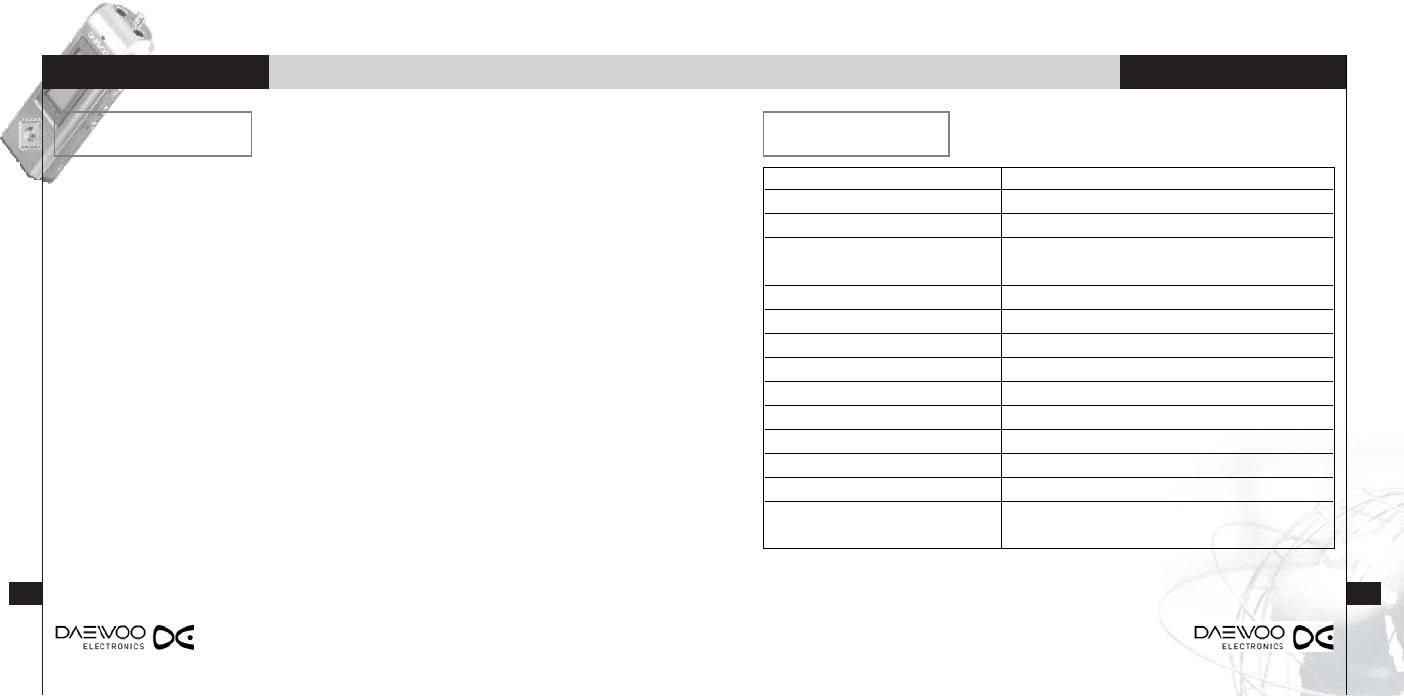
•Actual disk space available for use after formatting may be less than as indicated.
•Data transfer rate may differ, depending on your PC specifications.
•Playing time may differ, depending on style of use and/or configuration settings.
Model
SupportedCompressionFormats
InternalStorageCapacity
Display
SupportedLanguages
UserInterfaceLanguage
FileTransferRate
EarphoneOutput
SignaltoNoiseRatio
OutputFrequencyRange
Battery
PlayingTime
FMFrequencyRange
Dimensions/Weight
DPSeries
MP3(8.320kbps),ADPCM(32kbps),WMA
128/256/512MB
FSTNTypeGraphic(128X64)LCD
(7ColorLEDBackLight)
36
English
Max.2.4Mbps
12mW(L)+12mW(R)
85dB
20Hzto20KHz
AAABattery1EA
10hrs(MP3Mode)
87.5MHzto108.0MHz
32(W)X78(H)X23(D)mm/48g
(IncludingBattery)
•There's nothing displayed on the LCD.
•Check the battery power indicator.
•Check the battery is inserted correctly (+/-).
•Music does not play after pressing the "Play" button.
•See if there are music files stored in the memory to be playback.
•Make sure that the "Hold" switch is not engaged.
•Check the volume setting.
•Files cannot be downloaded.
•Ensure that the USB driver is correctly installed on the PC.
•Check for proper USB cable connection.
Troubleshooting Specification
DIGITAL AUDIO PLAYER
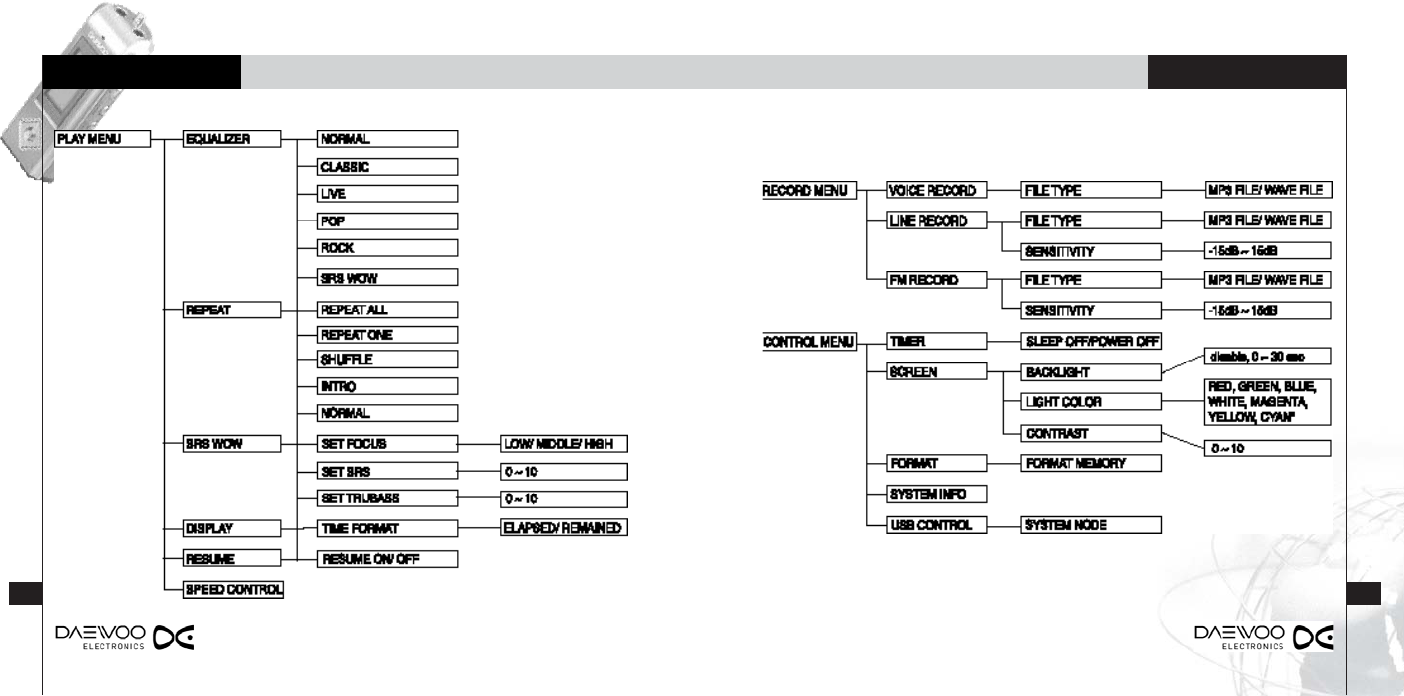
Menu Tree
3837
Menu Tree

DIGITAL AUDIO PLAYER
Memo
4039
NOTE
NOTE: This equipment has been tested and found to comply with the limits for a Class B digital
device, pursuant to Part 15 of the FCC Rules. These limits are designed to provide reasonable
protection against harmful interference in a residential installation. This equipment generates, uses
and can radiate radio frequency energy and, if not installed and used in accordance with the
instructions, may cause harmful interference to radio communications. However, there is no
guarantee that interference will not occur in a particular installation. If this equipment does cause
harmful interference to radio or television reception, which can be determined by turning the
equipment off and on, the user is encouraged to try to correct the interference by one or more of
the following measures:
- Reorient or relocate the receiving antenna.
- Increase the separation between the equipment and receiver.
- Connect the equipment into an outlet on a circuit different from that to which the receiver is
connected.
- Consult the dealer or an experienced radio/TV technician for help.
- Changes or modifications not expressly approved by the party responsible for compliance could
void the user's authority to operate the equipment."