Wavetrend Technologies TG700 ActivDuo Tag - Key Fob User Manual ActivDuo Tag 00 8 UM LT
Wavetrend Technologies Limited ActivDuo Tag - Key Fob ActivDuo Tag 00 8 UM LT
Users Manual
User Manual
Active RFID Tags

USER MANUAL – ActivDuo Active RFID Tags
Configuration No. Wavetrend Technologies Ltd Master File Name Issue Date Page
00000-0000-150-1 User Manual ActivDuo Tag-00.8-UM-LT 3 DECEMBER 2008 2 OF 42
ABBREVIATIONS USED
Abbreviation Meaning
ActivDuo One of Wavetrend’s two ranges of Active RFID Tags
ASK Amplitude-shift keying modulation
BNC connector Bayonet Neill-Concelman connector (a common type of RF connector)
CE Conformité Européenne, "European Conformity" in French.
CISPR Comite international Special des Perturbations Radioelectriques, “International
Special Committee on Radio Interference” in French.
CSC ‘Customer Site Code’ – Uniquely assigned by Wavetrend to every customer, on
request.
EMC Electromagnetic Compatibility
FCC Federal Communications Commission (USA)
ID Identifier
IEC International Electrotechnical Commission
IP rating Ingress Protection rating
IPR Intellectual Property Rights
IT Information Technology
m Meter (metric measurement)
MHz Mega hertz (= 1000 Hz)
OEM Original Equipment Manufacturing
Ohm The unit of electrical impedance or, in the direct current case, electrical
resistance, named after Georg Ohm
PUC Product Unique Code
RF Radio Frequency
RFID Radio Frequency Identification
RoHS Restriction of Hazardous Substances (EU Directive)
RTLS Real Time Location System
SABS South African Bureau of Standards
Tx Transmit / Transmission
VHB Very high bond
WEEE Waste Electrical and Electronic Equipment (EU Directive)
μV/m Microvolts per meter (the units used to describe the strength of an electric field
created by the operation of a transmitter)
Table 1: Abbreviations Used

USER MANUAL – ActivDuo Active RFID Tags
Configuration No. Wavetrend Technologies Ltd Master File Name Issue Date Page
00000-0000-150-1 User Manual ActivDuo Tag-00.8-UM-LT 3 DECEMBER 2008 3 OF 42
IMPORTANT NOTICE TO THE READER
Each of Wavetrend®’s ActivDuo active RFID tags has been specifically designed to operate in specific
circumstances or applications and be attached to specific types of items in a specific manner. Failure to
follow the guidelines and application notes contained in this manual for each tag listed can lead to their
incorrect operation and failure to perform as expected or intended. The choice of which Wavetrend® tags to
use in any project must be made by a fully trained and Wavetrend® certified engineer. Wavetrend® accepts
no responsibility for any failure of the product in any way caused by the incorrect selection, installation and
usage of Wavetrend®’s active RFID tags, readers, ancillary devices and software.
DISCLAIMER
NOTICES REGARDING HARDWARE, SOFTWARE, DOCUMENTS AND SERVICES THAT ARE
AVAILABLE FROM WAVETREND:
In no event shall Wavetrend® and/or its respective suppliers be liable for any special, indirect or
consequential damages or any damages whatsoever resulting from loss of use, data or profits, whether in an
action of contract, negligence or other tortuous action, arising out of or in connection with the use or
performance of hardware, software, documents, provision of or failure to provide services, or information
available from Wavetrend® and/or our website http://www.wavetrend.net.
The documents published by Wavetrend® could include technical inaccuracies or typographical errors.
Changes are periodically added to the information herein. Wavetrend® and/or its respective suppliers may
make improvements and/or changes in the product (s) and/or the program (s) described herein at any time
without prior notice.
FCC STATEMENT
Each of the devices described in this manual complies with Part 15 of the FCC Rules. Operation is subject to
the following two conditions: (1) this device may not cause harmful interference, and (2) this device must
accept any interference received, including interference that may cause undesired operation.
The user is cautioned that changes or modifications to this product that are not expressly approved by the
party responsible for compliance could void the user's authority to operate the equipment.
Copyright © 2008 Wavetrend Technologies Limited. All rights reserved. Wavetrend and the Wavetrend logo are either registered
trademarks or trademarks of Wavetrend Technologies Limited in the United States and/or other countries. All other trademarks
are the property of their respective owners.

USER MANUAL – ActivDuo Active RFID Tags
Configuration No. Wavetrend Technologies Ltd Master File Name Issue Date Page
00000-0000-150-1 User Manual ActivDuo Tag-00.8-UM-LT 3 DECEMBER 2008 4 OF 42
TABLE OF CONTENTS
1THE ACTIVDUO RANGE OF ACTIVE RFID TAGS ..................................................................................... 7
1.1Product Overview ............................................................................................................................... 7
1.1.1L-Series & W-Series Explained ...................................................................................................... 7
1.1.2Key Features and Benefits of ActivDuo Tags ................................................................................ 8
1.2General Facts about ActivDuo Tags ................................................................................................ 10
1.3Obtaining Professional Advice on Using Tags ................................................................................. 10
1.3.1Wavetrend Professional Services ................................................................................................ 10
1.3.2Wavetrend’s Product Customization Capabilities ........................................................................ 10
1.4Standard Tag Functionality .............................................................................................................. 11
1.4.1Standard Transmission Mode ...................................................................................................... 11
1.4.2Movement Alert Mode .................................................................................................................. 11
1.4.3Manual Alert Operation for the TG700-A Key Fob PA Tag ......................................................... 11
1.4.4Tag Transmission Repetition Rates – Nominal vs. Actual ........................................................... 12
1.5Tag Battery (Functional) Life Span .................................................................................................. 12
1.5.1L-Series Life Spans ...................................................................................................................... 13
1.5.2W-Series Life Spans .................................................................................................................... 14
1.5.3End of Life .................................................................................................................................... 14
1.5.4Keeping Tags in Stock ................................................................................................................. 14
1.6ActivDuo Tag Accessories ............................................................................................................... 14
1.6.1Tag Attachment Kits ..................................................................................................................... 14
1.6.2Anti-Tamper Tag Attachment Kits ................................................................................................ 15
1.6.3Identifying the Correct Attachment Kit to Use .............................................................................. 15
1.6.4Other Attachment Methods .......................................................................................................... 15
1.7Other Hardware Requirements ........................................................................................................ 16
1.7.1Reader Network Hardware Required ........................................................................................... 16
1.7.2External Antennas ........................................................................................................................ 17
1.8Programming ActivDuo Tags ........................................................................................................... 17
1.9Activating W-Series ActivDuo Tags ................................................................................................. 18
1.9.1Using the Auto-Wake Feature with the ActivDuo Tags ................................................................ 18
1.10Disposal of Tags .............................................................................................................................. 18
2THE TG100-A ‘DOMINO’ TAG ................................................................................................................ 19
2.1Important Facts about the TG100-A Tag ......................................................................................... 19
2.2Attaching the TG100-A for Tracking Assets .................................................................................... 20
2.2.1Requirements ............................................................................................................................... 20
2.2.2Preparation ................................................................................................................................... 20
2.2.3Arming the anti-tamper (if using the TA100-AT attachment kit) .................................................. 20
2.2.4Final steps .................................................................................................................................... 20
2.3Removing the TG100-A ................................................................................................................... 20

USER MANUAL – ActivDuo Active RFID Tags
Configuration No. Wavetrend Technologies Ltd Master File Name Issue Date Page
00000-0000-150-1 User Manual ActivDuo Tag-00.8-UM-LT 3 DECEMBER 2008 5 OF 42
2.3.1Requirements ............................................................................................................................... 20
2.3.2Removal ....................................................................................................................................... 20
3THE TG501-A ‘PERSONNEL’ TAG ......................................................................................................... 22
3.1Important Facts about the TG501-A Tag ......................................................................................... 22
3.2Using the TG501-A for Tracking Personnel ..................................................................................... 22
3.2.1Requirements & Instructions ........................................................................................................ 22
3.3Installing the TG501-A for Tracking Assets ..................................................................................... 23
3.3.1Requirements ............................................................................................................................... 23
3.3.2Preparation ................................................................................................................................... 23
3.3.3Arming the anti-tamper (if using the TA501-AT attachment kit) .................................................. 23
3.3.4Final steps .................................................................................................................................... 23
3.4Removing the TG501-A ................................................................................................................... 23
3.4.1Requirements ............................................................................................................................... 23
3.4.2Removal ....................................................................................................................................... 23
4THE TG700-A ‘KEY FOB PA’ TAG ......................................................................................................... 25
4.1Important Facts about the TG700-A Tag ......................................................................................... 25
4.2Using the TG700-A for Personnel Security Applications or Key Ring Tracking .............................. 25
4.2.1Requirements & Instructions ........................................................................................................ 25
4.2.2Modes of Operation ...................................................................................................................... 26
5THE TG800-A ‘ASSET’ TAG ................................................................................................................... 27
5.1Important Facts about the TG800-A Tag ......................................................................................... 27
5.2Attaching the TG800-A for Tracking IT Equipments and Other Assets ........................................... 28
5.2.1Requirements ............................................................................................................................... 28
5.2.2Preparation ................................................................................................................................... 28
5.2.3Arming the anti-tamper (if using the TA800-AT attachment kit) .................................................. 28
5.2.4Final steps .................................................................................................................................... 28
5.3Removing the TG800-A ................................................................................................................... 28
5.3.1Requirements ............................................................................................................................... 28
5.3.2Removal ....................................................................................................................................... 28
6THE TG800-A-IH ‘ASSET IP67’ TAG ...................................................................................................... 30
6.1Important Facts about the TG800-A-IH Tag .................................................................................... 30
6.2Attaching the TG800-A-IH for Tracking Containers and Other Assets ............................................ 31
6.2.1Requirements ............................................................................................................................... 31
6.2.2Preparation ................................................................................................................................... 31
6.2.3Arming the anti-tamper (using the spring loaded magnet provided with the tag) ........................ 31
6.2.4Final steps .................................................................................................................................... 31
6.3Removing the TG800-A-IH............................................................................................................... 31
6.3.1Requirements ............................................................................................................................... 32
6.3.2Removal ....................................................................................................................................... 32
7THE TG801-A & TG801-A-WM ‘SMALL ASSET’ TAG ........................................................................... 33

USER MANUAL – ActivDuo Active RFID Tags
Configuration No. Wavetrend Technologies Ltd Master File Name Issue Date Page
00000-0000-150-1 User Manual ActivDuo Tag-00.8-UM-LT 3 DECEMBER 2008 6 OF 42
7.1Important Facts about the Small Asset Tag ..................................................................................... 33
7.2Attaching the TG801-A for Tracking IT Equipment and Other Assets ............................................. 33
7.2.1Requirements ............................................................................................................................... 33
7.2.2Preparation ................................................................................................................................... 34
7.2.3Arming the anti-tamper (if using the TA801-AT attachment kit) .................................................. 34
7.2.4Final steps .................................................................................................................................... 34
7.3Attaching the TG801-A-WM for Tracking IT Equipment and Other Assets ..................................... 34
7.3.1Requirements ............................................................................................................................... 34
7.3.2Preparation ................................................................................................................................... 34
7.3.3Arming the anti-tamper (if using the TA801-AT attachment kit) .................................................. 34
7.3.4Final steps .................................................................................................................................... 35
7.4Removing the TG801-A or TG801-A-WM ........................................................................................ 35
7.4.1Requirements ............................................................................................................................... 35
7.4.2Removal ....................................................................................................................................... 35
8THE TG1800-A ‘WRIST’ TAG ................................................................................................................. 36
8.1Important Facts about the Wrist Tag ................................................................................................ 36
8.2Attaching the TG1800-A for Tracking Patients and Other People ................................................... 36
8.2.1Requirements ............................................................................................................................... 36
8.2.2Fitment ......................................................................................................................................... 36
8.3Attaching the TG1800-A to Objects for Asset Tracking Systems .................................................... 37
8.3.1Requirements ............................................................................................................................... 37
8.3.2Fitment using Non-Metal Straps .................................................................................................. 37
8.3.3Fitment using Steel/Metal Straps ................................................................................................. 37
8.4Removing the TG1800-A ................................................................................................................. 37
9THE TG1810-A ‘MINI ASSET’ TAG ......................................................................................................... 38
9.1Important Facts about the Mini Asset Tag ....................................................................................... 38
9.2Attaching the TG1810-A for Tracking IT Equipments and Other Assets ......................................... 39
9.2.1Requirements ............................................................................................................................... 39
9.2.2Preparation (when using the Tag Attachment Kit) ....................................................................... 39
9.2.3Arming the anti-tamper (if using the TA1810-AT attachment kit) ................................................ 39
9.2.4Final steps .................................................................................................................................... 39
9.3Removing the TG1810-A ................................................................................................................. 39
9.3.1Requirements ............................................................................................................................... 39
9.3.2Removal ....................................................................................................................................... 39
APPENDIX A.STANDARD SPECIFICATIONS & CERTIFICATIONS ....................................................... 41
APPENDIX B.DOCUMENT INFORMATION .............................................................................................. 42

USER MANUAL – ActivDuo Active RFID Tags
Configuration No. Wavetrend Technologies Ltd Master File Name Issue Date Page
00000-0000-150-1 User Manual ActivDuo Tag-00.8-UM-LT 3 DECEMBER 2008 7 OF 42
1 THE ACTIVDUO RANGE OF ACTIVE RFID TAGS
1.1 Product Overview
Wavetrend® ActivDuo tags are Active Radio Frequency Identification (RFID) beacon tags (i.e. self-
powered tags, that transmit their data at periodic intervals without being ‘asked’ to transmit by a reader) and
are to be used in conjunction with the Wavetrend® range of Active RFID readers or OEM products that
support reading Wavetrend’s tags. All ActivDuo tags have –A included in their part number, e.g. L-TG501-A.
ActivDuo Tags can be used in various applications such as access control, personnel monitoring, asset
location & status monitoring, vehicle monitoring and building management applications. Standard on-board
sensors identify attempts to tamper with or move the tagged asset and the tag transmits alerts immediately,
allowing the RFID system to raise real time alerts for the RFID system users. Temperature, humidity and
other digital sensors can be added to the tags to transmit the data from these sensors wirelessly. Please
enquire with Wavetrend® if you require such advanced sensor functionality.
The tags are suitably packaged in sealed plastic housings to meet the most common requirements for
different tag usage applications; although it is advised to check with Wavetrend® and the local standards
authority that the tag(s) of choice meet all regulatory requirements in the country and location of use before
specifying or using it in that country and/or location. For instance, tags used within a petrochemical plant will
be required to hold nationally recognized intrinsic safety (IS) certification, and many countries require that
their own IS certification is obtained for the tags.
1.1.1 L-Series & W-Series Explained
‘L-Series’ and ‘W-Series’ refer to two different proprietary communication protocols used between ActivDuo
tags and Wavetrend’s readers. An L-Series reader must be used with Wavetrend L-Series tags. A W-Series
reader must be used with Wavetrend W-Series tags. Both types of reader can operate on the same reader
network infrastructure. Please refer to the various Wavetrend reader user manuals for more information on
using Wavetrend readers.
L-Series and W-Series each offer different functionality for the user from the ActivDuo tag. Generally, L-
Series tags offer greater read range, function as a simple identity tag, and are better suited to RFID
systems where fewer tags are in range of any one reader at any one time.
W-Series tags offer a greater flexibility of the amount and type of data that is transmitted and offer
more transmit interval options, but are better suited to applications where many hundreds or thousands
of tags are deployed on a site and where shorter read ranges are suitable or preferred i.e. where it is
more important to detect a large number of tags quickly than it is to achieve very large read ranges.
W-Series data options: The user is able to choose which fixed data elements are to be transmitted by the W-
tag, for instance the battery age counter is an optional data element. In addition to the fixed data elements,
the user can also program the tag with their own data (up to 25 characters) for the tag to transmit.
Note: The total amount of data the tag can transmit at maximum is fixed, so the more fixed data elements
that are selected for the tag to transmit, the less data space will be available for the user data, and vice
versa.
The user data can only be changed through reprogramming the tag using the tag programmer, it cannot be
changed at will during normal use of the tags, and as such W-Series tags are not read/write tags.
Tags are manufactured to use one of the protocols and cannot be changed afterward to use the other
protocol. The tag range is available in identically designed and shaped tags for each protocol, but are
typically colored Grey for L-Series tags or Black for W-Series tags. The Series prefix (L- or W-) in the tag’s
part number denotes the protocol the tag uses. e.g. L-TG501-A denotes an L-Series tag, W-TG501-A
denotes a W-Series tag.

USER MANUAL – ActivDuo Active RFID Tags
Configuration No. Wavetrend Technologies Ltd Master File Name Issue Date Page
00000-0000-150-1 User Manual ActivDuo Tag-00.8-UM-LT 3 DECEMBER 2008 8 OF 42
1.1.2 Key Features and Benefits of ActivDuo Tags
Key Tag Features Business Benefits Available
L-Series W-Series
Transmits a Unique ID Number
Allows for the unique identification of every tag in
an RFID system, and by extension, the asset or
person the tag is attached to or carried by.
; ;
Incorporates a motion sensor as standard
Provides immediate notification if movement of the
tag occurs. This allows the tag to operate in two
modes – more frequent transmissions when in alert
mode (i.e. when movement or tampering occurs),
or less frequent transmissions when in standard or
‘at rest’ mode.
; ;
Transmits up to 25 characters of user defined
information
Allows for additional data to be stored and
transmitted by the tag, such as an Electronic
Product Code (EPC) identifier or Vehicle
Identification Number (VIN), in addition to the
unique tag ID number (the PUC)
: ;
Transmits on a regular basis (called ‘status
transmissions’).
The next transmission is initiated randomly
within a very short period of time after the user
programmed transmission or ‘Tx’ interval has
elapsed after the previous transmission.
Regular transmissions at short intervals (typically
10 seconds) provide near real time tracking
capability of tagged assets or personnel, while still
providing an exceptional functional lifespan
; ;
Transmits on an exceptional basis (called
‘alarm’ or ‘alert’ transmissions’) immediately on
activation of either the tamper sensor (if
armed) or the movement sensor.
Provides real time indication of any attempt to
tamper with a tag or move a tagged asset, with
alert transmissions being made at short intervals
(typically 1.5 seconds) for a period of 5 seconds.
; ;
Transmits additional tag information, such as
the tag type, the tag’s standard transmission
interval, the status of the alarm bit, the status
of the tamper bit, the motion sensor counter
and the tamper sensor counter.
Allows for advanced application functions to be
built into the RFID system to fully utilize the RFID
hardware’s capabilities.
; ;
The user can configure the combination of data
the tag will transmit by using a tag programmer
Increases tag life span and tag capacities by
reducing the amount of data transmitted to the
minimum data required by the RFID system.
: ;
Collision avoidance algorithm
Reduces loss of data through simultaneous
transmissions from multiple tags. The
randomization of the transmission interval aids the
collision avoidance algorithm.
; ;
(enhanced)
Ultra low power consumption Life span of 7+ years when transmitting at the
standard 10 second or greater interval ; ;
All tags sealed to IP64 standards or higher Splash proof and intrinsically safe capable ; ;
All tags can be configured, activated or deactivated by the user by using a desktop tag programmer
(PG101-A) available for purchase from Wavetrend or any of its Accredited Partners. ; ;
Data Transmitted by Tags:
Site/Vendor Code (CSC)*
A unique code that is allocated by Wavetrend
to each customer on request.
Readers can be set to accept only one
specific CSC and ignore tags with ‘incorrect’
site codes
; ;**

USER MANUAL – ActivDuo Active RFID Tags
Configuration No. Wavetrend Technologies Ltd Master File Name Issue Date Page
00000-0000-150-1 User Manual ActivDuo Tag-00.8-UM-LT 3 DECEMBER 2008 9 OF 42
Key Tag Features Business Benefits Available
L-Series W-Series
Tag ID* 4.2 billion Tag ID’s are available per Site Code
( Tag ID is different from the PUC). ; ;**
Tag Age Counter
The Age Counter allows for advance
notification to RFID systems of the nearing
end of the tag’s functional life.
Uniquely identifies each transmission made by
the tag.
; ;**
Product Unique Code (PUC)
Factory set ID for the tag that can function as
the tag’s unique ID number instead of a Site
Code/Tag ID combination.
The user cannot change the PUC.
: ;
Various standard transmission
repetition intervals*
(default is 10 seconds, nominal)
Different status transmission intervals allow tags to
be configured for use in diverse applications in a
way to ensure 100% system functionality and that
the maximum battery life is achieved, but without
overloading the RFID system with too many
unnecessary tag signals.
2
Intervals
11
Intervals
Various alert transmission repetition
intervals*
(default is 1.5 seconds, nominal)
Different alert transmission intervals allow tags
to be used in diverse security applications in a
way to ensure 100% system functionality is
achieved, but maximizing the battery life span
of the tag.
When activated, alert transmissions continue
for a maximum period of 5 seconds.
3
Intervals
6
Intervals
Movement Alert
Provides instant notification of an attempt to move
a tag by setting the alarm bit and entering Alert Tx
mode for 5 seconds.
; ;
Movement Counter Value
Increments each time the motion sensor triggers
the tag’s alert transmission mode. This allows an
RFID system to determine if Alert Tx mode was
initiated because of movement.
; ;**
Tamper Alert Provides instant notification of unauthorized
attempts to remove a tag from an asset by setting
the alarm bit and transmitting 4 rapid alarm Tx’s.
; ;
Tamper Counter Value
Increments each time the tamper sensor triggers
the tag’s alert transmission mode. This allows an
RFID system to determine if Alert Tx mode was
initiated because of tampering, or if a tamper event
occurred outside of a reading zone.
; ;**
Tamper Latch
Provides notification with every transmission
afterward of a tamper event having occurred. This
allows an RFID system to determine if a tamper
occurred outside of a reading zone without having
to look up the previous tamper counter value.
Tamper latch can be reset using a Wavetrend tag
programmer.
: ;**
* Indicates data that the user can configure on
any tag using a Wavetrend tag programmer
** Indicates data
options that the user
can set the tag to
transmit, if desired.
Table 2 - Key Features and Benefits of ActivDuo Tags
USER MANUAL – ActivDuo Active RFID Tags
Configuration No. Wavetrend Technologies Ltd Master File Name Issue Date Page
00000-0000-150-1 User Manual ActivDuo Tag-00.8-UM-LT 3 DECEMBER 2008 10 OF 42
1.2 General Facts about ActivDuo Tags
Radio Frequency (RF) signals are scientifically complex and subject to strict government controls to
avoid causing interference with other RF signals. How tags are used and where they are used all affect
how the tags perform and what may be allowed in one country may be prohibited in another.
The products offered by other active RFID vendors are not functionally identical to Wavetrend’s and may
perform very differently. Using and installing RFID tags requires careful consideration of these and many
other factors by a trained RFID engineer. The use of the services of a Wavetrend trained and accredited
engineer to determine the requirements of an RFID system and to specify the correct Wavetrend
products to use is strongly recommended to ensure a satisfactory experience for the user.
All ActivDuo tags operate at a frequency of 433.92 MHz as standard. Alternate frequencies (such as
868MHz or 915MHz) or customized tag designs can be supplied for specific large scale projects, but
would require product development activities. Please enquire with Wavetrend.
1.3 Obtaining Professional Advice on Using Tags
For most tagging applications, following the guidelines in this manual will provide sufficient basic advice to
any user. If these guidelines do not provide enough assistance, then the user should contact one of
Wavetrend’s Accredited Partners or a Wavetrend Professional Services representative directly for further
advice and assistance.
Note on Accredited Partners: Wavetrend has a worldwide Accredited Partner network of companies
trained up in all aspects of Wavetrend technology. These companies can offer their expertise and
knowledge to ensure that the best choice of Wavetrend products is made to suit user’s requirements,
and that the products are correctly installed, configured and operated. A full listing of Accredited
Partners can be found on www.wavetrend.net under the Partners section.
Wavetrend does not recommend the use of services provided by any company that is not fully trained and
accredited by Wavetrend.
1.3.1 Wavetrend Professional Services
Wavetrend’s in-house Professional Service teams are also available to provide second line support to
Accredited Partners or directly to users for more challenging or unusual customer applications where
standard tags may or may not be suitable for use. Minor modifications to existing products to make them
better suited to the application can be done, but after a detailed examination of the customer’s requirements
by Wavetrend.
1.3.2 Wavetrend’s Product Customization Capabilities
For truly unique applications, Wavetrend can design custom tags to meet specific requirements. However,
such work is expensive and time consuming and is only conducted after careful consideration of the
customer requirements, the volume required and acceptance by all parties involved of the costs to be shared
and the timescale of embarking on a new product development project.

USER MANUAL – ActivDuo Active RFID Tags
Configuration No. Wavetrend Technologies Ltd Master File Name Issue Date Page
00000-0000-150-1 User Manual ActivDuo Tag-00.8-UM-LT 3 DECEMBER 2008 11 OF 42
1.4 Standard Tag Functionality
The ActivDuo tag offers three primary modes of operation that determines how often the tag will transmit.
They are defined as being ‘Standard’, ‘Movement Alert’ and ‘Tamper Alert’ transmission modes:
1.4.1 Standard Transmission Mode
In this mode, the tag will transmit its ID number and
ancillary data regularly at the programmed status
transmission interval (called the ‘Status Tx rate’).
The default Status Tx rate is 1 transmission at least
every 10 seconds. Other transmission intervals for the
Status Tx rate greater than 10 seconds can be selected
by the user and programmed into the tag through a tag
programmer unit. See the section on tag programming
for more information on how to do this.
1.4.2 Movement Alert Mode
In this mode the tag will transmit its data at a shorter
alert interval (the ‘Alert Tx rate’) for a short period of
time if the motion sensor within the tag registers
movement or vibration.
For L-Series and W-Series, the default transmission
rate for movement alert operation is 1 transmission
every 1.5 seconds. But other alert transmission
intervals (0.4 or 0.8 seconds for L-Series and 0.4 / 0.8 /
1 / 3 or 5 seconds for W-Series) can be selected by the
user and programmed into the tag.
The tag will cease transmitting at the Alert Tx rate after
5 seconds of entering Movement Alert mode and revert
to the Status Tx rate. Each time the motion sensor is
activated when the tag is in Standard mode, the tag will
immediately enter the Movement Alert mode.
The movement counter will increment each time the
Movement Alert mode is activated.
1.4.3 Tamper Alert Mode
In this mode, triggered by the anti-tamper circuit, the
tag will transmit its data, together with setting the Alarm
bit, in a rapid burst of four alert transmissions and in
intervals of 0.4 seconds. The tamper alert mode will interrupt the movement alert mode if a tamper
event occurs while the tag is moving. The tamper counter value will increment each time the Tamper
Alert mode is activated.
1.4.4 Manual Alert Operation for the TG700-A Key Fob PA Tag
The Key Fob PA tag does not include a motion sensor. In its place a push button is fitted. When
pressed, the push button activates the Movement Alert mode of operation. The alert transmissions
Alert Tx Rates
L Series Status Tx Rates
L-Series
0.4 seconds 10 seconds
(default)
0.8 seconds 30 seconds
1.5 seconds
(default)
Table 3 - List of Programmable Nominal
Transmission Rates for the L-Series ActivDuo
tags
Alert Tx Rates
W Series Status Tx Rates
W-Series
0.4 seconds 10 seconds
(default)
0.8 seconds 15 seconds
1 second 20 seconds
1.5 seconds
(default) 30 seconds
2 seconds 45 seconds
5 seconds 1 minute
- 1.5 minutes
- 2 minutes
- 3 minutes
- 5 minutes
- 10 minutes
Table 4 - List of Programmable Nominal
Transmission Rates for the W-Series ActivDuo
tags
USER MANUAL – ActivDuo Active RFID Tags
Configuration No. Wavetrend Technologies Ltd Master File Name Issue Date Page
00000-0000-150-1 User Manual ActivDuo Tag-00.8-UM-LT 3 DECEMBER 2008 12 OF 42
are generated in exactly the same way as for the Movement Alert Mode described above, the only
difference being that the transmissions are initiated by the user through a button press rather than a
movement sensor being activated by motion.
For track and trace operations that require the use of the TG700-A Key Fob PA tag, set the Status
Tx rate to the minimum rate available (10 seconds) to ensure regular location updates for the tag are
received by the RTLS system.
Note to Software Developers: When the TG700-A’s button is pressed, the Key Fob tag will set the
alarm bit in the data packet for the each of the Alert Tx’s generated and will appear to be indicating
that a movement alert has occurred in the same way that all other ActivDuo tags which are fitted with
movement sensors would do. To correctly identify that there is a panic alarm, or to allow a door to be
unlocked (if used with access control systems, for example), the tag ID must be flagged in the
application as being a Panic Alert tag, and the transmitted tag ID checked by the application so that the
system understands that the alert transmissions are coming from a TG700-A tag because of a button press
and not because of physical movement, and to then react accordingly.
Note to System Engineers: If using the TG700-A with the PA100 Wiegand Converter for simple access
control purposes, or for simple audio-visual notification of the panic alert, the appropriate jumper settings can
be made on the PA100 to activate the alarm relay on receipt of the alarm transmissions from the TG700-A.
1.4.5 Tag Transmission Repetition Rates – Nominal vs. Actual
All Status and Alert tag transmission rates quoted in Table 3 and Table 4 above are the nominal
interval time periods. Ambient temperatures will affect actual tag transmission intervals due to the
effect of temperature on the electronic components used in the tag that govern the repetition rate.
Hotter temperatures will decrease the actual tag transmission interval
Colder temperatures will increase the actual tag transmission interval
All stated tag life span expectations in the product data sheets for tags are based on the tags
operating throughout their life at around room temperature (70oF or 21oC) and the associated actual
tag transmission interval achieved when the tag is set to the default status and alert nominal intervals.
For example, setting the Status Tx interval to 10 seconds (the nominal rate) will result in a real interval
of around 12.5 seconds when the tag is operating at room temperature. If the tag is used in an
environment where the ambient temperature approaches 140oF (60oC), the actual status transmission
interval will decrease near to 10 seconds. In the reverse, if the tag is used in an environment where
the ambient temperature approaches 14oF (-10oC), the real status transmission interval will increase
near to 15 seconds.
1.5 Tag Battery (Functional) Life Span
Wavetrend’s ActivDuo tags typically use a Lithium-Ion battery that the manufacturer states as offering an 8
year shelf life, rated for. The batteries are more efficient at producing current in hotter temperatures and less
efficient in colder temperatures.
Note about calculating tag life spans: Wavetrend provides all Accredited Partners with an
application which allows the minimum expected life span of a tag to be quite accurately calculated by
entering information about the tag type, the tag configuration (data & options) and expected usage
information (temperatures & amount of movement) that is available.
If you do not have access to the tag life span calculator and want to find out if a tag will provide a sufficient
functional life for your intended use, please ask Wavetrend or one of our Accredited Partners to assist you.
USER MANUAL – ActivDuo Active RFID Tags
Configuration No. Wavetrend Technologies Ltd Master File Name Issue Date Page
00000-0000-150-1 User Manual ActivDuo Tag-00.8-UM-LT 3 DECEMBER 2008 13 OF 42
While the tag batteries are manufactured on demand for Wavetrend to minimize the loss of functional life
span between battery manufacture and customer activation of the tag, Wavetrend typically quotes a
conservative maximum battery life span of 6 years 2 months for tags set to the default transmission rates to
allow for a more than reasonable amount of time that the tag might be stored in stock by our distributors &
resellers and to allow for usage in either variable temperature or colder climates.
While hotter temperatures will decrease the transmission interval rates, thus making the tag transmit more
often per day, the greater efficiency of the battery exceeds the increased power usage caused by the shorter
transmission interval. In reverse, the loss of battery efficiency at colder temperatures exceeds the benefit of
longer actual transmission intervals.
We feel it is better to be conservative than to set expectations that may lead to customer disappointment, but
for the majority of tags sold we would expect the customer to enjoy a potential maximum life span of up to
between 7 and 8 years from a tag – depending very much on how the tag is configured to operate, how much
data is transmitted per transmission (W-Series tags only), and the ambient temperature it will experience
throughout its life span.
Summary: What can reduce a tag’s life span?
Transmission intervals. Shorter standard and alert intervals = shorter life span.
Ambient temperatures. The power consumption of the electrical components inside the tag will
change very slightly with changes in temperature and the battery will be less efficient in generating
energy.
Colder temperatures = shorter life span.
Regular temperature cycles. Where the tag is subjected to repeated and regular temperature cycles (hot /
cold / hot etc.) the battery life span will be reduced. The greater the extremes in hot and cold, the greater the
reduction of life span.
Regular temperature cycles = shorter life span.
The amount of movement, and therefore how often the Alert mode is initiated, will affect life span.
More movement = shorter life span.
The amount of data the tag transmits. L-Series tags transmit a fixed amount of data and life span calculations
are quite straightforward. W-Series tags can transmit anything between 8 & 28 bytes of data, and this
variable amount of data, and thus variable transmission duration lengths, makes life span calculations more
complex.
More data = shorter life span
1.5.1 L-Series Life Spans
The L-Series ActivDuo tag will typically give the user greater than 6 years 2 months of continuous use when
set to transmit at its default Status Tx rate of 10 seconds.
The tag will give the user just under 5 years of continuous use even if it is exposed to movement of up to
90% of its total functional life span when the Alert Tx rate is set to the default rate of 1.5 seconds.
For other Alert Tx rates less than 1.5 seconds, and where the tag moves for more than 10% of its total
functional life span, the tag battery life span will be reduced, due to the greater number of transmissions
initiated during its life span.
At worst the tag will offer a user just under 2 years of continuous use when set to the shortest Alert Tx rate
(0.4s) and when it moves for up to 90% of its functional life span.

USER MANUAL – ActivDuo Active RFID Tags
Configuration No. Wavetrend Technologies Ltd Master File Name Issue Date Page
00000-0000-150-1 User Manual ActivDuo Tag-00.8-UM-LT 3 DECEMBER 2008 14 OF 42
1.5.2 W-Series Life Spans
Battery life spans for a W-Series tag are very much determined on the amount of tag data the user selects
the tag to transmit. For the purposes of this section, the best case life span figures are given for Class 1 tags
which transmit the least amount of data, while the worst case life span figures are given for tags that are
programmed to transmit the full amount of data possible.
The W-Series ActivDuo tag will typically give the user greater than 6 years 2 months of continuous use when
set to transmit at its default Status Tx rate of 10 seconds, and is configured to carry L-Series type data (Class
5) and experiences movement for less than 10% of its functional life.
The tag will give the user at least 5 years of continuous use even if it is exposed to movement of up to 90%
of its total functional life span when the Alert Tx rate is set to the default rate of 1.5 seconds.
For other Alert Tx rates less than 1.5 seconds, and where the tag moves for more than 10% of its total
functional life span, the tag battery life span will be reduced, due to the greater number of transmissions
initiated during its life span.
At worst the tag will offer a user over 2 years of continuous use when set to the shortest Alert Tx rate (0.4s)
and when it moves for up to 90% of its functional life span.
1.5.3 End of Life
The tag will continue to transmit its data signals at a constant strength until the battery is exhausted, at which
point the tag will cease transmitting. The battery loses less than 1% of its power for every year in storage.
The battery has a maximum specified shelf life of 8 years, in the case of where the tag is never activated.
The tag’s Battery Age Counter value is transmitted with every signal (L-Series) or can be selected to be
transmitted, if required, (W-Series). By monitoring the value of the age counter, the recipient RFID software
system can alert the user to the fact that the tag is nearing the end of its functional life.
1.5.4 Keeping Tags in Stock
It is recommended that ActivDuo tags be kept in stock for less than two years after purchase from
Wavetrend. The oldest tags held in stock should always be sold on, used or activated first. Tags should not
be activated if they are to be held in stock. Activate tags only when needed for use. If tags are to be used on
occasions, deactivate them when they are in storage between uses to maximize their useful life.
1.6 ActivDuo Tag Accessories
1.6.1 Tag Attachment Kits
Most of the ActivDuo Tags can be attached to most types of assets using the Tag Attachment Kits supplied
by Wavetrend. The attachment kit consists of 10 very high bond (VHB), double-sided adhesive pads, with
most being made of clear gel, while the TG800-A-IH pads are made of VHB gel-foam pads. The VHB pads
are cut to match the size of the tag.
The VHB gel pads will take 24 hours to cure and reach maximum adhesion to both the tag and the asset.
Within this time period it will be easier to remove the tag if it needs repositioning or has been affixed to an
asset in error. If the tag & gel pad are removed from the asset soon after first being affixed to the asset, it is
not recommended to try reuse the gel pad as it will not adhere to the asset surface as well for the second
time. Replace the pad.
The VHB pads will not adhere to wet, greasy, dusty or rough surfaces (such as wood, concrete etc.)

USER MANUAL – ActivDuo Active RFID Tags
Configuration No. Wavetrend Technologies Ltd Master File Name Issue Date Page
00000-0000-150-1 User Manual ActivDuo Tag-00.8-UM-LT 3 DECEMBER 2008 15 OF 42
1.6.2 Anti-Tamper Tag Attachment Kits
The kits of 10 VHB gel pads also include a small magnet that fits into the pre-punched hole in each gel pad.
This magnet provides the mechanism to arm the anti-tamper circuit in the tag. If any attempt is made to
remove the tag, the deformation and breakup of the gel pad caused by the attempt to remove the tag will
cause the magnet to shift in position relative to the tag, immediately activating the tamper alert transmission
from the tag.
It is recommended to place a spot of Superglue™ or other suitable adhesive on the magnet so that it will
adhere to the asset surface and be able to trigger a tamper alert more quickly should any unauthorized
attempt be made to remove a tag from its asset. Do not glue the magnet to the back of the tag, this will
prevent the anti-tamper feature from working.
1.6.3 Identifying the Correct Attachment Kit to Use
All attachment kits have a product code starting with the prefix ‘TA’, and share the same product code
number as the tag type they are to be used with. For example, the TA501 kit will be used with the TG501-A
ActivDuo tag.
The Anti-Tamper Tag Attachment Kit has the suffix ‘-AT’ after the kit’s product code. For example the anti-
tamper kit for the TG501-A tag is the TA501-AT.
1.6.4 Other Attachment Methods
Certain tags, usually those with part numbers ending in –IH (“Industrial Housing”) or –WM (“wing mount”),
are designed to allow attachment to assets using customer supplied screws or rivets, and fixing holes are
provided in the tag housing for this purpose. It is not recommended to rely purely on the VHB gel pads or
other adhesives if a very secure fixture to an asset is required, such as to a vehicle or asset that is normally
handled roughly.
It is recommended to test any other type of adhesive or glue before generally attaching tags to assets using
this other type of adhesive. Not all adhesives will bond well with both the tag and the surface material of the
tagged object. Some adhesives or glues will cause damage to the plastic tag housing and possibly to the tag.
It is not recommended to attach the tag by any type of permanent adhesive method if the tag is to be
removed at the end of its functional lifespan as damage may be caused to the asset, rather use screws or
rivets that can be removed without causing damage to the outdoor asset, or for indoor assets, use the tag
attachment kits.
For temporary attachment to assets that allow quick removal or re-attachment of the tag when desired,
adhesive Velcro™ strips are an excellent material for this purpose.
USER MANUAL – ActivDuo Active RFID Tags
Configuration No. Wavetrend Technologies Ltd Master File Name Issue Date Page
00000-0000-150-1 User Manual ActivDuo Tag-00.8-UM-LT 3 DECEMBER 2008 16 OF 42
1.7 Other Hardware Requirements
1.7.1 Reader Network Hardware Required
In order to receive the data transmissions from the tag, the user will need the following equipment at a
minimum:
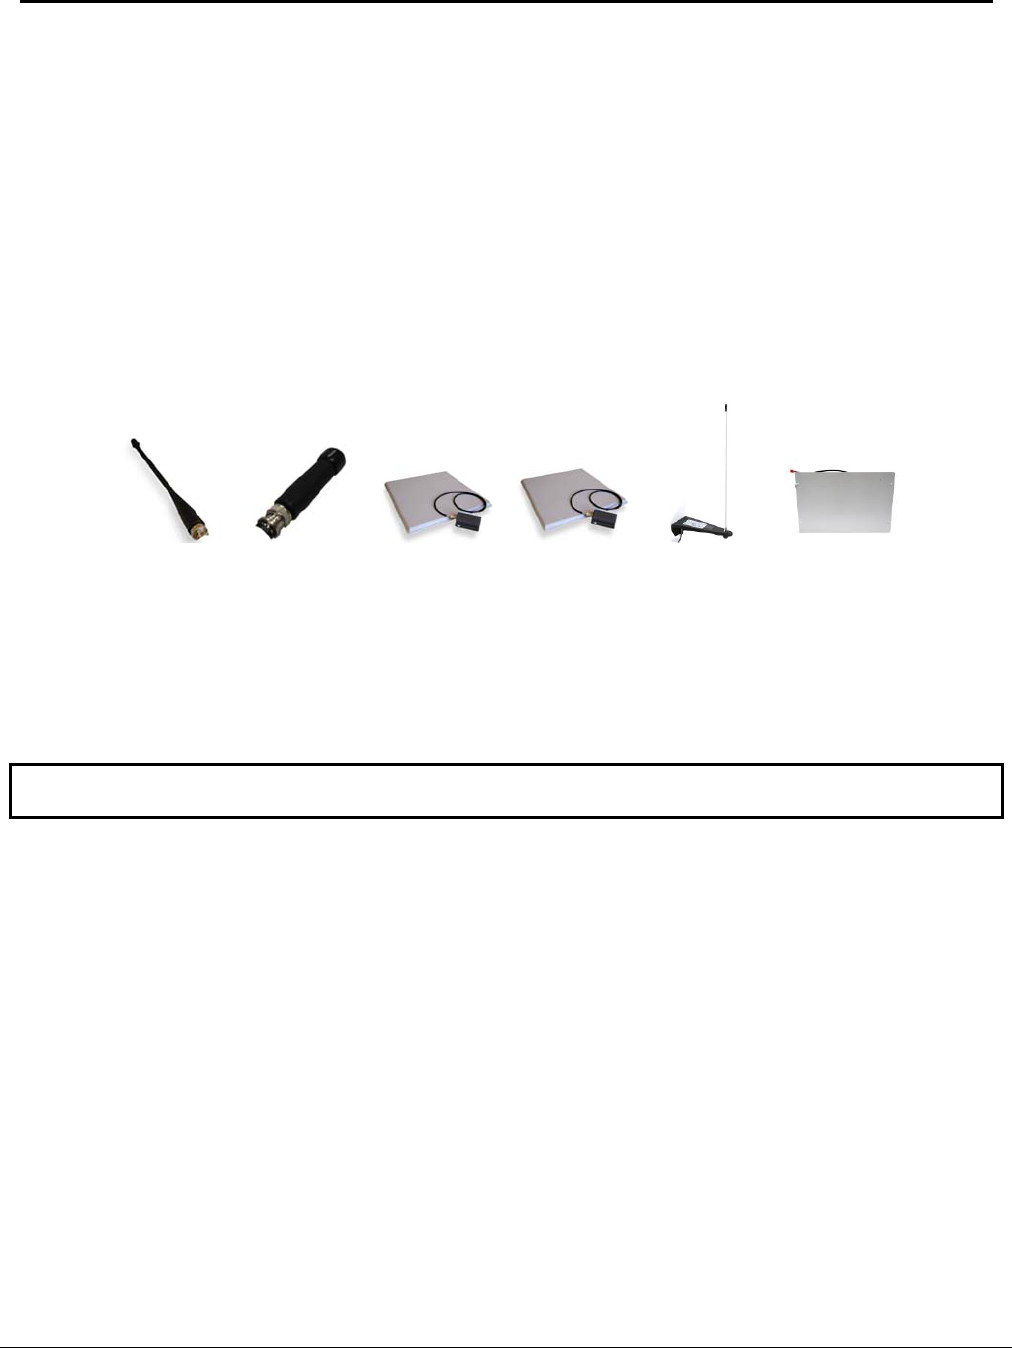
Any Wavetrend Reader, such as the
RX201, pictured above with the
AN200 antenna fitted
The appropriate power supply for
the reader
(may be sold separately)
433 MHz Antenna, to extend
the reader range
(sold separately)
All data is passed by the reader to a computer, where software capable of decoding the tag and reader data
can then display the tag data and location data. Both Wavetrend and many of Wavetrend’s Accredited
Partners offer suitable software
applications for asset
management applications.
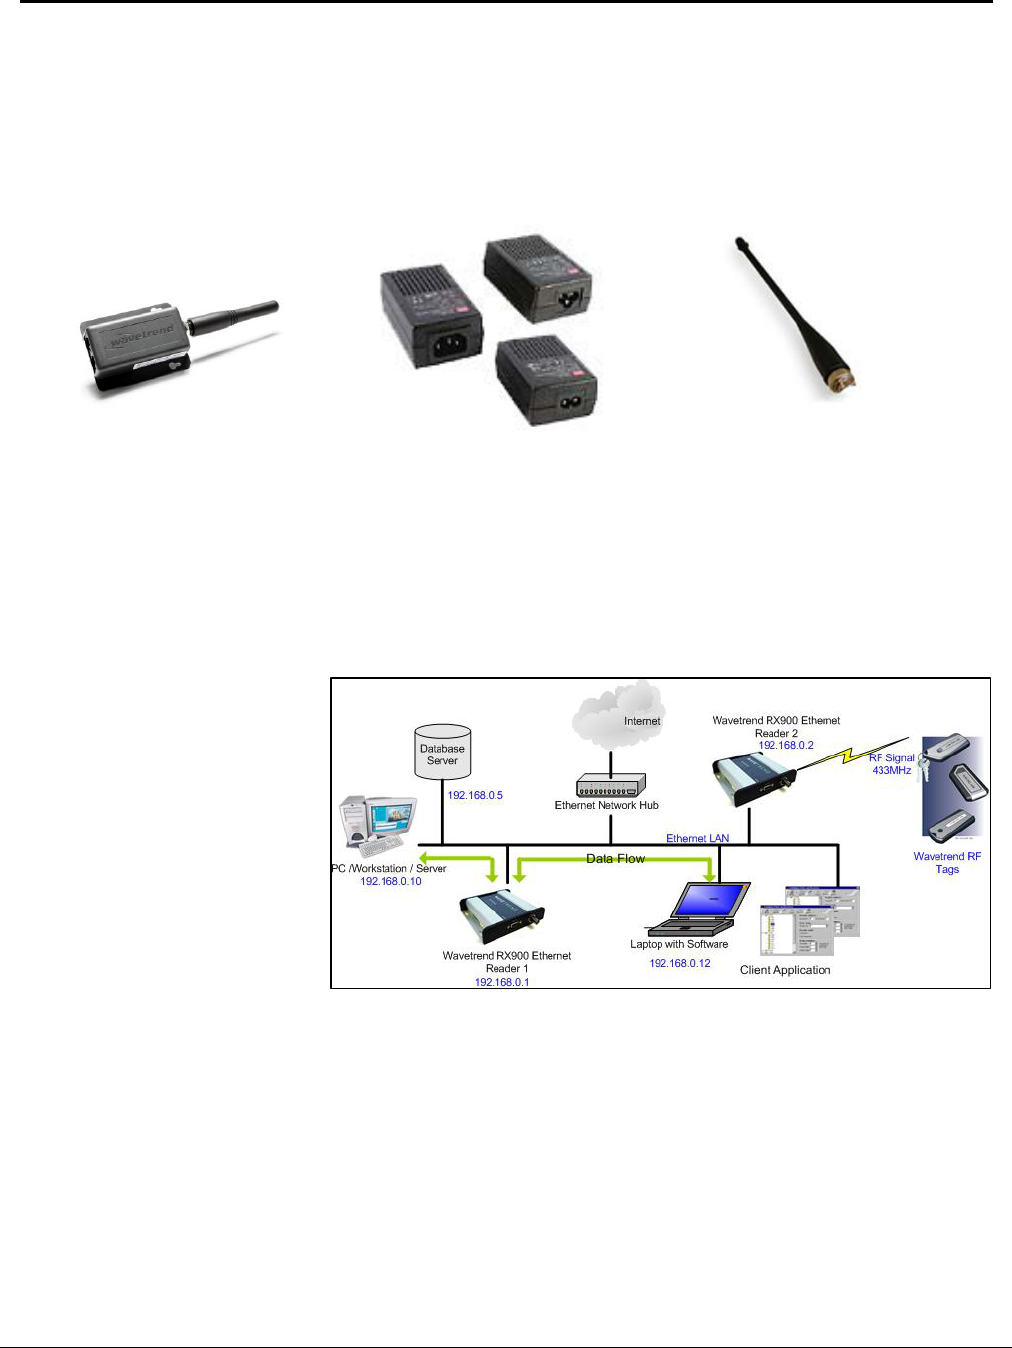
Figure 1 shows the basic
network topography required for
an active RFID system that uses
ActivDuo tags.
This particular example shows
the topography for the RX900
Ethernet reader. For more
information on other reader
topographies and how to set up
and use Wavetrend readers,
please refer to each reader’s
User Manual.
Figure 1. Example of an RFID System Topography
USER MANUAL – ActivDuo Active RFID Tags
Configuration No. Wavetrend Technologies Ltd Master File Name Issue Date Page
00000-0000-150-1 User Manual ActivDuo Tag-00.8-UM-LT 3 DECEMBER 2008 17 OF 42
1.7.2 External Antennas
The read range offered by any tag is actually determined by three key factors: the type of reader used to
detect the tag transmissions, the antenna that the reader uses, and environmental and “noise” conditions
present at the location of use. Wavetrend readers can use any 433MHz, 50 Ohm antenna that comes with a
BNC (F) connector. Wavetrend offers the following antennas for use with the RX201 / RX900 / RX1000 type
readers:
AN100 – ¼ Wave Whip Antenna
AN200 – Stub Antenna
AN300 – Patch Antenna – linear polarized
AN350 – Patch Antenna – circular polarized
AN400 – Outdoor Whip Antenna
AN500 – Blade Antenna
If you require a specialized antenna, for example to achieve hundreds of meters of read range, please
contact a Wavetrend Accredited Partner or a Wavetrend Professional Services specialist directly.
Wavetrend’s Accredited Partners should contact their nearest Wavetrend office with any challenging
requirements.
Note: It may be impossible to achieve any and every read range requirement due to limitations of the
technology, limitations imposed by the regulations applicable to the technology, or the laws of physics.
1.8 Programming ActivDuo Tags
Before tags can be deployed and used, they should be configured to suit the user’s requirements. The
ActivDuo tag is manufactured to hold a unique factory set CSC & Tag ID (L-Series) or a unique PUC (W-
Series), and is set to the default Status Tx & Alert Tx rates and motion sensor sensitivity settings previously
mentioned.
Should the Status or Alert Tx rates need to be changed, or for any additional user data to be written onto the
tag, the user will need to use the PG101-A Wavetrend Tag Programmer unit available for purchase from
any Wavetrend sales agent.
Alternatively the user can order tags from their Wavetrend sales agent pre-programmed to their specification,
if the agent offers this service. Wavetrend offers tag programming at manufacture for orders exceeding 1000
tags. Please enquire with Wavetrend or a sales agent for more information.
Tags are typically shipped in an inactive or ‘asleep’ state to comply with regulations concerning the air
freight of transmitting devices. The L-PG101-A Programmer must be used to configure, activate and
deactivate L-Series & the W-PG101-A Programmer must be used to configure, activate and deactivate W-
Series tags.
AN100 AN200 AN300 AN350 AN400 AN500

USER MANUAL – ActivDuo Active RFID Tags
Configuration No. Wavetrend Technologies Ltd Master File Name Issue Date Page
00000-0000-150-1 User Manual ActivDuo Tag-00.8-UM-LT 3 DECEMBER 2008 18 OF 42
1.9 Activating W-Series ActivDuo Tags
In addition to using the PG101-A Programmer, all W-Series tags offer an ‘auto-wake’ feature. This feature
automatically activates the tag approximately 2 minutes after fitting the tag to an asset and arming the anti-
tamper circuit. If the anti-tamper feature is not going to be used, then ensure the tag is activated using the
tag programmer before attachment to an asset.
1.9.1 Using the Auto-Wake Feature with the ActivDuo Tags
When fitting a tag to an asset object, ensure the correct Tag Attachment Kit with Anti-Tamper is used. The
small magnet supplied with each gel pad should be fitted into the pad, and the pad orientated so that the
magnet sits between the tag and the object in the correct location. This location is indicated on the back of
the tag by a small indented circle, and the attachment gel pad has a hole for the magnet that allows for the
positioning of the magnet in the correct location on the back of the tag.
The tag will automatically activate after 2 minutes of fitting the magnet in place. The user should have an
operational reader handy to ensure that the tag has activated.
1.10 Disposal of Tags
At the end of its functional life the tag must be disposed of in a suitable local recycling facility and in
accordance with any local laws pertaining to the recycling of waste electronic equipment. The tag consists of
an ABS plastic housing, electronic components and a lithium battery. The tag contains no substances
banned by the European Union’s Restriction of Hazardous Substances (RoHS) directive.
European customers: under the provisions of the Waste Electrical and Electronic Equipment (WEEE)
Directive 2002/96/EC, the spent tag must be recovered and recycled in accordance with the local regulations
pertaining to WEEE. Please enquire with your European Wavetrend sales agent for details of how to dispose
the tag in the correct way.
Wavetrend (UK) Ltd. EPRN: WEE/GD0727WW
Please protect our environment and recycle all used electronic and electrical equipment through
reputable, ethical companies who properly handle electrical waste. Do not throw the used tag out
with normal garbage.
USER MANUAL – ActivDuo Active RFID Tags
Configuration No. Wavetrend Technologies Ltd Master File Name Issue Date Page
00000-0000-150-1 User Manual ActivDuo Tag-00.8-UM-LT 3 DECEMBER 2008 19 OF 42
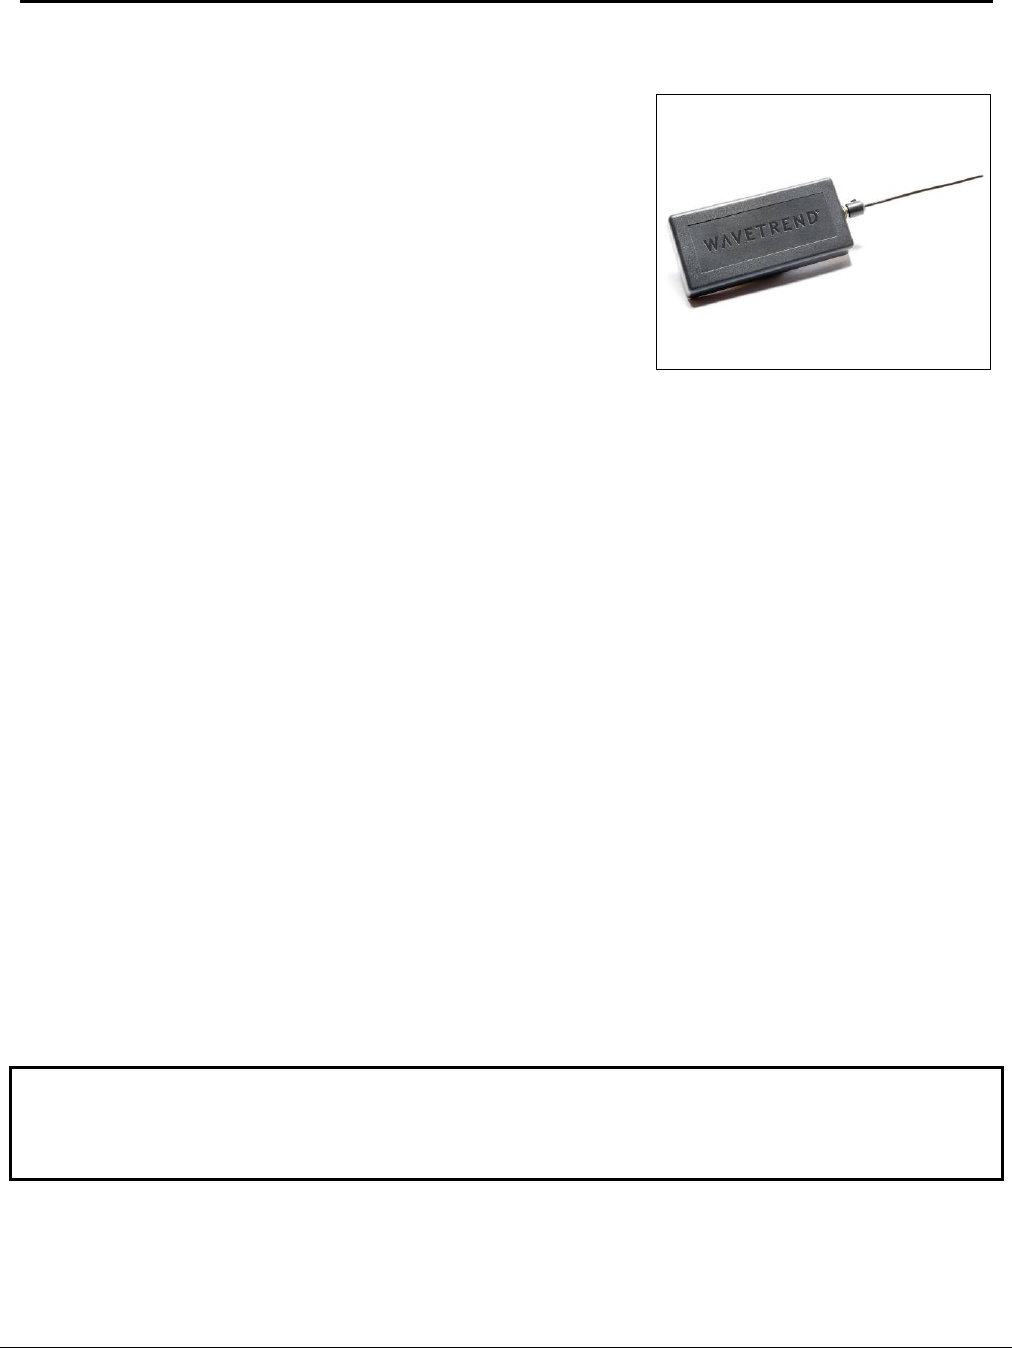
2 THE TG100-A ‘DOMINO’ TAG
The TG100-A Domino tag is one of the smallest ActivDuo tags, and
is ideally suited for use indoors on non-metallic assets for general
tracking or movement monitoring purposes. The tag has a
polycarbonate coated external antenna. The tag incorporates a
motion sensor and has an anti-tamper facility.
The tag is also used to indicate ‘door open’ events wirelessly. This is
achieved by fitting the tag to the door and fitting a magnet to the
frame in such a way that closing the door arms the anti-tamper
mechanism, and opening the door initiates the tamper alert. Place a
reader within range of the tag. The tag ID will uniquely identify the
door that has been opened.
2.1 Important Facts about the TG100-A Tag
The tag must not be installed directly onto metal surfaces.
The tag has a linear polarized antenna. Where all tags will be attached to assets in exactly the same
orientation, use linear polarized antennas with the reader, and orientate the reader antenna to obtain the
best read range. Where all tags will be attached to assets in a manner that means you cannot be sure
which orientation any tag could be in when passing through a read zone, use a circular polarized
antenna or expect that some tags may offer lower signal strength due to their adverse orientation in
relation to the antenna.
Do not cut or remove the antenna as this will drastically reduce the tag’s read range or render it
inoperable. Replacement antennas are available from Wavetrend in the event of the loss of or damage to
the antenna.
Fitting the tag with a longer antenna to extend the read range is prohibited as this will cause the tag to
exceed the limits for its signal strength set by the FCC Part 15 Rules. Wavetrend is not responsible for
any unauthorized modifications made to this tag by the user that compromises the tag’s FCC Approval
Grant and the user may face prosecution by the FCC for any such unauthorized modifications.
The tag incorporates a movement sensor as standard and operates in three different modes, the
standard operation mode that transmits its data with Status Tx rate, movement alert operation mode that
transmits with the Alert Tx rate when its movement sensor senses any movement or vibration of the tag,
and tamper alert mode if the tag is fixed to an object with Anti-Tamper kit.
The tag is rated to operate in ambient temperatures between -10oC and +60oC, using the tag in ambient
temperatures beyond this range will cause damage to the tag and possibly cause its complete failure.
The Nema standard IP rating of the TG100-A tag is 64, which means it is protected against dust and
splashing water. Using the tag in harsher conditions will cause damage to the tag and possibly cause its
complete failure.
Note: Using this tag for an incorrect application can significantly reduce the read range the tag provides,
possibly to the point that no signal from the tag can be received at all.
This manual gives instructions for the correct method and location to attach the tag; failure to follow these
instructions will result in impaired operation or even the complete loss of tag signals.

USER MANUAL – ActivDuo Active RFID Tags
Configuration No. Wavetrend Technologies Ltd Master File Name Issue Date Page
00000-0000-150-1 User Manual ActivDuo Tag-00.8-UM-LT 3 DECEMBER 2008 20 OF 42
2.2 Attaching the TG100-A for Tracking Assets
2.2.1 Requirements
TG100-A tag
1 adhesive gel pad (& magnet) from a 10-pack TA100 or TA100-AT Attachment Kit
Glass cleaner
Clean dry cloth
2.2.2 Preparation
Clean an area a little larger than the tag on an object. Ensure that no dust, oil, grease or residue
remains.
Position the gel pad over the back of the tag and align the hole in the pad with the embossed circle
on the tag. Remove the gel pad cover and stick the gel pad to the back of the tag. Make sure the
hole in the pad and the circle on the back of the tag are aligned.
2.2.3 Arming the anti-tamper (if using the TA100-AT attachment kit)
Once the gel pad is stuck firmly to the tag insert the small magnet into the pad and press around it.
Make sure the magnet has stuck to the pad in the hole. The tag’s anti-tamper is now armed.
It is recommended to place a spot of Superglue™ or other suitable adhesive on the magnet so that it
will adhere to the asset surface and be able to trigger a tamper alert more quickly should any
unauthorized attempt be made to remove a tag from its asset. Do not glue the magnet to the back of
the tag, this will prevent the anti-tamper feature from working.
2.2.4 Final steps
Remove the other cover from the gel pad and position the tag in a suitable location on the asset.
Press firmly and ensure no air bubbles remain visible.
The gel pad will take up to 24 hours to cure to full bond strength.
2.3 Removing the TG100-A
The tag may require removal from the object either at the end of its functional life, or in instances where the
tag has been damaged, or where the asset is at end of its life cycle and must be replaced or disposed of. In
the case of asset replacement or disposal and where the tag is still fully functional, the tag can be installed
onto a new asset with a new gel pad.
2.3.1 Requirements
1 thin, flat instrument or blade, such as a dinner table knife
2.3.2 Removal
Carefully insert the blade into the gel pad repeatedly, working all the way around the edge of the tag.
Repeat this as many times as it take to loosen enough of the gel pad around the edge of the tag to
allow gentle twisting or rotation of the tag in a clock-wise then anti-clockwise manner. Use the blade
to continue loosening or breaking up the gel pad to allow greater rotation of the tag.

USER MANUAL – ActivDuo Active RFID Tags
Configuration No. Wavetrend Technologies Ltd Master File Name Issue Date Page
00000-0000-150-1 User Manual ActivDuo Tag-00.8-UM-LT 3 DECEMBER 2008 21 OF 42
Continue to twist the tag until it comes off the object.
Notes:
The anti-tamper feature (if used) will cause the tag to alarm immediately if any attempt is made to remove the
tag before the end of its functional lifespan.
Do not try to pull the tag off the object when removing it, the best way to break down the bond between the
gel pad and the tag & object is to rotate the tag clockwise and anti-clockwise repeatedly while loosening the
gel pad.
USER MANUAL – ActivDuo Active RFID Tags
Configuration No. Wavetrend Technologies Ltd Master File Name Issue Date Page
00000-0000-150-1 User Manual ActivDuo Tag-00.8-UM-LT 3 DECEMBER 2008 22 OF 42
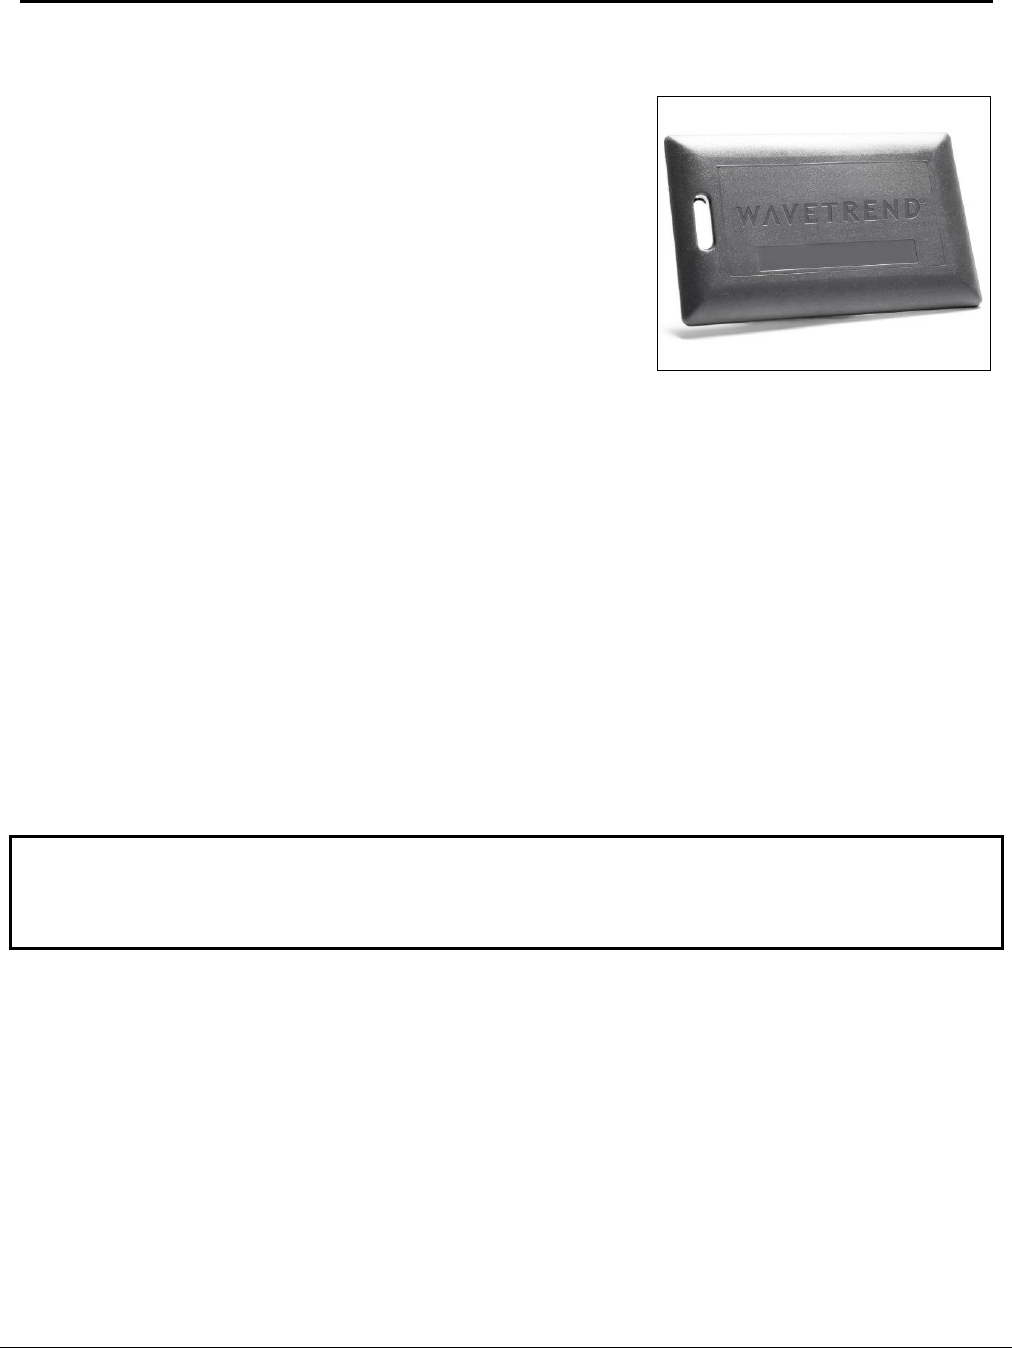
3 THE TG501-A ‘PERSONNEL’ TAG
The TG501-A Personnel tag is generally used by people who need to
carry a tag with them, typically for access control or time &
attendance purposes. The housing incorporates a clip-slot for
convenient wearing for that purpose. However, it may be used in
other applications such as asset monitoring. The mounting and
affixing method for the tag depends on the type of application it is
used in.
An IP67 version of the tag will be available in 2009 – the TG501-A-IH
Slimline Asset IP67 tag for use outdoors or in harsh conditions.
3.1 Important Facts about the TG501-A Tag
The tag must not be installed directly onto metal surfaces.
The tag has a linear polarized antenna. Where all tags will be attached to assets in exactly the same
orientation, use linear polarized antennas with the reader, and orientate the reader antenna to obtain the
best read range. Where all tags will be attached to assets in a manner that means you cannot be sure
which orientation any tag could be in when passing through a read zone, use a circular polarized
antenna or expect that some tags may offer lower signal strength due to their adverse orientation in
relation to the antenna.
The tag incorporates a movement sensor as standard and operates in three different modes, the
standard operation mode that transmits its data with Status Tx rate, the movement alert operation mode
that transmits with the Alert Tx rate when its movement sensor senses any movement or vibration of the
tag, and the tamper alert mode if the tag is fixed to an object with Anti-Tamper kit.
The tag is rated to operate in ambient temperatures between -10oC and +60oC, using the tag in ambient
temperatures beyond this range will cause damage to the tag and possibly cause its complete failure.
The Nema standard IP rating of the TG501-A tag is 64, which means it is protected against dust and
splashing water. Using the tag in harsher conditions will cause damage to the tag and possibly cause its
complete failure.
Note: Using this tag for an incorrect application can significantly reduce the read range the tag provides,
possibly to the point that no signal from the tag can be received at all.
This manual gives instructions for the correct method and location to attach the tag; failure to follow these
instructions will result in impaired operation or even the complete loss of tag signals.
3.2 Using the TG501-A for Tracking Personnel
3.2.1 Requirements & Instructions
TG501-A tag
Any standard card clip, lanyard, key ring, card holder etc.
Attach the tag to the clip / lanyard / key ring using the clip slot provided on the tag, or slide the tag into the
card holder (it will fit in most). The tag should be worn with the flat back facing outward, and should not be
kept in a pocket or anywhere else where it is pressed up against the body. The human body can reduce the
tag’s signal strength and this may lead to apparently erratic operation in certain instances.
If desired, a ‘sticky-back’ plastic label that is pre-printed with personal identification information can be stuck
to the flat back of the TG501-A tag, to enable the TG501-A to function as an ID card for the carrier.

USER MANUAL – ActivDuo Active RFID Tags
Configuration No. Wavetrend Technologies Ltd Master File Name Issue Date Page
00000-0000-150-1 User Manual ActivDuo Tag-00.8-UM-LT 3 DECEMBER 2008 23 OF 42
3.3 Installing the TG501-A for Tracking Assets
3.3.1 Requirements
TG501-A tag
1 adhesive gel pad (& magnet) from a 10-pack TA501 or TA501-AT Attachment Kit
Glass cleaner
Clean dry cloth
3.3.2 Preparation
Clean an area a little larger than the tag on an object. Ensure that no dust, oil, grease or residue
remains.
Position the gel pad over the back of the tag and align the hole in the pad with the embossed circle
on the tag. Remove the gel pad cover and stick the gel pad to the back of the tag. Make sure the
hole in the pad and the circle on the back of the tag are aligned.
3.3.3 Arming the anti-tamper (if using the TA501-AT attachment kit)
Once the gel pad is stuck firmly to the tag insert the small magnet into the pad and press around it.
Make sure the magnet has stuck firmly to the pad in the hole. The tag’s anti-tamper is now armed.
It is recommended to place a spot of Superglue™ or other suitable adhesive on the magnet so that it
will adhere to the asset surface and be able to trigger a tamper alert more quickly should any
unauthorized attempt be made to remove a tag from its asset. Do not glue the magnet to the back of
the tag, this will prevent the anti-tamper feature from working.
3.3.4 Final steps
Remove the other cover from the gel pad and position the tag in a suitable location on the asset.
Press firmly and ensure no air bubbles remain visible.
The gel pad will take up to 24 hours to cure to full bond strength.
3.4 Removing the TG501-A
The tag may require removal from the object either at the end of its functional life, or in instances where the
tag has been damaged, or where the asset is at end of its life cycle and must be replaced or disposed of. In
the case of asset replacement or disposal and where the tag is still fully functional, the tag can be installed
onto a new asset with a new gel pad.
3.4.1 Requirements
1 thin, flat instrument or blade, such as a dinner table knife
3.4.2 Removal
Carefully insert the blade into the gel pad repeatedly, working all the way around the edge of the tag.
Repeat this as many times as it take to loosen enough of the gel pad around the edge of the tag to
allow gentle twisting or rotation of the tag in a clock-wise then anti-clockwise manner. Use the blade
to continue loosening or breaking up the gel pad to allow greater rotation of the tag.

USER MANUAL – ActivDuo Active RFID Tags
Configuration No. Wavetrend Technologies Ltd Master File Name Issue Date Page
00000-0000-150-1 User Manual ActivDuo Tag-00.8-UM-LT 3 DECEMBER 2008 24 OF 42
Continue to twist the tag until it comes off the object.
Notes:
The anti-tamper feature will cause the tag to alarm immediately if any attempt is made to remove the tag
before the end of its functional lifespan.
Do not try to pull the tag off the object when removing it, the best way to break down the bond between the
gel pad and the tag & object is to rotate the tag clockwise and anti-clockwise repeatedly.
USER MANUAL – ActivDuo Active RFID Tags
Configuration No. Wavetrend Technologies Ltd Master File Name Issue Date Page
00000-0000-150-1 User Manual ActivDuo Tag-00.8-UM-LT 3 DECEMBER 2008 25 OF 42
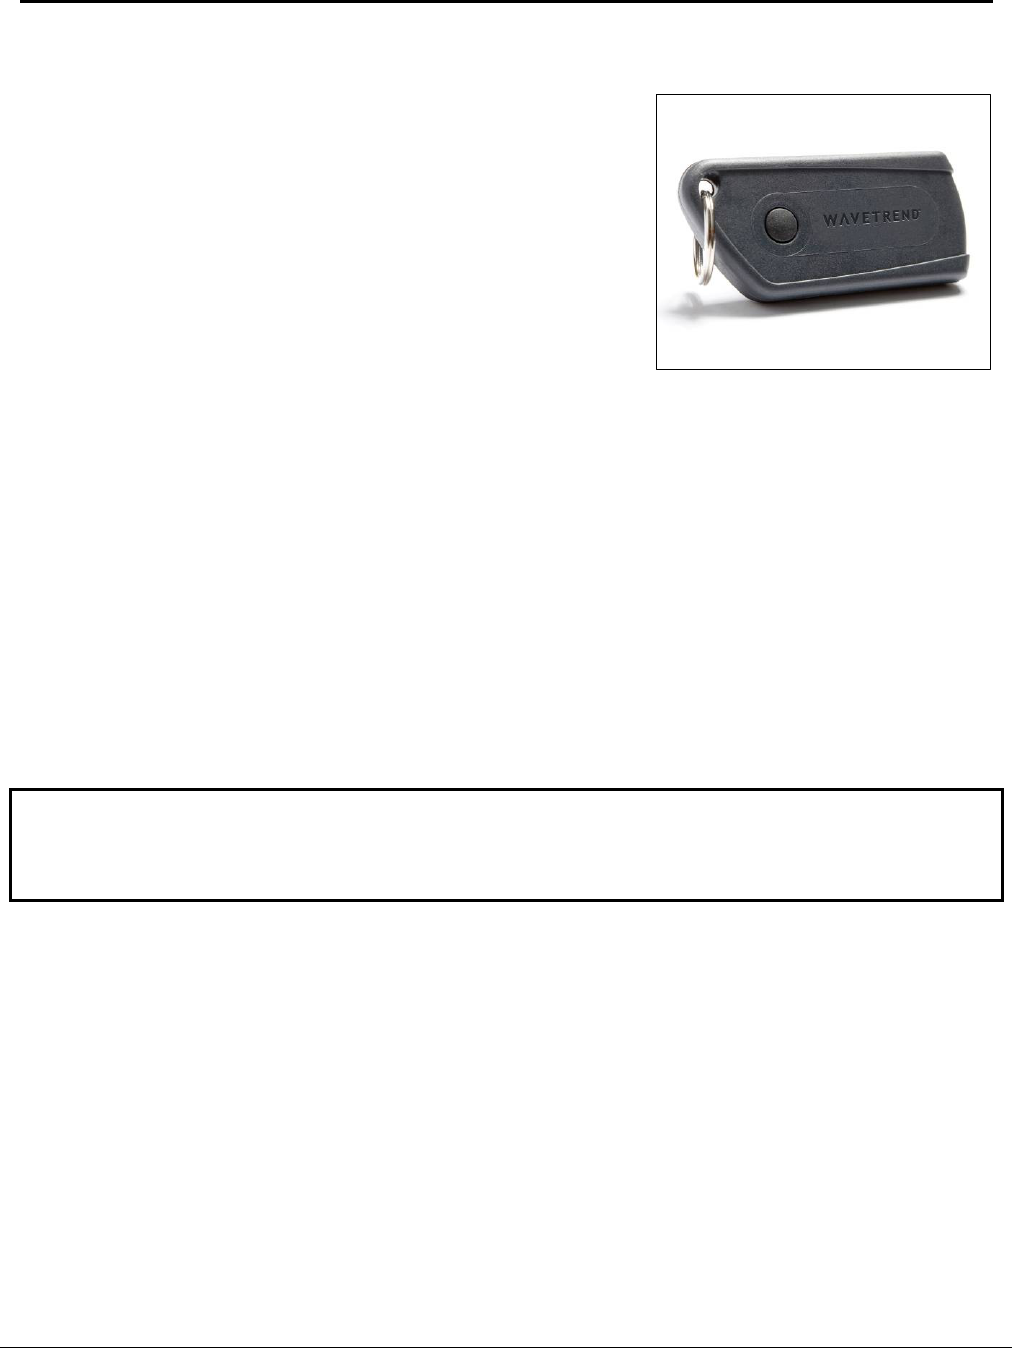
4 THE TG700-A ‘KEY FOB PA’ TAG
The TG700 Key Fob PA tag is designed for use by personnel who
require a ‘panic alert’ button that will allow them to send a specific
alert message when required by pressing the button. The tag may be
used also for more mundane purposes, such as opening doors or
audio/visual indicators, etc. when the button is pressed. The tag has
also been designed to allow for the tracking of key rings and will
operate with metal keys hanging around it.
4.1 Important Facts about the TG700-A Tag
The tag has a linear polarized antenna. Where all tags will be
attached to assets in exactly the same orientation, use linear polarized antennas with the reader, and
orientate the reader antenna to obtain the best read range. Where all tags will be attached to assets in a
manner that means you cannot be sure which orientation any tag could be in when passing through a
read zone, use a circular polarized antenna or expect that some tags may offer lower signal strength due
to their adverse orientation in relation to the antenna.
The tag incorporates a movement sensor as standard and operates three different modes, the standard
operation mode that transmits its data with Status Tx rate, movement alert operation mode that transmits
with the Alert Tx rate when its movement sensor senses any movement or vibration of the tag, and
tamper alert mode if the tag’s button is pressed. The tag does incorporate a movement sensor and we
may need to decide if the press button is sufficient for activation of the alert tx and may need to
incorporate the MS in here which has some implications…
The tag is rated to operate in ambient temperatures between -10oC and +60oC, using the tag in ambient
temperatures beyond this range will cause damage to the tag and possibly cause its complete failure.
The Nema standard IP rating of the TG700-A tag is 65, which means it is protected against dust and low
pressure water jets. Using the tag in harsher conditions will cause damage to the tag and possibly cause
its complete failure.
Note: Using this tag for an incorrect application can significantly reduce the read range the tag provides,
possibly to the point that no signal from the tag can be received at all.
This manual gives instructions for the correct method and location to attach the tag; failure to follow these
instructions will result in impaired operation or even the complete loss of tag signals.
4.2 Using the TG700-A for Personnel Security Applications or Key Ring Tracking
4.2.1 Requirements & Instructions
TG700-A tag
Suitable attachment location on the person or asset
Attach the tag to the key ring / belt / lanyard / asset using the ring provided with the tag. The tag should be
worn loosely on the body, and should not be kept in a pocket or anywhere else where it is pressed up
against the body as it may also lead to inadvertent button presses. The human body can reduce the tag’s
signal strength and this may lead to apparently erratic operation in certain instances.

USER MANUAL – ActivDuo Active RFID Tags
Configuration No. Wavetrend Technologies Ltd Master File Name Issue Date Page
00000-0000-150-1 User Manual ActivDuo Tag-00.8-UM-LT 3 DECEMBER 2008 26 OF 42
4.2.2 Modes of Operation
The TG700-A tag’s button will activate the alert transmission from the tag whether the tag has its
Status Transmissions activated or not. Where the tag is to be used purely for personnel panic alert or
access control purposes, this mode may be sufficient.
For all personnel or asset tracking and tracing purposes, the tag should be activated to allow the
Status Transmissions to be issued at least once every 10s.

USER MANUAL – ActivDuo Active RFID Tags
Configuration No. Wavetrend Technologies Ltd Master File Name Issue Date Page
00000-0000-150-1 User Manual ActivDuo Tag-00.8-UM-LT 3 DECEMBER 2008 27 OF 42
5 THE TG800-A ‘ASSET’ TAG
The TG800-A Asset tag is specially designed for use in asset
tagging applications such as laptops, IT equipment, vehicles and
transportation media. The TG800-A is specifically designed for
operating on metallic surfaces (or plastics containing a high
metal content). When placed on metal it offers the best read
range performance.
For non-metal assets, it is recommended to use the TG501-A
Personnel tag or TG100-A Domino tag instead of the TG800-A
Asset tag. The Personnel or Domino tags will provide full signal
strength when used on non-metal assets.
5.1 Important Facts about the TG800-A Tag
The tag should be installed directly onto metal surfaces to obtain the best read range performance from
the tag.
The tag has a linear polarized antenna. Where all tags will be attached to assets in exactly the same
orientation, use linear polarized antennas with the reader, and orientate the reader antenna to obtain the
best read range. Where all tags will be attached to assets in a manner that means you cannot be sure
which orientation any tag could be in when passing through a read zone, use a circular polarized
antenna or expect that some tags may offer lower signal strength due to their adverse orientation in
relation to the antenna.
Attaching the tag to plastic or other non-metal surfaces will reduce the maximum read range the tag can
provide. This is because the tag’s antenna is designed to be more effective when placed against a metal
surface. Please ensure that, especially when the tag is intended to be used with other Wavetrend tags in
the system, you can obtain sufficient read range to ensure the system will operate correctly despite the
lower signal strength output by this tag when installed on non-metal surfaces.
The tag incorporates a movement sensor as standard and operates in three different modes, the
standard operation mode that transmits its data with Status Tx rate, the movement alert operation mode
that transmits with the Alert Tx rate when its movement sensor senses any movement or vibration of the
tag, and the tamper alert mode if the tag is fixed to an object with Anti-Tamper kit.
The tag is rated to operate in ambient temperatures between -10oC and +60oC, using the tag in ambient
temperatures beyond this range will cause damage to the tag and possibly cause its complete failure.
The Nema standard IP rating of the TG800-A tag is 64, which means it is protected against dust and
splashing water. Using the tag in harsher conditions will cause damage to the tag and possibly cause its
complete failure.
Note: Using this tag for an incorrect application can significantly reduce the read range the tag provides,
possibly to the point that no signal from the tag can be received at all.
This manual gives instructions for the correct method and location to attach the tag; failure to follow these
instructions will result in impaired operation or even the complete loss of tag signals.

USER MANUAL – ActivDuo Active RFID Tags
Configuration No. Wavetrend Technologies Ltd Master File Name Issue Date Page
00000-0000-150-1 User Manual ActivDuo Tag-00.8-UM-LT 3 DECEMBER 2008 28 OF 42
5.2 Attaching the TG800-A for Tracking IT Equipments and Other Assets
5.2.1 Requirements
TG800-A tag
1 adhesive gel pad (& magnet) from a 10-pack TA800 or TA800-AT Attachment Kit
Glass cleaner
Clean dry cloth
5.2.2 Preparation
Clean an area a little larger than the tag on an object. Ensure that no dust, oil, grease or residue
remains.
Position the gel pad over the back of the tag and align the hole in the pad with the embossed circle
on the tag. Remove the gel pad cover and stick the gel pad to the back of the tag. Make sure the
hole in the pad and the circle on the back of the tag are aligned.
5.2.3 Arming the anti-tamper (if using the TA800-AT attachment kit)
Once the gel pad is stuck firmly to the tag insert the small magnet into the pad and press around it.
Make sure the magnet has stuck firmly to the pad in the hole. The tag’s anti-tamper is now armed.
It is recommended to place a spot of Superglue™ or other suitable adhesive on the magnet so that it
will adhere to the asset surface and be able to trigger a tamper alert more quickly should any
unauthorized attempt be made to remove a tag from its asset. Do not glue the magnet to the back of
the tag, this will prevent the anti-tamper feature from working.
5.2.4 Final steps
Remove the other cover from the gel pad and position the tag in a suitable location on the asset.
Press firmly and ensure no air bubbles remain visible.
The gel pad will take up to 24 hours to cure to full bond strength.
5.3 Removing the TG800-A
The tag may require removal from the object either at the end of its functional life, or in instances where the
tag has been damaged, or where the asset is at end of its life cycle and must be replaced or disposed of. In
the case of asset replacement or disposal and where the tag is still fully functional, the tag can be installed
onto a new asset with a new gel pad.
5.3.1 Requirements
1 thin, flat instrument or blade, such as a dinner table knife
5.3.2 Removal
Carefully insert the blade into the gel pad repeatedly, working all the way around the edge of the tag.
Repeat this as many times as it take to loosen enough of the gel pad around the edge of the tag to
allow gentle twisting or rotation of the tag in a clock-wise then anti-clockwise manner. Use the blade
to continue loosening or breaking up the gel pad to allow greater rotation of the tag.

USER MANUAL – ActivDuo Active RFID Tags
Configuration No. Wavetrend Technologies Ltd Master File Name Issue Date Page
00000-0000-150-1 User Manual ActivDuo Tag-00.8-UM-LT 3 DECEMBER 2008 29 OF 42
Continue to twist the tag until it comes off the object.
Notes:
The anti-tamper feature (if used) will cause the tag to alarm immediately if any attempt is made to remove the
tag before the end of its functional lifespan.
Do not try to pull the tag off the object when removing it, the best way to break down the bond between the
gel pad and the tag & object is to rotate the tag clockwise and anti-clockwise repeatedly.
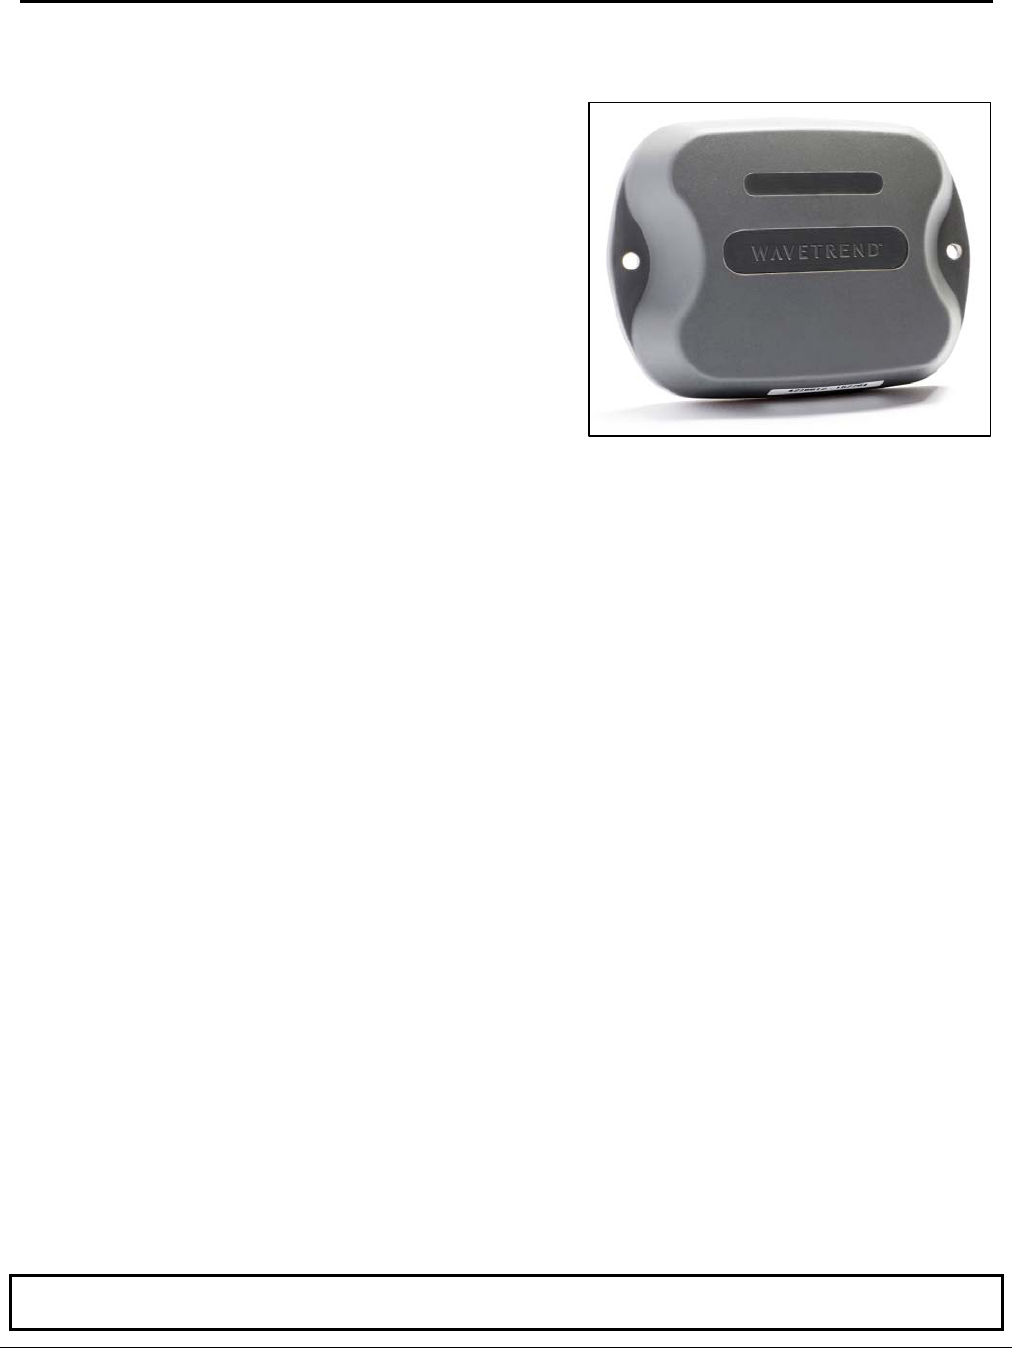
USER MANUAL – ActivDuo Active RFID Tags
Configuration No. Wavetrend Technologies Ltd Master File Name Issue Date Page
00000-0000-150-1 User Manual ActivDuo Tag-00.8-UM-LT 3 DECEMBER 2008 30 OF 42
6 THE TG800-A-IH ‘ASSET IP67’ TAG
The TG800-A-IH Asset IP67 tag is specially designed for use
in asset tagging applications such as containers, vehicles and
transport media where the tag must be water proof and
capable of withstanding extremely harsh treatment. The
TG800-A-IH is specially designed for operating on metallic
surfaces (or plastics containing a high metal content).
For non-metal assets requiring a robust, waterproof tag, it is
recommended to use the TG501-A-IH Slimline Asset IP67
Tag instead of the TG800-A-IH Asset IP67 tag. The Slimline
Asset IP67 tag will provide full signal strength when used on
non-metal assets. The TG501-A-IH Slimline Asset IP67 tag
will be available to order in early 2009.
6.1 Important Facts about the TG800-A-IH Tag
The tag should be installed directly onto metal surfaces to obtain the best read range performance from
the tag.
The tag has a linear polarized antenna. Where all tags will be attached to assets in exactly the same
orientation, use linear polarized antennas with the reader, and orientate the reader antenna to obtain the
best read range. Where all tags will be attached to assets in a manner that means you cannot be sure
which orientation any tag could be in when passing through a read zone, use a circular polarized
antenna or expect that some tags may offer lower signal strength due to their adverse orientation in
relation to the antenna.
Attaching the tag to plastic or other non-metal surfaces will reduce the maximum read range the tag can
provide. This is because the tag’s antenna is designed to be more effective when placed against a metal
surface. Please ensure that, especially when the tag is intended to be used with other Wavetrend tags in
the system, you can obtain sufficient read range to ensure the system will operate correctly despite the
lower signal strength output by this tag when installed on non-metal surfaces.
The tag’s back plate is slightly curved meaning that, when fitted to perfectly flat surfaces, the VHB pad
will typically bond only the edges of the tag to the asset, rather than providing a bond across the entire
back surface of the tag. The curve is part of the original design for the tag, where it was to be fitted to
petrochemical tankers. For this reason it is recommended to attach the tag using both the VHB pad and
screws or rivets to ensure the tag cannot become accidentally detached during use.
The tag incorporates a movement sensor as standard and operates in three different modes, the
standard operation mode that transmits its data with Status Tx rate, the movement alert operation mode
that transmits with the Alert Tx rate when its movement sensor senses any movement or vibration of the
tag, and the tamper alert mode if the tag is fixed to an object with Anti-Tamper kit.
The tag is rated to operate in ambient temperatures between -10oC and +60oC, using the tag in ambient
temperatures beyond this range will cause damage to the tag and possibly cause its complete failure.
The Nema standard IP rating of the TG800-A-IH tag is 67, which means it is dustproof and waterproof
but is not capable of being submerged deep in water. Using the tag in harsher conditions will cause
damage to the tag and possibly cause its complete failure.
The anti-tamper spring loaded magnet is supplied loose with the tag. The tag cannot be programmed if
the anti-tamper magnet is fitted, so first program the tag and activate it, and then fit the magnet.
Note: Using this tag for an incorrect application can significantly reduce the read range the tag provides,
possibly to the point that no signal from the tag can be received at all.

USER MANUAL – ActivDuo Active RFID Tags
Configuration No. Wavetrend Technologies Ltd Master File Name Issue Date Page
00000-0000-150-1 User Manual ActivDuo Tag-00.8-UM-LT 3 DECEMBER 2008 31 OF 42
This manual gives instructions for the correct method and location to attach the tag; failure to follow these
instructions will result in impaired operation or even the complete loss of tag signals.
6.2 Attaching the TG800-A-IH for Tracking Containers and Other Assets
6.2.1 Requirements
TG800-A-IH tag (comes with VHB foam-gel pad attached)
Anti-tamper spring magnet (supplied with the tag, to be fitted only once the tag has been
programmed and activated and is ready for attachment to the asset)
Glass cleaner
Clean dry cloth
6.2.2 Preparation
Clean an area a little larger than the tag on an object. Ensure that no dust, oil, grease or residue
remains.
6.2.3 Arming the anti-tamper (using the spring loaded magnet provided with the tag)
• Fit the spring loaded magnet to the tag using a small diameter cylindrical tool (such as a ball point
pen casing) to press down the end of the spring magnet over the fitment stub in the magnet recess
on the back of the tag. Ensure the magnet is fitted firmly to the stub and is not capable of easy
removal.
Once the spring magnet is fitted, remove the gel pad cover from the magnet. The tag’s anti-tamper is
ready and will be armed as soon as the tag is fitted to the asset.
6.2.4 Final steps
Remove the paper cover from the gel pad on the back of the tag and position the tag in a suitable
location on the asset. Press firmly to ensure a firm bond.
The gel pad will take up to 24 hours to cure to full bond strength.
For all assets that will be driven or transported and/or which may experience rough handling and/or
cleaning with high pressure water jets it is strongly recommended to fix the TG800-A-IH tag to the
asset with screws or rivets in addition to the VHB gel pad. 4mm diameter screws or rivets are
suitable.
It is helpful to first attach the tag to the asset using the VHB pad and then to drill the required holes
for the screws or rivets as the tag will be held in the correct location by the VHB pad while you are
working.
6.3 Removing the TG800-A-IH
The tag may require removal from the object either at the end of its functional life, or in instances where the
tag has been damaged, or where the asset is at end of its life cycle and must be replaced or disposed of. In
the case of asset replacement or disposal and where the tag is still fully functional, the tag can be installed
onto a new asset with a new VHB pad and screws/rivets.

USER MANUAL – ActivDuo Active RFID Tags
Configuration No. Wavetrend Technologies Ltd Master File Name Issue Date Page
00000-0000-150-1 User Manual ActivDuo Tag-00.8-UM-LT 3 DECEMBER 2008 32 OF 42
6.3.1 Requirements
1 strong, flat tipped instrument, such as a flat head screw driver
Drill or screw driver to remove any rivets or screws used to fix the tag to the asset
6.3.2 Removal
For plastic assets or assets made of softer metal, it is highly likely that some surface damage could
occur during removal of the tag. Take as much care as possible to avoid this by working carefully to
break the VHB bond and use an instrument that is less likely to gouge or scratch the asset surface.
First remove any fixing screws or drill out any rivets used to fix the tag to the asset.
Carefully work the flat tipped instrument (screwdriver) under the tag. Start by inserting the instrument
under the tag in the middle of the tag at the bottom (assuming the ‘Wavetrend’ brand appears in
landscape orientation, the right way up) and gently push under the tag. The slight curve of the tag’s
back plate means that the bottom middle of the tag is the best location to easily insert the tool.
Break the adhesive bond by leveraging the tag off the asset slowly, adjusting the position of the
instrument to the left and then to the right repeatedly, working all the way around the edge of the tag
to loosen the VHB bond.
Repeat this as many times as it take to loosen enough of the gel pad around the edge of the tag to
allow gentle twisting or rotation of the tag in a clock-wise then anti-clockwise manner or to lift the tag
by one edge. Use the blade to continue loosening or breaking up the gel pad to allow greater rotation
of the tag.
Continue to twist and lift the tag until it comes off the object.
Notes:
The anti-tamper feature will cause the tag to alarm immediately if any attempt is made to remove the tag
before the end of its functional lifespan.
Do not try to pull the tag off the object when removing it, the best way to break down the bond between the
gel pad and the tag & object is to rotate the tag clockwise and anti-clockwise repeatedly.
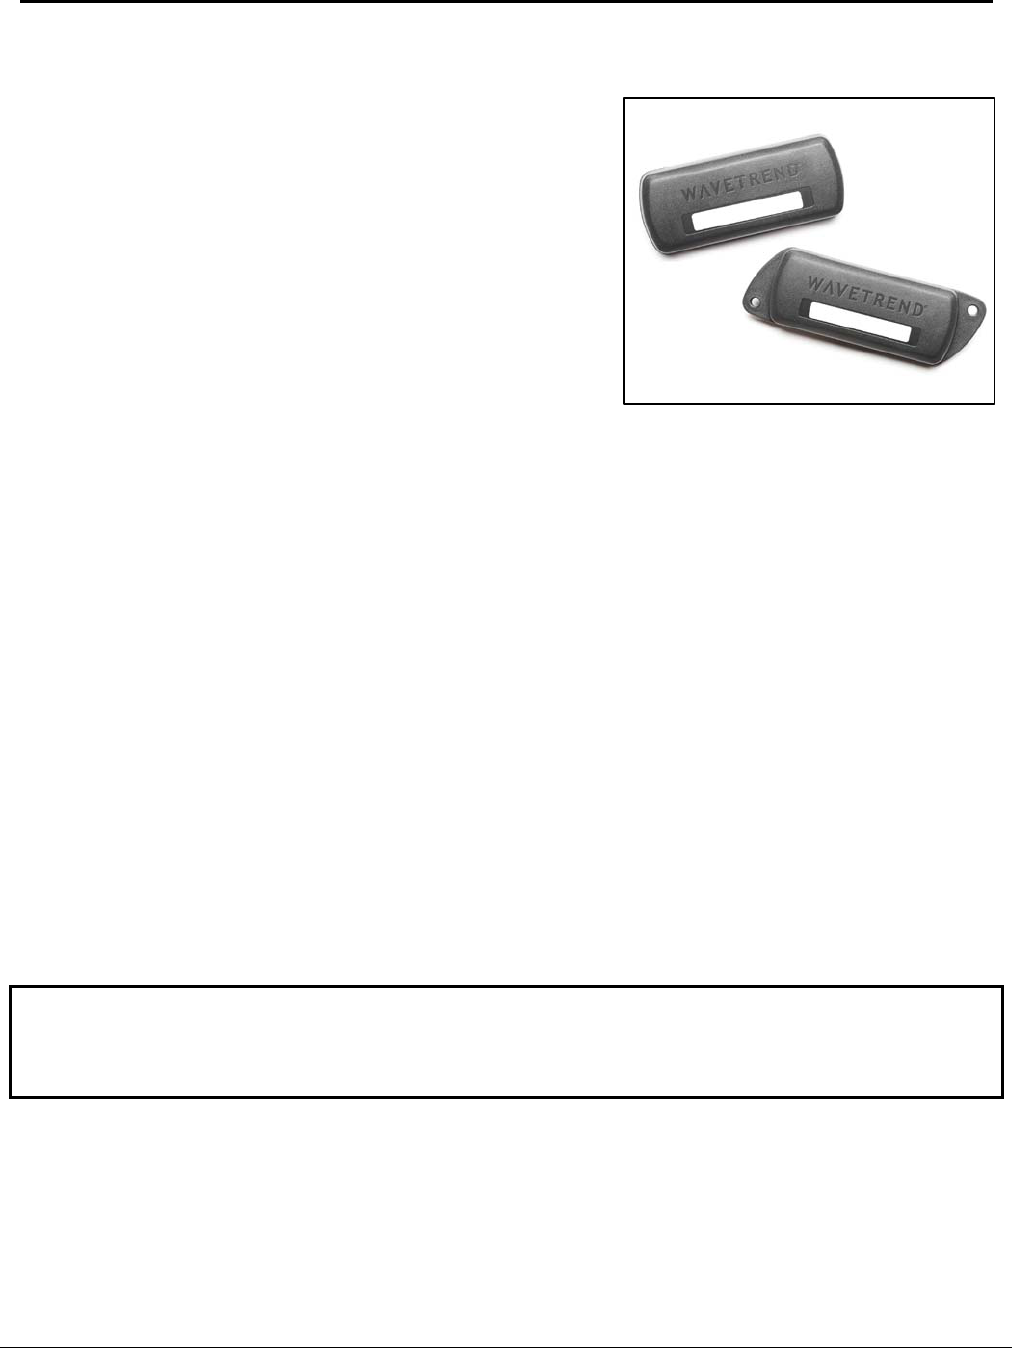
USER MANUAL – ActivDuo Active RFID Tags
Configuration No. Wavetrend Technologies Ltd Master File Name Issue Date Page
00000-0000-150-1 User Manual ActivDuo Tag-00.8-UM-LT 3 DECEMBER 2008 33 OF 42
7 THE TG801-A & TG801-A-WM ‘SMALL ASSET’ TAG
The TG801-A Small Asset tag is specially designed for use in
asset tagging applications such as laptops, IT equipment,
vehicles and transport media. The TG801-A is specially designed
for operating on metallic surfaces (or plastics containing a high
metal content). When placed on metal with dimensions of at least
86mm x 86 mm, it offers the best read range performance.
The Small Asset tag is also available with wing mount option
(TG801-A-WM), providing two fixing holes that can be used to
attach the tag to an asset using screws or rivets.
7.1 Important Facts about the Small Asset Tag
The tag should be installed directly onto metal surfaces to obtain the best read range performance from
the tag.
Attaching the tag to plastic or other non-metal surfaces will reduce the maximum read range the tag can
provide. This is because the tag’s antenna is designed to be more effective when placed against a metal
surface. Please ensure that, especially when the tag is intended to be used with other Wavetrend tags in
the system, you can obtain sufficient read range to ensure the system will operate correctly despite the
lower signal strength output by this tag when installed on non-metal surfaces.
The tag has a linear polarized antenna. Where all tags will be attached to assets in exactly the same
orientation, use linear polarized antennas with the reader, and orientate the reader antenna to obtain the
best read range. Where all tags will be attached to assets in a manner that means you cannot be sure
which orientation any tag could be in when passing through a read zone, use a circular polarized
antenna or expect that some tags may offer lower signal strength due to their adverse orientation in
relation to the antenna.
The tag incorporates a movement sensor as standard and operates in three different modes, the
standard operation mode that transmits its data with Status Tx rate, the movement alert operation mode
that transmits with the Alert Tx rate when its movement sensor senses any movement or vibration of the
tag, and the tamper alert mode if the tag is fixed to an object with Anti-Tamper kit.
The tag is rated to operate in ambient temperatures between -10oC and +60oC, using the tag in ambient
temperatures beyond this range will cause damage to the tag and possibly cause its complete failure.
The Nema standard IP rating of the TG801-A tag is 64, which means it is protected against dust and
splashing water. Using the tag in harsher conditions will cause damage to the tag and possibly cause its
complete failure.
Note: Using this tag for an incorrect application can significantly reduce the read range the tag provides,
possibly to the point that no signal from the tag can be received at all.
This manual gives instructions for the correct method and location to attach the tag; failure to follow these
instructions will result in impaired operation or even the complete loss of tag signals.
7.2 Attaching the TG801-A for Tracking IT Equipment and Other Assets
7.2.1 Requirements
TG801-A tag
1 adhesive gel pad (& magnet) from a 10-pack TA801 or TA801-AT Attachment Kit

USER MANUAL – ActivDuo Active RFID Tags
Configuration No. Wavetrend Technologies Ltd Master File Name Issue Date Page
00000-0000-150-1 User Manual ActivDuo Tag-00.8-UM-LT 3 DECEMBER 2008 34 OF 42
Glass cleaner
Clean dry cloth
7.2.2 Preparation
Clean an area a little larger than the tag on an object. Ensure that no dust, oil, grease or residue
remains.
Position the gel pad over the back of the tag and align the hole in the pad with the embossed circle
on the tag. Remove the gel pad cover and stick the gel pad to the back of the tag. Make sure the
hole in the pad and the circle on the back of the tag are aligned.
7.2.3 Arming the anti-tamper (if using the TA801-AT attachment kit)
Once the gel pad is stuck firmly to the tag insert the small magnet into the pad and press around it.
Make sure the magnet has stuck firmly to the pad in the hole. The tag’s anti-tamper is now armed.
It is recommended to place a spot of Superglue™ or other suitable adhesive on the magnet so that it
will adhere to the asset surface and be able to trigger a tamper alert more quickly should any
unauthorized attempt be made to remove a tag from its asset. Do not glue the magnet to the back of
the tag, this will prevent the anti-tamper feature from working.
7.2.4 Final steps
Remove the other cover from the gel pad and position the tag in a suitable location on the asset.
Press firmly and ensure no air bubbles remain visible.
The gel pad will take up to 24 hours to cure to full bond strength.
7.3 Attaching the TG801-A-WM for Tracking IT Equipment and Other Assets
7.3.1 Requirements
The Tag Attachment Kit can be used on its own to attach the TG801-A-WM tag to an asset, or can
be used together with screws and rivets. Alternatively, the tag can be attached using just screws or
rivets. The requirements below list all possible items you will need.
TG801-A-WM tag
4mm diameter screws or rivets (if required)
1 adhesive gel pad (& magnet) from a 10-pack TA801 or TA801-AT Attachment Kit (if required)
Glass cleaner
Clean dry cloth
7.3.2 Preparation
Clean an area a little larger than the tag on the asset. Ensure that no dust, oil, grease or residue
remains.
7.3.3 Arming the anti-tamper (if using the TA801-AT attachment kit)
Once the gel pad is stuck firmly to the tag insert the small magnet into the pad and press around it.
Make sure the magnet has stuck firmly to the pad in the hole. The tag’s anti-tamper is now armed.

USER MANUAL – ActivDuo Active RFID Tags
Configuration No. Wavetrend Technologies Ltd Master File Name Issue Date Page
00000-0000-150-1 User Manual ActivDuo Tag-00.8-UM-LT 3 DECEMBER 2008 35 OF 42
It is recommended to place a spot of Superglue™ or other suitable adhesive on the magnet so that it
will adhere to the asset surface and be able to trigger a tamper alert more quickly should any
unauthorized attempt be made to remove a tag from its asset. Do not glue the magnet to the back of
the tag, this will prevent the anti-tamper feature from working.
7.3.4 Final steps
Remove the other cover from the gel pad and position the tag in a suitable location on the asset.
Press firmly and ensure no air bubbles remain visible.
The gel pad will take up to 24 hours to cure to full bond strength.
If fitting the tag to the asset using screws or rivets with the VHB gel pad it is helpful to first attach the
tag to the asset using the gel pad and then to drill the required holes for the screws or rivets as the
tag will be held in the correct location by the VHB pad while you are working.
If fitting the tag to the asset using screws or rivets without the VHB gel pad, mark the centre of each
hole using the tag’s fixing holes as your guide.
Then to drill the required holes for the screws or rivets and fix the tag to the asset using the screws
or rivets.
7.4 Removing the TG801-A or TG801-A-WM
The tag may require removal from the object either at the end of its functional life, or in instances where the
tag has been damaged, or where the asset is at end of its life cycle and must be replaced or disposed of. In
the case of asset replacement or disposal and where the tag is still fully functional, the tag can be installed
onto a new asset with a new gel pad.
7.4.1 Requirements
1 thin, flat instrument or blade, such as a dinner table knife
Drill or screw driver to remove any rivets or screws used to fix the tag to the asset
7.4.2 Removal
For plastic assets or assets made of softer metal, it is highly likely that some surface damage could
occur during removal of the tag. Take as much care as possible to avoid this by working carefully to
break the VHB bond and use an instrument that is less likely to gouge or scratch the asset surface.
First remove any fixing screws or drill out any rivets used to fix the tag to the asset.
Carefully insert the blade into the gel pad repeatedly, working all the way around the edge of the tag.
Repeat this as many times as it take to loosen enough of the gel pad around the edge of the tag to
allow gentle twisting or rotation of the tag in a clock-wise then anti-clockwise manner. Use the blade
to continue loosening or breaking up the gel pad to allow greater rotation of the tag.
Continue to twist the tag until it comes off the object.
Notes:
The anti-tamper feature (if used) will cause the tag to alarm immediately if any attempt is made to remove the
tag before the end of its functional lifespan.
Do not try to pull the tag off the object when removing it, the best way to break down the bond between the
gel pad and the tag & object is to rotate the tag clockwise and anti-clockwise repeatedly.
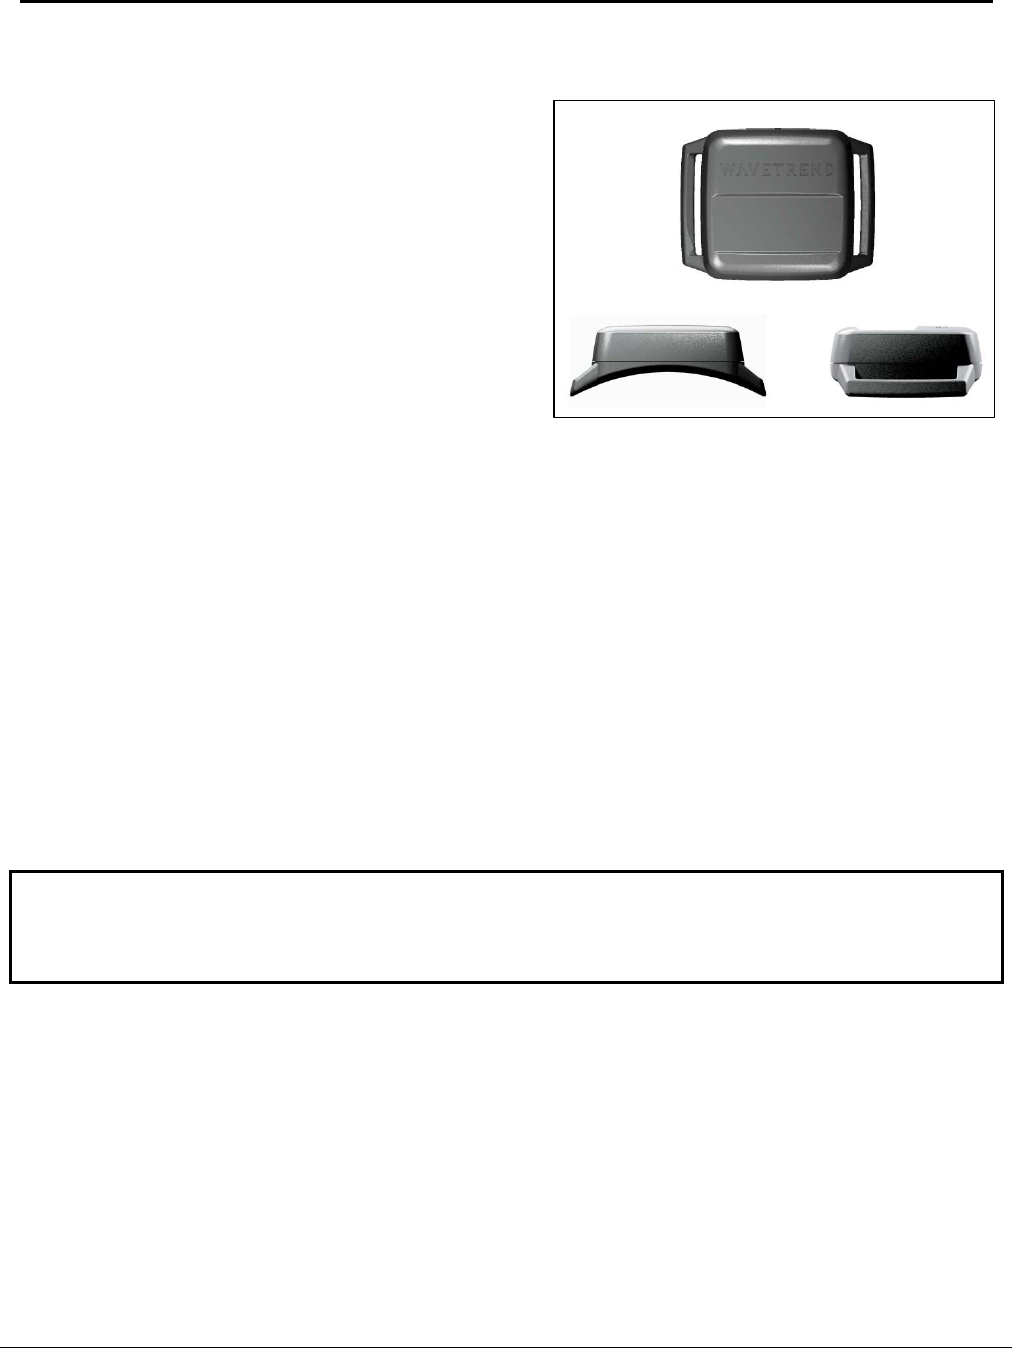
USER MANUAL – ActivDuo Active RFID Tags
Configuration No. Wavetrend Technologies Ltd Master File Name Issue Date Page
00000-0000-150-1 User Manual ActivDuo Tag-00.8-UM-LT 3 DECEMBER 2008 36 OF 42
8 THE TG1800-A ‘WRIST’ TAG
The TG1800-A Wrist tag is specially designed for use on
people’s wrists for the purpose of personnel tracking or
other similar uses, such as patient tracking. The TG1800-
A is capable of operating on metallic surfaces (or plastics
containing a high metal content), although this type of use
is unlikely given the tag’s design.
This tag will be available to order in 2009.
An IP67 version of the tag will be available in 2009 – the
TG1800-A-IH Wrist IP67 tag for use outdoors or in harsh
conditions.
8.1 Important Facts about the Wrist Tag
The tag is specifically designed to fit a human wrist, but can be attached to curved metal surfaces.
The tag has a linear polarized antenna. Where all tags will be attached to assets in exactly the same
orientation, use linear polarized antennas with the reader, and orientate the reader antenna to obtain the
best read range. Where all tags will be attached to assets in a manner that means you cannot be sure
which orientation any tag could be in when passing through a read zone, use a circular polarized
antenna or expect that some tags may offer lower signal strength due to their adverse orientation in
relation to the antenna.
The tag incorporates a movement sensor as standard and operates in two different modes, the standard
operation mode that transmits its data with Status Tx rate; and the movement alert operation mode that
transmits with the Alert Tx rate when its movement sensor senses any movement or vibration of the tag.
The tag is rated to operate in ambient temperatures between -10oC and +60oC, using the tag in ambient
temperatures beyond this range will cause damage to the tag and possibly cause its complete failure.
The Nema standard IP rating of the TG1800-A tag is 64, which means it is protected against dust and
splashing water. Using the tag in harsher conditions will cause damage to the tag and possibly cause its
complete failure. The tag should not be submerged during use (i.e. in a bath or swimming pool), but can
be worn when washing hands or showering.
Note: Using this tag for an incorrect application can significantly reduce the read range the tag provides,
possibly to the point that no signal from the tag can be received at all.
This manual gives instructions for the correct method and location to attach the tag; failure to follow these
instructions will result in impaired operation or even the complete loss of tag signals.
8.2 Attaching the TG1800-A for Tracking Patients and Other People
8.2.1 Requirements
An adjustable wrist strap of the user’s choice. Examples could be hospital ID straps or any type of
plastic, silicon or rubber wrist strap that can fit through the TG1800-A tag’s side slots.
8.2.2 Fitment
Thread the strap up through one of the side slots on the tag, pass the strap over the top of the tag
and thread the strap down through the other side slot on the tag.

USER MANUAL – ActivDuo Active RFID Tags
Configuration No. Wavetrend Technologies Ltd Master File Name Issue Date Page
00000-0000-150-1 User Manual ActivDuo Tag-00.8-UM-LT 3 DECEMBER 2008 37 OF 42
Once the strap is fitted to the tag, secure the strap comfortably around the users wrist so that the tag
& strap cannot easily rotate around the wrist whilst being worn, but not too tight as to cause
discomfort for the wearer.
8.3 Attaching the TG1800-A to Objects for Asset Tracking Systems
8.3.1 Requirements
An adjustable strap of the user’s choice. Examples could be any type of plastic, silicon or rubber
wrist strap that can fit through the TG1800-A tag’s side slots. Steel or metal straps can be used, but
take note of the important instruction below.
8.3.2 Fitment using Non-Metal Straps
Thread the strap through one of the side slots on the tag, pass the strap either over the top of the tag
or underneath it and thread the strap through the other side slot on the tag.
Once the strap is fitted to the tag, secure the strap tightly around the object so that the tag & strap
cannot rotate around the object during use.
8.3.3 Fitment using Steel/Metal Straps
Thread the strap down through one of the side slots on the tag, pass the strap underneath the tag or
underneath it and thread the strap up through the other side slot on the tag.
Once the strap is fitted to the tag, secure the strap tightly around the object so that the tag & strap
cannot rotate around the object during use.
NOTE: Do not pass a metal strap over the top of the tag, this will seriously degrade the RF signal
from the tag and reduce the read range considerably, if not entirely.
8.4 Removing the TG1800-A
The tag can be removed from the wrist or asset by either unlocking the strap (if possible) or by cutting the
strap.
If the tag is be re-used by another person, clean and sterilize the tag by wiping it thoroughly using a liquid
chemical sterilization solution and follow the instructions for the sterilization solution to ensure complete
sterilization of the tag’s housing is achieved. Fit the tag to the new user as instructed above, using a new
wrist strap.
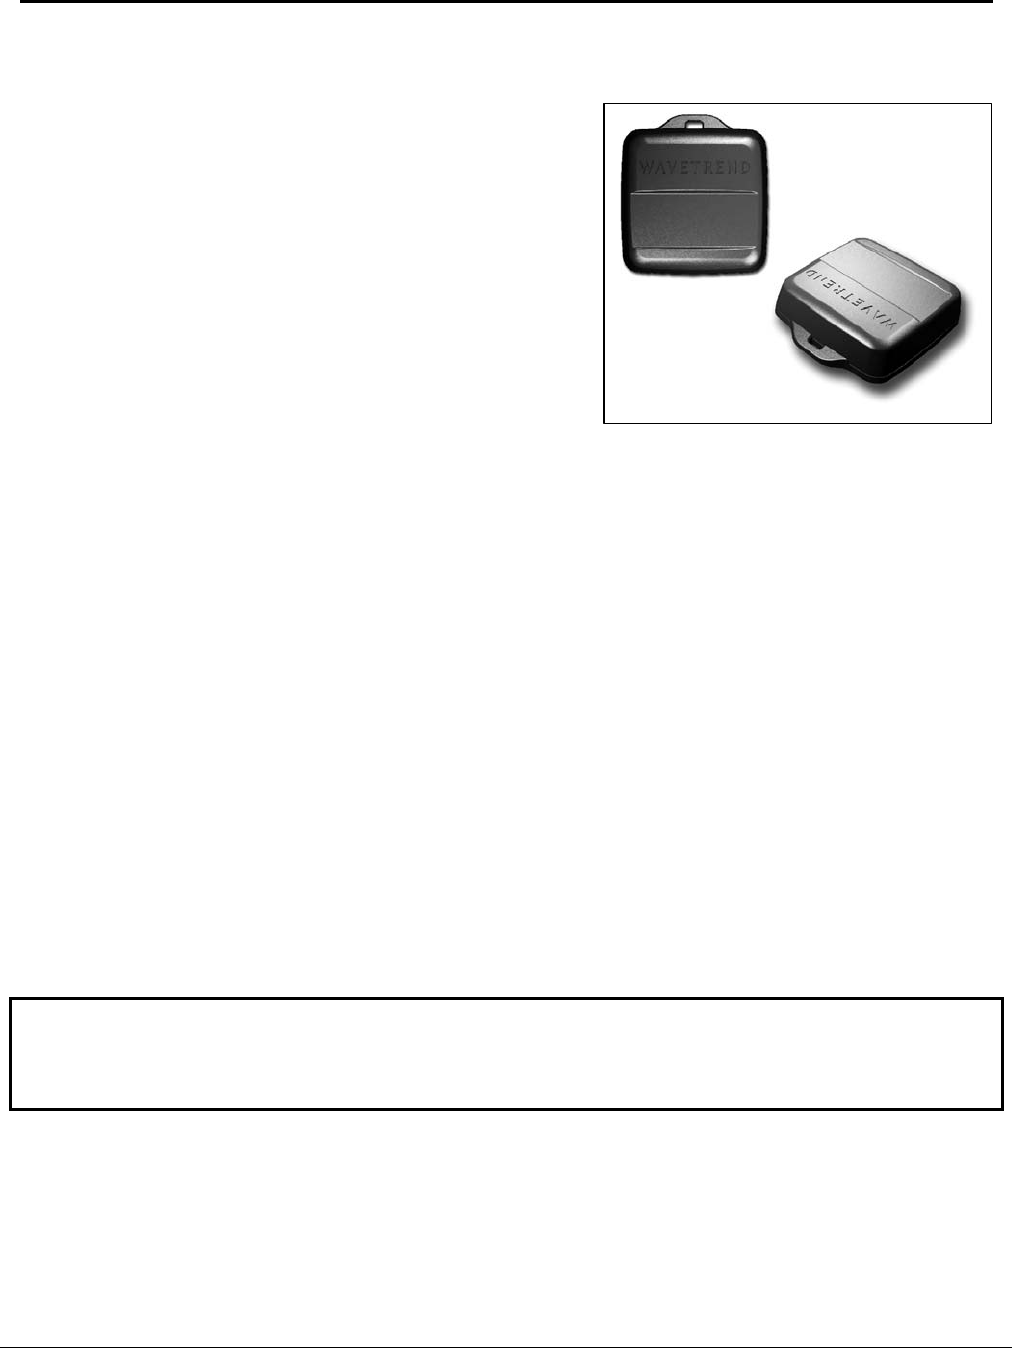
USER MANUAL – ActivDuo Active RFID Tags
Configuration No. Wavetrend Technologies Ltd Master File Name Issue Date Page
00000-0000-150-1 User Manual ActivDuo Tag-00.8-UM-LT 3 DECEMBER 2008 38 OF 42
9 THE TG1810-A ‘MINI ASSET’ TAG
The TG1810-A Mini Asset tag is specially designed for use in
asset tagging applications for a diverse array of assets such as
laptops, IT equipment, vehicles and transportation media. The
TG1810-A is specifically suited for operating on metallic
surfaces (or plastics containing a high metal content).
This tag will be available to order in 2009.
An IP67 version of the tag will be available in 2009 – the
TG1810-A-IH Mini Asset IP67 tag for use outdoors or in harsh
conditions.
9.1 Important Facts about the Mini Asset Tag
The tag should be installed directly onto metal surfaces to
obtain the best read range performance from the tag.
The tag has a linear polarized antenna. Where all tags will be attached to assets in exactly the same
orientation, use linear polarized antennas with the reader, and orientate the reader antenna to obtain the
best read range. Where all tags will be attached to assets in a manner that means you cannot be sure
which orientation any tag could be in when passing through a read zone, use a circular polarized
antenna or expect that some tags may offer lower signal strength due to their adverse orientation in
relation to the antenna.
Attaching the tag to plastic or other non-metal surfaces will reduce the maximum read range the tag can
provide. This is because the tag’s antenna is designed to be more effective when placed against a metal
surface. Please ensure that, especially when the tag is intended to be used with other Wavetrend tags in
the system, you can obtain sufficient read range to ensure the system will operate correctly despite the
lower signal strength output by this tag when installed on non-metal surfaces.
The tag incorporates a movement sensor as standard and operates in three different modes, the
standard operation mode that transmits its data with Status Tx rate, the movement alert operation mode
that transmits with the Alert Tx rate when its movement sensor senses any movement or vibration of the
tag, and the tamper alert mode if the tag is fixed to an object with Anti-Tamper kit.
The tag is rated to operate in ambient temperatures between -10oC and +60oC, using the tag in ambient
temperatures beyond this range will cause damage to the tag and possibly cause its complete failure.
The Nema standard IP rating of the TG1810-A tag is 64, which means it is protected against dust and
splashing water. Using the tag in harsher conditions will cause damage to the tag and possibly cause its
complete failure.
Note: Using this tag for an incorrect application can significantly reduce the read range the tag provides,
possibly to the point that no signal from the tag can be received at all.
This manual gives instructions for the correct method and location to attach the tag; failure to follow these
instructions will result in impaired operation or even the complete loss of tag signals.

USER MANUAL – ActivDuo Active RFID Tags
Configuration No. Wavetrend Technologies Ltd Master File Name Issue Date Page
00000-0000-150-1 User Manual ActivDuo Tag-00.8-UM-LT 3 DECEMBER 2008 39 OF 42
9.2 Attaching the TG1810-A for Tracking IT Equipments and Other Assets
9.2.1 Requirements
TG1810-A tag
1 adhesive gel pad (& magnet) from a 10-pack TA1810 or TA1810-AT Attachment Kit
Glass cleaner
Clean dry cloth
Alternately, a tie strap (max. 5mm width) can be used to attach the tag to the asset by using the slot
provided at the top of the tag.
9.2.2 Preparation (when using the Tag Attachment Kit)
Clean an area a little larger than the tag on an object. Ensure that no dust, oil, grease or residue
remains.
Position the gel pad over the back of the tag and align the hole in the pad with the embossed circle
on the tag. Remove the gel pad cover and stick the gel pad to the back of the tag. Make sure the
hole in the pad and the circle on the back of the tag are aligned.
9.2.3 Arming the anti-tamper (if using the TA1810-AT attachment kit)
Once the gel pad is stuck firmly to the tag insert the small magnet into the pad and press around it.
Make sure the magnet has stuck firmly to the pad in the hole. The tag’s anti-tamper is now armed.
It is recommended to place a spot of Superglue™ or other suitable adhesive on the magnet so that it
will adhere to the asset surface and be able to trigger a tamper alert more quickly should any
unauthorized attempt be made to remove a tag from its asset. Do not glue the magnet to the back of
the tag, this will prevent the anti-tamper feature from working.
9.2.4 Final steps
Remove the other cover from the gel pad and position the tag in a suitable location on the asset.
Press firmly and ensure no air bubbles remain visible.
The gel pad will take up to 24 hours to cure to full bond strength.
9.3 Removing the TG1810-A
The tag may require removal from the object either at the end of its functional life, or in instances where the
tag has been damaged, or where the asset is at end of its life cycle and must be replaced or disposed of. In
the case of asset replacement or disposal and where the tag is still fully functional, the tag can be installed
onto a new asset with a new gel pad.
9.3.1 Requirements
1 thin, flat instrument or blade, such as a dinner table knife
9.3.2 Removal
Carefully insert the blade into the gel pad repeatedly, working all the way around the edge of the tag.

USER MANUAL – ActivDuo Active RFID Tags
Configuration No. Wavetrend Technologies Ltd Master File Name Issue Date Page
00000-0000-150-1 User Manual ActivDuo Tag-00.8-UM-LT 3 DECEMBER 2008 40 OF 42
Repeat this as many times as it take to loosen enough of the gel pad around the edge of the tag to
allow gentle twisting or rotation of the tag in a clock-wise then anti-clockwise manner. Use the blade
to continue loosening or breaking up the gel pad to allow greater rotation of the tag.
Continue to twist the tag until it comes off the object.
Notes:
The anti-tamper feature (if used) will cause the tag to alarm immediately if any attempt is made to remove the
tag before the end of its functional lifespan.
Do not try to pull the tag off the object when removing it, the best way to break down the bond between the
gel pad and the tag & object is to rotate the tag clockwise and anti-clockwise repeatedly.

USER MANUAL – ActivDuo Active RFID Tags
Configuration No. Wavetrend Technologies Ltd Master File Name Issue Date Page
00000-0000-150-1 User Manual ActivDuo Tag-00.8-UM-LT 3 DECEMBER 2008 41 OF 42
APPENDIX A. STANDARD SPECIFICATIONS & CERTIFICATIONS
Standard Tag Specifications
The standard specifications applicable to
the ActivDuo tag range are shown in the
table alongside.
Product Information sheets on all
Wavetrend products are available for
download from the company website:
IPR Statement
The products described in this document are
protected by various patents held by
Wavetrend. Refer to the URL
www.wavetrend.net/IPR for information on all
patents and trademarks held, and for
Wavetrend’s Policy on Intellectual Property
Rights.
Regulatory Certifications for the ActivDuo Tags:
Regulatory
Authority Details
RoHS (2002/95/EC) All tags comply with the Restriction of Hazardous Substances Directive (RoHS)
APPLICABLE TO ALL ACTIVDUO TAGS DESCRIBED IN THIS DOCUMENT:
This device is currently in the certification process for FCC approval under Part 15.209 &
15.231 Part (a) and (e) of the FCC Rules
This device complies with Part 15 of the FCC Rules. Operation is subject to the following
two conditions: (1) this device may not cause harmful interference, and (2) this device
must accept any interference received, including interference that may cause undesired
operation.
The user is cautioned that changes or modifications to this product that are not expressly
approved by the party responsible for compliance could void the user's authority to
operate the equipment.
Copyright © 2008 Wavetrend Technologies Limited. All Rights Reserved. Wavetrend and the Wavetrend logo are either registered
trademarks or trademarks of Wavetrend Technologies Limited in the United States and/or other countries. All other trademarks are the
property of their respective owners.
Environmental
Operating temperature
Storage temperature
Humidity
Physical
Radio Frequency
Transmit Frequency
Power Output
Modulation
Bandwidth
Stability
Range
Electrical
Power
Accessories
TA***
TA***-AT
: -10°C to +60°C
: -20°C to +70°C
: 5% to 90% (non-condensing)
Please refer the individual tag data sheets.
: 433.92 MHz
: 72dBμV/m @3m, 4300 μV/m
: ASK
: 1 MHz
: SAW Stabilized
: 1 to 50+ meters (actual range is determined
by the choice of reader & antenna used to
detect the tag and the environment it is
used in)
: Internally powered by lithium battery
(All sold in packs of 10)
: Tag attachment kit
: Tag attachment kit with Anti-Tamper

USER MANUAL – ActivDuo Active RFID Tags
Configuration No. Wavetrend Technologies Ltd Master File Name Issue Date Page
00000-0000-150-1 User Manual ActivDuo Tag-00.8-UM-LT 3 DECEMBER 2008 42 OF 42
APPENDIX B. DOCUMENT INFORMATION
AMENDMENT HISTORY
Issue Date Amendment Details Amended By
0.1 22 May 2008 Final Draft Compiled Yuri Guest
0.2 22 May 2008 Final Draft Reviewed, minor edits Warren Scott
0.3 16 June 2008 Some abbreviations were added
1.1.2 Key Features were edited
TG801 was added
Yuri Guest
0.4 15 July 2008 Pictures were added Yuri Guest
0.6 1 December 2008 Updates to all sections Warren Scott
0.7 2 December 2008 Completed Draft Prepared Warren Scott
0.8 3 December 2008 Final Updates Warren Scott
Table 5: Amendment History
APPROVALS
Number Name Designation Date Signature
1. Edward Gonsalves SVP Product Development
2. Des Reddy Product Manager
3. Warren Scott Product Marketing Manager
4.
5.
Table 6: Approvals
REFERENCED DOCUMENTS
Number Title Document Number Rev Source
1.
2.
3.
4.
5.
Table 7: Referenced Documents