Waxess DM1000CE Home Cellular Cordless Telephone User Manual
Waxess Inc. Home Cellular Cordless Telephone Users Manual
Waxess >
User Manual
Waxess USA, Inc.
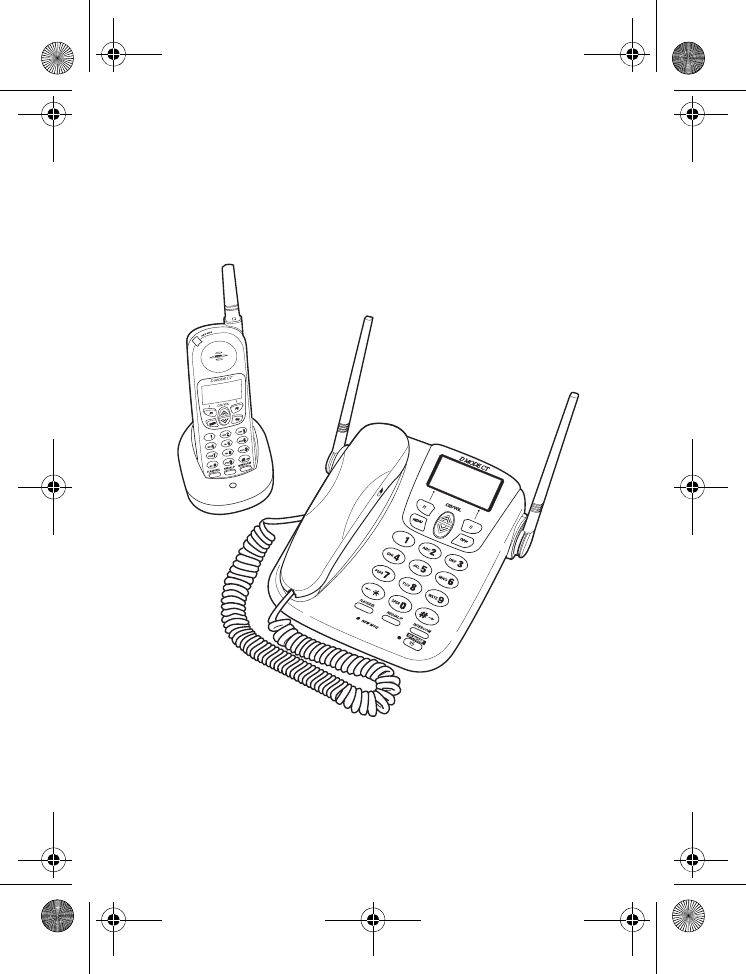
DM1000
User Guide
D Mode DM1000CB cover draft 1.fm Page i Friday, June 18, 2010 12:25 PM

DM1000 ii Copyright © 2010 Waxess USA
Handset 1 Antenna
2 Betlclip attachment
3 Speaker for Ringer
4 Handset battery compartment
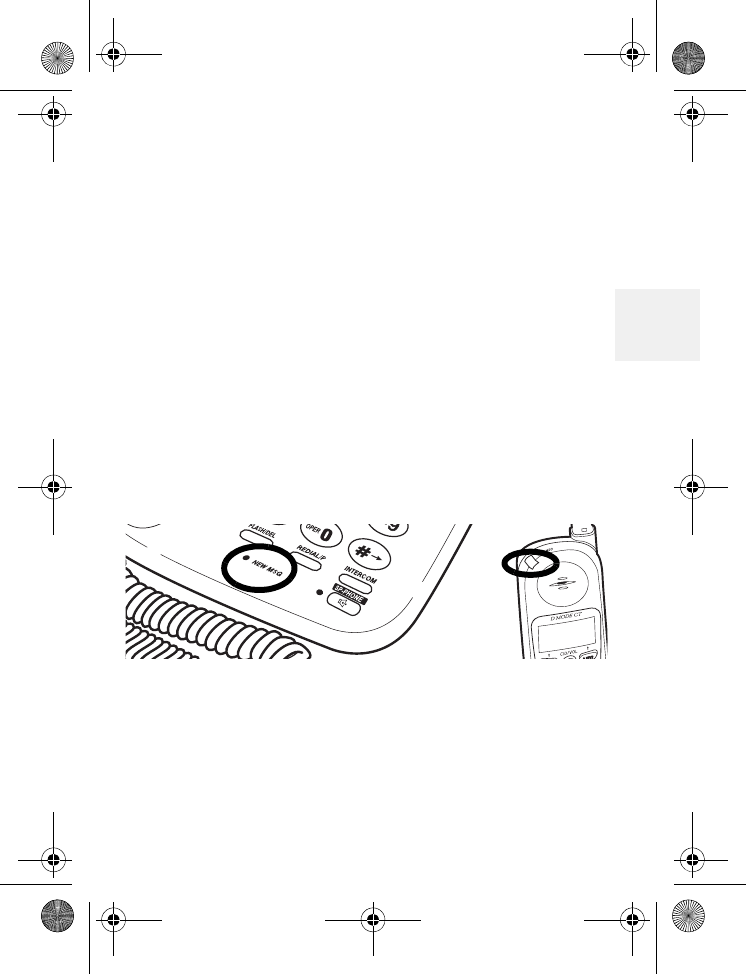
5 New Message LED
6 Handset Earpiece
7LCD Display
8Function Keys
9Up/Down keys
10 Menu and Off keys
11 * Scroll Left
12 Flash/Delete key
13 Redial/Pause key
14 Headset Jack
15 # Scroll Right
16 Intercom
17 Handset Microphone
18 Handset Charging Contacts
D Mode DM1000CB cover draft 1.fm Page ii Friday, June 18, 2010 12:26 PM
DM1000 iii Copyright © 2010 Waxess USA
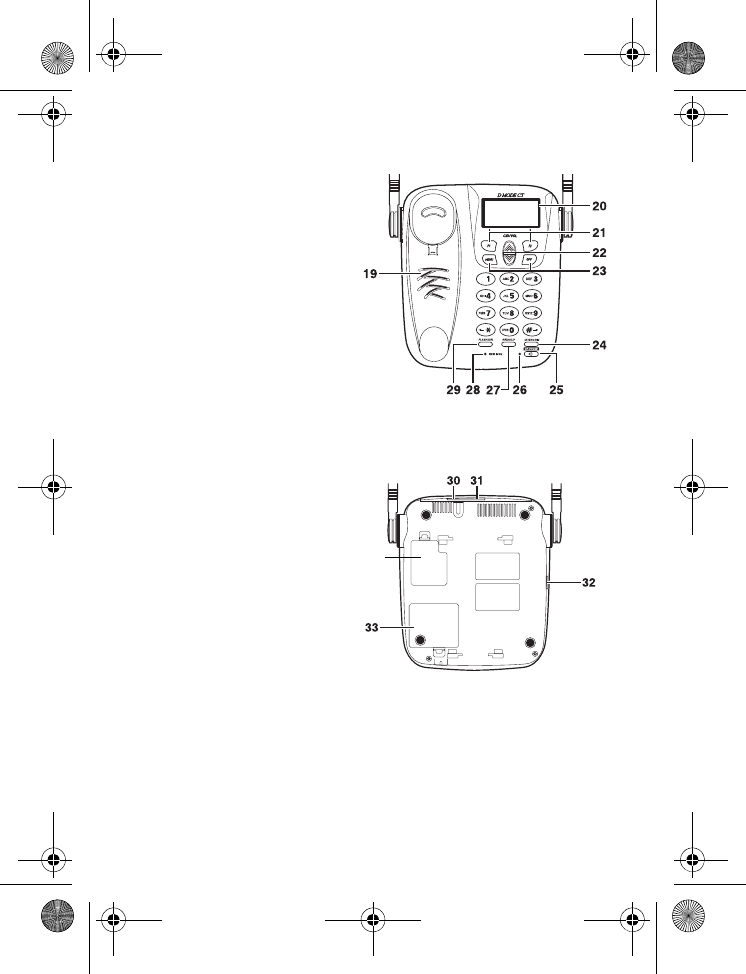
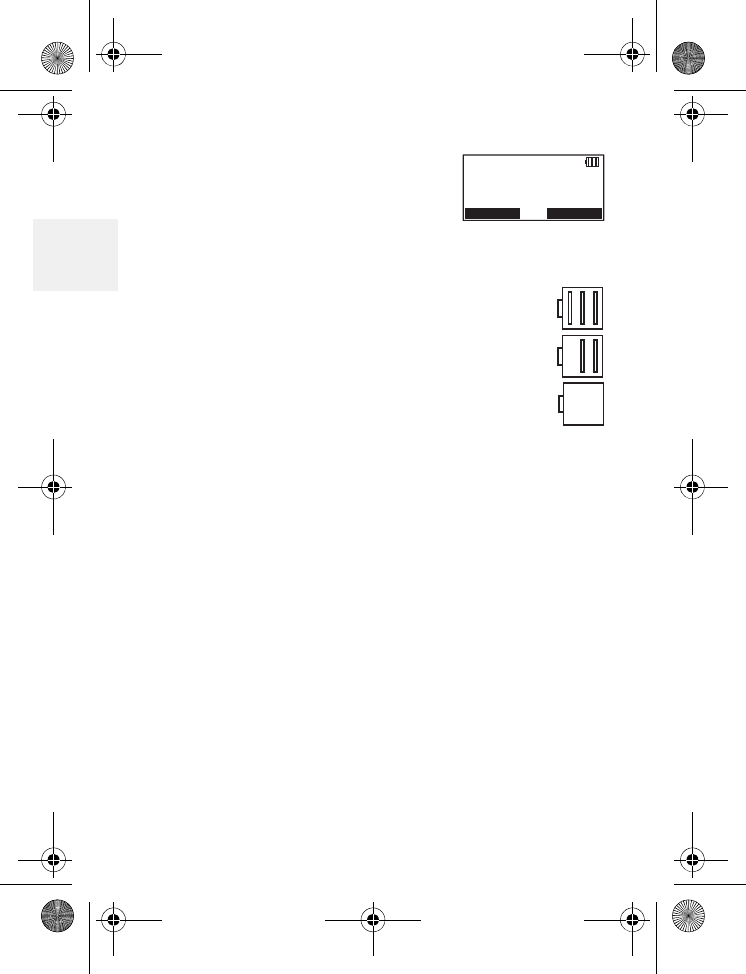
Base
19 Base Speaker/Ringer
20 LCD Display
21 Function Keys
22 Up/Down Keys
23 Menu and Off Keys
24 Intercom Key
25 Speaker Phone Key
26 Speaker Phone ON LED
27 Redial/Pause Key
28 New Message LED
29 Flash Key
30 DC IN 9V Jack
31 TEL LINE Jack
32 Corded Handset Jack
33 Battery cover
34 Data Port Door
(not for consumer use)
34
D Mode DM1000CB cover draft 1.fm Page iii Friday, June 18, 2010 12:26 PM

DM1000 iv Copyright © 2010 Waxess USA
Contents
Get ready . . . . . . . . . . . . . . . . . . . . . . 1
Choose Location . . . . . . . . . . . . . . . . . . . . . 1
Desk or Table . . . . . . . . . . . . . . . . . . . . . . . 2
Wall mount . . . . . . . . . . . . . . . . . . . . . . . . 3
Base power on . . . . . . . . . . . . . . . . . . . . . . 4
Power backup batteries (Optional) . . . . . . . . 4
Standby Screen . . . . . . . . . . . . . . . . . . . . . 6
Signal level meter . . . . . . . . . . . . . . . . . . . . 7
Optional antenna removal . . . . . . . . . . . . . . 7
Ready the cordless handset . . . . . . . . . . . . . 8
Get set . . . . . . . . . . . . . . . . . . . . . . . 11
Dialing mode . . . . . . . . . . . . . . . . . . . . . . 11
Time and date . . . . . . . . . . . . . . . . . . . . . 12
Set the ringer tone . . . . . . . . . . . . . . . . . . 14
Set the ringer volume . . . . . . . . . . . . . . . . 15
Key beep . . . . . . . . . . . . . . . . . . . . . . . . . 16
Area codes . . . . . . . . . . . . . . . . . . . . . . . . 16
Add/remove a 1 . . . . . . . . . . . . . . . . . . . . 17
Add/remove area code . . . . . . . . . . . . . . . 18
Language . . . . . . . . . . . . . . . . . . . . . . . . . 18
LCD contrast . . . . . . . . . . . . . . . . . . . . . . 19
Name . . . . . . . . . . . . . . . . . . . . . . . . . . . 19
Handset registration . . . . . . . . . . . . . . . . . 19
Register . . . . . . . . . . . . . . . . . . . . . . . . . . 19
Deregister . . . . . . . . . . . . . . . . . . . . . . . . 20
GO! . . . . . . . . . . . . . . . . . . . . . . . . . 21
CDMA Activation . . . . . . . . . . . . . . . . . . . . 21
DM1000CB-CDMATOC.fm Page iv Friday, June 18, 2010 12:18 PM
DM1000 v Copyright © 2010 Waxess USA
Make a wireless call . . . . . . . . . . . . . . . . . 21
Make a landline call . . . . . . . . . . . . . . . . . . 22
Set earpiece volume . . . . . . . . . . . . . . . . . 22
Calling options . . . . . . . . . . . . . . . . . . . . . 23
Speed dial . . . . . . . . . . . . . . . . . . . . . . . . 23
Redial . . . . . . . . . . . . . . . . . . . . . . . . . . . 23
Pause (for TEL line use only) . . . . . . . . . . . 24
Answer a wireless call . . . . . . . . . . . . . . . . 24
Answer a landline call . . . . . . . . . . . . . . . . 25
In-Call operations . . . . . . . . . . . . . . . . . . . 26
Place a call on Hold . . . . . . . . . . . . . . . . . . 26
Mute a call . . . . . . . . . . . . . . . . . . . . . . . . 26
Transfer a call . . . . . . . . . . . . . . . . . . . . . . 26
Set up a conference call . . . . . . . . . . . . . . . 29
Phone book . . . . . . . . . . . . . . . . . . . . . . . 29
Enter names and characters . . . . . . . . . . . . 30
Enter numbers directly . . . . . . . . . . . . . . . 31
Edit names or numbers . . . . . . . . . . . . . . . 32
Enter numbers from Caller ID . . . . . . . . . . . 32
Call from phone book . . . . . . . . . . . . . . . . 34
Speed dial . . . . . . . . . . . . . . . . . . . . . . . . 34
Messages . . . . . . . . . . . . . . . . . . . . . . . . . 34
Voice messages . . . . . . . . . . . . . . . . . . . . 34
Short Message Service (SMS) . . . . . . . . . . . 36
More features . . . . . . . . . . . . . . . . . . 42
Caller ID . . . . . . . . . . . . . . . . . . . . . . . . . 42
Caller ID information . . . . . . . . . . . . . . . . . 42
Check the log . . . . . . . . . . . . . . . . . . . . . . 44
Dial a number . . . . . . . . . . . . . . . . . . . . . 44
Save a number . . . . . . . . . . . . . . . . . . . . . 44
DM1000CB-CDMATOC.fm Page v Friday, June 18, 2010 12:18 PM

DM1000 vi Copyright © 2010 Waxess USA
Delete a number . . . . . . . . . . . . . . . . . . . . 45
Call Forwarding . . . . . . . . . . . . . . . . . . . . . 46
Activate Call Forwarding . . . . . . . . . . . . . . 46
Deactivate Call Forwarding . . . . . . . . . . . . . 47
Page and Intercom . . . . . . . . . . . . . . . . . . 47
Page . . . . . . . . . . . . . . . . . . . . . . . . . . . . 47
Intercom . . . . . . . . . . . . . . . . . . . . . . . . . 48
Two-line calling . . . . . . . . . . . . . . . . . . . . . 49
Quick reference chart . . . . . . . . . . . . . . . . 50
Make two separate calls . . . . . . . . . . . . . . . 51
Receive two separate calls . . . . . . . . . . . . . 51
Call waiting with two calls . . . . . . . . . . . . . 52
Barge-in . . . . . . . . . . . . . . . . . . . . . . . . . 52
Quick reference chart . . . . . . . . . . . . . . . . 54
Set up Barge-In . . . . . . . . . . . . . . . . . . . . 55
Use Barge-In . . . . . . . . . . . . . . . . . . . . . . 55
Cellular only . . . . . . . . . . . . . . . . . . . . . . . 56
Set up Cellular only . . . . . . . . . . . . . . . . . . 56
Turn off Cellular only . . . . . . . . . . . . . . . . . 56
CEL Phone Number . . . . . . . . . . . . . . . . . . 57
Power back-up . . . . . . . . . . . . . . . . . . . . . 57
Precautions . . . . . . . . . . . . . . . . . . . . 59
Rechargeable Nickel-Metal-Hydride Battery Warn-
ing . . . . . . . . . . . . . . . . . . . . . . . . . . . . . 59
Rechargeable Nickel-Metal-Hydride Batteries
Must Be Recycled or Disposed of Properly. . 60
Important safety instructions . . . . . . . . . . . 60
Important Electrical Considerations . . . . . . . 64
The FCC Wants You To Know . . . . . . . . . . . 64
Range . . . . . . . . . . . . . . . . . . . . . . . . . . . 65
DM1000CB-CDMATOC.fm Page vi Friday, June 18, 2010 12:18 PM

DM1000 vii Copyright © 2010 Waxess USA
Telephone Line Problems . . . . . . . . . . . . . . 66
Radio Interference . . . . . . . . . . . . . . . . . . 66
More than One Cordless Telephone . . . . . . . 67
Cordless Telephone Privacy . . . . . . . . . . . . 68
Installation Considerations . . . . . . . . . . . . . 68
Telephone Line Outlets . . . . . . . . . . . . . . . 69
Connecting the Telephone Cords . . . . . . . . . 70
Applying Power to the base . . . . . . . . . . . . 70
I.C. Notice . . . . . . . . . . . . . . . . . . . . . . . . 71
RADIO EQUIPMENT . . . . . . . . . . . . . . . . . . 72
General information . . . . . . . . . . . . . . 73
DM1000 Menu map . . . . . . . . . . . . . . 75
DM1000CB-CDMATOC.fm Page vii Friday, June 18, 2010 12:18 PM
Get ready
DM1000 1 Copyright © 2010 Waxess USA
1
1Get ready
•Choose Location
Some important considerations:
• Charge the handset for 12–15 hours before use it.
• Locate the base near both a phone jack and a
power outlet which is not controlled by a switch.
• Keep the base and handset away from sources of
electrical noise, such as motors and fluorescent
lighting.
• Leave enough room to raise both base antennas
fully vertical.
Included items
• Base • Belt clip
• Cordless handset • Wall mount bracket
• AC adaptor for base • Telephone cord
• AC adaptor for
cordless handset •User guide
• Rechargeable battery
for cordless handset
D Mode CM1000CB body.fm Page 1 Friday, June 18, 2010 12:19 PM
DM1000 2 Copyright © 2010 Waxess USA
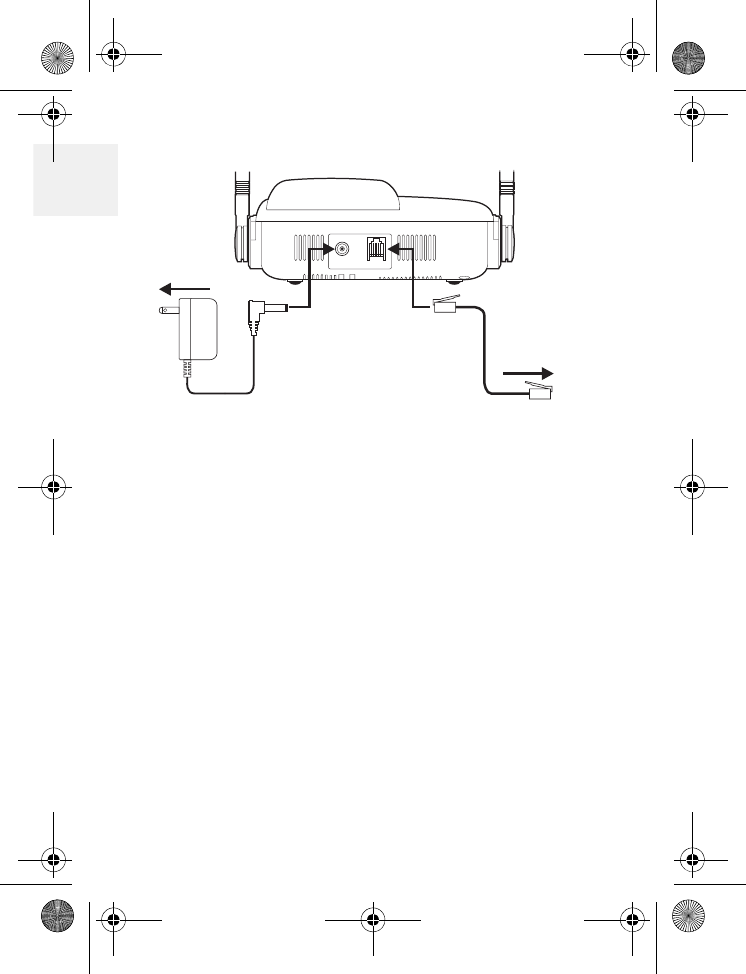
1Desk or Table
1Connect the telephone line cord to the TEL LINE
jack and to a telephone jack.
2Set the base on a desk or table and place the
handset on the base.
3Connect the handset cord to the jacks on the
handset and the base, then set the handset in
the cradle.
4Raise both antennas to a vertical position.
5Find the base AC adaptor (the larger adaptor),
and connect it to the DC IN 9V jack and to a
standard 120V AC.
To AC outlet
To telephone
outlet
D Mode CM1000CB body.fm Page 2 Friday, June 25, 2010 4:20 PM
Get ready
DM1000 3 Copyright © 2010 Waxess USA
1
Wall mount
1Attach the wall mount adaptor to the base.
2Find the base AC adaptor (the larger adaptor),
plug the connector into the DC IN 9V jack, then
plug the telephone line cord to the TEL LINE
jack.
3Wrap the AC adaptor inside the molded wiring
channel, then wrap the cord around the strain
relief notch.
4Raise the antennas to a vertical position.
5Align the mounting slots on the base with the
mounting posts on the wall plate. Then push in
and down until the phone is firmly seated.
6Connect the handset cord to the jacks on the
handset and base, then set the corded handset
in the cradle.
7On the base, remove the handset retainer, flip it
over, then replace it.
D Mode CM1000CB body.fm Page 3 Friday, June 25, 2010 4:20 PM
DM1000 4 Copyright © 2010 Waxess USA
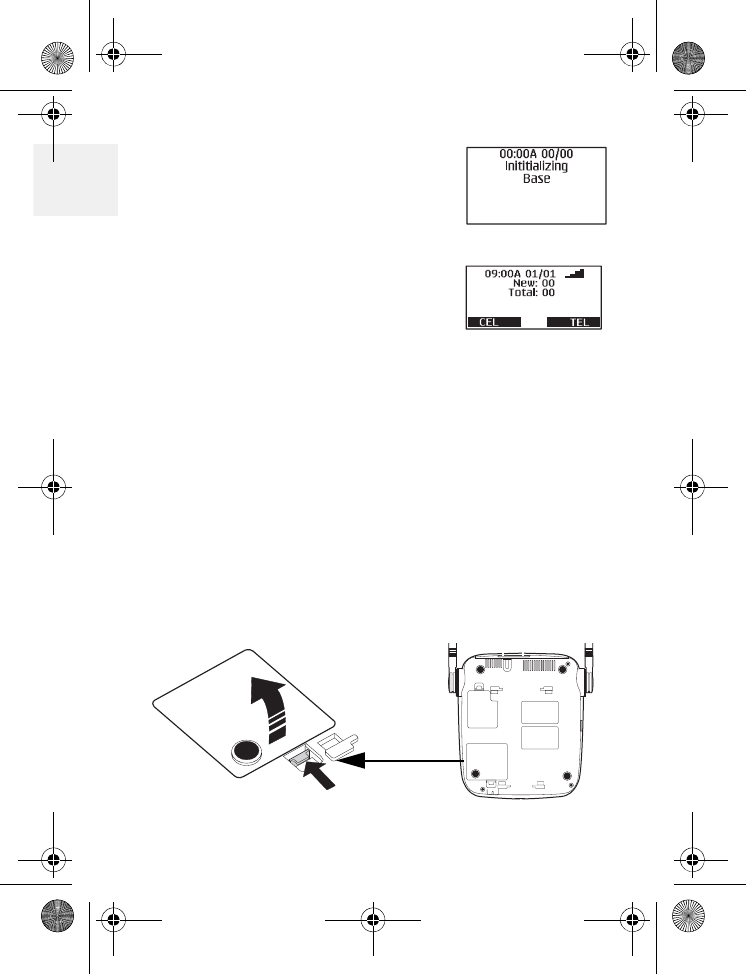
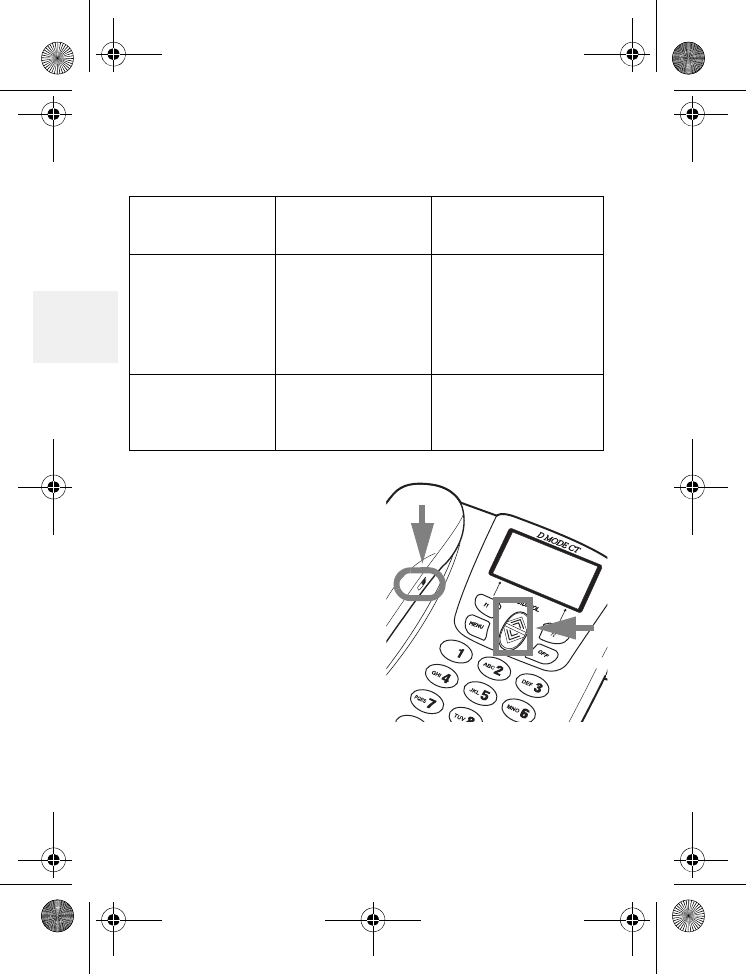
1Base power on
When powered on for the first
time, the base goes through an
initialization sequence.
Note: Do not use the phone
until the initialization
sequence is complete.
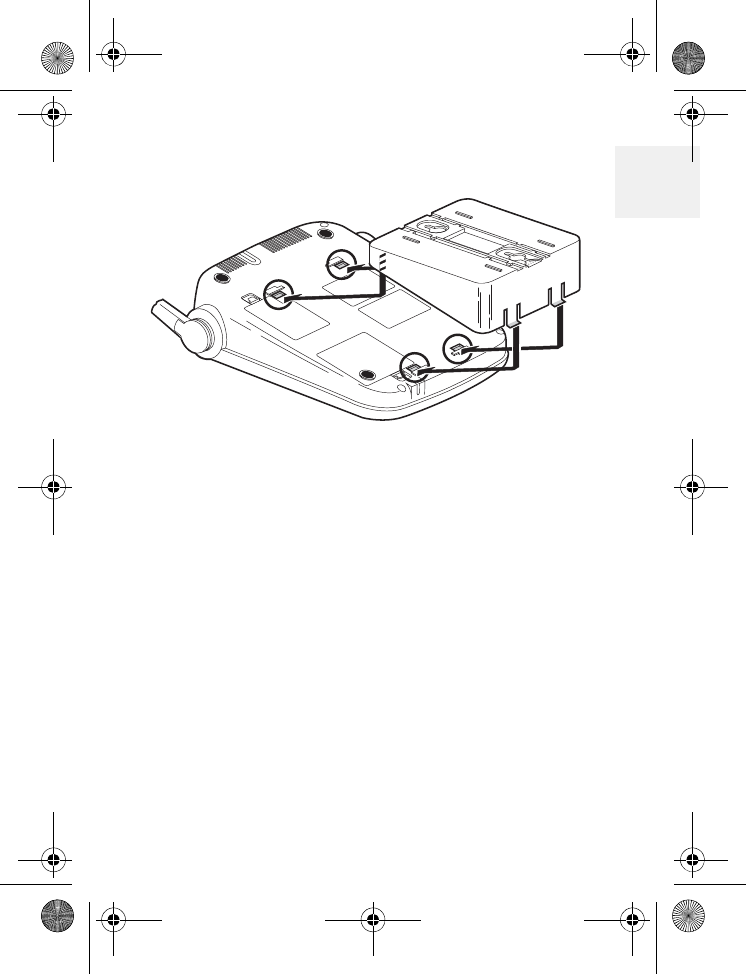
Power backup
batteries (Optional)
The optional back-up batteries provide a reserve
power supply so the base can operate for up to 30
minutes (depending on battery condition) in case of
power outages or if power is cut off to the base for
any reason. Backup power activates immediately
when the normal power supply to the base is cut off.
1Verify power is disconnected from the base.
2Open the battery cover on the bottom of the
base.
D Mode CM1000CB body.fm Page 4 Friday, June 18, 2010 12:19 PM
Get ready
DM1000 5 Copyright © 2010 Waxess USA
1
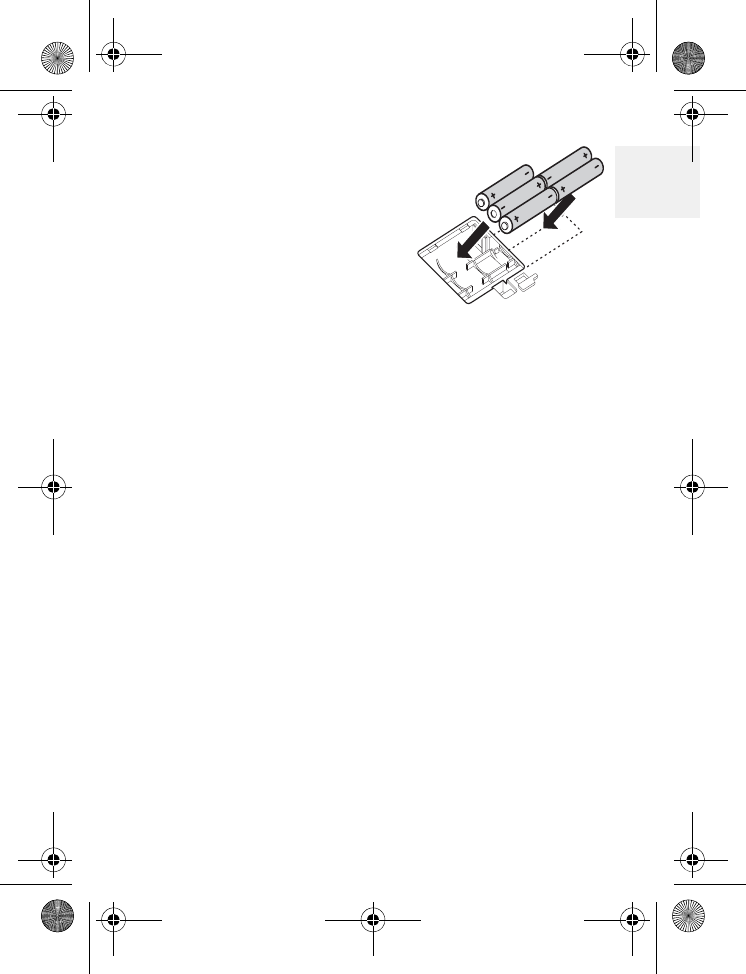
3Insert five AA alkaline
batteries with the
polarity (+ and -)
aligned as marked in the
compartment.
4Replace the cover.
Note:
• Batteries are not included
• Batteries are not required to operate the product
• There is no indication that shows when the base is
operating with normal power or back-up power
• If you choose to install back-up batteries, check
the power level frequently (see “Power back-up”
on page 57). Replace the batteries when the
power level is less than half of maximum
• After any power outage, check the battery power
level and replace batteries as needed
•
The battery power comes on automatically when
current from the AC adaptor is interrupted;
unplugging the AC adaptor does not turn off power
to the phone
• Be sure to remove at least one battery when
disconnecting power
D Mode CM1000CB body.fm Page 5 Friday, June 18, 2010 12:19 PM
DM1000 6 Copyright © 2010 Waxess USA
1•The Battery Level indicator on the base menu
screen may not show true battery condition unless
all five batteries are installed
Caution: Use only AA alkaline batteries for power
backup. Do not use rechargeable
batteries. The battery compartment
circuitry is not designed to recharge
batteries.
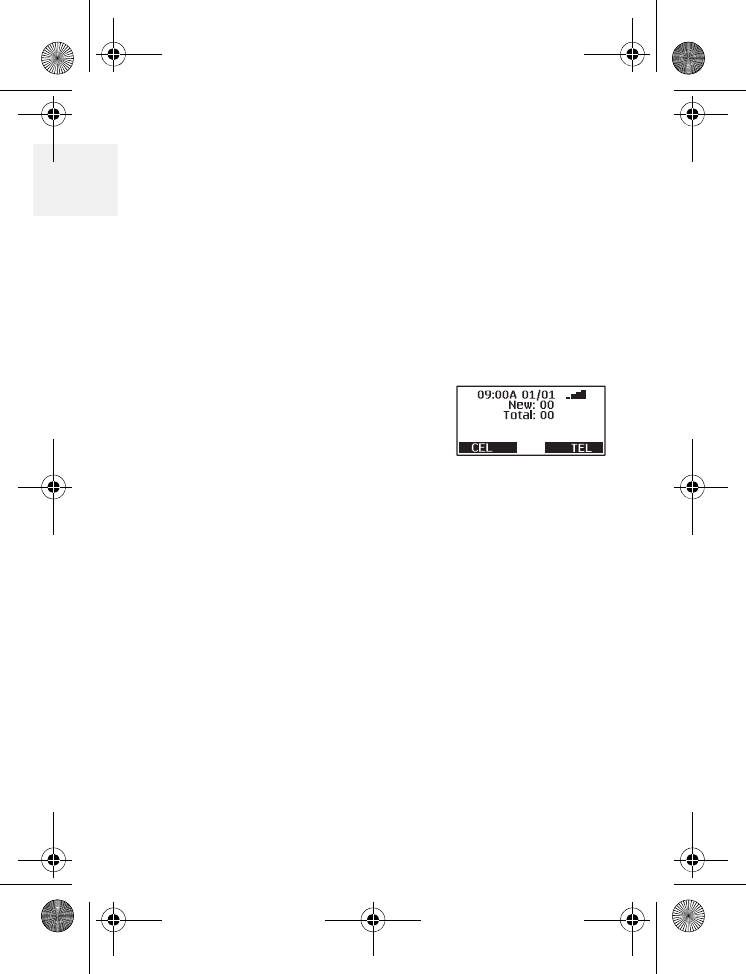
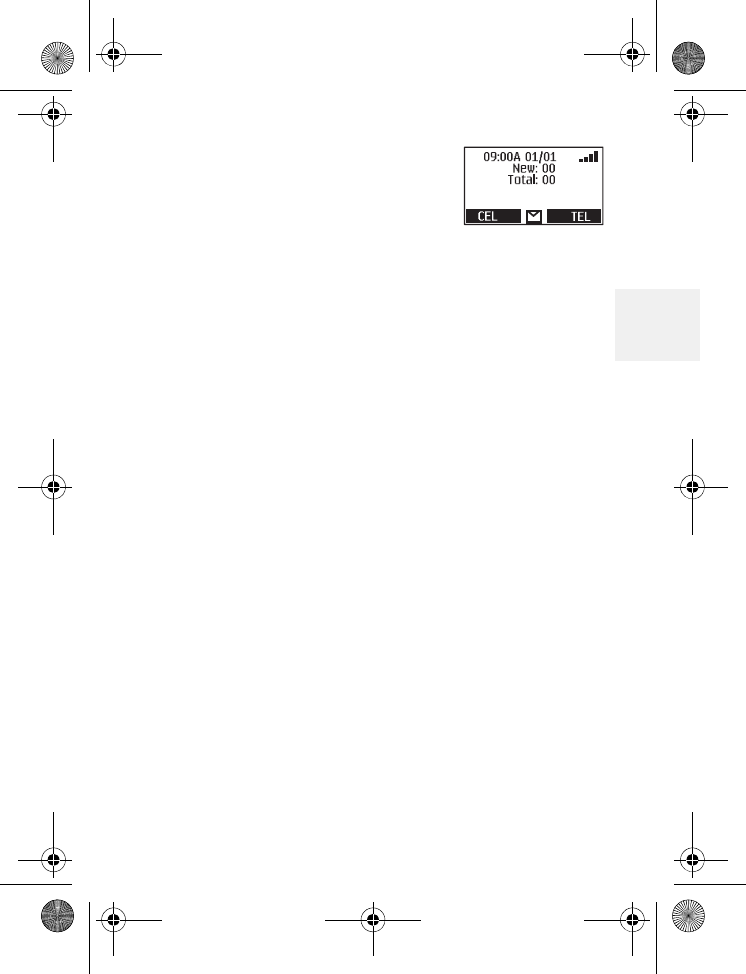
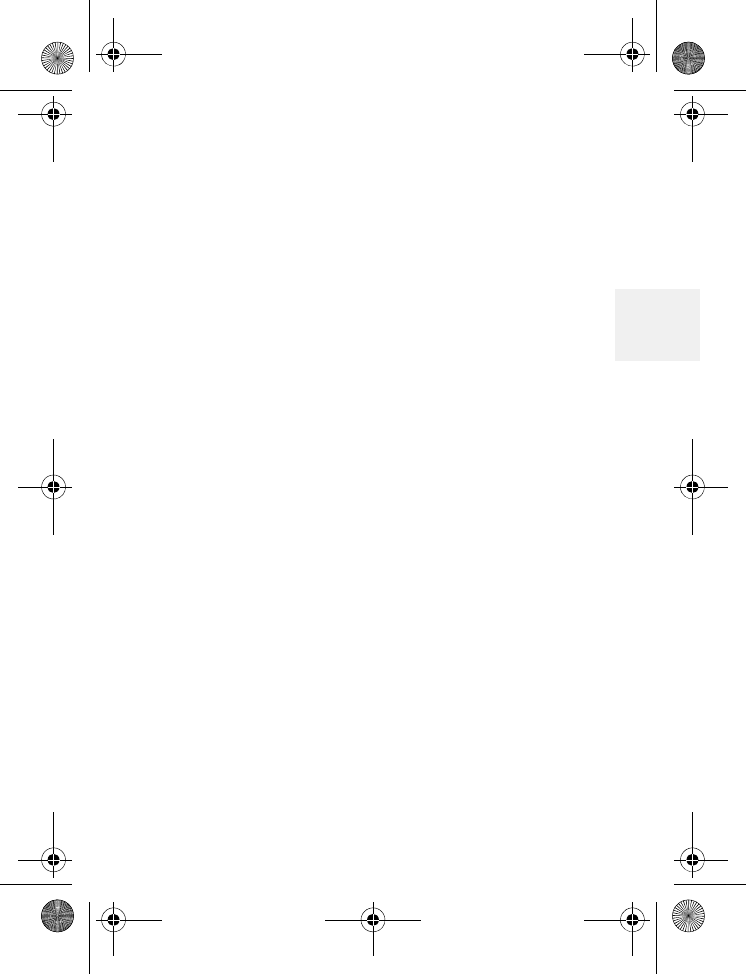
Standby Screen
When the sequence is complete,
the Standby Screen appears.
This screen appears on both the
base and the handset, and is
always visible when the phone is
idle. At the bottom of the screen, the text indicates
which service lines are active. CEL is wireless
service, and TEL is landline service.
The CEL indicator may take up to two minutes to
appear, depending on cellular signal conditions in
your area.
If you have connected with your cellular service
provider, the date and time may be set
automatically. If not, see “Time and date” on page
12 to set the date and time manually.
D Mode CM1000CB body.fm Page 6 Friday, June 18, 2010 12:19 PM
Get ready
DM1000 7 Copyright © 2010 Waxess USA
1
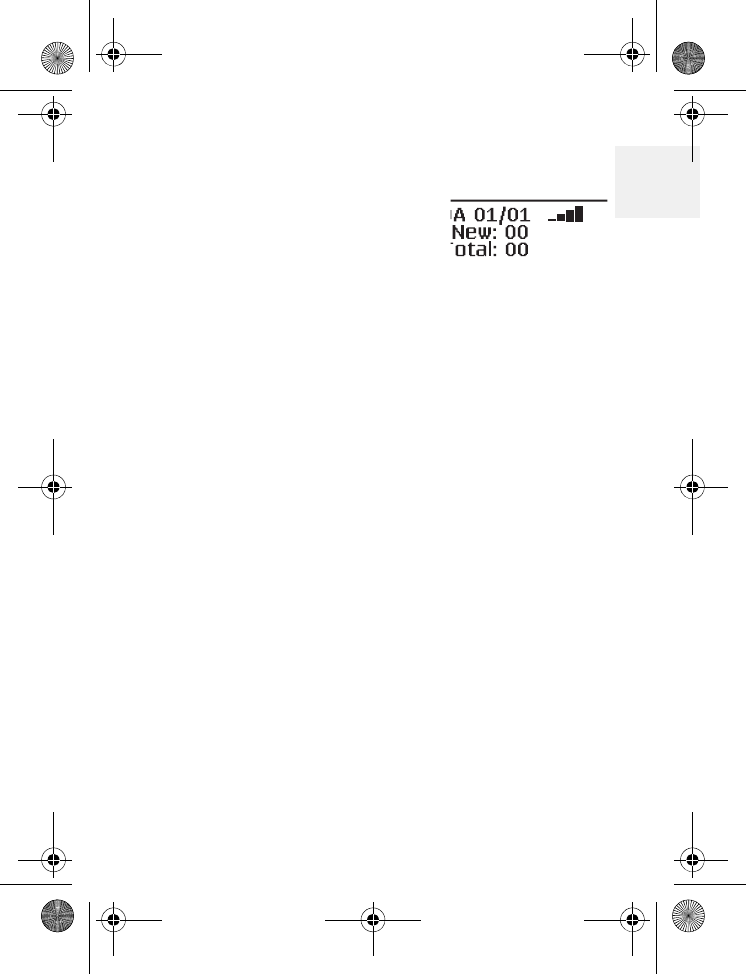
Signal level meter
The Signal Level feature helps
you find your strongest cellular
service signal. Move the base
around your location to find the
strongest signal level.
Be sure the CEL indicator is shown in the
display before checking the signal level.
D Mode CM1000CB body.fm Page 7 Friday, June 18, 2010 12:19 PM
DM1000 8 Copyright © 2010 Waxess USA
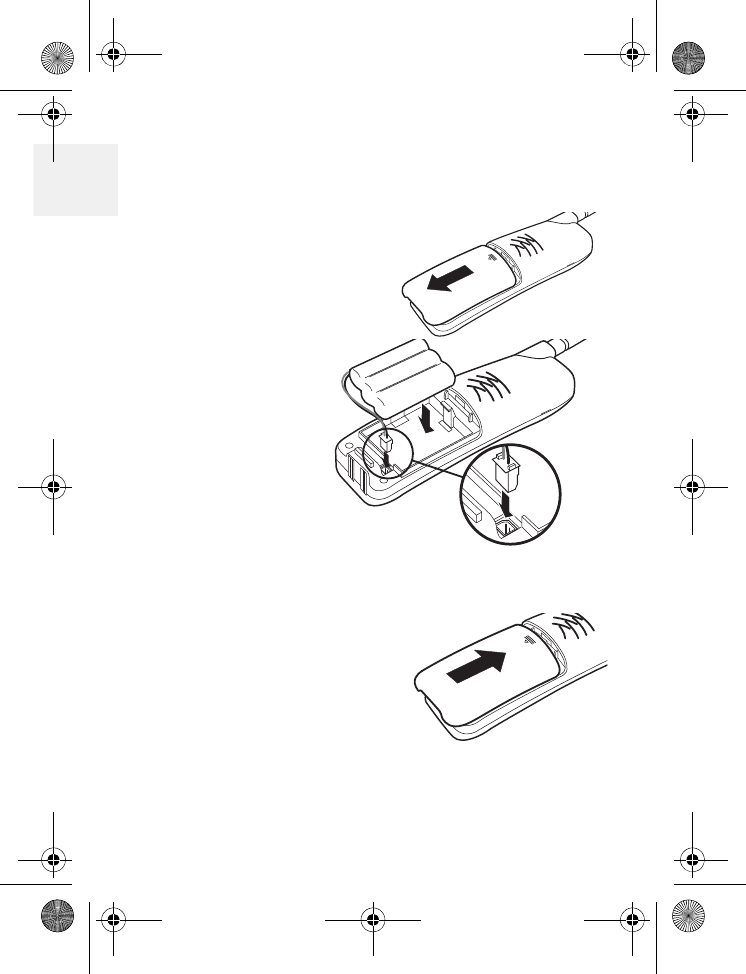
1Ready the cordless handset
INSTALL THE BATTERY
1Open the cover.
2Verify that the
connector is
properly
aligned with
the jack and
connect the
battery.
Note: The
connector
is
designed to easily fit the jack in only one
direction. Do not use excessive force.
3Close the cover.
D Mode CM1000CB body.fm Page 8 Friday, June 18, 2010 12:19 PM
Get ready
DM1000 9 Copyright © 2010 Waxess USA
1
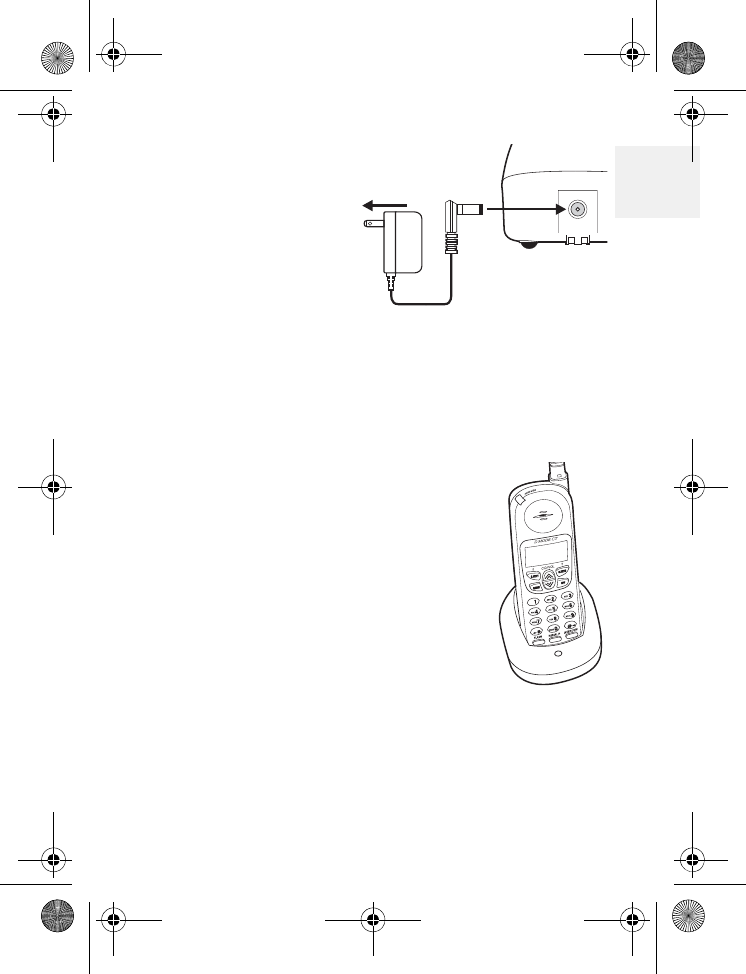
CHARGE THE
BATTERY
1Find the cordless
handset AC
Adaptor (the
smaller adaptor,
Model number
HKD090050U).
Connect the AC adaptor to the DC 9V IN jack on
the charger and to a standard 120V AC wall
outlet.
2Set the charger on a desk or table, then set the
handset in the charger with the keypad facing
forward.
3Allow the battery to charge for
12–15 hours.
Note: Charge the battery
frequently. Leaving the
battery uncharged for a
prolonged period can
adversely affect battery
charging capacity. If this
happens, replace the battery.
To AC outlet
D Mode CM1000CB body.fm Page 9 Friday, June 18, 2010 12:19 PM
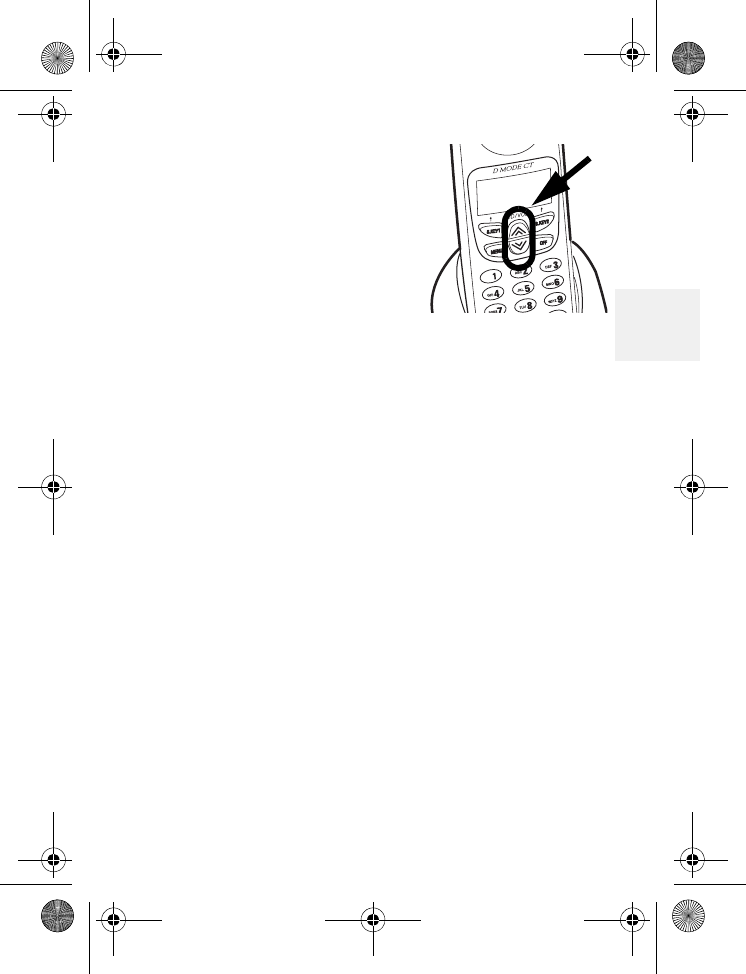
DM1000 10 Copyright © 2010 Waxess USA
2
A power indicator in the upper
right corner of the LCD shows
how much battery life remains.
Full charge
Low charge
Note: Use only the rechargeable battery pack
supplied with your cordless handset.
09:00A 01/01
Total: 00
New: 00
HANDSET - 1
CEL TEL
D Mode CM1000CB body.fm Page 10 Friday, June 18, 2010 12:19 PM

Get set
DM1000 11 Copyright © 2010 Waxess USA
2
2Get set
•Dialing mode
1Press the MENU key on the
base.
The Menu appears.
2Press the key so the highlight bar moves to
Setup.
This action is called “scrolling” throughout this
guide.
3Press F1 to “select” this menu item.
This action is called “Press Select”
throughout this guide.
Another menu list appears.
4Press the key and scroll to Tone/Pulse.
5Press F1 to select this item
and this screen appears.
Highlight the correct setting for your phone
system, then press F1 to enter the setting in
memory.
A beep confirms the setting, and the Setup
menu appears.
D Mode CM1000CB body.fm Page 11 Friday, June 18, 2010 12:19 PM
DM1000 12 Copyright © 2010 Waxess USA
2
6Press EXIT to return to the main menu screen.
OR
Press EXIT twice or OFF to return to Standby.
The following steps apply to both the base and the
handset.
•Time and date
The time and date automatically synchronizes with
the cellular network once when the base is powered
on (if supported by your service provider). If the
time and date do not automatically synchronize
with the network afterward it must be set manually.
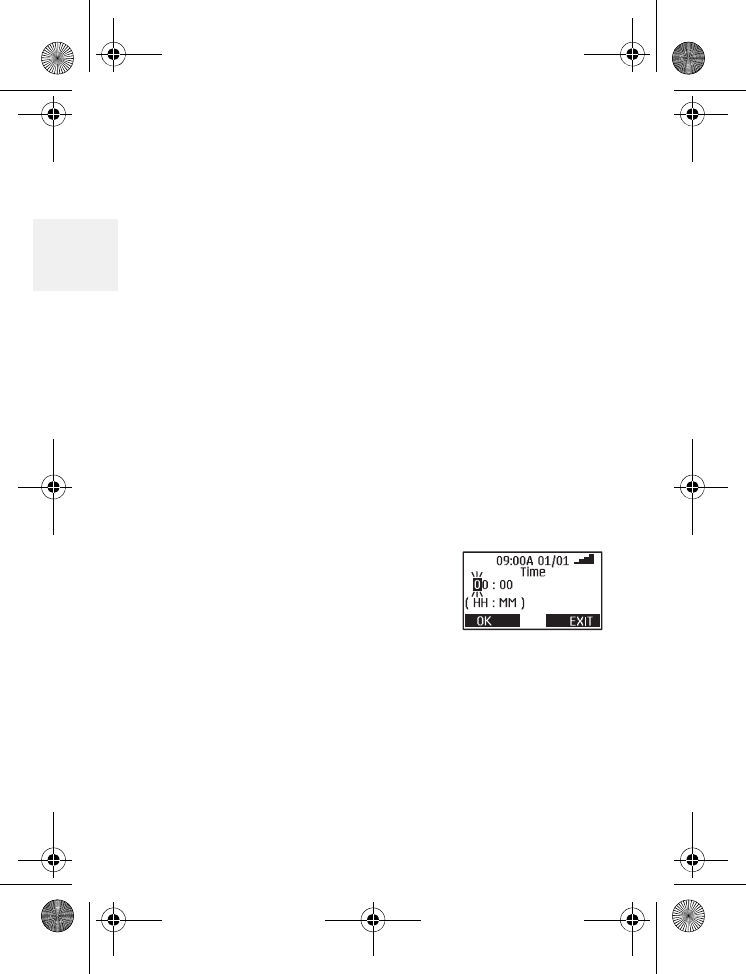
1Press MENU.
2Use the / keys and scroll to Time and Date.
3Press Select.
A cursor blinks on the hour
number.
4Use the keypad to enter the
correct hour.
The cursor moves to the right for the minute
numbers.
5Enter the correct minutes, and press OK.
The AM/PM screen appears.
6Use the or key to set AM or PM and press
OK.
D Mode CM1000CB body.fm Page 12 Friday, June 18, 2010 12:19 PM

Get set
DM1000 13 Copyright © 2010 Waxess USA
2
The time format setting appears.
7Use the or key to set the time format and
press OK.
The date screen appears with months showing.
8Use the keypad to enter the correct month.
After entering the month, the cursor moves to
the day.
9Enter the correct day then press OK.
The cursor appears on the first digit of the
current year setting.
10Use the keypad to enter the four digits for the
correct year and press OK
The date format appears.
11Press or to select a format and press OK.
You hear a confirmation tone and the Main
menu appears.
When the time and date are set on the base or on
one of the cordless handsets, the time and date for
all other components (handset or base)
automatically synchronize after a few minutes. If a
new cordless handset is added and properly
registered, the time and date for the new handset
will automatically synchronize.
D Mode CM1000CB body.fm Page 13 Friday, June 18, 2010 12:19 PM
DM1000 14 Copyright © 2010 Waxess USA
2
•Set the ringer tone
You can set different ring tones for CEL (wireless)
calls and TEL (landline) calls.
1Press MENU.
2Scroll to Ringer/Key Beep, and press Select.
3Scroll to Ringer Tone, and press Select.
The ringer tone menu for CEL calls appears
first. The current ringer tone is highlighted.
The base has three ring tones available. The
handset has six rings available—three tones
and three melodies.
Note: Melodies are only available on the cordless
handset.
4Scroll through the list of tones.
Pause on a tone name to hear a short sample of
the tone. The sample plays two seconds for a
ring tone and 10 seconds for a melody.
5Press Select.
The TEL Ring Tone setting appears.
OR
Press Exit to cancel without saving changes.
6Follow steps 1–4 above to choose a tone, and
press Select.
A confirmation tone plays.
D Mode CM1000CB body.fm Page 14 Friday, June 18, 2010 12:19 PM

Get set
DM1000 15 Copyright © 2010 Waxess USA
2
Set the ringer volume
You can set the ringer volume from menu. The
choices are
Off-Low-Medium-High.
1Press MENU, scroll to Ringer/Key Beep, and
press Select.
2Scroll to Ringer volume, and press Select.
The current ring volume setting is highlighted.
3Scroll to a volume setting. Each time you stop
on a setting a sample plays briefly.
4Scroll to the ring volume you want and press
Select.
A confirmation tone plays and the Ringer/Key
beep menu appears.
5Press Exit or OFF to return to the Standby
screen.
NIGHT VOLUME
You can set the volume for the ringer to a lower
level for night time between 9 p.m. and 6 a.m.
based on the phone’s internal clock.
1Press MENU, scroll to Ringer/Key Beep, and
press Select.
2Scroll to Night Volume and press Select.
3Use the or key to change the volume
setting.
D Mode CM1000CB body.fm Page 15 Friday, June 18, 2010 12:19 PM
DM1000 16 Copyright © 2010 Waxess USA
2
A sample of the volume level plays when you
move the cursor. The sample plays two seconds
for each ringer tone and 10 seconds for each
melody.
4Press Select to set the ringer.
A tone confirms the setting.
•Key beep
Set the phone so that you hear a beep each time
you press a button, or turn off the beep feature.
1Press MENU, scroll to Ringer/Key Beep, and
press Select.
2Scroll to Key beep, press Select, then choose
On or Off.
3Press OK to enter the setting.
A tone confirms the setting and the Ringer/Key
beep menu appears.
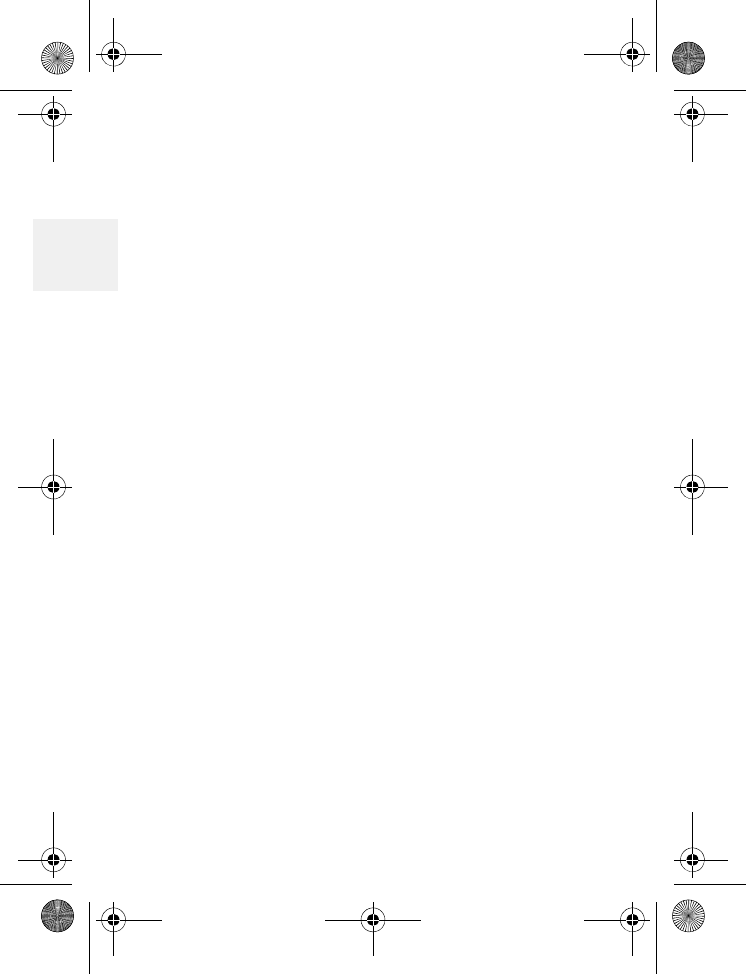
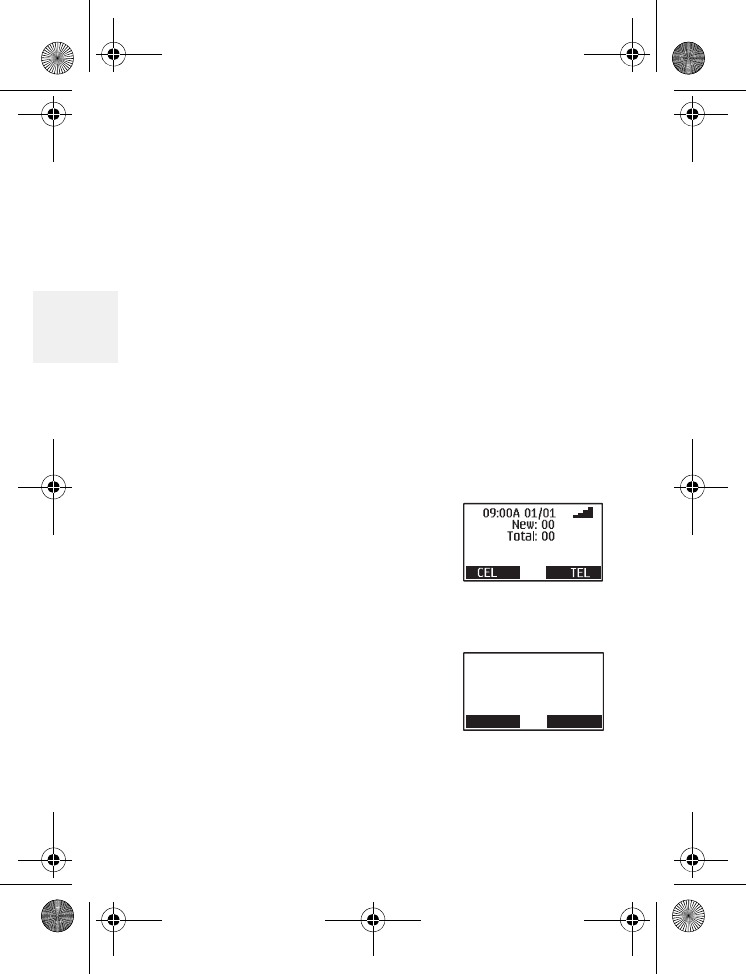
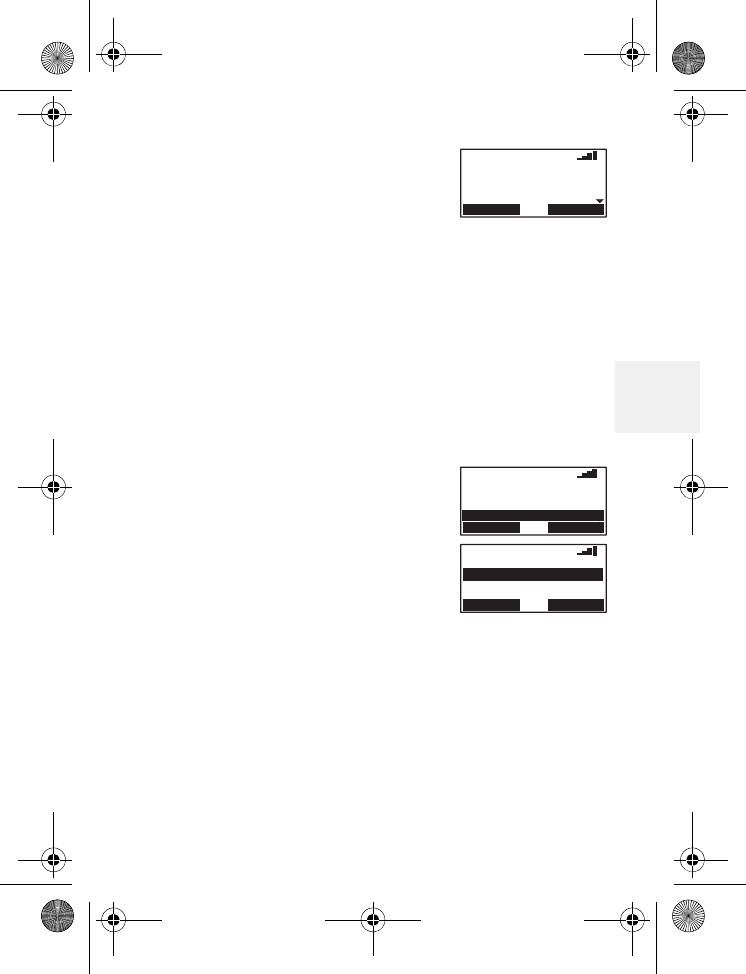
•Area codes
Enter up to three area codes.
With local area codes stored, the
phone can distinguish between
local and long distance calls.
1Press MENU.
2Scroll to Setup, then press Select.
3Scroll to Area Code, and press Select.
Area Code
Area Code
Area Code
Area Code
EXIT
D Mode CM1000CB body.fm Page 16 Friday, June 18, 2010 12:19 PM
Get set
DM1000 17 Copyright © 2010 Waxess USA
2
4Use the keypad to enter the area code number,
then press OK.
If you make a mistake, press FLASH/DEL to erase
the last digit entered.
5Press OK to set the code.
A beep confirms the setting and the Setup
menu appears.
6Press Exit or OFF to return to the Standby
screen.
Add/remove a 1
With area codes stored in memory, the and
keys have a unique function in phone memory
dialing.
If you need to add a 1 to a 10–digit phone number
for proper dialing in your area, press . Press
again to remove the number 1. When retrieving a
number from the Caller ID log, use the key to
add or remove a 1. This feature is not available
when using Redial.
D Mode CM1000CB body.fm Page 17 Friday, June 18, 2010 12:19 PM
DM1000 18 Copyright © 2010 Waxess USA
2
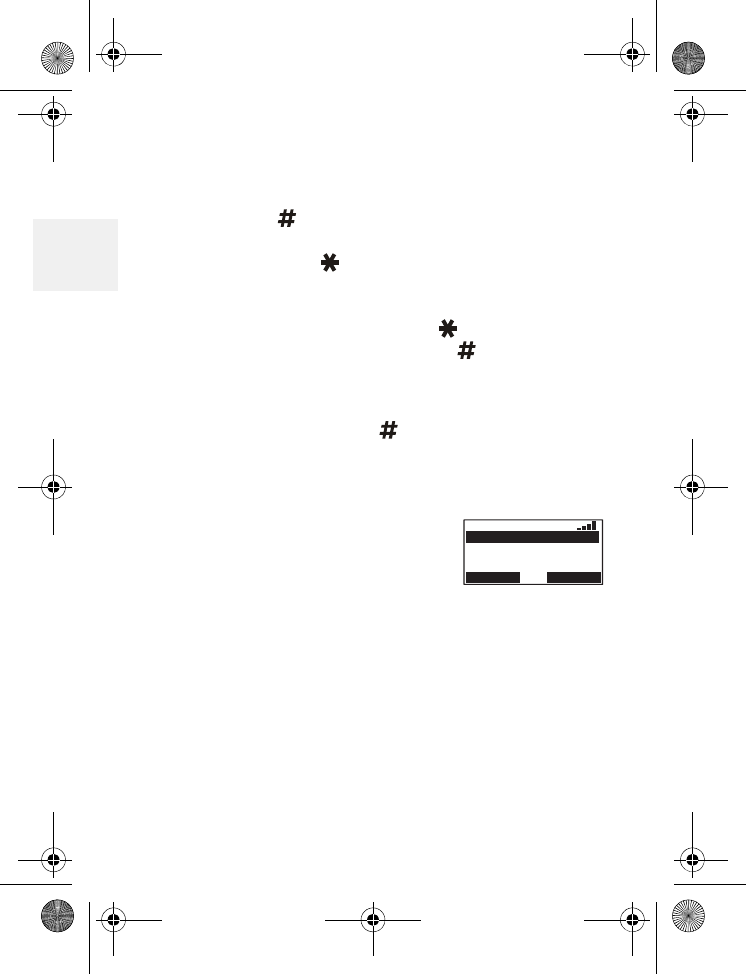
Add/remove area code
If you need to add the area code to a 7–digit
number, press to display the area code list. Scroll
to the correct area code, and press OK. At this point
you can also press to add the number 1, if
needed.
To remove the area code, press to remove the
number 1 (if present), then press .
Note: When dialing numbers from the Caller ID
log, area codes stored in the phone are not
accessible. Press and use the keypad to
add the area code. This feature is not
available when using Redial.
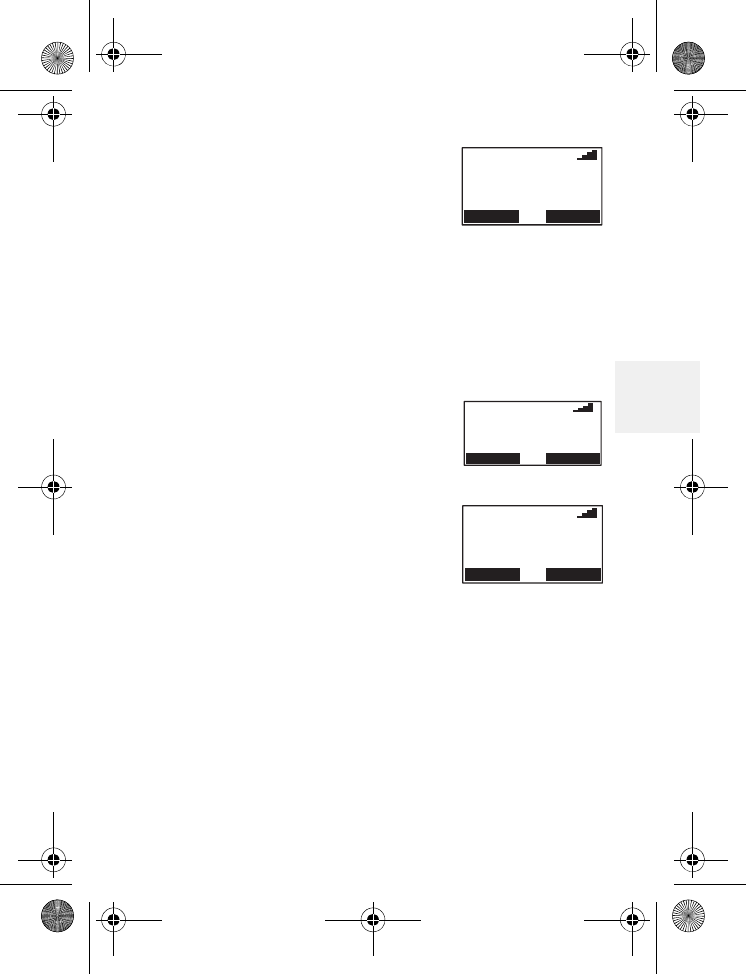
•Language
1Press MENU, scroll to Setup,
and press Select.
2Scroll to Language, and press
Select.
The highlight bar shows the current language
setting.
3Scroll to the language you want, and press
Select.
A beep confirms the setting and the Setup
menu appears. The menu appears in the
language you selected.
09:00A 01/01
Spanish
French
Portuguese
SELECT EXIT
English
D Mode CM1000CB body.fm Page 18 Friday, June 18, 2010 12:19 PM
Get set
DM1000 19 Copyright © 2010 Waxess USA
2
•LCD contrast
1Press MENU, scroll to Setup, and press Select.
2Scroll to LCD Contrast, and press Select.
3Pressto darken the display orto lighten the
display.
4Press OK to set the contrast.
•Name
Your phone arrives with the name “Base”
preassigned to the base. Each handset receives a
number (1–4) in the order of registration. You can
assign a unique name to the base and even change
the number and name assigned to a handset.
1Press MENU, scroll to Setup, and press Select.
2Scroll to Name the Unit and press Select.
3Enter the name and press Select. See “Enter
names and characters” on page 30.
A tone confirms the setting.
•Handset registration
Register
You can register up to three more handsets with the
base. Each new cordless handset must be electronically
registered with the base. The cordless handset
included in this package is preregistered at the factory
with the base. If it somehow becomes deregistered,
use this procedure to reregister the handset.
D Mode CM1000CB body.fm Page 19 Friday, June 18, 2010 12:19 PM
DM1000 20 Copyright © 2010 Waxess USA
2
1On the handset, press MENU, scroll to Setup
and press Select.
2Scroll to Register and press Select.
The display shows “Press and hold Intercom
on base, then OK.”
3Press and hold Intercom (at least two seconds)
on the base until you hear a beep.
4Then, press OK on the handset.
Registration takes only a few seconds.
When registration completes,
you hear a tone and this
message appears on the LCD
screen.
Deregister
1Press MENU, scroll to Setup, and press Select.
2Scroll to Deregister and press Select.
A list of registered cordless handsets appears.
3Scroll to the handset you want to deregister and
press Select.
The confirmation message “Delete
registration?” appears.
4Press Yes to confirm, or press No to return to
the previous screen.
When deregistration is complete, the
confirmation message “Handset 1 is
deregistered” appears.
D Mode CM1000CB body.fm Page 20 Friday, June 18, 2010 12:19 PM
GO!
DM1000 21 Copyright © 2010 Waxess USA
2
3GO!
•CDMA Activation
Please refer to the enclosed sheet for details on
activating service with your cellular service
provider.
•Make a wireless call
Note: When making a wireless call, no dial tone is
generated until the phone connects to the
cellular network.
Cordless
handset
Speakerphone
on base Corded handset
on base
•Press CEL
•Enter number
•Press CEL
OR
•Enter number
•Press CEL
•Enter number
•Press CEL •Lift handset off
base
•Enter number
•Press CEL
•To end the
call, Press OFF •To end the
call, press SP-
PHONE or OFF
•To end the call,
replace the
handset
D Mode CM1000CB body.fm Page 21 Friday, June 18, 2010 12:19 PM
DM1000 22 Copyright © 2010 Waxess USA
3
•Make a landline call
Set earpiece
volume
ON CORDED HANDSET
During a call, move the
selector switch to L, M, or
H.
ON BASE SPEAKER
PHONE
During a call, press for
louder or for softer.
Cordless
handset
Speakerphone
on base
Corded handset
on base
•Press TEL
•Enter number
OR
•Enter number
•Press TEL
•Enter number
•Press TEL •Lift handset off
base
•Enter number
•Press TEL
•To end the
call, Press OFF •To end the
call, press SP-
PHONE or OFF
•To end the call,
replace the
handset
D Mode CM1000CB body.fm Page 22 Friday, June 18, 2010 12:19 PM
GO!
DM1000 23 Copyright © 2010 Waxess USA
3
ON CORDLESS HANDSET
DURING A CALL
Press for louder or for
softer.
•Calling options
Speed dial
1Set up keys 0–9 with numbers in the phone
book for speed dial. See “Enter numbers
directly” on page 31.
2Press and hold the appropriate number key,
then press CEL or TEL.
If you need to add or remove the number 1 or the
area code for proper dialing in your area, see “Add/
remove a 1” on page 17, or “Add/remove area
code” on page 18.
Redial
The phone memory holds the last five numbers
dialed. Each number can have up to 32 digits.
1Press REDIAL/P to search through the numbers.
In the upper left corner, the LCD shows a C if
the call was on the cellular line or a T if the call
was on the landline.
2Press CEL or TEL to redial the number.
D Mode CM1000CB body.fm Page 23 Friday, June 18, 2010 12:19 PM

DM1000 24 Copyright © 2010 Waxess USA
3
Pause (for TEL line use only)
While entering a phone number, press REDIAL/P to
add a two second pause. The pause is added as the
digits are transmitted when dialing. Press REDIAL/P
again to make the pause longer. The letter P
appears in the number each time you enter the
pause.
Note:
• Pause is available only when using the TEL line.
Pause may not be recognized as a valid number on
the cellular network and calls may not connect.
• Pause is disabled when dialing on the TEL line as
a second line, such as while the cellular line is
connected to another call. Pause is also disabled
during conference calls.
•Answer a wireless call
When the phone receives a wireless call:
• The base and all registered cordless handsets
ring.
• The caller ID, if available, appears on the LCD
screen.
D Mode CM1000CB body.fm Page 24 Friday, June 18, 2010 12:19 PM
GO!
DM1000 25 Copyright © 2010 Waxess USA
3
•Answer a landline call
When the phone receives a landline call
• The base and all registered cordless handsets ring.
• Caller ID, if available, appears on the LCD screen.
Cordless
handset Speakerphone
on base Corded handset
on base
•Press CEL •Press CEL
OR
•Press SP-PHONE
•Lift handset off
base
•To end the
call, press OFF
twice
•To end the call,
press SP-PHONE
or OFF
•To end the call,
replace the
handset
Cordless
handset Speakerphone
on base Corded handset
on base
•Press TEL •Press TEL
OR
•Press SP-PHONE
•Lift handset off
base
•To end the
call, press OFF
twice
•To end the call,
press SP-PHONE
or OFF
•To end the call,
replace the
handset
D Mode CM1000CB body.fm Page 25 Friday, June 18, 2010 12:19 PM

DM1000 26 Copyright © 2010 Waxess USA
3
•In-Call operations
Place a call on Hold
• Press Hold to place a call on hold.
• Press Exit to return to the call.
Mute a call
• Press Mute to temporarily cut off the microphone.
• Press Unmute to return to the call
Transfer a call
You can transfer calls between the base and the
handsets, and from handset to handset. This
function works for both cellular and landline calls.
BASE TO HANDSET TRANSFER
1Press Intercom, scroll to the
handset (or base) that you
want and press Page.
The base and the handset
involved in the transfer
operation begin beeping (a
different tone than with the
Intercom function), and a
message appears on the LCD.
If there is no answer within 60 seconds, the
D Mode CM1000CB body.fm Page 26 Friday, June 18, 2010 12:19 PM
GO!
DM1000 27 Copyright © 2010 Waxess USA
3
page and the transfer are cancelled and you
return to the call. You can press Exit to return
to the call immediately.
2Press Answer to take the
transfer, or press Exit to
reject the transfer.
The call returns to the device
that started the transfer -
handset or base.
Note: When transferring between base and a
handset, the caller is transferred
immediately and is not put on hold.
3Press OFF to end the call.
OR
Follow the steps above to transfer the call back
to the base.
You can also use the HOLD function to start a
transfer. During a call, press HOLD, select
Transfer, then follow the steps above.
HANDSET TO HANDSET
TRANSFER
1During a call, press Intercom,
scroll to the handset you
want, and press Page.
The handset involved in the
transfer operation begins
beeping (a different tone
than with the Intercom
D Mode CM1000CB body.fm Page 27 Friday, June 18, 2010 12:19 PM
DM1000 28 Copyright © 2010 Waxess USA
3
function) and a message appears on the LCD.
If there is no answer within 60 seconds, the
page and the transfer are cancelled and you
return to the call. You can press Exit to return
to the call immediately.
2Press Answer on the handset
receiving the page.
The call is now on hold, and
the parties with the handsets
can speak.
3Press Exit on the handset that started the
transfer.
The call is now transferred to the receiving
handset.
On the receiving handset, you can press OFF or
Exit to reject the transfer. Then, the call returns
to the handset that started the transfer.
4Press OFF to end the call.
You can also use the HOLD function to start a
transfer. During a call, press HOLD, select
Transfer, then follow the steps above.
D Mode CM1000CB body.fm Page 28 Friday, June 18, 2010 12:19 PM

GO!
DM1000 29 Copyright © 2010 Waxess USA
3
Set up a conference call
Conference calling lets you make a call with two
other participants. The phone places the third call
with the service (cellular or landline) that is not
being used. The Conference feature is available only
with the cordless handset.
1Make a normal call to the first participant.
2Press Hold, scroll to Initiate a call, and press
Select.
3Enter the number of the next participant, and
press CEL (or TEL).
When the other participant answers, you can
speak privately without the other participant.
Press FLIP to change between the participants.
The LCD shows which line (CEL or TEL) is in
use.
4 Press CONF to connect all participants.
5To drop a participant from the conference call
press CEL DROP or TEL DROP.
Press OFF to drop all participants and end the
call.
•Phone book
Use the phone book to store up to 50 names and
numbers.
D Mode CM1000CB body.fm Page 29 Friday, June 18, 2010 12:19 PM
DM1000 30 Copyright © 2010 Waxess USA
3
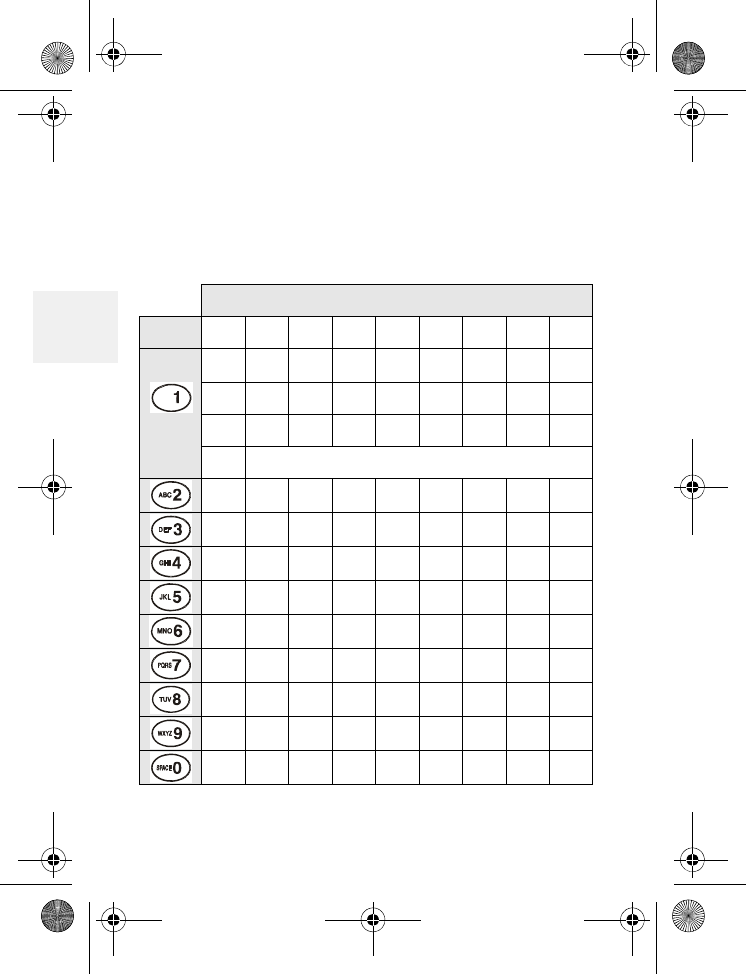
Enter names and characters
Use the keypad to choose the characters you want.
Each time you press a key, the letters on that key
appear first as capital letters, then as lower case
letters, then the number corresponding to that key.
Number of times key pressed
keys123456789
1!“*#$%&‘
( )<>+ , - . /
:;?@\=^_‘
~
ABCabc2
DEFdef3
GH I gh i 4
JKL j k l 5
MNOmno6
PQRSpq r s7
TUVtuv8
WXYZwxyz9
0Space
D Mode CM1000CB body.fm Page 30 Friday, June 18, 2010 12:19 PM
GO!
DM1000 31 Copyright © 2010 Waxess USA
3
• Use and to scroll left or right.
• Press Clear to erase a character.
Enter numbers directly
1Press MENU, scroll to Memory, and press
Select.
2Scroll to Phone book, and press Select.
3Scroll to Add new entry, and press Select.
“Name?” appears in the display.
4Use the letters on the keypad to enter the name
(up to 16 characters) and press OK.
Press OK to leave Name blank.
“Number?” appears in the display.
5Use the keypad to enter the number with area
code and press OK.
The Distinctive ring setting appears.
This feature lets you add a special ring tone to
phone numbers that you store in memory.
During an incoming call, the phone compares
the number to the distinctive ring list, and when
it finds a match, the distinctive ring plays.
Then, you can recognize a caller just from the
type of ring tone you hear.
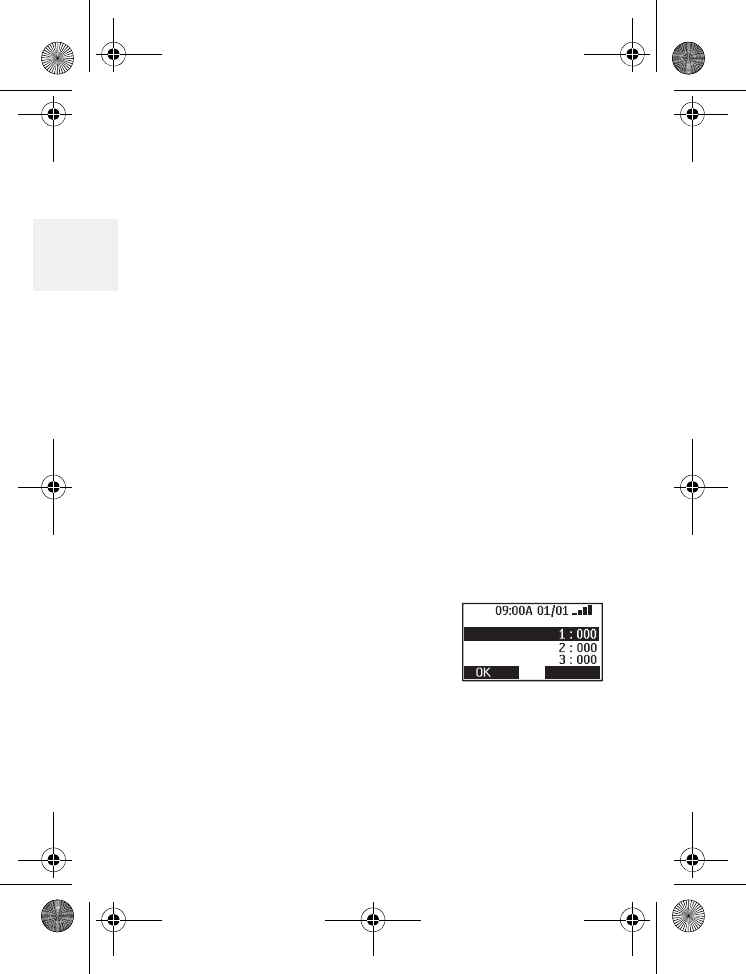
6Scroll to Ringer 1, 2, or 3, Melody 1, 2, or 3, or
No setting and press OK.
Melody tones are only available on the handset.
The Speed Dial screen appears.
D Mode CM1000CB body.fm Page 31 Friday, June 18, 2010 12:19 PM

DM1000 32 Copyright © 2010 Waxess USA
3
7Choose an empty Speed Dial key number and
press OK.
A beep confirms the entry and the Standby
screen appears.
Press Skip to complete the entry without
registering it in Speed Dial.
Edit names or numbers
1While in the phone book, scroll to Find name
and press Select.
2Scroll to the name you want to edit and press
Select.
Call/Dial, Edit, Delete, and Delete all appear.
3Use the or key to highlight Edit and press
Select.
4Edit the name.
OR, Press OK to skip to the number.
5Edit the number if needed and press OK.
You hear a tone, Complete appears in the LCD
and the list of names appears.
Enter numbers from Caller ID
1While in the Caller ID log, scroll to the name/
number you want to enter in the phone book
and press Select.
Call/Dial, Save, Edit, and Delete appear.
2Scroll to Save and press Select.“Name?”
appears.
D Mode CM1000CB body.fm Page 32 Friday, June 18, 2010 12:19 PM
GO!
DM1000 33 Copyright © 2010 Waxess USA
3
3If the Caller ID shows a name, press OK to
continue, or use the keypad to enter the name,
then press OK to continue.
4If the Caller ID shows a number, press OK.
You can also use the keypad to enter a number,
then press OK.
The Distinctive ring settings appear.
5Scroll to the ringer tone or melody you want,
and press OK.
The Speed dial setting appears.
6Choose an empty Speed Dial key number, and
press OK.
A beep confirms the entry and the Standby
screen appears.
OR
7Press Skip to complete the entry without
registering it in Speed Dial.
A tone confirms the entry and Complete
appears in the LCD. After a brief pause, the
name and number you just entered appears.
8Press CEL or TEL to make the call.
Press OFF to return to Standby.
Use the and keys to enter a 1 or area
codes if needed for proper dialing in your area.
See “Add/remove a 1” on page 17. Or “Add/
remove area code” on page 18.
D Mode CM1000CB body.fm Page 33 Friday, June 18, 2010 12:19 PM

DM1000 34 Copyright © 2010 Waxess USA
3
Call from phone book
1Press MENU, scroll to Memory, and press
Select.
2Scroll to Phone Book, and press Select.
3Scroll to Find Name, and press Select.
4Scroll to the name you want to dial and press
Select.
Four options appear on the LCD.
5Scroll to Call/Dial and press Select.
The name and number appear in the LCD.
6Press CEL or TEL to make the call.
Speed dial
For quick, one-button dialing, you can store up to
10 numbers in Speed Dial memory. See “Speed
dial” on page 23.
•Messages
Note: You must have a subscription to use these
message services. Check with your service
provider for details.
Voice messages
The DM1000 works with both cellular and landline
voicemail.
D Mode CM1000CB body.fm Page 34 Friday, June 18, 2010 12:19 PM
GO!
DM1000 35 Copyright © 2010 Waxess USA
3
SET UP VOICEMAIL
1Press MENU, scroll to Setup, and press Select.
2Scroll to Messages, and press Select.
3Scroll to Voicemail setup, and press Select.
The message VM Number (CEL)? appears.
4Use the keypad to enter the voicemail number
for your cellular service provider, then press OK.
The message VM number (TEL)? appears.
5Use the keypad to enter the voicemail number
for your landline service, then press OK.
A beep confirms your entry.
CHECK VOICEMAIL MESSAGES
When new messages are waiting, the message
LEDs on the base and the handset blink.
The LED blinks faster for a landline voicemail,
slower for a cellular voicemail, and equally if there
are messages for both landline and cellular.
1Press MENU, scroll to Messages, and press
Select.
2Scroll to Voicemail and press Select.
D Mode CM1000CB body.fm Page 35 Friday, June 18, 2010 12:19 PM
DM1000 36 Copyright © 2010 Waxess USA
3
3Scroll to the voicemail–CEL Voicemail or TEL
Voicemail–with the message waiting and press
Select.
To manage messages (such as saving, deleting, or
forwarding), follow the commands for your specific
voicemail system.
Short Message Service (SMS)
This feature–available only with cellular service–lets
you send and receive text messages to other SMS
enabled cellular phones through the CEL connection
at the base or the cordless handset. Check with
your service provider for availability.
The options available in SMS are:
•Write new
•Saved
•In Box
•Storage status
Note: Due to the data access process in the
DM1000, the phone may not respond
instantly when keys are pressed. This is
normal operation, and any delay is no more
than one or two seconds.
D Mode CM1000CB body.fm Page 36 Friday, June 18, 2010 12:19 PM

GO!
DM1000 37 Copyright © 2010 Waxess USA
3
WRITE A NEW MESSAGE
1Press MENU, scroll to Messages, and press
Select.
2Scroll to SMS, and press Select.
Write new is highlighted.
3Press Select.
4Use the keypad to write a message up to 160
characters long, including spaces and special
characters. See “Enter names and characters”
on page 30.)
5When you finish writing, press OK.
The new message submenu appears with Send,
Edit, Save.
If the phone receives a call or someone initiates a
call on another handset while you are writing a
message, the message is automatically stored in
Saved messages. You can access the message later,
edit the message, if needed, then send the message
by following the steps below.
SEND A NEW MESSAGE
1Write a message, then press OK.
Send, Edit, and Save appear.
2Scroll to Send, and press Select.
Recipient No.? appears.
3Enter the phone number of the recipient and
press OK.
D Mode CM1000CB body.fm Page 37 Friday, June 18, 2010 12:19 PM

DM1000 38 Copyright © 2010 Waxess USA
3
To send a message to a number that is stored
in the phone book, press MENU, scroll to the
entry you want, and press Select.
Note: Verify that the CEL line is not in use
before sending the message.
A confirmation message appears. Then, the
SMS menu appears. Press EXIT to return to the
SMS main menu.
4To save the message before exiting, follow the
steps in “Save a new message.”
The message is stored in Saved messages for
easy viewing later.
OR
Press No to exit.
SAVE A NEW MESSAGE
1After writing a message, press OK.
2Scroll to Save, and press Select.
The message is stored in Saved messages for
easy viewing later. Press EXIT to return to the
SMS main menu.
VIEW SAVED MESSAGES
1Press MENU, scroll to Messages, press Select.
2Scroll to SMS, and press Select.
3Scroll to Saved, and press Select.
4Scroll to the message you want to read, and
press Select.
D Mode CM1000CB body.fm Page 38 Friday, June 18, 2010 12:19 PM
GO!
DM1000 39 Copyright © 2010 Waxess USA
3
RECEIVE A MESSAGE
When the DM1000 receives a text
message, you hear a distinctive
ring tone and an envelope icon
appears in the display. The message goes to the
Inbox.
CHECK THE INBOX FOR READ AND UNREAD
(NEW) MESSAGES
1Press MENU, scroll to Messages, and press
Select.
2Scroll to SMS, and press Select.
3Scroll to Inbox, and press Select.
4Scroll to UnRead Messages, and press Select
The phone number from which the message
originated displays.
5Press Select again to read the message.
If you have no unread messages, an error tone
sounds.
OR
6Scroll to Read messages, and press Select.
The phone number from which the message
originated displays.
7Scroll to the message you want to read, and
press Select.
D Mode CM1000CB body.fm Page 39 Friday, June 18, 2010 12:19 PM

DM1000 40 Copyright © 2010 Waxess USA
3
When you exit the Unread Messages list, any
messages that have not been viewed are
automatically stored in the Read Messages list. Be
sure to view all unread messages before exiting the
Unread Message list.
REPLY TO A MESSAGE
1While reading a message, press Select.
2Scroll to Reply, and press Select.
Write a reply the same way as you write a new
message, press OK, then Select to send the
message.
FORWARD A MESSAGE
1While reading a message, press Select.
2Scroll to Forward and press Select.
3Enter the recipient’s number and press OK.
To send to a number from the phone book,
press MENU, scroll to the entry you want, and
press Select.
Note: Forwarding a message can only be done
through a CEL connection.
DELETE A MESSAGE
While reading a message, press Select, scroll to
Delete, and press OK.
D Mode CM1000CB body.fm Page 40 Friday, June 18, 2010 12:19 PM
GO!
DM1000 41 Copyright © 2010 Waxess USA
3
CALL THE MESSAGE SENDER
While viewing a message, press Select, scroll to
Call, and press Select. The phone dials the number
automatically on the cellular service.
CHECK SMS STORAGE STATUS
1Press MENU, scroll to Messages, and press
Select.
2Scroll to SMS, and press Select.
3Scroll to Storage Status and press Select.
The storage status appears.
The Storage status feature shows how many SMS
messages are saved in memory or stored in the
inbox. Storage capacity is limited, and there is no
indication that the memory is full. When the
message memory gets full, no more SMS messages
can be received, so it is important to clear the
memory frequently.
D Mode CM1000CB body.fm Page 41 Friday, June 18, 2010 12:19 PM
DM1000 42 Copyright © 2010 Waxess USA
3
4 More features
•Caller ID
This feature helps identify incoming calls and
requires subscription through your service provider.
When Caller ID is active, your phone may display
the caller’s name and phone number if the landline
or cellular service supports it.
Note: Caller ID and Call Waiting are usually
included with cellular calling plans, but
landlines may require a separate
subscription. Check with your service
provider for details.
Caller ID information
SINGLE CEL OR TEL CALL
In Standby, the Caller ID normally
shows new and total calls received.
On a single incoming call, Caller
ID shows the time and date, the
caller’s name, and the number.
CEL or TEL blinks depending on
the type of
call–cellular service or landline.
CEL TEL
09:00A 01/01
123-555-4567
Waxess
Ring from CEL
C
D Mode CM1000CB body.fm Page 42 Friday, June 18, 2010 12:19 PM
More features
DM1000 43 Copyright © 2010 Waxess USA
4
SIMULTANEOUS CEL AND TEL
CALL
When both landline and cellular
services are active, the phone can
receive both types of calls at the same time or very
close together. When that happens, Caller ID
information for both calls appears in the display and
the call arriving first is on top.
CALL WAITING
If you receive another call during
a call in progress, information for
both calls appears in the displays
Press FLASH/DEL to answer the
new call. Press FLASH/DEL again to
return to the first call.
If the current call is on the CEL
line and another call arrives also
on the CEL line, a “C” blinks in the display.
If the current call is on a CEL line and the new call
is on the TEL line, the “C” remains solid, and the “T”
indicator blinks.
If you receive a call waiting signal during the
conference call, press FLASH to answer the call.
CEL TEL
09:00A 01/01
CEL: 123-555-4567
TEL: 765-555-4321
Waxess
Global Group
C
Call in progress
MUTE HOLD
123-555-4567
Talk (TEL) 2:25
09:00A 01/01
CT
New call
MUTE HOLD
123-555-4567
Waxess
Talk (TEL)
CALL WAITING
2:25
10:00A 01/05
T
D Mode CM1000CB body.fm Page 43 Friday, June 18, 2010 12:19 PM

DM1000 44 Copyright © 2010 Waxess USA
4
Check the log
The Caller ID log lists the name associated with the
Caller ID data. If the data received does not have
proper name data, the phone number is listed
instead.
Press to scroll through the log from newest to
oldest. Press to scroll through the log from oldest
to newest. The log holds up to 50 entries.
Dial a number
1Scroll to a name/number displayed, and press
Select twice.
The number appears in the display.
If the number’s area code is the same as an
area code stored in the phone memory (see
“Area codes” on page 16), the area code may
not appear. If the area code is required for
dialing, press # to add the area code to the
number. If the number 1 is also required for
dialing, press * to add 1 to the beginning of the
number.
2Press CEL or TEL to make the call.
Save a number
1Scroll to a name/number displayed, and press
Select.
D Mode CM1000CB body.fm Page 44 Friday, June 18, 2010 12:19 PM

More features
DM1000 45 Copyright © 2010 Waxess USA
4
2Scroll to Save, and press Select.
3Enter a name if needed (see “Enter names and
characters” on page 30) and press OK.
4Edit the number if needed and press OK.
The Distinctive Ring menu appears.
5Scroll to the setting you want and press OK.
The Speed Dial menu appears.
6Scroll to the speed dial number that you want
for this new entry and press OK.
OR
Press Skip to exit. A tone confirms that the
entry is stored in the phone book, and the name
and number appear in the display.
7Press OFF twice to return to Standby.
Delete a number
ONE BY ONE
1Press to scroll through the log from newest
to oldest. Press to scroll through the log from
oldest to newest.
2Stop on the number you want, press Select.
3Scroll to Delete, and press Select.
A confirmation message appears.
4Press Yes to delete the number.
A tone confirms your choice and the Caller ID
log appears.
D Mode CM1000CB body.fm Page 45 Friday, June 18, 2010 12:19 PM
DM1000 46 Copyright © 2010 Waxess USA
4
OR
Press NO and the Caller ID menu appears.
DELETE ALL
1Press , then press Select.
2Scroll to Delete ALL and press Select.
A confirmation message appears.
3Press Yes to delete all data from the Caller ID
log.
OR
Press NO and the Caller ID menu appears.
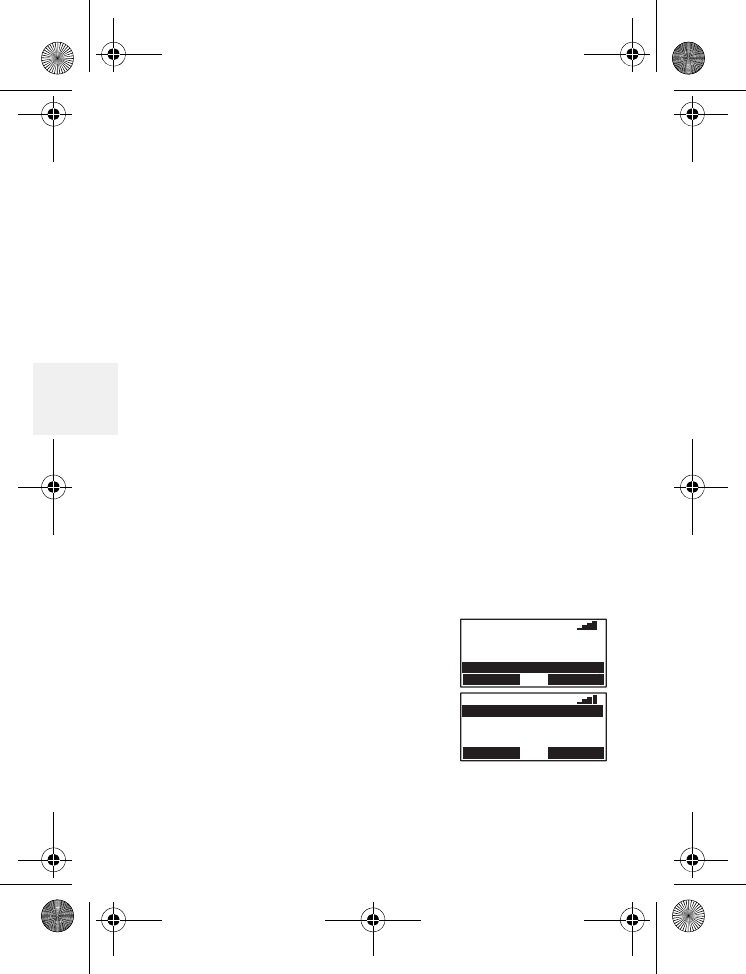
•Call Forwarding
This feature lets you redirect an incoming call to
another telephone number.
Activate Call Forwarding
1Press Menu, scroll to Set Up and press Select.
2Scroll to Call Forwarding and
press Select.
3Select Activate.
SELECT EXIT
Call Forwarding
09:00A 01/01
CEL Number
Phone Set Up
LCD Contrast
SELECT EXIT
Deactivate
09:00A 01/01
Activate
D Mode CM1000CB body.fm Page 46 Friday, June 18, 2010 12:19 PM
More features
DM1000 47 Copyright © 2010 Waxess USA
4
4Enter the telephone number
to which you want to direct
the call and press OK, or press
Clear to erase the number.
Complete appears to confirm
your selection.
5Forward FCN ON displays in the LCD.
NOTE:
To avoid missing calls, follow the steps below
to deactivate Call Forwarding when no longer needed.
Deactivate Call Forwarding
1Press Menu, scroll to Set Up and press Select.
2Scroll to Call Forwarding and
press Select.
3Select Deactivate.
Complete appears to confirm
your selection.
•Page and Intercom
Page
The Page feature lets you locate the handset if it is
misplaced, but it also can be answered by the
handset. Page can be initiated by the base or the
cordless handset.
OK CLEAR
123-555-1234
09:00A 01/01
Forward Number?
SELECT EXIT
Call Forwarding
09:00A 01/01
CEL Number
Phone Set Up
LCD Contrast
SELECT EXIT
09:00A 01/01
Activate
Deactivate
D Mode CM1000CB body.fm Page 47 Friday, June 25, 2010 5:06 PM
DM1000 48 Copyright © 2010 Waxess USA
4
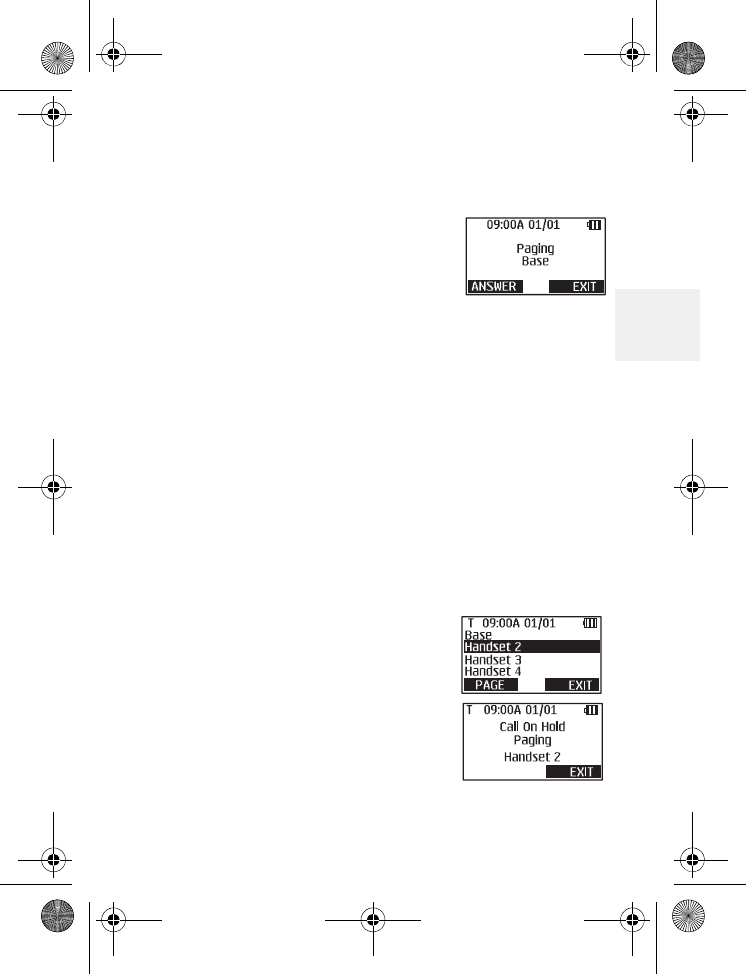
1Press INTERCOM on the base,
scroll to the handset you want
to page, and press PAGE.
OR
To send a page to all
registered handsets, select All and press PAGE.
The Page All feature is only available at the
base.
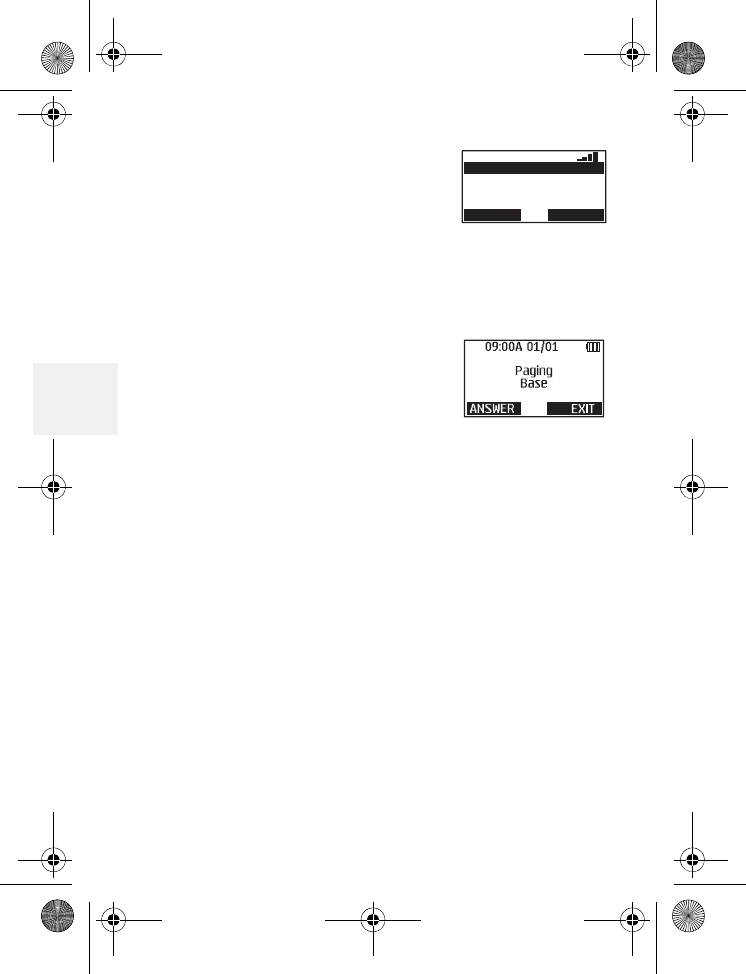
The handset beeps up to 60
seconds, and Paging Base
appears in the display.
2On the handset receiving the
page, press ANSWER to
connect with the base.
On Intercom appears in the display.
3Press Exit to stop the page without connecting
to the paging party through the Intercom.
For Page All, the page stops when any handset
responds to the page. Intercom is not available
for Page All.
Intercom
The Intercom feature is available on the handset
and the base.
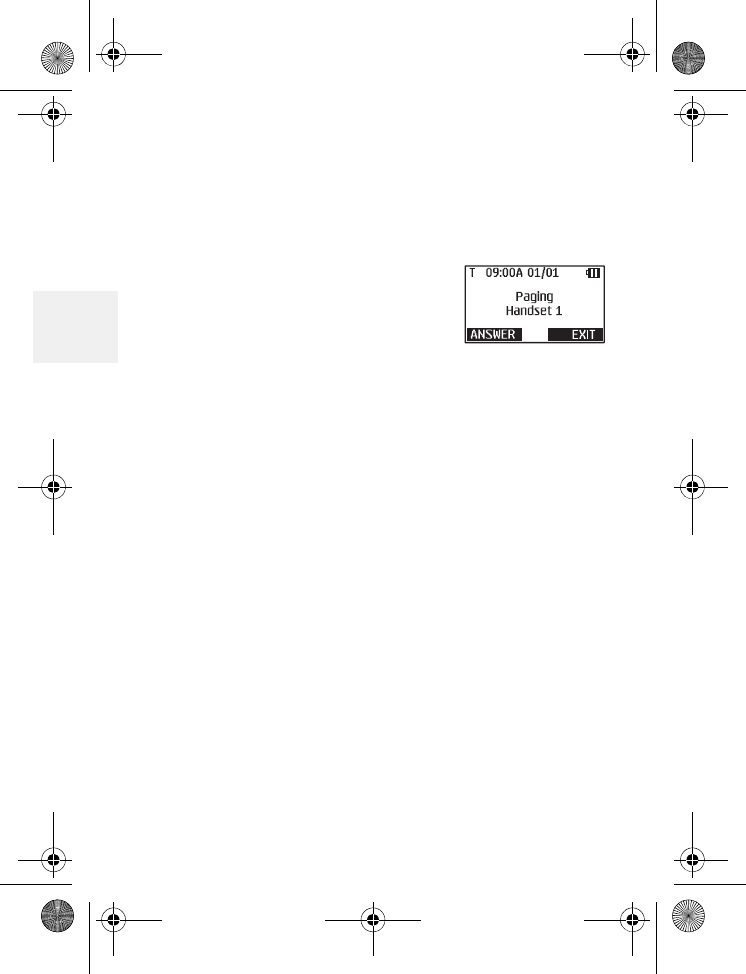
1Press INTERCOM, scroll to the handset you want
(or base), and press PAGE.
The handset or base beeps up to 60 seconds
Handset 3
09:00A 01/01
ALL (Page Only)
Handset 4
PAGE EXIT
Handset 2
D Mode CM1000CB body.fm Page 48 Friday, June 18, 2010 12:19 PM

More features
DM1000 49 Copyright © 2010 Waxess USA
4
and Paging Handset 1 (or 2, 3, or 4) appears
in the display.
2To answer:
• On the handset, press ANSWER to connect
with Intercom.
• On the base, lift the corded handset,
press ANSWER, or press SP-PHONE to
connect with the Intercom.
During an Intercom connection, use Mute to
turn off the microphone at the base or on the
handset.
Note: While using INTERCOM, an incoming call
from the CEL line automatically terminates
the INTERCOM connection. An incoming call
from the TEL line will not terminate the
INTERCOM connection unless the call is
answered by the base or any handset.
•Two-line calling
The Dual Mode Communication Terminal is a
two-line phone that offers unique calling features
because it can be used to make or receive two
separate calls at the same time; one call on the
landline (TEL) service and the other on the cellular
(CEL) service.
D Mode CM1000CB body.fm Page 49 Friday, June 18, 2010 12:19 PM
DM1000 50 Copyright © 2010 Waxess USA
4
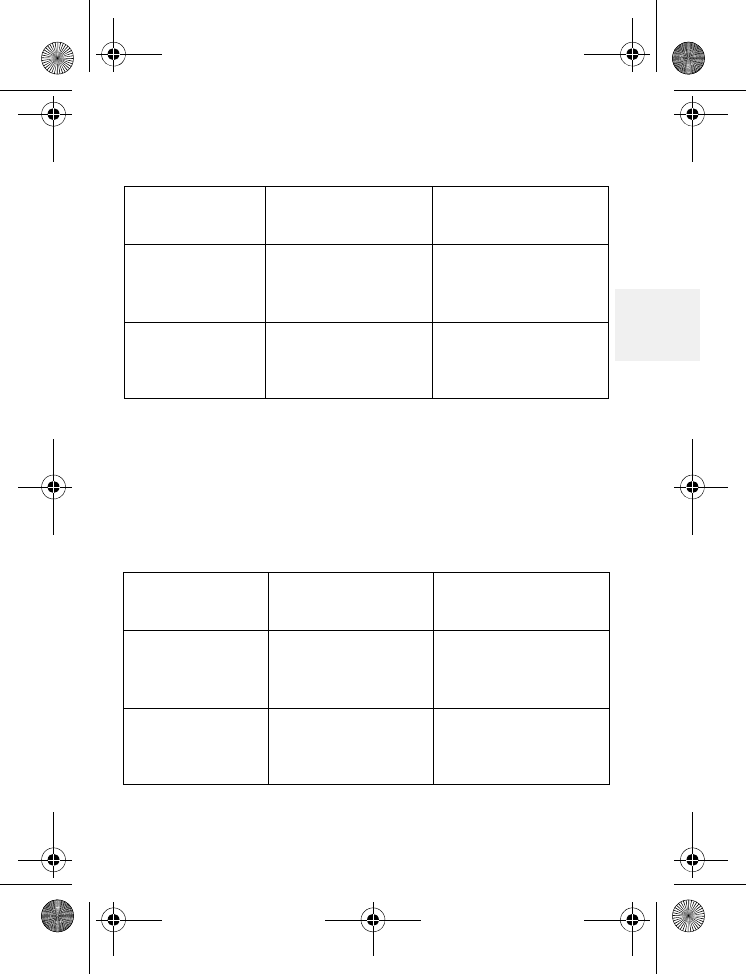
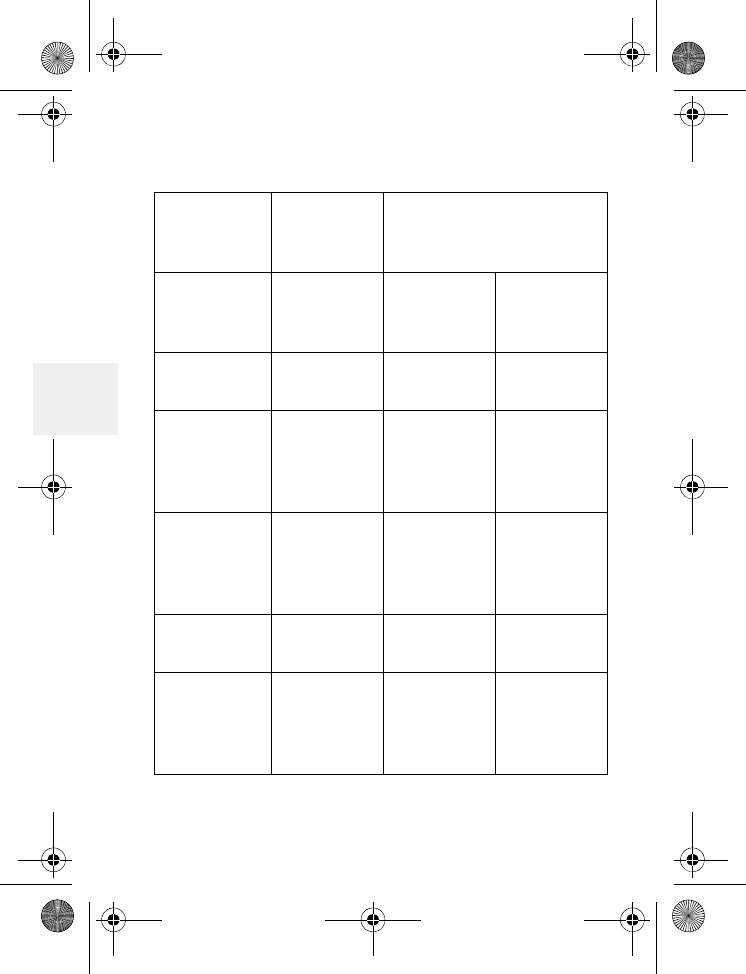
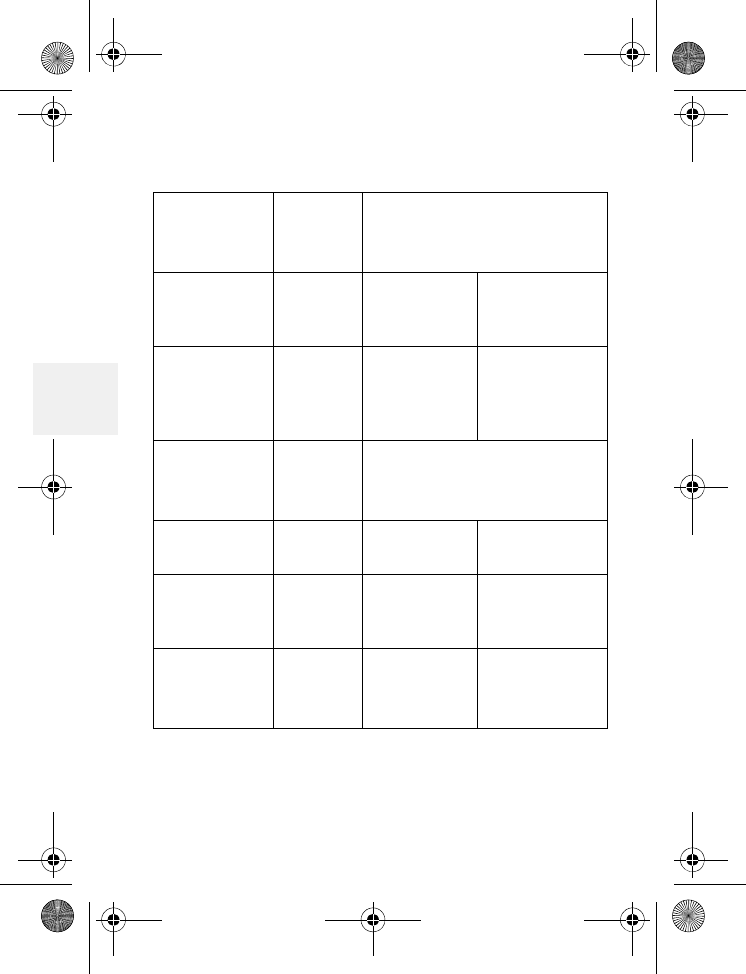
Quick reference chart
When
calling on: Line Second call can be
made:
Using Line:
Base Cellular Any
cordless
handset
Landline
Cordless
handset Cellular Base Landline
Cordless
handset Cellular Any
remaining
cordless
handset
Landline
Base Landline Any
remaining
cordless
handset
Cellular
Cordless
handset Landline Base Cellular
Cordless
handset Landline Any
remaining
cordless
handset
Cellular
D Mode CM1000CB body.fm Page 50 Friday, June 18, 2010 12:19 PM
More features
DM1000 51 Copyright © 2010 Waxess USA
4
Make two separate calls
1Use the base (corded handset or speakerphone)
to place a call–for example, a landline (TEL) call
(see “Make a landline call” on page 22).
2Place a cellular (CEL) call, for example, with a
handset that is not in use (see “Make a wireless
call” on page 21).
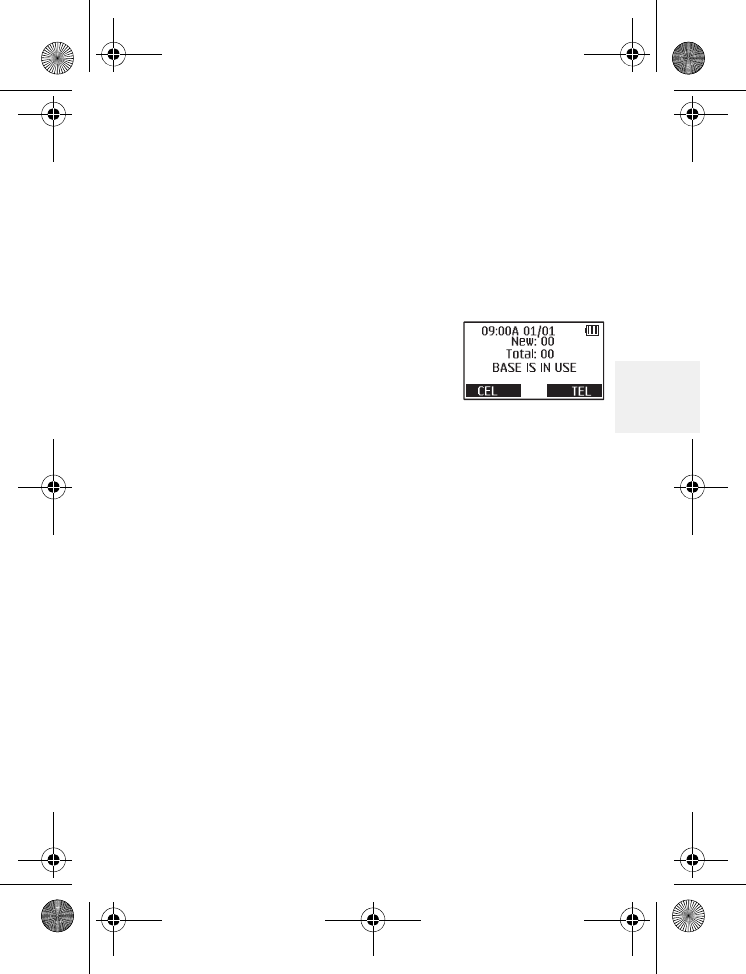
• The display on any handset or
base not in use shows
XXX in use; XXX means base or
handset in this case.
• The two calls are completely
separate and cannot be conferenced.
• If Barge-In is on (see “Barge-in” on page 52), and
the first call is made from a cordless handset on a
landline, other handsets can join the call by
pressing TEL; but the base can not join the call.
Receive two separate calls
1When a call comes in–for example, a landline
(TEL) call, answer it normally. In this example,
use the corded handset on the base. See
“Answer a landline call” on page 25.
2If a cellular (CEL) call comes in, use a cordless
handset and press CEL to answer it.
D Mode CM1000CB body.fm Page 51 Friday, June 18, 2010 12:19 PM

DM1000 52 Copyright © 2010 Waxess USA
4
Remember that the corded handset and the
speakerphone on the base cannot be used at the
same time.
Call waiting with two calls
1While a call is in progress (as in the above
example) and the landline (TEL) receives
another call, Call waiting appears in the display
and any other cordless handsets not in use will
ring.
2To answer the call, press FLASH/DEL on the base,
or TEL on any handset not in use.
If the new call comes in on a different line,
press the appropriate key (CEL or TEL)
regardless of whether you are using the base or
a handset.
•Barge-in
After placing a landline (TEL) call with a cordless
handset, this feature allows up to three other
registered cordless handsets to join the call. Before
using the Barge-In feature, read the following
information.
• The D-Mode CT comes with the Barge-In feature
set to off–it must be activated before use.
• If power to the base is interrupted, Barge-In must
be reactivated.
• The first cordless handset to place the call is the
D Mode CM1000CB body.fm Page 52 Friday, June 18, 2010 12:19 PM

More features
DM1000 53 Copyright © 2010 Waxess USA
4
“master” and fully controls the call. Other
registered handsets that join the call are “slaves”
and can only join or exit the call.
• Barge-In works only for cordless handsets during
a landline (TEL) call and is not operable on the
base.
Note: Remember that with Barge-In activated,
privacy may be compromised. Any
registered handset can join the call, but
there is no indication that another handset
joined the call.
D Mode CM1000CB body.fm Page 53 Friday, June 18, 2010 12:19 PM
DM1000 54 Copyright © 2010 Waxess USA
4
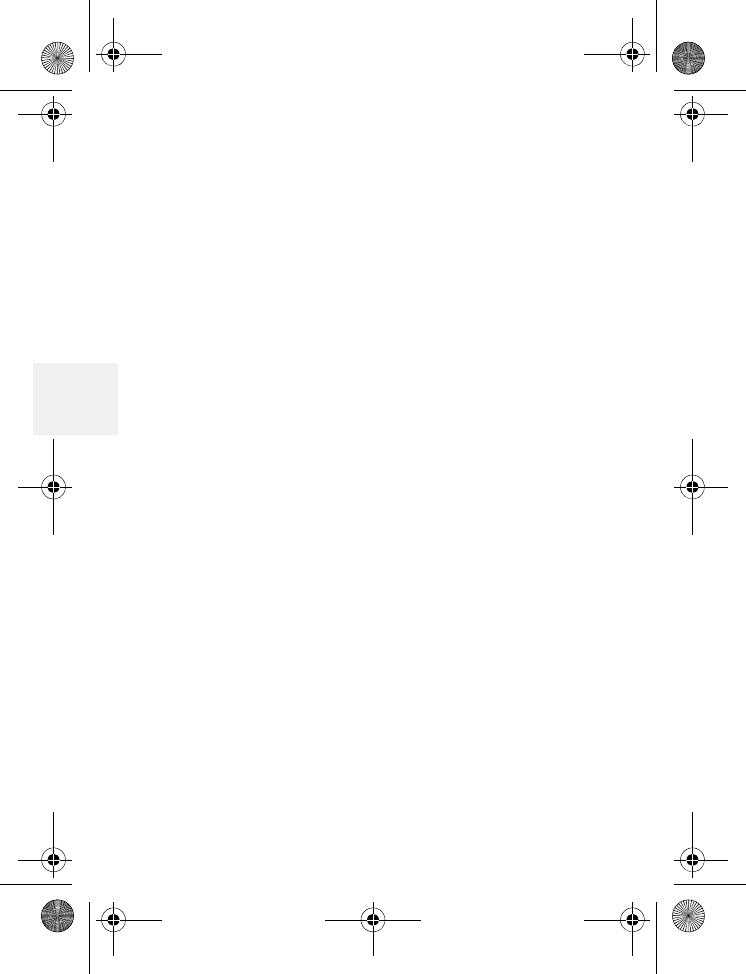
Quick reference chart
Notes: See next page.
When
calling on: Line Second call can be
made:
Using: Line:
Base1Cellular •1 or more
cordless
handsets
Landline2,4
1 cordless
handset Cellular •Up to 3
cordless
handsets
•base
Landline2,3,4
2 or more
cordless
handsets
Cellular Not available 5
Base Landline • 1 cordless
handset Cellular2,4
1 cordless
handset Landline • 1 cordless
handset
•base
Cellular2,4
2 or more
cordless
handsets
Landline • 1 cordless
handset
•base
Cellular2,4
D Mode CM1000CB body.fm Page 54 Friday, June 18, 2010 12:19 PM

More features
DM1000 55 Copyright © 2010 Waxess USA
4
1 Base includes the speakerphone and corded
handset.
2 In Barge-In mode, Page/Intercom between
base and cordless is disabled during a call.
3 Conference call feature disabled for CEL and
TEL
4 Call transfer disabled
5 Use of two or more cordless handsets on cellular
line is only available in Cellular Only mode.
Set up Barge-In
1Press MENU, scroll to Setup, and press Select.
2Scroll to Barge-In and press Select.
3Scroll to ON, and press OK.
A tone confirms the choice and the Setup menu
appears.
4Press Exit twice to return to Standby.
Use Barge-In
1Verify that Barge-In is activated, then use one
handset to place a call.
2After the call is answered, press TEL on any
handset to join the call.
D Mode CM1000CB body.fm Page 55 Friday, June 18, 2010 12:19 PM
DM1000 56 Copyright © 2010 Waxess USA
4
•Cellular only
When activated on the base, the Cellular Only mode
enables up to four cordless handsets to join in a
conference call on the cellular line (CEL) call.
Activating Cellular Only automatically deactivates
the landline, so the TEL icon on the LCD does not
appear.
Set up Cellular only
1Disconnect the telephone cord from the base.
2Press MENU, scroll to Setup, and press Select.
3Scroll to Cellular Only, and press Select.
4Scroll to On, and press Select.
A tone confirms the choice, and the Setup menu
appears.
Note: With Cellular Only activated, privacy may
be compromised. Any registered cordless
handset can join the call, but there is no
indication that another handset has joined
the call.
Turn off Cellular only
If landline services are needed, deactivate this
feature first.
1Press MENU, scroll to Setup, and press Select.
D Mode CM1000CB body.fm Page 56 Friday, June 18, 2010 12:19 PM
More features
DM1000 57 Copyright © 2010 Waxess USA
4
2Scroll to Cellular Only, and press Select.
3Scroll to Off, and press Select.
A tone confirms the choice, and the Setup
menu appears.
4Connect the telephone cord.
•CEL Phone Number
Use this feature to see your CEL telephone number.
1From the Stand-by mode, check the display to
ensure that the CEL mode is active.
CEL should appear in the lower left corner of the
display.
2Press MENU, scroll to Setup, and press Select.
3Scroll to CEL Phone Number and press Select.
The cellular number appears on the screen.
4To exit, press Exit or Off.
•Power back-up
Power back-up for the base is an optional feature
(not required to operate this product) that allows
the base to operate for up 30 minutes even
(depending on battery condition) if AC power is
disrupted. If you install batteries for the Power
Back-up feature you can check the condition of the
batteries while they are installed.
D Mode CM1000CB body.fm Page 57 Friday, June 18, 2010 12:19 PM
DM1000 58 Copyright © 2010 Waxess USA
4
1On the base, press MENU, scroll to Setup, and
press Select.
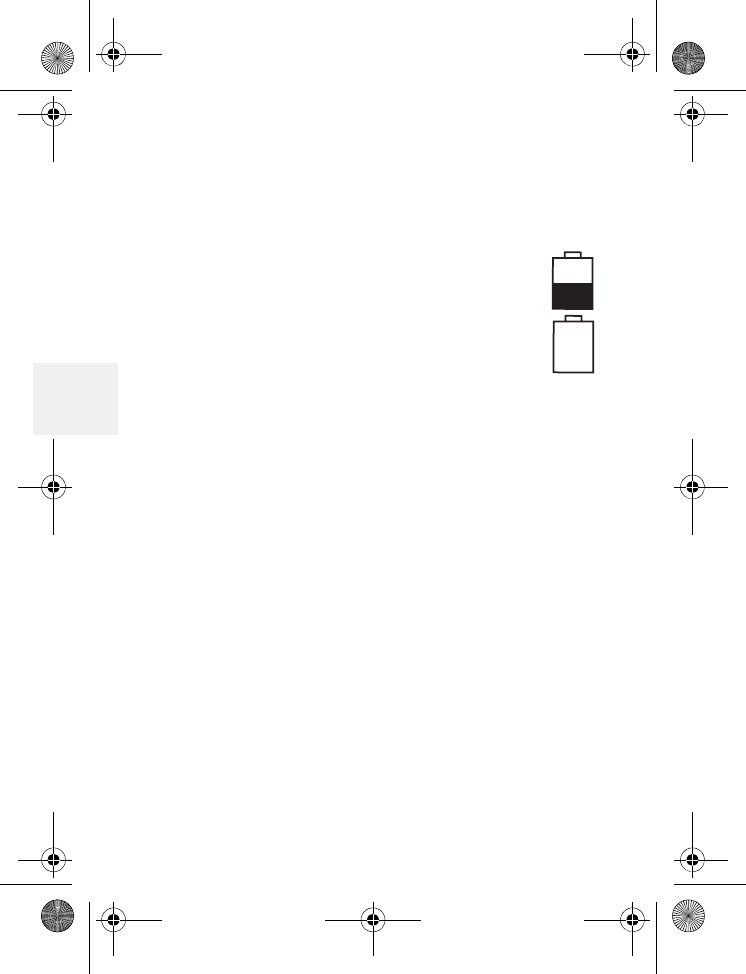
2Scroll to Battery Level, and press Select.
Current power level for the batteries appears.
If no batteries are installed, the level
indicates “Replace.” OK
Replace
3Press Exit to return to the Setup
menu.
Notes about Power Back-up
• Use new batteries.
• There are no indicators to inform you when the
phone is operating under regular power or backup
power.
• If you disconnect the AC power adaptor, Power
Back-up starts automatically.
• Check battery levels frequently, and replace the
batteries if the charge level drops below one half
of fully charged.
• After every power outage, check the batteries and
replace them as needed.
• Actual operating time using Power Back-up varies
depending on the condition of the batteries.
D Mode CM1000CB body.fm Page 58 Friday, June 18, 2010 12:19 PM

Precautions
DM1000 59 Copyright © 2010 Waxess USA
5
5 Precautions
Before you read anything else, please observe the
following precautions.
Warning!
Waxess USA, Inc. DOES NOT represent this unit to
be waterproof. To reduce the risk of fire, electrical
shock, or damage to the unit, DO NOT expose this
unit to rain or moisture.
Rechargeable Nickel-Metal-
Hydride Battery Warning
• This equipment contains a rechargeable Nickel-
Metal-Hydride battery.
• Nickel is a chemical known to state of California to
cause cancer.
• The rechargeable Nickel-Metal-Hydride battery
contained in this equipment may explode if
disposed of in a fire.
• Do not short-circuit the battery.
• Do not charge the rechargeable Nickel-Metal-
Hydride battery used in his equipment in any
charger other than the one designed to charge this
battery as specified in the owner's manual. Using
another charger may damage the battery or cause
the battery to explode.
D Mode CM1000CB body.fm Page 59 Friday, June 18, 2010 12:19 PM
DM1000 60 Copyright © 2010 Waxess USA
5
Rechargeable Nickel-Metal-
Hydride Batteries Must Be
Recycled or Disposed of
Properly
•Important safety instructions
When using your telephone equipment, these basic
safety precautions should always be followed to
reduce the risk of fire, electrical shock, and injury
to persons:
1Read and understand all instructions.
2Follow all warnings and instructions marked on
the product.
3Unplug this product from the wall outlet before
cleaning. Use a dry cloth for cleaning without
liquid or aerosol cleaners.
4Do not use this product near water; for
example, near a bathtub, wash bowl, kitchen
sink or laundry tub, in a wet basement, or near
a swimming pool.
5Do not place this product on an unstable cart,
The exclamation point within an equilateral
triangle is intended to alert the user to the
presence of important and maintenance
(servicing) instructions in the literature
accompanying the appliance.
D Mode CM1000CB body.fm Page 60 Friday, June 18, 2010 12:19 PM

Precautions
DM1000 61 Copyright © 2010 Waxess USA
5
stand, or table. The telephone may fall, causing
serious damage to the unit.
6Slots and openings in the cabinet and the back
or bottom are provided for ventilation. To
protect the product from overheating, these
openings must not be blocked or covered. This
product should never be placed near or over a
radiator or heat register. This product should
not be placed in a built-in installation unless
proper ventilation is provided.
7This product should be operated only from the
type of power source indicated on the marking
label. If you are not sure of the type of power
supply to your home, consult your dealer or
local power company.
8Do not allow anything to rest on the power cord.
Do not locate this product where the cord will be
damaged by persons walking on it.
9Do not overload wall outlets and extension
cords, as this can result in the risk of fire or
electrical shock.
10Never push objects of any kind into this product
through cabinet slots, as they may touch
dangerous voltage points or short out parts that
could result in a risk of fire or electric shock.
Never spill liquid of any kind on the product.
11To reduce the risk of electric shock, do not
disassemble this product. Take it to qualified
service personnel when service or repair work is
required. Opening or removing covers may
D Mode CM1000CB body.fm Page 61 Friday, June 18, 2010 12:19 PM

DM1000 62 Copyright © 2010 Waxess USA
5
expose you to dangerous voltages or other
risks. Incorrect reassembly can cause electric
shock when the appliance is subsequently used.
12Unplug this product from the wall outlet and
refer servicing to qualified service personnel
under the following conditions:
A When the power supply cord is
damaged or frayed.
B If liquid has been spilled into the
product.
C If the product has been exposed to rain
or water.
D If the product does not operate
normally when following the operating
instructions. (Adjust only those controls
that are covered by the operating
instructions. Improper adjustment of
other controls may result in damage
and will often require extensive repair
work by a qualified technician.)
E If the product has been dropped or the
cabinet has been damaged.
F If the product exhibits a distinct change
in performance.
13Do not use the telephone to report a gas leak in
the vicinity of the leak.
D Mode CM1000CB body.fm Page 62 Friday, June 18, 2010 12:19 PM

Precautions
DM1000 63 Copyright © 2010 Waxess USA
5
ADDITIONAL BATTERY SAFETY PRECAUTIONS
Caution: To reduce the risk of fire or injury to
persons by the battery, read and follow
these instructions:
1Use only the battery pack specified in the
owner's manual.
2Do not dispose of the battery pack in a fire. The
cell may explode. Check the Nickel Metal
Hydride battery disposal package insert for
disposal instructions.
3Do not open or mutilate the battery pack.
Released electrolyte is corrosive and may cause
damage to the eyes or skin. It may be toxic if
swallowed.
4Exercise care in handling the battery in order
not to short the battery with conducting
materials such as rings, bracelets, and keys.
The battery or conductor may overheat and
cause burns.
5Charge the battery pack provided with or
identified for use with this product only in
accordance with the instructions and limitations
specified in the owners manual provided for this
product.
6Observe proper polarity orientation between
the battery pack and battery charger.
SAVE THESE INSTRUCTIONS!
D Mode CM1000CB body.fm Page 63 Friday, June 18, 2010 12:19 PM

DM1000 64 Copyright © 2010 Waxess USA
5
Important Electrical
Considerations
Unplug all electrical appliances when you know an
electrical storm is approaching. Lightning can pass
through your household wiring and damage any
device connected to it. This phone is no exception.
The FCC Wants You To Know
Changes or modifications to this product not
expressly approved by Waxess, or operation of this
product in any way other than as detailed by the
owner's manual, could void your authority to
operate this product. our telephone complies with
Part 68 of FCC Rules. You must, upon request,
provide the FCC registration number and the REN to
your telephone company. Both numbers are on the
base unit.
Note: You must not connect your phone to:
• coin-operated systems
• most electronic key telephone systems
This device complies with FCC rules for operating in
the CDMA band. Operation is subject to the
following two conditions: (1) This device may not
cause harmful interference, and (2) This device
must accept any interference received, including
D Mode CM1000CB body.fm Page 64 Friday, June 18, 2010 12:19 PM

Precautions
DM1000 65 Copyright © 2010 Waxess USA
5
interference that may cause undesired operation.
Privacy of communications, may not be ensured
when using this phone.
To insure the safety of users, the FCC has
established criteria for the amount of radio
frequency energy various products may produce
depending on their intended usage. This product
has been tested and found to comply with the FCC's
exposure criteria. For body worn operation, the FCC
RF exposure guidelines were also met when used
with the accessories supplied or designed for this
product. Use of other accessories may not ensure
compliance with FCC RF exposure guidelines and
should be avoided.
Range
Your new phone is designed to achieve the
maximum possible range by transmitting and
receiving according to the highest specifications set
forth by the FCC. We have rated this phone to
operate at a maximum distance with the
qualification that the range depends upon the
environment in which the telephone is used. Many
factors limit range, and it would be impossible to
include all the variables in our rating. The Maximum
Range rating of this phone is meant to be used as a
means of comparison against other range claims.
D Mode CM1000CB body.fm Page 65 Friday, June 18, 2010 12:19 PM

DM1000 66 Copyright © 2010 Waxess USA
5
Telephone Line Problems
The FCC has granted the telephone company the
right to disconnect service in the event that your
phone causes problems on the telephone line. Also,
the telephone company may make changes in
facilities and services which may affect the
operation of your unit. However, your telephone
company must give adequate notice in writing prior
to such actions to allow you time for making
necessary arrangements to continue uninterrupted
service. If you are having trouble with your
telephone service, you must first disconnect your
phone to determine if it is the cause of your
problem. If you determine that it is the cause, you
must leave it disconnected until the trouble has
been corrected.
Radio Interference
Radio interference may occasionally cause buzzing
and humming in your cordless handset, or clicking
noises in the base. This interference is caused by
external sources such as TV, refrigerator, vacuum
cleaner, fluorescent lighting, or electrical storm.
Your unit is NOT DEFECTIVE. If these noises
continue and are too distracting, please check
around your home to see what appliances may be
causing the problem. In addition, we recommend
that the base not be plugged into a circuit that also
D Mode CM1000CB body.fm Page 66 Friday, June 18, 2010 12:19 PM

Precautions
DM1000 67 Copyright © 2010 Waxess USA
5
powers a major appliance because of the potential
for interference. Be certain that the antenna on the
unit is fully extended when needed. In the unlikely
event that you consistently hear other voices or
distracting transmissions on your phone, you may
be receiving radio signals from another cordless
telephone or other source of interference. If you
cannot eliminate this type of interference, you need
to change to a different channel. Finally, it should be
noted that some cordless telephones operate at
frequencies that may cause interference to nearby
TVs and VCRs. To minimize or prevent such
interference, the base of the cordless telephone
should not be placed near or on top of a TV or VCR.
If interference is experienced, moving the cordless
telephone farther away from the TV or VCR will
often reduce or eliminate the interference.
Cordless Telephone Privacy
Cordless telephones are radio devices.
Communications between the handset and base of
your cordless telephone are accomplished by
means of radio waves which are broadcast over the
open airways. Because of the inherent physical
properties of radio waves, your communications
can be received by radio receiving devices other
than your own cordless telephone unit.
Consequently, any communications using your
cordless telephone may not be private.
D Mode CM1000CB body.fm Page 67 Friday, June 18, 2010 12:19 PM

DM1000 68 Copyright © 2010 Waxess USA
5
Installation Considerations
SELECTING A LOCATION
Before choosing a location for your new phone,
there are some important guidelines you should
consider:
• The location should be close to both a phone jack
and continuous power outlet. (A continuous power
outlet is an AC outlet which does not have a switch
to interrupt its power.)
• Keep the base and handset away from sources of
electrical noise such as motors or fluorescent
lighting.
• Be sure there is sufficient space to fully extend the
base antenna.
• The base can be placed on a desk or tabletop or
mounted on a standard telephone wall plate.
• You should charge your new phone for 12–15
hours before completing the installation or using
the handset.
Telephone Line Outlets
There are two types of phone outlets:
Modular Jack
Most phone equipment available now uses modular
jacks. Phone cords are fitted with a molded plastic
connector which plugs into this type of jack. If you
D Mode CM1000CB body.fm Page 68 Friday, June 18, 2010 12:19 PM

Precautions
DM1000 69 Copyright © 2010 Waxess USA
5
do not have modular phone jacks, contact your local
telephone company for information about their
installation.
Hardwired Jack
Some equipment is wired directly to a phone jack,
and these types of installations require a modular
jack converter. This type of installation is not
difficult; however, you should contact your
telephone dealer or a telephone supply store for
advice about the proper adapter or converter for
your particular situation.
Connecting the Telephone Cords
Consider these safety guidelines before connecting
the telephone cords:
Caution:
• Never install telephone wiring during a lightning
storm.
• Never touch uninsulated telephone wires or
terminals unless the telephone line has been
disconnected.
• Use caution when installing or modifying
telephone lines.
D Mode CM1000CB body.fm Page 69 Friday, June 18, 2010 12:38 PM
DM1000 70 Copyright © 2010 Waxess USA
5
Applying Power to the base
This phone requires an AC outlet, without a switch
to interrupt power, and the included AC adapter. To
relieve strain on the DC plug when the phone is
placed on a desk or table, wrap the power cord
around the strain relief notch on the bottom of the
base.
Note: Place the power cord so that it does not
create a trip hazard, or where it could
become chafed and create a fire or other
electrical hazards.
•I.C. Notice
TERMINAL EQUIPMENT
Notice:This equipment meets the applicable
Industry Canada Terminal Equipment
Technical Specifications. This is
confirmed by the registration number.
The abbreviation, IC, before the
registration number signifies that
registration was performed based on
a Declaration of Conformity indicating
that Industry Canada technical
specifications were met. It does not
imply that Industry Canada approved
the equipment.
D Mode CM1000CB body.fm Page 70 Friday, June 18, 2010 12:38 PM
Precautions
DM1000 71 Copyright © 2010 Waxess USA
5
Notice:The Ringer Equivalence Number
(REN) for this terminal equipment is
marked on the equipment itself. The
REN assigned to each terminal
equipment provides an indication of
the maximum number of terminals
allowed to be connected to a
telephone interface. The termination
on an interface may consist of any
combination of devices subject only
to the requirement that the sum of
the Ringer Equivalence Numbers of
all the devices does not exceed five.
RADIO EQUIPMENT
The term "IC" before the radio certification number
only signifies that Industry Canada technical
specifications were met.
Operation is subject to the following two conditions:
(1) this device may not cause interference, and (2)
this device must accept any interference, including
interference that may cause undesired operation of
the device. “Privacy of communications may not be
ensured when using this telephone.”
D Mode CM1000CB body.fm Page 71 Friday, June 18, 2010 12:38 PM

DM1000 72 Copyright © 2010 Waxess USA
5
Notes:
D Mode CM1000CB body.fm Page 72 Friday, June 18, 2010 12:38 PM

General information
DM1000 73 Copyright © 2010 Waxess USA
6
6 General information
This phone complies with FCC Parts 15 and 68.
AC Adaptor Information:
Base: Input voltage 120V AC, 60Hz. 0.3A
Output voltage 9V DC, 1000 mA
Charger Handset Charging Cradle
Input voltage 120V AC, 60 Hz, 0.15A
Output voltage 9V DC, 500 mA
Battery Information: Ni-MH, 3.6V, 1300mA
Frequency: CDMA 800/1900 MHz
Handset/ Base 2.4GHz
Weight: Handset 4.9 oz. (without battery)
7.3 oz. (with battery)
Base 1 lb., 13.7 oz. with corded handset
Dimensions:
Handset 6-3/4” x 2” x 1-1/4” (height, width,
depth)
Base 3-1/4” x 7-3/4” x 7-7/8” (height, width,
depth)
FCC ID Number SNBDM1000CE/SNBDM100HS
Specifications, features, and availability of optional
accessories are all subject to change without prior notice.
Approved patents:
6,766,175/6,987,988/7,072,675/7,010,311/7,146,180
Patents pending:
11/234.297, 11/542.804, 11/593.725, 11/141.819
Notes
D Mode CM1000CB body.fm Page 73 Friday, June 25, 2010 4:21 PM
DM1000 74 Copyright © 2010 Waxess USA
6
Notes
D Mode CM1000CB body.fm Page 74 Friday, June 18, 2010 12:38 PM
DM1000 Menu map
DM1000 75 Copyright © 2010 Waxess USA
7
7 DM1000 Menu map
BASE
Messages
Voicemail
Voicemail Setup
SMS
Write New
Saved
In Box
Storage Status
Memory
Phone book
Find name
Add new entry
Caller ID
Ringer/Key Beep
Ringer tone
Ringer Volume
Night Volume
Key Beep
Setup
Distinctive Ring
Area Code
Language
Name the Unit
Tone/Pulse
Barge-In
Battery Level
Cellular Only
LCD Contrast
CEL Phone Number
Phone Set Up
Enter SPC
Call Forwarding
Activate
Reactivate
Time and Date
CORDLESS HANDSET
Messages
Voicemail
Voicemail Setup
SMS
Write New
Saved
In Box
Storage Status
Memory
Phone book
Find name
Add new entry
Caller ID
Ringer/Key Beep
Ringer tone
Ringer Volume
Night Volume
Key Beep
Setup
Distinctive Ring
Area Code
Language
Name the Unit
Register
Deregister
LCD Contrast
TTY
D Mode CM1000CB body.fm Page 75 Friday, June 18, 2010 12:38 PM

DM1000 76 Copyright © 2010 Waxess USA
7
Notes
D Mode CM1000CB body.fm Page 76 Friday, June 18, 2010 12:38 PM

DM1000 77 Copyright © 2010 Waxess USA
Index
A
Call Forwarding
Activate...........................46
B
barge-in ...........................52
quick reference
chart.................... 54
set up ...........................55
use .................................55
base unit batteries ........4
C
call
answer landline ........25
answer wireless ........24
conference call ..........29
make landline call ....22
make wireless call ...21
Call Forwarding ............46
caller ID ...........................42
delete number ..........45
dial number ................44
information .................42
save number ..............44
CEL phone number .....57
cellular only ...................56
set up ...........................56
turn off .........................56
cordless handset ............8
battery indicator ...... 10
charge the battery .... 9
install batteries .......... 8
D
Call Forwarding
Deactivate ...................... 47
distinctive ring ....... 31, 33
H
hold .................................. 26
I
included items ................ 1
intercom ......................... 48
L
location ............................. 1
desk or tabletop ........ 2
wall mount ................... 3
M
Menu Map ...................... 75
messages
SMS .............................. 34
check inbox .............39
delete a message .40
forward .....................40
memory status ......41
receive ......................39
reply ...........................40
DM1000CB-CDMAIX.fm Page 77 Friday, June 18, 2010 12:21 PM

DM1000e 78 Copyright © 2010 Waxess USA
save a new
message ................... 38
send ........................... 37
send a new
message ................... 37
write .......................... 37
voice messages ........34
check voicemail ... 35
set up ........................ 35
mute .................................26
P
page ..................................47
pause ................................24
phone book ....................29
call from
phonebook............ 34
enter characters .......30
enter numbers ..........31
phonebook
distinctive ring ..........31
edit names and
numbers ......................32
enter Caller ID
numbers ......................32
enter speed dial
number ........................34
power on ...........................4
precautions ....................59
R
redial ................................23
S
safety instructions ...... 60
set
area codes ................. 16
dialing mode ............. 11
earpiece volume ...... 22
corded handset ......22
cordless handset ...23
speaker phone .......22
handset registration 19
deregister ................20
register .....................19
language ..................... 18
ringer tone ................. 14
night volume ..........15
volume ......................15
time and date ........... 12
unit name ................... 19
signal level ...................... 7
specifications ................ 73
speed dial ....................... 23
standby screen .............. 6
T
text messages .............. 34
transfer ........................... 26
two-line calling ............ 49
call waiting ................. 52
make calls .................. 51
quick reference
chart ............................. 50
receive calls ............... 51
DM1000CB-CDMAIX.fm Page 78 Friday, June 18, 2010 12:21 PM

DM1000 User Guide
Copyright © 2010 Waxess USA, Inc.
DM1000CB-CDMA back cover.fm Page 72 Friday, June 18, 2010 12:22 PM