West Elm Modular Storage Collection Open Cube *mod 1
2014-07-06
: West-Elm Modular-Storage-Collection-Open-Cube modular-storage-collection-open-cube west-elm pdf
Open the PDF directly: View PDF ![]() .
.
Page Count: 5

: modular storage collection - open cube
6183156 / 6183164 - 05/24/04 page 1 of 4
assembly instructions
mounting plate 2x screw 4x
A B
MOUNTING HARDWARE (included with each modular unit):
! Tools required:
! Do not throw away packaging materials until assembly is complete.
! Assemble this item on a soft surface, such as cardboard or carpet, to protect the finish.
! Use mounting hardware to secure unit(s) to base and units together when placed beside or on top of each other.
! Use overbalance protection hardware (included with base) when stacking 3 units high.
! Do NOT stack more than 3 units high.
: modular storage collection - open cube
6183156 / 6183164 - 05/24/04
assembly instructions
page 2 of 4
CARE INSTRUCTIONS:
Wipe with a soft, dry cloth. To protect the finish, avoid the use of all chemicals and household cleaners.
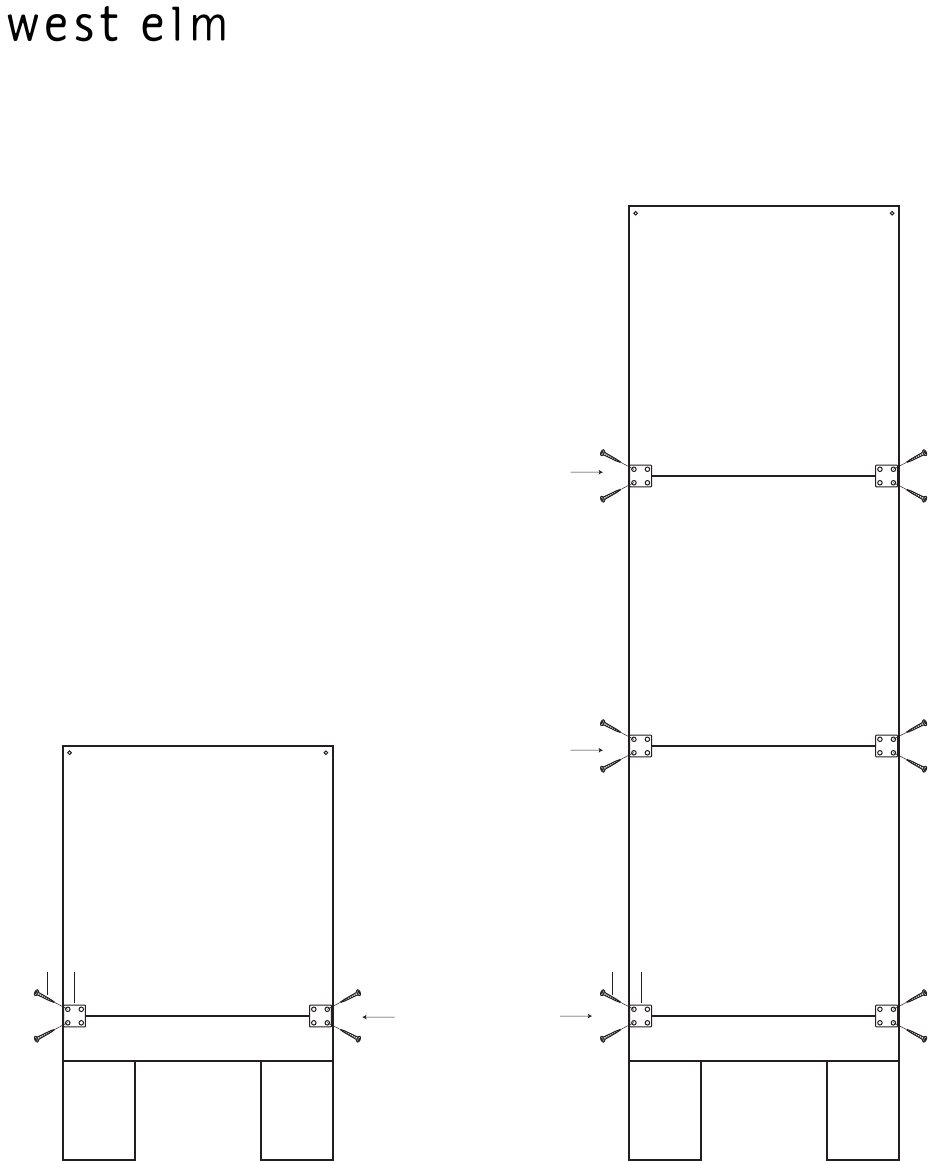
BACK VIEW.
1. Connect unit to base or units together with mounting
plates (A) and screws (B). Insert screws into pre-drilled
holes as shown. Tighten with a Philip's head screwdriver.
AB
secure units together
when stacking
secure units together
when stacking
AB
secure unit to base
: modular storage collection - open cube
6183156 / 6183164 - 05/24/04
assembly instructions
page 3 of 4
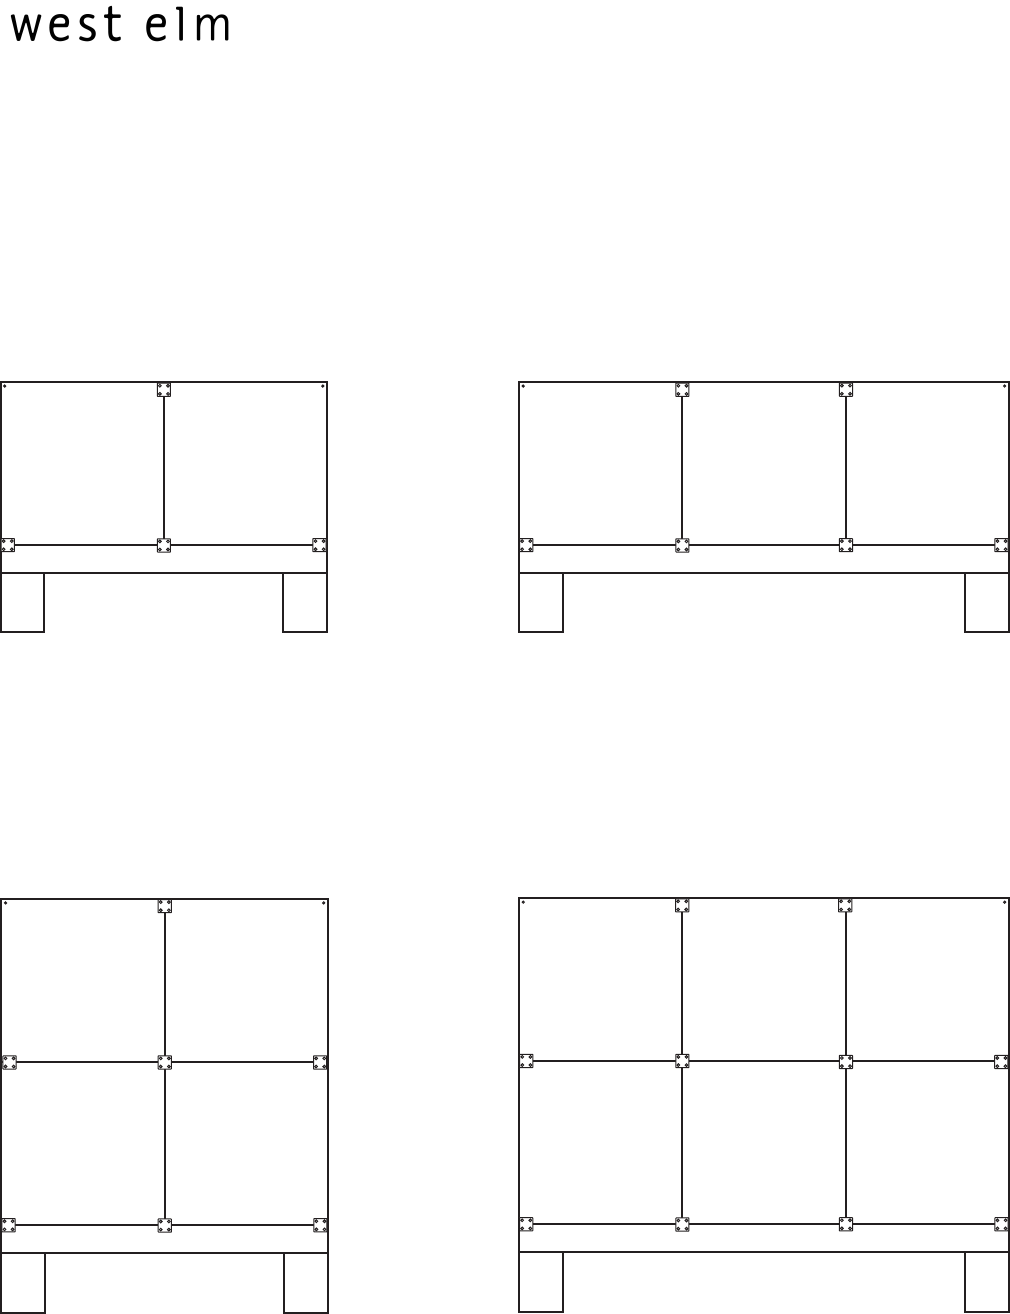
Examples of how units can be placed on bases (back view):
: modular storage collection - open cube
6183156 / 6183164 - 05/24/04
assembly instructions
page 4 of 4
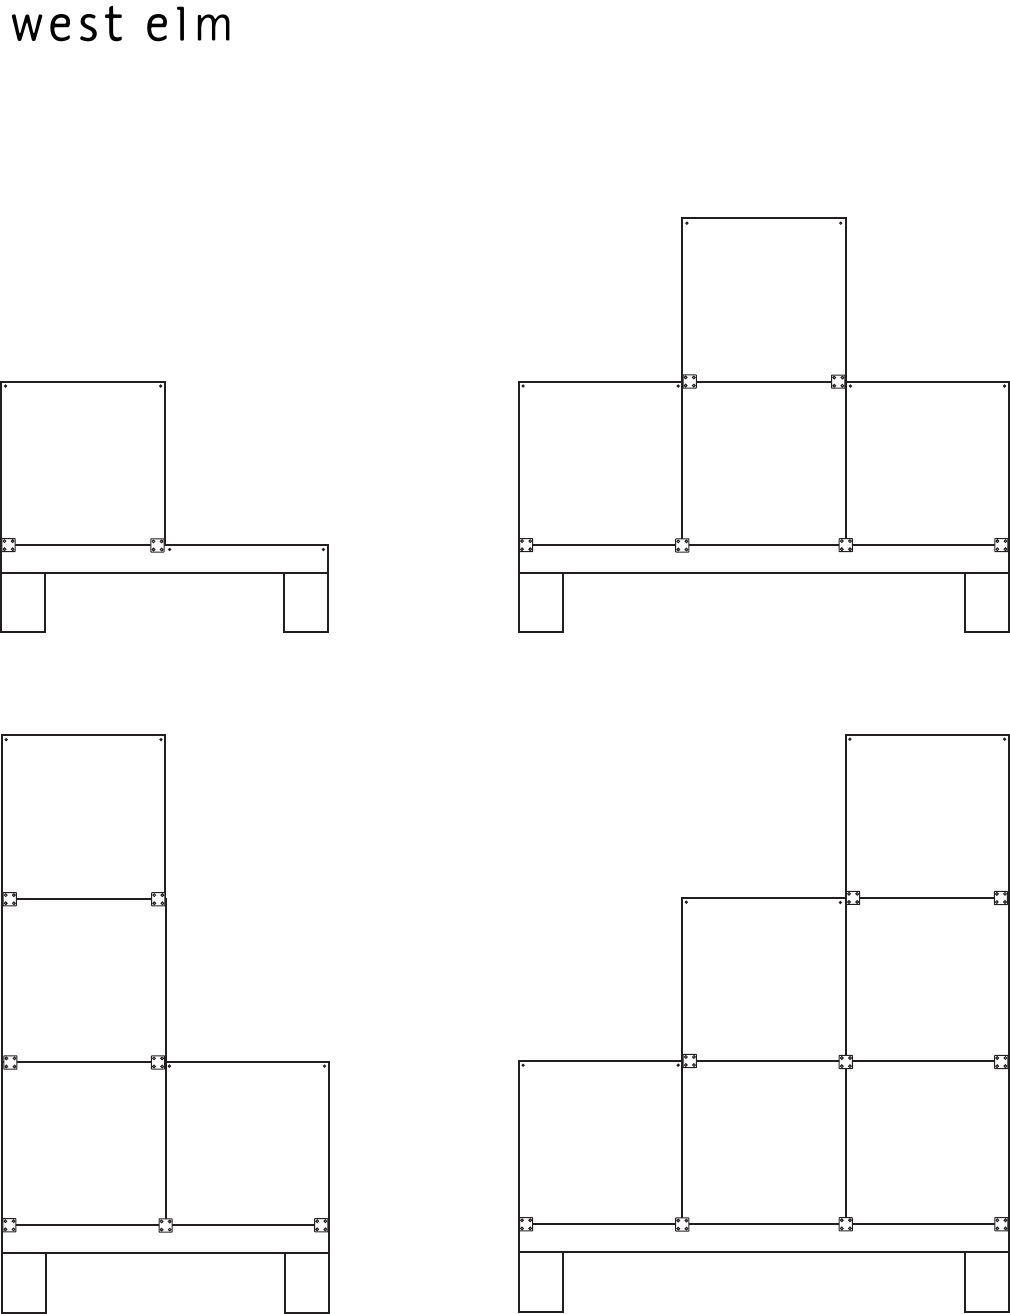
Examples of how units can be placed on bases (back view):
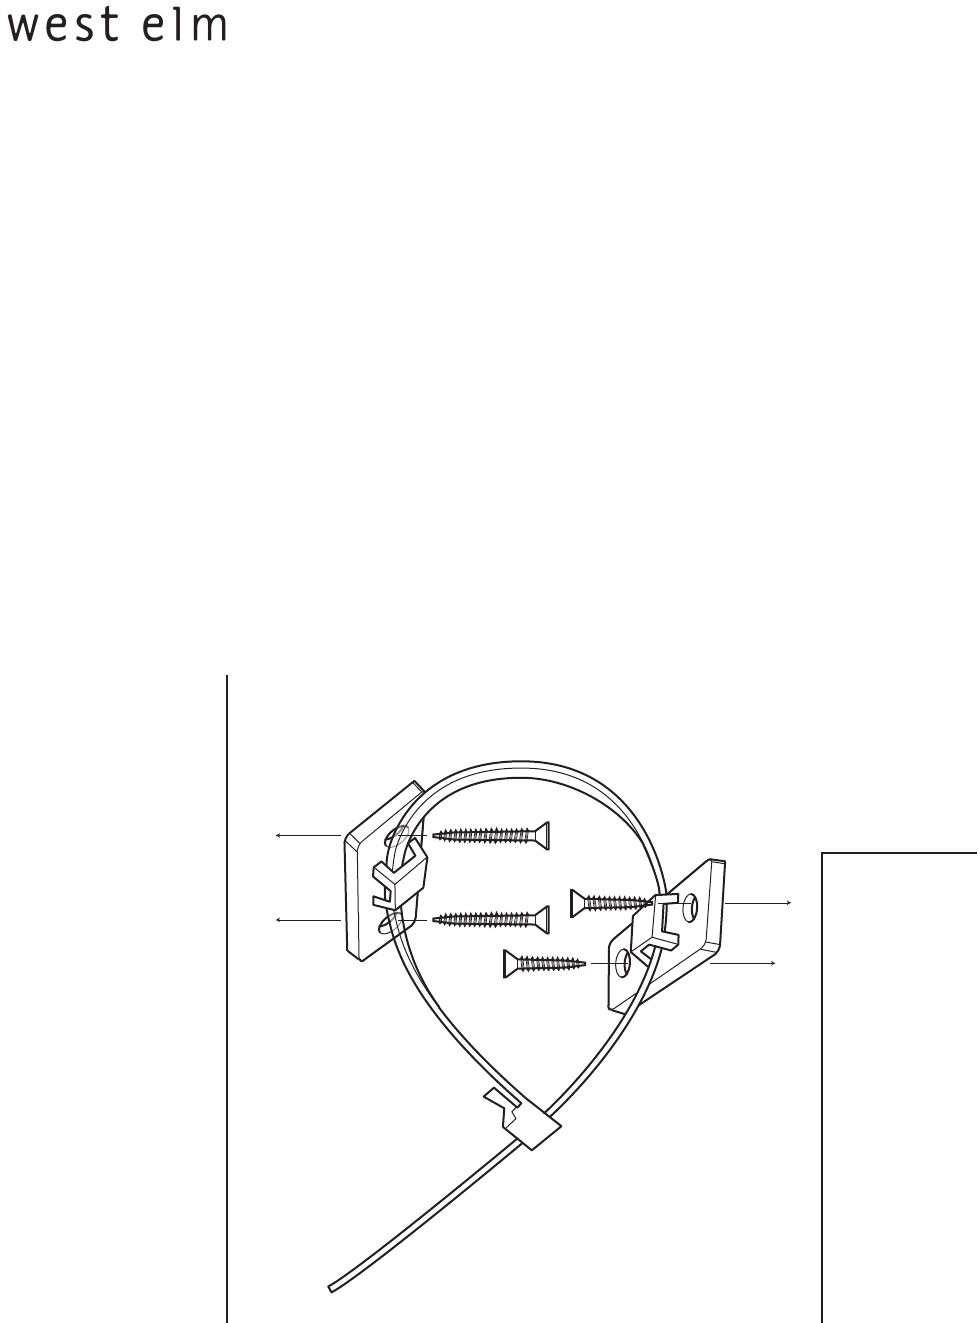
OVER BALANCE. To prevent injury and property damage from unexpected tipping of furniture, we highly recommend
installation of the overbalance protection hardware included with this product.
1. Attach the mounting brackets horizontally to the top back edge of the furniture. Insert the
2. Determine where the furniture is to be placed and mark location on the wall for the other
mounting bracket screw holes. It should be placed approximately 2” below the bracket mounted
to the furniture.
3. Attach the mounting brackets vertically to the wall by inserting the long screws provided through
the holes in the bracket and tightening securely using screwdriver.
short screws through the holes in the bracket and tighten securely using screwdriver.
4. Place the furniture so the brackets on the back edge are in line with the brackets on the wall.
5. Lace an end of the nylon restraint strap down through each bracket. Bring both ends together
and slide the thin end of the strap through the receiving end of the strap until snug.
6. Check to make sure the strap is securely laced and locked to the brackets.
back side
wall
: modular storage collection - open cube
6183156 / 6183164 - 05/24/04
assembly instructions
