Westell A90HS1058 Spread Spetrum Transmitter User Manual PRODUCT DESCRIPTION
Westell Inc Spread Spetrum Transmitter PRODUCT DESCRIPTION
Westell >
Contents
- 1. Users Manual Part 1
- 2. Users Manual Part 2
Users Manual Part 1

030-300419 Rev. A
Draft 8 – 11/30/04
© Copyright 2004 Westell, Inc. 030-300419 Rev. A
Draft 7 Changed power to AC 12V
Draft 8 Updates section 3.1 Telephone Safety Instructions per Joe Gage
VERIZON ONE TELEPHONE SUBSYSTEM
5.8 GHZ DIGITAL CORDLESS SPEAKERPHONE
USER GUIDE

030-300419 Rev. A
Draft 8– 11/30/04
030-300419 Rev. A 2 November 2004
User Guide Verizon One Telephone Subsystem
TABLE OF CONTENTS
1. PRODUCT DESCRIPTION.................................................................................................................................4
2. CONVENTIONS USED IN THIS DOCUMENT................................................................................................4
3. SAFETY INSTRUCTIONS .................................................................................................................................5
3.1 Telephone Safety Instructions ....................................................................................................................5
3.2 Battery Safety Instructions .........................................................................................................................5
4. REGULATORY INFORMATION ......................................................................................................................6
FCC Compliance Note ...........................................................................................................................................6
5. GETTING TO KNOW YOUR VERIZON ONE SYSTEM.................................................................................7
5.1 Caring for Your Verizon One.....................................................................................................................7
5.2 Base Unit Telephone Features....................................................................................................................7
5.3 Cordless Handset Telephone Features........................................................................................................8
6. TELEPHONE SUBSYSTEM QUICK STARTUP...............................................................................................9
7. INSTALLING THE VERIZON ONE BASE UNIT...........................................................................................10
7.1 Choosing a Location to Install Verizon One ............................................................................................10
7.2 Installing the Base Unit on a Desktop or Flat Surface..............................................................................10
7.3 Wall Mounting on a Hollow Drywall Surface (Optional) ........................................................................10
8. INSTALLING THE VERIZON ONE HANDSET.............................................................................................12
8.1 Installing the Handset Battery ..................................................................................................................12
8.2 Charging the Handset (Battery) ................................................................................................................13
8.3 Battery Charge Indication.........................................................................................................................14
8.4 Turning On the Handset ...........................................................................................................................15
8.5 Parking the Handset on the Base ..............................................................................................................16
8.6 Using the Handset Belt Clip .....................................................................................................................16
9. REGISTERING THE HANDSET TO THE Verizon One BASE ......................................................................17
10. VERIZON ONE HANDSET CONTROLS........................................................................................................18
10.1 Handset Control Buttons ..........................................................................................................................18
10.2 Handset Activity LED ..............................................................................................................................19
10.3 Backlighting .............................................................................................................................................19
11. Verizon One HANDSET SCREENS..................................................................................................................20
11.1 Standby.....................................................................................................................................................20
11.2 No New Calls ...........................................................................................................................................20
11.3 Twelve New Calls ....................................................................................................................................21
11.4 Ringer Off.................................................................................................................................................21
11.5 Fifteen New Calls, No Messages Waiting, Line In use ............................................................................21
11.6 Fifteen New Calls, Messages Waiting, Line In use..................................................................................21
12. USING THE Verizon One MAIN MENU..........................................................................................................22
12.1 Accessing Handset Main Menu ................................................................................................................22
12.2 Registration Menu ....................................................................................................................................23
12.3 Date and Time Menu ................................................................................................................................24

030-300419 Rev. A
Draft 8– 11/30/04
030-300419 Rev. A 3 November 2004
User Guide Verizon One Telephone Subsystem
12.4 Handset Name Menu ................................................................................................................................25
12.5 Ringer Setup Menu...................................................................................................................................25
12.6 Incoming Calls Menu ...............................................................................................................................27
13. USING THE PHONEBOOK MENU.................................................................................................................33
13.1 Accessing the Phonebook.........................................................................................................................33
13.2 Adding a New Name ................................................................................................................................34
13.3 Phonebook Listing....................................................................................................................................36
13.4 Phonebook View Entry.............................................................................................................................36
13.5 Phonebook Options ..................................................................................................................................37
13.6 Edit a Phone Entry....................................................................................................................................37
13.7 Deleting Existing Phone Numbers............................................................................................................39
14. USING INTERCOM AND CALL TRANSFER FUNCTIONS.........................................................................40
14.1 Intercom Functions...................................................................................................................................40
14.2 Call Transfer Functions ............................................................................................................................44
14.3 Handset Locator........................................................................................................................................46
15. USING DIALING FUNCTIONS .......................................................................................................................47
15.1 Dialing Screen ..........................................................................................................................................47
15.2 Redial Screen............................................................................................................................................51
15.3 Incoming Call Screen ...............................................................................................................................51
15.4 Talk Screen...............................................................................................................................................52
15.5 Call Waiting Screen..................................................................................................................................52
15.6 Unregistered Handset Screen....................................................................................................................52
15.7 Out of Range Detection ............................................................................................................................53
16. HEADSET SUPPORT........................................................................................................................................54
17. VERIZON ONE BASE UNIT CONTROLS......................................................................................................55
17.1 Base Unit Speakerphone Control Buttons ................................................................................................55
17.2 Base Unit Activity LED ...........................................................................................................................56
17.3 Backlighting .............................................................................................................................................57
18. VERIZON ONE BASE UNIT OPERATIONS ..................................................................................................57
18.1 Base Unit, Stylus and LCD.......................................................................................................................57
18.2 Making and Ending Calls .........................................................................................................................57
18.3 Answering Incoming Calls .......................................................................................................................57
18.4 Transferring Calls from the Base to the Handset......................................................................................58
18.5 Transferring Calls from the Handset to the Base......................................................................................58
18.6 Paging from the Base................................................................................................................................58
18.7 Adjusting the Volume...............................................................................................................................58
18.8 Using the Mute Button .............................................................................................................................58
18.9 Using the Hold Button..............................................................................................................................58
18.10 Using the Menu and Address Book Buttons ............................................................................................58
19. TECHNICAL SUPPORT INFORMATION ......................................................................................................59
20. PUBLICATION INFORMATION.....................................................................................................................59

030-300419 Rev. A
Draft 8– 11/30/04
030-300419 Rev. A 4 November 2004
User Guide Verizon One Telephone Subsystem
1. PRODUCT DESCRIPTION
The Verizon One is an integrated communications platform that combines your telephone, data networking and
Internet services into one simple device.
This User’s Guide explains how to use the telephone features of your new Verizon One when operating the
telephone in what is called “Stand Alone” mode. Your Verizon One has been designed to operate in two different
modes: Stand Alone and iobi.
The default mode of operation is iobi. When iobi services are not available because either your DSL Line has not
been provisioned or for other network reasons, your Verizon One will revert to Stand Alone mode. In Stand Alone
mode, your Verizon One telephone system will work as a standard cordless telephone as explained in this document.
For details on operating your Verizon One in iobi mode, please refer to Verizon’s iobi user manual. The remainder
of this document will only address using your Verizon One telephone system in Stand Alone mode.
Hereafter, the Verizon One Telephone Subsystem will be referred to as “Verizon One,” “Base Unit,” or “Handset.”
2. CONVENTIONS USED IN THIS DOCUMENT
LCD screens – The screens displayed in this document are meant to provide a visual representation of Verizon
One’s Handset and Base functionality. The actual data displayed in your LCD screens may differ slightly from
the data displayed in the screens of this document.
Lucy – Refers to the name assigned to an additional Handset registered to the Verizon One Base Unit. This
name was used to explain the Intercom and Call Transfer Functions discussed in section 14 of this document.
Note – Refers to outlined information that provides additional details about a feature or function.
On-hook – Refers to the condition when either the Base Unit or a Handset is not active in requesting a dial tone
or placing a call.
Off-hook – Refers to the condition when either the Base Unit or Handset is active in requesting dial tone or is
engaged in a call.
Pointer – Refers to the pointer symbol ► used to select items in the LCD screens.
Screen – Refers to either the Handset’s or the Base Unit’s Liquid Crystal Display (LCD).
Words enclosed in symbols < > represent physical buttons that you can press with your finger. These are
located on the face of the Handset and the Base Unit.
Words enclosed in brackets [ ] represent soft key functions accessible/selectable through the Handset’s and
Base Unit’s LCD screens.
030-300419 Rev. A
Draft 8– 11/30/04
030-300419 Rev. A 5 November 2004
User Guide Verizon One Telephone Subsystem
3. SAFETY INSTRUCTIONS
3.1 Telephone Safety Instructions
Please save these important safety instructions.
Always disconnect all telecommunications network conductors prior to servicing the unit.
Do not use a telephone to report a gas leak in the vicinity of the leak. (Move away from the gas leak before
using a telephone.)
Never install any telephone wiring during a lightning storm.
Never install telephone jacks in wet locations unless the jack is specifically designed for wet locations.
Never touch non-insulated telephone wires or terminals unless the telephone line has been disconnected at
the network interface.
Use caution when installing or modifying telephone lines.
IMPORTANT: In the event of a loss of electricity to your home/office, your Verizon One telephone system will not
operate. For this reason, it is recommended that you have at least one standard telephone in your home/office for use
in case of an emergency.
WARNING
Risk of electric shock. Voltages up to 140 Vdc (with reference to
ground) may be present on telecommunications circuits.
3.2 Battery Safety Instructions
Use only the battery that was provided with your Verizon One kit, or an authorized replacement
recommended by the manufacturer.
Do not puncture the battery. The battery contains toxic materials that could be released if mishandled,
resulting in injury.
Keep batteries and other potentially hazardous devices out of the reach of children.
Never dispose of batteries in fire, which could result in explosion.


030-300419 Rev. A
Draft 8– 11/30/04
030-300419 Rev. A 7 November 2004
User Guide Verizon One Telephone Subsystem
5. GETTING TO KNOW YOUR VERIZON ONE SYSTEM
The Verizon One Telephone Subsystem can function in two modes: Standalone mode and iobi mode. In
Standalone mode, Verizon One functions as a standard cordless telephone/speaker device that can be used
in your home or office. In iobi mode, Verizon One provides a variety of voice and data network services
that can be delivered through your broadband connection to Verizon’s network.
If you are using Verizon One in iobi mode, you will perform most of your interactions through the Base
Unit’s LCD touch screen. A stylus pen is provided with the Base and, by using the stylus, you can gently
tap the components in the LCD screen and navigate to various Iobi features. The Stylus, which is included
with your Verizon One kit, is stored in the stylus holder located on the right side of the Verizon One base.
The default mode of operation is iobi. When iobi services are not available because either your DSL Line
has not been provisioned or for other network reasons, your Verizon One will revert to Stand Alone mode.
In Stand Alone mode, your Verizon One telephone system will work as a standard cordless telephone as
explained in this document.
For details on operating your Verizon One in iobi mode, please refer to Verizon’s iobi user manual. The
remainder of this document will only address using your Verizon One telephone system in Stand Alone
mode.
5.1 Caring for Your Verizon One
Please follow these guidelines to ensure the best use of your Verizon One.
• When using Stylus pen (Verizon One in iobi mode), please be sure to gently tap the components in the
LCD screen to navigate to various Iobi features.
• DO NOT use a pen, pencil or other pointed object on the LCD screen as these items may cause
damage to the screen. Always use the point of the Stylus for tapping on the LCD screen and making
selections.
• Warning: DO NOT use an abrasive cleaner on the LCD screen as this will damage the screen. If the
LCD becomes soiled, use a damp, clean cloth moistened with a window-cleaning solution to
gently wipe the screen.
5.2 Base Unit Telephone Features
The following features are provided in the Verizon One Base Unit. An in-depth discussion of functions will
be discussed later in this document.
• Symmetrical 5.8 GHz DSS cordless telephone technology with built-in 5.8 GHz Antennae
• 75 Hopping Channels for enhanced operation under interference
• 12-key Keypad allows alphanumeric data entry to the Base Unit.
• Telephone Control buttons allow phone setup, navigation, menu selection, and call control (such as
hold, mute, intercom, volume control) from the Base Unit.
• Full Duplex, Handsfree Speaker/Microphone for placing / receiving calls from the Base Unit

030-300419 Rev. A
Draft 8– 11/30/04
030-300419 Rev. A 8 November 2004
User Guide Verizon One Telephone Subsystem
• Internally filtered convenience/Fax jack – enables the connection of other telephony equipment such as
fax machines directly to Verizon One
• Integrated Handset Cradle with battery charger
• Illuminated, Color LCD Touch Screen – Primary iobi user interface that enables access to Verizon
One’s advanced services
• LED Indicators display the operational status of Verizon One’s telephony and data networking
functions
• Message Waiting/Ringing LED indicator – provides indication of incoming calls and/or message
waiting
• Selective intercom page to either Base or the Handset.
• Stylus Pen functions as a detachable, pen-like, plastic tool for selecting items on the Base Unit’s LCD
screen (primarily used with iobi services)
5.3 Cordless Handset Telephone Features
The following features are provided in the Verizon One Cordless Telephone Handset. An in-depth
discussion of functions will be discussed later in this document.
• Symmetrical 5.8 GHz DSS cordless telephone technology with built-in 5.8GHz Antennae
• 75 Hopping Channels for enhanced operation under interference
• Illuminated 12-key Keypad allows alphanumeric data entry
• Telephone Control buttons allow phone setup, navigation, menu selection, and call control (such as
hold, mute, intercom, manual volume control) from the Handset
• Illuminated Liquid Crystal Display (LCD) screen with graphics-based operation
• Message Waiting/Ringing LED indicator– provides indication of incoming calls and/or message
waiting
• Type I and Type II Caller ID, Call Waiting and Call Waiting with Caller Line ID (user must subscribe
to services from telephone company)
• Incoming Calls with last 40 Caller ID records
• Support for Off hook dialing, pre-dialing and redial
• One touch conference and Selective intercom page between Base Unit and Handset(s)
• Phonebook dialing; 50 Phonebook
• Redial from list of last 5 numbers dialed
• Saving selective Caller ID records into Phonebook directory
• Digital Volume Control
• Rechargeable Battery
• Ear plug adapter for headset (optional headset not included)
• Belt Clip for hands-free operation when using a headset (optional headset not included)
030-300419 Rev. A
Draft 8– 11/30/04
030-300419 Rev. A 9 November 2004
User Guide Verizon One Telephone Subsystem
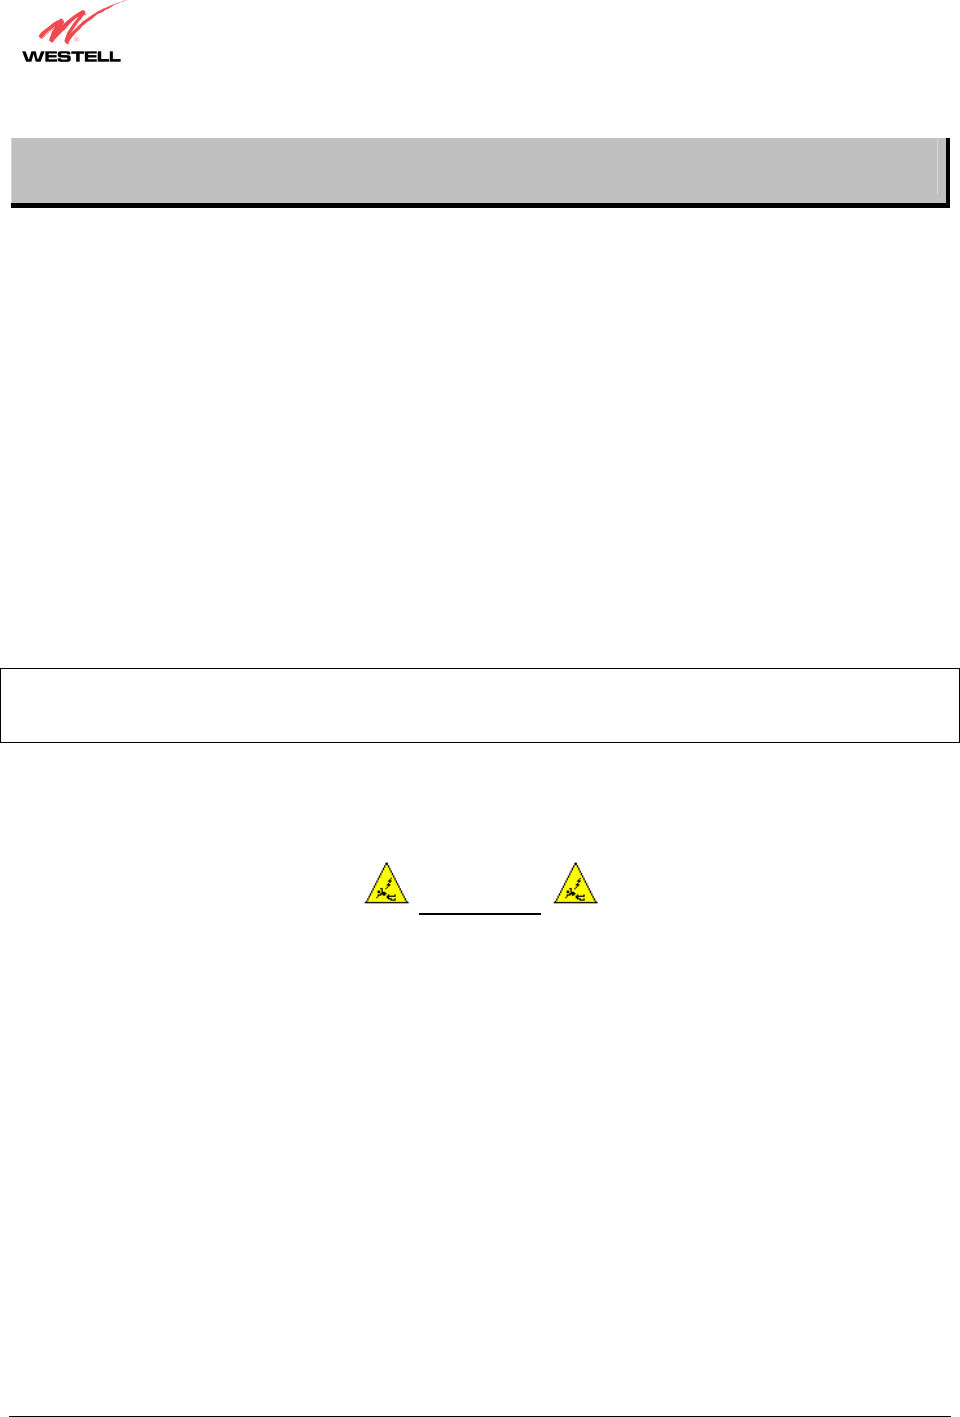
6. TELEPHONE SUBSYSTEM QUICK STARTUP
Checking Package Contents
Item Quantity
Verizon One Base Unit 1
Stylus 1
Power Supply 1
RJ-45 Ethernet cable (straight-
through) (yellow) 1
RJ-11 Phone cable 1
Verizon One Cordless Handset
with Battery and Headset 1
Handset Belt Clip 1
Base Unit Swivel Support Stand 1

030-300419 Rev. A
Draft 8– 11/30/04
030-300419 Rev. A 10 November 2004
User Guide Verizon One Telephone Subsystem
7. INSTALLING THE VERIZON ONE BASE UNIT
To install the Verizon One Base Unit, please follow the instructions provided in this section.
7.1 Choosing a Location to Install Verizon One
For optimal performance of Verizon One, please find a location that is:
• Away from electrical and interferences such a televisions, radios, microwave ovens
• Away from water or moisture, excessive dust, or extreme cold
• In a central location that has no obstructions – this will optimize cordless performance
• Away from heat sources and sunlight
• In locations where there are multiple cordless telephones, separate the base units as much as possible
7.2 Installing the Base Unit on a Desktop or Flat Surface
1. Snap-on the Base Unit swivel support stand onto the back of the Verizon One Base Unit.
2. Locate a sturdy, flat surface, table or desktop that is near an active wall AC power outlet and a provisioned
telephone jack, and position the Verizon One Base Unit.
3. Connect the included phone cable from the jack marked DSL on the rear panel of the Base Unit to the telephone
wall jack provisioned for DSL and phone service. This connection will provide dial tone for voice services in
addition to providing DSL to your Verizon One. (Note: The Verizon One has a convenience/Fax jack that can
be used to connect additional telephone equipment such as a fax machine).
4. Connect the AC 12V power supply cord to the power connector marked 12V AC on the rear panel of the
Verizon One Base Unit. Plug the other end of the power supply into an AC wall socket, and then turn on the
power switch (if it is not already on).
5. Check the Base to see if the Power LED is solid green. If the Power LED is solid green, the Verizon One Base
is powered up.
6. Verify telephone operation by pressing the <Speakerphone> button found on the front of the Base Unit. Once
pressed, the In-Use LED lights solid blue and dial tone should be heard from the speaker.
7.3 Wall Mounting on a Hollow Drywall Surface (Optional)
Follow the steps below to mount Verizon One on a wall:
NOTE: The hardware needed to wall mount Verizon One is not included with the product.
1. Obtain two #8 pan-head screws and two #8 wall anchors.
2. Place the Verizon One Base Unit stand against the wall where it is to be mounted. Using a pencil, mark one of
the two corresponding screw locations. Mark the other at the appropriate distance vertically.
3. Drill a 3/16” hole for the wall anchors and insert. Screw in the #8 screws until the face of the screws are
approximately 1/8” from the wall.

030-300419 Rev. A
Draft 8– 11/30/04
030-300419 Rev. A 11 November 2004
User Guide Verizon One Telephone Subsystem
4. Test-fit the Verizon One Base Unit swivel stand on the screws and adjust the screw depth for a sliding fit. Once
the stand fits tightly against the wall, remove it from the wall.
5. Connect the included phone cable from the jack marked DSL on the rear panel of the Base Unit to the telephone
wall jack provisioned for DSL and phone service. This connection will provide dial tone for voice services in
addition to providing DSL to your Verizon One. (Note: The Verizon One has a convenience/Fax jack that can
be used to connect additional telephone equipment such as a fax machine).
6. Connect the AC 12V power supply cord to the power connector marked 12V AC on the rear panel of the
Verizon One Base Unit. Plug the other end of the power supply into an AC wall socket, and then turn on the
power switch (if it is not already on).
7. Check the Base to see if the Power LED is solid green. If the Power LED is solid green, the Verizon One Base
is powered up.
8. Verify telephone operation by pressing the <Speakerphone> button found on the front of the Base Unit. Once
pressed, the In-Use LED lights solid blue and a dial tone should be emitted from the speaker.
9. Once telephone operation has been verified, snap the Base Unit Swivel stand onto the base. Adjust the stand by
pressing the paddle and tilting the base until the top of the Base Unit Touches the edge of the circular stand.
The Base Unit must be installed in this position. Prior to placing the Base Unit and Swivel Stand onto the wall,
use the cable management grooves within the bottom of the stand to guide the Power, and telephone cables so
that the stand can sit flush with the wall. Mount the unit to the wall.
10. Once unit has been mounted to the wall, re-verify telephone operation by pressing the <Speakerphone> button
on the front of the Base Unit. Once pressed, the In-Use LED lights solid blue and a dial tone should be heard
from the speaker.
030-300419 Rev. A
Draft 8– 11/30/04
030-300419 Rev. A 12 November 2004
User Guide Verizon One Telephone Subsystem
8. INSTALLING THE VERIZON ONE HANDSET
To install the Handset, please follow the instructions provided in this section.
NOTE: The Verizon One kit includes a battery that provides power to the Handset when the Handset is not
cradled in the Base Unit. When the Handset is cradled in the Base Unit, the Base Unit will automatically begin
charging the handset battery. This battery can be found inside the battery compartment of the handset. Prior to
use, you must plug the battery into the handset as described in section 8.1 (Installing the Handset Battery).
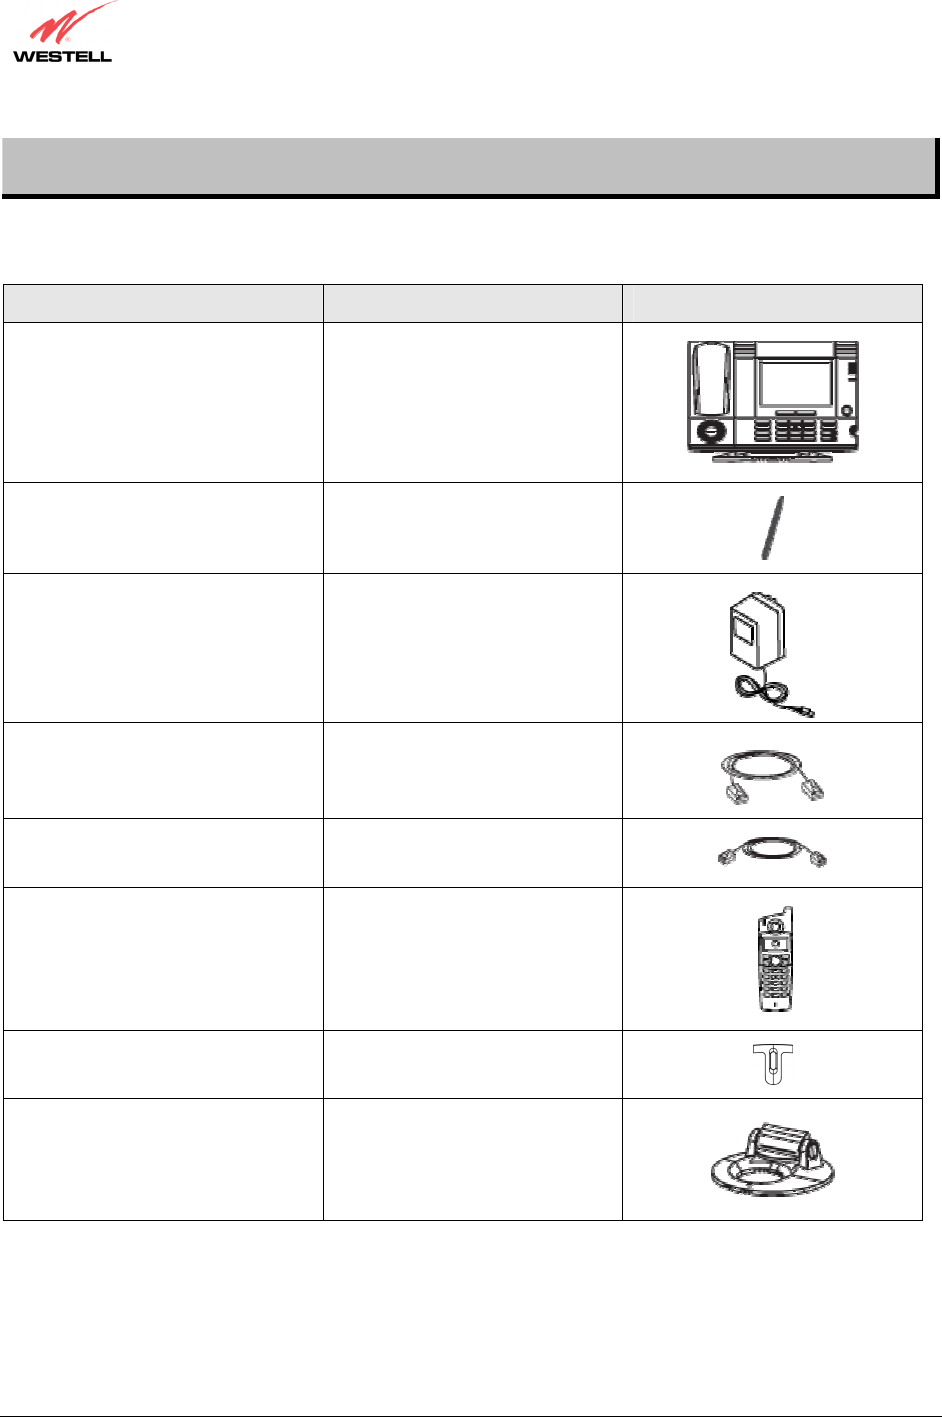
8.1 Installing the Handset Battery
IMPORTANT: Before you install or handle the battery, please read section 3.2 for Battery Safety Instructions.
1. Remove the battery cover by pressing on the cover and then sliding the cover off the battery compartment.
2. Attach the battery cable connector to the connector socket inside the battery compartment, and then slide the
battery into the compartment. (Note: Prior to replacing the battery cover, be sure that the battery cables will not
obstruct the compartment when the cover is replaced.)
030-300419 Rev. A
Draft 8– 11/30/04
030-300419 Rev. A 13 November 2004
User Guide Verizon One Telephone Subsystem
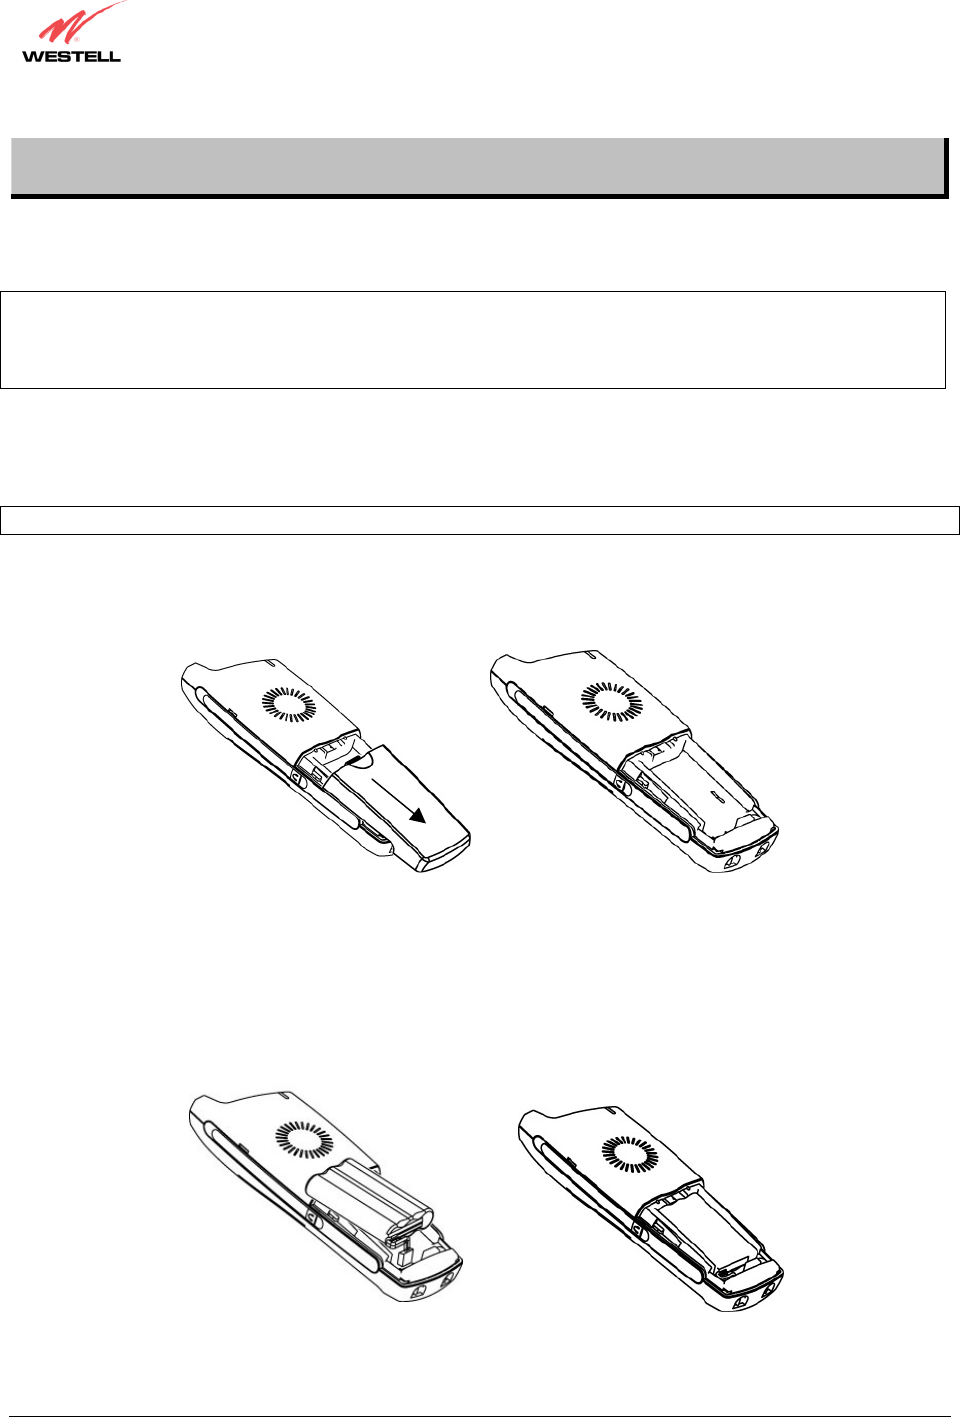
3. Replace the battery cover by sliding the cover upward until it snaps into place on the Handset.
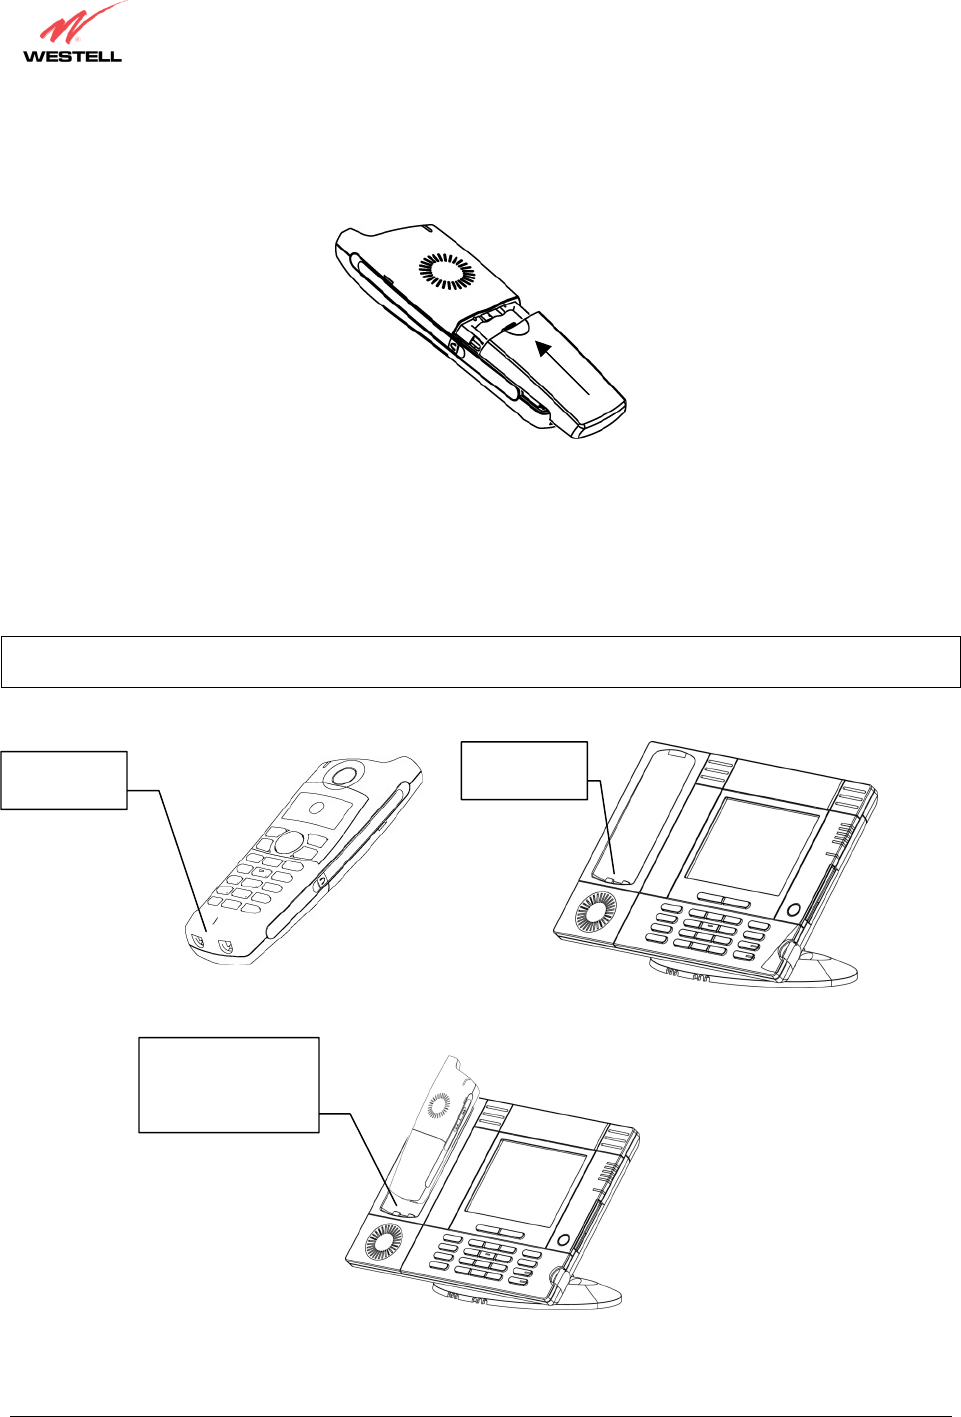
8.2 Charging the Handset (Battery)
Prior to using your Verizon One Handset for the first time, the Handset Battery must be fully charged. To charge the
Handset, place the Handset into the cradle with the keypad facedown so that the contacts on the Handset touch the
contacts on the Base Unit. Allow the battery to charge for approximately 12 hours prior to initial use.
NOTE: To charge the Handset initially, allow the Handset and battery to charge for 12 hours. Whenever the Handset
battery needs recharging, the battery icon on the handset’s LCD will be shown flashing.
Handset
Contacts
Base Unit
Contacts
Slide the Handset
face down into the
cradle of Base so that
the contacts touch.

030-300419 Rev. A
Draft 8– 11/30/04
030-300419 Rev. A 14 November 2004
User Guide Verizon One Telephone Subsystem
8.3 Battery Charge Indication
The Handset provides indication of 4 levels of battery charge state. (Full, High, Medium, Low). It takes
approximately 2 seconds for the Handset to detect the battery charge level after it has been removed from the cradle.
The Handset LCD design includes a Battery level meter icon.
8.3.1 Battery Level (Low Charge)
When the handset reaches low battery level state during a talk state, the “battery low” tone is played once per minute
through the speaker and the battery low icon begins to flash indicating approximately 8 minutes of talk time are
remaining. If the Handset is not currently on a call and the icon is flashing, when you press any key, the Handset
will emit an error tone and all keypad functions will be disabled (in the event that the battery is too low to initiate a
telephone call). The battery low icon will continue to flash until the battery is recharged or completely discharged.
Low battery level indication (battery icon flashes)
8.3.2 Battery Level (Medium Charge)
When the Handset reaches Medium battery level, the battery icon is displayed “on” steady and will remain on until
either a low charge is reached (icon will be flashing), or until a High charge is reached by re-charging the battery.
Medium battery level indication (battery icon “on” steady)
Icon flashes
Icon on “steady”
030-300419 Rev. A
Draft 8– 11/30/04
030-300419 Rev. A 15 November 2004
User Guide Verizon One Telephone Subsystem
8.3.3 Battery Level (High Charge)
When the Handset is at High battery level, the battery icon is not displayed.
High battery level indication (battery icon is not displayed)
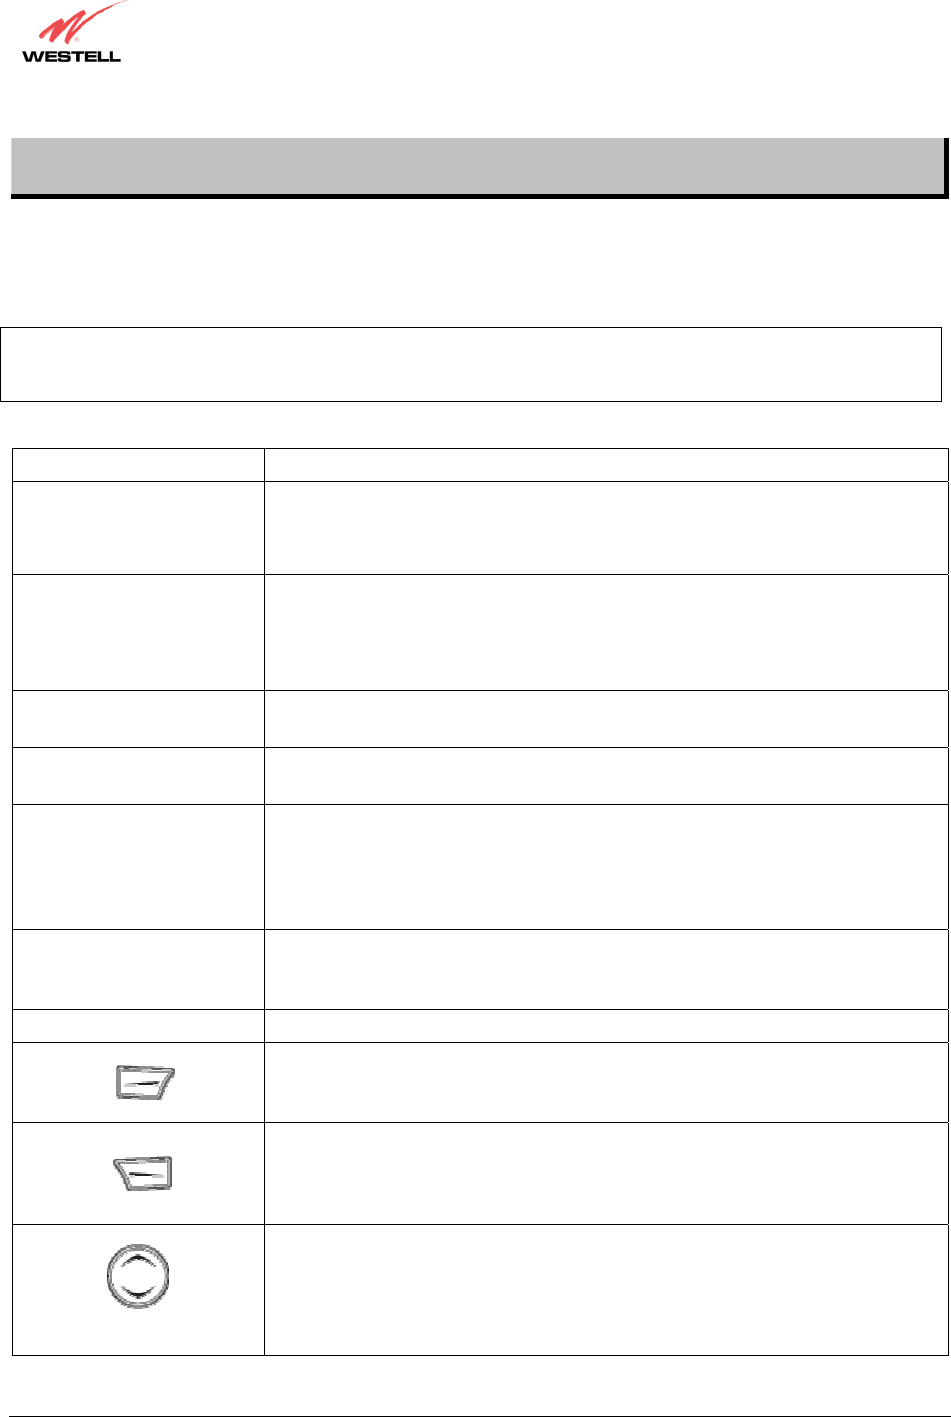
8.3.4 Battery Level (Full Charge)
If the handset is fully charged when removed from the base and in an idle state, the screen will display the following
message for 3 seconds or until you press any key. After 3 seconds the display will revert to the normal Standby
screen.
8.4 Turning On the Handset
Once the battery has been installed and the Handset has been charged, the handset will be functional. Pressing any
key will illuminate the display.

030-300419 Rev. A
Draft 8– 11/30/04
030-300419 Rev. A 16 November 2004
User Guide Verizon One Telephone Subsystem
8.5 Parking the Handset on the Base
To park the Handset, slide the Handset (face down) into the cradle of the Base Unit. Be sure the contacts on the
Handset touch the contacts on the Base.
8.6 Using the Handset Belt Clip
If you want to use the belt clip provided with the Handset, snap the belt clip onto the back of the Handset, and then
fasten the belt clip and Handset onto your belt. This is an easy and secure way to transport the phone, and is
convenient when using the headset jack for hands-free operation.
Slide the Handset face down
into the cradle of Base so
that the contacts touch.

030-300419 Rev. A
Draft 8– 11/30/04
030-300419 Rev. A 17 November 2004
User Guide Verizon One Telephone Subsystem
9. REGISTERING THE HANDSET TO THE VERIZON ONE BASE
Registration Procedure
After successfully charging your Verizon One Handset, you must perform a registration procedure to allow
the Handset to communicate with the base. To register the handset to the Base Unit perform the following
steps:
NOTE: To select soft key functions displayed on the left side of the LCD screen, press the key in the top left
corner key of the Handset. To select soft key functions displayed on the right side of the screen, press the key
in the top right corner. These buttons are used to select soft key functions only. For example, if you want to select
Phonebook, press . To select Menu, press . To scroll up or down, use the round navigation button .
1. While at the Base Unit select the <Menu> function on the Handset.
2. Using the round navigational button, scroll down to find the [Registration] menu. Next, press the top left corner
key to select “Registration.”
3. After you have selected “Registration,” the Handset will instruct you to press and hold the <Intercom> key on
the Base Unit. Press and hold this key for 3 seconds.
4. After 3 seconds, the Handset will automatically register to the Base Unit.
To verify successful registration, press the <Talk/Flash> button on the Handset; a dial tone will be emitted
from the Handset and a call may successfully be placed. If no dial tone is emitted, but the Handset
indicated that it successfully registered with the base, verify that the Base Unit is connected to an active
telephone line and that this line is plugged into the “DSL” port on the back of the Base Unit.
030-300419 Rev. A
Draft 8– 11/30/04
030-300419 Rev. A 18 November 2004
User Guide Verizon One Telephone Subsystem
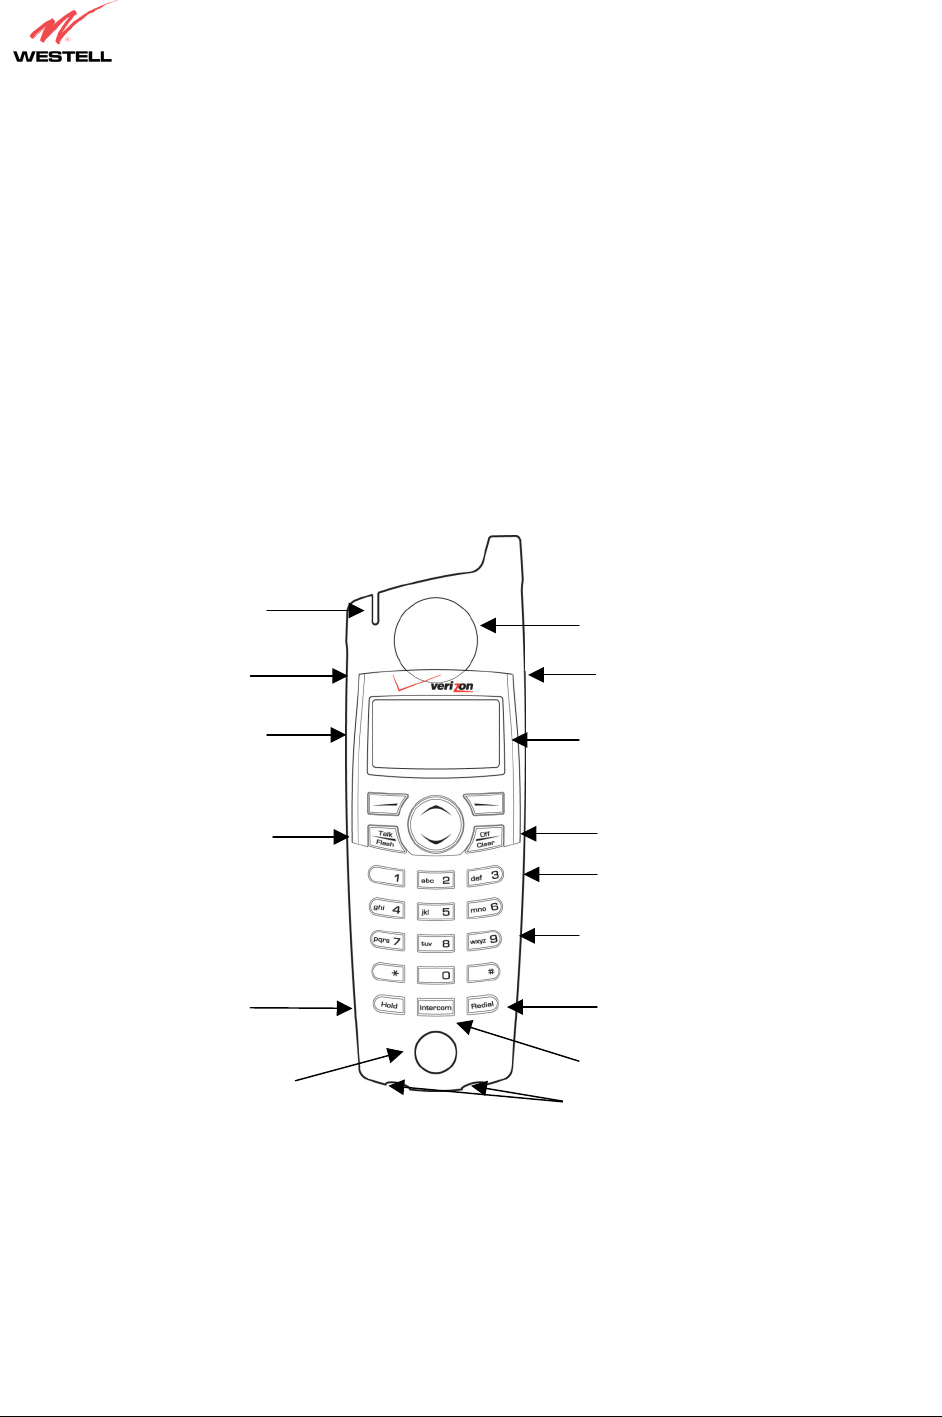
10. VERIZON ONE HANDSET CONTROLS
10.1 Handset Control Buttons
The following control buttons are provided on the Verizon One Handset.
NOTE: “Off-hook” refers to the condition when either the Base Unit or Handset is active in requesting a
dial tone or is engaged in a call. “On-hook” refers to the condition when either the Base Unit or a Handset
is not active in requesting a dial tone or placing a call.
Button Function
Volume Up/Volume Down
(On side of Handset)
Pressing these buttons will raise/lower the volume of the Handset Ringer when
handset is on-hook.. The ringer volume can be set to low, medium, high, or off. .
The ringer level will be displayed while you are changing the volume. Pressing
these buttons when on off-hook mode will adjust the speaker volume of the audio.
Talk/Flash
When pressed initially, this button places the phone in off-hook status, and you
may dial the desired phone number. When pressed during an active call, it will
simulate a momentary press and release of the phone’s hook switch and will put
the active call on hold and accepts the incoming call as with call waiting or 3-way
calling.
Off/Clear Enables you to end any calls by placing the phone on-hook. Clear is used to clear
entries and selections made to the soft-menu available on the Handset LCD.
Hold When pressed once, this button will place the entire call on hold. Press the Hold
button again to release the call from hold status.
Intercom
When the Intercom button is pressed on the Handset, it serves as a paging device
to locate the Base Unit and/or to establish an intercom call between the Handset
and Base Unit. When Intercom is pressed, the Base Unit will receive the signal
from the Handset, and will ring until the Base Unit is set to off-hook status or until
the Handset presses intercom turning the intercom function off.
Redial
Redial enables you to select one of the last 5 phone numbers entered in the phone.
(Note: It will not redial numbers such as passcodes or account numbers that may
have been entered after the outgoing call was established.)
12-key Keypad (0-9, *, #) Enables you to enter the desired characters.
Pressing this button will allow you to:
-Select a menu option from the Main menu screen
-Edit/Erase/Save the option settings
Pressing this button will allow you to:
-Access Handset’s Main menu screen
-Delete/Backspace characters
-View the settings of an option once it is selected
Pressing this button enables you to:
-Scroll up/down to the desired menu option
-Toggle between sublevel menu options and settings
-Select calls displayed on the Handset’s LCD screen
-Access speed dial numbers
030-300419 Rev. A
Draft 8– 11/30/04
030-300419 Rev. A 19 November 2004
User Guide Verizon One Telephone Subsystem
10.2 Handset Activity LED
The Handset includes an Activity LED, also referred to as the “Voice Message Waiting LED,” which performs the
following functions:
• Incoming Ring: Activity LED is flashing at a cadence in accordance to an incoming ring pattern. When ring
cadence is ON, the LED blinks.
• Talk Mode: If the Handset is in Talk mode, Intercom, or Voice-Mail mode, the Activity LED lights solid blue.
• Paging: When the Handset is being paged, the Activity LED will flash according to Paging tone cadence.
• Call on HOLD or on MUTE: The Activity LED should blink at 1 Hz rate when Handset has placed a call on
MUTE or on HOLD.
• Message Waiting: When there is a voicemail message waiting and none of the above conditions are present, the
Activity LED flashes.
Verizon One Handset
10.3 Backlighting
Backlighting refers to the condition when the LCD screen or the buttons on the Handset or the Base light to
indicate any of the following conditions:
• Incoming Calls
• Pressing Keys
• Paging and/or Intercom functions
Activit
y
LED
Talk/Flash OFF/Clea
r
Hold
Interco
m
Redial
LCD Screen
12-ke
y
Ke
yp
ad
Micro
p
hone
Speaker
(on front and back)
Volume
Up/Down buttons
(on side)
Headset Jack
(
on side
)
Belt Clip hook
(
on sides and back
)
Belt Cli
p
hoo
k
Char
g
in
g
Contacts
(
on bottom
)
030-300419 Rev. A
Draft 8– 11/30/04
030-300419 Rev. A 20 November 2004
User Guide Verizon One Telephone Subsystem
11. VERIZON ONE HANDSET SCREENS
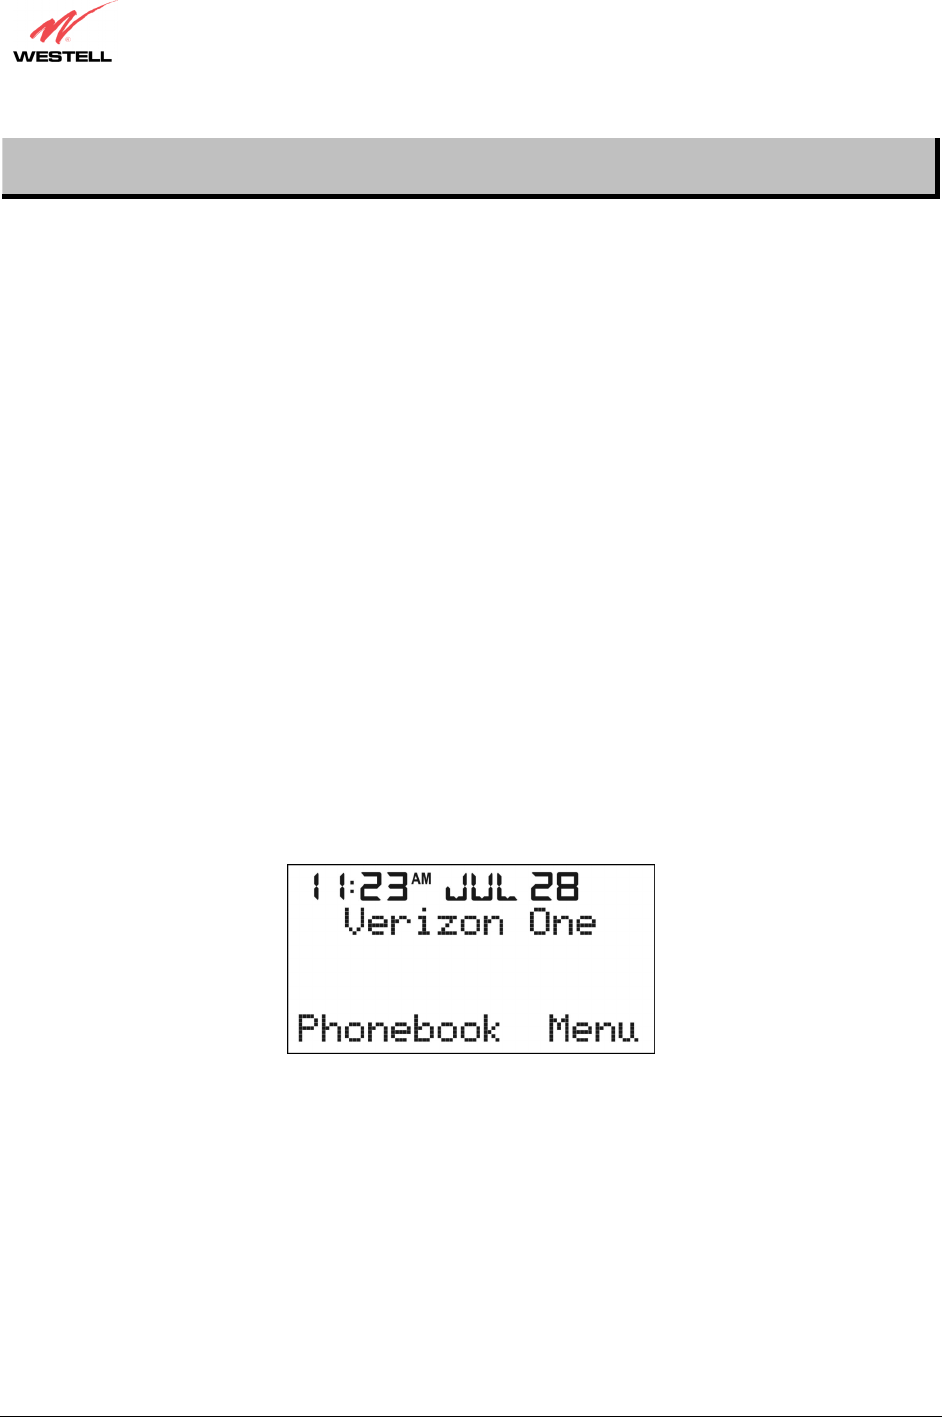
11.1 Standby
After you have charged and registered the Handset to the Base, the Standby screen will be displayed on the
Handset’s LCD screen. The Standby screen provides information such as:
• Current Time and Date
• Battery Level Meter (Note: Battery level meter will be displayed only if the battery contains a low or
medium charge. At a high or full charge, the battery level meter will not be displayed.)
• Handset Name (“Verizon-One” is the Handset’s default name)
• Number of New Calls Messages
• Message Waiting Indicator. Note: The activity LED on the Handset will also blink.
• Line Status
• Ringer Muted Indication
While the Standby screen is displayed, you can press the <Up/Down> button to scroll through the list
Incoming calls. The following examples illustrate the Handset’s response to various call conditions.
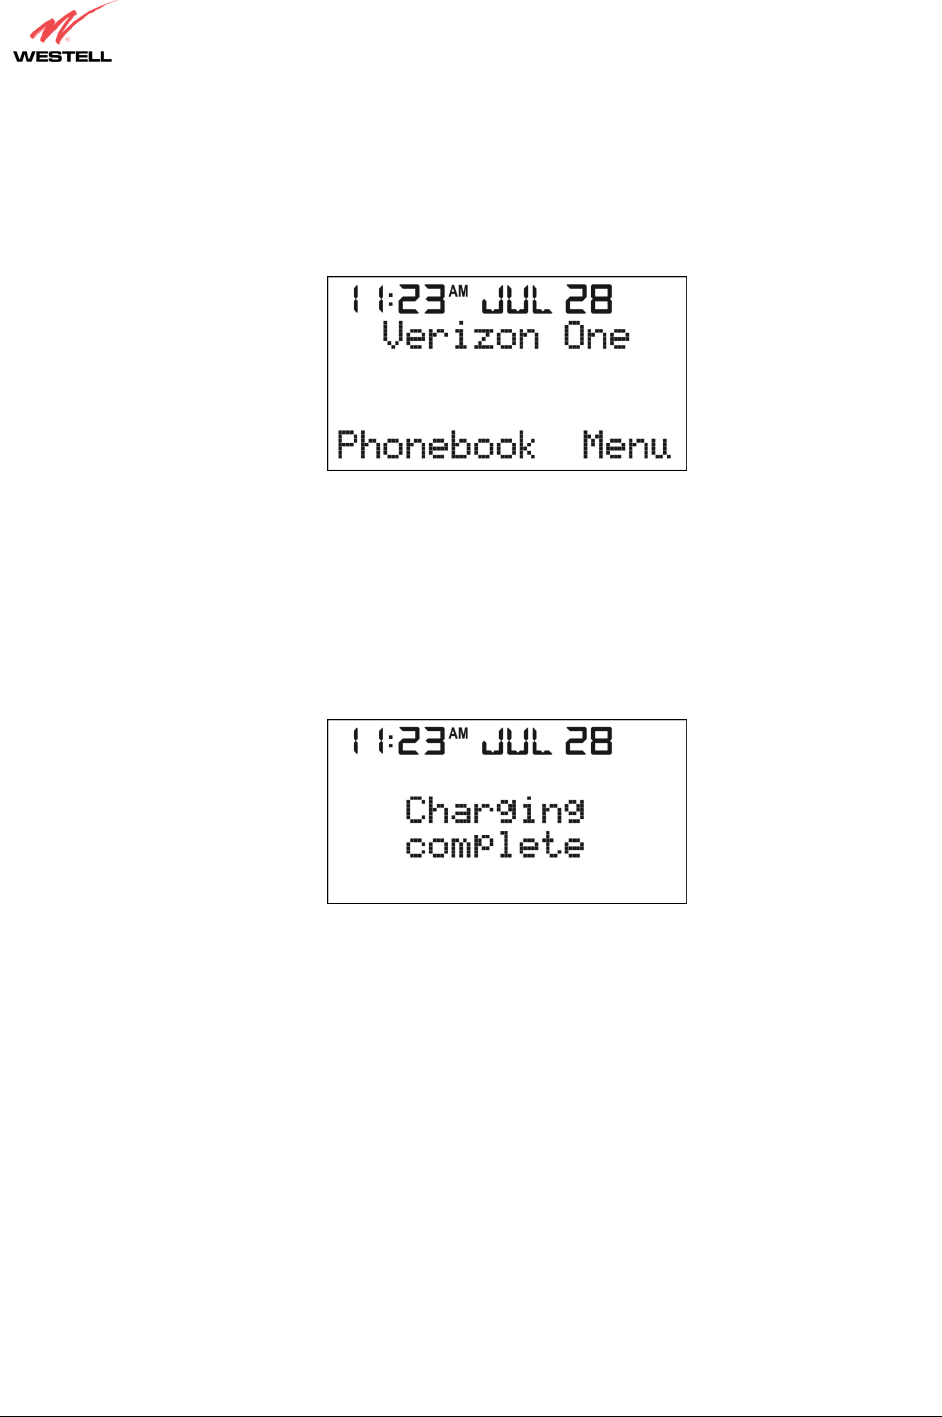
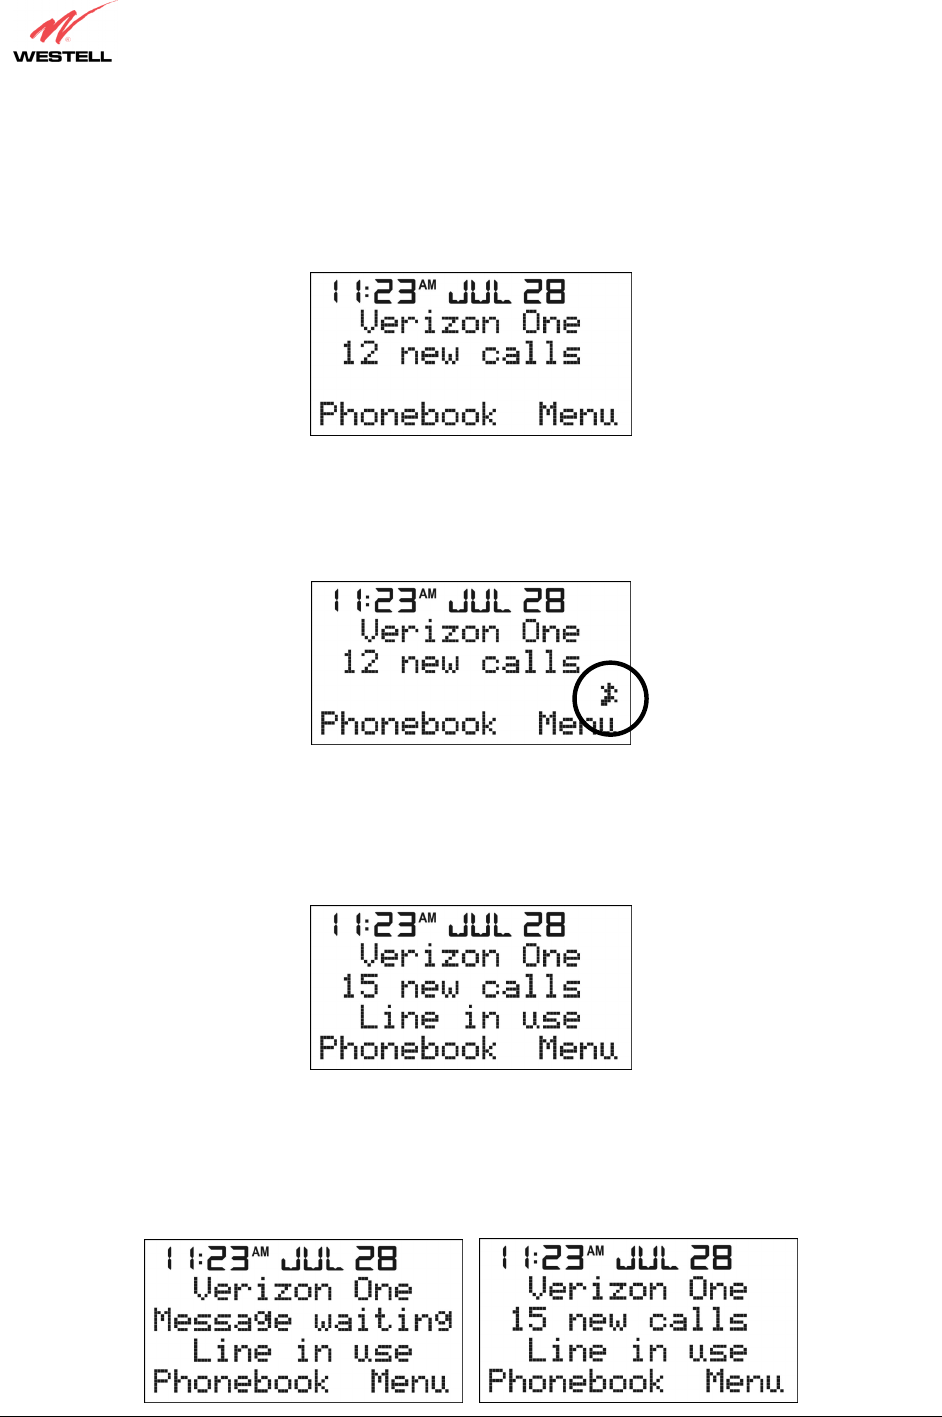
11.2 No New Calls
When there are no new calls, no messages waiting, and the line is not in use, the Handset will display the
following Standby screen.
030-300419 Rev. A
Draft 8– 11/30/04
030-300419 Rev. A 21 November 2004
User Guide Verizon One Telephone Subsystem
11.3 Twelve New Calls
For example, when there are 12 new calls, no messages waiting, and the line is not in use, the Handset will
display the following screen.
11.4 Ringer Off
When the ringer is off, the Handset will display the Ringer OFF icon on the LCD screen.
11.5 Fifteen New Calls, No Messages Waiting, Line In use
For example, when there are 15 new calls, no messages waiting, and the line is in use, the Handset will display the
following screen.
11.6 Fifteen New Calls, Messages Waiting, Line In use
For example, when there are 15 new calls, there are messages waiting, and the line is in use, the Handset will display
the following screens, alternately.
030-300419 Rev. A
Draft 8– 11/30/04
030-300419 Rev. A 22 November 2004
User Guide Verizon One Telephone Subsystem
12. USING THE VERIZON ONE MAIN MENU
12.1 Accessing Handset Main Menu
NOTE: To select soft key functions displayed on the left side of the LCD screen, press the key in the top left
corner key of the Handset. To select soft key functions displayed on the right side of the screen, press the key
in the top right corner. These buttons are used to select soft key functions only. For example, if you want to select
Phonebook, press . To select Menu, press . To scroll up or down, use the round navigational button .
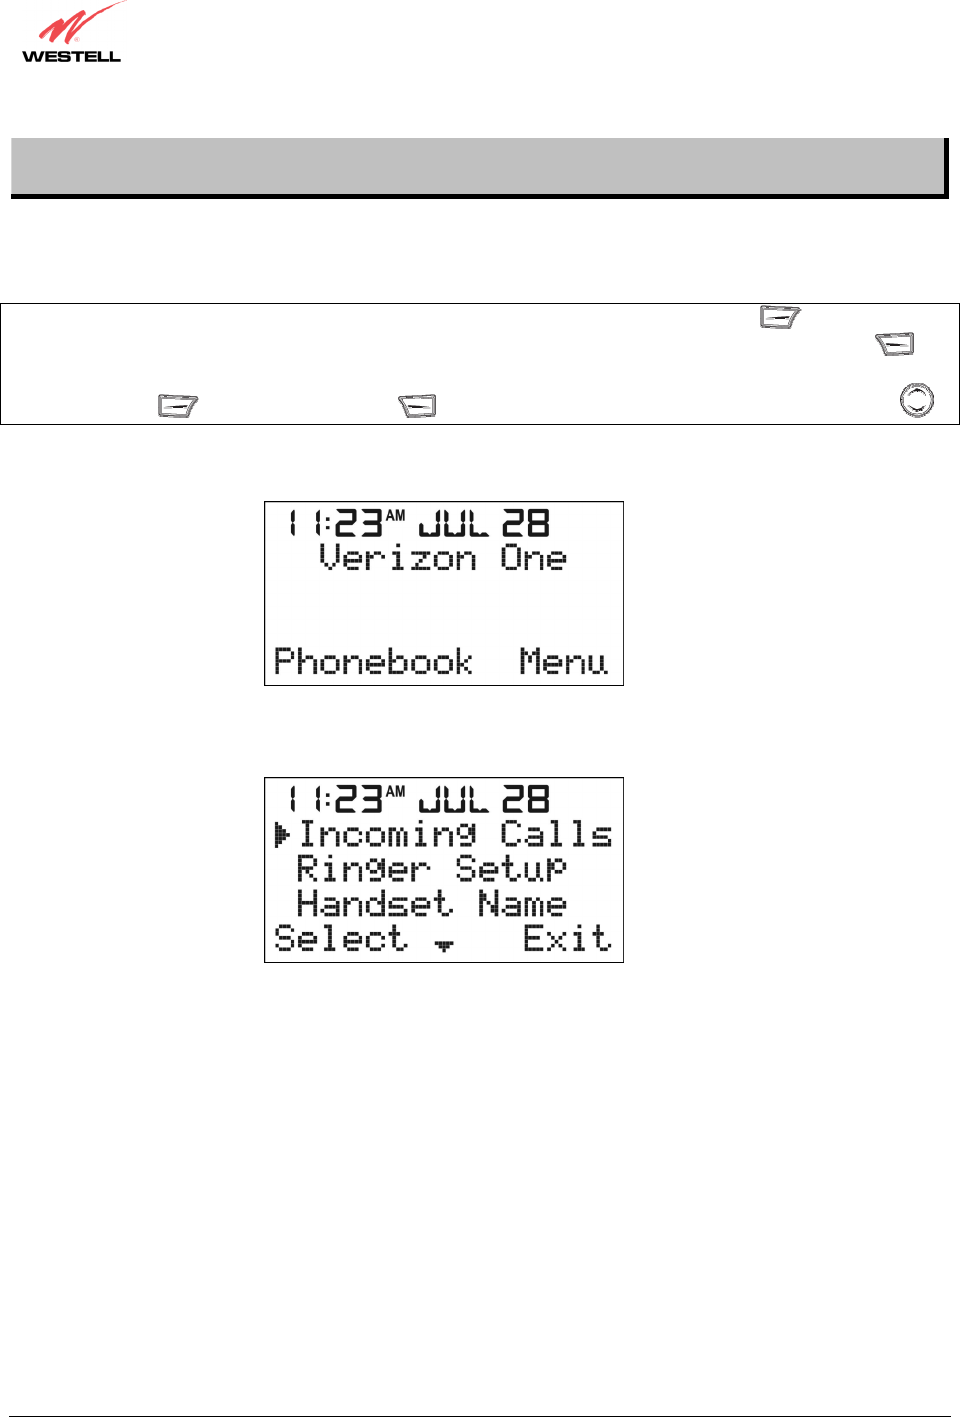
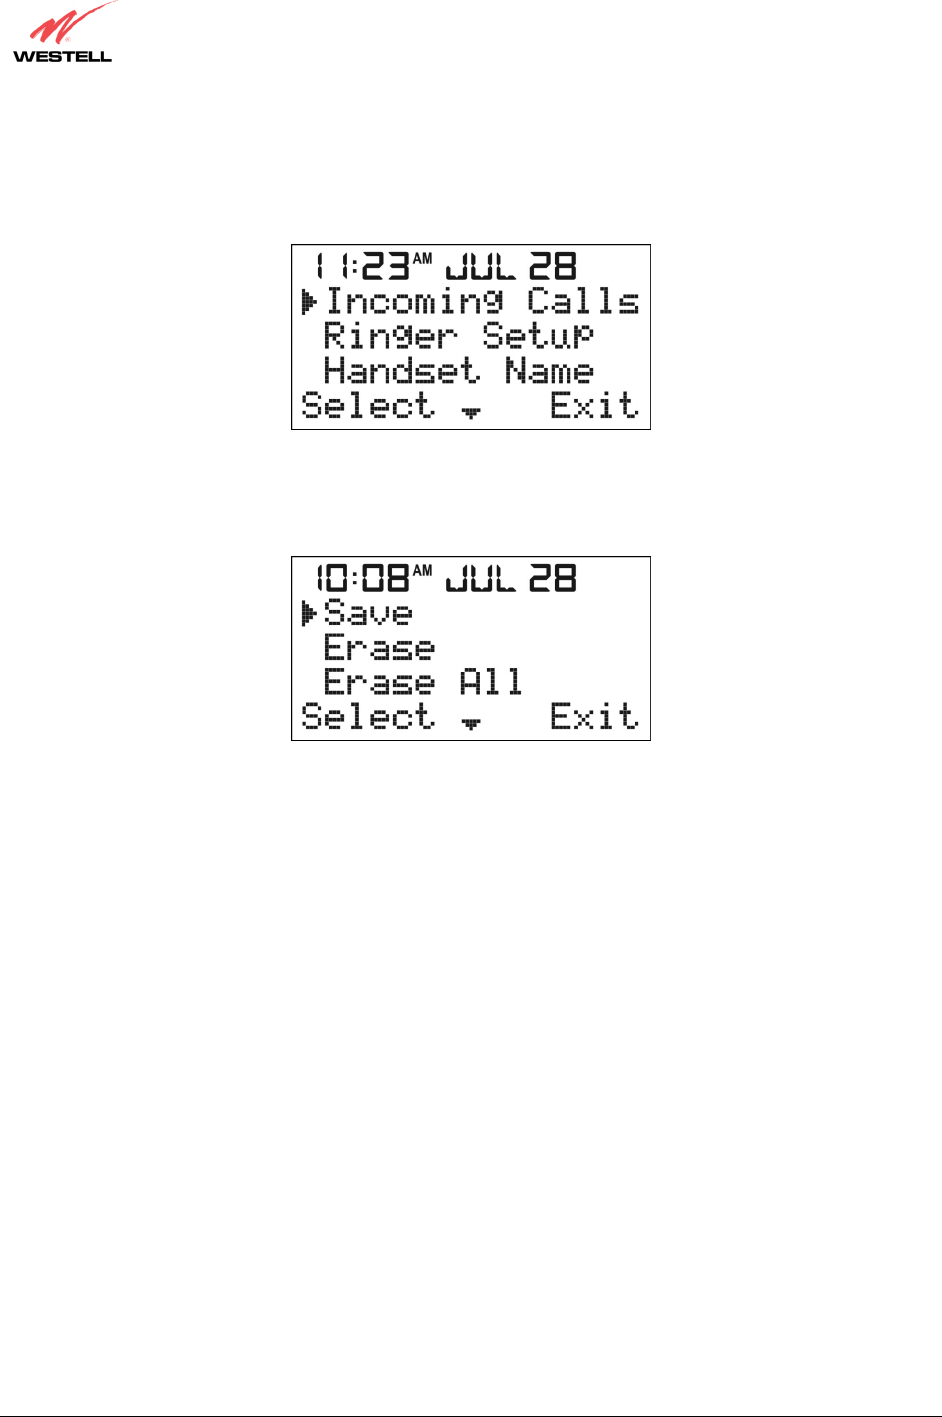
To access the Handset’s main menu, select [Menu] in the Standby screen.
Once selected, the following Main Menu screen will be displayed, and the pointer [►] should point to the
[Incoming Calls] menu.
Next, press the <Up/Down> button to scroll down through the Main Menu options. After you have
selected a main menu option, select the [Select] soft key on you Handset’s LCD screen to confirm your
selection and to display the submenu. If you select [Exit], you will return to the Standby screen.
After you have selected a main menu option, the submenu for that option will be displayed. Select the
desired submenu option, and then select [Select] to confirm your selection.
030-300419 Rev. A
Draft 8– 11/30/04
030-300419 Rev. A 23 November 2004
User Guide Verizon One Telephone Subsystem
The following chart displays Main Manu and Submenu options available to the Handset.
Main Menu Option Submenu Option(s)
Incoming Calls
Save – Selecting this option enables you to save incoming calls.
Erase – This option enables you to erase any saved calls.
Erase All – This option enables you to erase all saved calls.
Ringer Setup
Ringer Volume – Selecting this option enables you to set the volume to the level
(Off, Low, Medium, High) on your Handset.
Ringer Tone – Selecting this menu enables you to select the melody that you want
to use for the Ringer. See section 12.5 for available options.
Keypad Tones – Selecting this menu enables you to turn On/Off keypad
confirmation tones.
Handset Name Enter a name of your choice for the Handset.
Note: The default name for the Handset is “Verizon-One.”
Date and Time Enter the desired date and time settings on your Handset.
Registration View the Handset’s registration information.
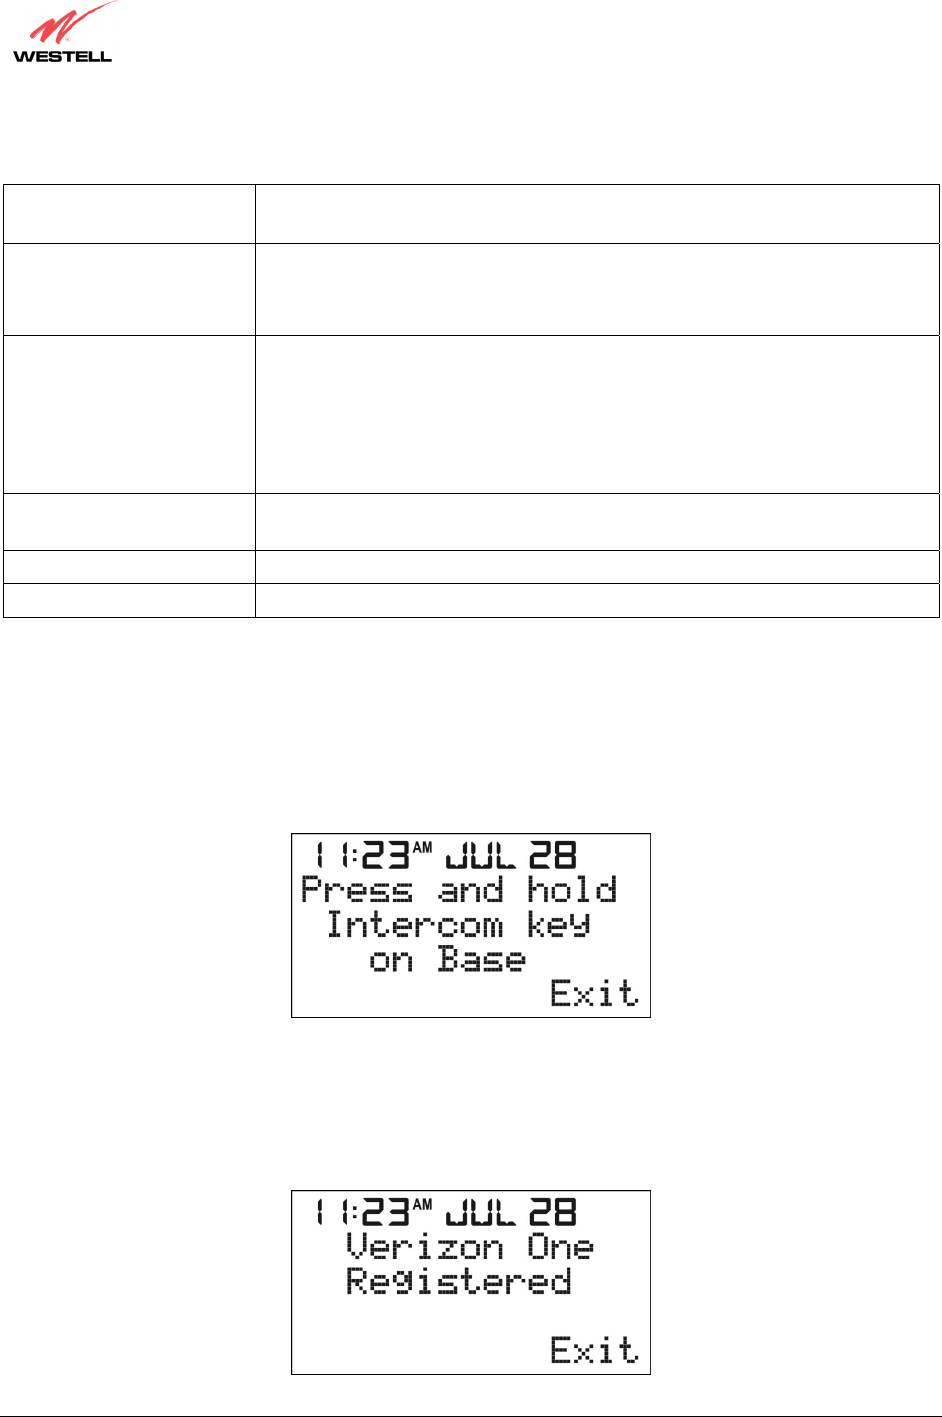
12.2 Registration Menu
When the [Registration] menu is selected from the main menu screen, the following screen will be displayed. By
using this menu, you can register a Handset to the Base. Begin by pressing and holding the <Intercom> button on
the Base Unit for 3.5 seconds. Select [Exit] if you want to return to the Main Menu screen.
If you press and hold the <Intercom> button on the Base unit for 3.5 seconds, the Handset will display a “Wait
Registering” message while it is communicating to the Base.
After a successful registration, the Handset will emit a confirmation tone (long beep), and the screen will display the
“Handset x Registered” message for 2 seconds. Then, the Main menu screen will be displayed.
030-300419 Rev. A
Draft 8– 11/30/04
030-300419 Rev. A 24 November 2004
User Guide Verizon One Telephone Subsystem
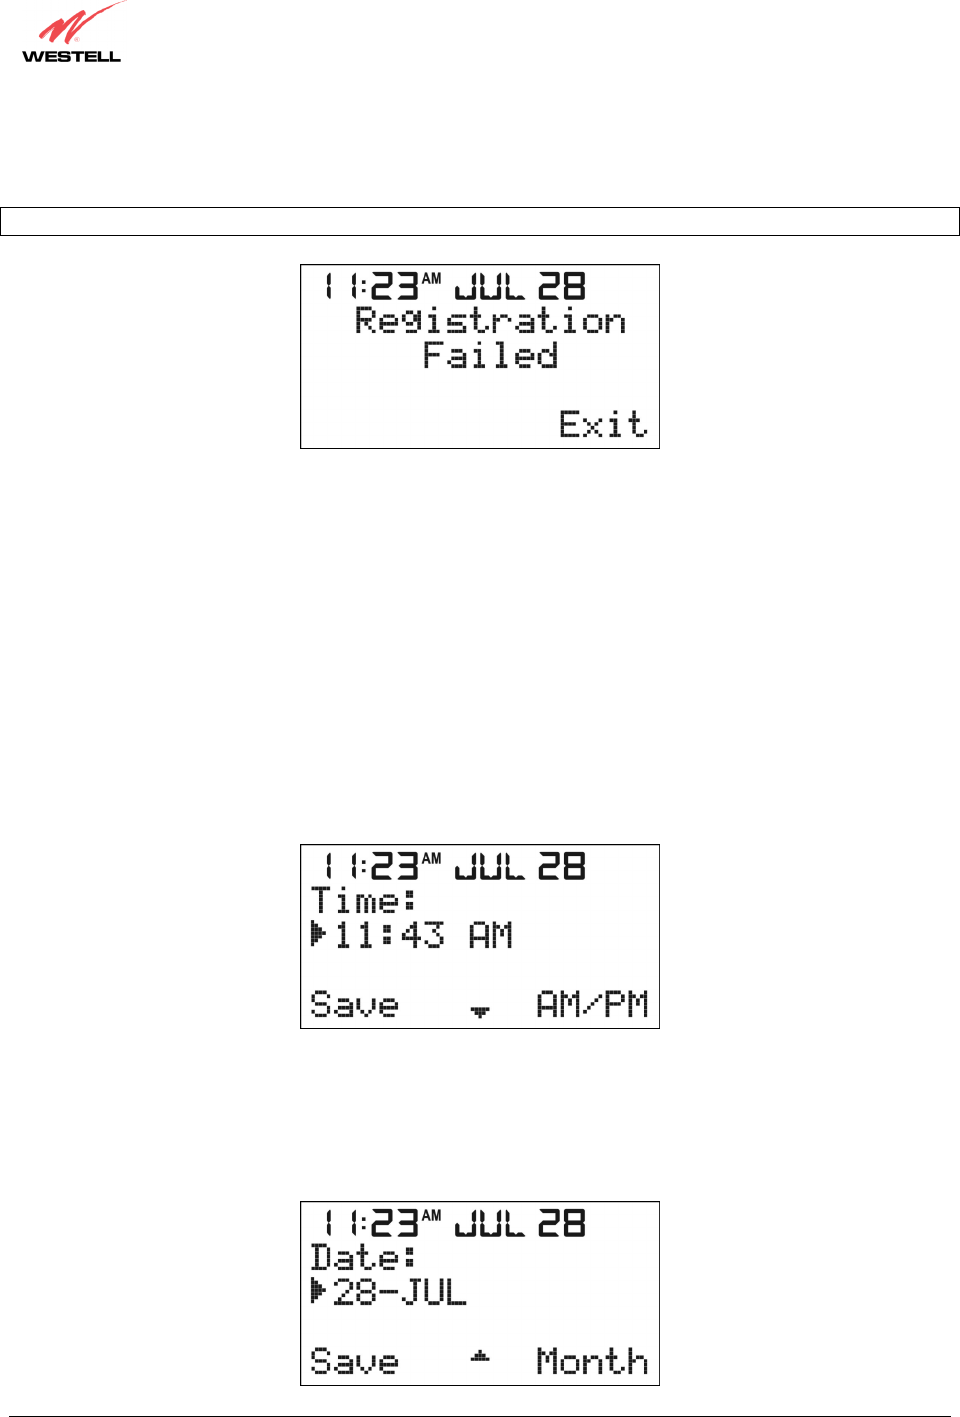
If the registration is unsuccessful, the Handset will emit an “error tone,” and the screen will display a “Registration
Failed” message for 2 seconds before returning to the initial Handset registration screen.
NOTE: The maximum number of handsets that can be registered to the Base is eight.
12.3 Date and Time Menu
When the [Date and Time] menu is selected from the main menu screen, the following screen will be displayed. The
pointer will be positioned at the time setting, and the first digit of time will blink to urge for input. After the first
digit has been entered, the second digit will blink. The blinking occurs in the following sequence: 1st -> 2nd (skip the
colon :) -> 3rd -> 4th -> in endless loop until the <Up/Down> button is pressed. An error tone will be given if
invalid digit is entered. After you have entered the desired time, select one of the following options:
• Select [AM/PM] to change the current “AM” setting to “PM” and vice versa.
• Press the <OFF> button to return to the Standby screen.
• Select [Save] to save the setting and to return to the Main Menu screen.
If <Up/Down> button is pressed at this time, the following Date screen will be displayed. The pointer will be
positioned at the time setting, and the first digit of time will blink to urge for input. After the first digit has been
entered, the second digit will blink. The blinking occurs in the following sequence: 1st -> 2nd (skip the colon :) ->
3rd -> 4th -> in endless loop until the <Up/Down> button is pressed. An error tone will be given if invalid digit is
entered. After you have entered the desired date, select one of the following options:

030-300419 Rev. A
Draft 8– 11/30/04
030-300419 Rev. A 25 November 2004
User Guide Verizon One Telephone Subsystem
• Select [Month] to change the current month setting.
• Press the <OFF> button to return to the Standby screen without saving changes.
• Select [Save] to save the settings and to return to Main Menu screen. Error checking of valid dates also takes
place on [Save]. If the date is not valid, then an error tone is played and you is returned to the Date editing
screen which should display the last valid calendar date for the specified month (for example, 30-FEB is
substituted with 29-FEB) with the first digit blinking to urge for input.
• If the <Up/Down> button is pressed at this time, the display will show the Time screen.
12.4 Handset Name Menu
When the [Handset Name] menu is selected from the main menu screen, the following screen will be displayed. This
feature enables you to assign names to the handsets that are registered to Verizon One.
NOTE: “Verizon-One” is the default Handset name.
The Handset extension number N= 1 to 8 reflects the Handset is the Nth Handset, which is registered to the base.
When [Handset Name] is selected, the screen will display the current Handset name. Perform one of the following
events:
• Enter a name at the blinking underscore using the keys (0-9, *, #) on the Handset keypad. After you enter a
character, the underscore will advance to next space on the right. (Note: The maximum number of characters
that can be use for a name is 12.)
• Select [Clear] to clear digit on the left of the blinking underscore.
• Press the <OFF> button to return to the Standby screen without saving setting.
• Select [Save] to save the Handset name and to return to the Main Menu screen (regardless of whether the
Handset name has or has not been modified).
12.5 Ringer Setup Menu
When the [Ringer Setup] menu is selected from the main menu screen, the following options will be displayed.
• Ringer Volume
• Ringer Tone
• Keypad Tones
Press the <Up/Down> button to go to the key functionality described below.
030-300419 Rev. A
Draft 8– 11/30/04
030-300419 Rev. A 26 November 2004
User Guide Verizon One Telephone Subsystem
• Select [Change] to change settings. (Note: for the Ringer volume, Ringer Tone menus, selecting the [Change]
soft key will also play the selected settings.)
• Select [Save] to stop playing the test Melody, save all settings, and to return to the Main Menu screen. The
pointer will be at the last selected menu item.
• Press the <Up/Down> button to switch to a different feature and to stop playing the test Melody.
• Press the <OFF> button to return to the Standby screen without saving changes and to stop playing the test
Melody.
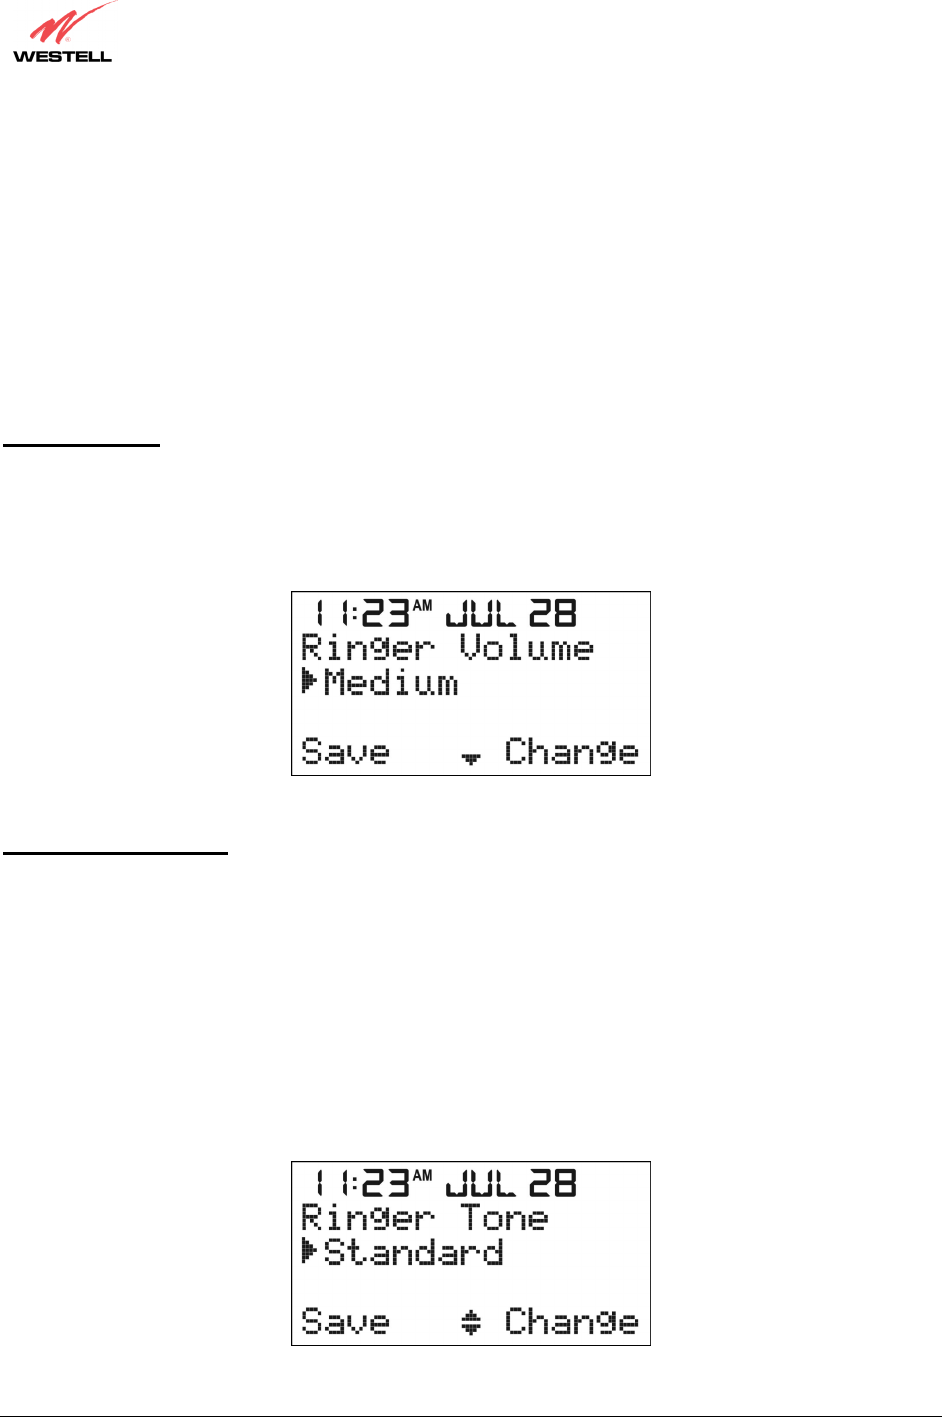
Ringer Volume
If you select [Ringer Volume] the following screen will be displayed. “Medium” is the default ringer volume. Select
the [Change] key to change Ringer Volume to either “Medium,” “High,” “Low,” or “Off”. (Note: The difference
between the levels is 6 dB.) Next, select the [Save] key to confirm your settings.
Ringer Tone / Melody
• If you select [Ringer Tone] the following screen will be displayed. “Standard” is the default ringer tone.
• Select [Change] and press the <Up/Down> button to switch to a different Melody. You may scroll through and
ear each melody option.
• Once the desired melody is identified, select [Save] to stop playing the test Melody and to save all settings and
return to the Main Menu screen. The pointer will be at the last selected menu item.
• Press the <Up/Down> button to switch to a different feature and to stop playing the test Melody.
• Press the <OFF> button to return to the Standby screen without saving changes and to stop playing the test
Melody.
030-300419 Rev. A
Draft 8– 11/30/04
030-300419 Rev. A 27 November 2004
User Guide Verizon One Telephone Subsystem
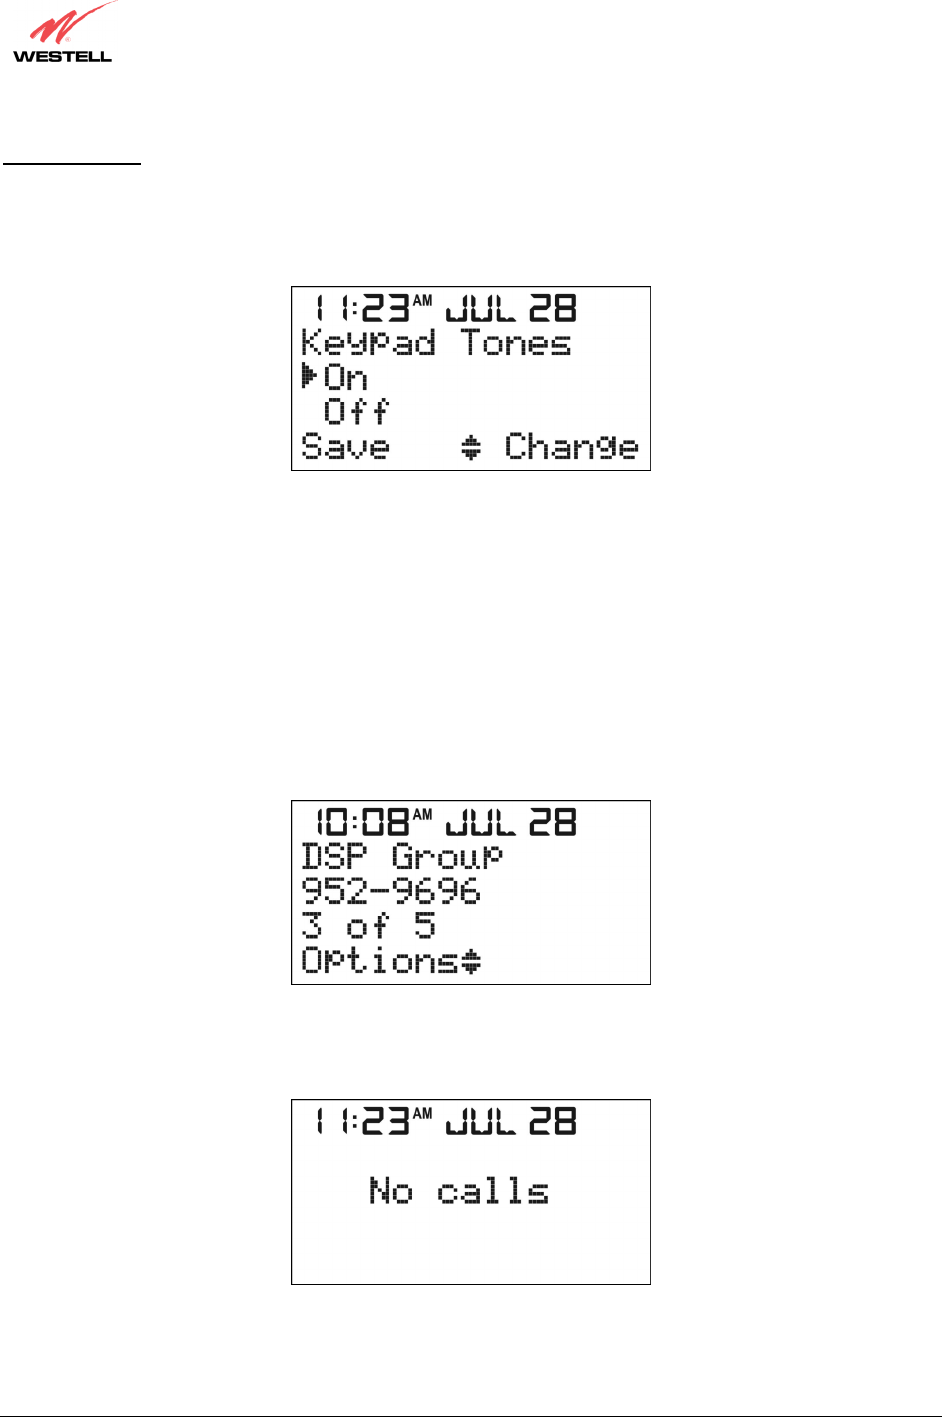
Keypad Tone
If you select [Keypad Tone] the following screen will be displayed. “On” is the default keypad tone. Select
[Change] if you want to change the keypad tone to “Off.” After you have modified this setting, select [Save] to save
your settings.
12.6 Incoming Calls Menu
When the [Incoming Calls] menu is selected from the main menu screen, the most recent Caller ID message will be
displayed together with date and time received. To search for the most recent calls, scroll down to the bottom of the
list using the <Up/Down> button. To search from the oldest calls, scroll up to the top of the list using the
<Up/Down> button. The time and date of the call is displayed at the top of the screen (instead of the current time
and date).
To dial a phone number from the list of Incoming Calls, select an entry and then press the <Talk> button. The phone
will automatically go off-hook state and dial the selected number.
If [Incoming Calls] is selected and there are no Caller ID records available, the Handset will emit an error tone, and
the following “No calls” screen will be displayed along with the current time and date.
030-300419 Rev. A
Draft 8– 11/30/04
030-300419 Rev. A 28 November 2004
User Guide Verizon One Telephone Subsystem
12.6.1 Saving Incoming Calls to the Phonebook
To save a call from the Incoming Calls log to the phonebook, first select [Incoming Calls] at the main menu screen.
View the list of incoming calls and then select the entry that you want to save. Next, select [Options] to display the
following “Save/Erase/Erase All” screen. Select [Save].
12.6.1.1 Phonebook is Open - Entries from the Incoming Calls Log are Accepted
After you select [Save] in the preceding “Save/Erase/Erase All” screen, the phonebook will determine if additional
entries can be added. If the phonebook is not full, additional entries can be added, and the following “Name” screen
will be displayed.
030-300419 Rev. A
Draft 8– 11/30/04
030-300419 Rev. A 29 November 2004
User Guide Verizon One Telephone Subsystem
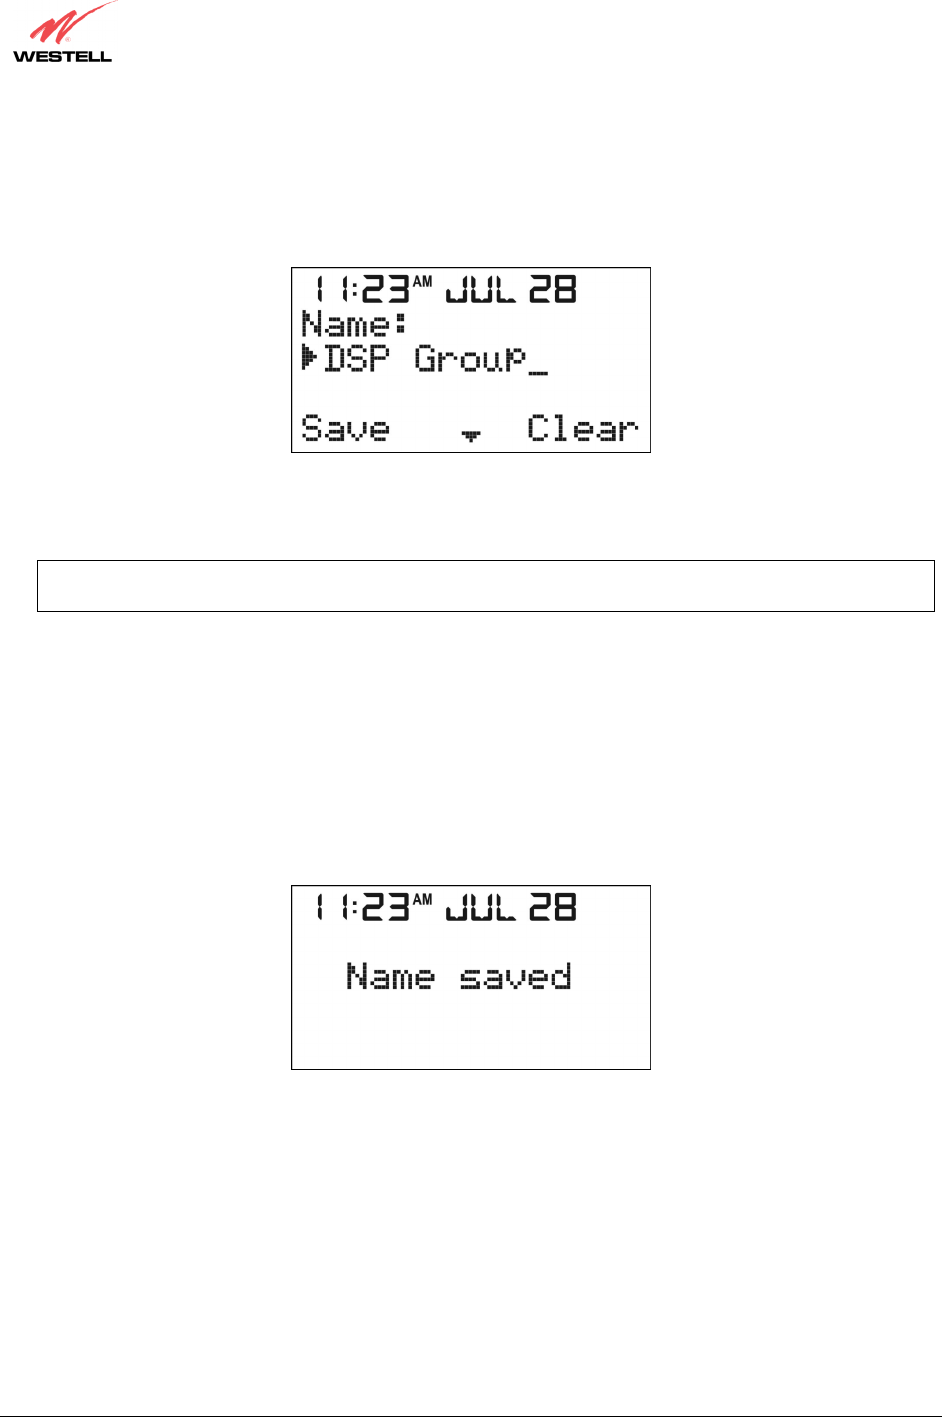
Name Screen
The caller’s name from the entry you selected at the Incoming Calls log will be displayed in the “Name” field.
Select from the following options, and then select [Save] to save the entry to the phonebook.
• Enter additional text to the caller’s name by pressing the # key, which will display at the blinking underscore at
the last character. Use the Handset keypad to input your text. You may also enter numbers ranging from 0 to 9.
NOTE: If you attempt to enter more than 11 characters into this field, the phone will emit an error tone and
additional characters will not accepted.
• Press the <Up/Down> button to go to the “Number” screen.
• Press the <OFF> button to return to the Standby screen.
• Select [Clear] to delete (backspace) characters.
• Select [Save] to save the entry to the Phonebook. Note: The phonebook will insert the new entry in alphabetical
order and renumber the list.
After you select [Save] in the “Name” screen, the “Name Saved” screen will be displayed for 2 seconds. The LCD
will then return to the Incoming Calls log.
If you select [Save] in the “Name” screen (and the screen does not contain a name), the entry is then entered into the
phonebook a “space (empty name)” record and inserted at the beginning of the list regardless of the number field.
The screen then returns to same item in the Incoming Calls log.
030-300419 Rev. A
Draft 8– 11/30/04
030-300419 Rev. A 30 November 2004
User Guide Verizon One Telephone Subsystem
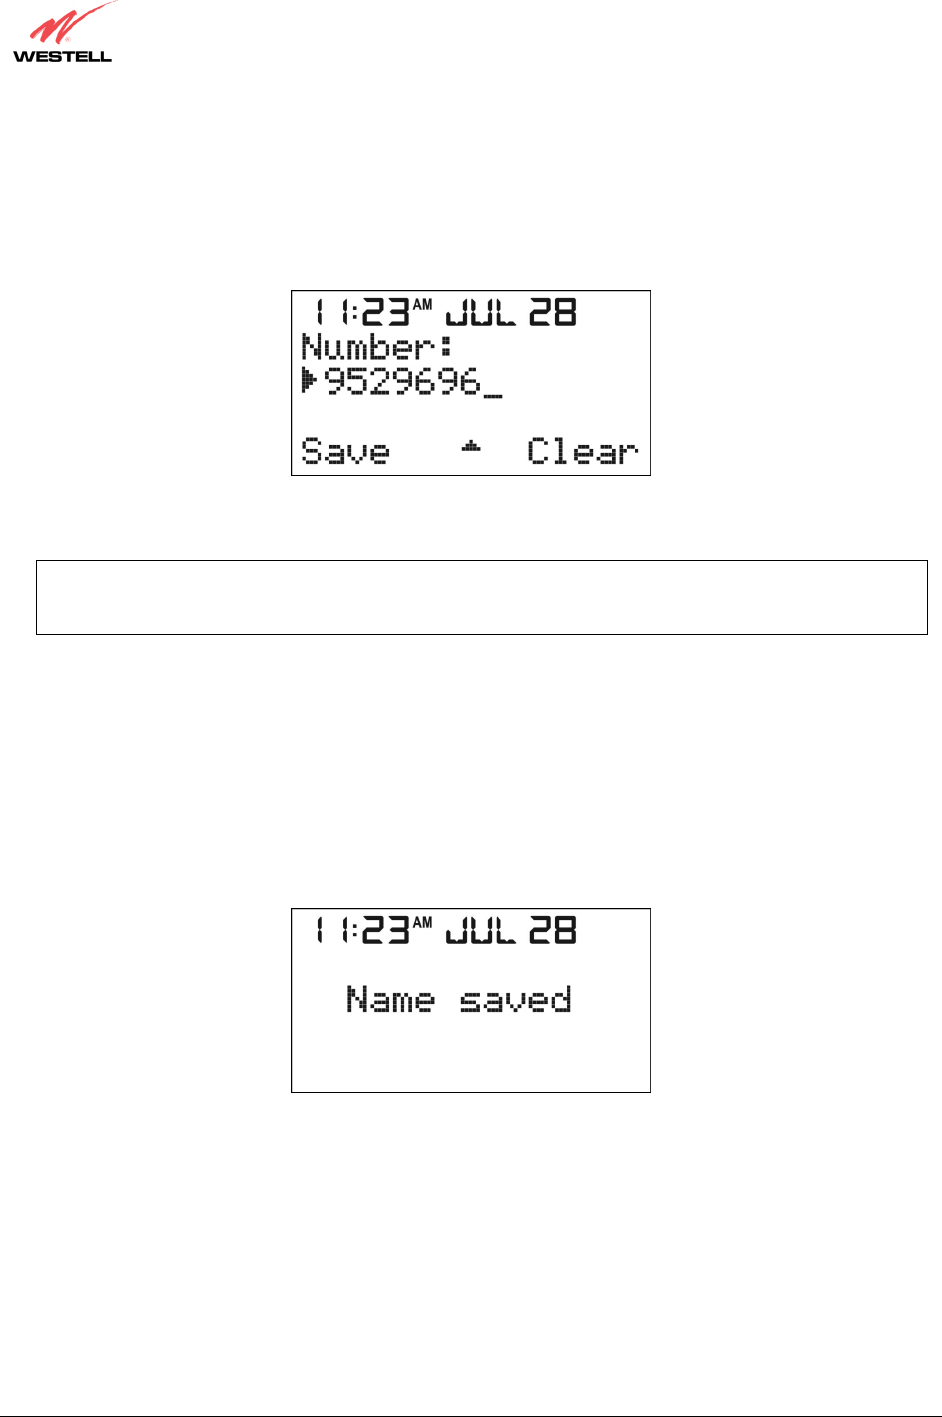
Number Screen
If you press the <Up/Down> button in the “Name” screen, the following “Number” screen will be displayed. The
caller’s phone number from the entry you selected at the Incoming Calls log will be displayed in the “Number”
field. Select from the following options, and then select [Save] to save the entry to the phonebook.
• Enter additional digits (0-9, *, #) at the blinking underscore by using the Handset keypad.
NOTE: Press the # symbol once to give a # or press the # symbol twice to insert “P,” which is a 3-second
pause during dialing. If you attempt to enter more than 24 digits into this field, the phone will emit an error
tone and additional digits will not be accepted.
• Select [Clear] to delete (backspace) characters.
• Press the <OFF> button to return to the Standby screen without saving any changes.
• Press the <Up/Down> button to go back to the “Name” screen.
• Select [Save] to save the entry to the Phonebook. Note: The phonebook will display the new entry in
alphabetical order and renumber the list.
If you select [Save] in the “Number” screen (and if the screen contains a number), the “Name Saved” screen will be
displayed for 2 seconds. The phonebook will display the new entry in alphabetical order and renumber the list.
If you select [Save] at the “Number” screen (and if the screen does not contain a number), the following “No
number entered” screen will be displayed. The phone will emit an error tone and then return to the “Number” screen
to enable you to enter a number. Enter a number into the “Number” screen, and then press save to save the entry to
the phonebook.