Wireless Matrix MBS2A Mobile base station with L-Band Sat, GSM and WLAN User Manual Style Guide
Wireless Matrix Corporation Mobile base station with L-Band Sat, GSM and WLAN Style Guide
Contents
- 1. Installer Guide
- 2. Users Manual
- 3. Users Guide
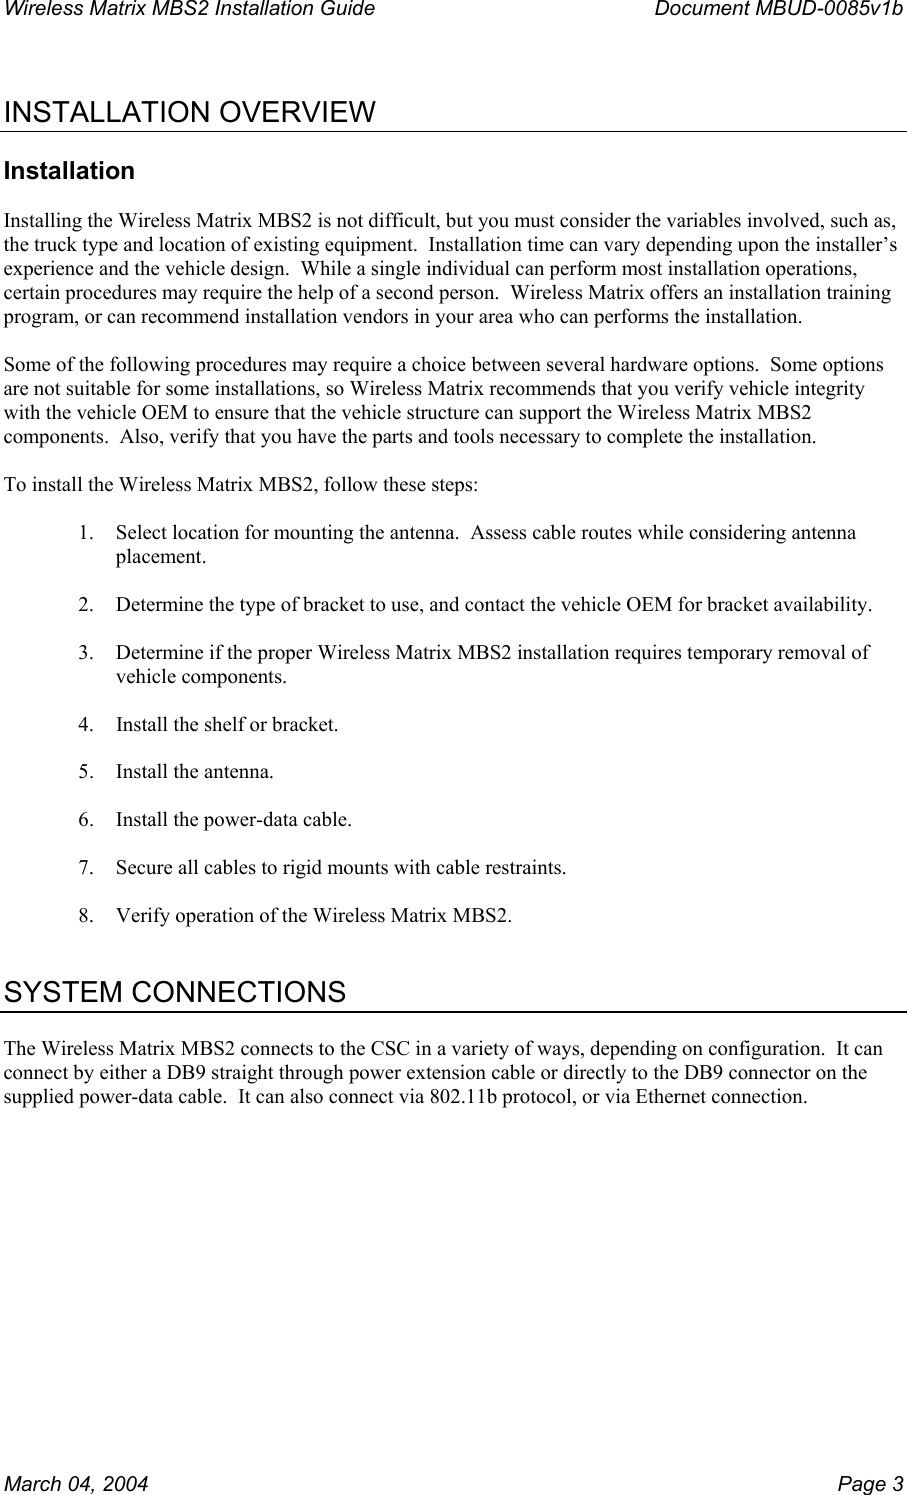
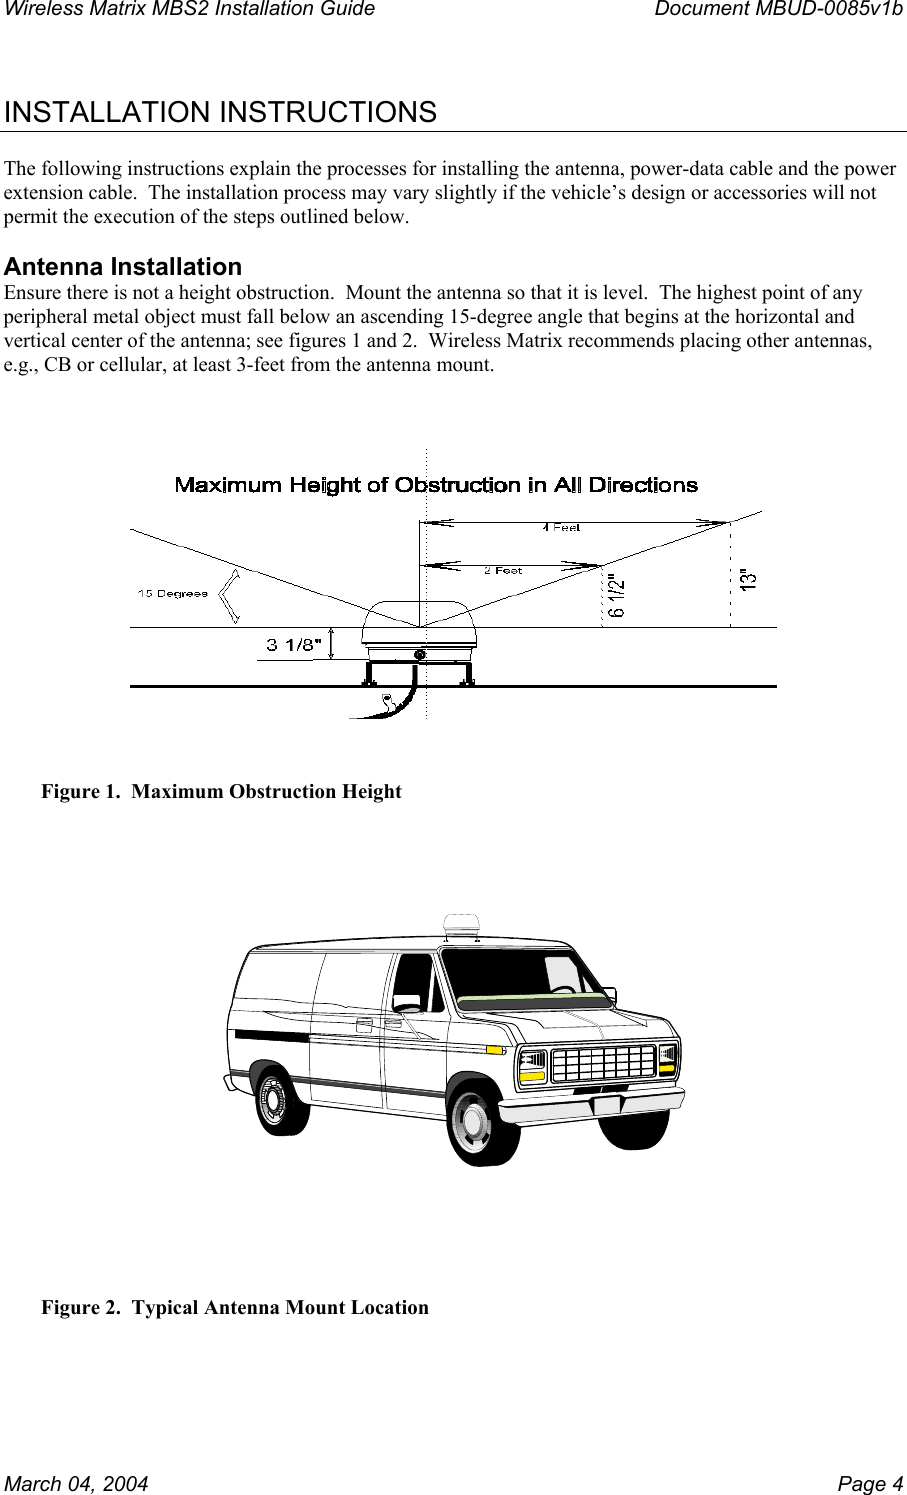
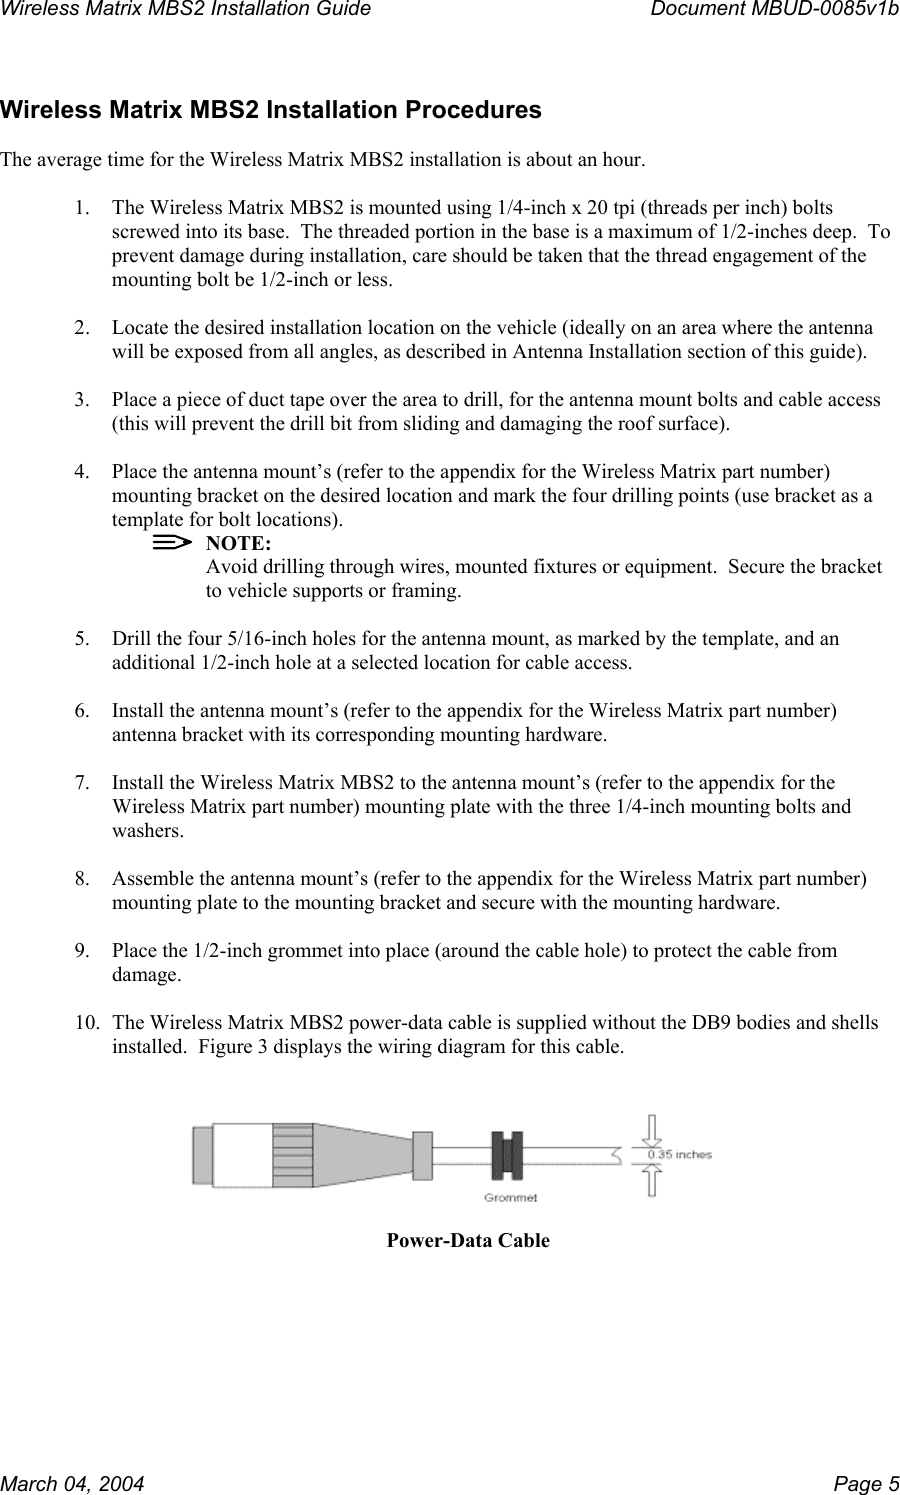
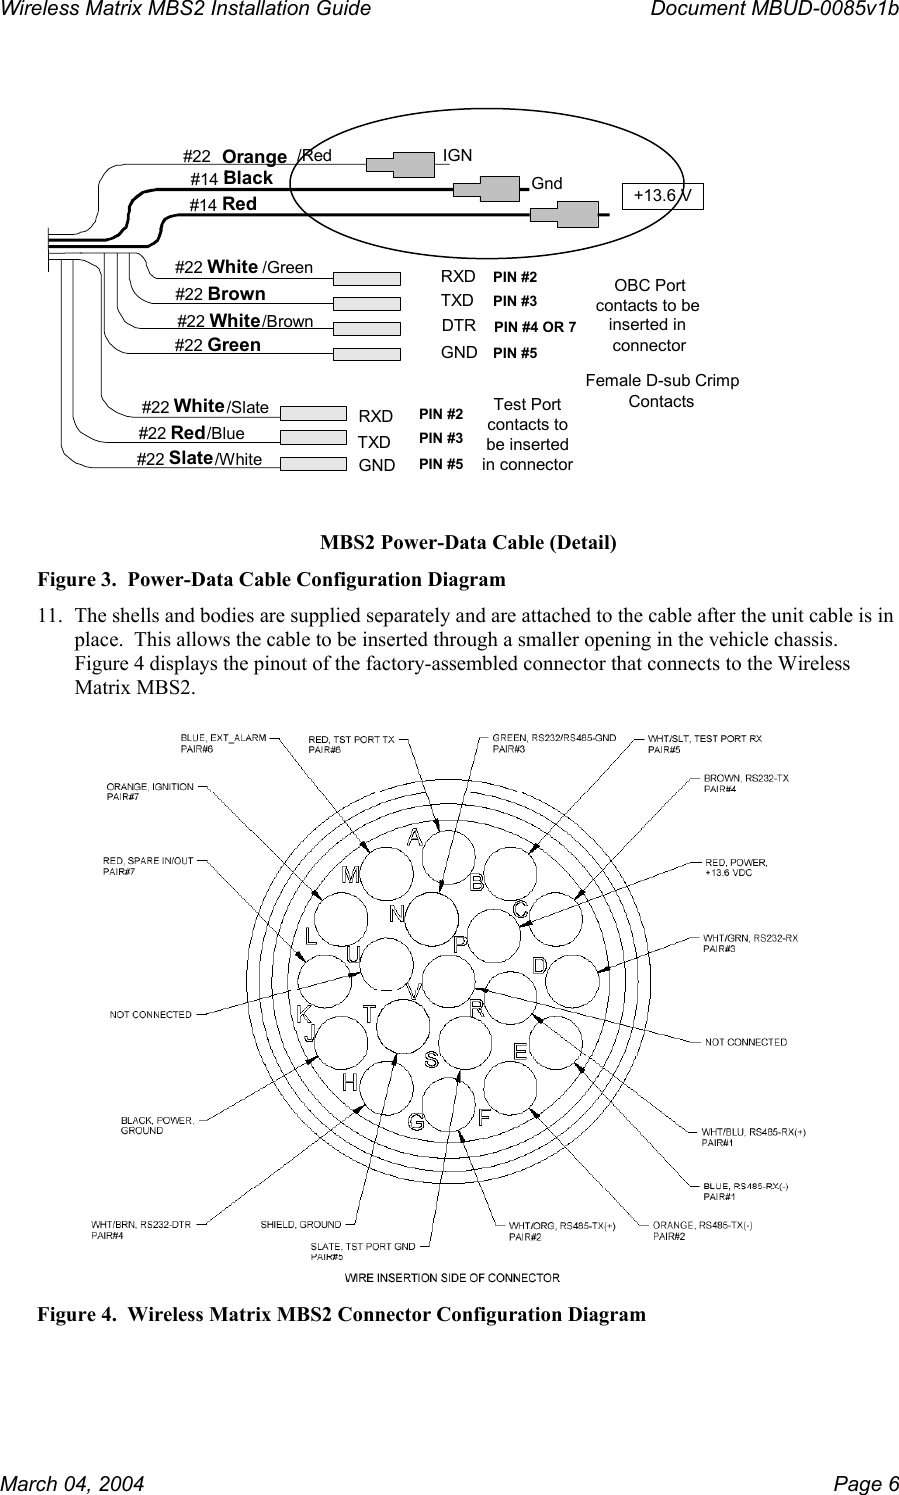
Installer Guide