Wistron 900-001 Flo Home Water Monitoring and Control User Manual revised0124
Wistron Corporation Flo Home Water Monitoring and Control Users Manual revised0124
Wistron >
Users Manual_revised0124

1
Meet Flo.
Get Acquainted.

2
Why Flo?
Millions of homeowners are affected by water damage
every year, often resulting in catastrophic nancial,
health and emotional costs.
With our home plumbing systems becoming more
outdated and our most precious natural resource
dwindling, controlling and monitoring our water
has become critical.
Our planet’s water supply is shrinking, drought conditions
worsening and water becoming more expensive.

3
In our homes, 13% of our water is lost due to leaks*.
That’s trillions of gallons of water every year. That’s
a lot of wasted water, and it’s causing billions of dollars
of damage to our homes.
What if homeowners had complete transparency to their
home water usage and the ability to detect even the
slowest and smallest of leaks before they result in
flooding, lost valuables, mold, relocation and costly repairs?
Meet Flo.
* Residential End Uses of Water, Version 2:
Executive Report, Water Research Foundation, 2016.
4
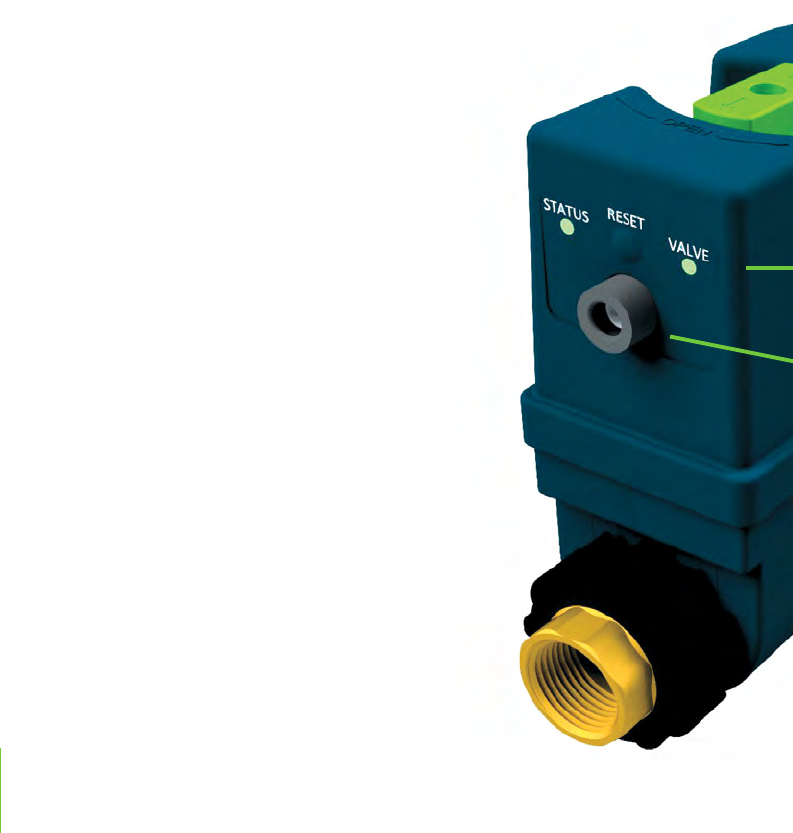
Flo Device:
The Heart of
the System
This water monitoring and control
device learns water habits and
customizes actions. A single tap from
your Flo Mobile App will open or close
the valve that controls water entering
your home.
If Flo senses that your home is in
immediate danger, the system can
automatically turn the water off for you.
5
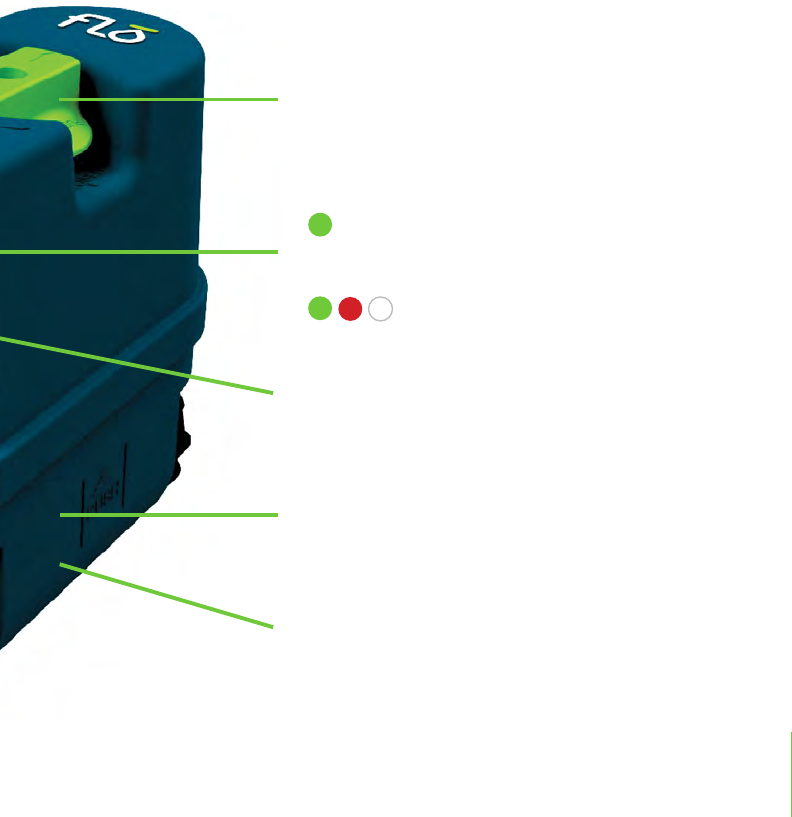
BACKUP SHUTOFF
If app connectivity is lost, open or close the manual shutoff by
using the supplied hex key to press down and turn the knob.
SYSTEM STATUS Verify that your system is connected
to your home wireless network
Confirm whether your valve is
open (green) or closed (red), or
in transition (white)
VALVE STATUS
POWER INPUT
Power your Flo Device by simply plugging it into the nearest outlet
SENSORS
Monitor your water’s pressure, temperature, and flow
WATERRESISTANT HOUSING
Feel confident that your device is safe from elements and
pests with a sealed protective shell
6
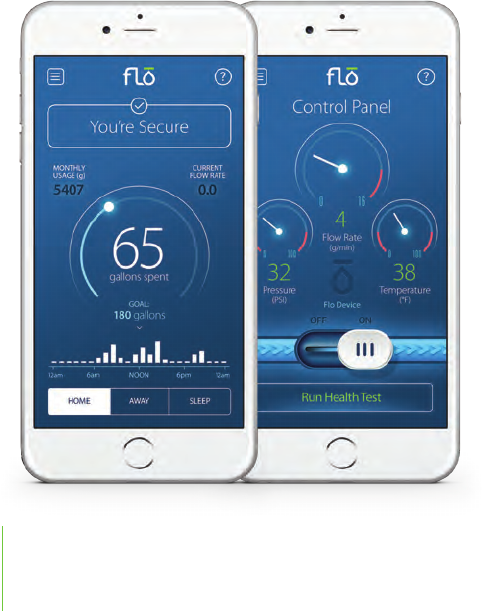
Flo Mobile App:
Never Miss a Drip
DASHBOARD
Monitor your daily and
monthly water consumption,
see your flow rate, and update
your home/away settings.
Detected leak or abnormal
usage? Your dashboard will
alert you by turning yellow
or red.
CONTROL PANEL
See pressure, temperature,
and flow rate in real time.
Run diagnostic health checks,
and turn your water off or on
as needed.
7
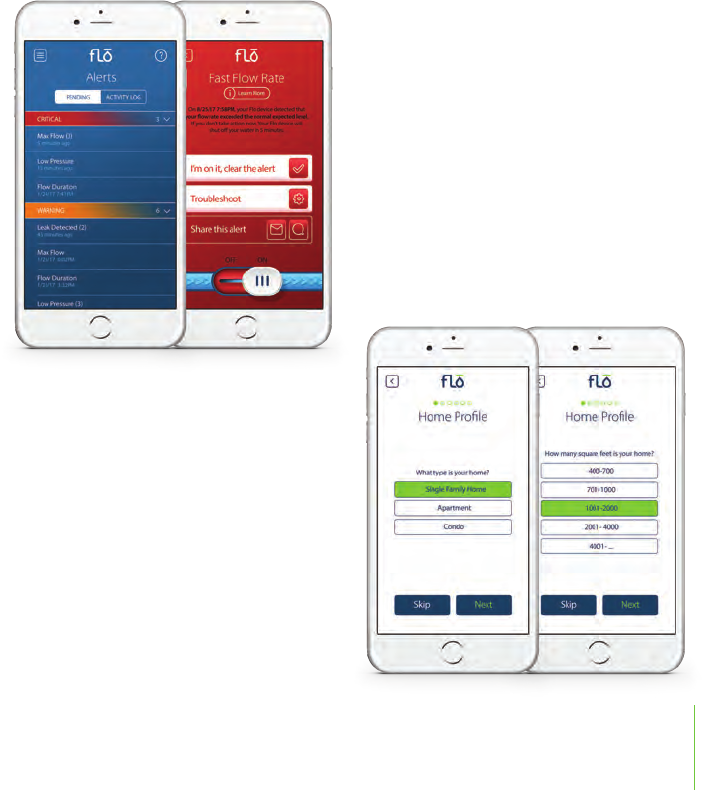
ALERTS
When a leak or abnormal usage is detected,
your Flo Mobile App notifies you. Alerts let you
take action immediately or ignore the alarm
and test again later.
You can even notify your plumber or other
contacts from the Flo Mobile App.
HOME PROFILE
Help Flo best assess your typical
water consumption and identify
any irregularities by updating
your home details.

8
Ready, Set, Flo:
Getting Started
Flo Components:
Essentials and Extras

9
Get familiar with your Flo System . . .
Identify the following primary components:
• FLO DEVICE: the heart of your Flo System, installed by a licensed plumber on your
main water line.
• QR CODE: unique code assigned to your Flo Device and essential for setup.
Please keep your QR code in a safe place should you need it later.
• POWER CORD: used to connect your Flo Device to the nearest power outlet.
Identify the following included accessories, in the event you need them:
• CONNECTION FITTINGS: 2 threaded, brass tail pieces used by a licensed plumber
to install your Flo device.
• O-RINGS: spare parts used to secure a sealed connection to the home piping.
• FLO SPACER: used in place of the Flo Device during installation or removal.
• HEX KEY: used to properly turn the manual shutoff knob.
10
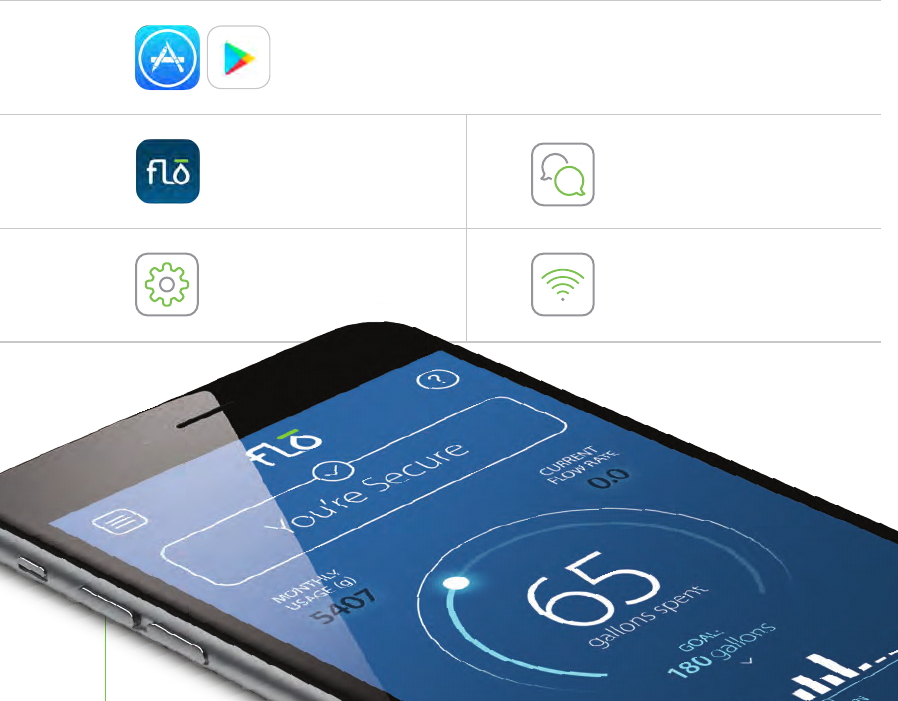
Setup the Flo Mobile App
Search for ‘Flo Technologies’ in the App Store or Google Play Store
Install the Flo Mobile App
Pair Flo Device to home network
1
2
Setup your user account
3
Answer on-boarding questions
4
5
11
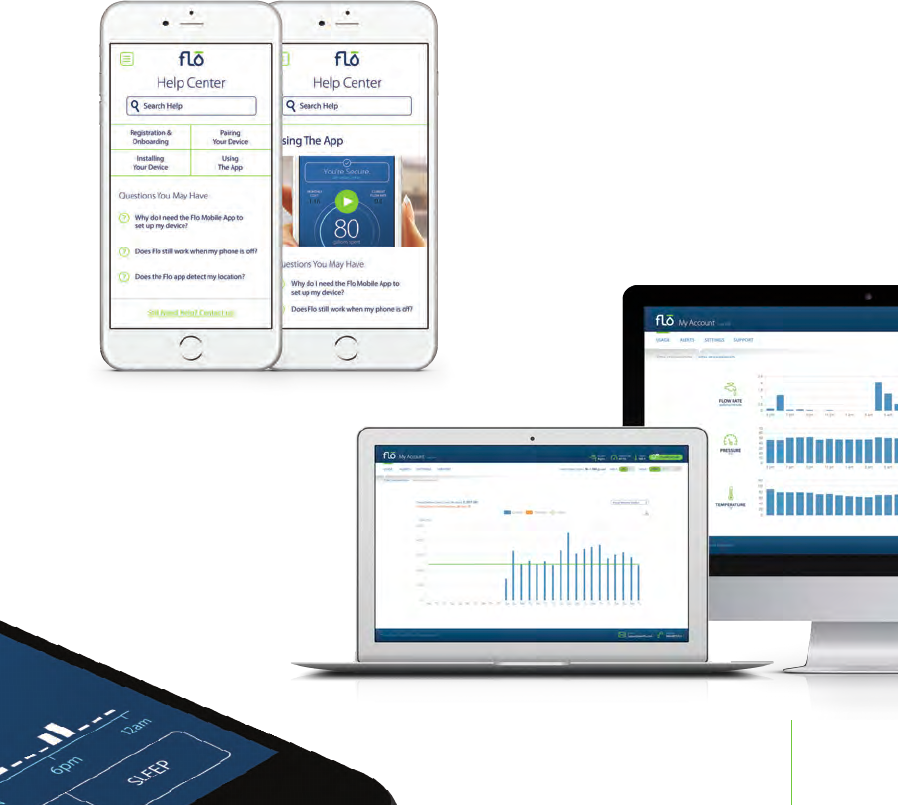
Visit the Help Center for video tutorials
and troubleshooting.
Login to
user.meeto.com
to view detailed usage
graphs and make
changes to your
account preferences.

12
support@meetflo.com
844.MEETFLO
Questions?
149.02W03.0011

1
Install Guide
2
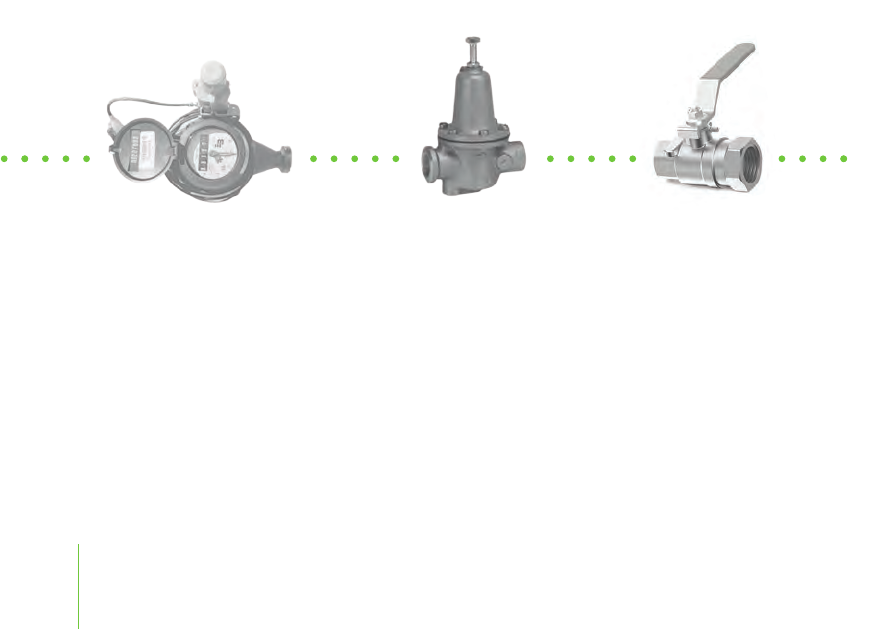
Water
Meter
Pressure
Regulator
Water
Shutoff
Hello installer. Meet Flo.
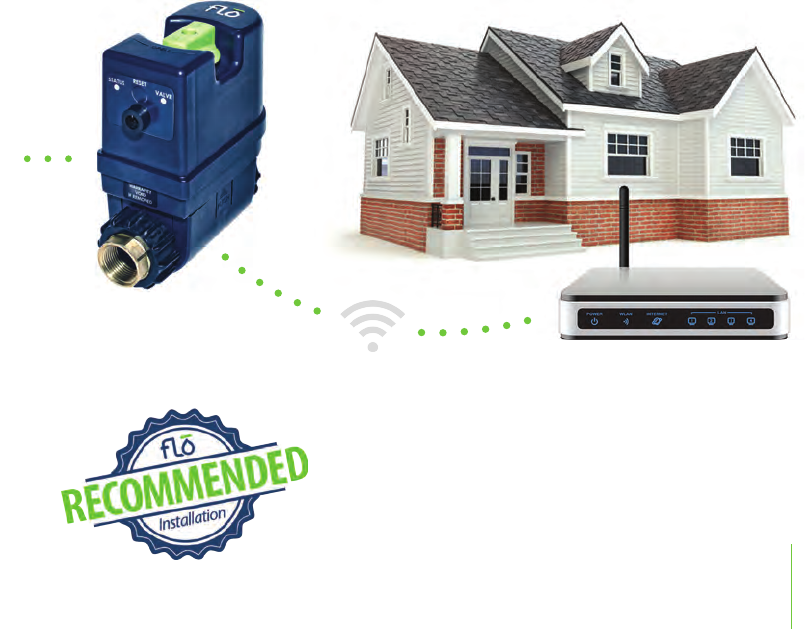
This is where Flo belongs on the
main water supply line:
3
This Install Guide outlines the Flo Recommended
Installation. It provides the necessary information on how
to install a Flo Device and make it a smooth process for
both you and the homeowner. Let’s get started!
Wireless Router
Flo Device
4
Contents:
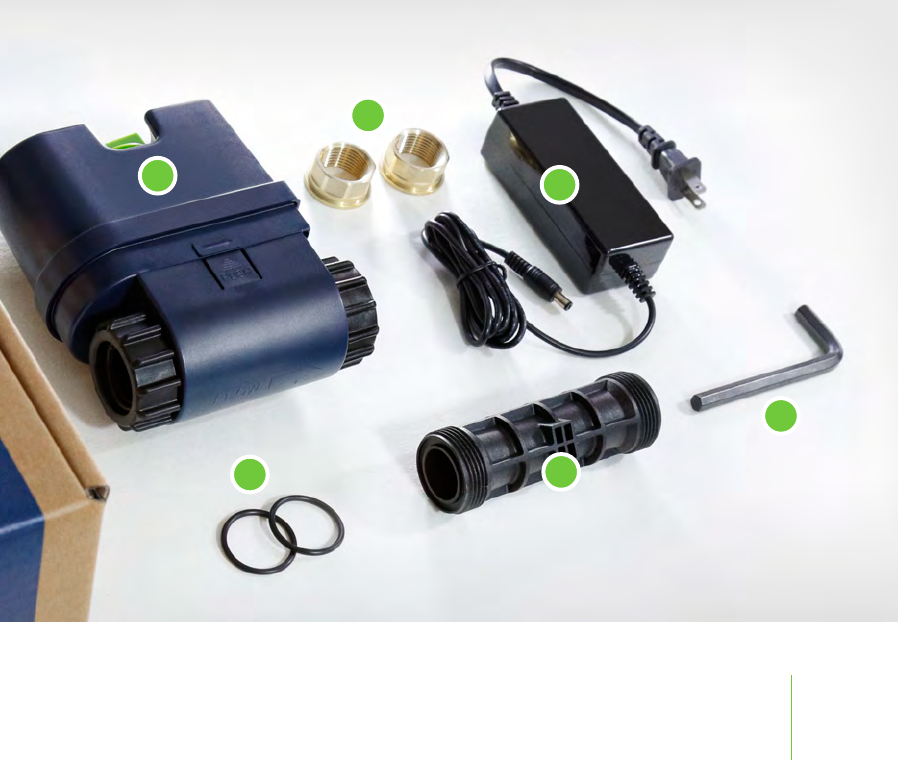
What’s in the Box
1Flo Device
2Threaded Connection Fittings
3Power Adapter
4Spare O-Rings
5Flo Spacer
6Manual Shutoff Hex Key
5
1
6
5
3
2
4
6
A
B
C
D
E
7
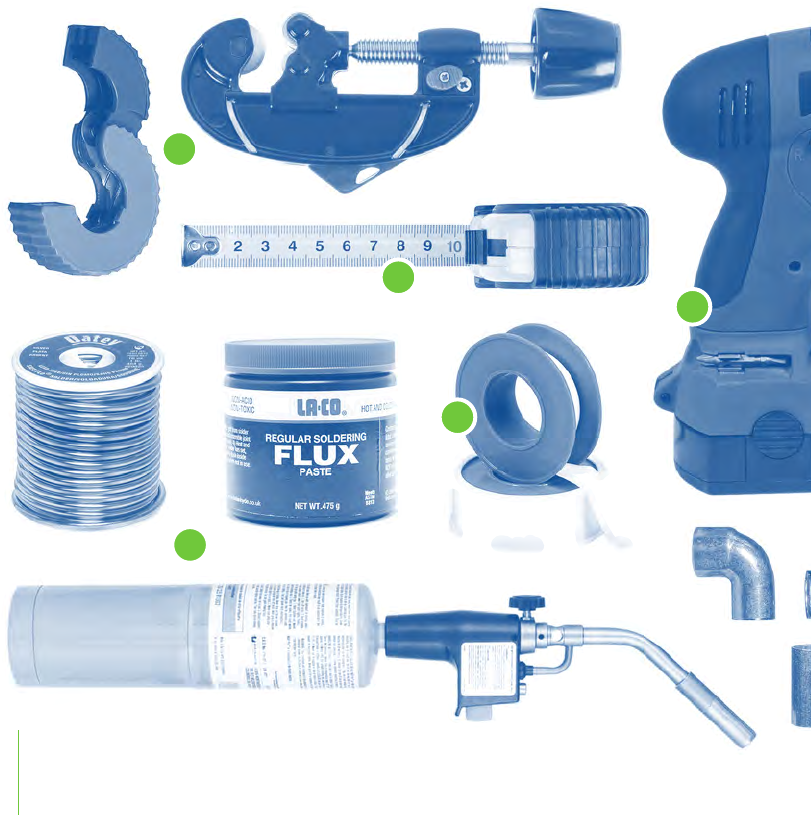
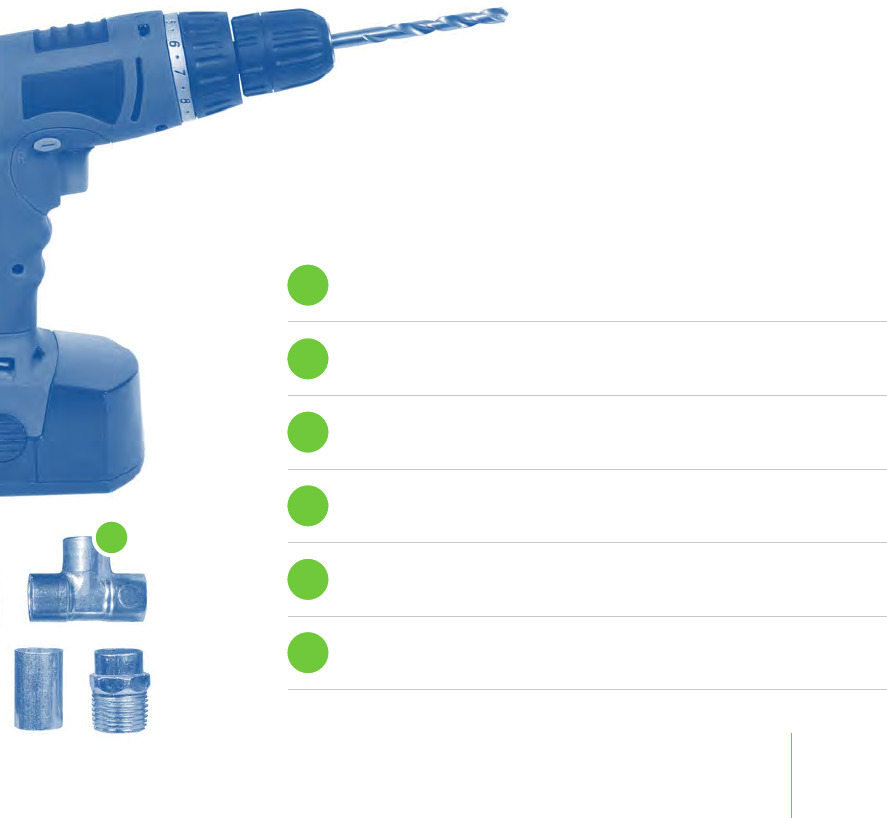
What you’ll need
Pipe Cutter
BMeasuring Tape
CTeflon Tape
DDrill
(Necessary when routing power through an exterior wall)
ESolder, Flux and Torch
(Necessary when using ‘Sweat’ fittings)
FAdditional Copper Pipe and Fittings
A
F
8
Installation
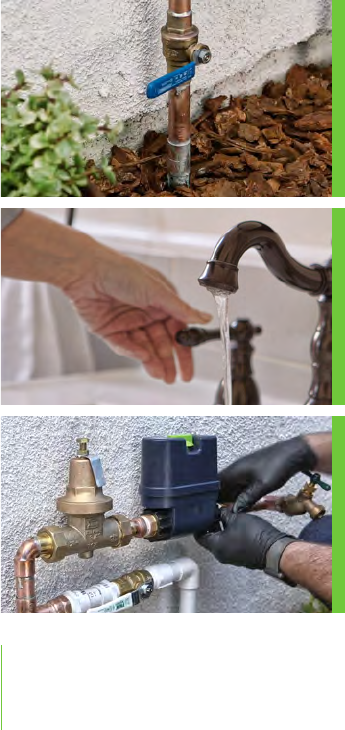
STEP 1
Locate and turn off the main
water supply valve
STEP 2
With the homeowner’s permission,
relieve water pressure by opening as
many fixtures possible
STEP 3
Install the Flo Device on the main
water line after the manual shut off
and after the PRV
Do not solder fittings with Flo Device installed
Use the Flo Spacer if necessary
Position the Flo Device with the arrow pointing towards
the flow of water into the home
A.
B.
C.
9
After Installation
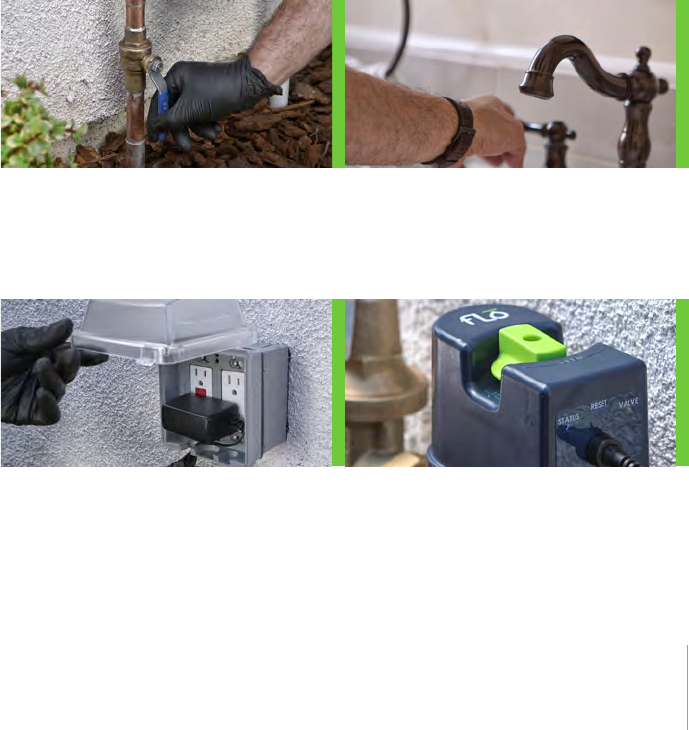
STEP 5
Turn off the fixtures opened from Step
2 and check for any possible leaks in
the installation
STEP 4
Slowly turn on the main water supply
and look for any possible leaks
around the point of installation
A.
B.
STEP 6
Connect the power adapter
If there is no outlet nearby you may have to drill
through the home’s exterior wall to for access to an
indoor outlet. (Homeowner’s approval is required.)
Verify that there are no pipes or obstructions behind
the wall before drilling.
STEP 7
Verify LED status
Valve LED is solid green when valve is open; solid red
when closed
Status LED is green when connected to the home’s
WLAN; Status LED is blinking green when connected to
the home’s WLAN but there is no internet connection;
Status LED is solid white when there is no connection
to the home’s WLAN or internet connection
10
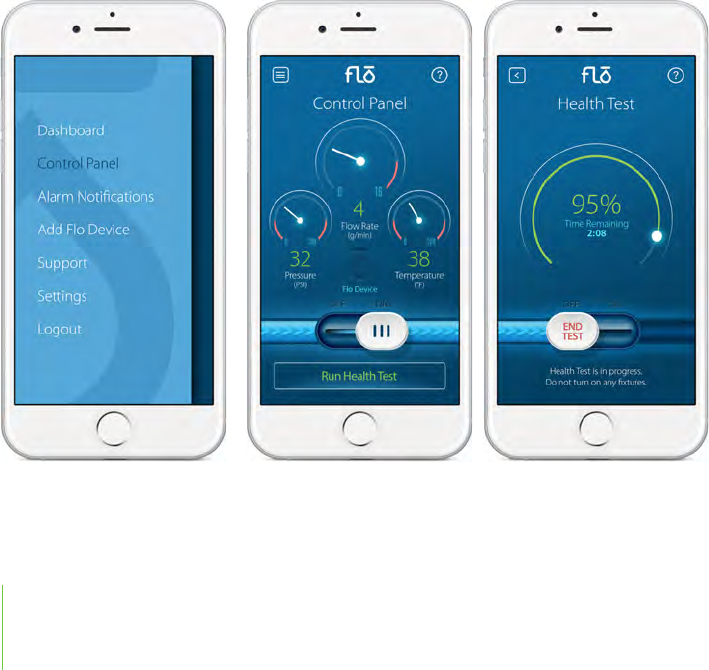
Run a Health Test with
the Homeowner
1. Open the Flo Mobile
App and navigate to the
Control Panel.
2. Turn off all the fixtures and tap ‘Run Health Test’.
Note that the Health Test can take up to 8 minutes.
11

12
Questions?
meetflo.com/support
support@meetflo.com
844-MEETFLO
Visit meeto.com/install for installation tips and details
149.02W01.0011

Federal Communications Commission (FCC) Statement
This equipment has been tested and found to comply with the limits for a Class B
digital device, pursuant to part 15 of the FCC rules. These limits are designed to
provide reasonable protection against harmful interference in a residential
installation. This equipment generates, uses and can radiate radio frequency energy
and, if not installed and used in accordance with the instructions, may cause harmful
interference to radio communications. However, there is no guarantee that
interference will not occur in a particular installation. If this equipment does cause
harmful interference to radio or television reception, which can be determined by
turning the equipment off and on, the user is encouraged to try to correct the
interference by one or more of the following measures:
-Reorient or relocate the receiving antenna.
-Increase the separation between the equipment and receiver.
-Connect the equipment into an outlet on a circuit different from that to which the
receiver is connected.
-Consult the dealer or an experienced radio/TV technician for help.
This device complies with Part 15 of the FCC Rules. Operation is subject to the
following two conditions:
1) this device may not cause harmful interference, and
2) this device must accept any interference received, including interference that may
cause undesired operation of the device.
FCC RF Radiation Exposure Statement:
1. This Transmitter must not be co-located or operating in conjunction with any
other antenna or transmitter.
2. This equipment complies with FCC RF radiation exposure limits set forth for an
uncontrolled environment. This equipment should be installed and operated with
a minimum distance of 20 centimeters between the radiator and your body.