Wooyoung WTN-17WE2 LCD Monitor With TV Function User Manual WTN 17WE2 UsrMan
Wooyoung Co., Ltd. LCD Monitor With TV Function WTN 17WE2 UsrMan
UserManual.wiki
>
Wooyoung
>
WTN-17WE2 User Manual
>
User Manual 2 of 2
Contents
1.
User Manual 1 of 2
2.
User Manual 2 of 2
User Manual 2 of 2
Navigation menu
Upload a User Manual
Namespaces
Wiki Guide
HTML
PDF
Info
Views
User Manual
Discussion / Help
Navigation
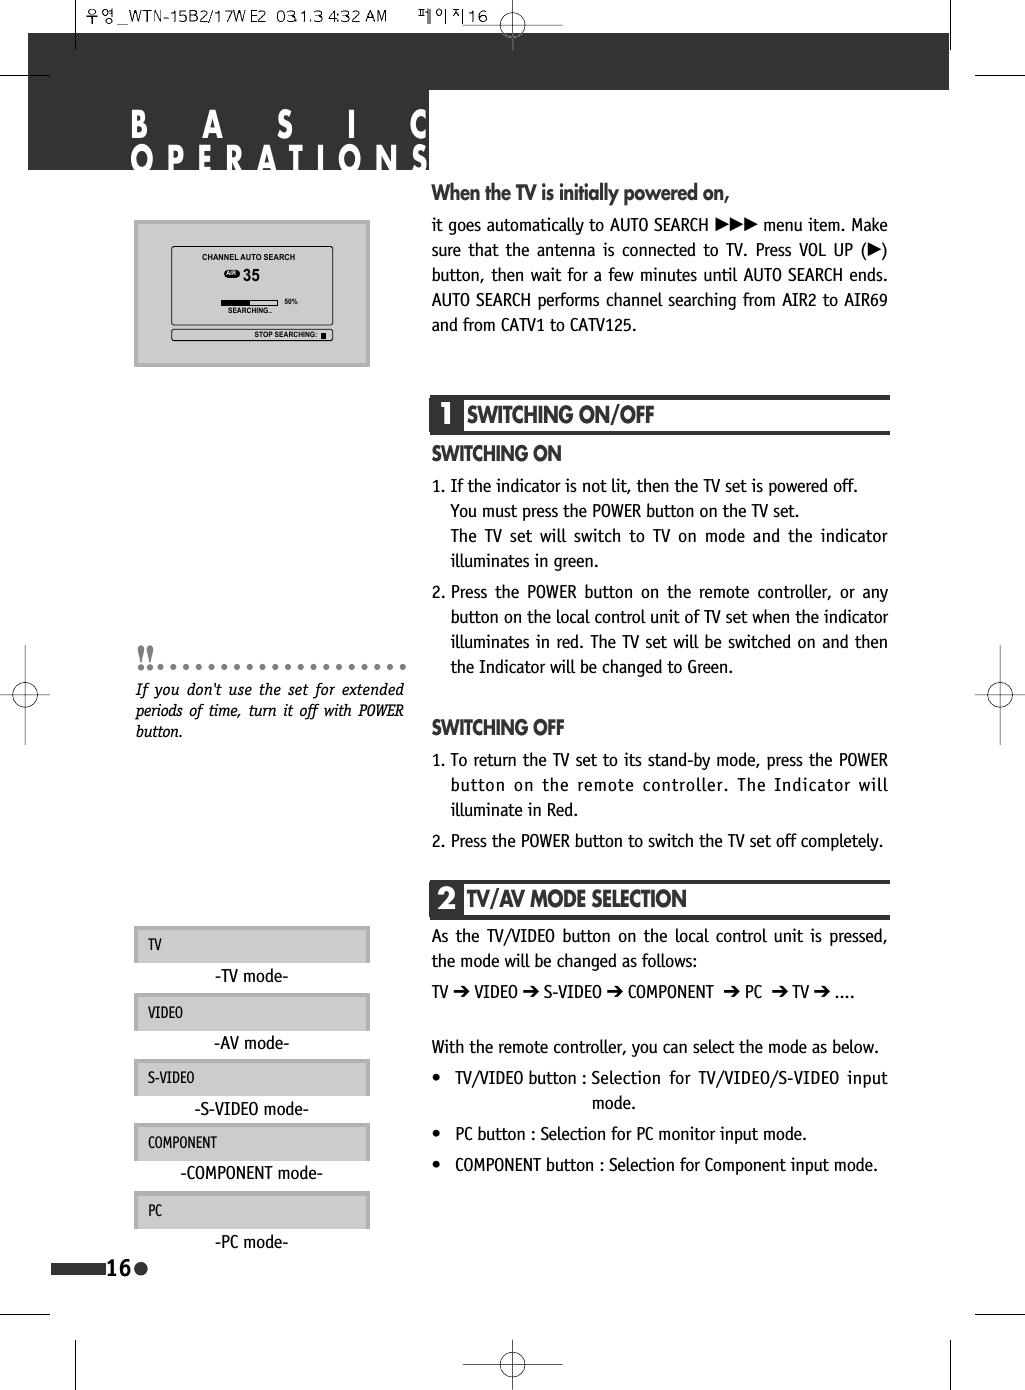
![3VOLUME CONTROLAdjust the volume with the VOL (œ /√) buttons.TO MUTE THE SOUNDPress the MUTE button to turns the sound off. The MUTE willbe displayed. The sound returns if the button is pressed oncemore, or pressed the VOL (œ /√) buttons.4CHANNEL SELECTIONThe set has 125 channel numbers, CH01..CH125. [AIR02-69,CATV01-125]DIRECT SELECTIONThe NUMBER buttons are used for direct channel selection.To select two-digit channel, press the second numbered buttonwithin 2 seconds.In case of selecting channels from 14 to 69 with Numberbuttons, the channel will go to AIR channel in first. If youpress the same button again, then it goes to CATV channel.UP/DOWN SELECTIONYou can also select a channel by pressing step by step the CH(…/†) buttons.basic operations17MUTE0(18087(799,'(2 6/((3&$37,213&&20321(173,&02'(&+&+92/92/](https://usermanual.wiki/Wooyoung/WTN-17WE2.User-Manual-2-of-2/User-Guide-310219-Page-7.png)
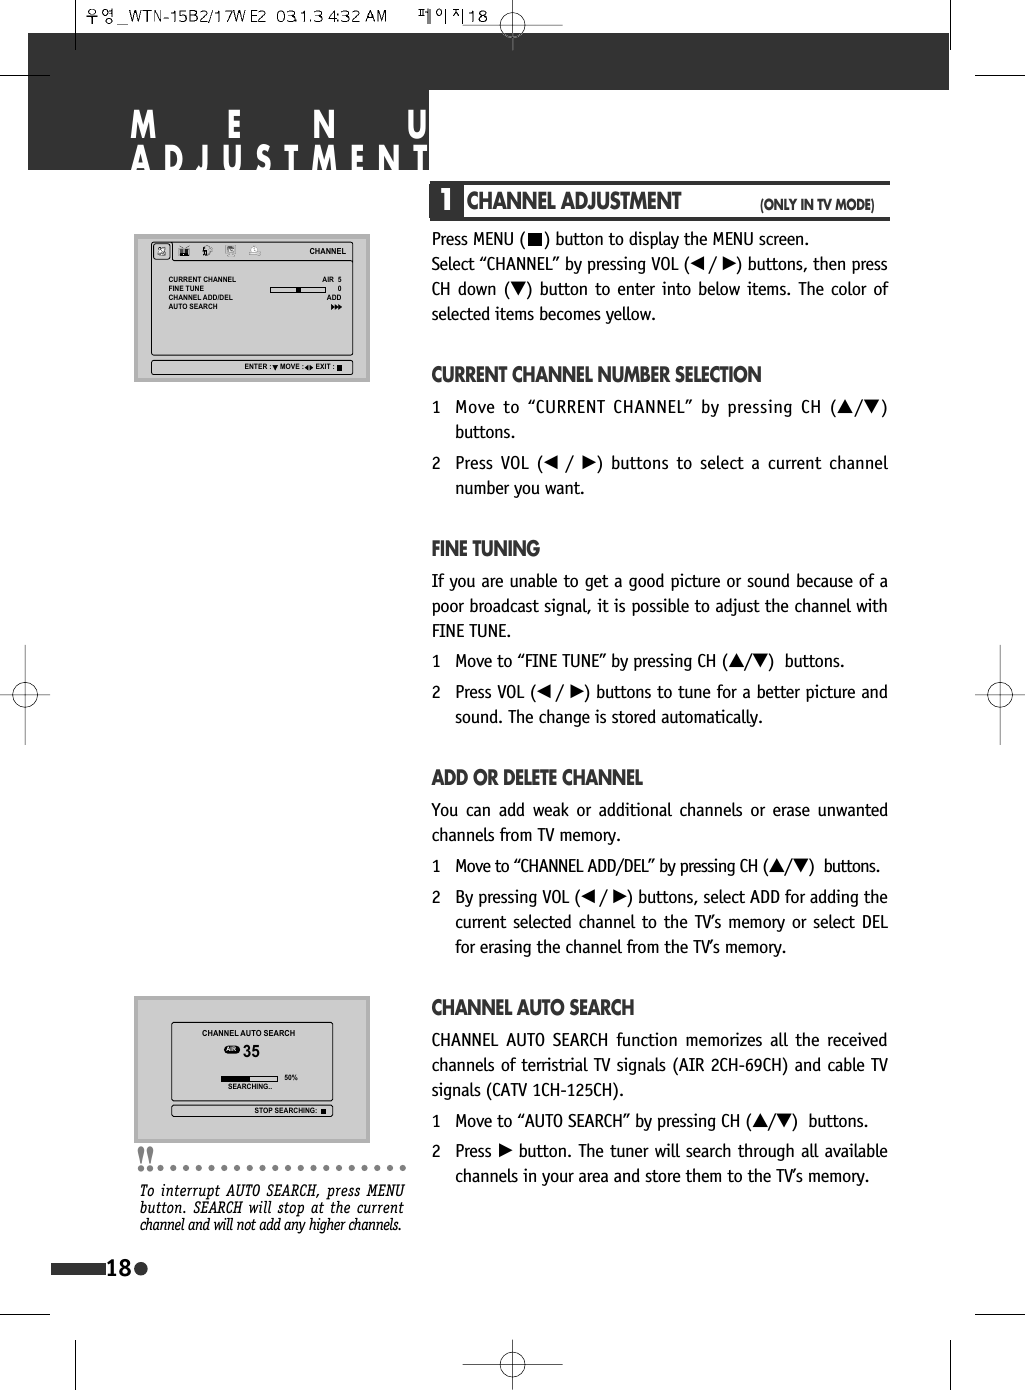

![31SPECIFICATIONMODEL WTN-15B2 WTN-17WE2PANEL 15.1” TFT LCD 17”WIDE TFT LCDRESOLUTION 1024 X RGB X 768 (XGA) 1028 X RGB X 768 (WXGA)ACTIVE AREA [mm] 307.0 x 230.4 372.5 x 223.550/ 70/ 75/ 75 50/ 70/ 75/ 75BRIGHTNESS [cd/m2] 450 450484 X 350 X 185 532 X 352 X 185484 X 303 X 59.7 532 X 296.5 X 68.2WEIGHT [WITHOUT ACCESSORIES] 12.8lbs [5.8kg] 13.7lbs [6.6kg]TV STANDARD NTSC-MTUNING SYSTEM ELECTRIC TUNING SYSTEM WITH PLL 181 CHANNELSSTEREO MTS + SAPCATV 125 CHANNELSINPUT POWER DC12V, AC 100-240V~, 50/60HzSOUND OUTPUT 3W + 3WPOWER CONSUMPTION 43W 46WAV IN VIDEO (COMPOSITE), S-VIDEO (Y/C), AUDIO L&RCOMPONENT Y, Pb(Cb), Pr(Cr) [480i, 480p, 720p, 1,080i], AUDIO L&RMONITOR OUT VIDEO (COMPOSITE) OUTHEADPHONE 3.5G STEREO MINI-JACKPC IN D-SUB 15PIN RGB IN, PC AUDIO INANT. IN F-TYPEACCESSORIES REMOTE CONTROLLER, BATTERIES, AC ADAPTER, AC CORD, D-SUB 15PIN CABLE, PC AUDIO CABLE, USER’S MANUALVIEWING ANGLE[U / D/ L/ R]WITH STAND[mm, W X H X D]WITHOUT STAND[mm, W X H X D]LCDDIMENSIONTV-FUNCTIONTERMINALS](https://usermanual.wiki/Wooyoung/WTN-17WE2.User-Manual-2-of-2/User-Guide-310219-Page-21.png)