WowWee Group 0890 Miposaur User Manual
WowWee Group Limited Miposaur
User Manual
USER MANUAL
ITEM NO.: 0890 / 0895
The Future of Prehistoric

1
INTRODUCTION P.2
BATTERY INFORMATION P.3 - 4
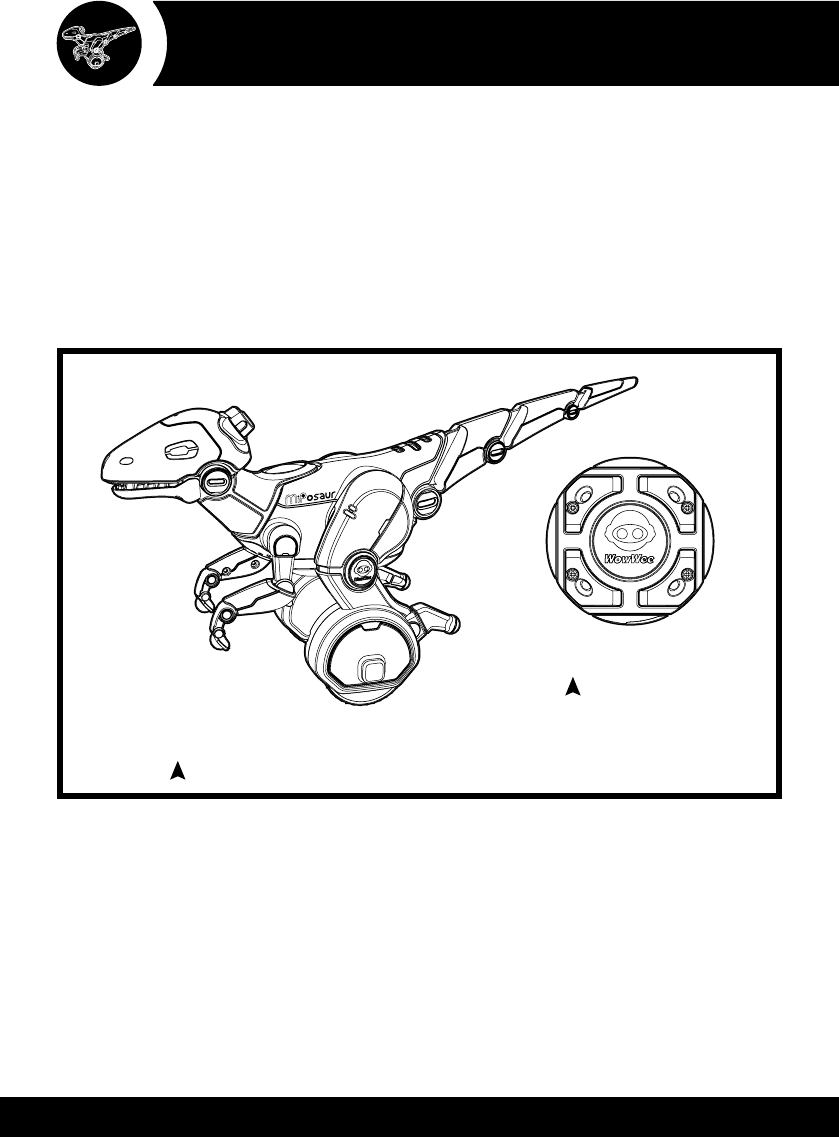
MIPOSAUR™ OVERVIEW P.5 - 6
GETTING STARTED P.7
PERSONALITY & MOODS P.8
CURIOUS MOOD P.8
EXCITED MOOD P.9
ANNOYED MOOD P.10
TRACKBALL P.11
TRACKBALL AND APP P.12
Q & A P.13
WARRANTY P14
CONTENTS
2
• 1 x Trackball
INTRODUCTION
• 1 x Quick Start Guide
• 1 x User Manual
• 1 x Miposaur™
Thank you for purchasing Miposaur™ by WowWee™!
Meet Miposaur™, your new gesture tracking, self-balancing robotic creature! Out of the box, this intelligent
robotic creature has an impressive blend of character and technology. Miposaur™ has an incredible evolving
intelligence and personailty, and an ability to sense its own surroundings and environment. Interact with
Miposaur™ and it will respond in a unique and lifelike way! Take control, interact, and play with Miposaur™
in many ways; through Gesture Sense™ technology, use Beacon Sense™ via the Trackball, or a Bluetooth®
Smart-Ready™ enabled mobile device.
Take a few minutes to look through this user manual and get Miposaur™ ready to go.
Please note the following when operating Miposaur™:
• Do not immerse Miposaur™ or any parts in water or any other form of liquid.
• Do not drop, throw, or kick Miposaur™ as this may damage mechanical functions.
• Do not allow the robot to roam freely or leave unattended near edges from which Miposaur™ could fall.
• Miposaur™ is intended for indoor use only.
3
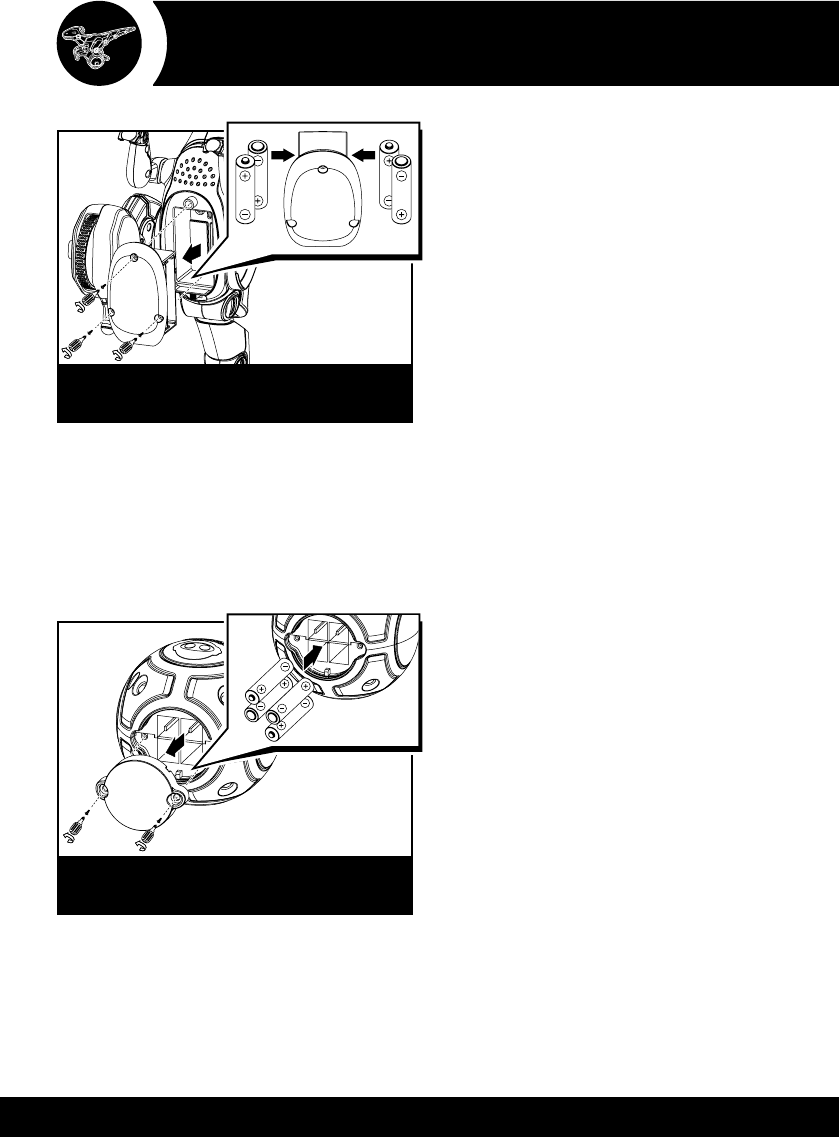
BATTERY INFORMATION
Installing or changing batteries in
Miposaur™:
1. To change the batteries, carefully lay
Miposaur™ on its side. Miposaur™
requires 4 x “AA” size alkaline batteries
(not included).
2. Using a Phillips screwdriver (not included)
remove the screws on the battery
compartment cover located on the bottom of
the robot.
3. Insert the batteries according to the diagram.
Ensure that the positive and negative
polarities match the illustrations inside the
battery compartment.
4. Replace the battery compartment cover
and tighten screws using the screwdriver.
Do not over-tighten.
Installing or changing batteries in the
Trackball:
1. Lay the Trackball so that the battery
compartment faces upwards. The Trackball
requires 4 x “AAA” size alkaline batteries
(not included).
2. Using a Phillips screwdriver (not included)
remove the screws on the battery
compartment cover located on the back of
the ball.
3. Insert the batteries according to the diagram.
Ensure that the positive and negative
polarities match the illustrations inside the
battery compartment.
4. Replace the battery compartment cover
and tighten screws using the screwdriver.
Do not over-tighten.
Trackball Battery Diagram/Installation
4 x “AAA” Size
Alkaline Batteries
Miposaur™ Battery Diagram/Installation
4 x “AA” Size
Alkaline Batteries