XYZprinting 3F1J0 3D Printer User Manual JR MANUAL EN indd
XYZprinting, Inc. 3D Printer JR MANUAL EN indd
UserManual.wiki
>
XYZprinting
>
3F1J0 User Manual
User Manual
Navigation menu
Upload a User Manual
Namespaces
Wiki Guide
HTML
PDF
Info
Views
User Manual
Discussion / Help
Navigation
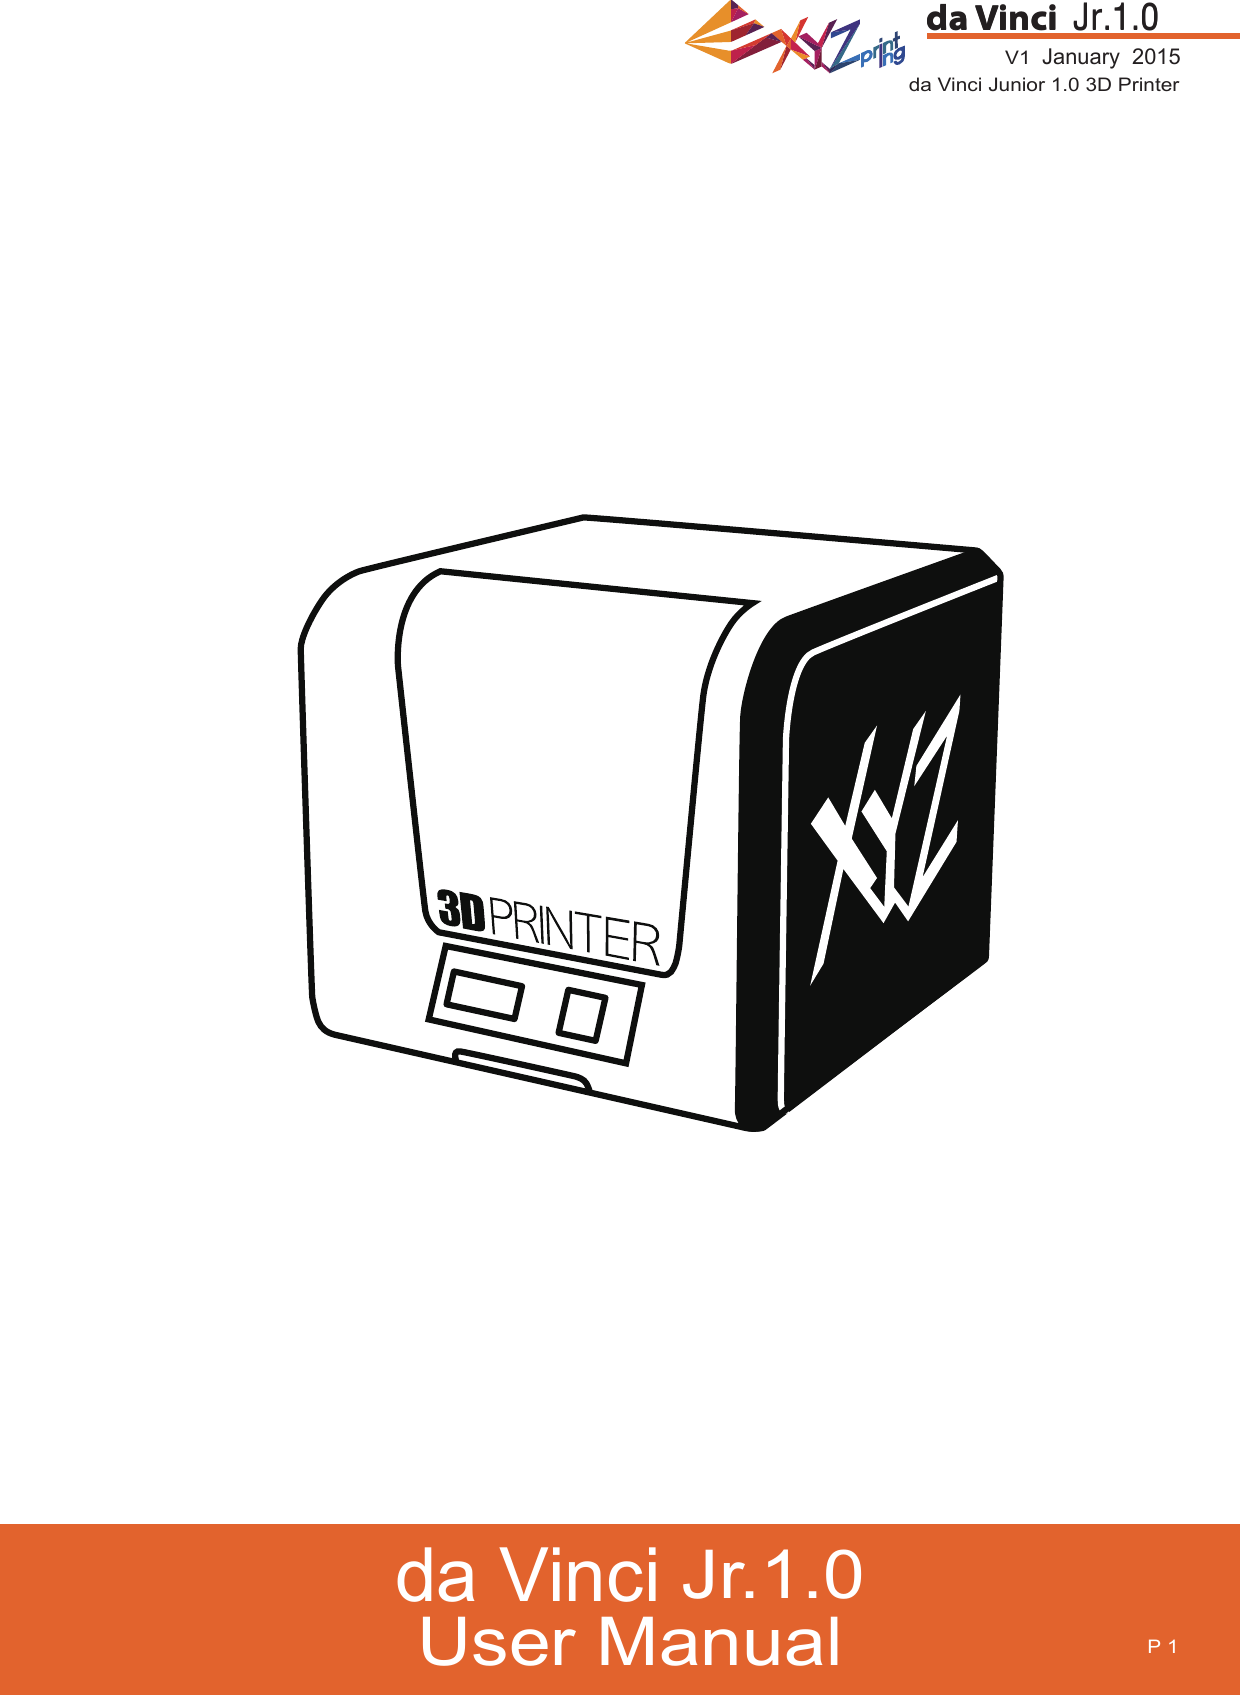
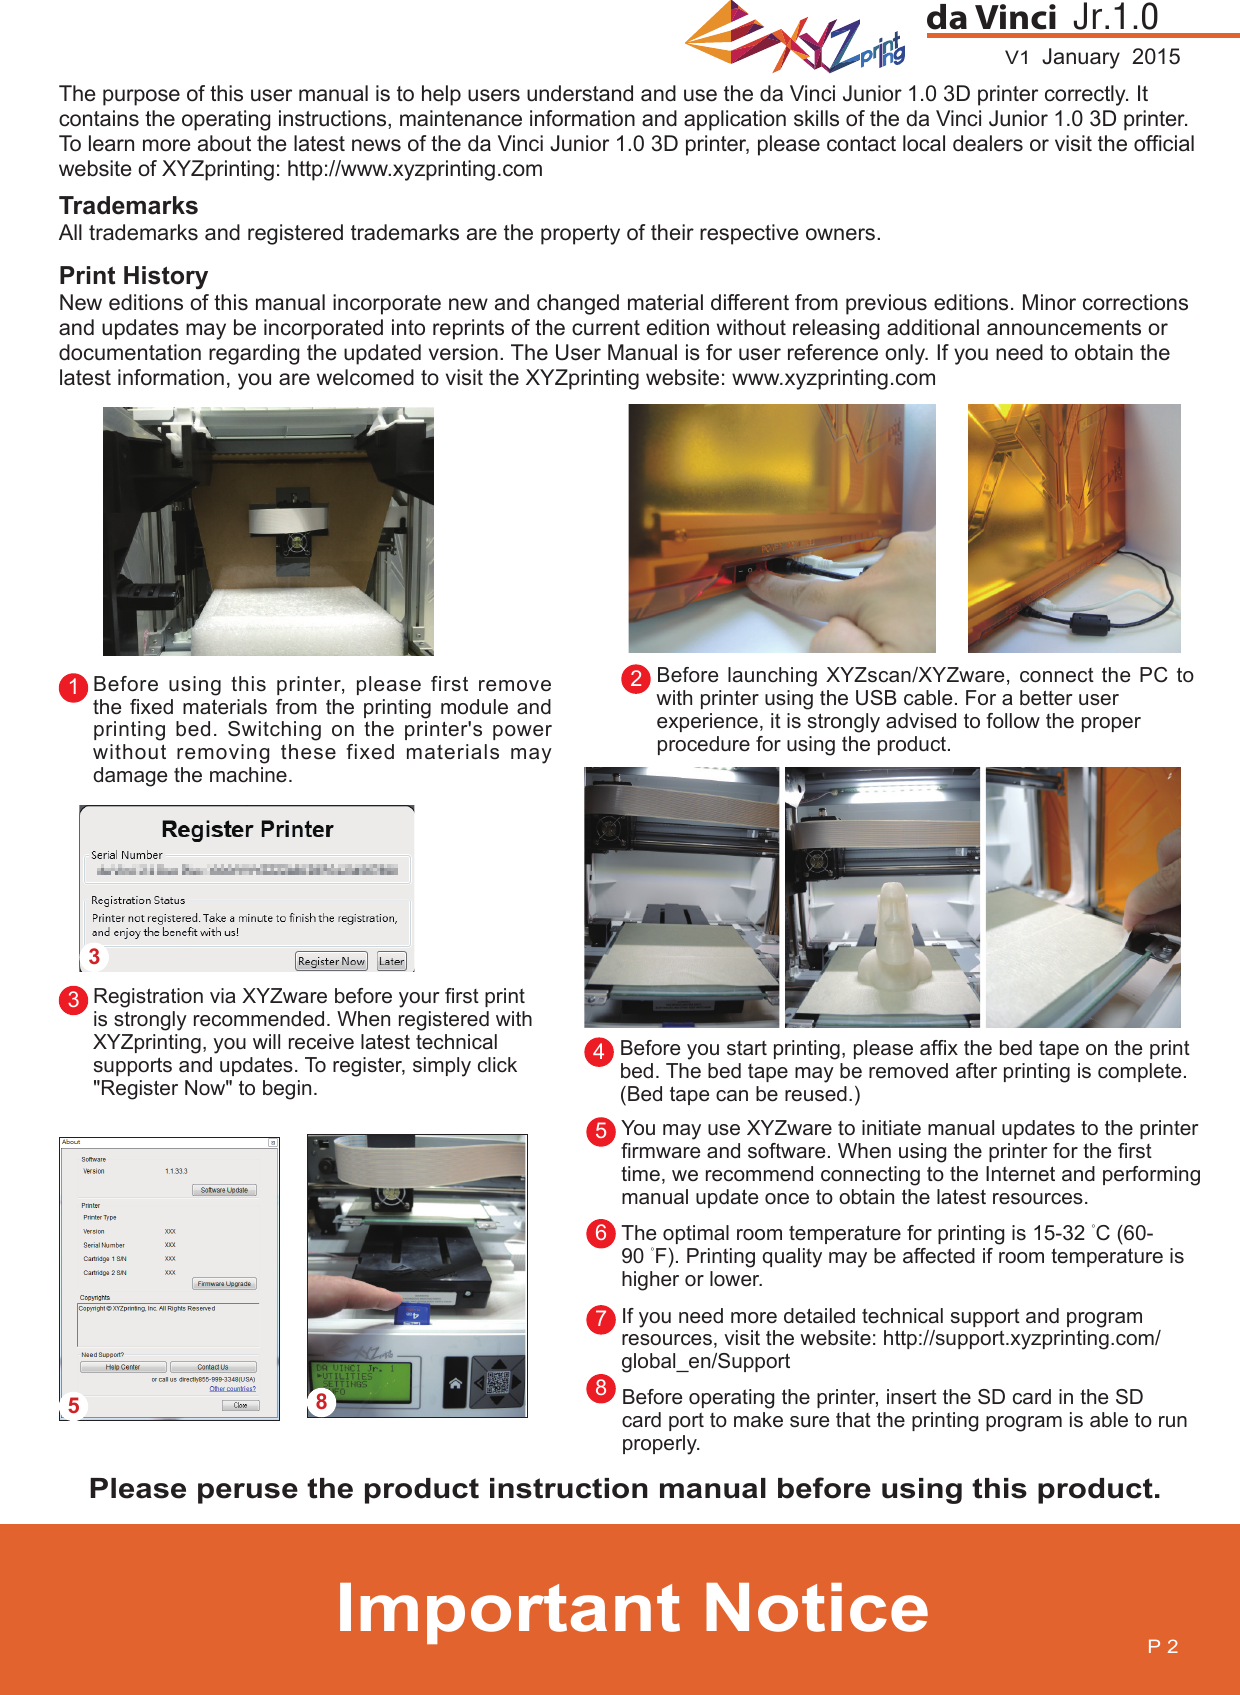

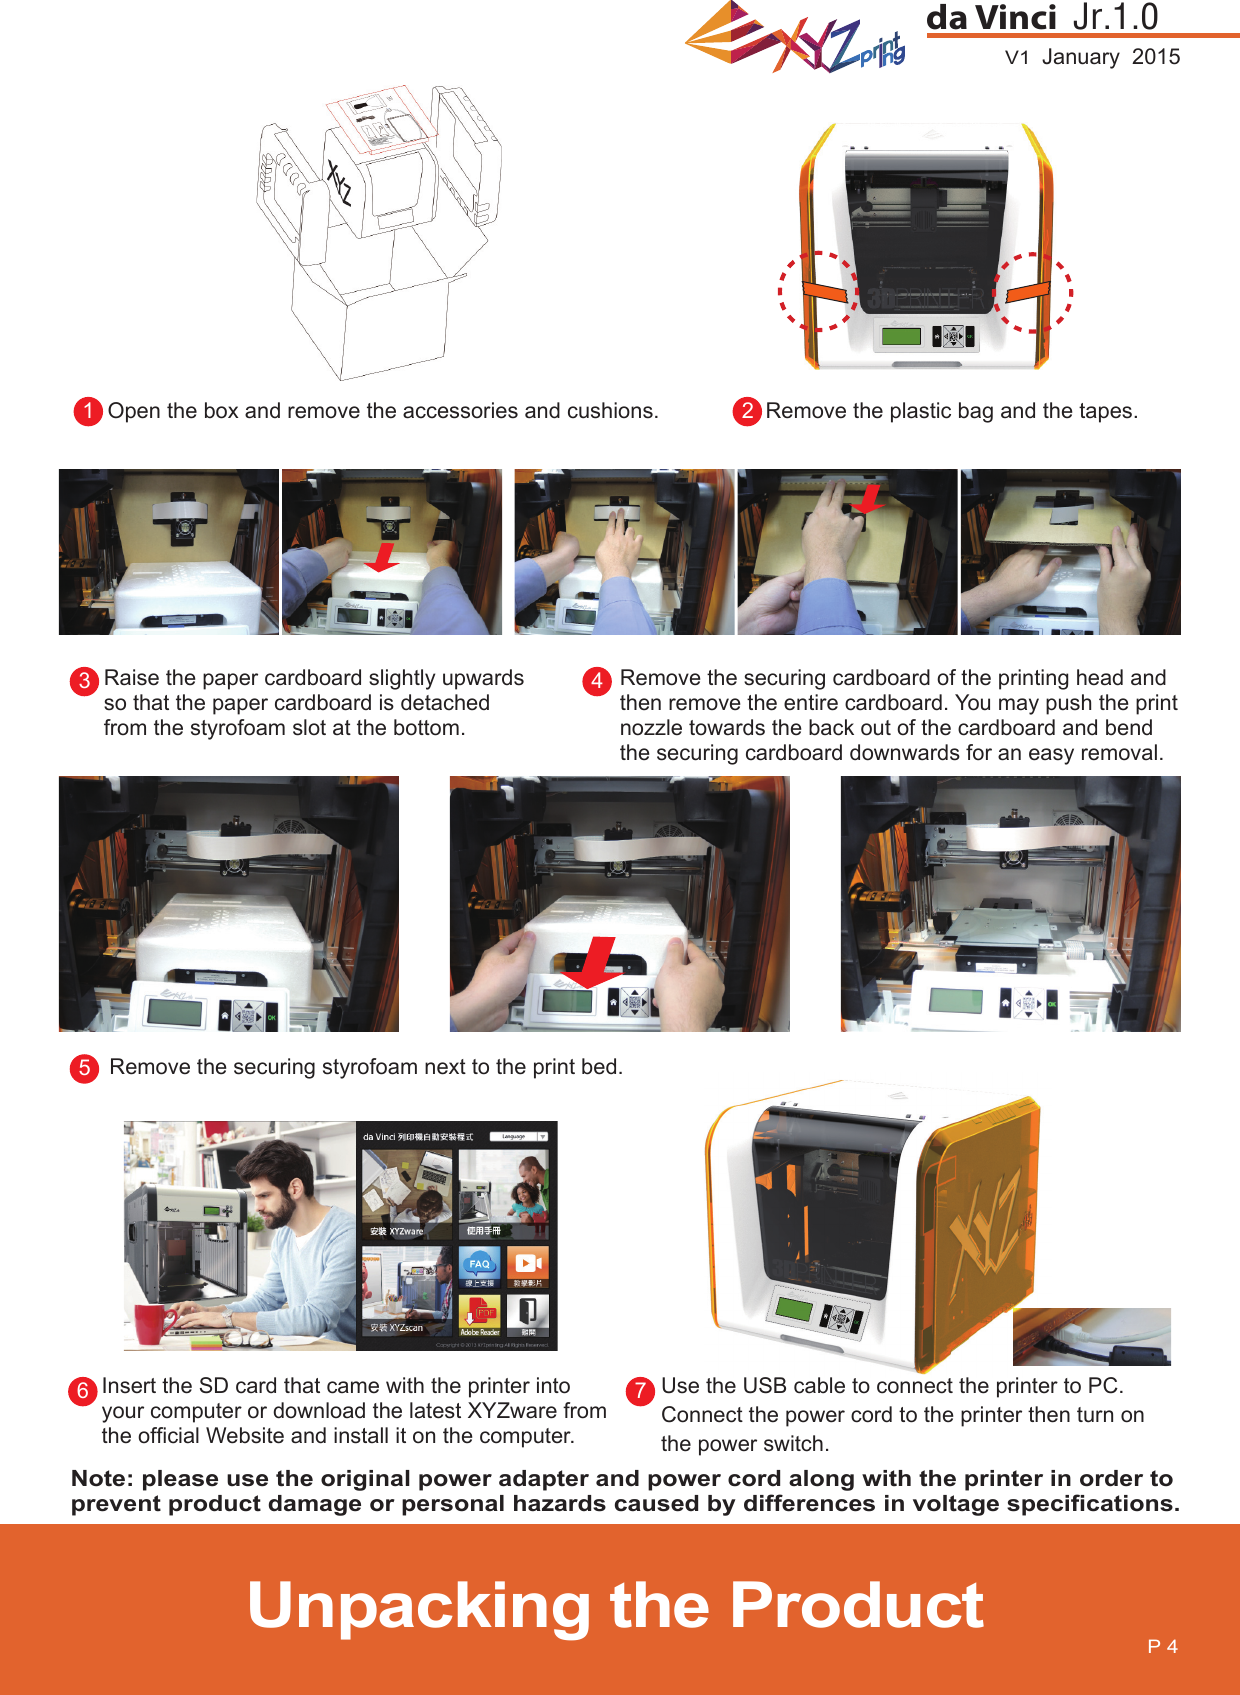
![V1 January 2015da Vinci Jr.1.0P 7LOAD FILAMENTThen load fi lament using the control panel on the printer…UNLOAD FILAMENTFirst unload fi lament using the control panel on the printer…11Select "UTILITIES" > "CHANGE SPOOL" > "LOAD FILAMENT".Select "UTILITIES" > "CHANGE SPOOL" > "UNLOAD FILAMENT".First open the release arm and then pull out the fi lament with spool axle rings. Arrange it properly for later use. 22Wait for the extruder to heat up and load fi lament.Wait for the extruder to heat up and unload fi lament. Press "OK" to pullout fi lament. 3Check if the nozzle outputs fi lament and press "OK" to go back to main menu.LOAD FILAMENTEXTRUDER HEATINGTEMPERATURE 190∘CPLEASE WAITLOAD FILAMENTEXTRUDER HEATINGTEMPERATURE 190∘CPLEASE WAITLOADINGPLEASE WAITUNLOADINGPLEASE WAIT[ OK ] TO RETURNUTILITIES CHANGE SPOOL HOME AXES JOG MODEUTILITIES CHANGE SPOOL HOME AXES JOG MODECHANGE SPOOL LOAD FILAMENT UNLOAD FILAMENTCHANGE SPOOL LOAD FILAMENT UNLOAD FILAMENTCHECK FILAMENTOUT FROM NOZZLE[ < ] TO RETRY[ OK ] TO RETURNDA VINCI Jr. 1 UTILITIES SETTINGS INFODA VINCI Jr. 1 BUILD FROM CARD UTILITIES SETTINGSWhen fi nishing "UNLOAD FILAMENT"Unload FilamentNote: Always implement the "UNLOAD FILAMENT" function when replacing the cartridge in order to ensure proper removal of the fi lament. Do not cut the fi lament at the printer head to prevent residual fi lament from blocking it and causing subsequent damages to the printer.](https://usermanual.wiki/XYZprinting/3F1J0/User-Guide-2560603-Page-7.png)